• Skip to primary navigation
  • Skip to main content
  • Skip to primary sidebar
Charleston Crafted
  • DIY
  • Woodworking
  • Popular Posts
  • Blog
  • About
  • Shop
menu icon
go to homepage
  • DIY
  • Woodworking
  • Popular Posts
  • Blog
  • About
  • Shop
search icon
Homepage link
  • DIY
  • Woodworking
  • Popular Posts
  • Blog
  • About
  • Shop
×
Home » Home Improvements

How to replace door knobs with Kwikset Levers

Published: Mar 20, 2019 · Modified: Feb 3, 2023 by Sean · As an Amazon Associate, we earn from qualifying purchases. This site contains affiliate links. ·

On Monday, we talked to you about how we updated our flat panel doors with molding. They look amazing, but we needed to finish them off with something crucial- knobs! Upgrading your doors with Kwikset levers is an easy way to add some flash to an area often overlooked! Knowing how to replace door knobs with Kwikset levers is easy and stylish.

How to replace door knobs with Kwikset Levers

So take a look at our knob situation before. This is something that has bothered us since the day we moved in.

Upgrading your Doors with Kwikset Knobs - Charleston Crafted

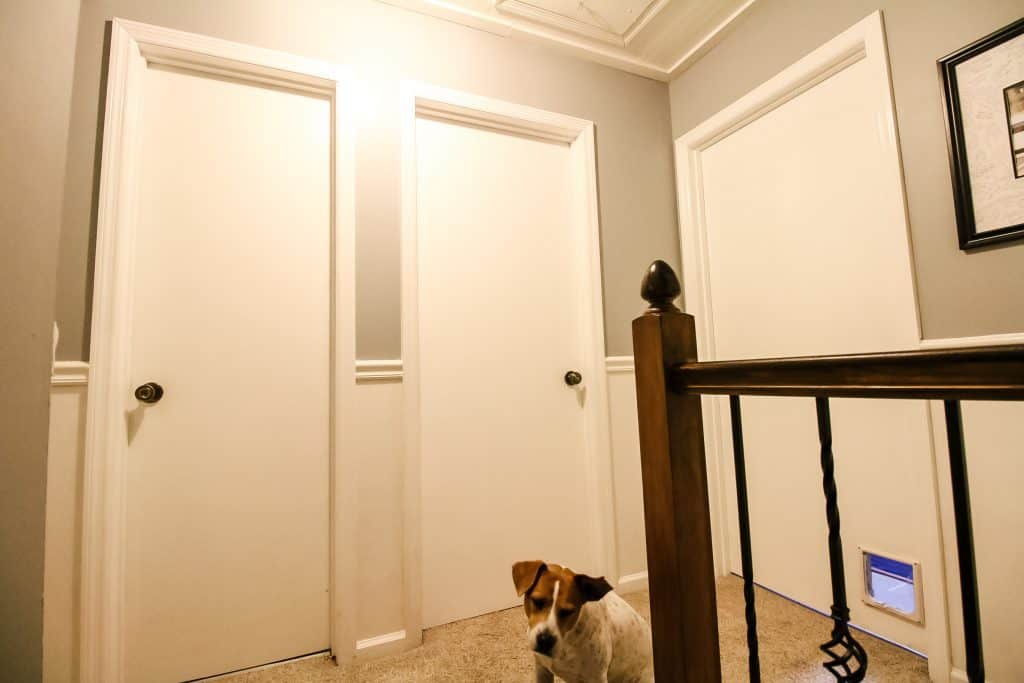
Nearly every knob in the house was different! Some were round, some where cylindrical, some were bronze, some were silver, some had keys, some had nothing. Nothing made sense. One door even had two different knobs on each side! 

Upgrading your Doors with Kwikset Knobs - Charleston Crafted

We have no idea how this knob situation happened, but we were going to replicate it once we made these boring flat panel doors into something beautiful.

The first thing we did was remove all the old knobs and putting them straight in the trash.

Upgrading your Doors with Kwikset Knobs - Charleston Crafted

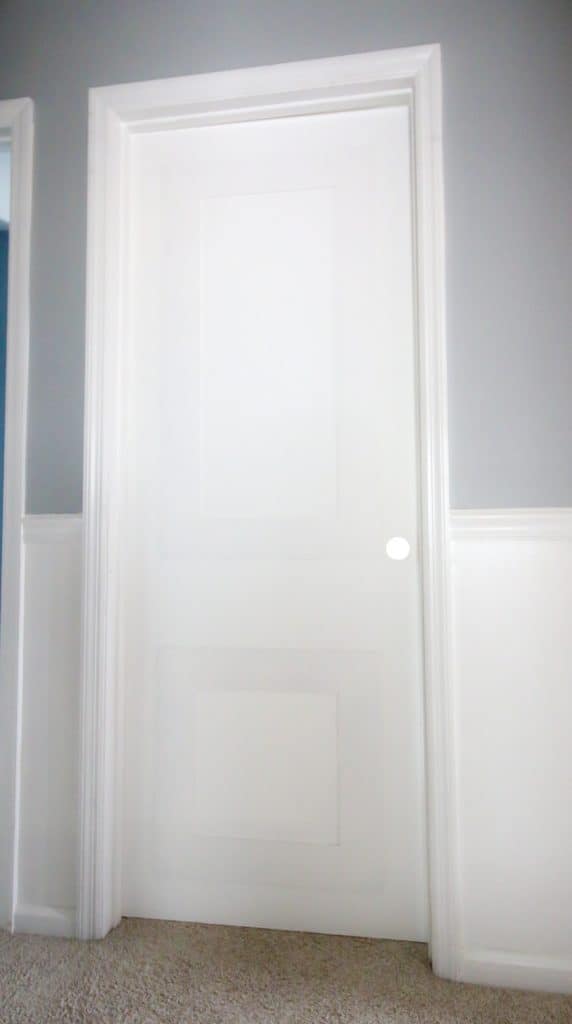
We opted for Kwikset Halifax levers in iron black with a square backing. This is a little more modern than usual and we wanted to change things up. We loved the look of these levers.

Upgrading your Doors with Kwikset Knobs - Charleston Crafted

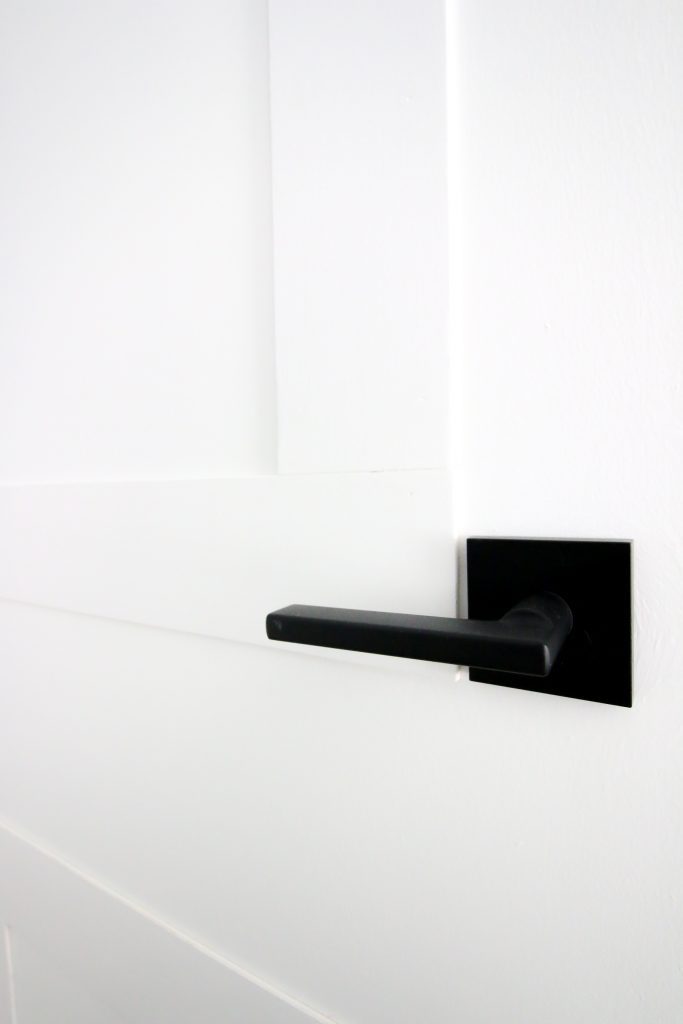
I had a bit of a time deciding what color finish to go with. A chrome-toned color would have been a safer choice. But, we decided that we wanted the levers to pop and not blend! Plus, metal finishes go in and out of style pretty quickly. I think that the black will hold up and be classic and timeless. 

Upgrading your Doors with Kwikset Knobs - Charleston Crafted

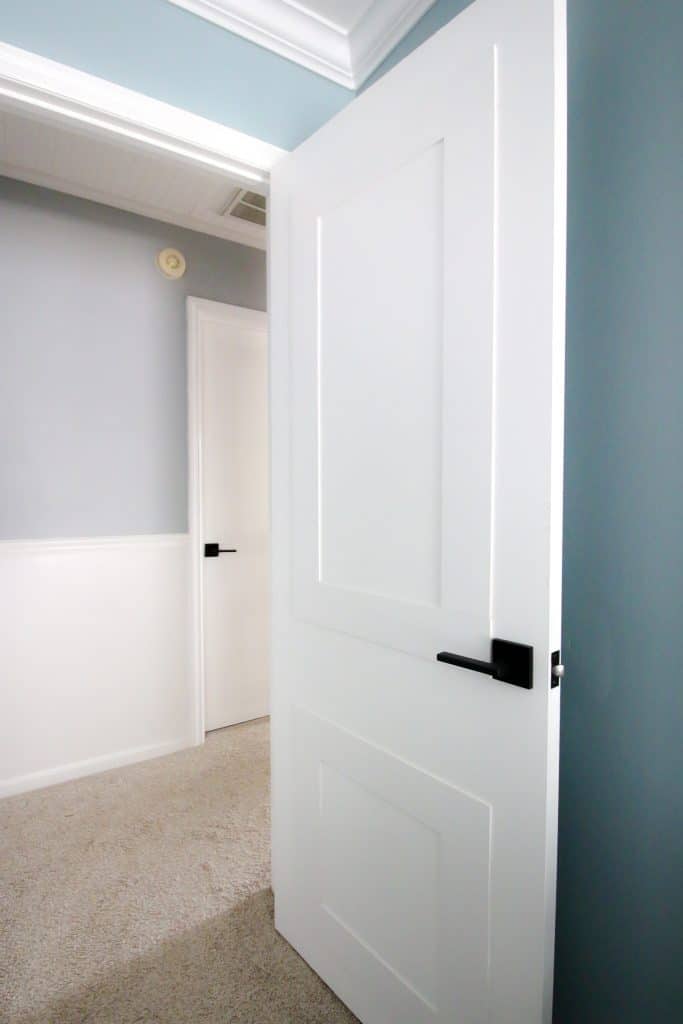
In addition to the levers, the square plate that attaches the knobs to the doors really makes a big statement. I love how it echoes the lines of the new molding and think that it really makes the doors look more high end and custom. 

We needed some "passage" levers that don't have locks and some "privacy" levers for bedrooms and bathrooms.

Upgrading your Doors with Kwikset Knobs - Charleston Crafted

How to remove an old door knob

  1. Use a drill or screwdriver to remove screws on the door jamb side of the door. Remove plate.
  2. There should be screws on one side of the knob. Unscrew them as well and the whole knob should come off with one piece on each side. 
  3. If your new knob is smaller, you might need to sand or touch up paint behind where the old knob used to be. 
  4. Remove the old strike plate on the doorjamb. 

Upgrading your Doors with Kwikset Knobs - Charleston Crafted

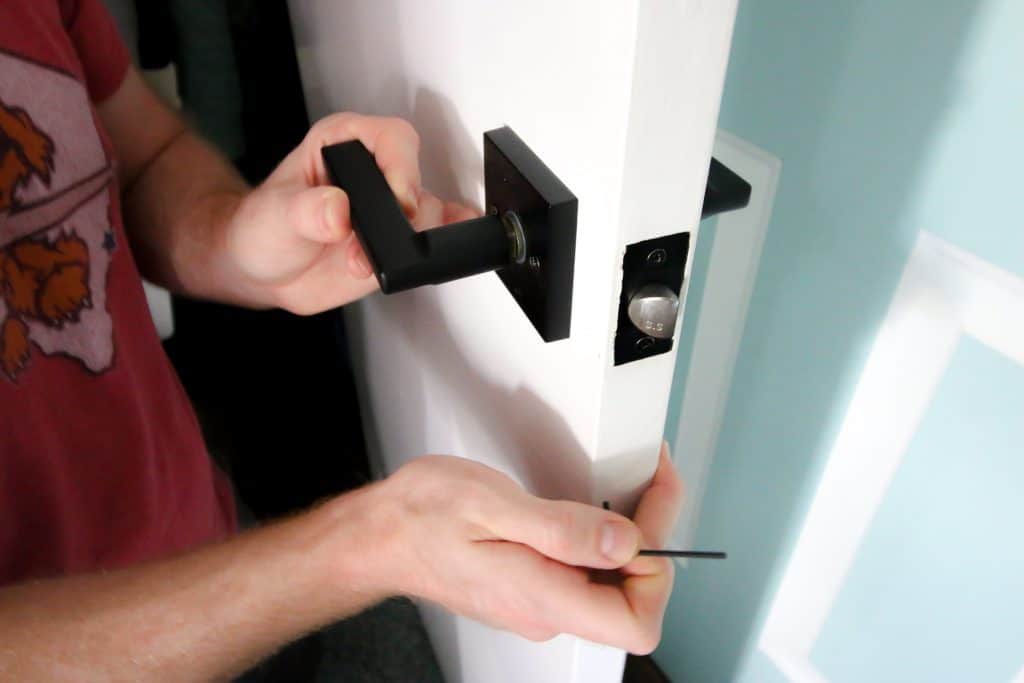
How to install a new door knob

  1. Add the internal latch components and plate and screw into place.
  2. Add the knob or lever on both sides and screw into place.
  3. Install your new strike plate into the doorframe.

These Kwikset Halifax levers were super easy to swap in. They come together quickly and easily screw together.

Our old flat panel doors now look amazing! Upgrading your doors with Kwikset knobs is simple and easy. This was a project I wish we had done years ago!

This post was sponsored by Kwikset. All opinions are our own and our opinion is that we love Kwikset knobs. Thank you for supporting the brands that make Charleston Crafted possible!

 Charleston Crafted Logo heart
 Charleston Crafted Logo facebook
 Charleston Crafted Logo insta
 Charleston Crafted Logo pinterest
 Charleston Crafted Logo twitter

Charleston Crafted email newsletter sign up

Sean headshot cropped
Sean

Hey there, I'm Sean, the woodworking enthusiast and builder behind CharlestonCrafted.com! Since 2012, I've been sharing the magic of turning raw materials into beautiful creations. I love teaching others the art and satisfaction of woodworking and DIY. I try to inspire fellow crafters to make something extraordinary out of nothing at all.

More Home Improvements

  • Keep outdoor rug from blowing up - Charleston Crafted
    How to keep your outdoor rug in place
  • how to stick to a budget on a home renovation
    How to stick to a budget on a home renovation
  • How to install an undermount sink - Charleston Crafted
    How to install an undermount bathroom sink
  • How to make your own quarter round - Charleston Crafted
    How to make your own quarter round trim

Primary Sidebar

Charleston Crafted about us image

Hey y'all!

We are Morgan & Sean McBride and we are crafting our home together in Charleston, South Carolina.

More about us

Popular Posts

  • DIY Coffered Ceiling
    DIY Coffered Ceiling
  • How to Make DIY Concrete Pumpkins via Charleston Crafted
    How to Make DIY Concrete Pumpkins
  • How to Make a Cupid's Arrow Valentine's Day Wall Hanging with felt on the Cricut
    How to make a Cupid's Arrow Valentine's Day Wall Hanging
  • Our Tropical Oasis - A backyard Hammock area - Charleston Crafted
    Our Tropical Oasis

Recent Posts

  • fisherman aesthetic home inspiration
    Fisherman Aesthetic Decor for Your Home
  • Senix Tools Review- Charleston Crafted
    Are Senix power tools any good?
  • Your Weekend To-Do List: 15 Things to Do for Summer Home Upkeep
    Your Weekend To-Do List: 15 Things to Do for Summer Home Upkeep
  • How to build a DIY gate pergola- Charleston Crafted
    How to build a DIY gate pergola

Privacy Policy

Footer

↑ back to top

Navigation

  • Home
  • Blog
  • Contact Us
  • Terms of Use
  • Disclaimer

Newsletter

  • Sign up for emails and updates
  • Follow us on Instagram
  • Work with Us

Browse by Category

  • Woodworking
  • Home Projects
  • Paint Colors
  • Room Reveals

© 2025 The Charleston Crafted Blog LLC DBA “Charleston Crafted” and “CharlestonCrafted” (also known as N/A) / All Rights Reserved.
Official Website: (Charleston Crafted)
Registered in USA (Co. Reg. No.: 565586)
Address: Charleston, USA 29414, South Carolina
Contact Phone: Not applicable — contact is via email: sean@charlestoncrafted.com

DISCLAIMER: The content on this website is provided for general informational purposes only and is not intended as professional advice. The Charleston Crafted Blog LLC and The Charleston Crafted Blog LLC make no representations or warranties—express or implied—regarding the accuracy, completeness, or suitability of the information contained herein. Any reliance you place on this information is strictly at your own risk. In no event shall The Charleston Crafted Blog LLC or The Charleston Crafted Blog LLC be liable for any loss or damage, including without limitation, indirect or consequential loss or damage, arising from the use or inability to use this website. This website is the official website of The Charleston Crafted Blog LLC.

AFFILIATE DISCLOSURE: This website contains affiliate links. If you click through and make a purchase, we may earn a commission at no extra cost to you.

As an Amazon Associate, I earn from qualifying purchases.

Site Editor: Morgan Smith McBride

Copyright © 2025 Charleston Crafted