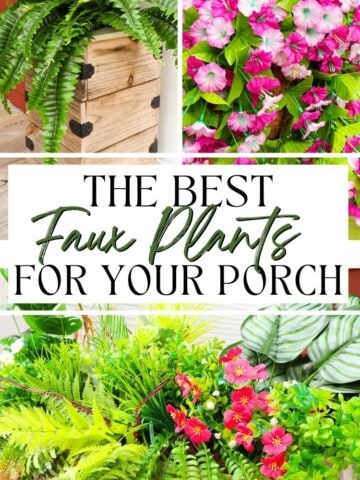
Want to add vertical interest to your garden? Here's how to make a topsy turvy pots planter!
Want to add a unique stacked planter to your yard? How about a topsy turvy planter!
We have been working on filling in the garden beds on either side of our small back yard.
I had a corner that was feeling a bit empty and blah, and I wanted to add some vertical interest.
So, I decided to create a topsy turvy planter - a stacked pot display that's super easy to put together in 15 minutes and a great way to display potted plants!
Here's how to make a topsy turvy planter for your yard.
See all of our DIY plant stand ideas here!
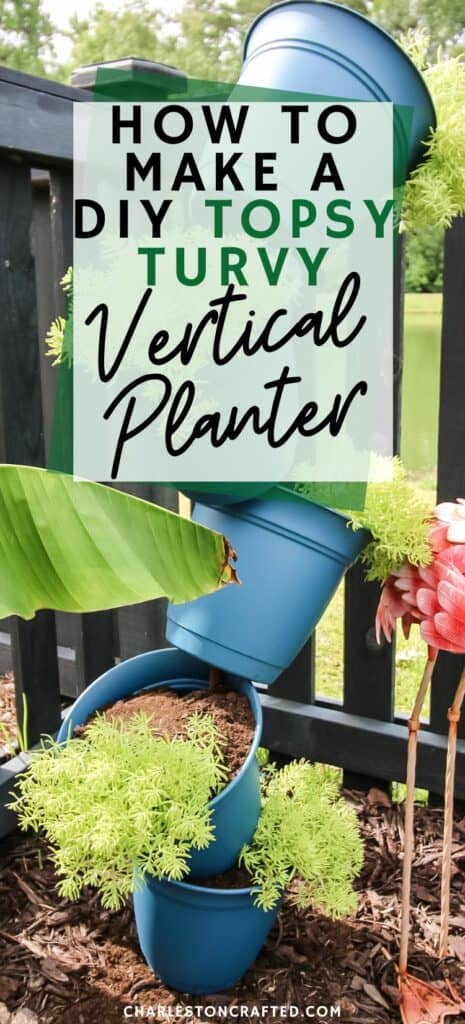
Step-by-Step Guide to Building a DIY Topsy Turvy Planter
Here's everything you need to know about hot to build a topsy turvy plant stand.
Materials and Tools:
- 5 pots - plastic or ceramic - mine were 10" in diameter
- Re-bar as tall as you want the stand to be + 6 inches
- Mallet or hammer
- Potting soil
- Plants to fill each pot
If you want to use different sizes of pots, consider placing a larger pot on the bottom (flat on the ground) and/or a smaller pot on top of the stack! All of my pots are the same size (10" diameter).
Design and Planning:
First, you want to plan and design your topsy turvy planter DIY. Pick a space in your yard to put the planter and determine your desired height and width.
Do a little simple math to determine how many pots you need and what size pots you will use. Since these are basically DIY stacked flower pots, you can divide your total height by the height of the pots to get a shopping list!
You can choose to use ceramic or plastic pots. Terra cotta pots are popular for stacked plant stands because the pots already have holes in the bottom.
However, terra cotta pots tend to run dry and our yard is very hot and sunny, so I chose to use a plastic pot to better retain moisture.
Also consider what plants you will select for your tilted flower pot display. Be sure to consider their growth habits, sunlight requirements, and maintenance needs.
Construction Process:
- Preparing the Containers:
- Make sure that the pots that you chose, if not new, are clean
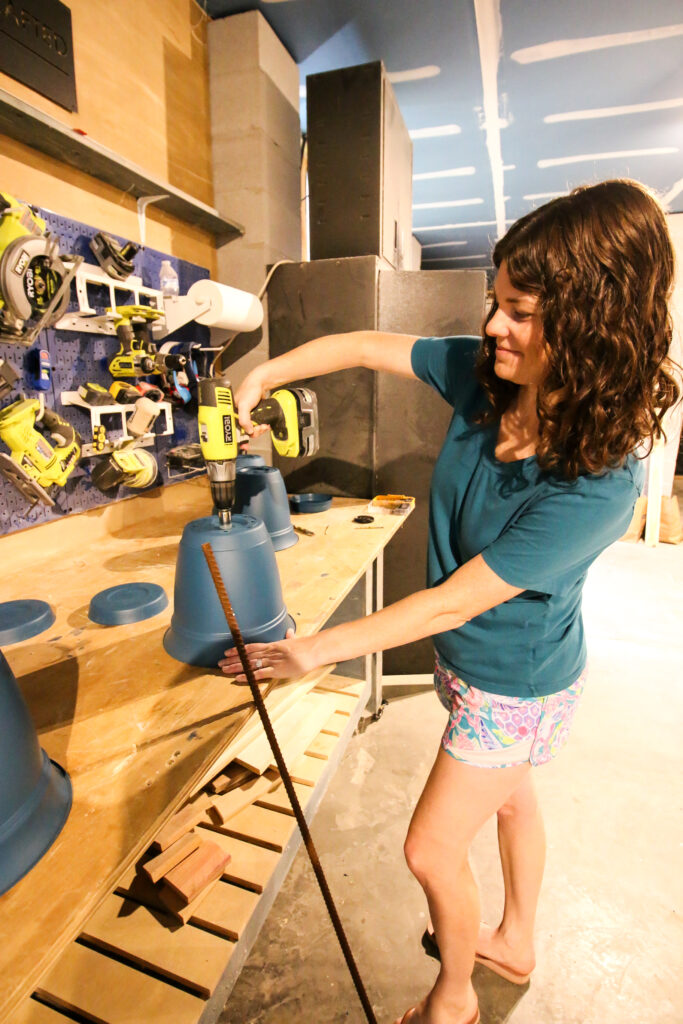
- Your pots will need 1 hole in the center of the bottom of each pot. Be sure that the hole is large enough to accomodate your rebar.
- If your pot does not have a drainage hole, choose a drill bit slightly larger than your rebar and drill a hole. It helps to have a second person to hold the pot/keep it from spinning while you drill.
- If your pot does not have drainage holes, I suggest drilling them at this time. These can be smaller holes, just to let excess water drain out. Otherwise, a rain storm can flood your plants!
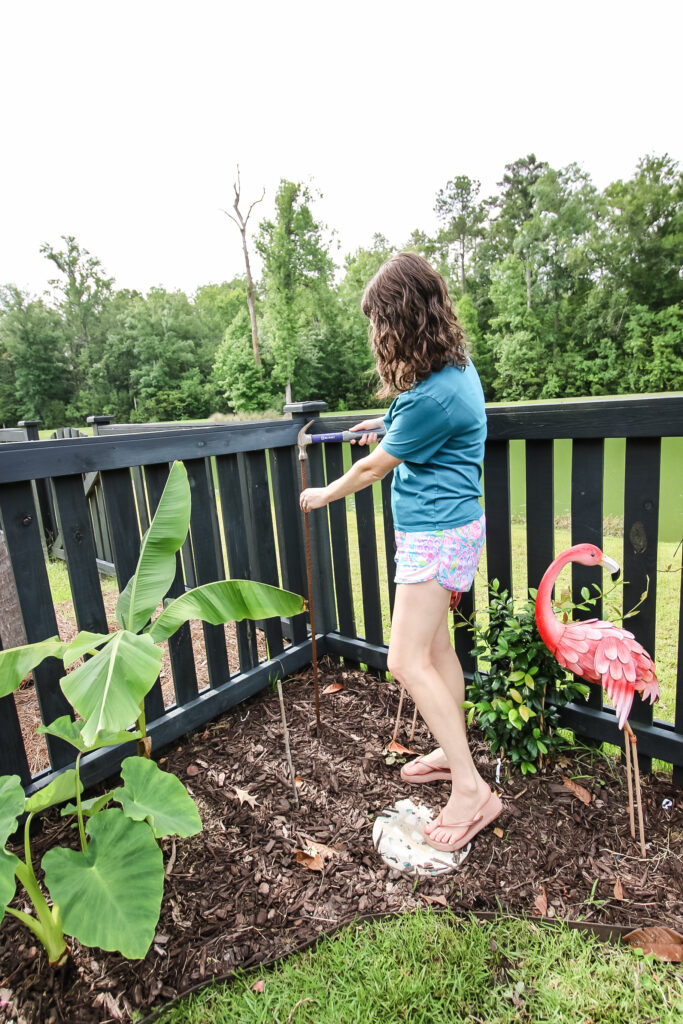
- Building the Frame:
- Set up the frame of your planter by choosing a spot for your planter to go outdoors.
- Hold your rebar in that spot and use a hammer or mallet to gently tap it into the ground.
- You want it to be at least 4-6" in the ground, or until it feels very stable.
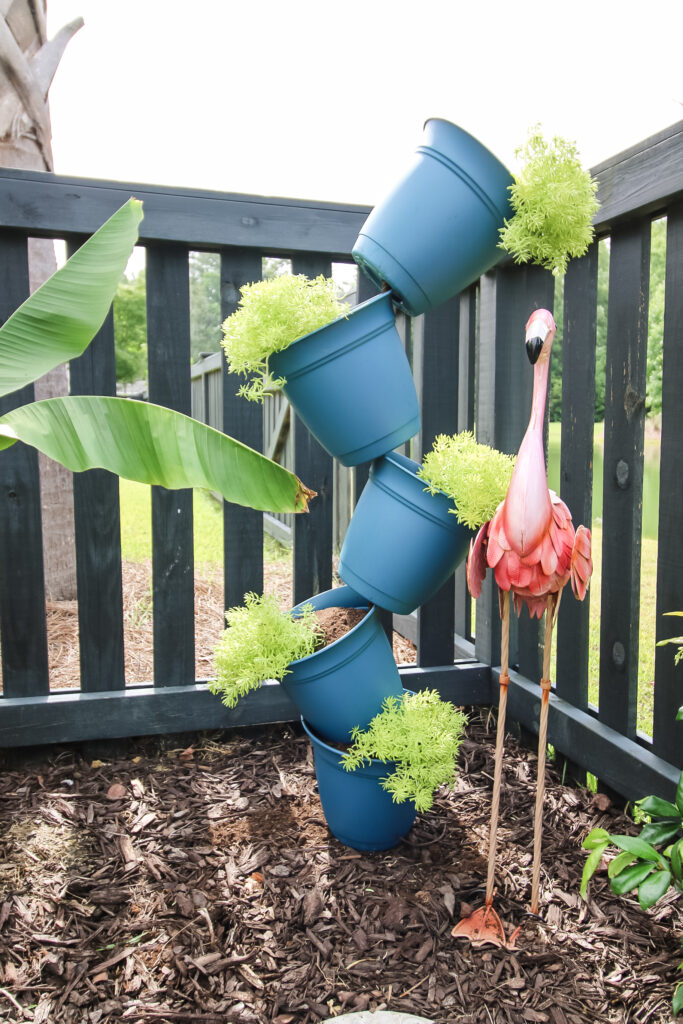
- Assembling the Topsy Turvy Planter:
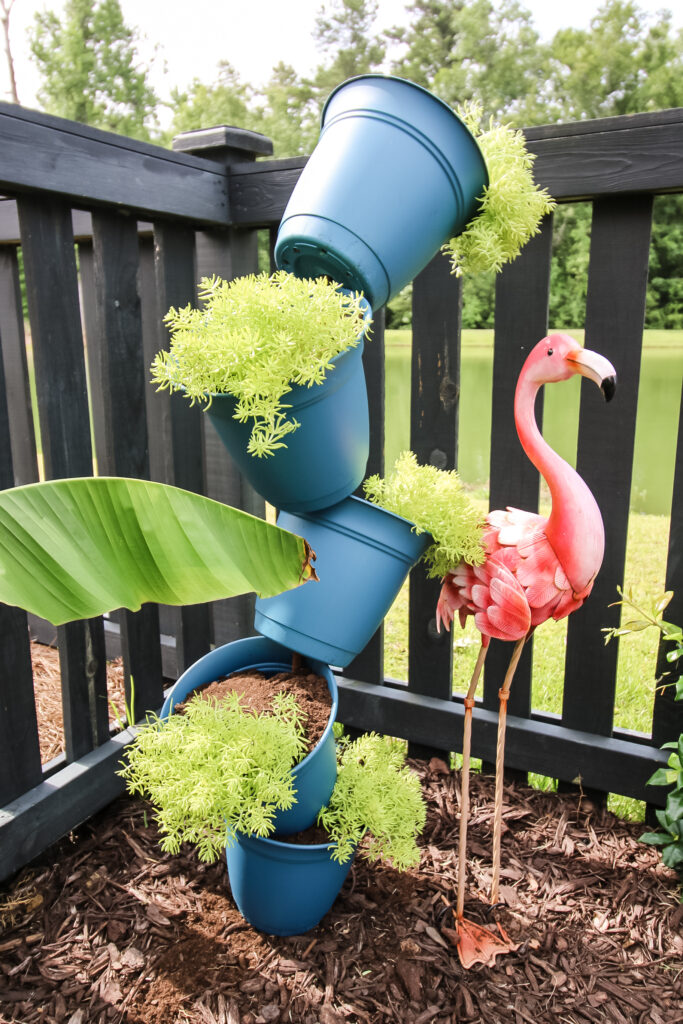
- Place your first pot onto the rebar and drop it into place. This pot will sit flat on the ground.
- You can add all of your pots at once, but I find it's easiest to add a pot, fill it with soil, then add the next pot and repeat.
- After the first pot (which is flat on the ground) you will want to tilt or angle the pots to alternating sides. This lets the plants drip out naturally and gives it that topsy turvy look.
- Filling and Planting:
- Add soil to your pot, then add your plant and fill in around it with soil.
- Arrange your plants so they are dripping out the side in alternating directions.
- Repeat
- Repeat this process - pot, soil, plant, soil, pot, soil, plant, soil - until your planter is 5 pots high or your desired height.
Maintenance and Care:
Your topsy turvy planter will need regular maintenance such as watering, fertilizing, and pruning.
The most important thing is to check on your topsy turvy flowers regularly, especially at first, and notice if they look dry, droopy, or sad.
Constant monitoring and quick responses to any problems are the best way to keep your vertical garden happy!
Any more questions about topsy turvy pots?

Looking for something?
We've been doing this since 2012 so we have a LOT of blog posts!
Search stuff like: Ceiling Projects | DIY Plant Stands | Thrift Flips

Hello, I'm Morgan, half of the creative force behind CharlestonCrafted.com! With a passion for DIY that dates back to 2012, I've transformed three homes and now I'm dedicated to helping others craft their dream spaces. Let's turn your house into a home together!