• Skip to primary navigation
  • Skip to main content
  • Skip to primary sidebar
Charleston Crafted
  • DIY
  • Woodworking
  • Popular Posts
  • Blog
  • About
  • Shop
menu icon
go to homepage
  • DIY
  • Woodworking
  • Popular Posts
  • Blog
  • About
  • Shop
search icon
Homepage link
  • DIY
  • Woodworking
  • Popular Posts
  • Blog
  • About
  • Shop
×
Home » Decor

Gold leaf epoxy resin coasters

Published: May 18, 2020 by Sean · As an Amazon Associate, we earn from qualifying purchases. This site contains affiliate links. ·

Epoxy resin is all the rage and will continue to be for a long time. If you're afraid to get into the epoxy game, the easiest way to do it is to buy a pre-made mold and some epoxy and simply try some things out!

One great example and option for that is to buy coaster molds on Amazon and some epoxy and try out making different coasters!

Gold leaf epoxy resin coasters - Charleston Crafted

How to make epoxy resin coasters

You can make custom epoxy resin coasters with all sorts of fillers and designs. Start by ordering some silicone coaster molds in square, round or hexagon. These make it super simple to mix your resin and pour into a mold and let dry.

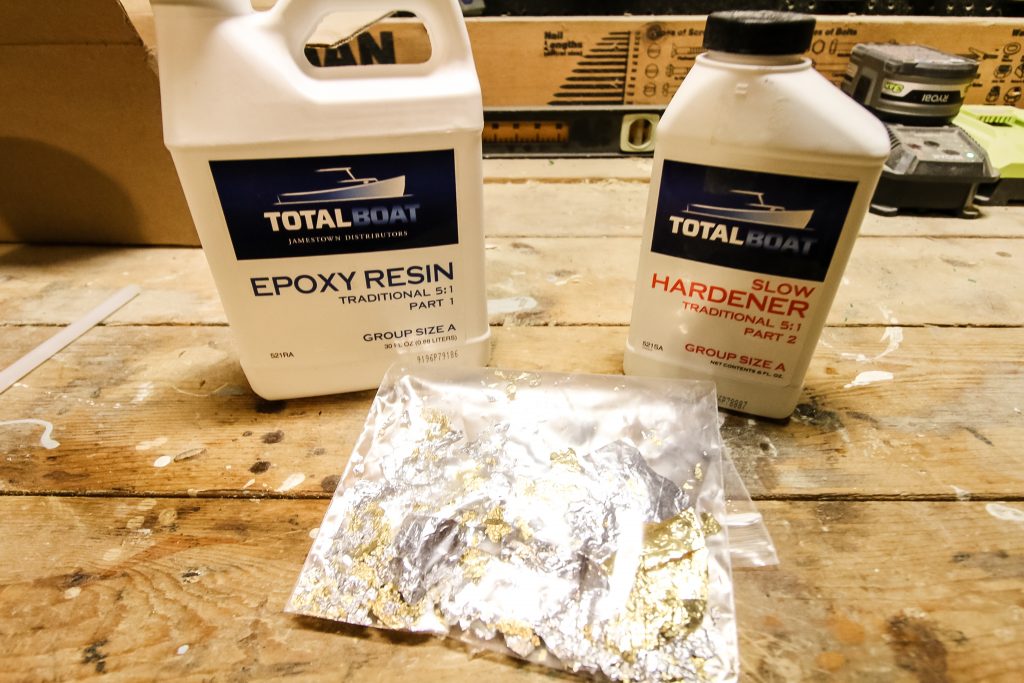
You'll also need epoxy resin. We got ours from Total Boat, but there are lots of kinds of epoxy resin out there that can be used for crafts and DIY art projects like this.

The other thing you'll need is a mixer. You can add dyes, paints, objects or whatever you want.

Total Boat epoxy and gold leaf

See how we used two-part epoxy and craft paint to make a river table!

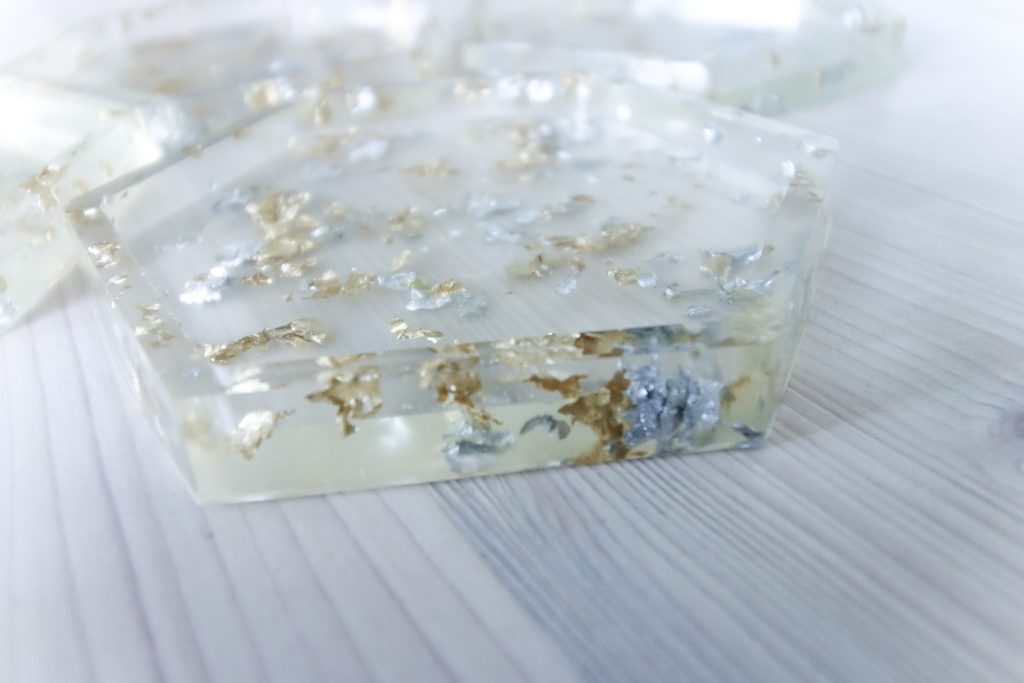
Gold leaf resin coasters

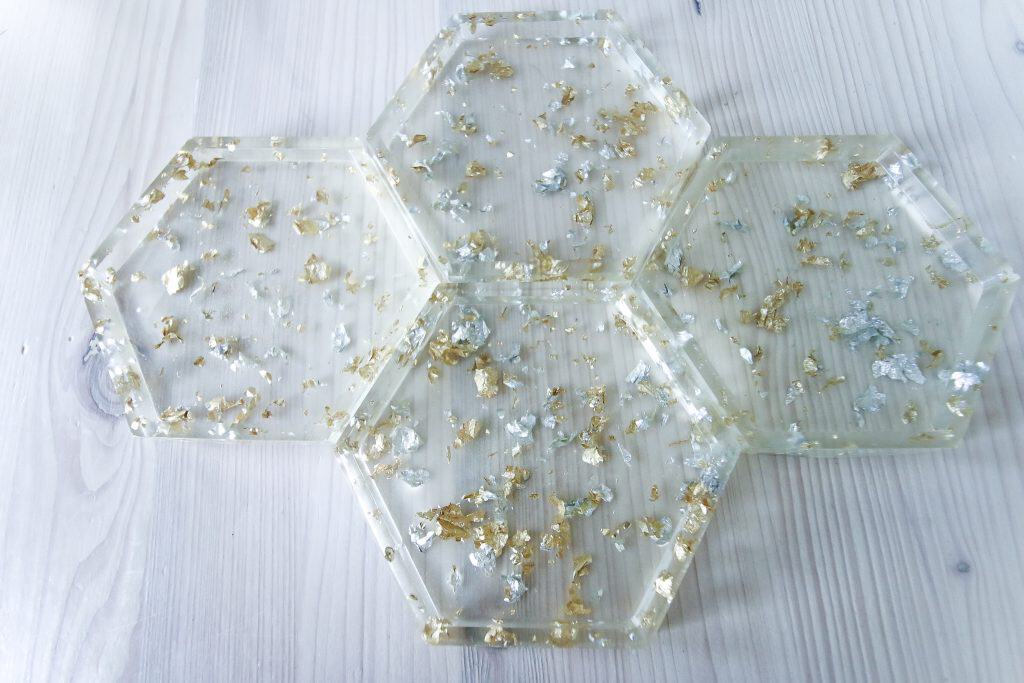
For this project, we used gold and silver leaf flecks to make a 3D confetti resin coaster.

Overhead view of epoxy coasters

The gold leaf flecks are torn bits that we saved when we made some Christmas crafts covered in gold and silver leaf. These projects were great, but they create lots of small bits torn off. We saved them in a bag for something just like this.

The epoxy resin is simple to mix according to the instructions. Use the ratios for the resin and hardener according to how the specific brand recommends. Pump them both into your mixing cup and stir for about 3 minutes.

Then add the flecks of gold leaf (or other mixer) into the epoxy resin mix.

Epoxy in coasters

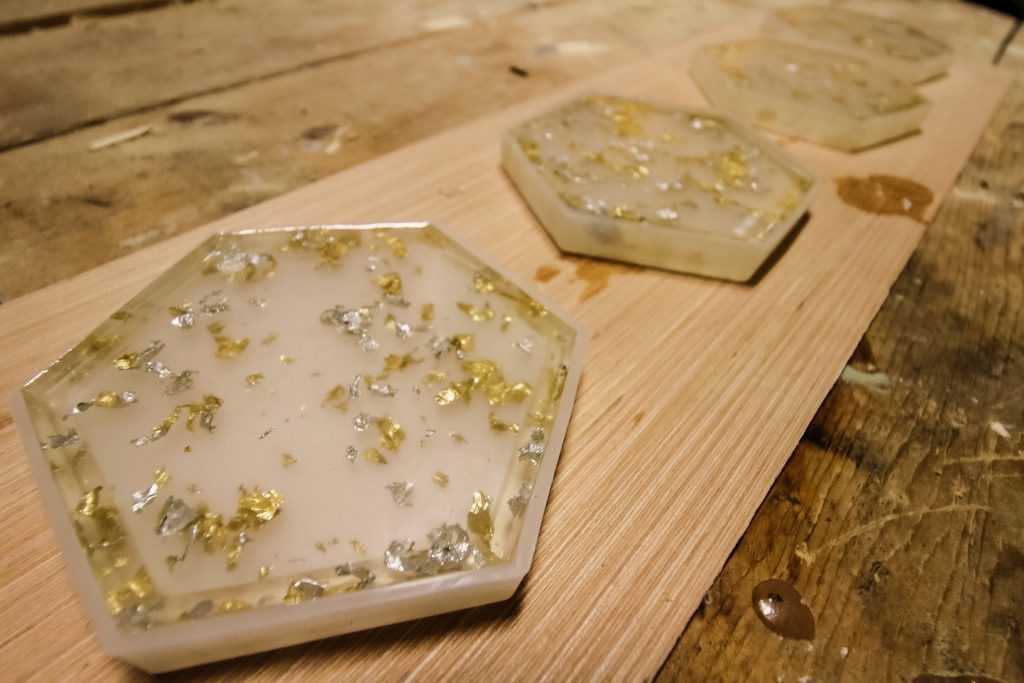
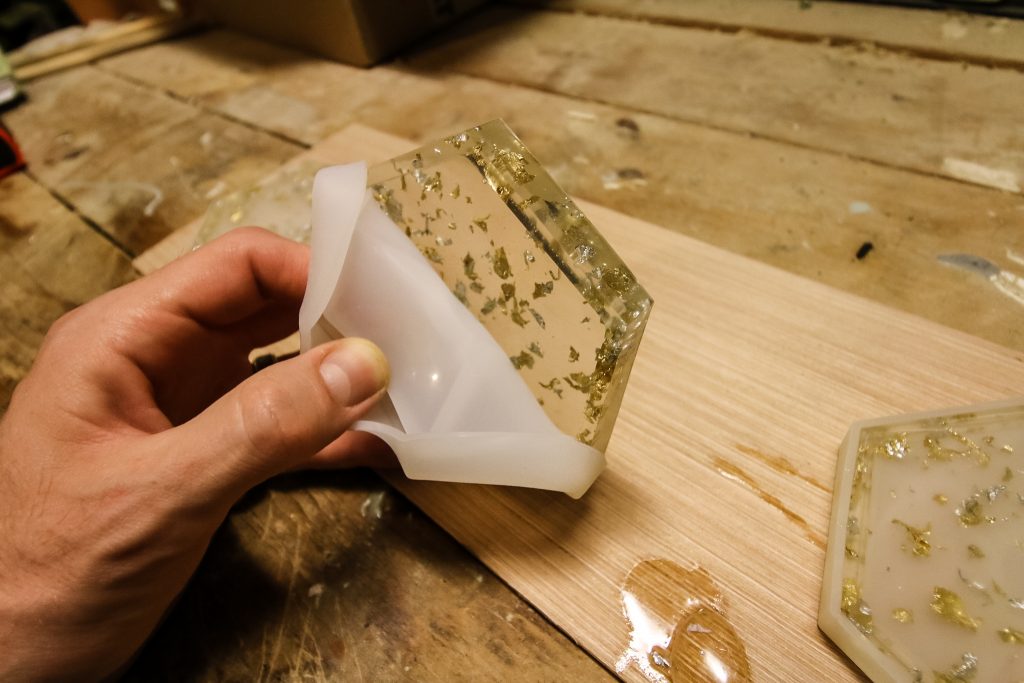
Once it was fully mixed, we poured it into the drink coaster molds.

When adding a mixer into epoxy resin for a pour, make sure that you have a good ratio of your mixer in all your pieces. For instance, the first two coasters got a lot more gold leaf than the others, so we used a plastic spoon to even it out.

After you pour your mix into the mold, make sure to vibrate out any bubbles or use a heat gun to get rid of them. For this mix, we didn't have any bubbles at all, but you can use something to tap the edge of the mold or vibrate with an orbital sander if needed.

Coaster coming out of mold

Using the fast dry resin is great for this and the coasters were ready in about 12 hours. Epoxy resin is super lightweight, so these coasters are perfect for serving drinks!

Drink on coaster

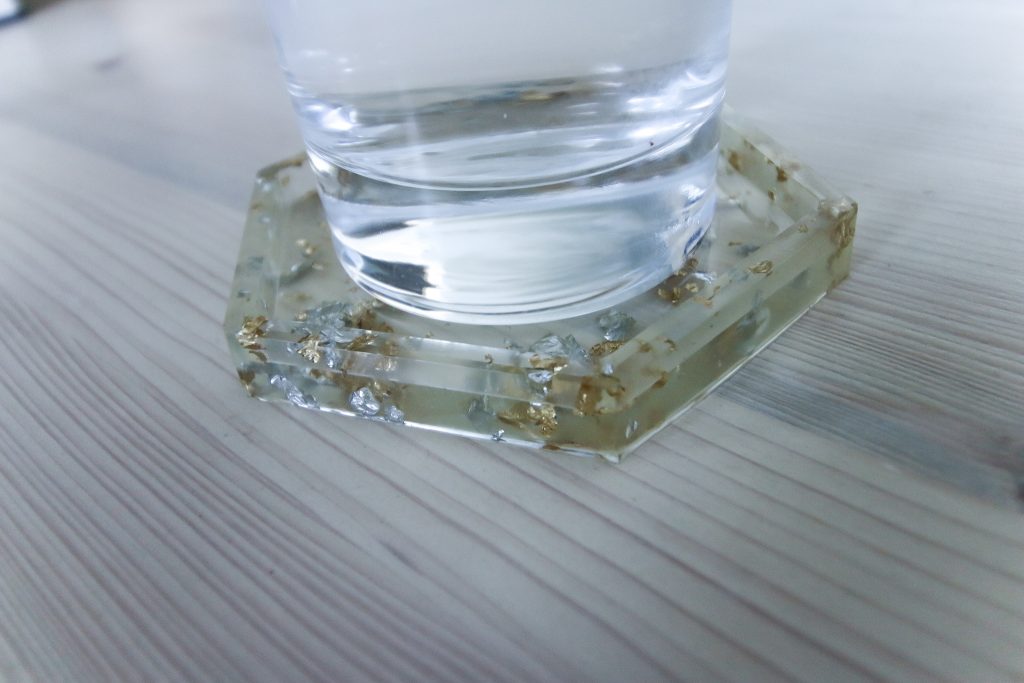
The gold leaf epoxy resin coasters are perfect for a party or celebration. A birthday or New Year's party would be great occasions to make a bunch of confetti coasters to share with your friends and family.

Coasters stacked

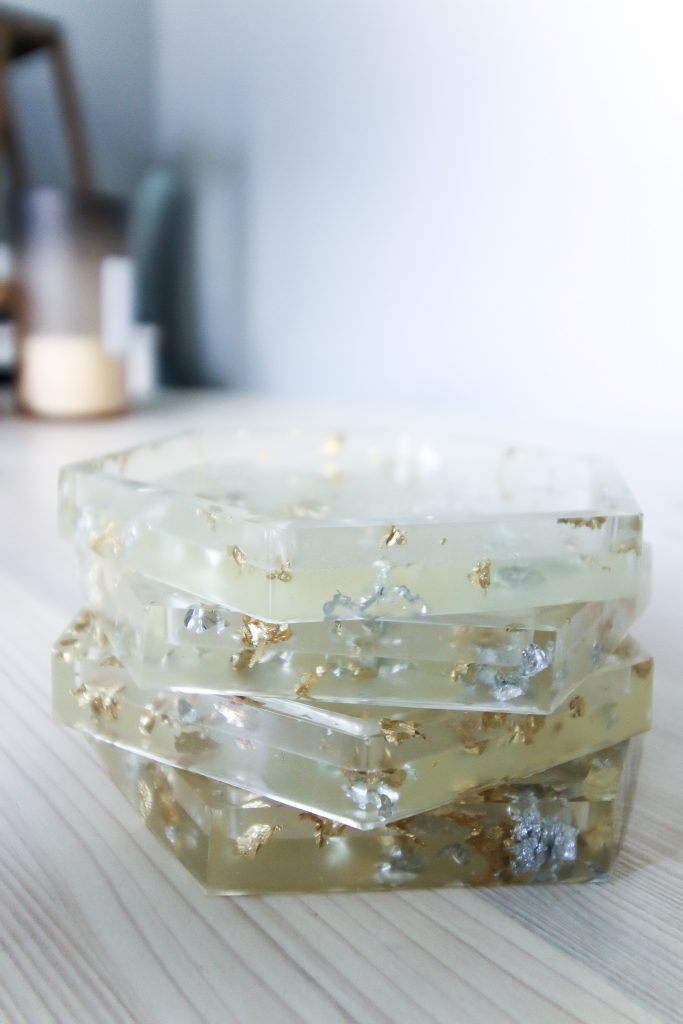
Try making some simple gold leaf epoxy resin coasters today or mix in some regular confetti or other options to suit your style!

Charleston Crafted Signature

Follow us on:
Pinterest | Instagram | TikTok | YouTube | Facebook | Amazon Storefront | LTK Shop

Looking for something?

We've been doing this since 2012 so we have a LOT of blog posts!
Search stuff like: Ceiling Projects | DIY Plant Stands | Thrift Flips

Charleston Crafted logo banner
Sean headshot cropped
Sean

Hey there, I'm Sean, the woodworking enthusiast and builder behind CharlestonCrafted.com! Since 2012, I've been sharing the magic of turning raw materials into beautiful creations. I love teaching others the art and satisfaction of woodworking and DIY. I try to inspire fellow crafters to make something extraordinary out of nothing at all.

More Decor

  • DIY easter egg topiary
    How to make an oversized Easter egg topiary
  • design shop review
    DesignShop Box Review
  • lighting trends for 2025
    Top Lighting Trends to Brighten Your Home in 2025
  • Our Valentine's Day Mantel Decor
    Valentines Day Mantel Decor

Reader Interactions

Comments

  1. James in STL says

    May 18, 2020 at 11:27 am

    I wished you went deeper into the process of preparing the molds, mixing the resin, and eliminating the bubbles that form. Beginners working with resin don't know all of the tricks yet.

    • Sean says

      May 18, 2020 at 11:33 am

      Thanks for the feedback, James! I'll add some of that! Hope you still enjoyed the project.

Primary Sidebar

Charleston Crafted about us image

Hey y'all!

We are Morgan & Sean McBride and we are crafting our home together in Charleston, South Carolina.

More about us

Popular Posts

  • DIY Coffered Ceiling
    DIY Coffered Ceiling
  • How to Make DIY Concrete Pumpkins via Charleston Crafted
    How to Make DIY Concrete Pumpkins
  • How to Make a Cupid's Arrow Valentine's Day Wall Hanging with felt on the Cricut
    How to make a Cupid's Arrow Valentine's Day Wall Hanging
  • Our Tropical Oasis - A backyard Hammock area - Charleston Crafted
    Our Tropical Oasis

Recent Posts

  • how to organize a pantry with zones
    How to Organize Your Pantry in Zones (And Why It’s a Game Changer)
  • Keep outdoor rug from blowing up - Charleston Crafted
    How to keep your outdoor rug in place
  • kitchen design mistakes to avoid
    Kitchen design mistakes to avoid
  • DIY Faux Tropical Window Box That Looks Real (But Won’t Die!)

Privacy Policy

Footer

↑ back to top

Navigation

  • Home
  • Blog
  • Contact Us
  • Terms of Use
  • Disclaimer

Newsletter

  • Sign up for emails and updates
  • Follow us on Instagram
  • Work with Us

Browse by Category

  • Woodworking
  • Home Projects
  • Paint Colors
  • Room Reveals

© 2025 The Charleston Crafted Blog LLC DBA “Charleston Crafted” and “CharlestonCrafted” (also known as N/A) / All Rights Reserved.
Official Website: (Charleston Crafted)
Registered in USA (Co. Reg. No.: 565586)
Address: Charleston, USA 29414, South Carolina
Contact Phone: Not applicable — contact is via email: sean@charlestoncrafted.com

DISCLAIMER: The content on this website is provided for general informational purposes only and is not intended as professional advice. The Charleston Crafted Blog LLC and The Charleston Crafted Blog LLC make no representations or warranties—express or implied—regarding the accuracy, completeness, or suitability of the information contained herein. Any reliance you place on this information is strictly at your own risk. In no event shall The Charleston Crafted Blog LLC or The Charleston Crafted Blog LLC be liable for any loss or damage, including without limitation, indirect or consequential loss or damage, arising from the use or inability to use this website. This website is the official website of The Charleston Crafted Blog LLC.

AFFILIATE DISCLOSURE: This website contains affiliate links. If you click through and make a purchase, we may earn a commission at no extra cost to you.

As an Amazon Associate, I earn from qualifying purchases.

Site Editor: Morgan Smith McBride

Copyright © 2025 Charleston Crafted