• Skip to primary navigation
  • Skip to main content
  • Skip to primary sidebar
Charleston Crafted
  • DIY
  • Woodworking
  • Popular Posts
  • Blog
  • About
  • Shop
menu icon
go to homepage
  • DIY
  • Woodworking
  • Popular Posts
  • Blog
  • About
  • Shop
search icon
Homepage link
  • DIY
  • Woodworking
  • Popular Posts
  • Blog
  • About
  • Shop
×
Home » Home Improvements

Five Tips to Make Staining a Breeze

Published: Nov 19, 2014 · Modified: Jan 8, 2023 by Sean · As an Amazon Associate, we earn from qualifying purchases. This site contains affiliate links. ·

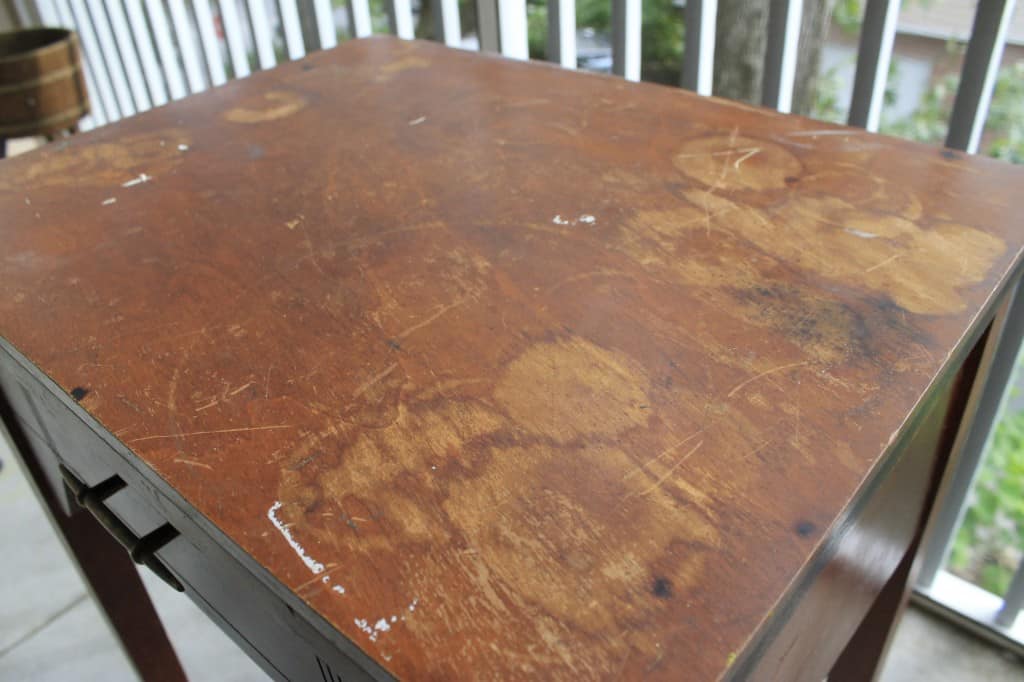
Colorfully painted furniture is super on trend right now, but it’s not the only way to refinish a piece. Whenever we can find a piece that is solid wood, my first instinct is to stain it.

A good stain job brings out the detail of the grain. It can make a piece of furniture look extremely expensive. If your home is already filled with a lot of painted furniture, consider staining your next project to bring in the upscale-natural look of wood.

Just remember that the whole piece should be made of real wood for you to do this.

Sewing Table turned into Bar Table - Charleston Crafted

Here are five tips to ensure that you get a great finish.

How to stain furniture

  1. Sand well and in the direction of the grain- You will need to sand off every bit of old finish, so that the new stain is able to penetrate the wood.
    We like using a sanding block on flat surfaces (it’s much easier on your hands) and then sheets of sandpaper on sides or rounded edges, such as legs.
    Start with a high grain and work your way to finer grain sandpaper, until you get it as smooth a finish as you’d like. Always, always sand in the direction of the wood grain or you will visibly scratch the wood.
    When you’re done, make sure to wipe away all of the sawdust before you stain or it will get caught in the stain and look bumpy and bad.
    Sewing Table turned into Bar Table - Charleston Crafted
  2. Apply your stain with a foam brush- I use cheap disposable brushes and throw them away afterwards. Foam brushes apply the stain well and do not leave brush marks.
  3. Don’t use a cheap brush to apply your sealant- I am all for cheap brushes, but when you are painting a piece of furniture, you really don’t want the bristles to fall out and get stuck in the finish.
    I buy Purdy brand brushes at Lowes, then wash them very well and reuse them many times.
  4. Two thin coats are better than one thick coat- Especially if you have never used a certain color stain before, it’s better to put on less (or for a shorter period of time), let it dry, and re-apply if you’d like it to get darker. 
    We like to apply stain, let it sit for five to ten minutes. This is depending on how dark you want it to get. Then use a disposable rag (NOT a paper towel) to wipe away the excess. Allow to dry for one hour before repeating.
    Allow to dry fully before sealing. Just keep in mind that the darker you go, the harder it is to see the natural grain of the wood underneath.
Sewing Table turned into Bar Table - Charleston Crafted

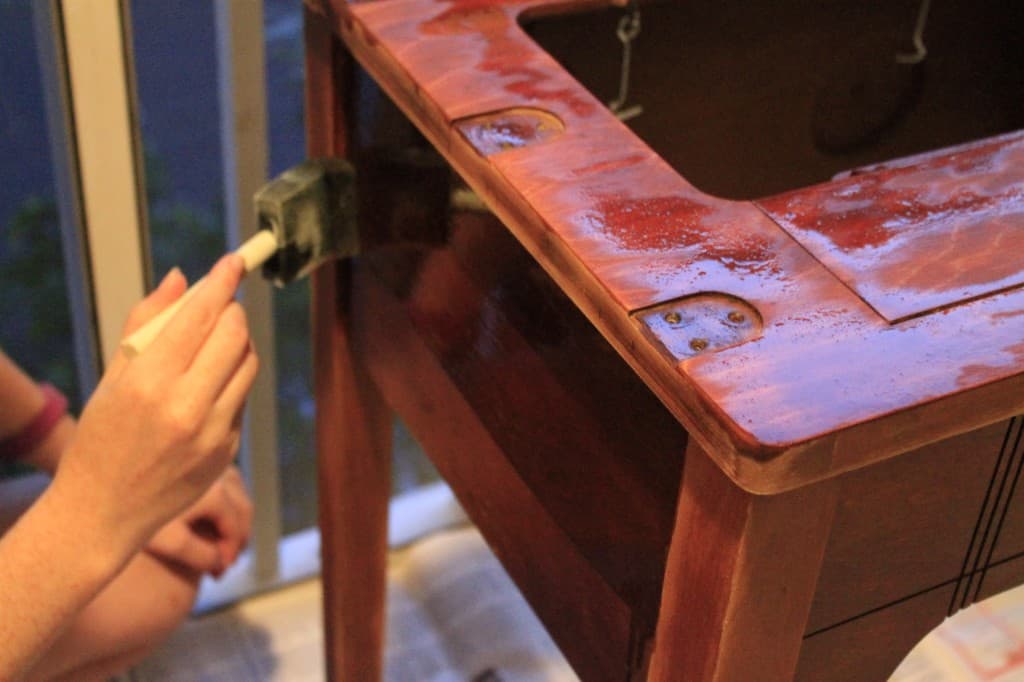
5. Don’t let anything drip- That’s the very most important thing. Usually when we stain, I apply the stain and Sean looks behind me to see if anything starts dripping. If it does (and it will), immediately catch the drip with your brush.
A drip will dry visible and aggravate you every time you see it! Watch for drips with your sealant, too. They will be clear but have the potential of drying bumpy.

Sewing Table into Bar Table - Charleston Crafted

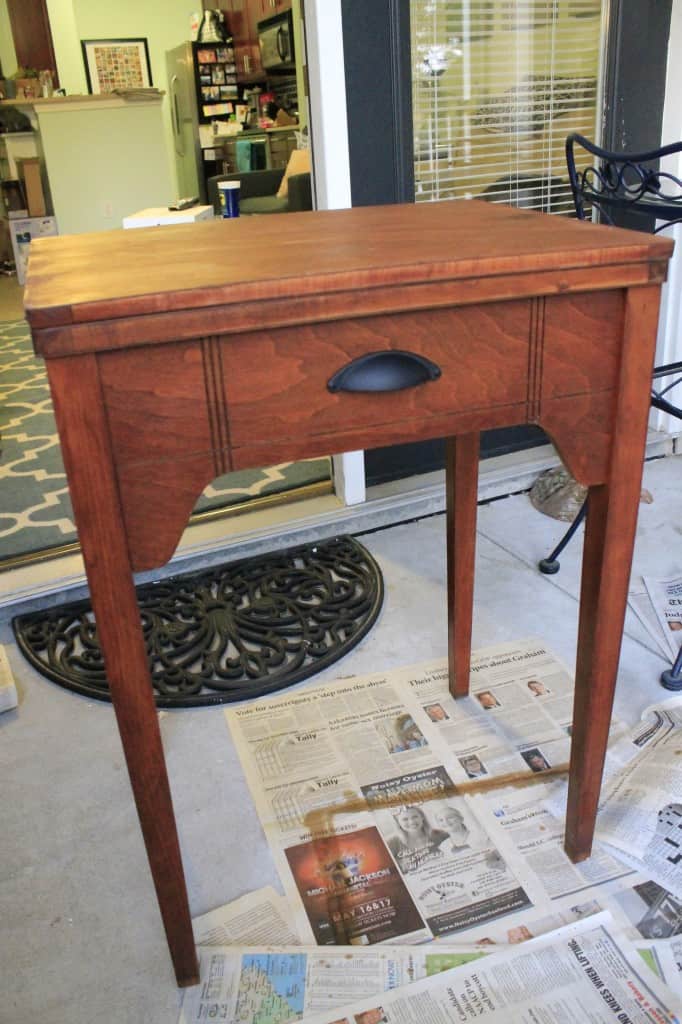
Stained wood is beautiful and a super easy and inexpensive upgrade. One small can of stain and sealant will last you for multiple projects. Next time you spot a solid wood piece at the thrift store, look past the water rings and dings and imagine it with a nice new stain.

Looking for the best stain colors? We tested 10 types of stain on 5 types of wood - check out the whole project!

What have you stained lately?

Charleston Crafted Signature

Follow us on:
Pinterest | Instagram | TikTok | YouTube | Facebook | Amazon Storefront | LTK Shop

Looking for something?

We've been doing this since 2012 so we have a LOT of blog posts!
Search stuff like: Ceiling Projects | DIY Plant Stands | Thrift Flips

Charleston Crafted logo banner
Sean headshot cropped
Sean

Hey there, I'm Sean, the woodworking enthusiast and builder behind CharlestonCrafted.com! Since 2012, I've been sharing the magic of turning raw materials into beautiful creations. I love teaching others the art and satisfaction of woodworking and DIY. I try to inspire fellow crafters to make something extraordinary out of nothing at all.

More Home Improvements

  • Keep outdoor rug from blowing up - Charleston Crafted
    How to keep your outdoor rug in place
  • how to stick to a budget on a home renovation
    How to stick to a budget on a home renovation
  • How to install an undermount sink - Charleston Crafted
    How to install an undermount bathroom sink
  • How to make your own quarter round - Charleston Crafted
    How to make your own quarter round trim

Primary Sidebar

Charleston Crafted about us image

Hey y'all!

We are Morgan & Sean McBride and we are crafting our home together in Charleston, South Carolina.

More about us

Popular Posts

  • DIY Coffered Ceiling
    DIY Coffered Ceiling
  • How to Make DIY Concrete Pumpkins via Charleston Crafted
    How to Make DIY Concrete Pumpkins
  • How to Make a Cupid's Arrow Valentine's Day Wall Hanging with felt on the Cricut
    How to make a Cupid's Arrow Valentine's Day Wall Hanging
  • Our Tropical Oasis - A backyard Hammock area - Charleston Crafted
    Our Tropical Oasis

Recent Posts

  • fisherman aesthetic home inspiration
    Fisherman Aesthetic Decor for Your Home
  • Senix Tools Review- Charleston Crafted
    Are Senix power tools any good?
  • Your Weekend To-Do List: 15 Things to Do for Summer Home Upkeep
    Your Weekend To-Do List: 15 Things to Do for Summer Home Upkeep
  • How to build a DIY gate pergola- Charleston Crafted
    How to build a DIY gate pergola

Privacy Policy

Footer

↑ back to top

Navigation

  • Home
  • Blog
  • Contact Us
  • Terms of Use
  • Disclaimer

Newsletter

  • Sign up for emails and updates
  • Follow us on Instagram
  • Work with Us

Browse by Category

  • Woodworking
  • Home Projects
  • Paint Colors
  • Room Reveals

© 2025 The Charleston Crafted Blog LLC DBA “Charleston Crafted” and “CharlestonCrafted” (also known as N/A) / All Rights Reserved.
Official Website: (Charleston Crafted)
Registered in USA (Co. Reg. No.: 565586)
Address: Charleston, USA 29414, South Carolina
Contact Phone: Not applicable — contact is via email: sean@charlestoncrafted.com

DISCLAIMER: The content on this website is provided for general informational purposes only and is not intended as professional advice. The Charleston Crafted Blog LLC and The Charleston Crafted Blog LLC make no representations or warranties—express or implied—regarding the accuracy, completeness, or suitability of the information contained herein. Any reliance you place on this information is strictly at your own risk. In no event shall The Charleston Crafted Blog LLC or The Charleston Crafted Blog LLC be liable for any loss or damage, including without limitation, indirect or consequential loss or damage, arising from the use or inability to use this website. This website is the official website of The Charleston Crafted Blog LLC.

AFFILIATE DISCLOSURE: This website contains affiliate links. If you click through and make a purchase, we may earn a commission at no extra cost to you.

As an Amazon Associate, I earn from qualifying purchases.

Site Editor: Morgan Smith McBride

Copyright © 2025 Charleston Crafted