This DIY spray paint storage rack is a great way to keep your spray paint cans organized and easy to access! Here's how to build one yourself. Scroll for the printable PDF woodworking plans!
We're working on our garage organization and workshop build and the first thing we had to do was organize.
This included purging, grouping like items, moving things around and coming up with new, better storage options for certain items.
One of those items was our spray paint collection, which as gotten quite large. I usually buy at least 2 cans of spray paint for each project - just in case - and have accumulated quite a few cans.
If you do a lot of DIY projects, you might have a similar problem!
We previously built this stain and paint can organizer for all of those supplies and it has been a lifesaver to not have cans stacked on top of each other.
Until now, our spray paint collection has been in a large plastic storage bin or in the cardboard shipping boxes they were sent to us in.
With our new set up, and constant goal to go vertical with all storage, we built this DIY spray paint storage rack that is perfect for anyone with a large spray paint collection.
This keeps our cans more organized, plus now we can see what we already have - and I'm a lot less likely to buy duplicates!
Spray paint organization
As mentioned, a great idea when it comes to garage organization as a whole is to go vertical as much as possible. This allows you to maximize the most amount of space possible.
The stain and paint storage shelf has been critical to our sanity, so we wanted to do something similar and simple for spray paint as well.
How do you organize spray paint cans?
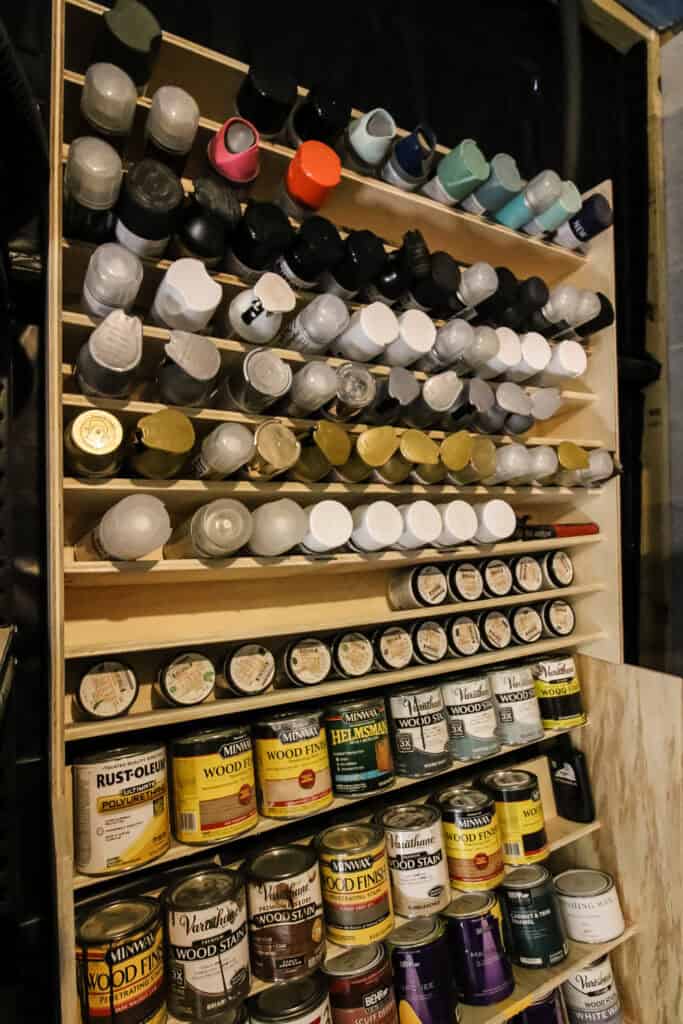
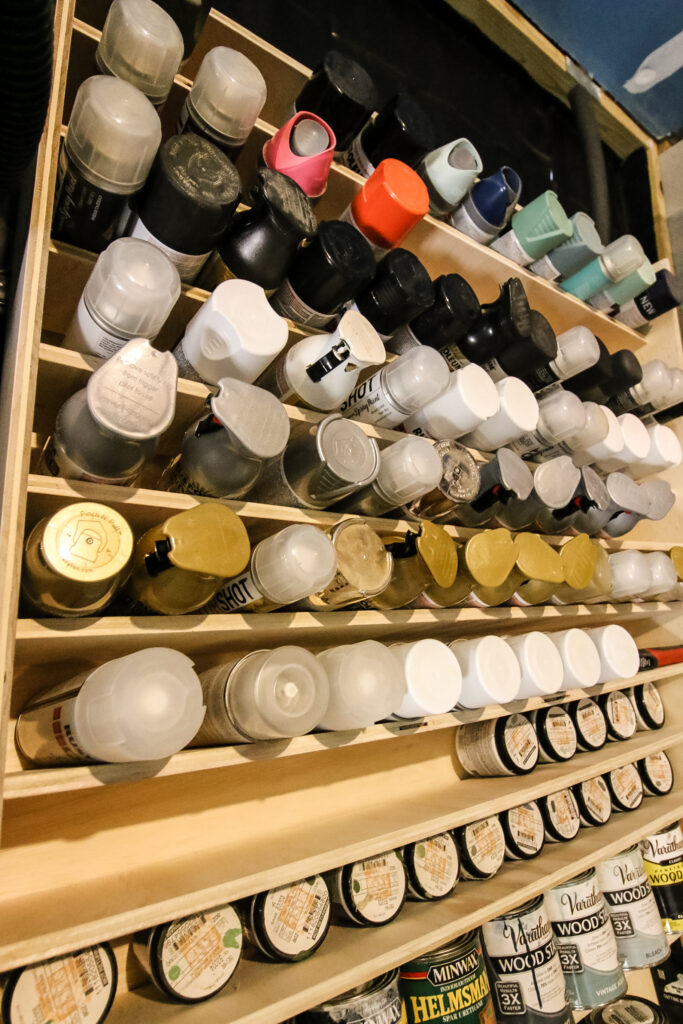
This spray paint storage rack is great for sorting cans by color, sheen, brand or however you like. It can hold 140 cans of standard size spray paint!
This was a simple project that we made completely with leftover plywood from our dollhouse shaped bookshelf, paint storage shelf and geometric plywood laundry room countertop projects.
With lumber prices being off the charts, this is a great project to use scrap pieces for based on the cut sizes!

How to build a spray paint organizer
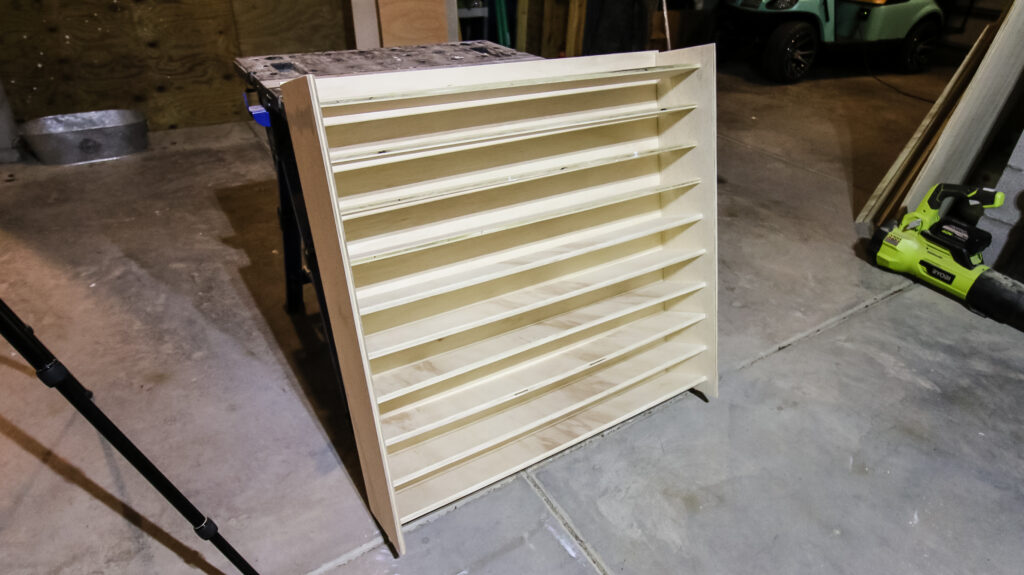
We based the size of the spray paint organizer off the paint storage rack. We wanted this set of shelves to be able to sit on top of the paint can one and then attach to the wall.
It's 36" wide and 36" tall, which means it can hold A LOT of spray paint. But as you'll see when we fill it up, we're almost out of room already...
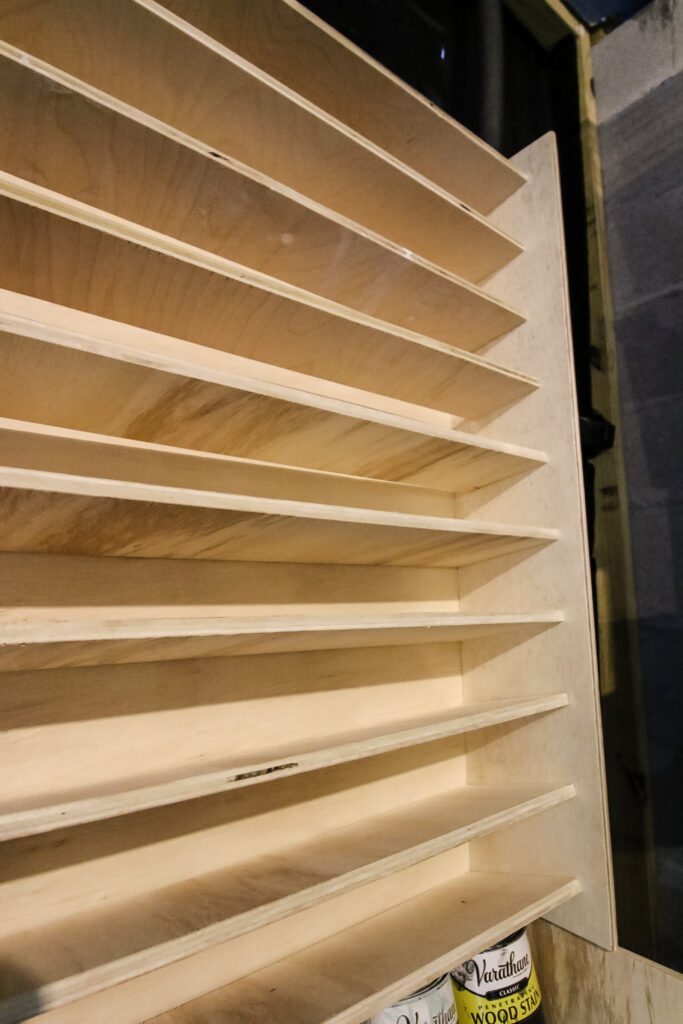
We started by making all the cuts and sanding everything down. Yes, it's in the garage, but we still wanted it to be sanded smooth since we'll be reaching our hands in all the time.
Supplies needed:
- ½" plywood
- ¼" plywood for backer
- Brad nails
- Wood glue
Tools needed:
- Table saw or circular saw
- Sander
- Brad nailer - You could also use a drill + screws if you prefer.
Get the full cut list in our printable PDF plans!
With everything cut, we started by attaching the side pieces to the backer. The entire project was built with wood glue and brad nails, so it was easy to tack together. No pocket holes or difficult joinery required!
With the sides on, we slid each of the shelves into place.
Each shelf went on at a slight angle so that the paint cans would stain in place and not have any trouble staying up.
We attached each shelf at the same angle with the same amount of spacing all the way up. Angles and spacing in the woodworking plans!
Once all the shelves were in place, that was it! This spray paint holder project seriously took just a couple of hours on the same day to cut, sand and assemble!

Adding spray paint cans to the organizer
Once the rack was built, we set it on top of the paint can rack and then attached it to a stud in the garage wall with three wood screws. No French cleats or hooks or anything needed!
Once in place, it was very secure and holds up to quite a bit of weight!
We opted to organize by color. We currently have a lot of gold, silver, black and white spray paints for a project we're working on, so each of those got their own shelf.
Then, colors of the rainbow took the top. Small paint samples from Home Depot also fit great on the lower shelves!
We absolutely love how this DIY spray paint organizer came together. It was quick and simple and is so satisfying to look at!

PDF woodworking plans for spray paint storage
If you haven't already, make sure you grab our printable PDF woodworking plans for this spray paint storage rack.
Our plans include the full material list, cut list and step-by-step instructions, accompanied by computer models.
This is a beginner-friendly project, so if you're usually just a spray painter for your DIY projects and not a woodworker, you can still do this project!
Video tutorial
If videos are your thing, swing over to our YouTube channel and check out the full video of how we built and styled our spray paint rack!


Looking for something?
We've been doing this since 2012 so we have a LOT of blog posts!
Search stuff like: Ceiling Projects | DIY Plant Stands | Thrift Flips

Hey there, I'm Sean, the woodworking enthusiast and builder behind CharlestonCrafted.com! Since 2012, I've been sharing the magic of turning raw materials into beautiful creations. I love teaching others the art and satisfaction of woodworking and DIY. I try to inspire fellow crafters to make something extraordinary out of nothing at all.


