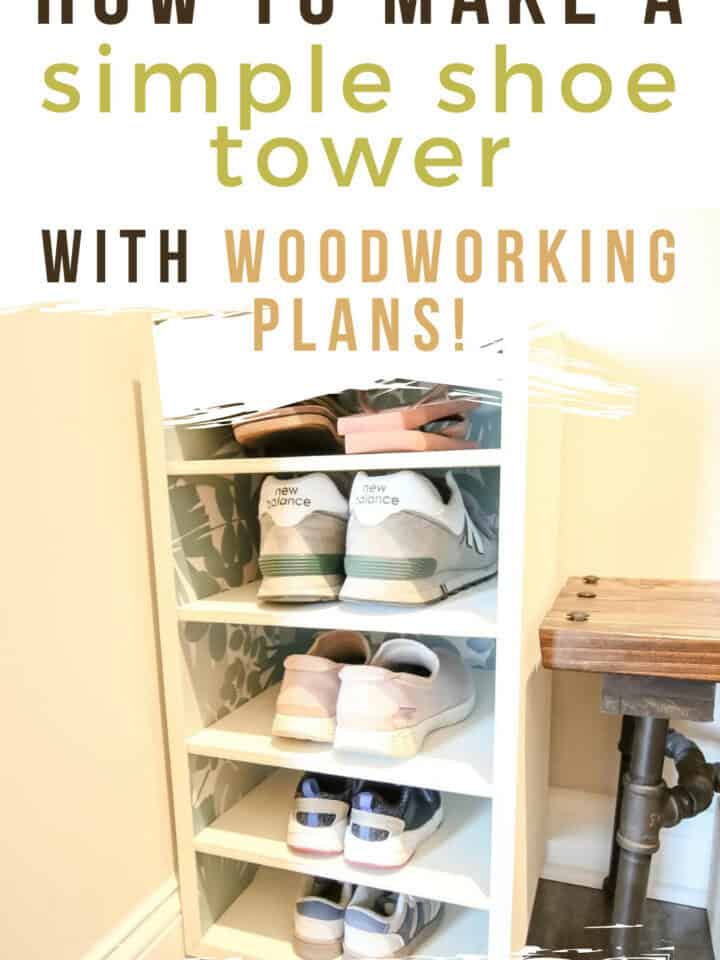
Here's how we built a simple shoe shelf for helping to organize all the shoes in our mudroom!
Interested in building a DIY shoe shelf for your space? There are lots of options depending on the look and functionality you're looking for.
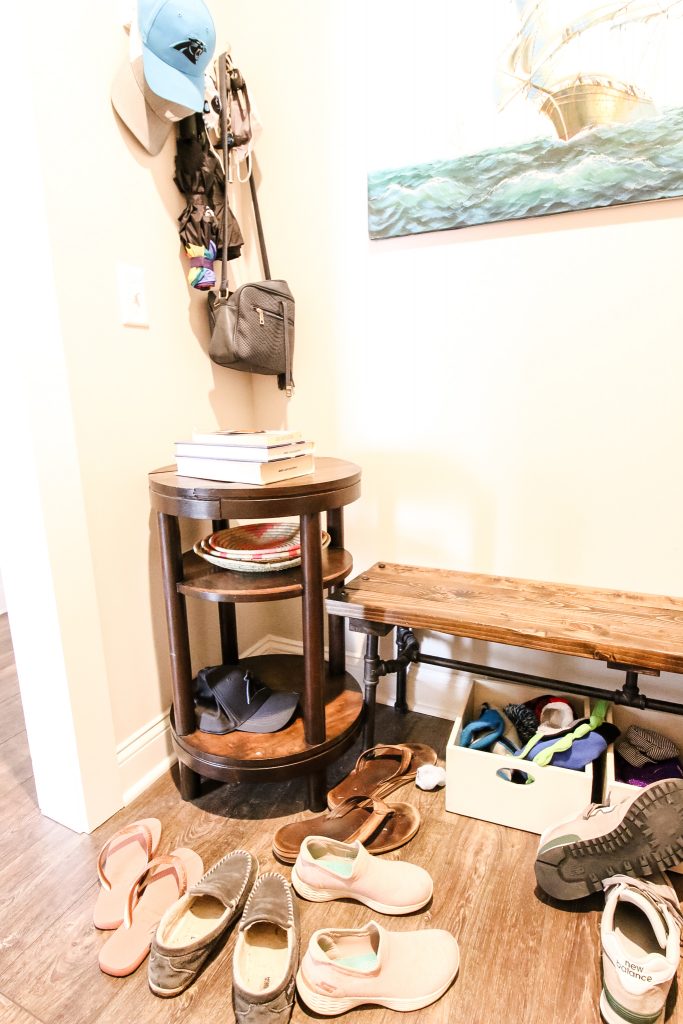
Shoes everywhere is one of the easiest ways to make your home look cluttered. The shoe drop off area is often the first impression when people walk into your home and can set the tone.
Having an organized and beautiful space to hide or store your shoes is a way to change your space. Learn how to build this DIY shoe shelf and how you can make one for yourself with a little bit of wood, stain, and contact paper!
Easy DIY shoe shelf build
There are lots of ways to build a shoe shelf, depending on your needs. This easy DIY shoe shelf build is beginner-friendly and made entirely from ½" plywood.
Remember when building a shoe shelf to build spaces that fit the biggest shoes you will be storing regularly. If you only wear size 7 shoes but your husband wears size 12, make sure there are spaces for the size 12 shoes.
If you have toddlers, you might consider having smaller sections for their shoes.
How to build a shelf to organize your shoes
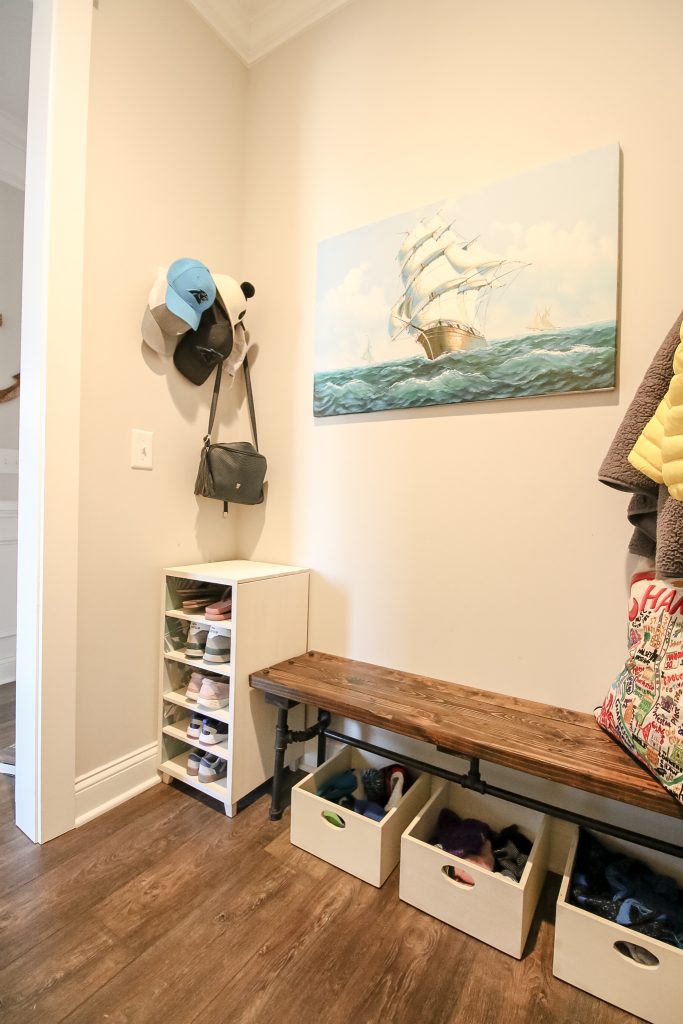
We built this DIY shoe shelf to fit a small gap between the wall and our industrial pipe bench in our new mud room. We had an old side table that was our first ever furniture flip there, but it literally didn't fit the space.
The gap is perfect for a tower style shoe shelf.
If you like the look of the shoe tower, grab our PDF woodworking plans here to help you build it!
Step one: cut and stain
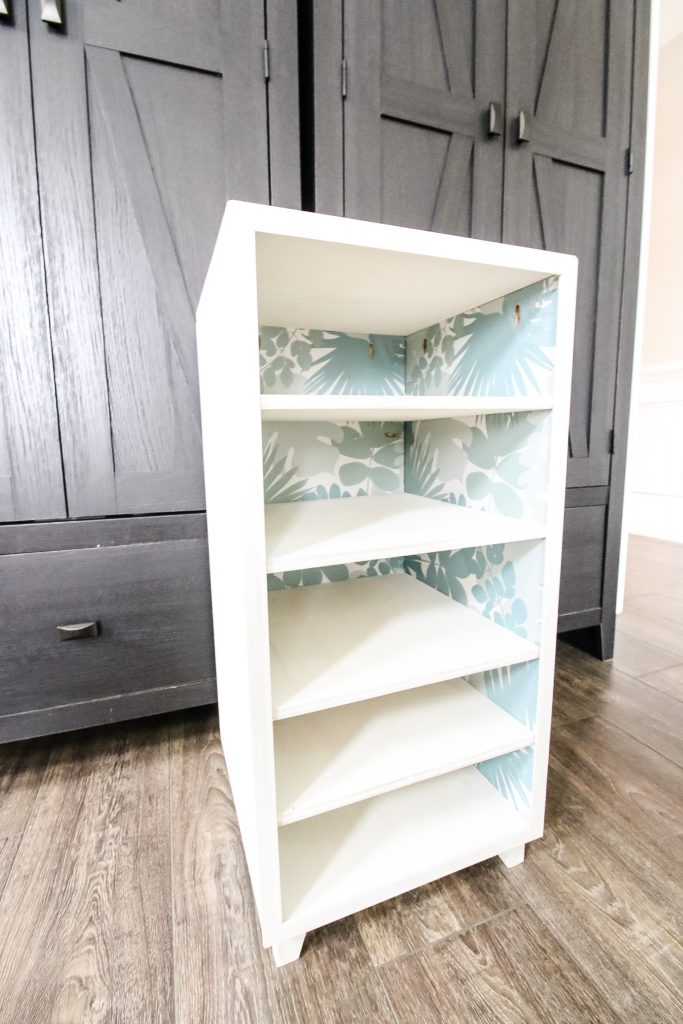
We started by cutting out all the pieces for the frame, shelves feet and veneer. After the cuts were sanded, we stained everything with a white wash.
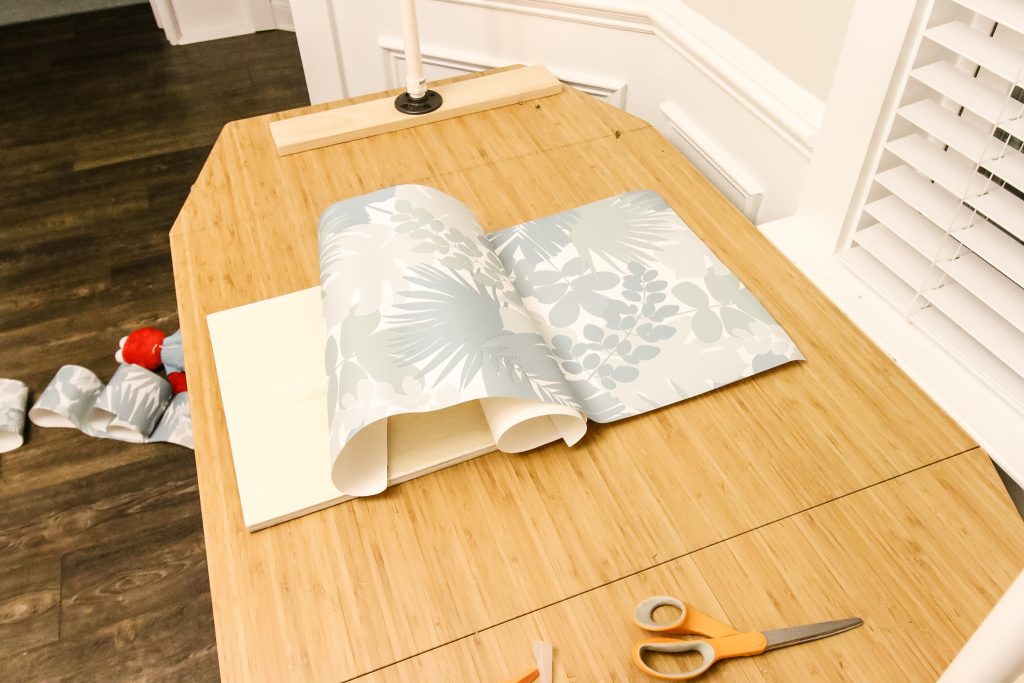
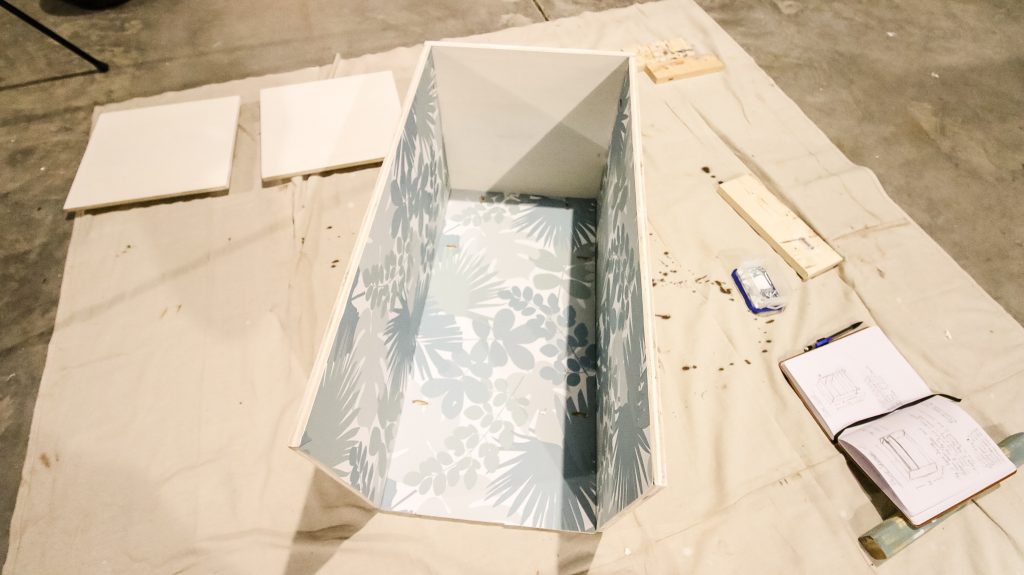
Step two: add optional wallpaper
Then, we used leftover peel and stick wallpaper from our son's old nursery to cover the inside of the side and back pieces. We drilled our pocket holes before applying the paper and then cut the holes out of the wallpaper with an exacto knife.
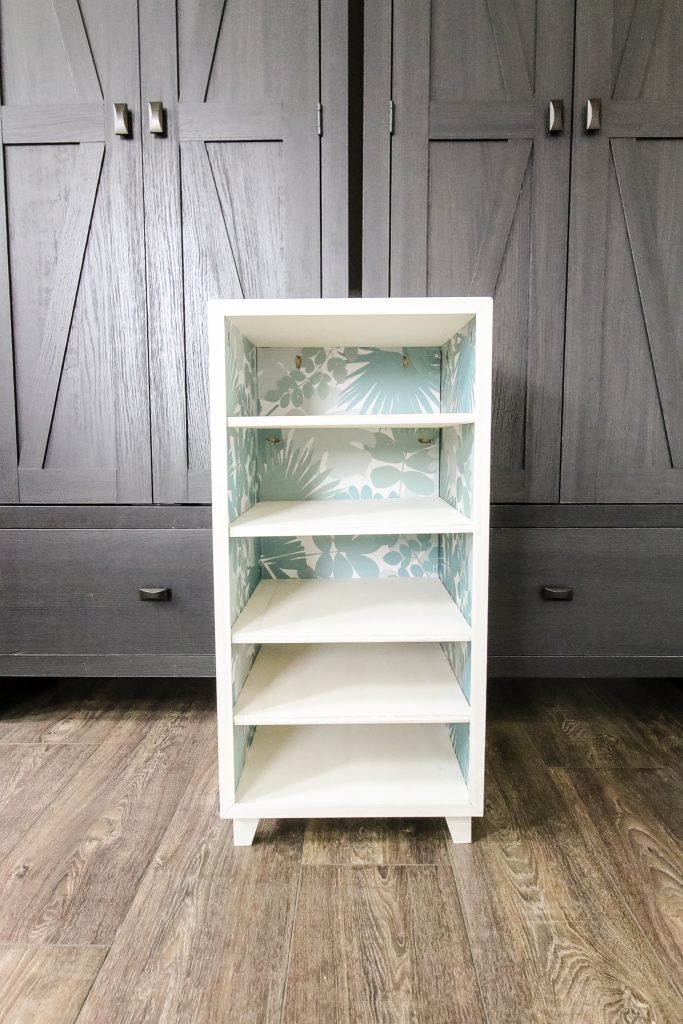
Step three: build box frame
Next we built the a box frame with the sides, back and top.
Once that was in place, we measured out 5" between shelves and screwed those into place as well.
Step four: add feet and face frame
Finally, we added feet and glued on veneer to the front face of the box. We made the veneer by cutting ⅛" strips of poplar.
Everything for this shoe shelf is connected together using our Kreg pocket hole jig. However, you could also easily construct this shoe shelf with a nail gun. We just didn't want holes in the sides and didn't feel like filling them.
DIY shoe shelf woodworking plans
If you like the looks of this DIY shoe shelf, we have woodworking plans available for you to grab!
The plans have the material list (hint- it's short), cut list and step-by-step instructions for building your very own wooden shoe shelf.
You can customize your version of this shoe shelf with your choice of stain or paint, or add your own contact paper to the inside.
Download the plans and organize your shoes today!


Looking for something?
We've been doing this since 2012 so we have a LOT of blog posts!
Search stuff like: Ceiling Projects | DIY Plant Stands | Thrift Flips

Hey there, I'm Sean, the woodworking enthusiast and builder behind CharlestonCrafted.com! Since 2012, I've been sharing the magic of turning raw materials into beautiful creations. I love teaching others the art and satisfaction of woodworking and DIY. I try to inspire fellow crafters to make something extraordinary out of nothing at all.


