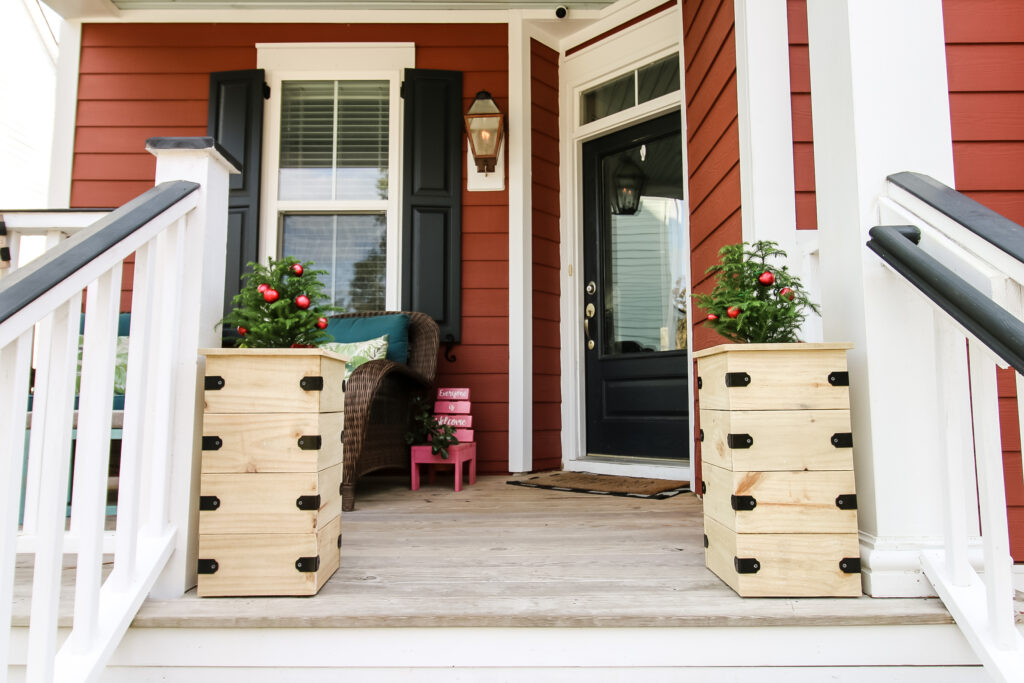
This project will show you how to build simple DIY planter boxes for mini Christmas trees to add some holiday cheer to your front porch this season. The plants can be swapped out throughout the year to bring color to each season!
This post was sponsored by National Hardware. All opinion are our own. Thank you for supporting the brands that make Charleston Crafted possible!
Nothing highlights Christmas decor like your stunning Christmas tree, right?
But the tree is inside in your living room. Why not bring some of that Christmas tree cheer to your front porch!
Mini Christmas trees are a super cute way to bring some of that traditional interior Christmas decor to the exterior of your home.
To do that, just like inside, you need a cute tree stand for your mini trees.
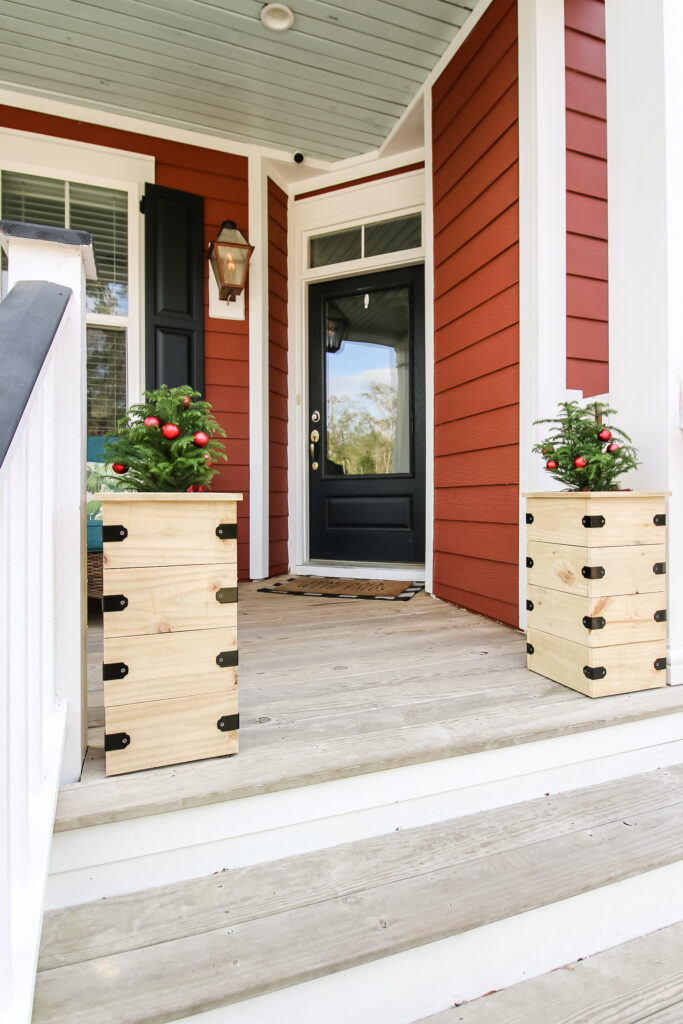
That's why we've come up with these super cute DIY Christmas tree planters perfect for mini trees on your porch. The best part is that these are stylish and can be used all year long by swapping out the plants that live in them.
Scroll down to see how we built these simple DIY mini Christmas tree stands and get the plans to build them for yourself!
DIY porch planter from fence pickets
Lumber is still at a shockingly high cost right now, which is why we designed our DIY porch planter to be built from fence pickets available at any big box hardware store.
Let's just compare prices for a quick second.
At the time of this writing, a ¾" x 5 ½" x 6' long cedar board (which is weather resistant, so great for a project like this) cost about $30 at the hardware store. A ¾" x 5 ½" x 6' long whitewood board (which is for interior use, but could be coated with outdoor stain or sealant) cost about $9.50.
A ¾" x 5 ½" x 6' long fence picket cost $1.98!
ONE DOLLAR AND NINETY EIGHT CENTS.
We wanted to design this to be a budget friendly project that can give you a cool, rustic outdoor look for your porch, and fence pickets are the way to do that.
How to build a DIY porch planter
This is a simple DIY project that can serve as a planter box on your porch all year long.
The way we brought some extra glam to these planters is by adding decorative hardware from National Hardware.
National Hardware carries a whole line of decorative hardware, including their Indio Collection, which has the light rafter ties we use in this project and the L-Straps we used when we built our wire and wood garden trellis.
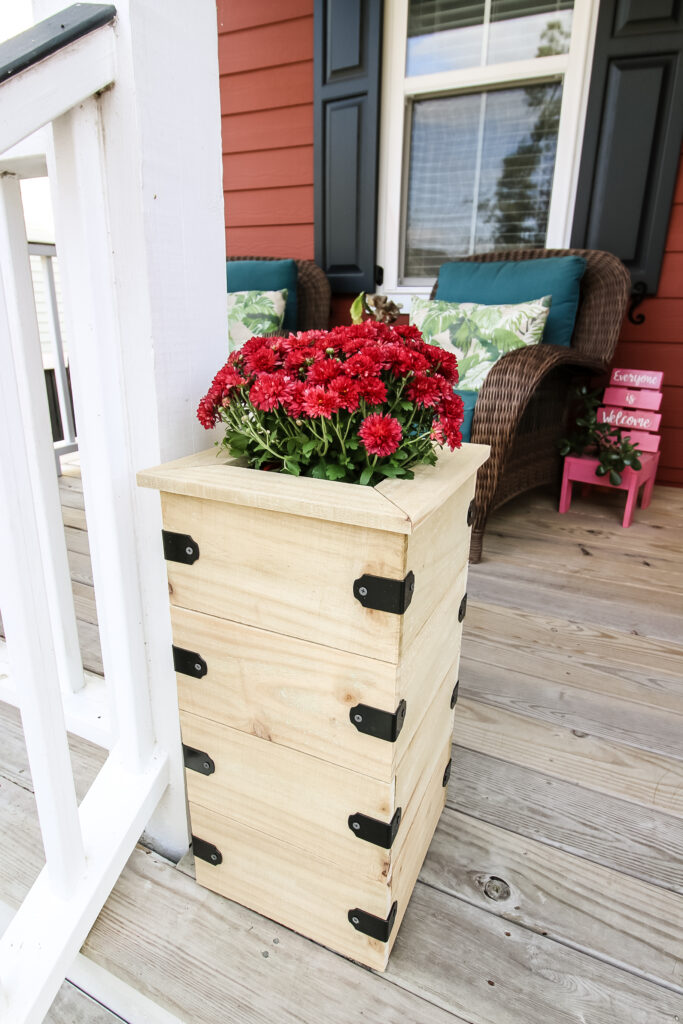
This is a great project to work on now in preparation for your holiday decorations. Build it now, put in some mums, then replace them with mini-Christmas trees in December!
Here's the general overview on how to build this raised planter box and then you can get the full instructions in the woodworking plans below!
Materials needed to build one planter:
- Fence pickets
- Decorative Light Rafter Ties
- Wood glue
- 1" brad nails
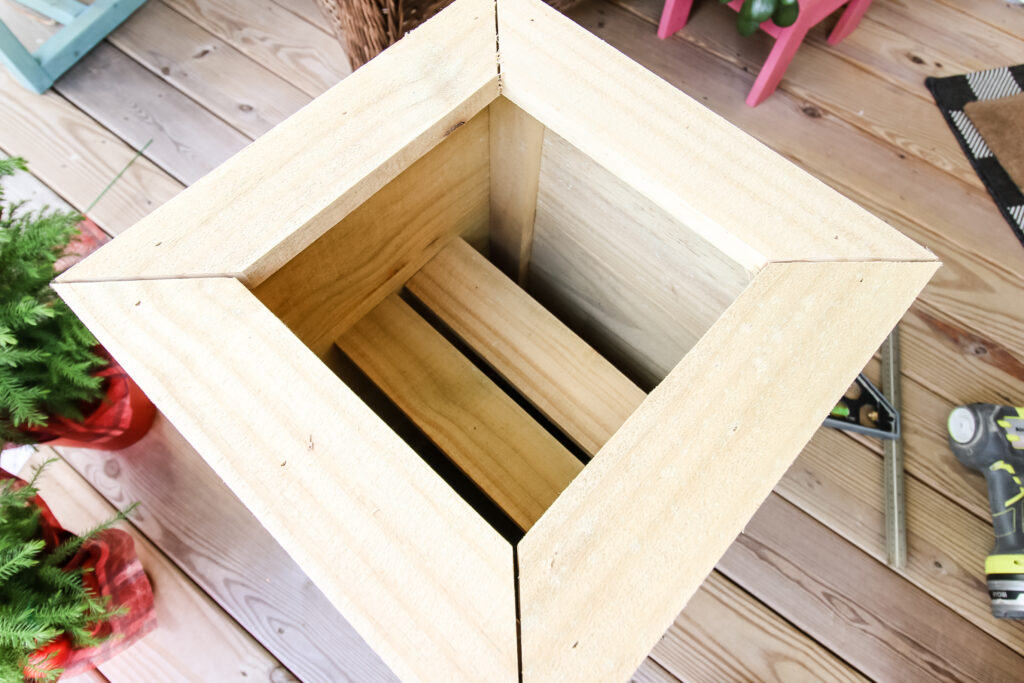
Step one: Build Front and Back
The first step is to assemble the front and back sections by attaching legs to the slats with wood glue and nails.
The front and back are built with grooves on each side of the legs so that the side slats can fit in nicely without overhang.
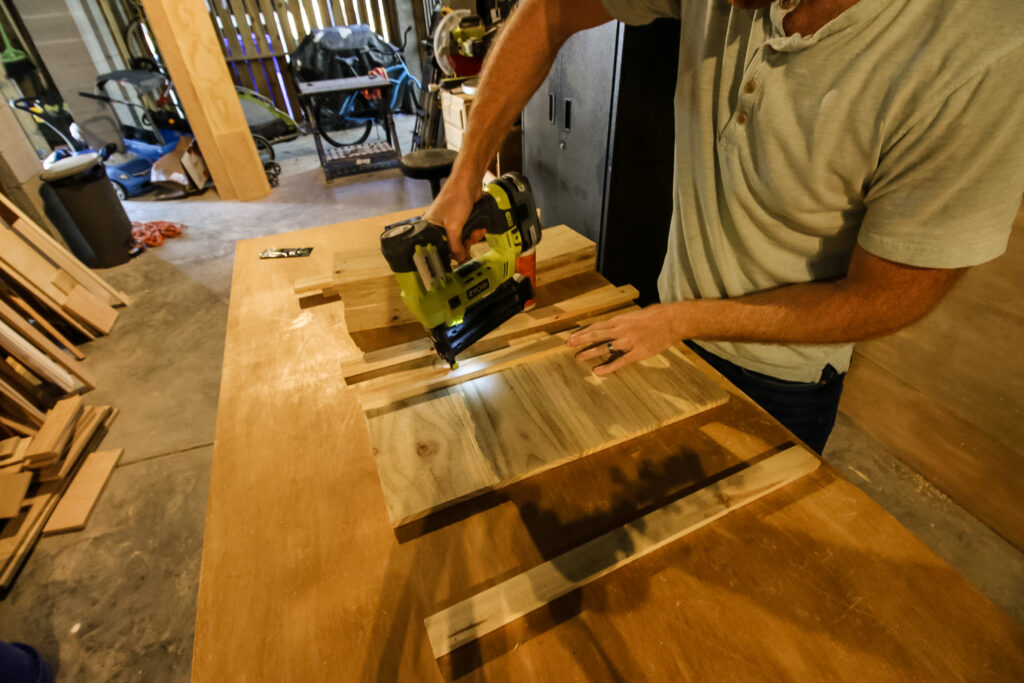
Step two: Add Sides
When the front and back are assembled, you slide the side slats into the groove and attach them to the back with wood glue and nails.
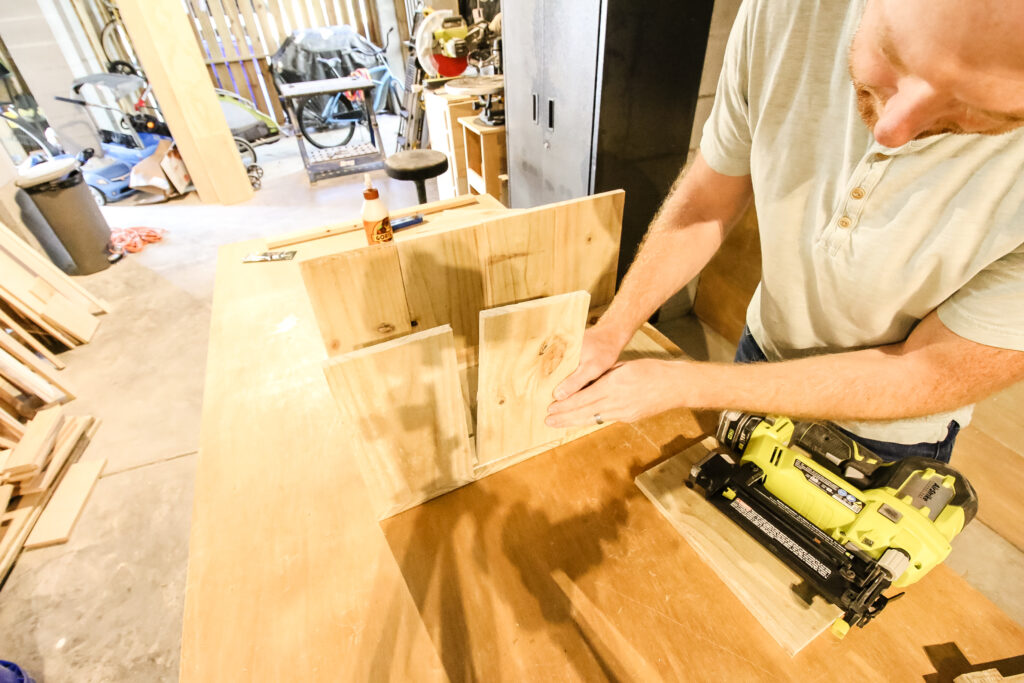
Step three: Attach Front
The front section slides into the sides that were just installed and are attached the same way, using wood glue and nails.

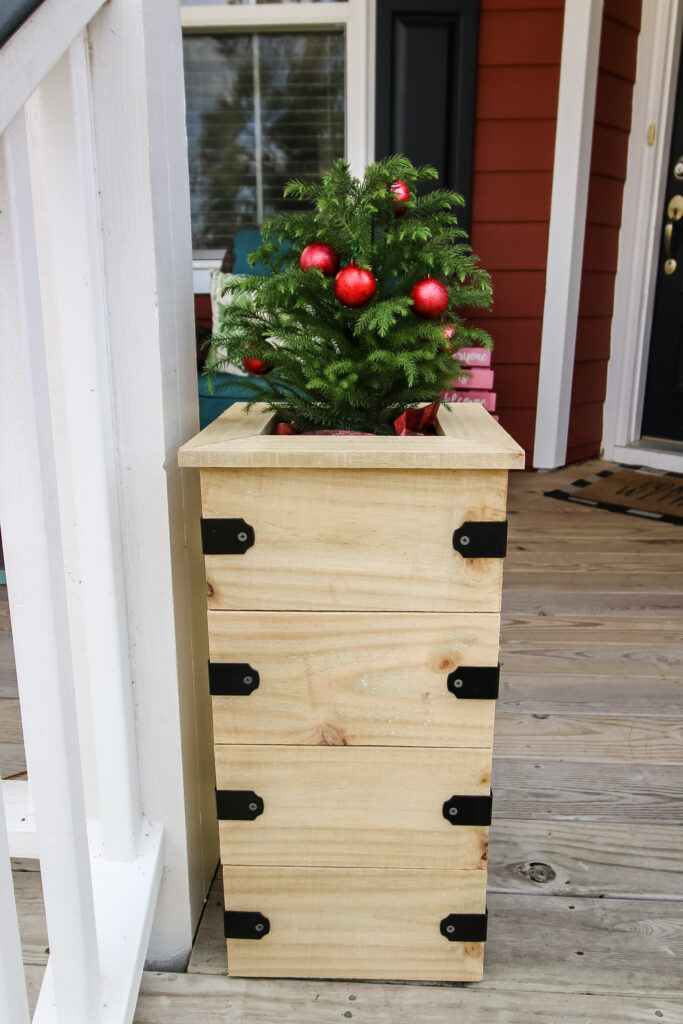
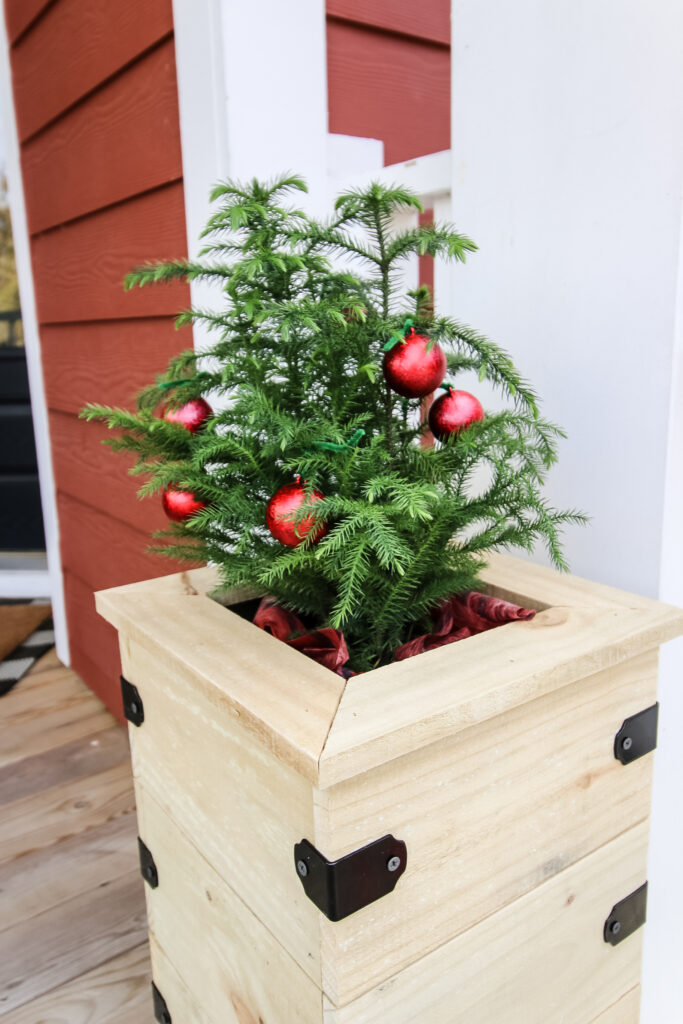
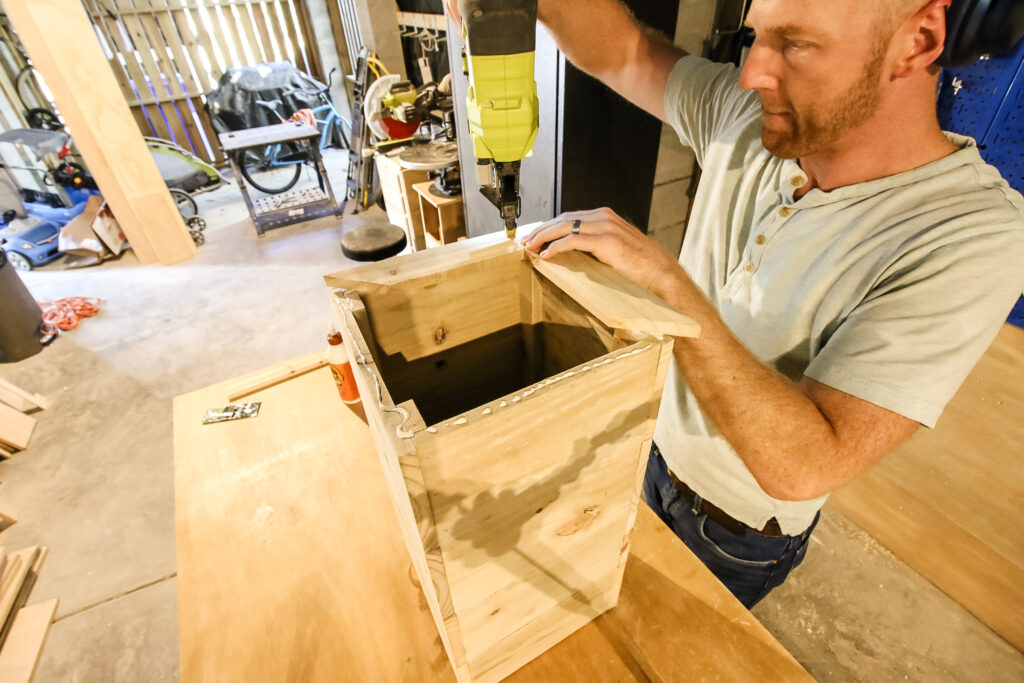
Step four: Attach Top Lips
We choose to have a decorative top lip around this wooden planter box so it would look more finished and snuggle up nicely around the tree when it's in place.
To do this, we cut more strips, cut them at a 45 degree angle, and then glued and nailed them around the top.
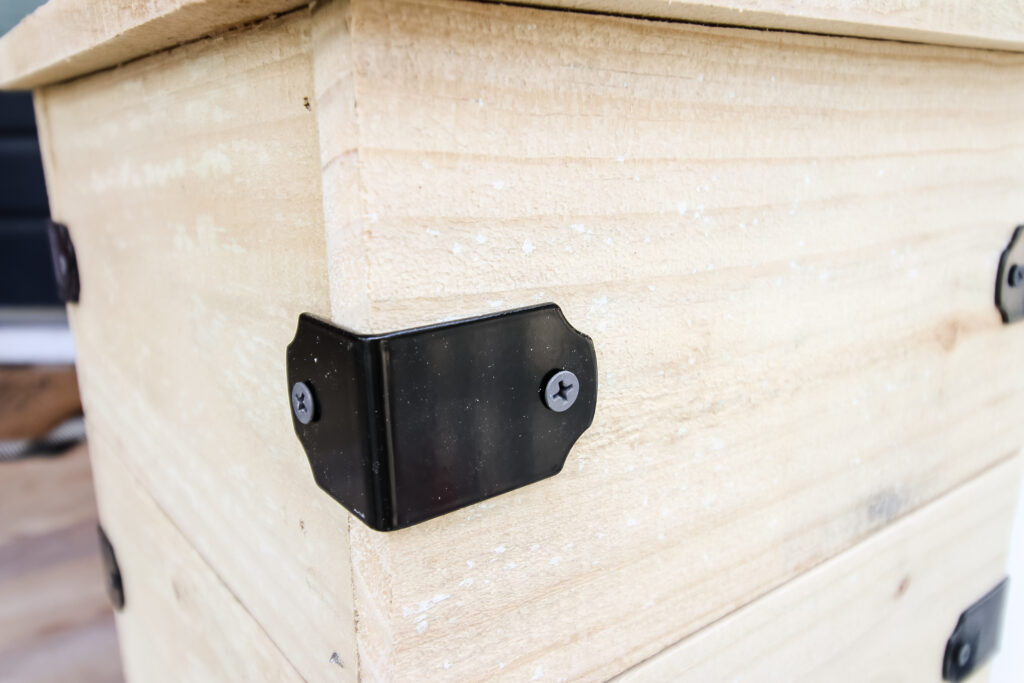
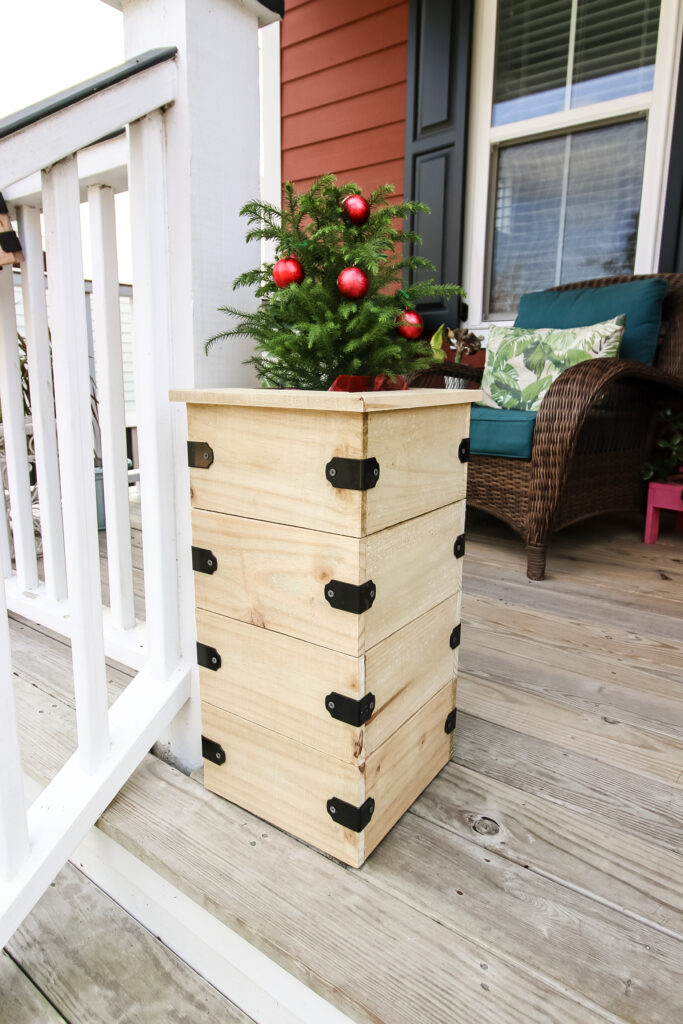
Step five: Add Decorative Hardware
Time to add that decorative hardware!
We built two of these planters, which meant attaching 32 of these light rafter ties from National Hardware.
Luckily, they are very simple to screw in.
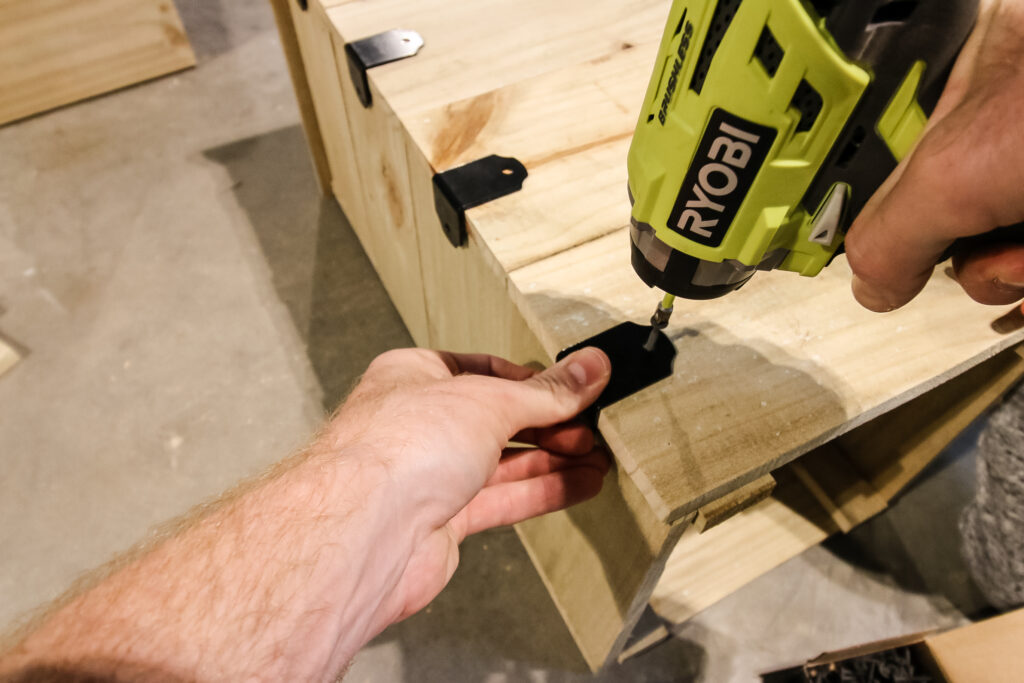
We centered each on each section of slats and screwed in from each side.
It adds such a nice little touch and looks so much more finished and elegant than a plain wood box!
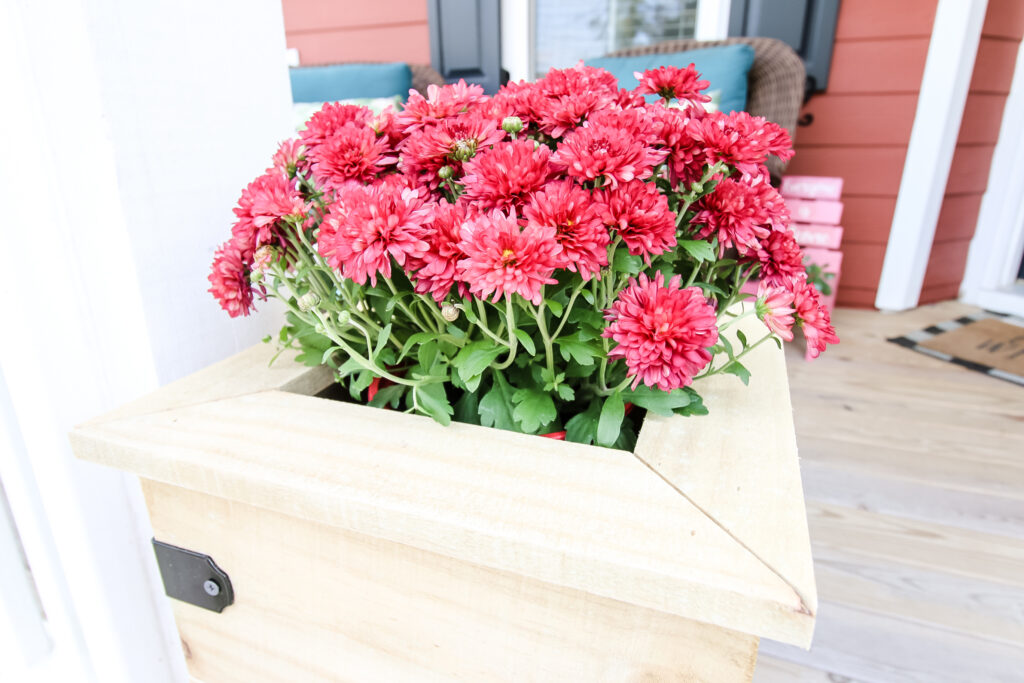
Step six: Add Plants
The last step was to nail in two support bases for the plants to rest on.
The position of these can depend on how big of a pot you are planning to use.
We measured the pot and then nailed the bases in from the sides.
Once those were there, we dropped in the plants!
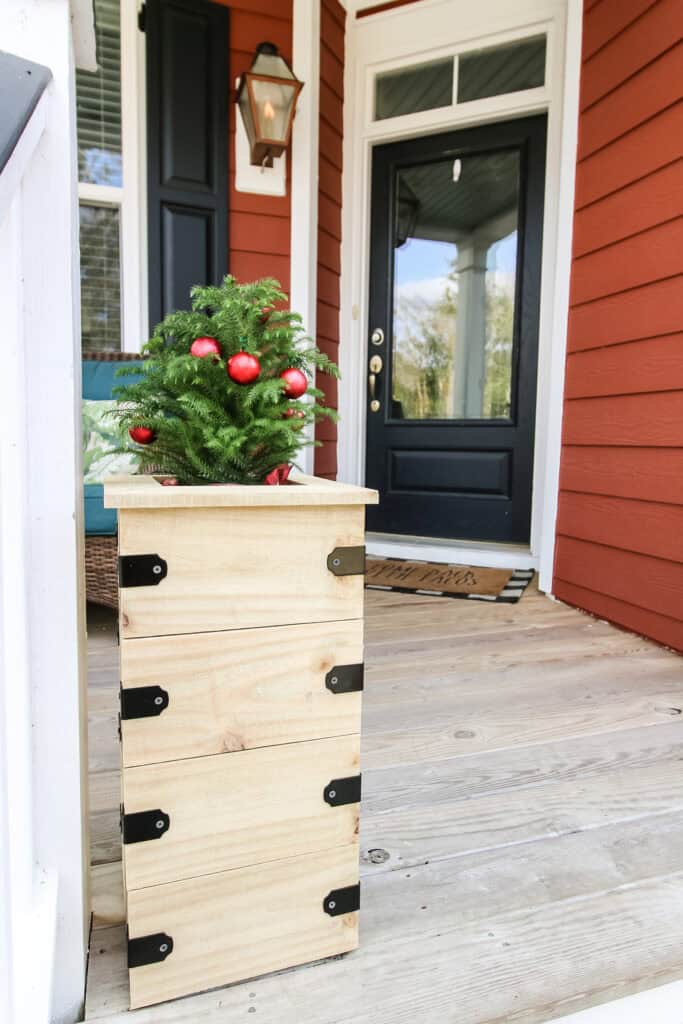
Completed outdoor planter box
We absolutely love how this mini Christmas tree planter looks!
It's rustic, but looks really nice with the decorative hardware.
Being built from fence pickets means it will stand up to the elements throughout the season, whether cold, heat, rain or sun.
Since it's still fall and we aren't crazy people that decorate for Christmas on November 1st, we opted to drop in some mums for the next month, but we already have our mini trees ready to go!
DIY mini Christmas tree planter stand woodworking plans
We've got full printable PDF woodworking plans for this DIY mini Christmas tree porch planter box just for you!
Inside these plans, you'll find the full material list, cut list and step-by-step instructions to build one or two of these planters for yourself.
These plans are simple to follow and will help you get a beautiful look to your holidays right now!
What plants look like mini Christmas trees?
Want to build this project, but aren't sure what type of plant to put in?
There are lots of plants that offer a great mini Christmas tree look.
Some of the best plants that look like mini Christmas trees are Norfolk Island pine, blue juniper and spruce.
The plants we used in the pictures for this post are Norfolk Island pines and they come preassembled with the little red Christmas ornaments at the store at Home Depot.
Use these plants now or substitute any plant that makes you happy!

Looking for something?
We've been doing this since 2012 so we have a LOT of blog posts!
Search stuff like: Ceiling Projects | DIY Plant Stands | Thrift Flips

Hello, I'm Morgan, half of the creative force behind CharlestonCrafted.com! With a passion for DIY that dates back to 2012, I've transformed three homes and now I'm dedicated to helping others craft their dream spaces. Let's turn your house into a home together!


Michael says
Nice
Joeliton says
Very nice.