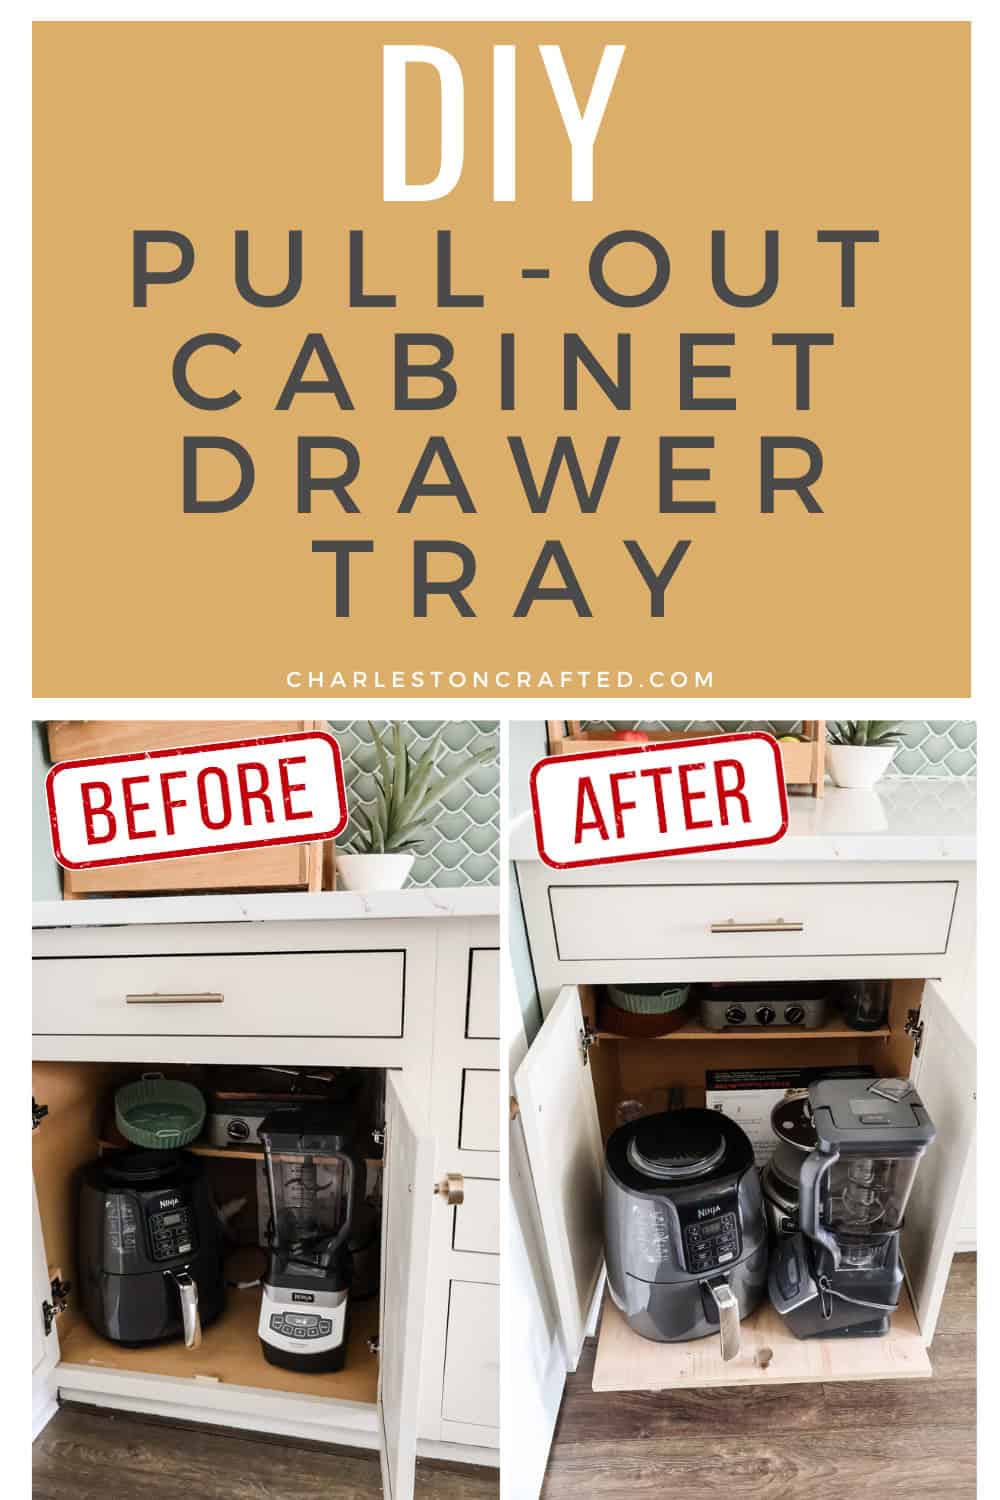
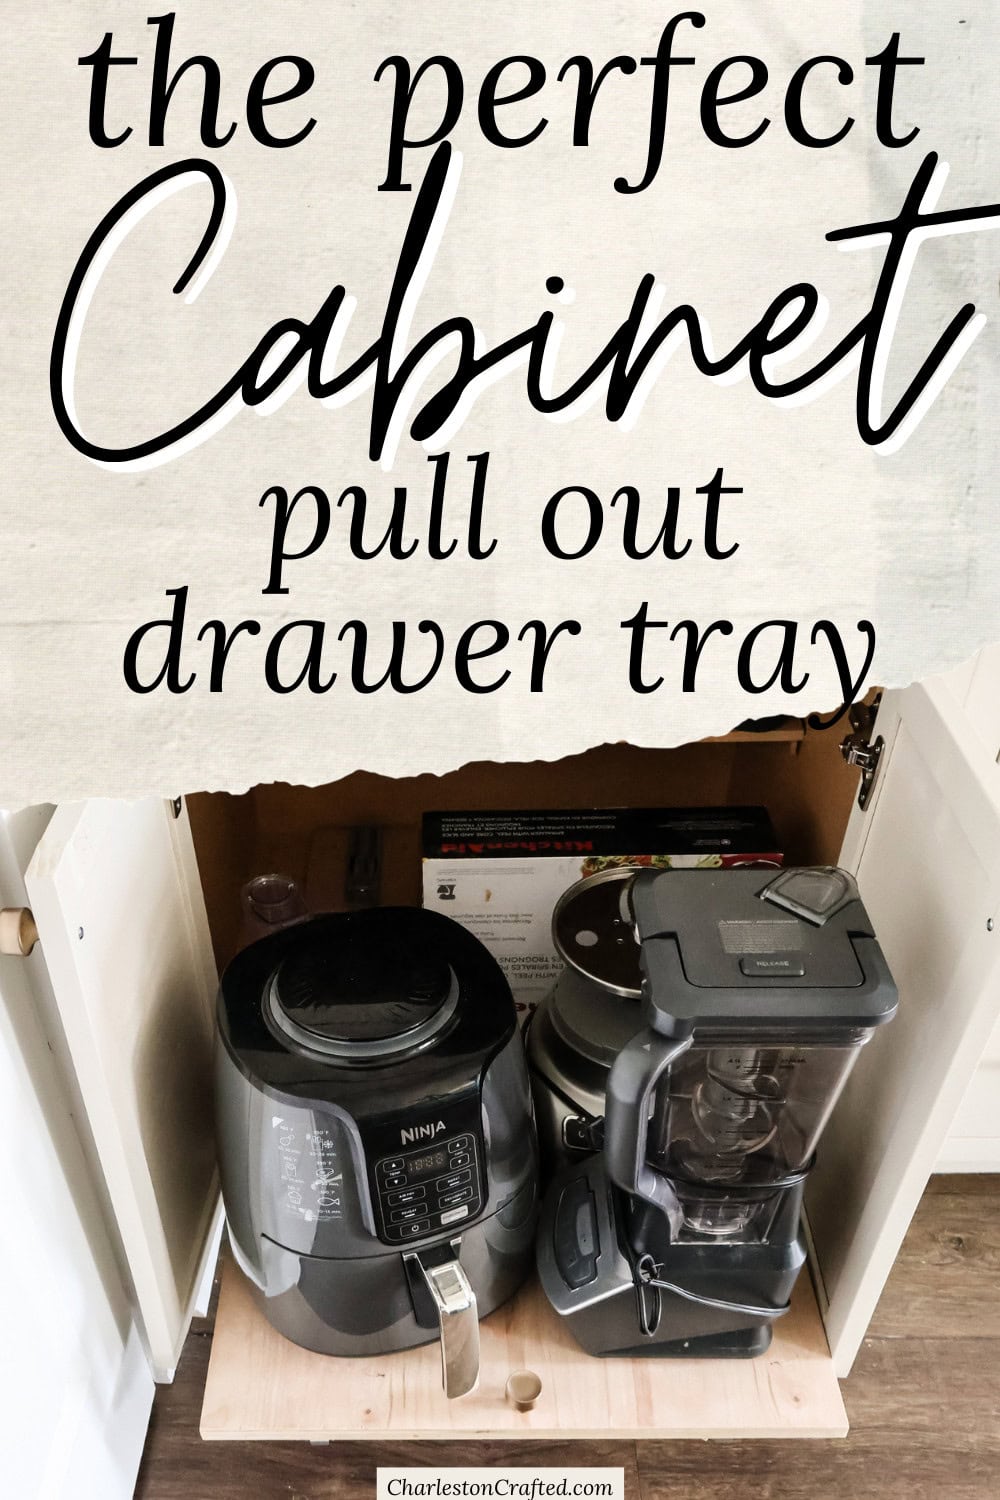
If you're having trouble reaching things in the back of your lower cabinets, build these DIY cabinet pull out drawers to easily access everything!
I've been working on a total kitchen renovation on and off for the last year. It's been "done" for a while but I still had my punch list of items I needed to check off to make it that much better.
Way back at the beginning of this process before I ever even started demo in the kitchen, I built all the new cabinets, including these DIY cabinets with doors and a single drawer.
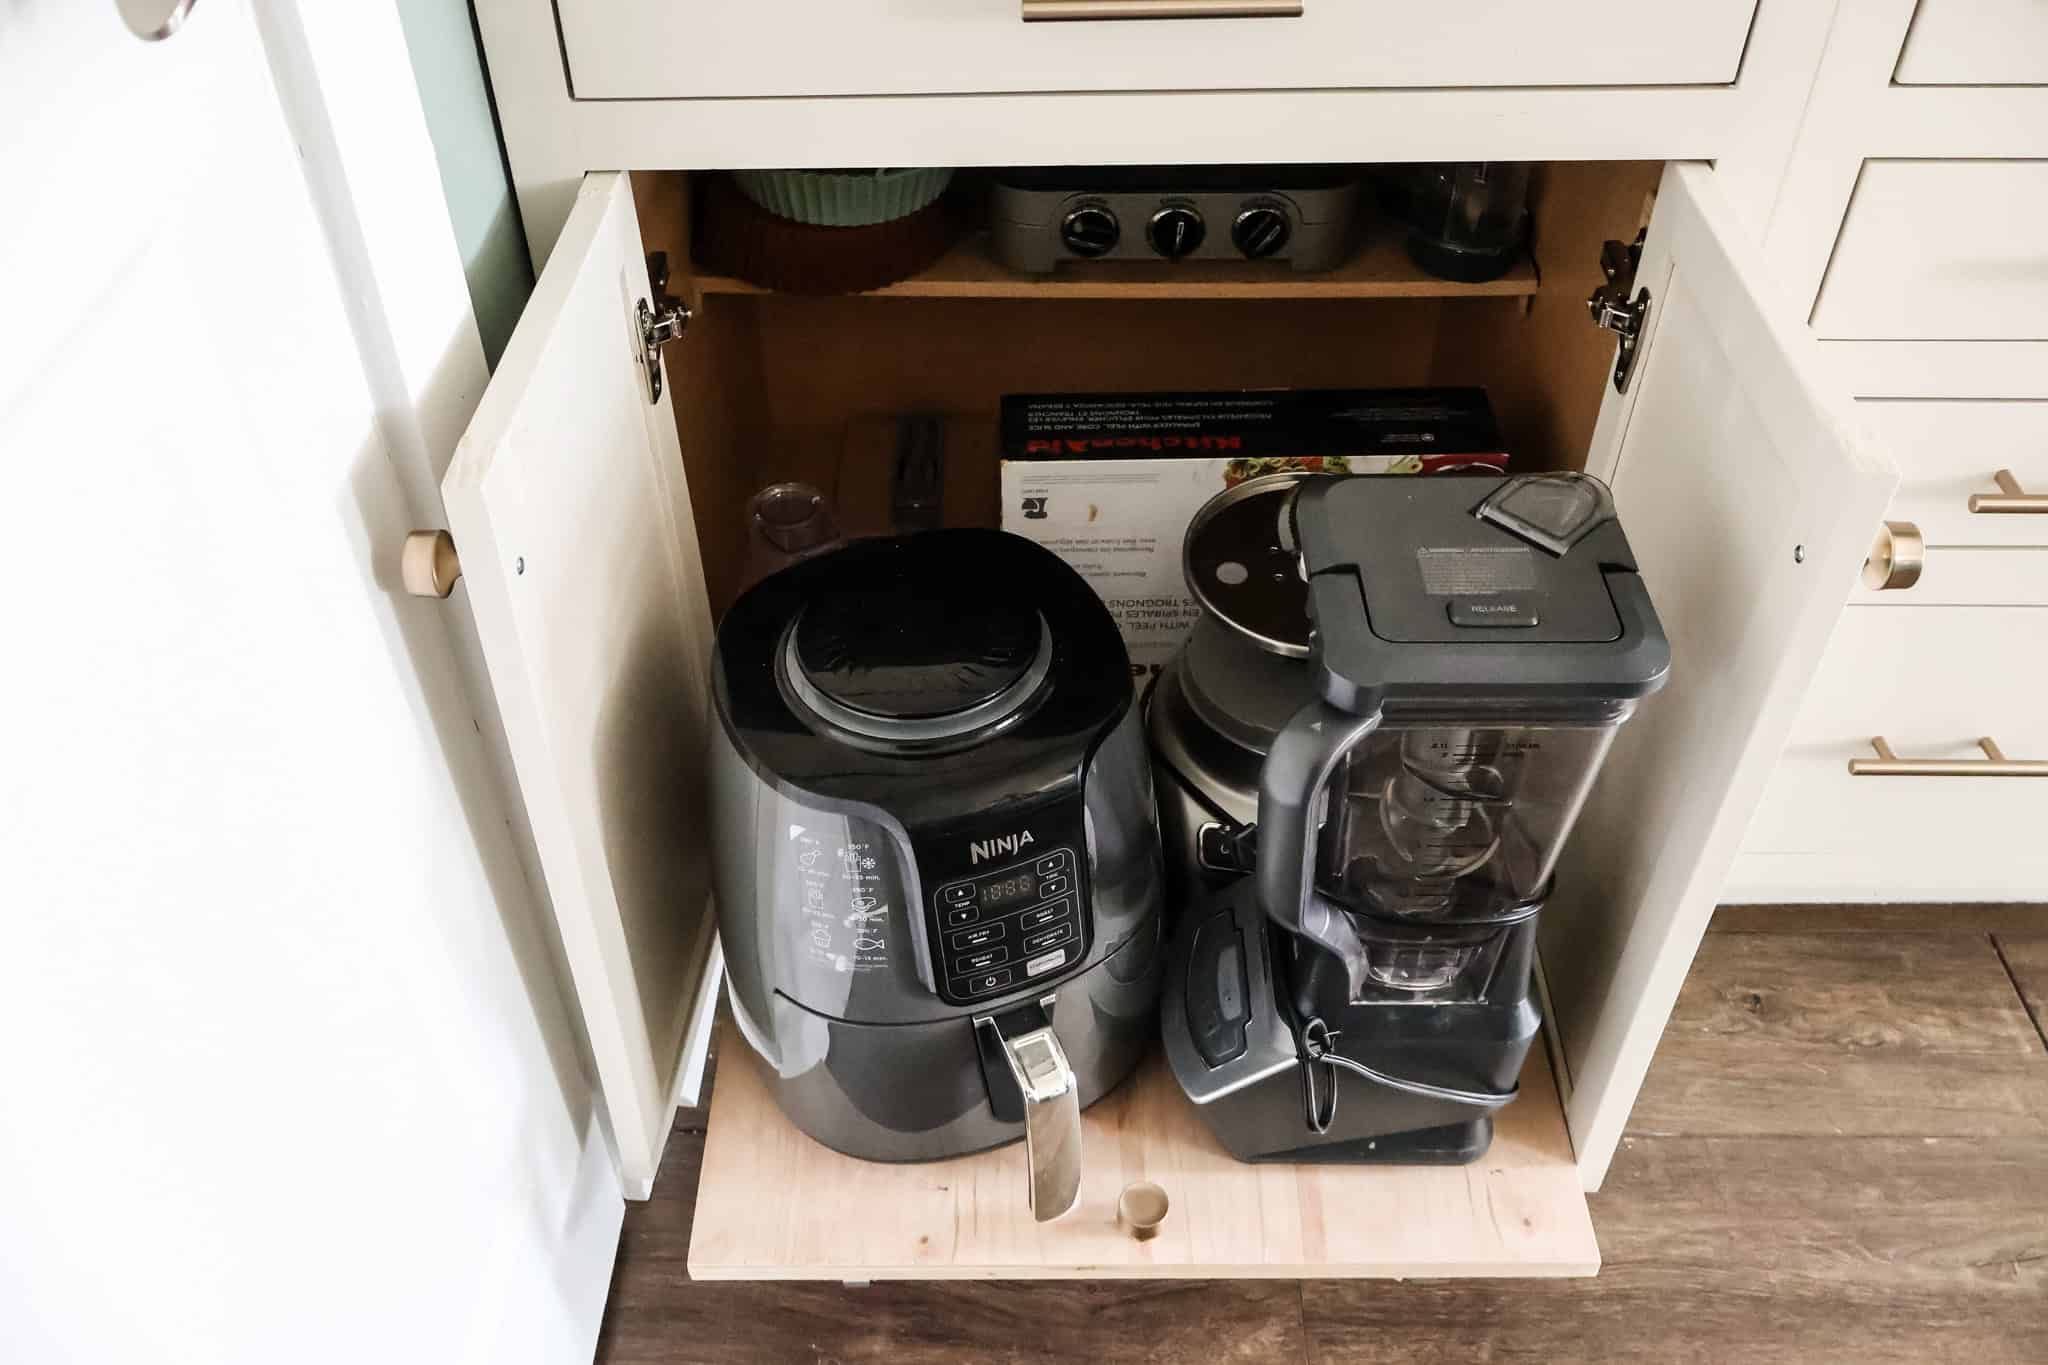
These cabinets are designed to store all of our bigger appliances, which we don't want to have out on the kitchen counter. But jamming all the appliances in there means we have to pull several items out in order to get to the things in the back.
So, I designed these simple DIY cabinet pull out drawers that can easily slide in and out so you can reach the back of the cabinet!
DIY cabinet pull out trays
These DIY cabinet pull out trays can be installed in any cabinet in any home. You just have to measure for your space, as my measurements might not work for yours.
But overall, this is a really easy project to do and doesn't require many tools, equipment or skills!
If you're looking to totally redo your kitchen, make sure you grab my full kitchen woodworking plans bundle!
Materials and tools needed
Here's the materials and tools you'll need to complete this project. It is actually very simple and doesn't require much to do. Anyone can do this project in about an hour!
- ¾" plywood
- 22" drawer slides (2 per cabinet)
- 1 ½" screws
- Cabinet pull of choice
- Table saw or circular saw
- Drill
- Sander
Want another kitchen organization build? Try this DIY spice drawer organizer!
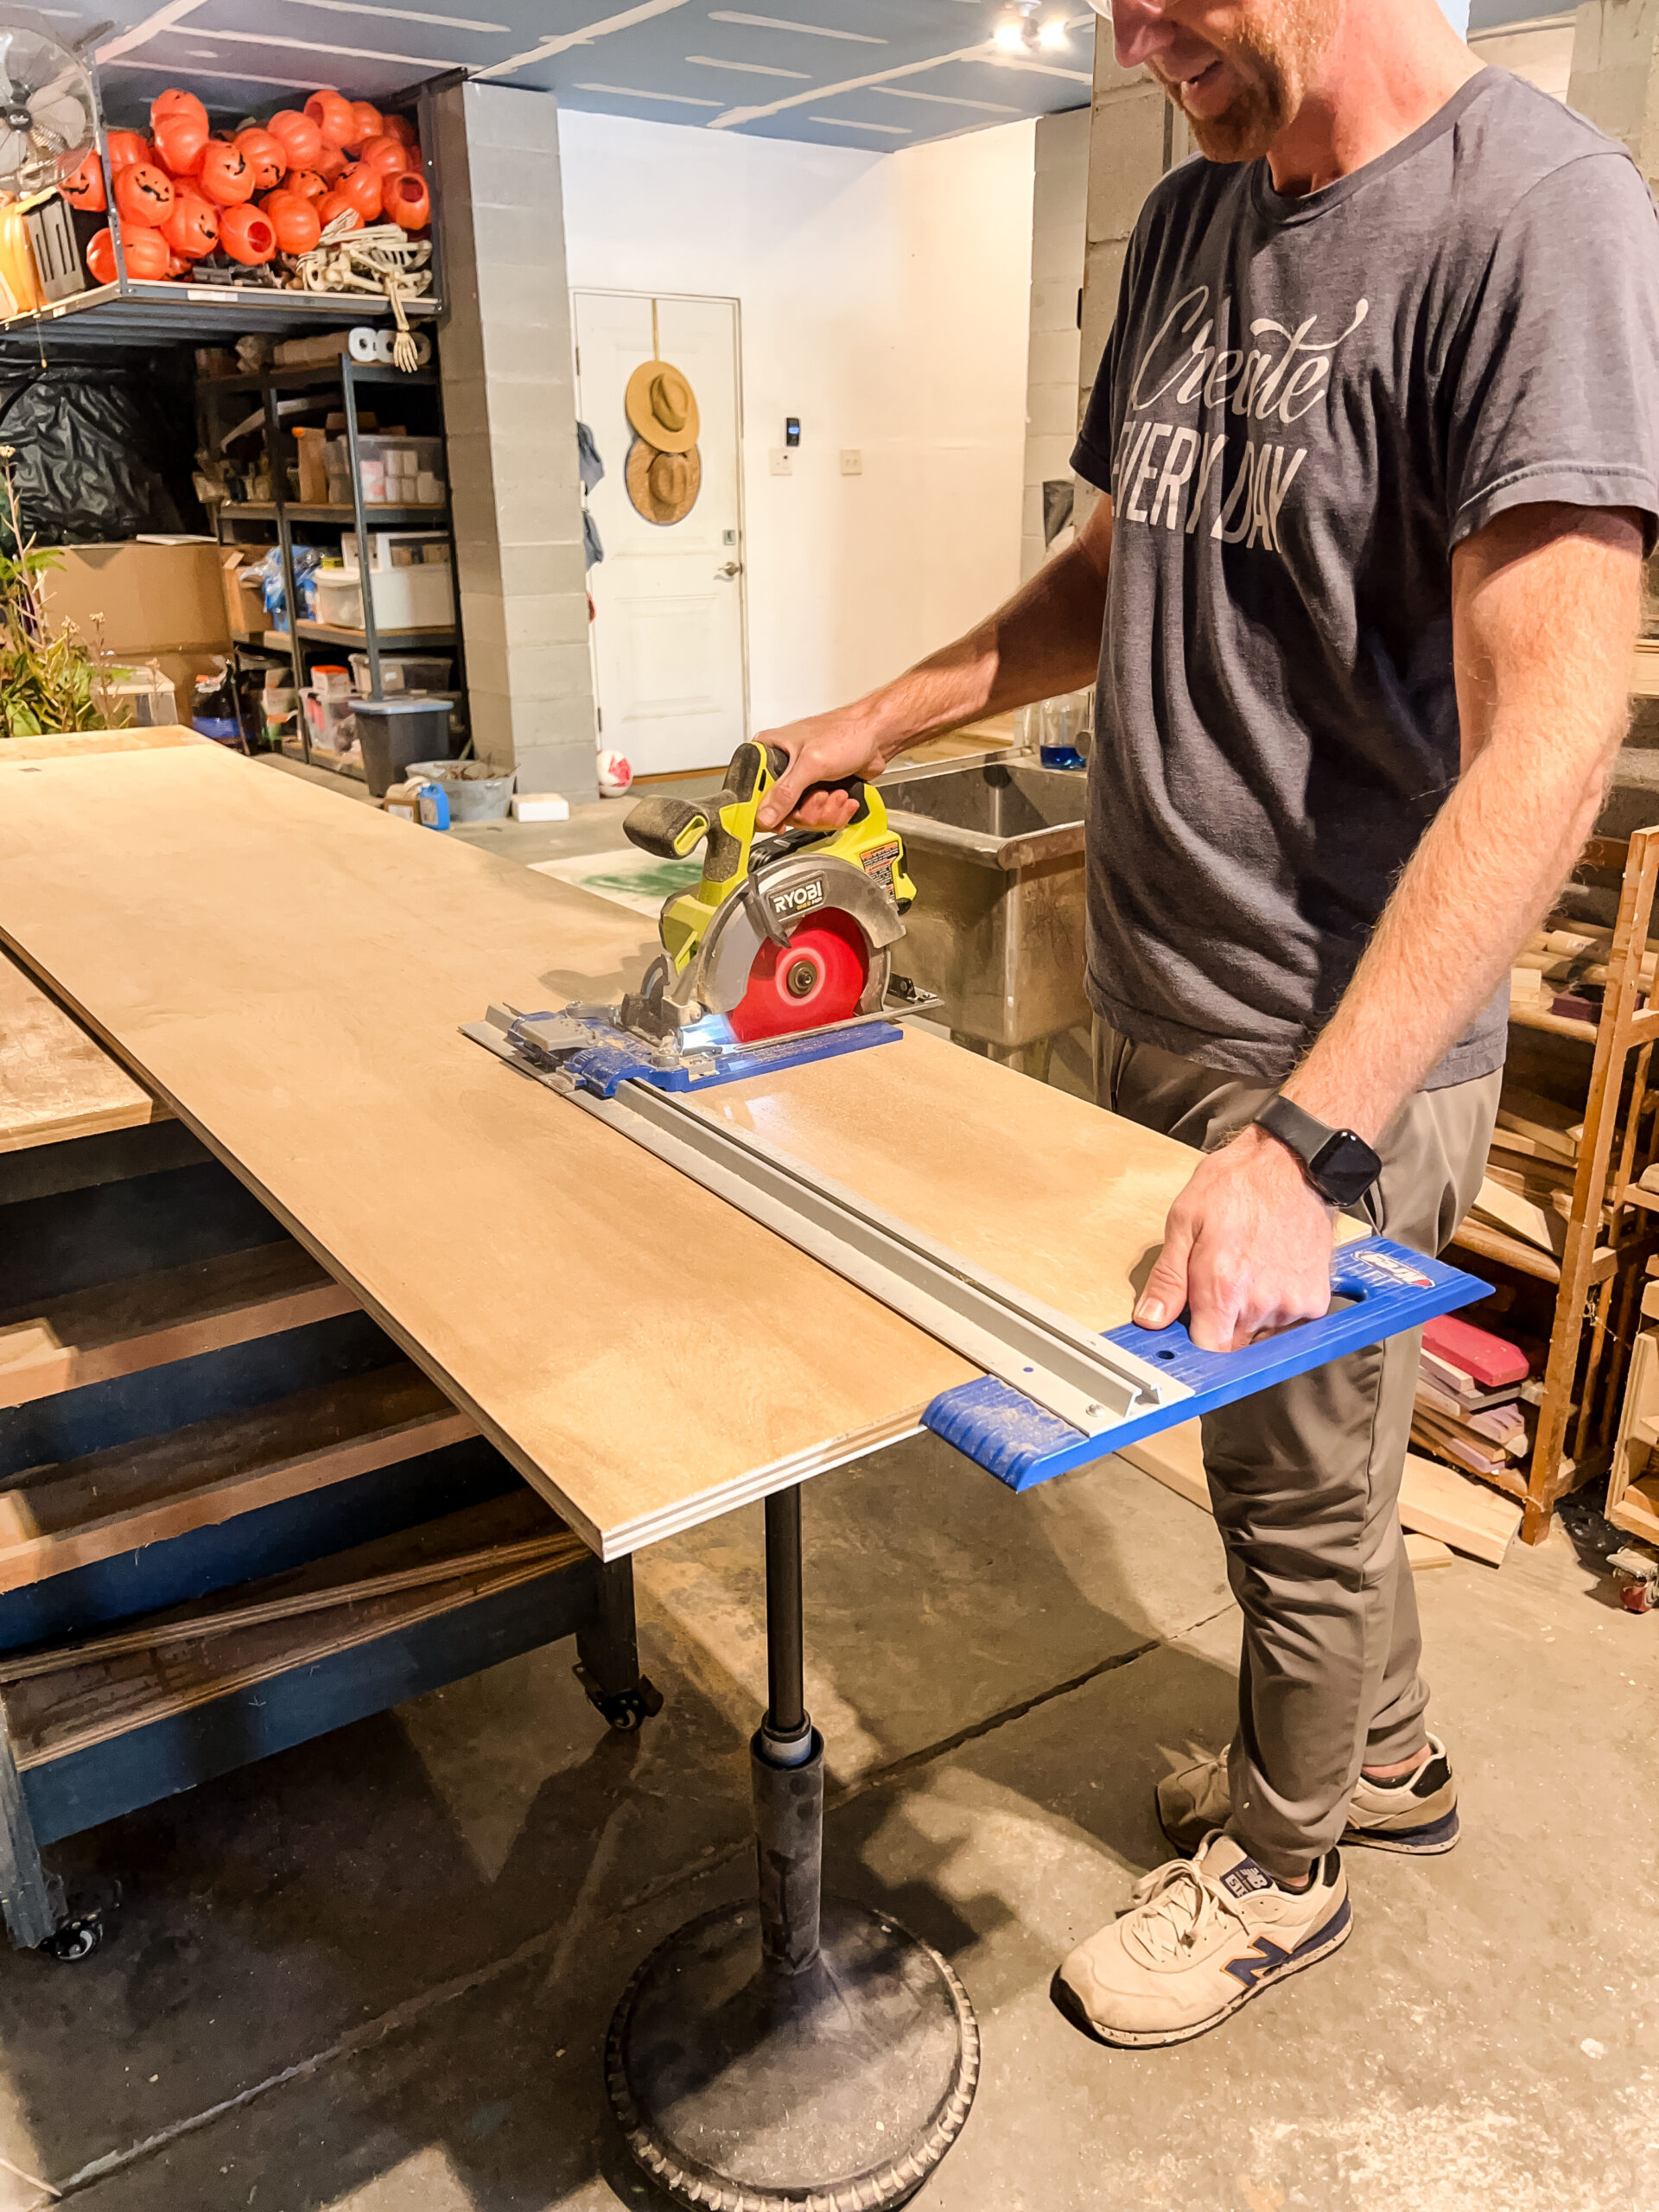
Step one: measure and cut
Start by measuring the inner space of your cabinet. Measure first from the inside of the front to the back wall. This is your depth.
Next, measure the width of the cabinet, but not from wall to wall. Measure from the inside of the two doors or hinges at the bottom, whatever sticks inside the most. You need the tray to be able to slide freely between these.
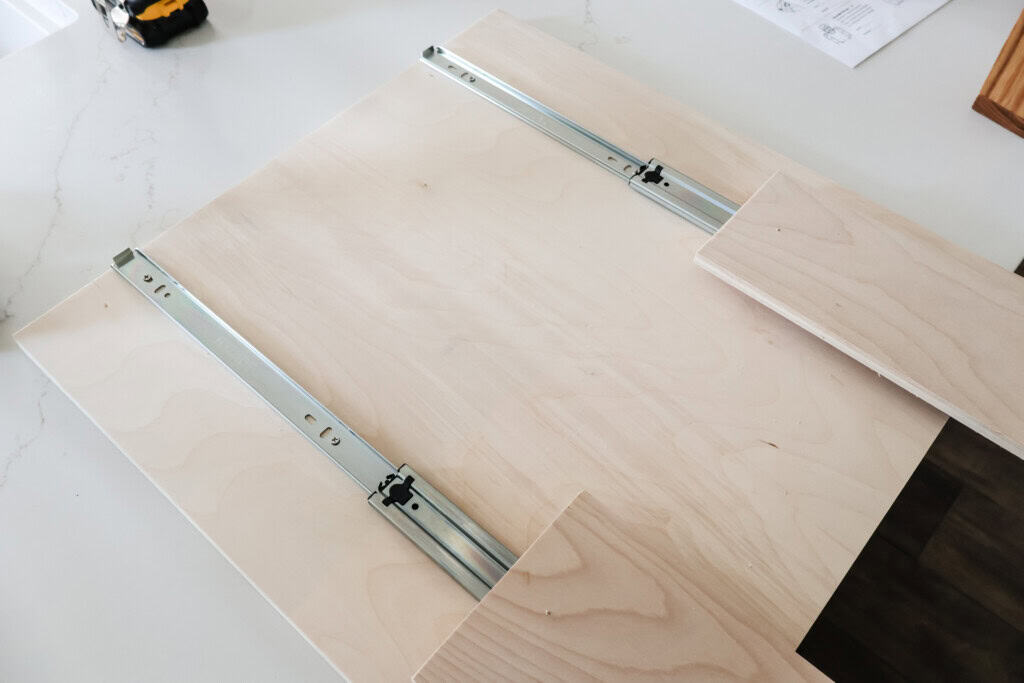
Then, cut the tray to those dimensions as well as cutting two pieces that are the depth of the cabinet and about 4" wide. These will be for mounting the drawer slides to.
If you have any leftover wood, make some DIY utensil dividers!
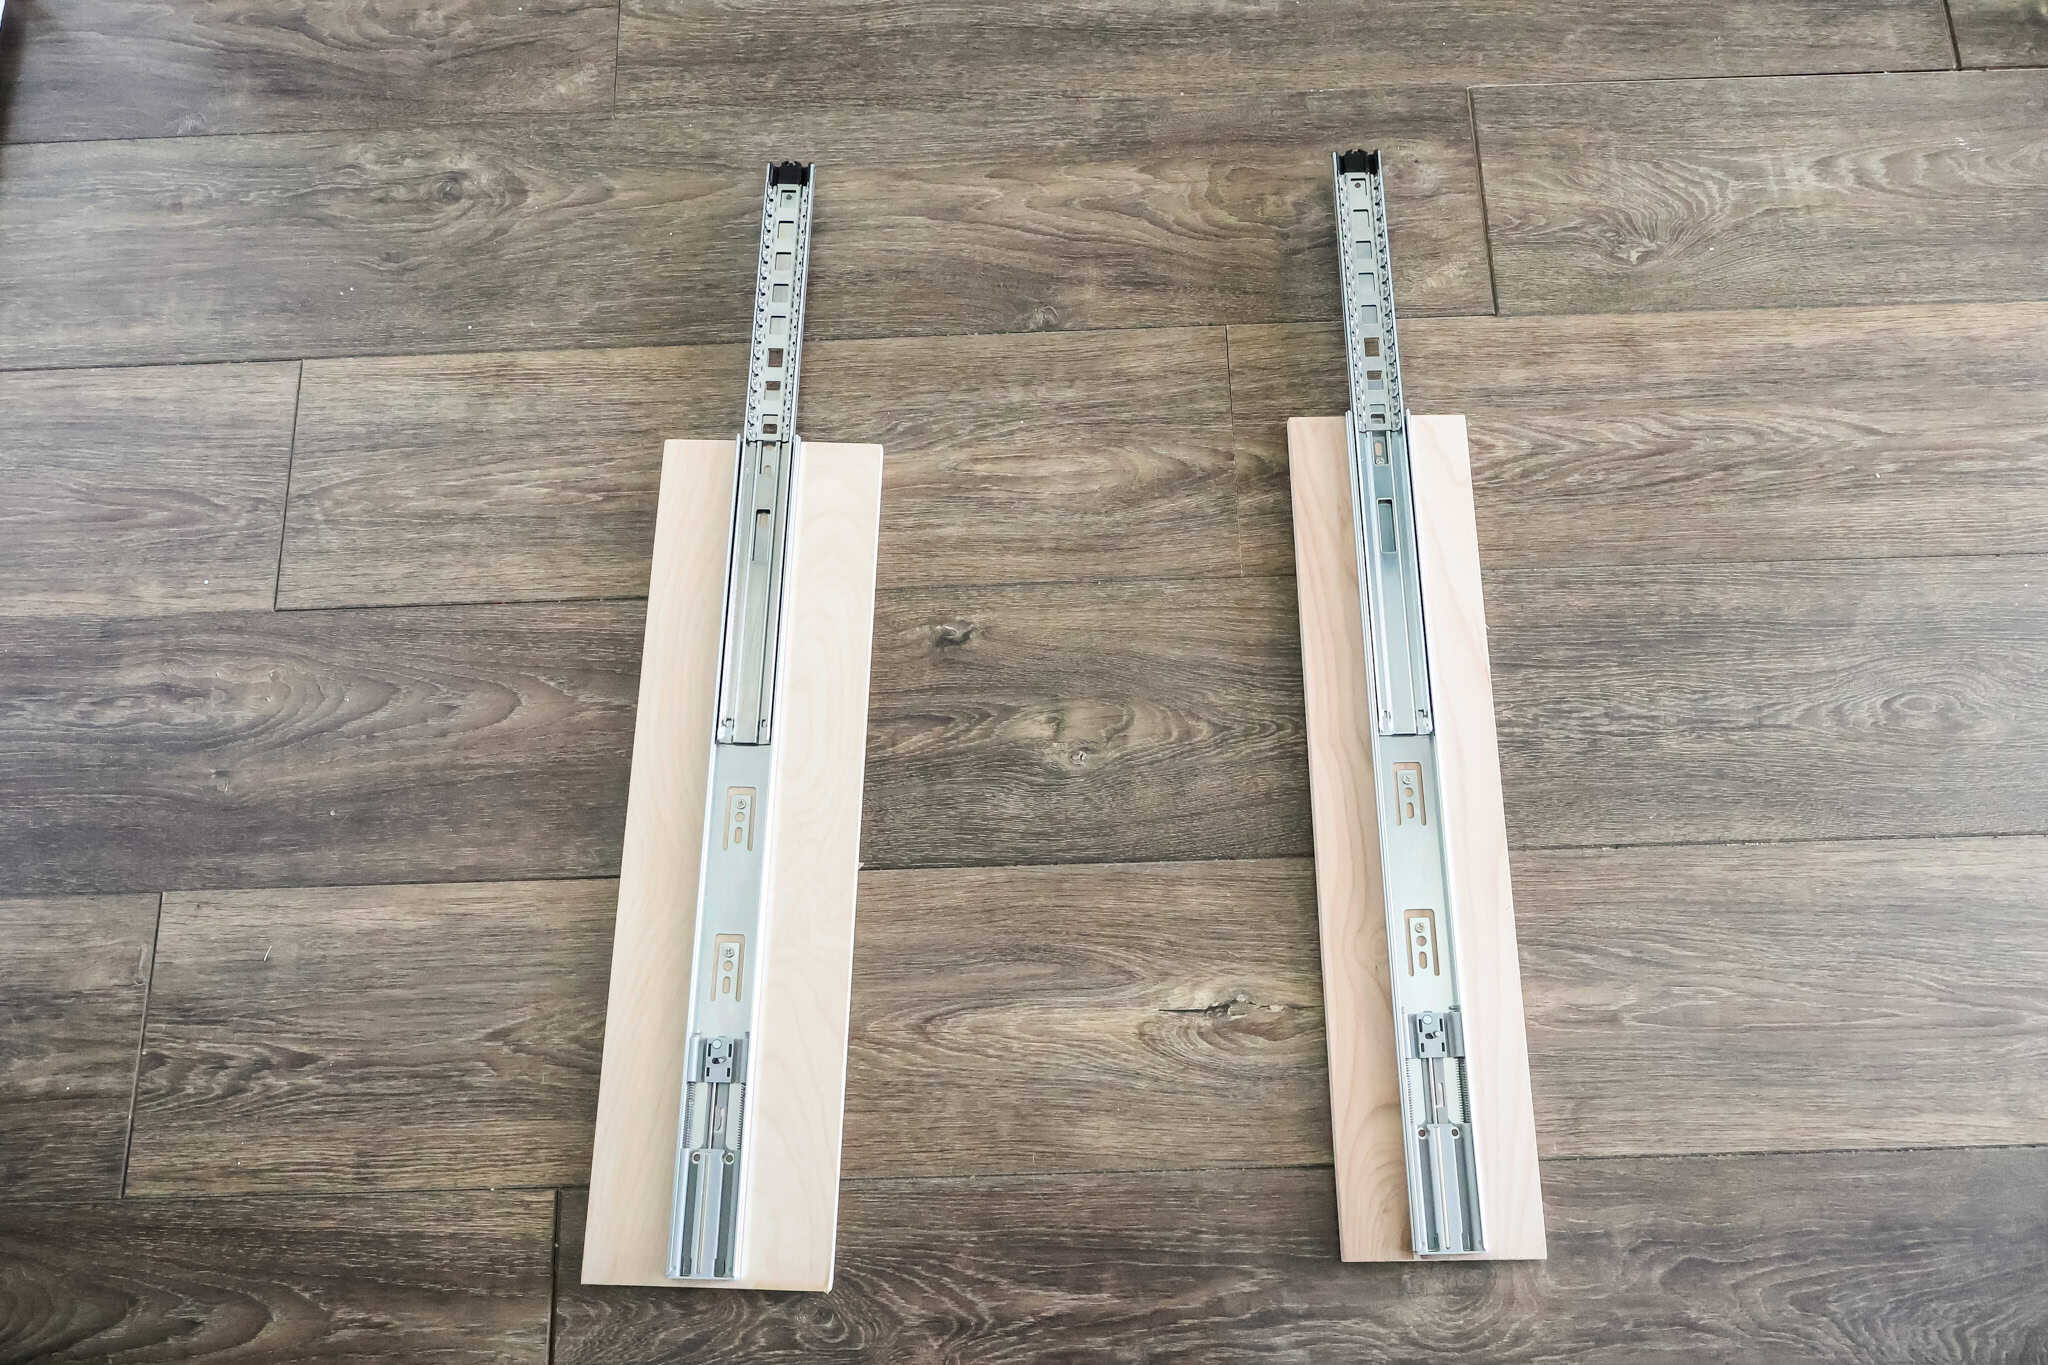
Step two: attach drawer slides to scraps
Next, attach the drawer slides to the scraps. Mount them with the front of the drawer slide along the front edge of the scraps, screwing through three different holes on the drawer slide base.
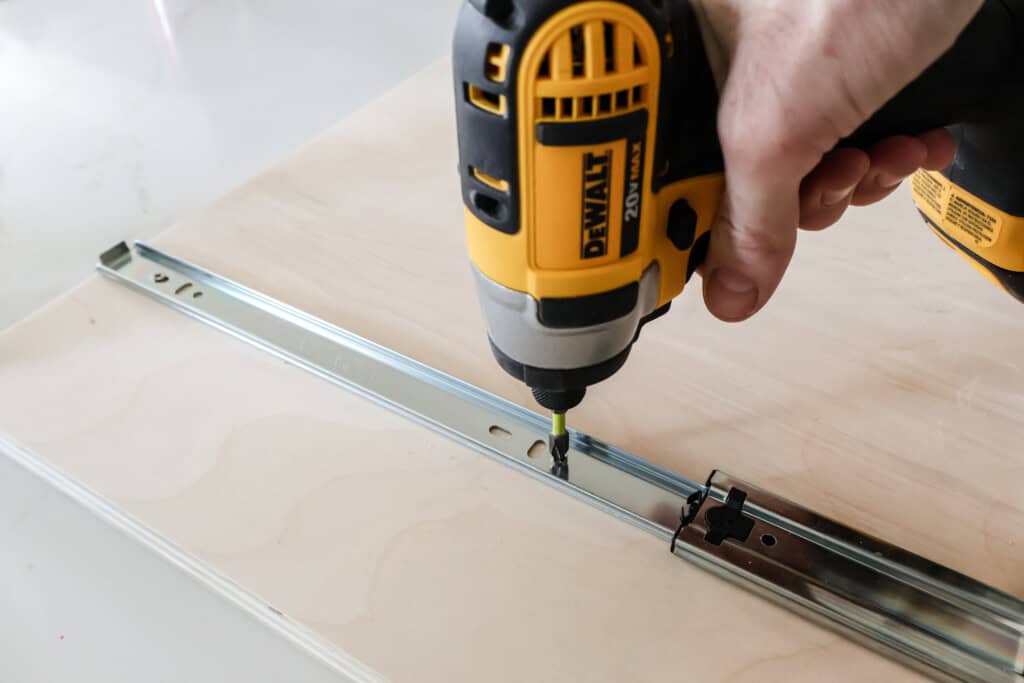
Step three: attach drawer slides to tray
Now, flip the drawer slides over onto the tray. Line up the front of the slide on the front edge of the tray.
Gently pull back on the drawer slides to extend them a bit, but not too far. Measure each slide 3 ½" from the outside edge of the tray and screw in the hole near the front of the slide.
Open the slide a bit more and make sure that the entire slide is in line with that 3 ½" spacing. Screw in a second hole and then a third.
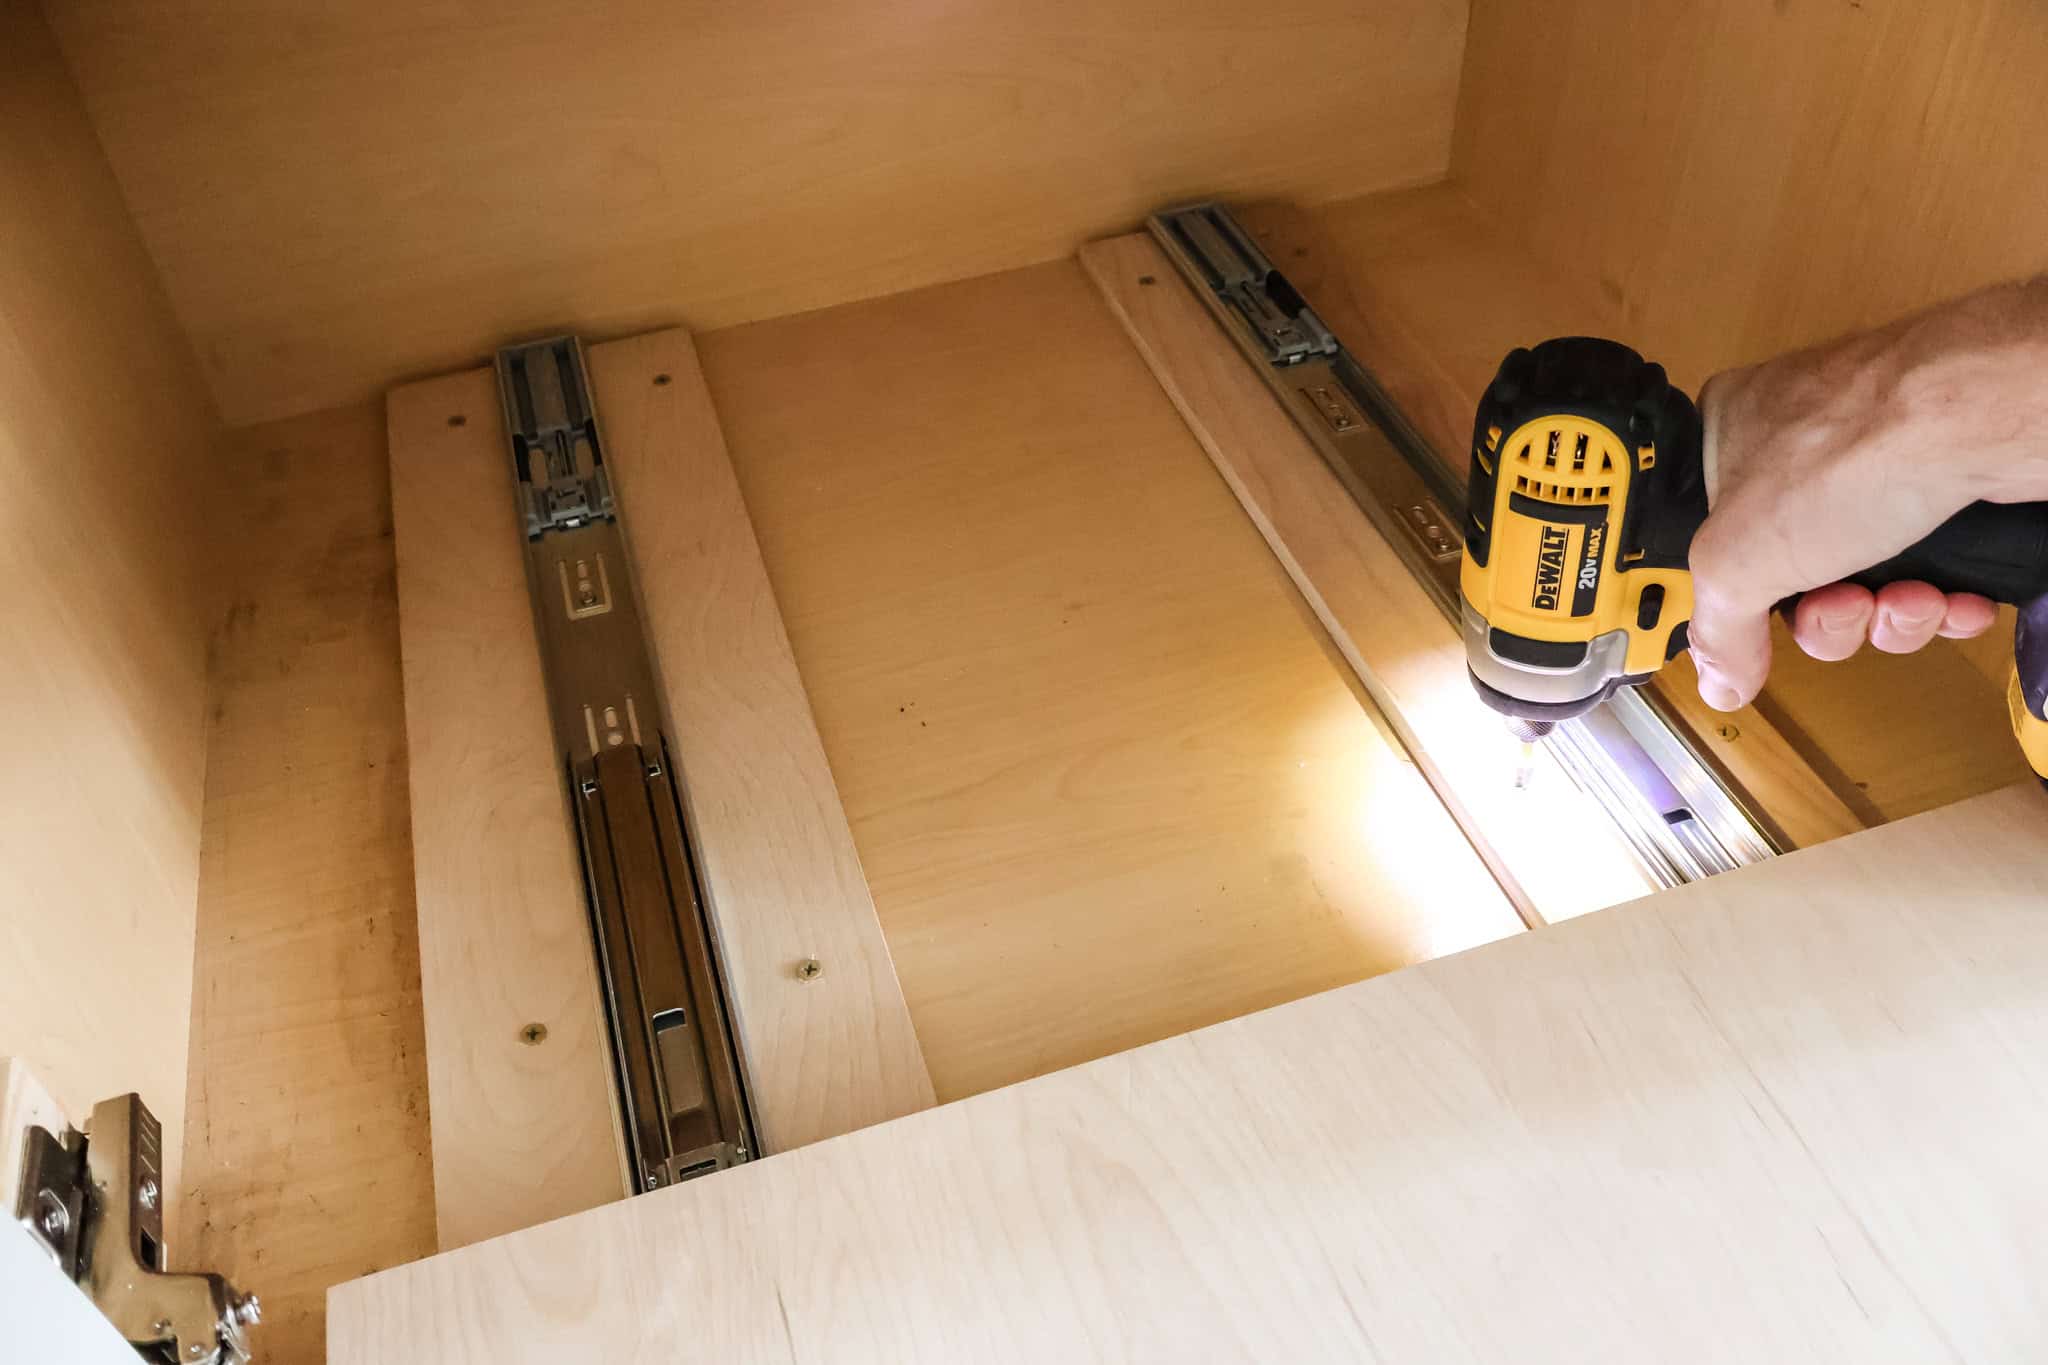
Step four: install in cabinet
Now, install this into the base of the cabinet. With everything cleared out, put the cabinet tray into the base and line up the front edge with the inside front edge of the cabinet.
Extend the tray out a bit and use the 1 ½" screws to screw down the scrap boards into the base of the cabinet. Attach two in the back of each scrap first, then two more near the front.
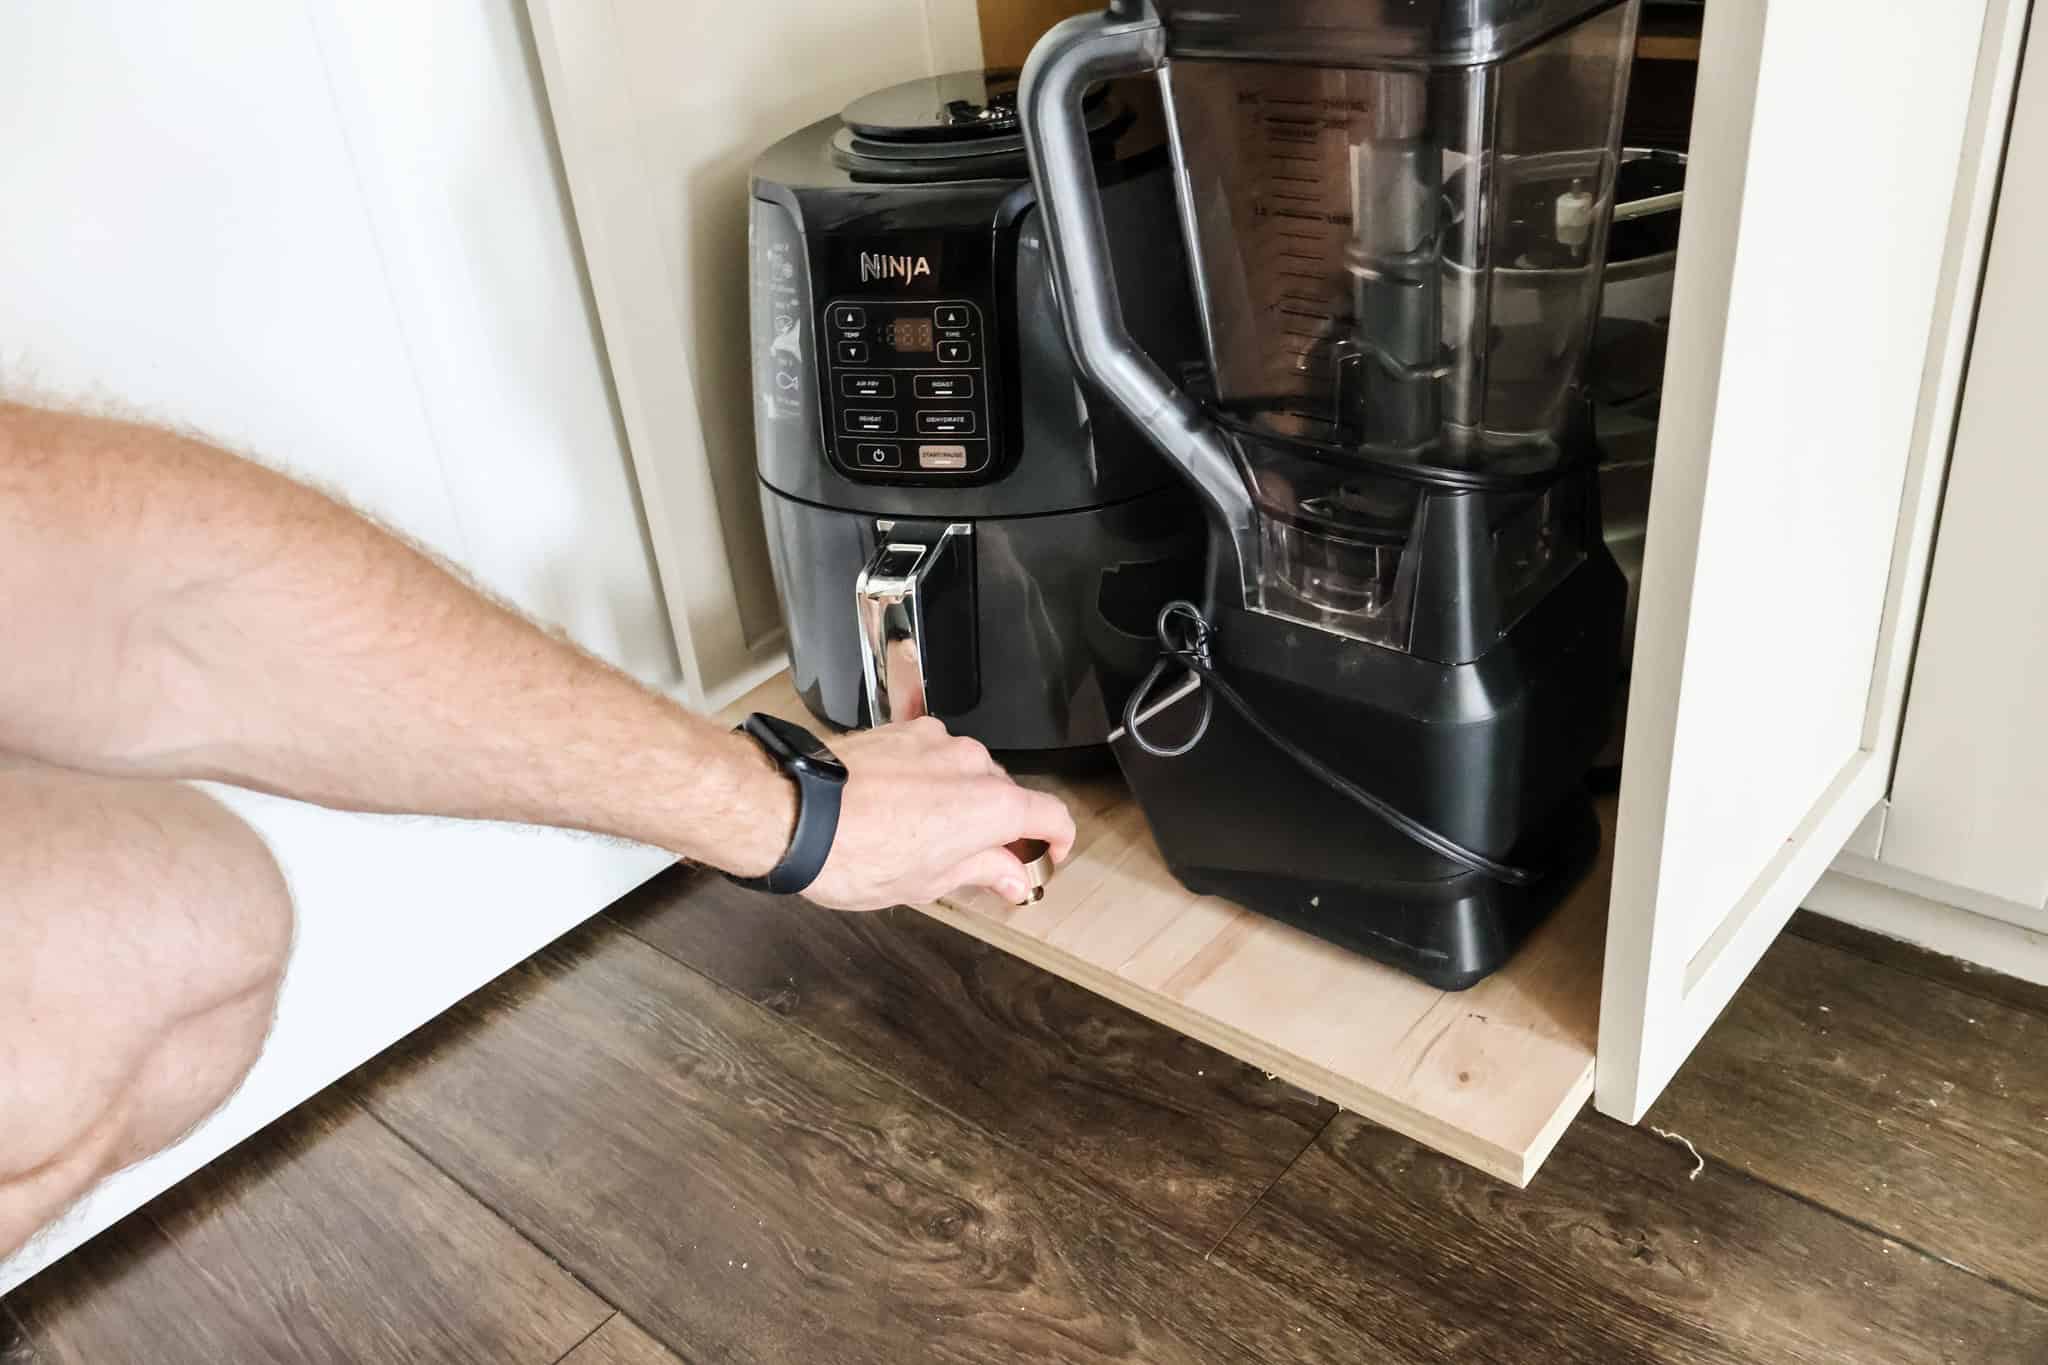
Step five: add handle pull
Finally, grab a cabinet door knob that matches your existing cabinet doors and drill a hole in the middle of the tray, about an inch from the front edge. Then screw in the knob.
If your cabinet doors swing open too far and bang the wall or another door, here's the quick way to fix it!
DIY cabinet pull out drawer
I love how easy these DIY cabinet pull out trays are to make! Literally anyone can make these and they make everyone's lives easier.

No more pulling out the blender and the air fryer to get to the food processor. Just pull them all out at once and grab what you need!

Looking for something?
We've been doing this since 2012 so we have a LOT of blog posts!
Search stuff like: Ceiling Projects | DIY Plant Stands | Thrift Flips

Hey there, I'm Sean, the woodworking enthusiast and builder behind CharlestonCrafted.com! Since 2012, I've been sharing the magic of turning raw materials into beautiful creations. I love teaching others the art and satisfaction of woodworking and DIY. I try to inspire fellow crafters to make something extraordinary out of nothing at all.