• Skip to primary navigation
  • Skip to main content
  • Skip to primary sidebar
Charleston Crafted
  • DIY
  • Woodworking
  • Popular Posts
  • Blog
  • About
  • Shop
menu icon
go to homepage
  • DIY
  • Woodworking
  • Popular Posts
  • Blog
  • About
  • Shop
search icon
Homepage link
  • DIY
  • Woodworking
  • Popular Posts
  • Blog
  • About
  • Shop
×
Home » Sewing & No Sew Projects

How to alter pillowcases to fit foam pillows

Published: Oct 17, 2016 · Modified: Aug 22, 2017 by Sean · As an Amazon Associate, we earn from qualifying purchases. This site contains affiliate links. ·

This shop has been compensated by Collective Bias, Inc. and its advertiser. All opinions are mine alone. #StickItToLint #CollectiveBias

We are loving our new bedding, but have been having one problem with our pillowcases. Sean & I both use memory foam pillows, and they are slightly smaller and much less fluffy than standard pillows. So, they look saggy and sad in standard pillowcases. Luckily, I was able to hem and alter the standard pillow cases to give them a more crisp look.

How to alter pillowcases to fit smaller pillows - via charleston crafted

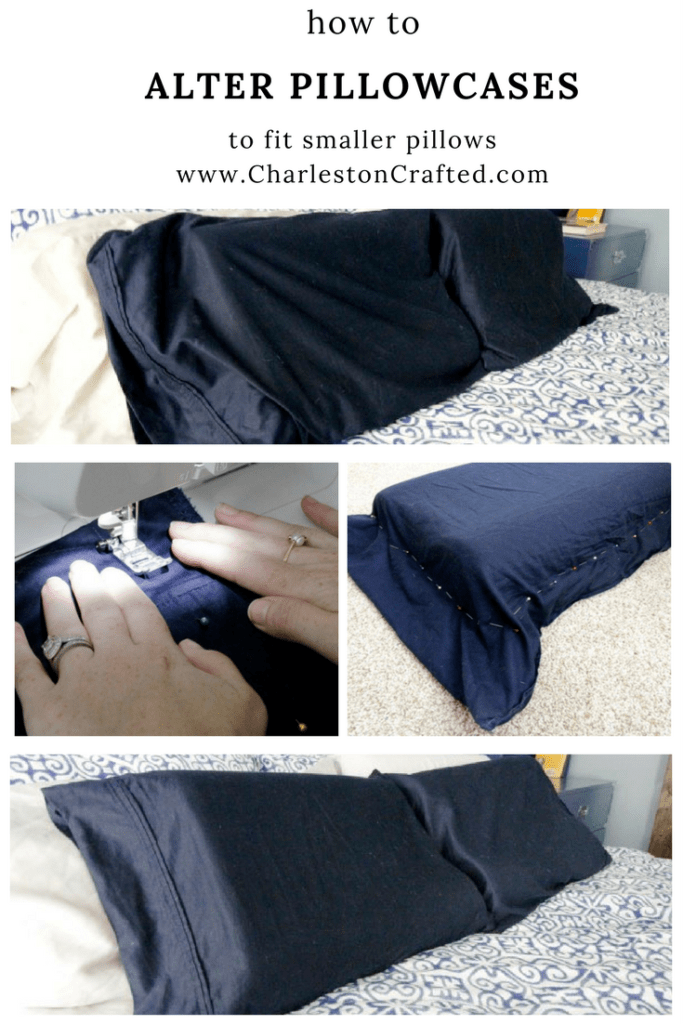
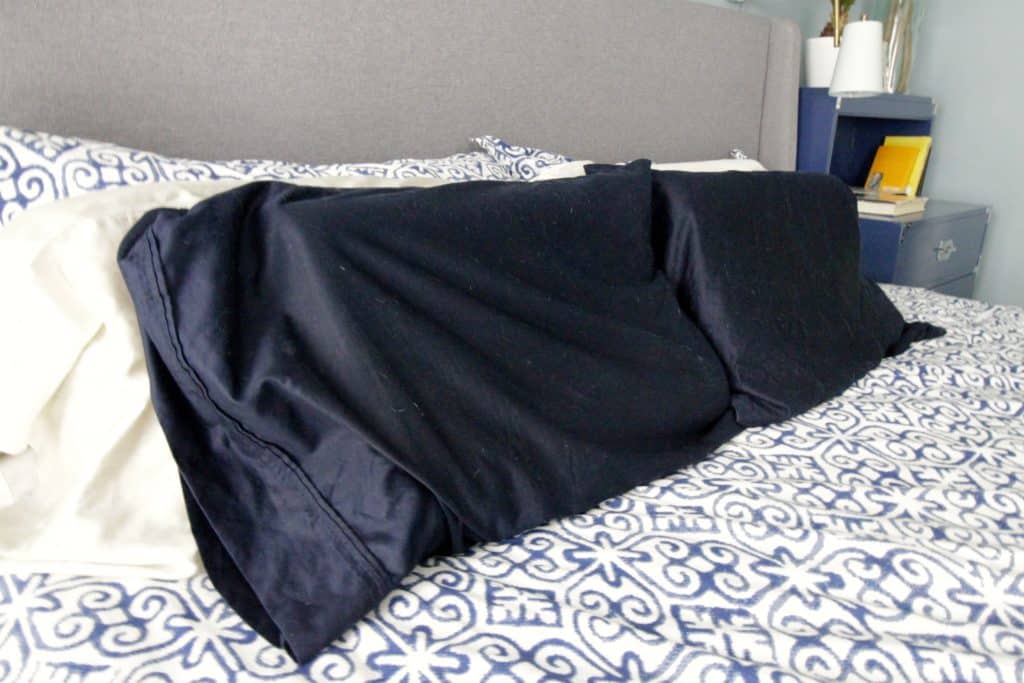
They looked a little frumpy. Here's how they looked before:

How to alter pillowcases to fit foam pillows - Charleston Crafted

How to alter pillowcases to fit foam pillows - Charleston Crafted

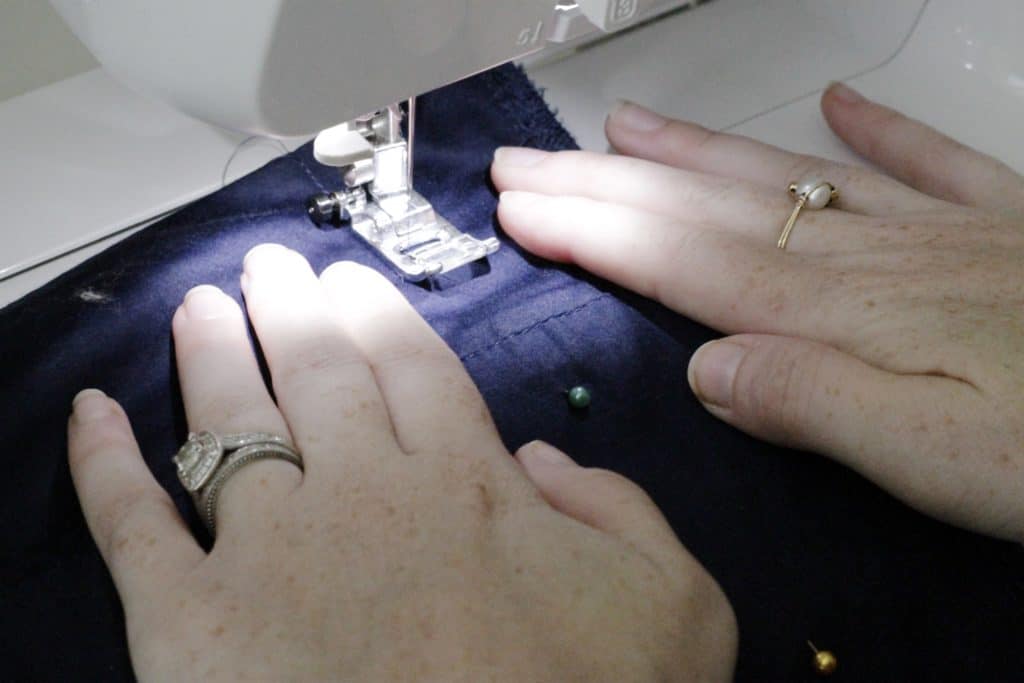
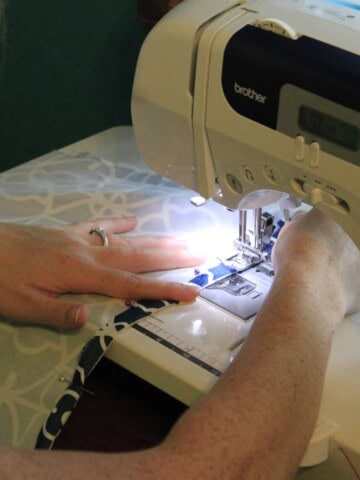
And here is what I did to alter them. **Note: wash and dry your pillowcases at least once before attempting this project in case they shrink!** First, turn the case inside out. Insert your pillow and move it to the edge of the pillow so that you have 2 sides of excess fabric. Simply use straight pins to pin the case in a more fitted design around the pillow. Remove the pillow from the case.

How to alter pillowcases to fit foam pillows - Charleston Crafted

How to alter pillowcases to fit foam pillows - Charleston Crafted

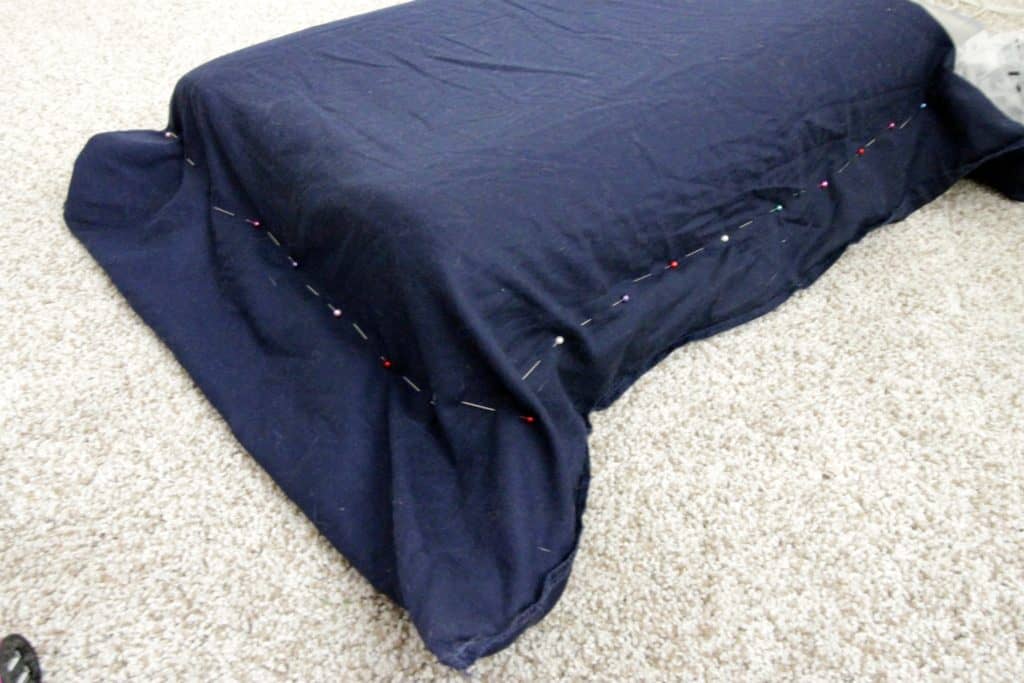
Sew a straight line just along your pinned lines. Sew a few stitches backwards at the end of your stitches to prevent unravelling.

How to alter pillowcases to fit foam pillows - Charleston Crafted

Insert your pillow into the sewn case to ensure that the fit is correct. Assuming that it is, trim the excess fabric, leaving about one inch beyond your sewn line.

How to alter pillowcases to fit foam pillows - Charleston Crafted

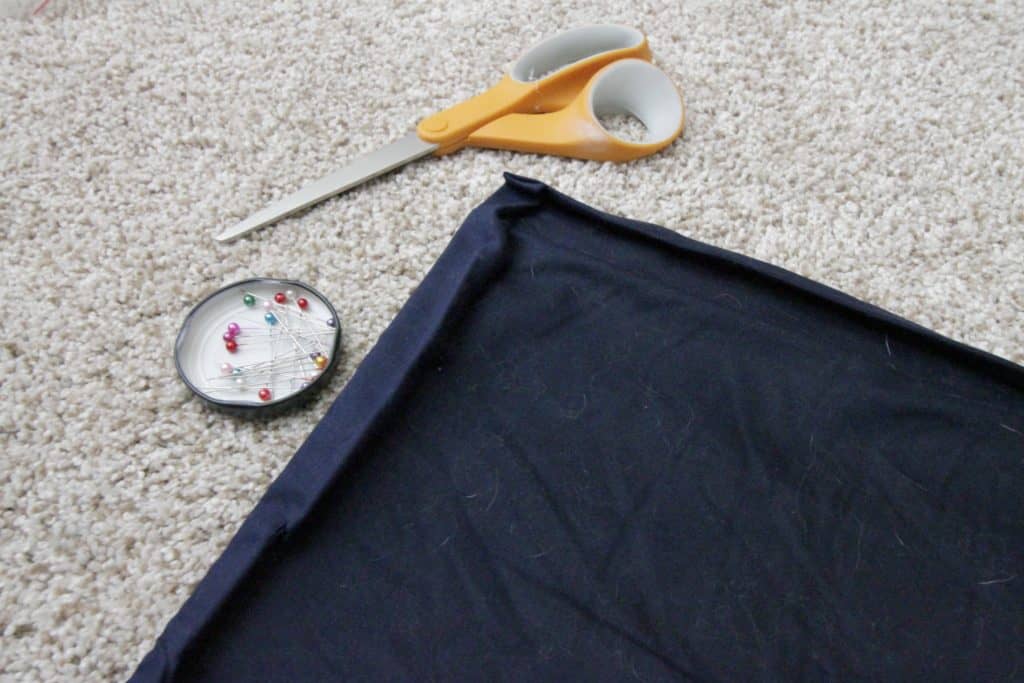
Fold the cut edge over and then fold again for a crisp line. I used my iron and ironing board to keep the fold secure until I was able to sew it down with another straight line. Alternatively, you could pin it. Sew along the crease line on both edges.

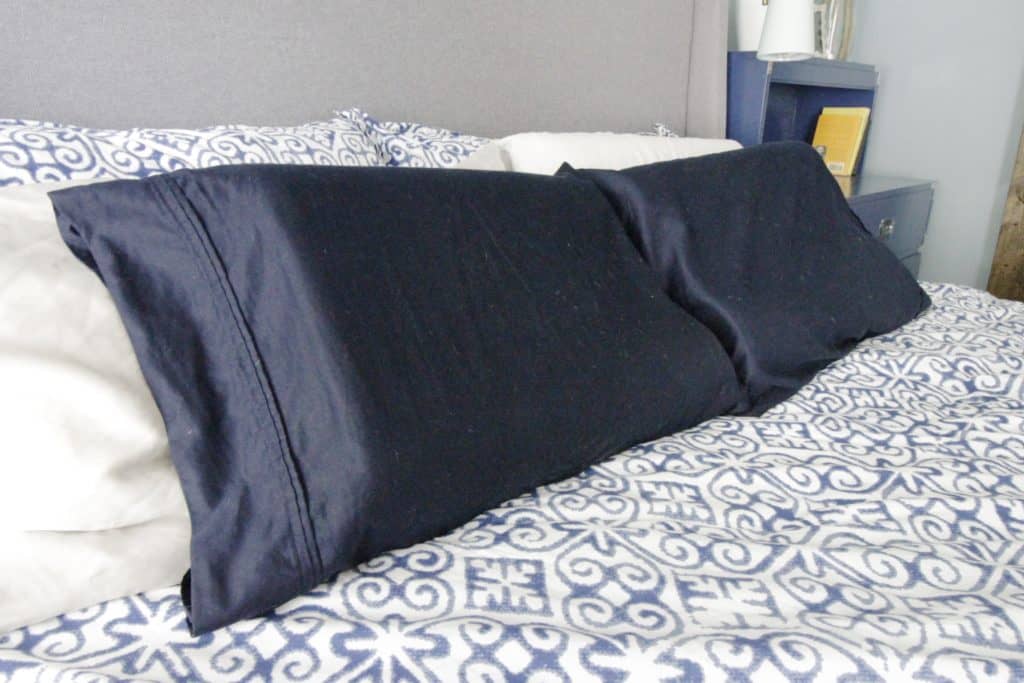
Turn the pillowcase right side out and insert your pillow. You should have a perfect fit.

How to alter pillowcases to fit foam pillows - Charleston Crafted

How to alter pillowcases to fit foam pillows - Charleston Crafted

The final step in finalizing our bed was to give it all a good clean. Y'all know that we have two pets and believe me - they are both constantly shedding. With a dark grey cat and a white dog, there are really no colors that are "safe" for hiding hairs. So, we have to be really vigilant about cleaning. For soft surfaces, my go-to cleaning tool is a Scotch-Brite™ Lint Roller. They are great for keeping fabric items lint, hair & fuzz free.

How to alter pillowcases to fit foam pillows - Charleston Crafted

How to alter pillowcases to fit foam pillows - Charleston Crafted

How to alter pillowcases to fit foam pillows - Charleston Crafted

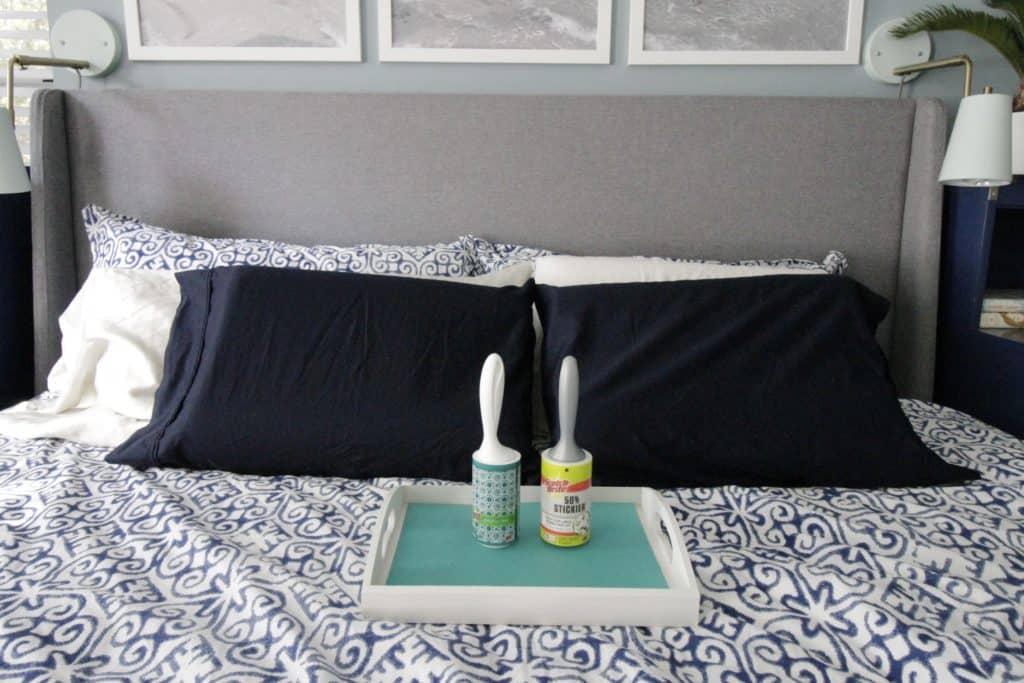
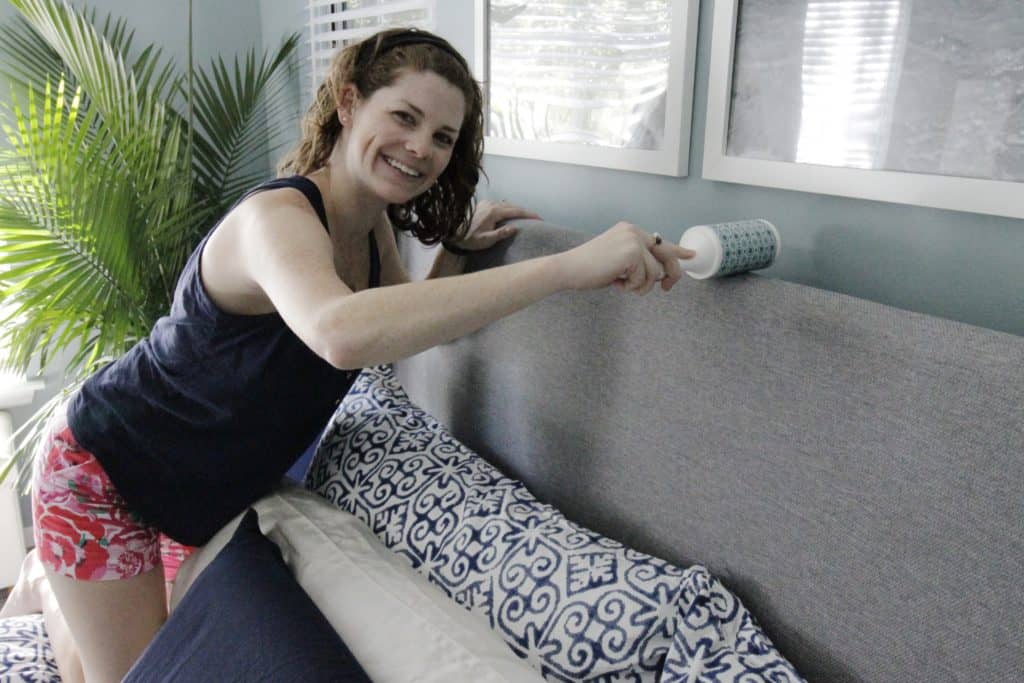
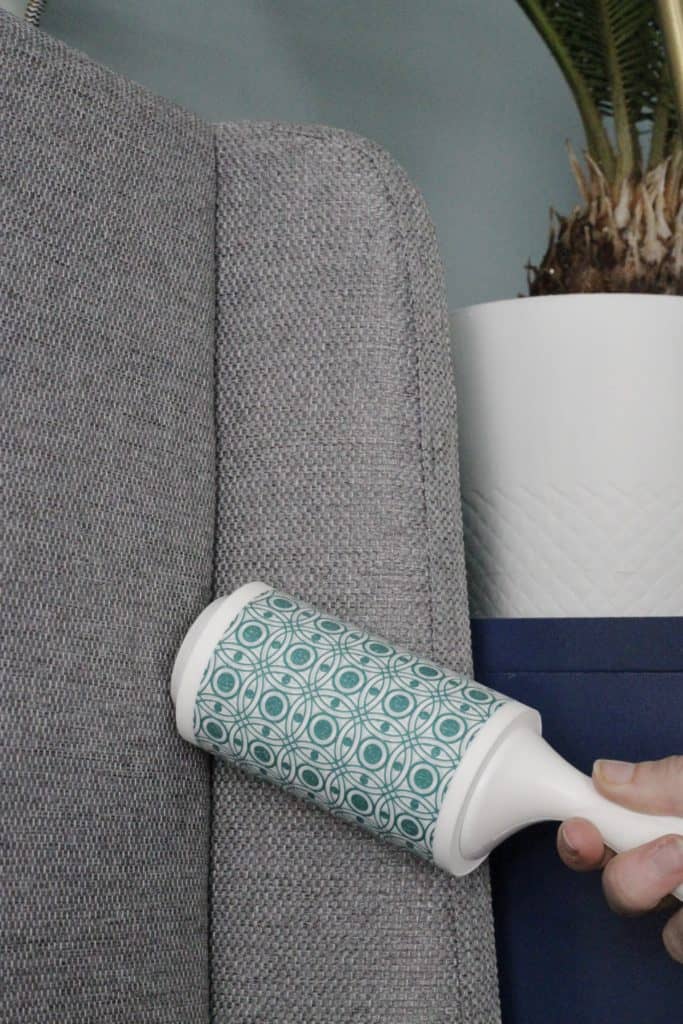
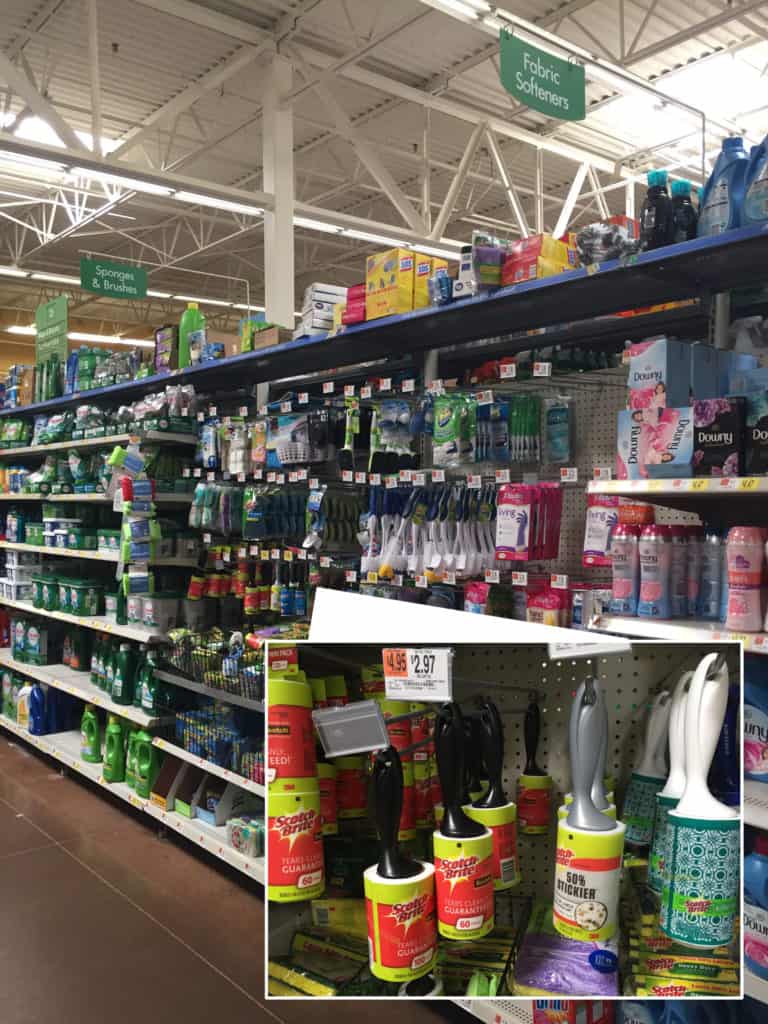
When I was recently shopping at Walmart for lint rollers, I was excited to find the Scotch-Brite™ Printed Lint Roller. It's located in the laundry aisle and has a beautiful patterned design on every sheet with the same great performance that I have grown to expect from Scotch-Brite Lint Rollers. I also picked up a Scotch-Brite 50% Stickier Lint Roller, which is really great for large debris pick-up such as pet hair & crumbs because it is 50% more adhesive to grab more than just lint and hair. These lint rollers are very versatile and can be used for so many things. We used them on the headboard too because the cat always rubs her body against it and leaves hair. Scotch-Brite has some great tips for cleaning on their website too, especially if you have a unique type of mess.

How to alter pillowcases to fit foam pillows - Charleston Crafted

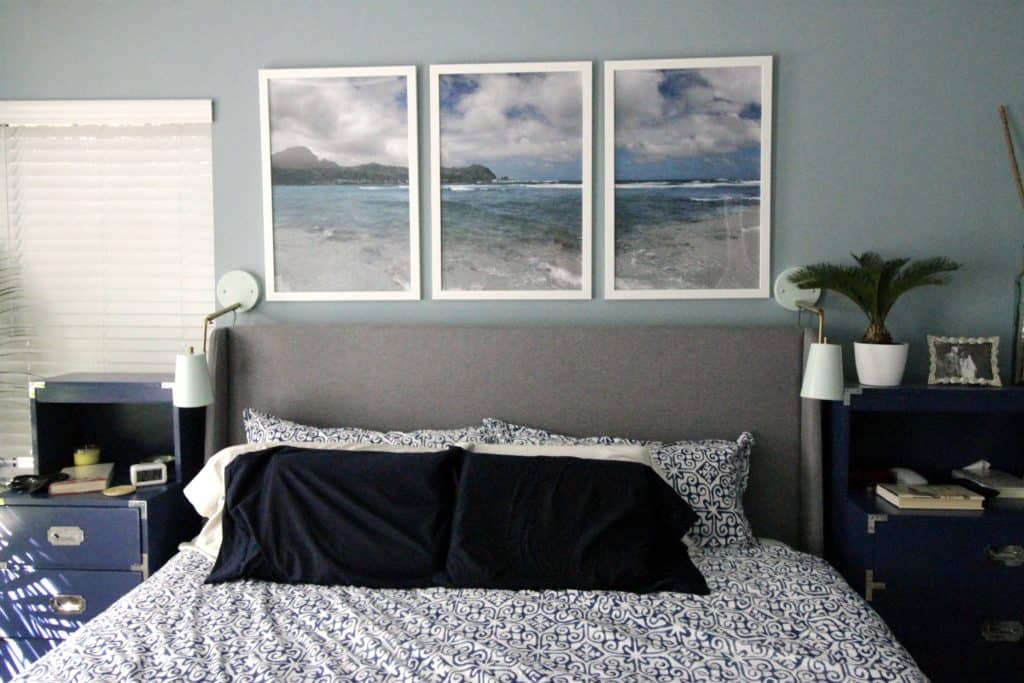
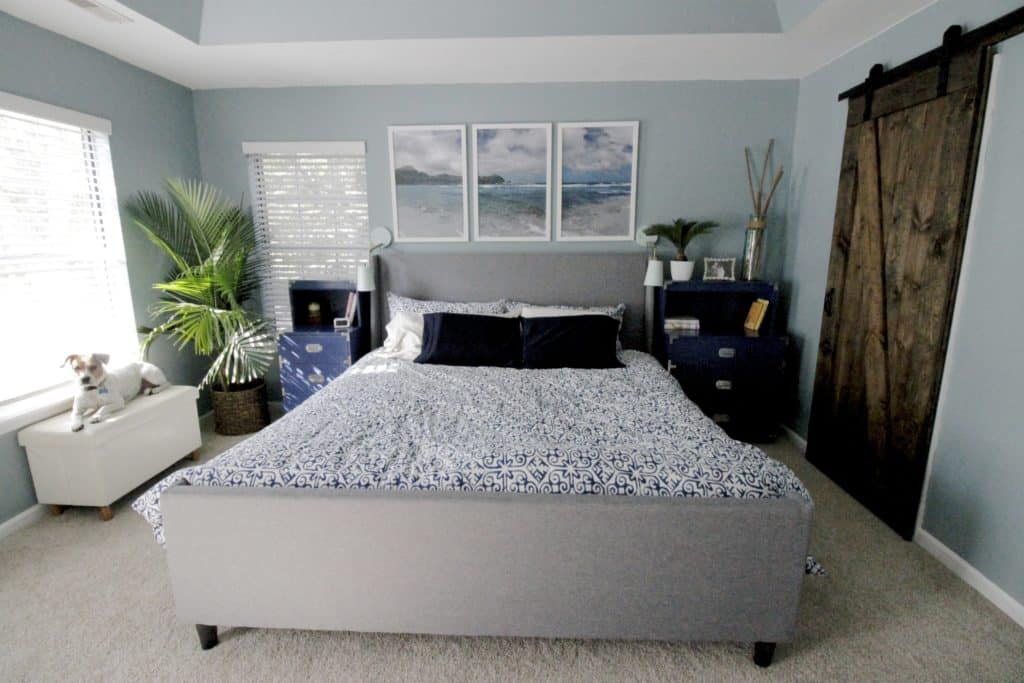
We are loving the new look of our bed and are glad that our newly altered pillows can be kept pet hair free.

What projects are you up to lately?

 Charleston Crafted Logo heart
 Charleston Crafted Logo facebook
 Charleston Crafted Logo insta
 Charleston Crafted Logo pinterest
 Charleston Crafted Logo twitter
Sean headshot cropped
Sean

Hey there, I'm Sean, the woodworking enthusiast and builder behind CharlestonCrafted.com! Since 2012, I've been sharing the magic of turning raw materials into beautiful creations. I love teaching others the art and satisfaction of woodworking and DIY. I try to inspire fellow crafters to make something extraordinary out of nothing at all.

More Sewing & No Sew Projects

  • How to make a no sew bow pillow
    How to make a no sew bow pillow
  • How to make a fur ball pom pom ornament
    How to make a fur ball pom pom ornament
  • Sewing an Envelope Pillow Cover - Charleston Crafted
    How to Make a Pillow
  • 7 Easy DIY No Sew Project Ideas
    7 Easy DIY No Sew Project Ideas

Reader Interactions

Comments

  1. Michelle says

    October 17, 2016 at 2:38 pm

    That is such a smart idea. I have the same issue with my pillow (in fact, I think I may have the same one you do!) Nice job! #client

Primary Sidebar

Charleston Crafted about us image

Hey y'all!

We are Morgan & Sean McBride and we are crafting our home together in Charleston, South Carolina.

More about us

Popular Posts

  • DIY Coffered Ceiling
    DIY Coffered Ceiling
  • How to Make DIY Concrete Pumpkins via Charleston Crafted
    How to Make DIY Concrete Pumpkins
  • How to Make a Cupid's Arrow Valentine's Day Wall Hanging with felt on the Cricut
    How to make a Cupid's Arrow Valentine's Day Wall Hanging
  • Our Tropical Oasis - A backyard Hammock area - Charleston Crafted
    Our Tropical Oasis

Recent Posts

  • fisherman aesthetic home inspiration
    Fisherman Aesthetic Decor for Your Home
  • Senix Tools Review- Charleston Crafted
    Are Senix power tools any good?
  • Your Weekend To-Do List: 15 Things to Do for Summer Home Upkeep
    Your Weekend To-Do List: 15 Things to Do for Summer Home Upkeep
  • How to build a DIY gate pergola- Charleston Crafted
    How to build a DIY gate pergola

Privacy Policy

Footer

↑ back to top

Navigation

  • Home
  • Blog
  • Contact Us
  • Terms of Use
  • Disclaimer

Newsletter

  • Sign up for emails and updates
  • Follow us on Instagram
  • Work with Us

Browse by Category

  • Woodworking
  • Home Projects
  • Paint Colors
  • Room Reveals

© 2025 The Charleston Crafted Blog LLC DBA “Charleston Crafted” and “CharlestonCrafted” (also known as N/A) / All Rights Reserved.
Official Website: (Charleston Crafted)
Registered in USA (Co. Reg. No.: 565586)
Address: Charleston, USA 29414, South Carolina
Contact Phone: Not applicable — contact is via email: sean@charlestoncrafted.com

DISCLAIMER: The content on this website is provided for general informational purposes only and is not intended as professional advice. The Charleston Crafted Blog LLC and The Charleston Crafted Blog LLC make no representations or warranties—express or implied—regarding the accuracy, completeness, or suitability of the information contained herein. Any reliance you place on this information is strictly at your own risk. In no event shall The Charleston Crafted Blog LLC or The Charleston Crafted Blog LLC be liable for any loss or damage, including without limitation, indirect or consequential loss or damage, arising from the use or inability to use this website. This website is the official website of The Charleston Crafted Blog LLC.

AFFILIATE DISCLOSURE: This website contains affiliate links. If you click through and make a purchase, we may earn a commission at no extra cost to you.

As an Amazon Associate, I earn from qualifying purchases.

Site Editor: Morgan Smith McBride

Copyright © 2025 Charleston Crafted