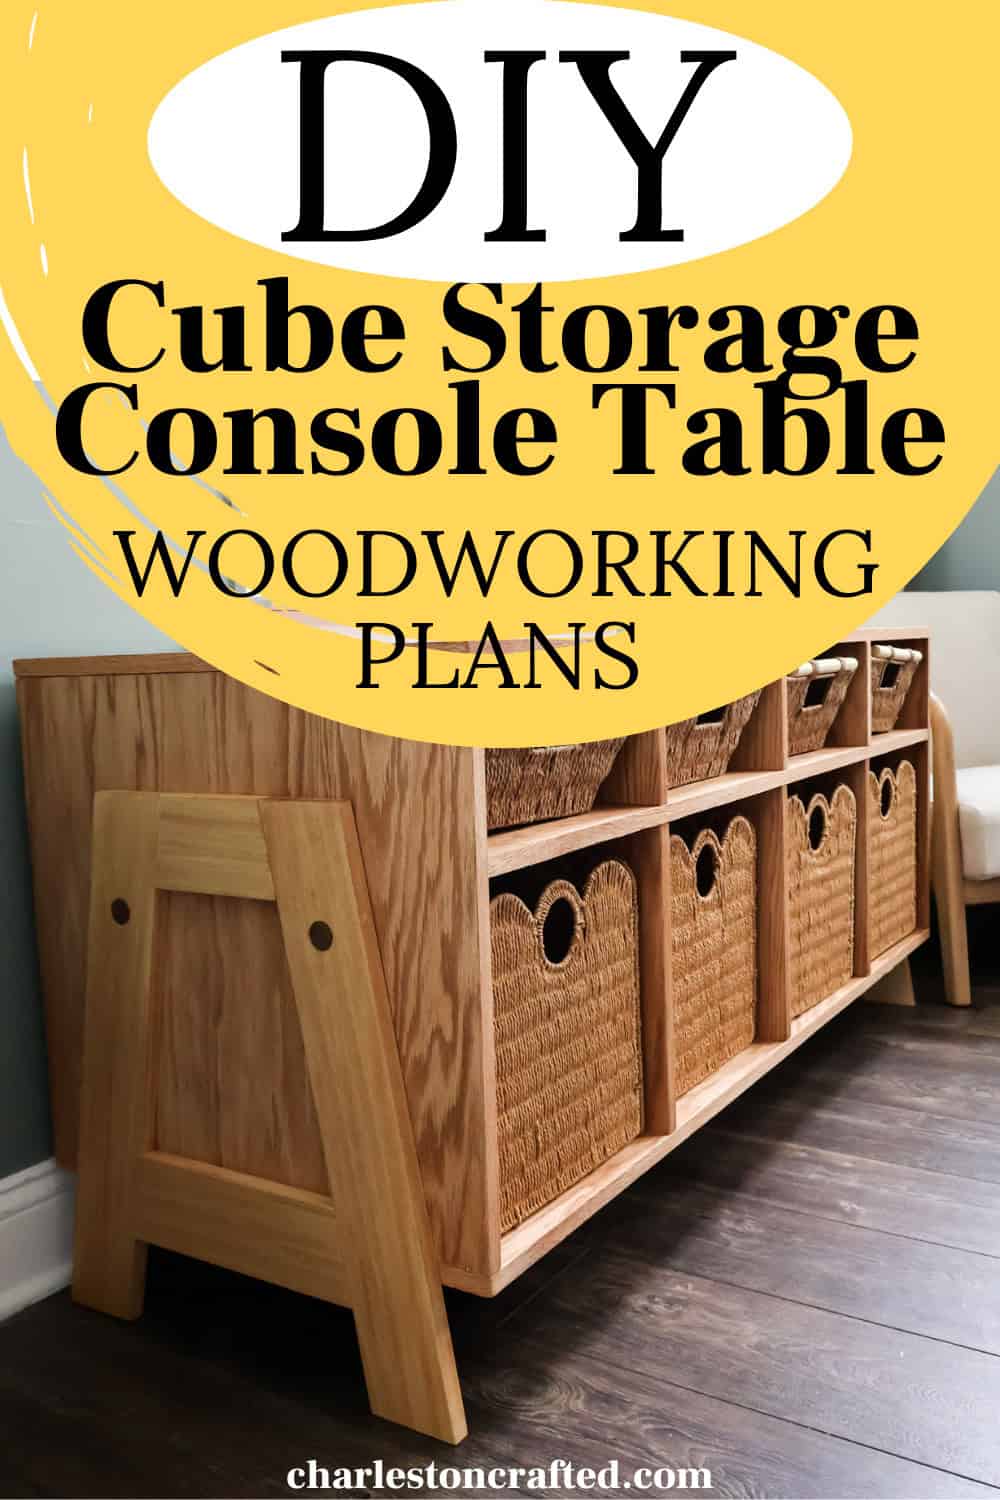
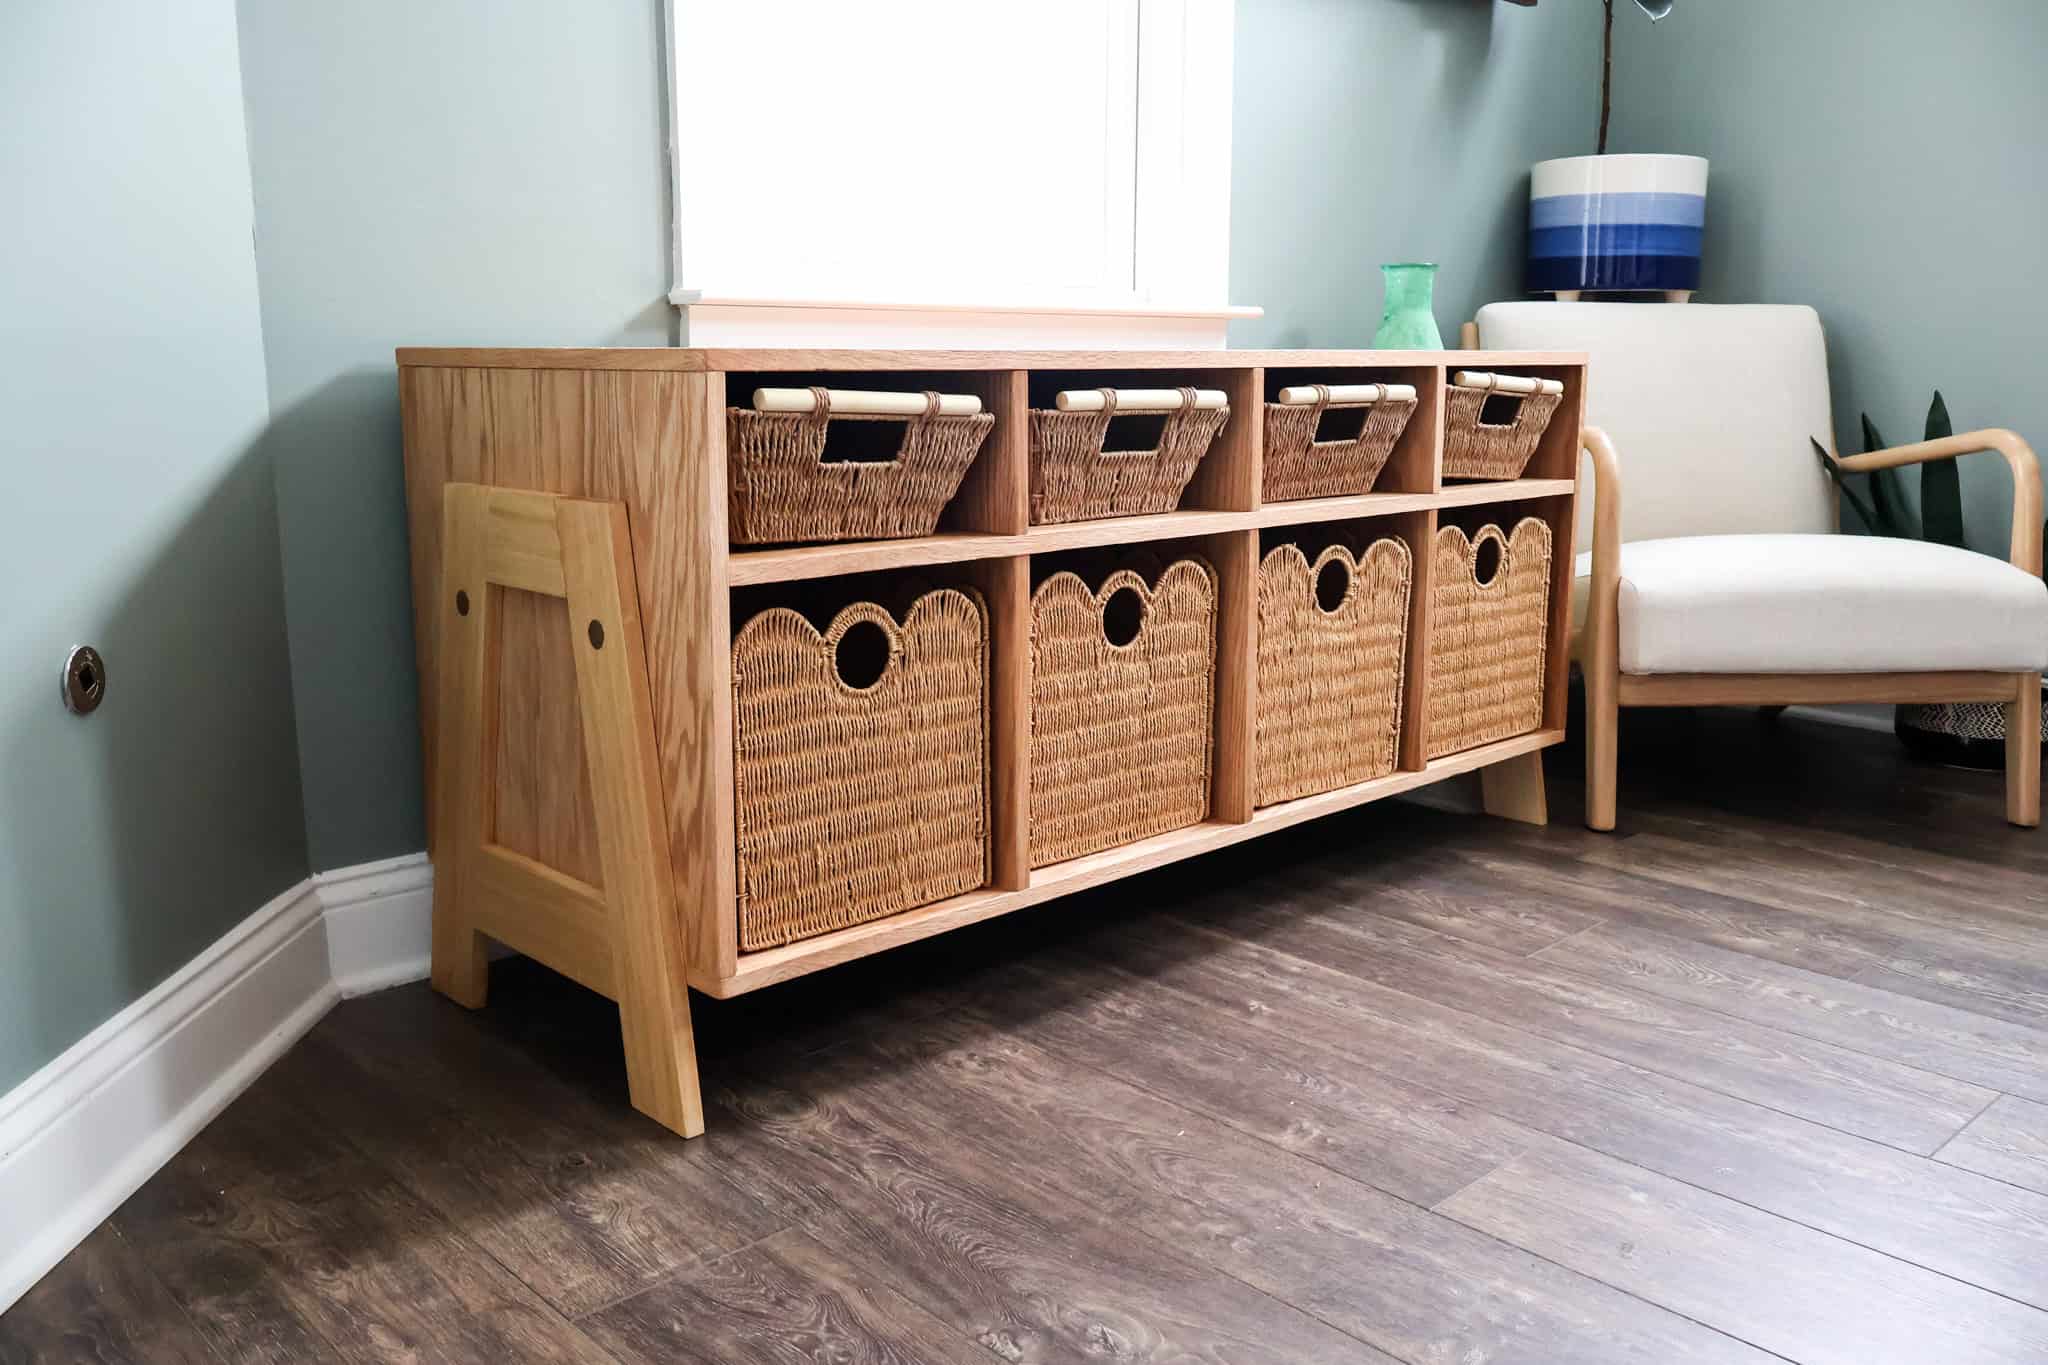
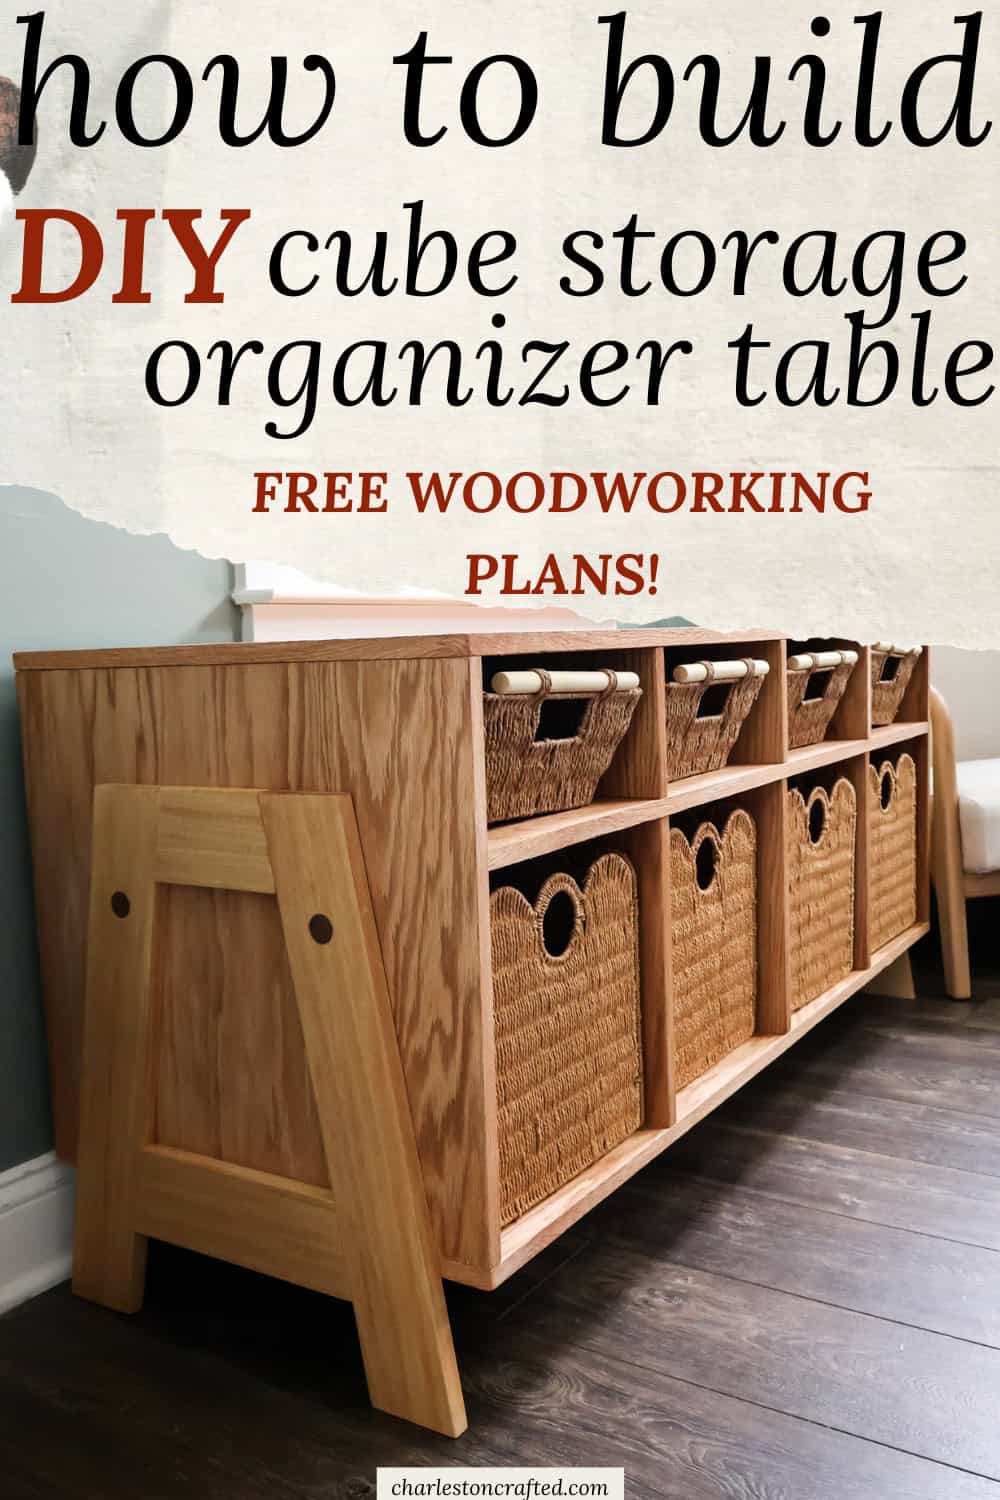
This storage console table is perfect for standard sized cubes as well as trays to keep miscellaneous items organized. The versatility and unique aesthetic design make this a truly custom piece!
This post is sponsored by Kreg Tool. All opinions are our own. Thank you for supporting the brands that make Charleston Crafted possible!
If you're anything like us, we are constantly trying to find new places to aesthetically tuck things away. You don't want your junk on display, so you need somewhere nice to hide it.
We've been filming a lot more content lately and Morgan has been ordering a lot more supplies for these videos. She previously had been just letting the boxes and bags and returns pile up in our office and it looked pretty junky.
Since our office renovation gave us a beautiful space to work in, we didn't want to see those things anymore, so I built a solution.
This DIY cube storage console table is a great way to store items but make it look cute and useful!
Cube storage organizer
This build fits standard 12x12x12 cubes that you can get pretty much anywhere, but I actually designed it to be a little deeper than that.
Morgan got a walking pad to use while working and we also wanted to be able to tuck that underneath this organizer so it would be out of sight. So it needed to be a little deeper than the standard cube.
So you can modify it or keep it the same, but this is a very simple build with a cool midcentury leg style that I hope you'll enjoy!
Materials and tools needed
Here's all the materials and tools you need to build this cube storage organizer. To get the exact cut list for the materials and full quantities, make sure you download the free project plans!
- ¾" plywood
- 1x4s
- 1" dowel
- ¾" edge banding
- 1 ¼" Kreg pocket hole screws
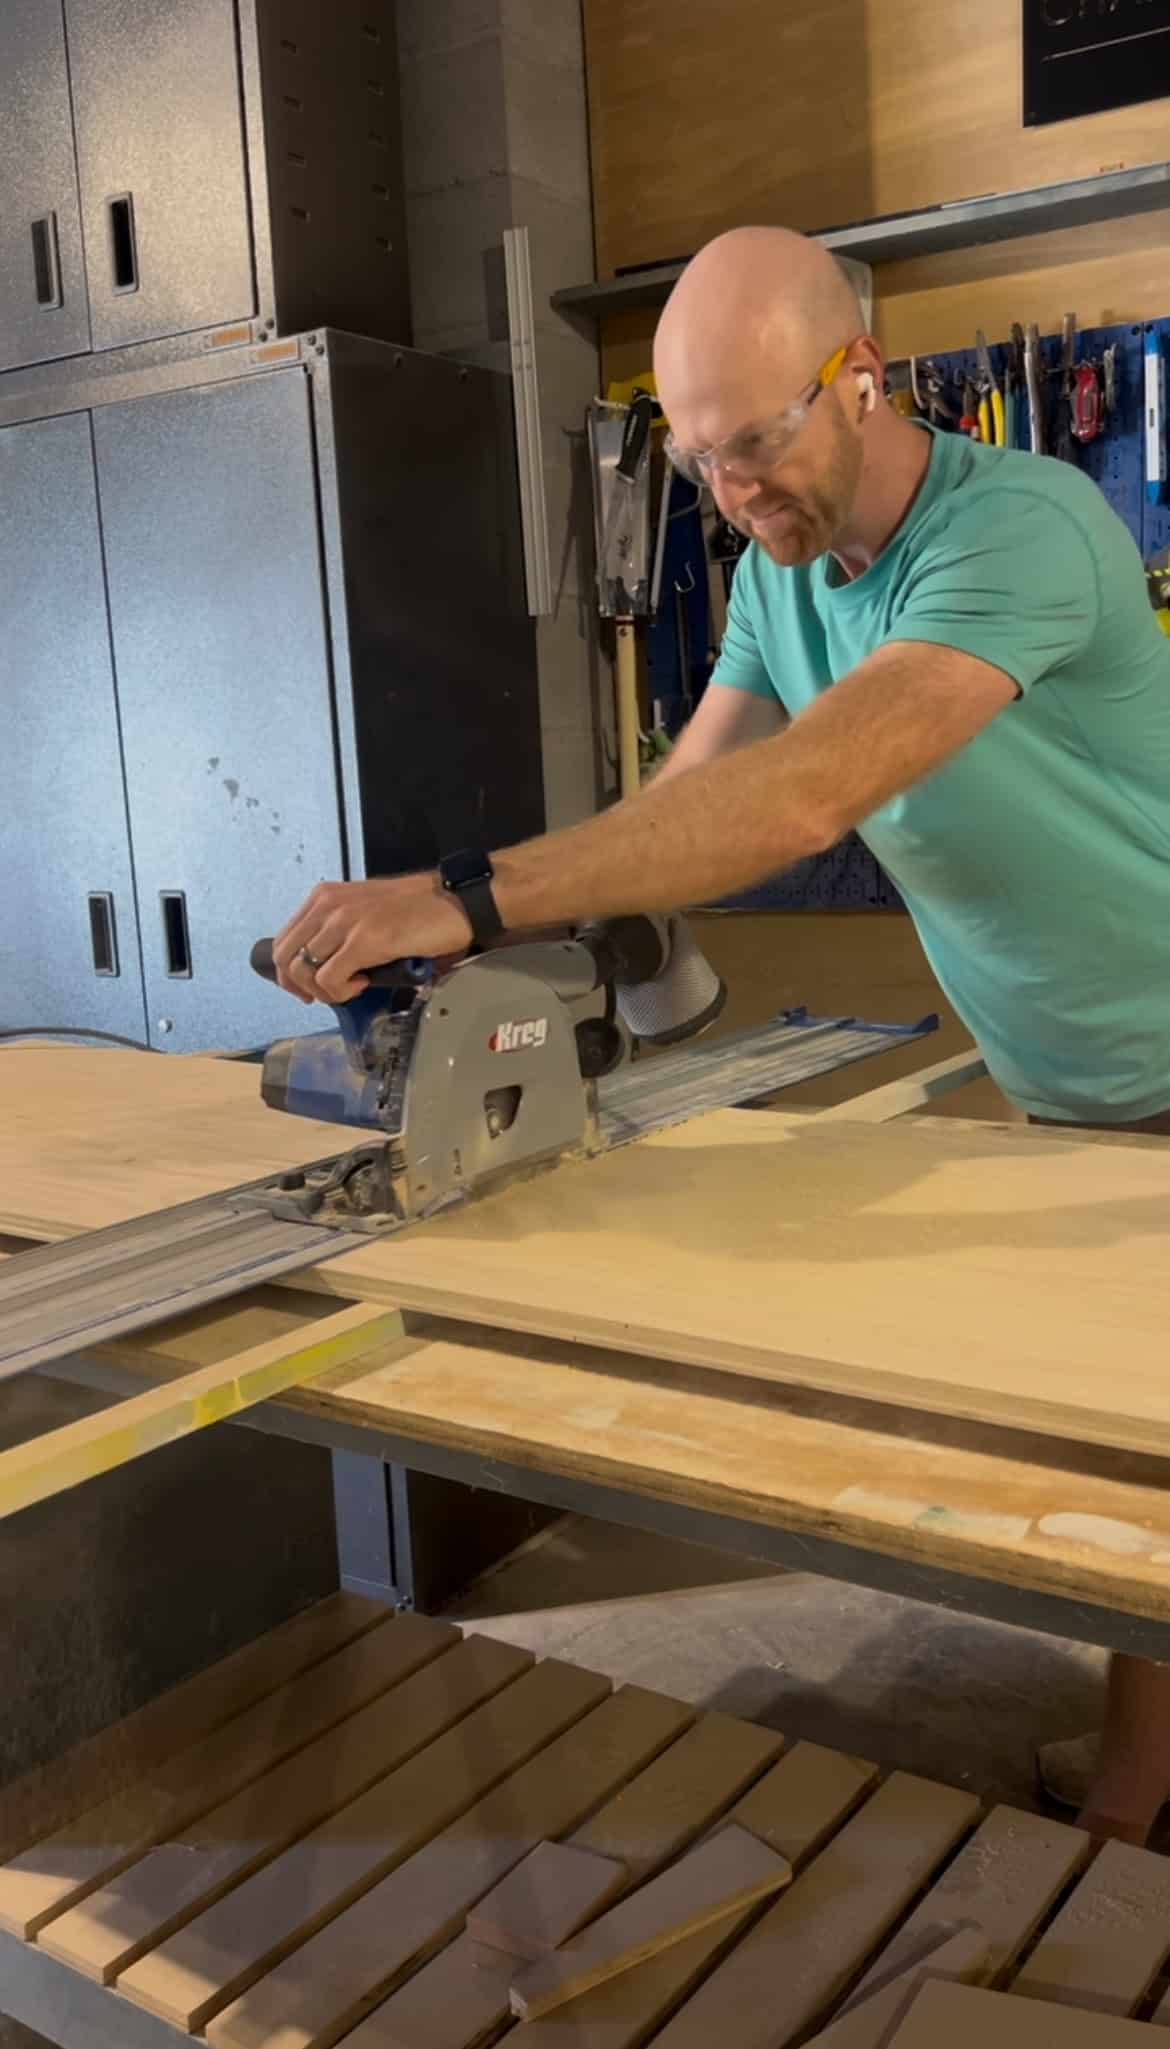
- Kreg ACS Track Saw and track
- Kreg 720 Pro Pocket Hole Jig
- Wood glue
- Oil or stain
- Cube storage baskets
- Short baskets
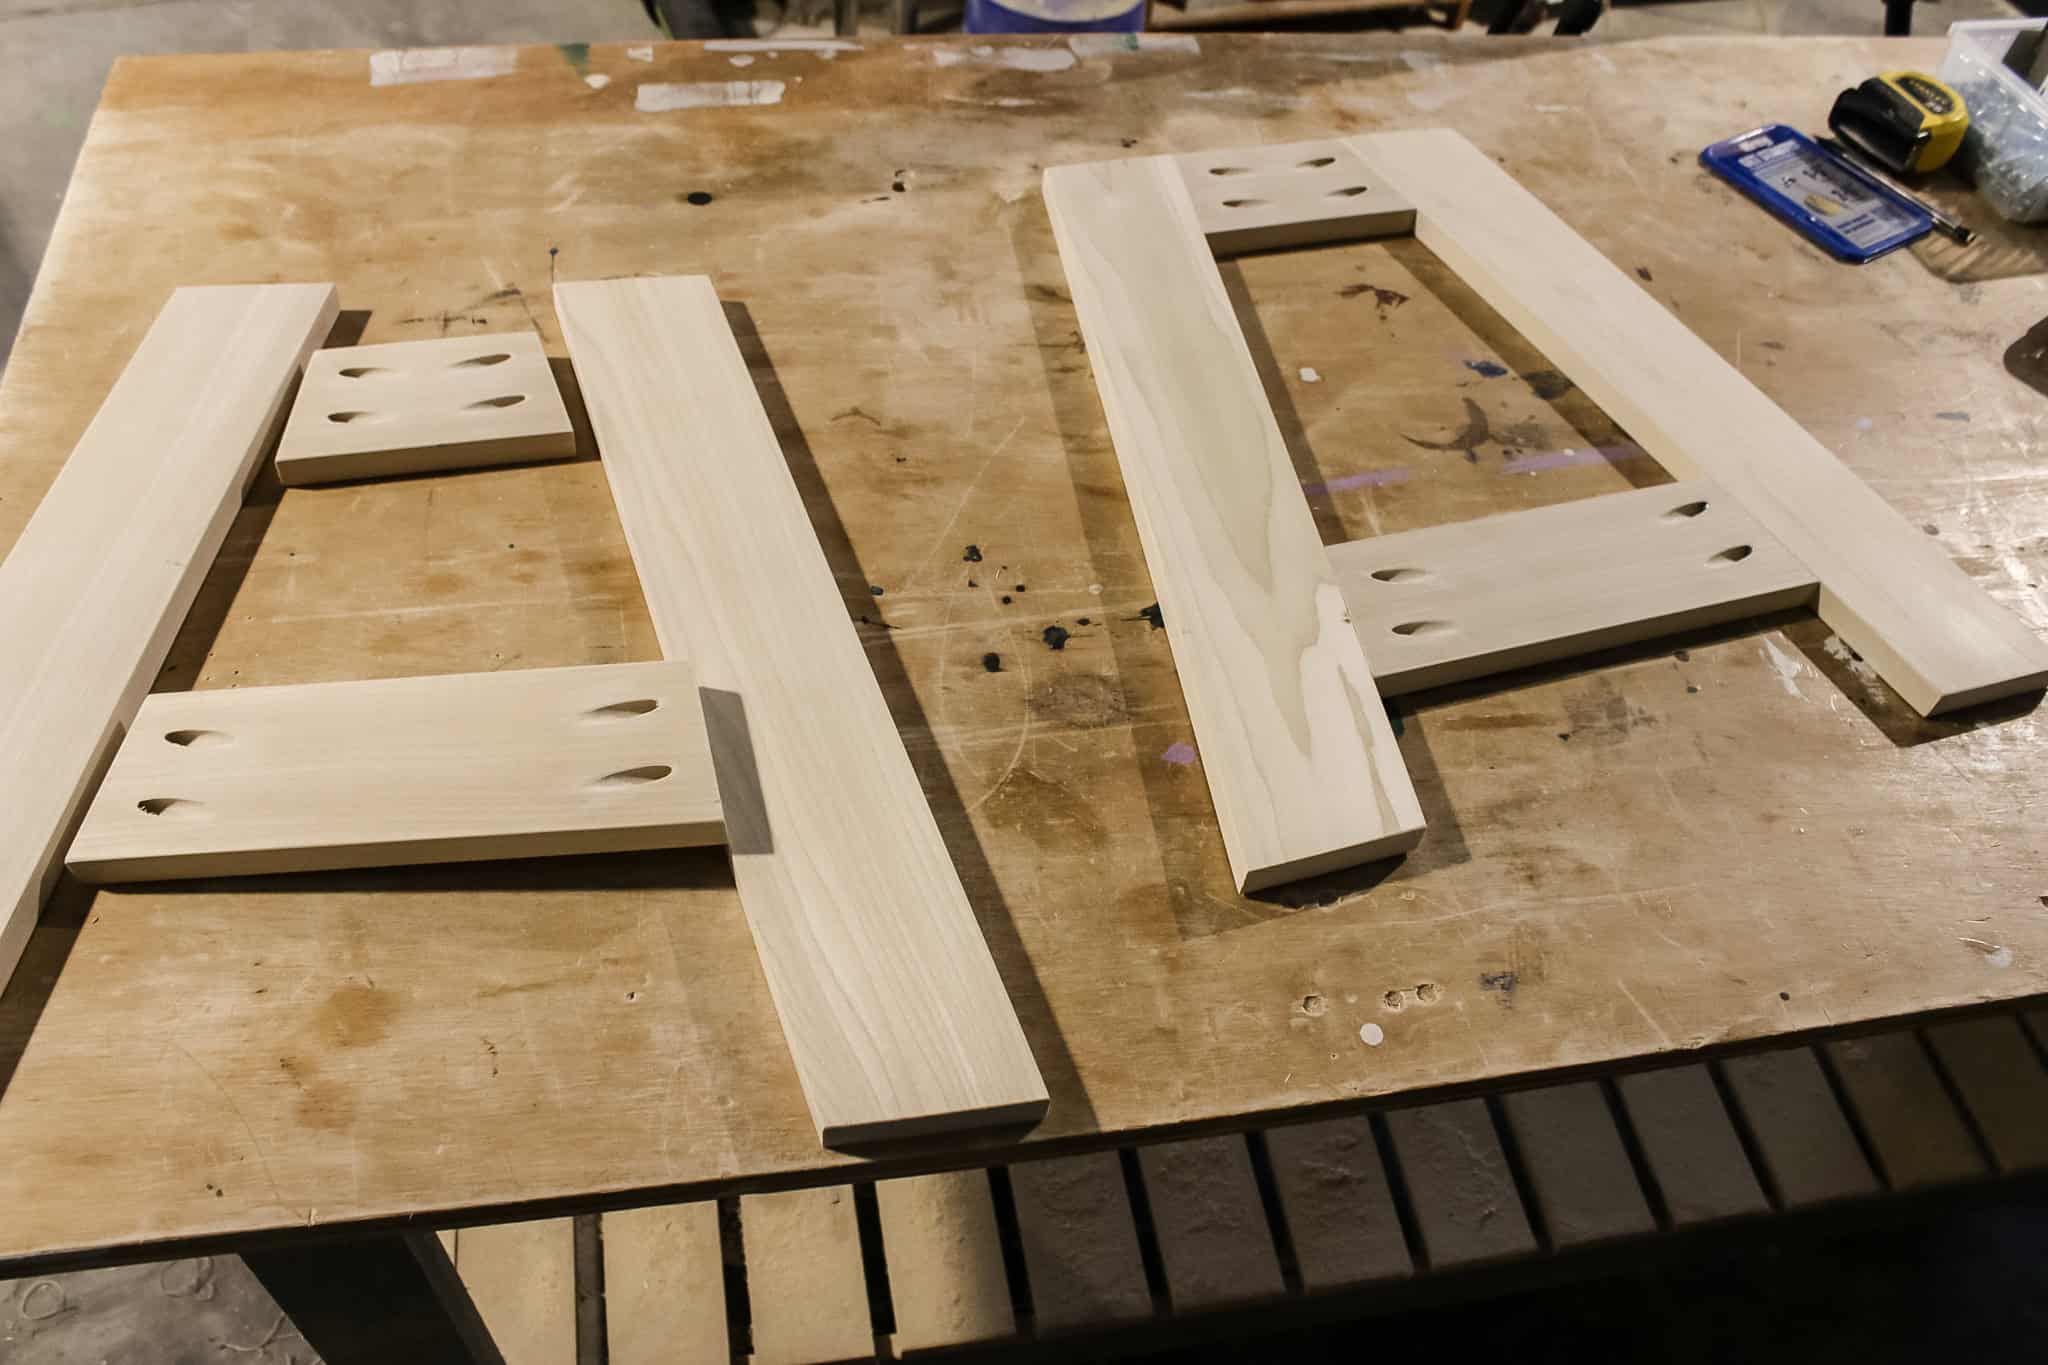
Step one: make cuts and drill pocket holes
When I'm doing a project, I like to make all my cuts and drill all my pocket holes first so that I can sand everything in bulk as well.
To do all that though, you'll need to make sure you have all the cuts done right and the pocket holes in the right places. That's where my free woodworking plans for this project come into play!
My woodworking plans for this DIY cube storage table include the full material list, cut list and step-by-step instructions with imagery so you can feel confident you made all the right cuts the first time.
Since you're ripping down huge pieces of plywood (and I used oak, so it was real heavy), I recommend using the Kreg ACS plunge saw and track system to cut everything down.
I've used a lot of saws and I think the Kreg plunge saw makes the smoothest cuts on the market, but its power and ease of use is why it's perfect for cutting plywood.
Then, I lined up everything for drilling pocket holes. Since I was the pieces for this build are all fairly large, I put everything into my Kreg 720 Pro for drilling.
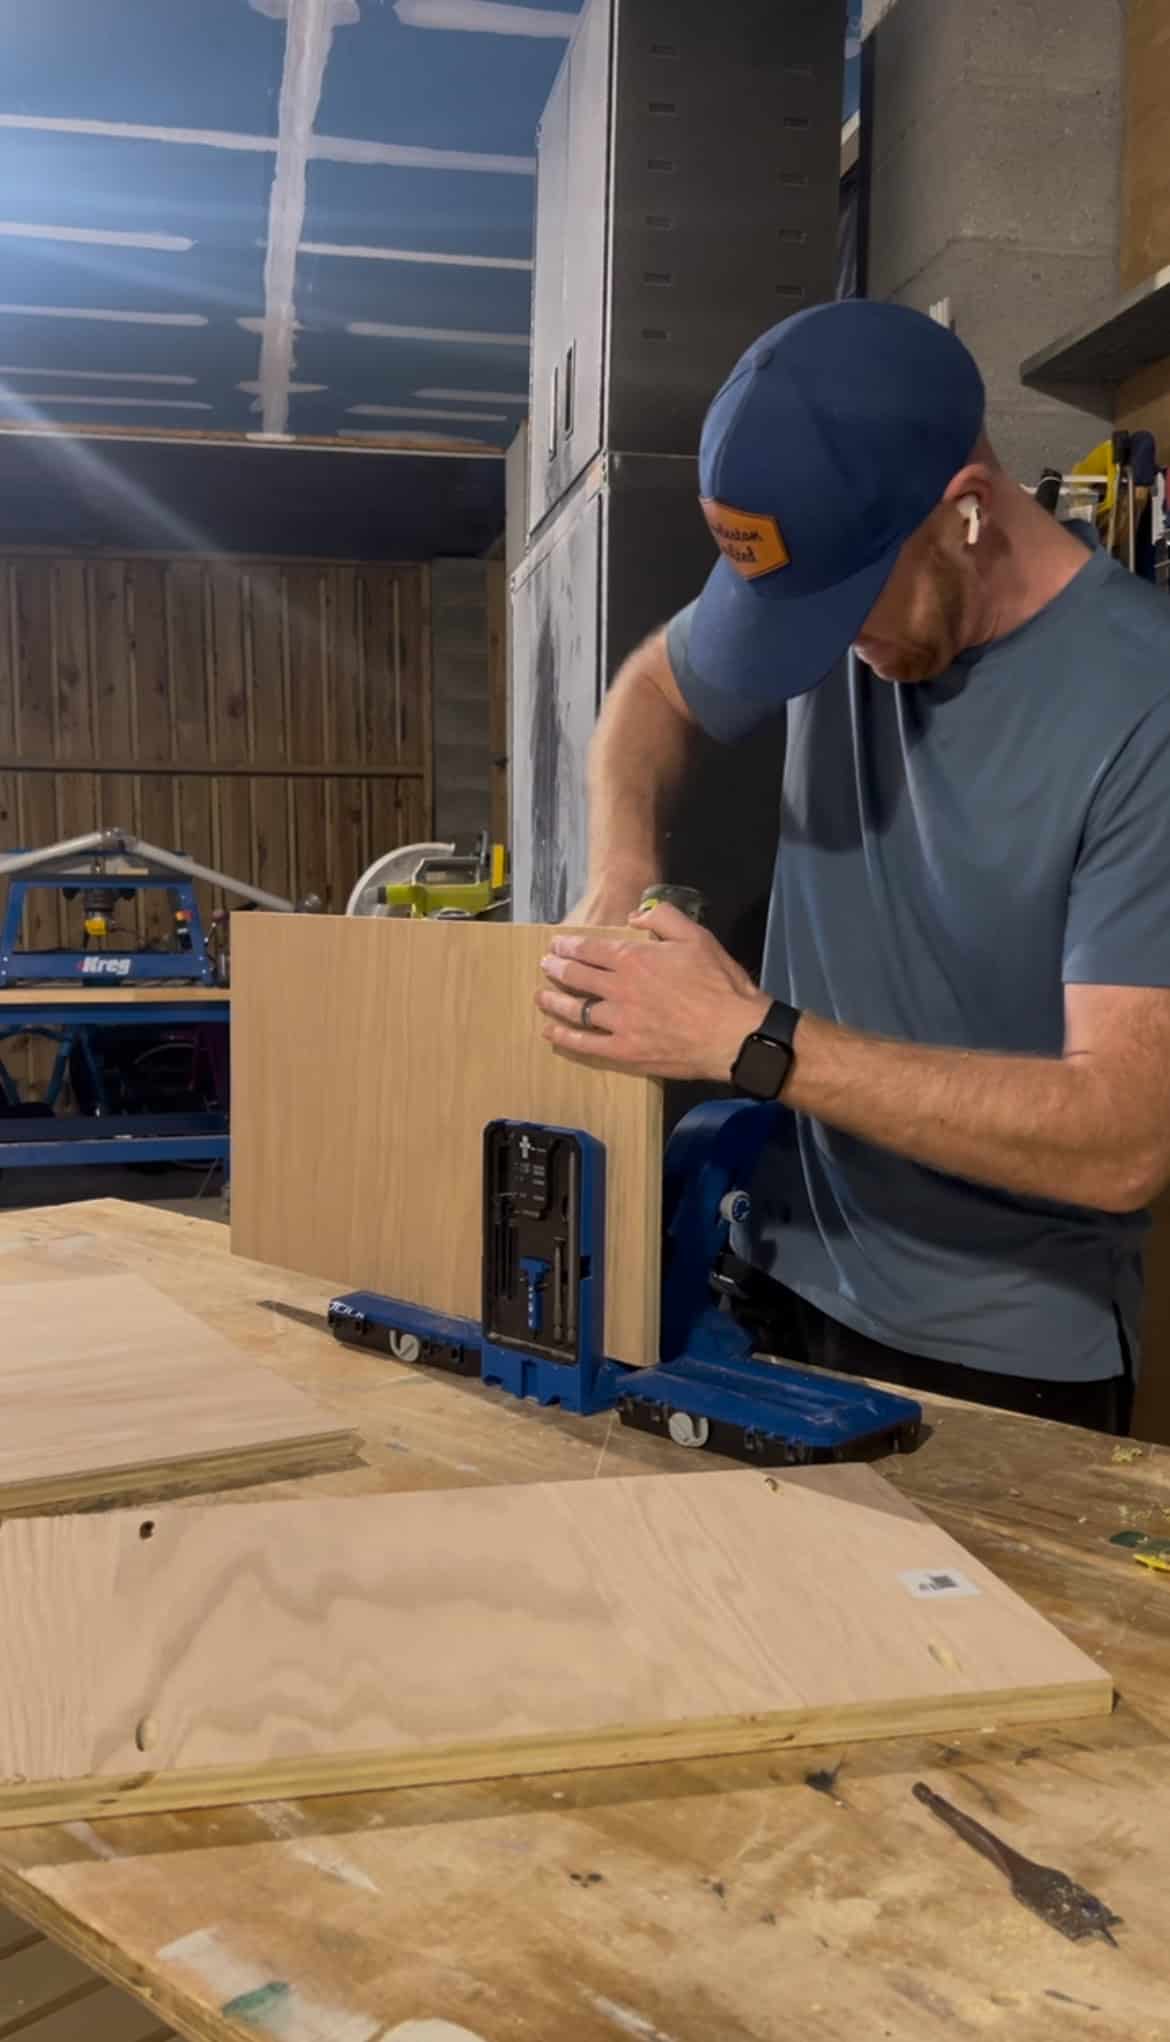
If you done want to handle the pieces like that though, you could also grab the portable Kreg 520 and and clamp that directly to your wood so it's a little easier.
Read how I compare the Kreg 720 and 520 pocket hole jigs!
Step two: build base
Then I sanded everything down and added the edge banding here so it would be easier to cut off versus adding it at the end, but to each their own.

To start construction, I used wood glue and 1 ¼" pocket hole screws to attach the sides of the box to the bottom piece.
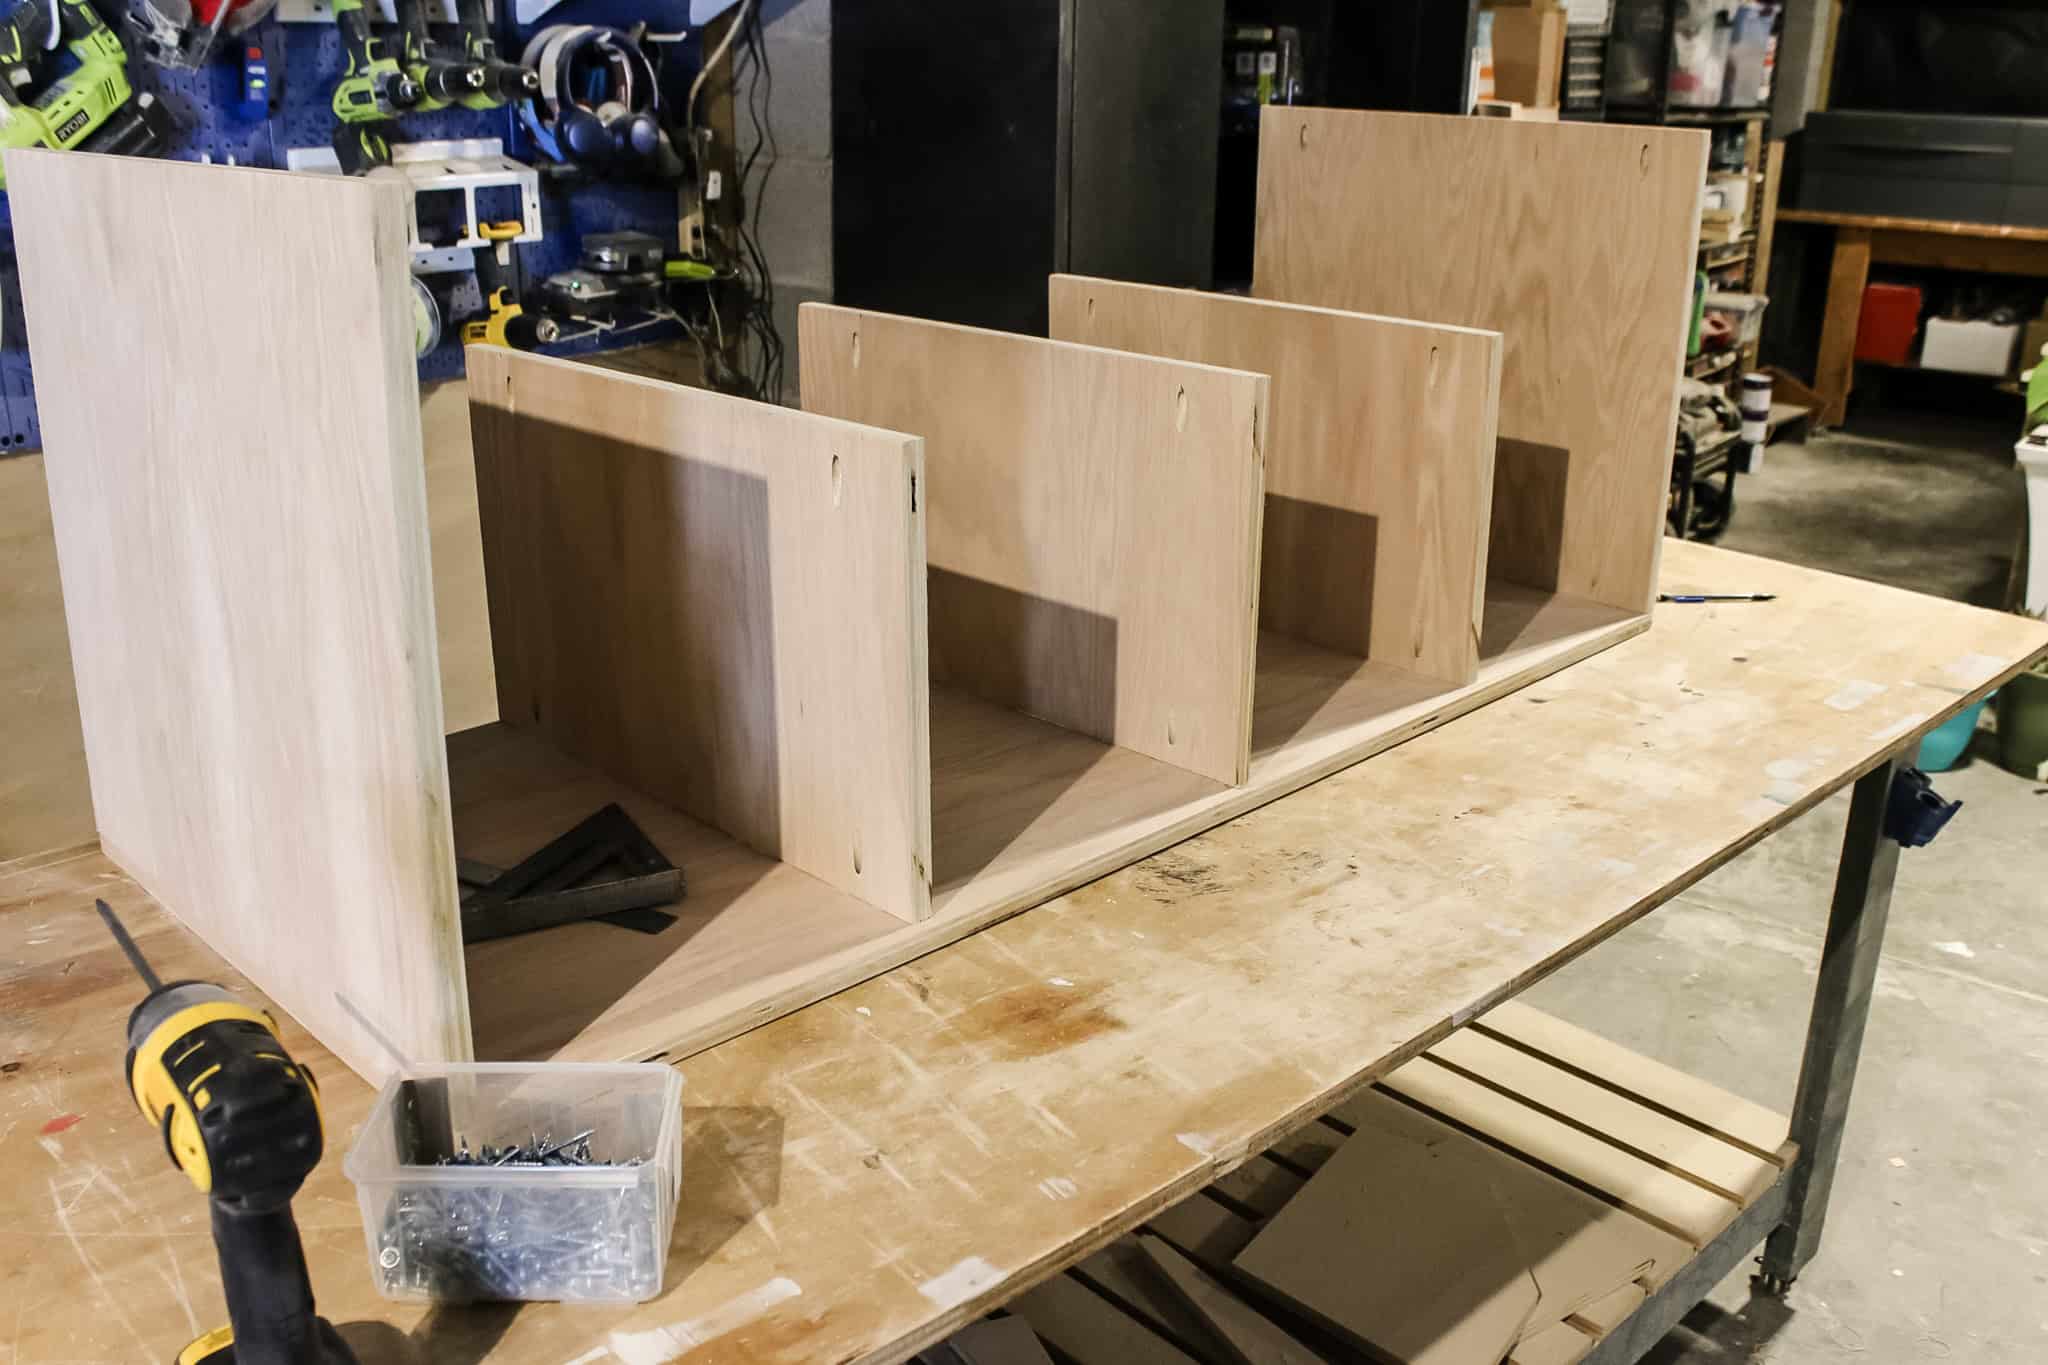
Step three: add dividers and shelf
Once the base was established, I added the three large dividers on the bottom with wood glue and pocket hole screws.
This build is designed to have 13" of space between the dividers so that the 12" cubes would fit and have a little bit of space on each side.
Then I added a shelf above the big dividers and attached the smaller dividers to that, lined up directly with the big dividers underneath.
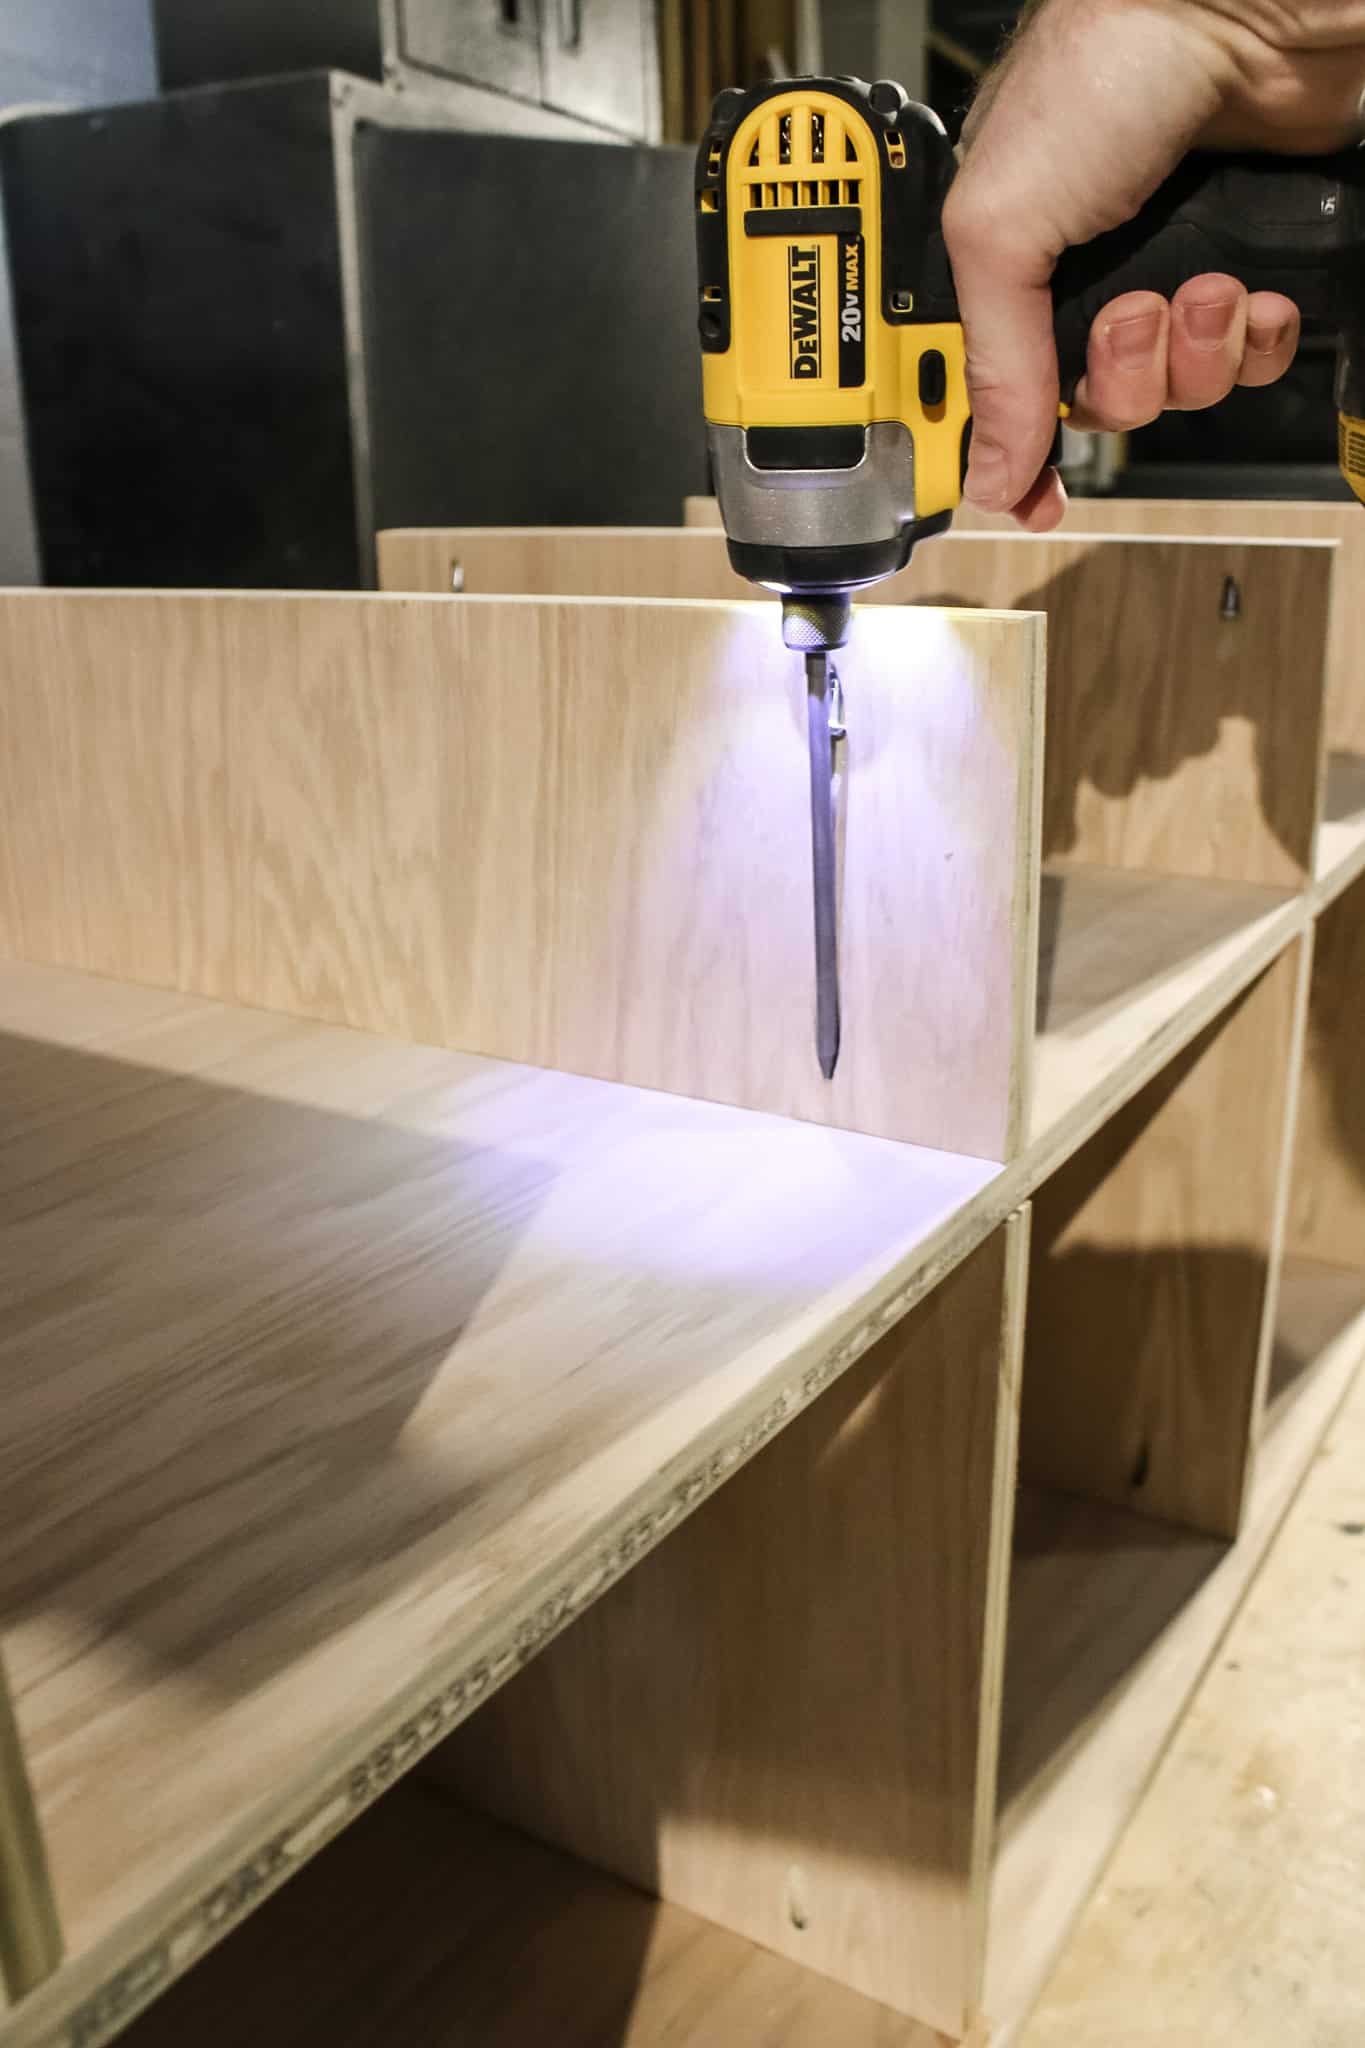
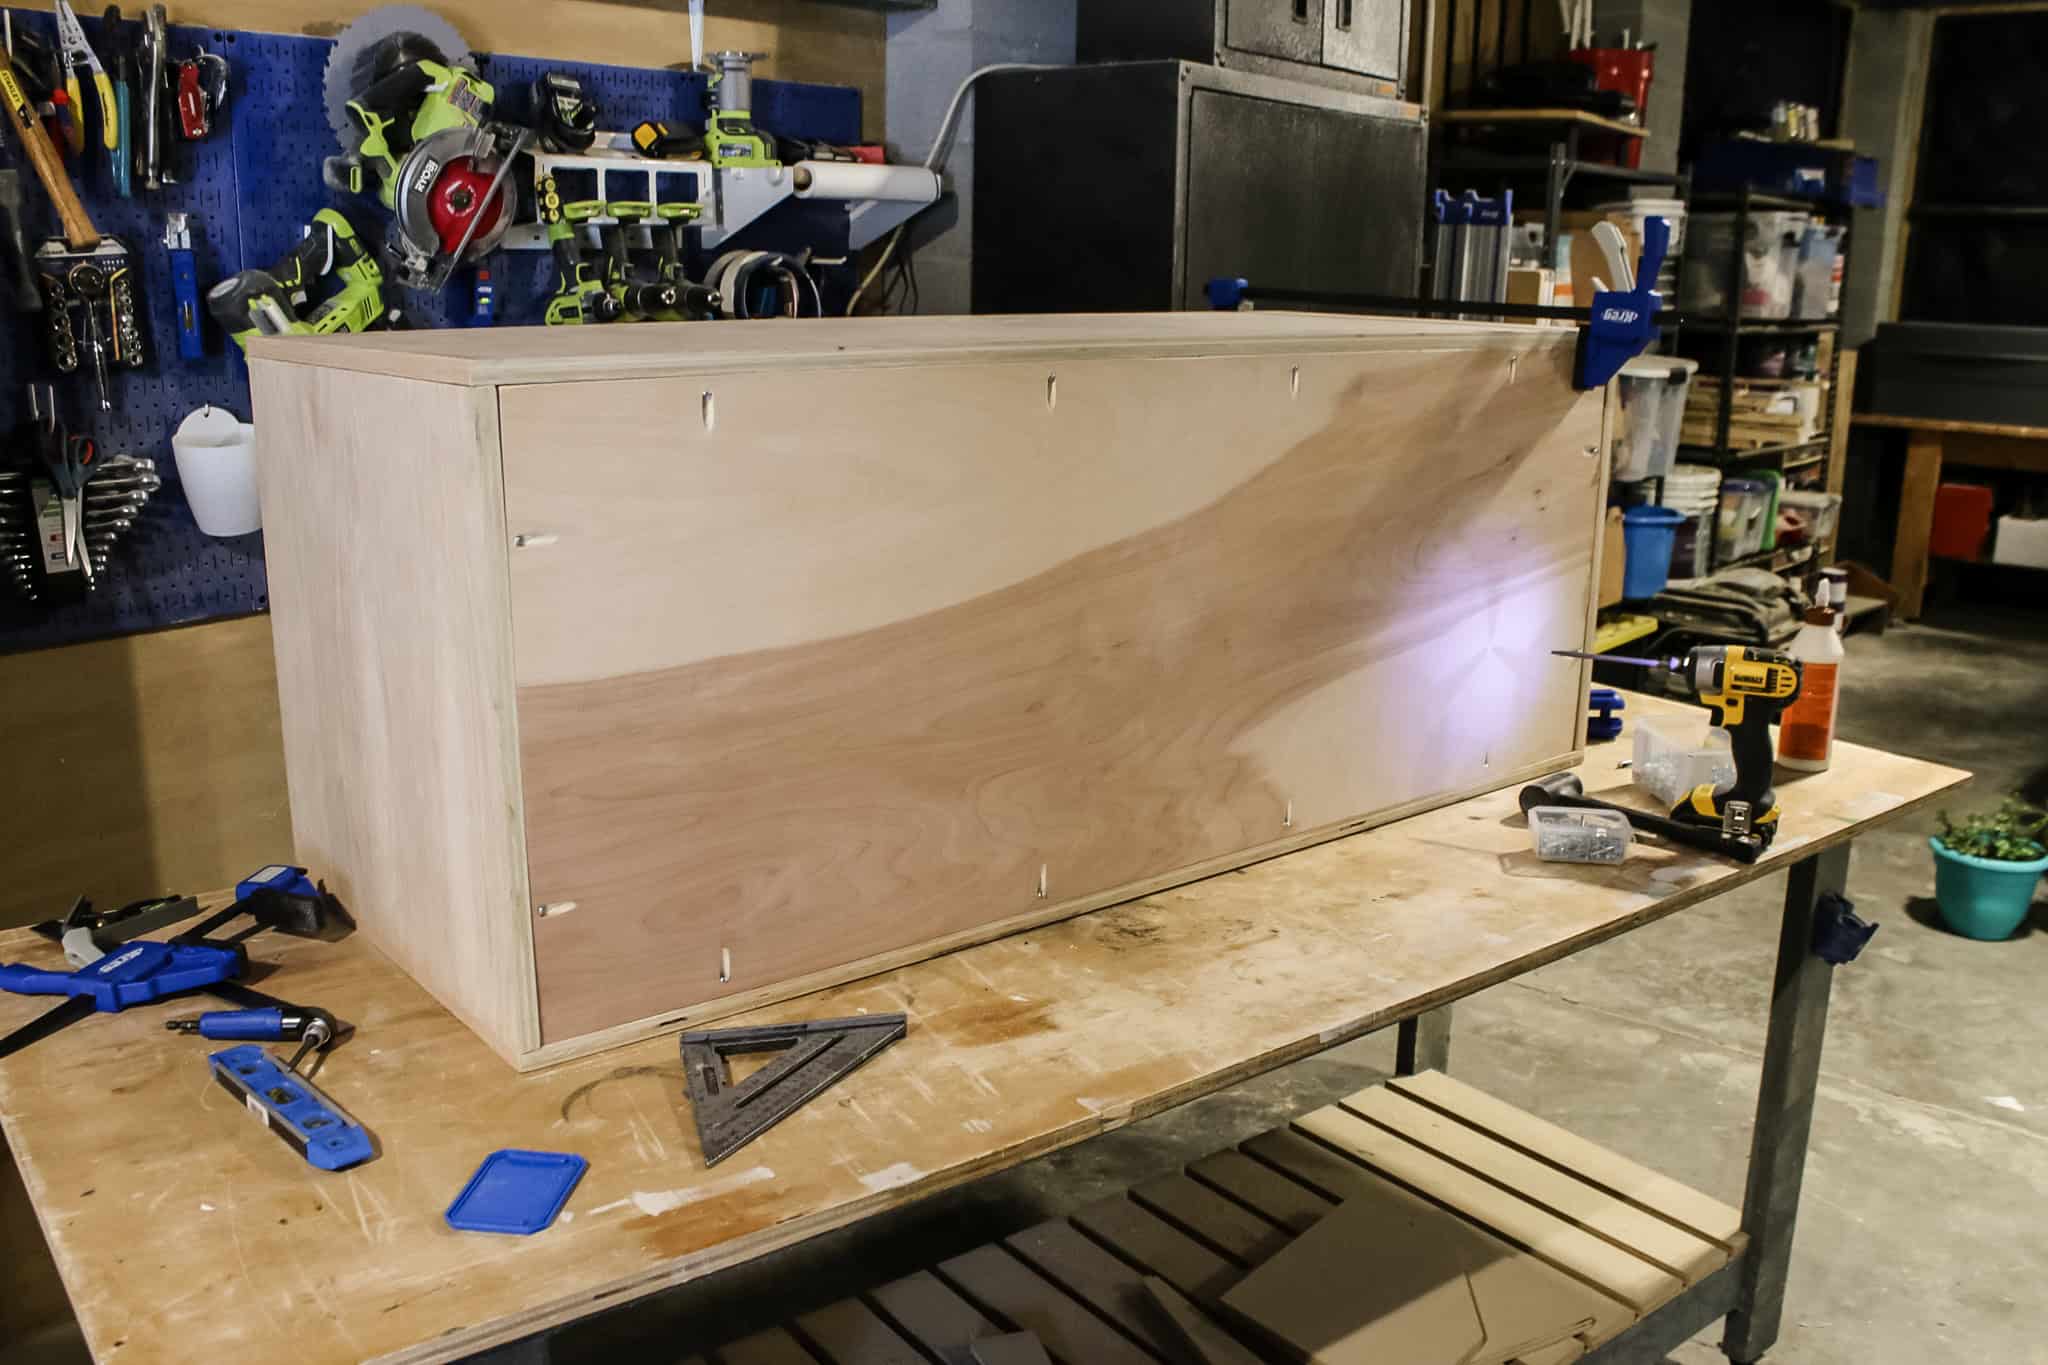
Step four: add top and back
I finished off the box by attaching the top to the sides and smaller dividers using wood glue and pocket hole screws.
Then, I slide the back piece into the gap inside the box and attached that to the sides, top and bottom so that you couldn't see through the piece.
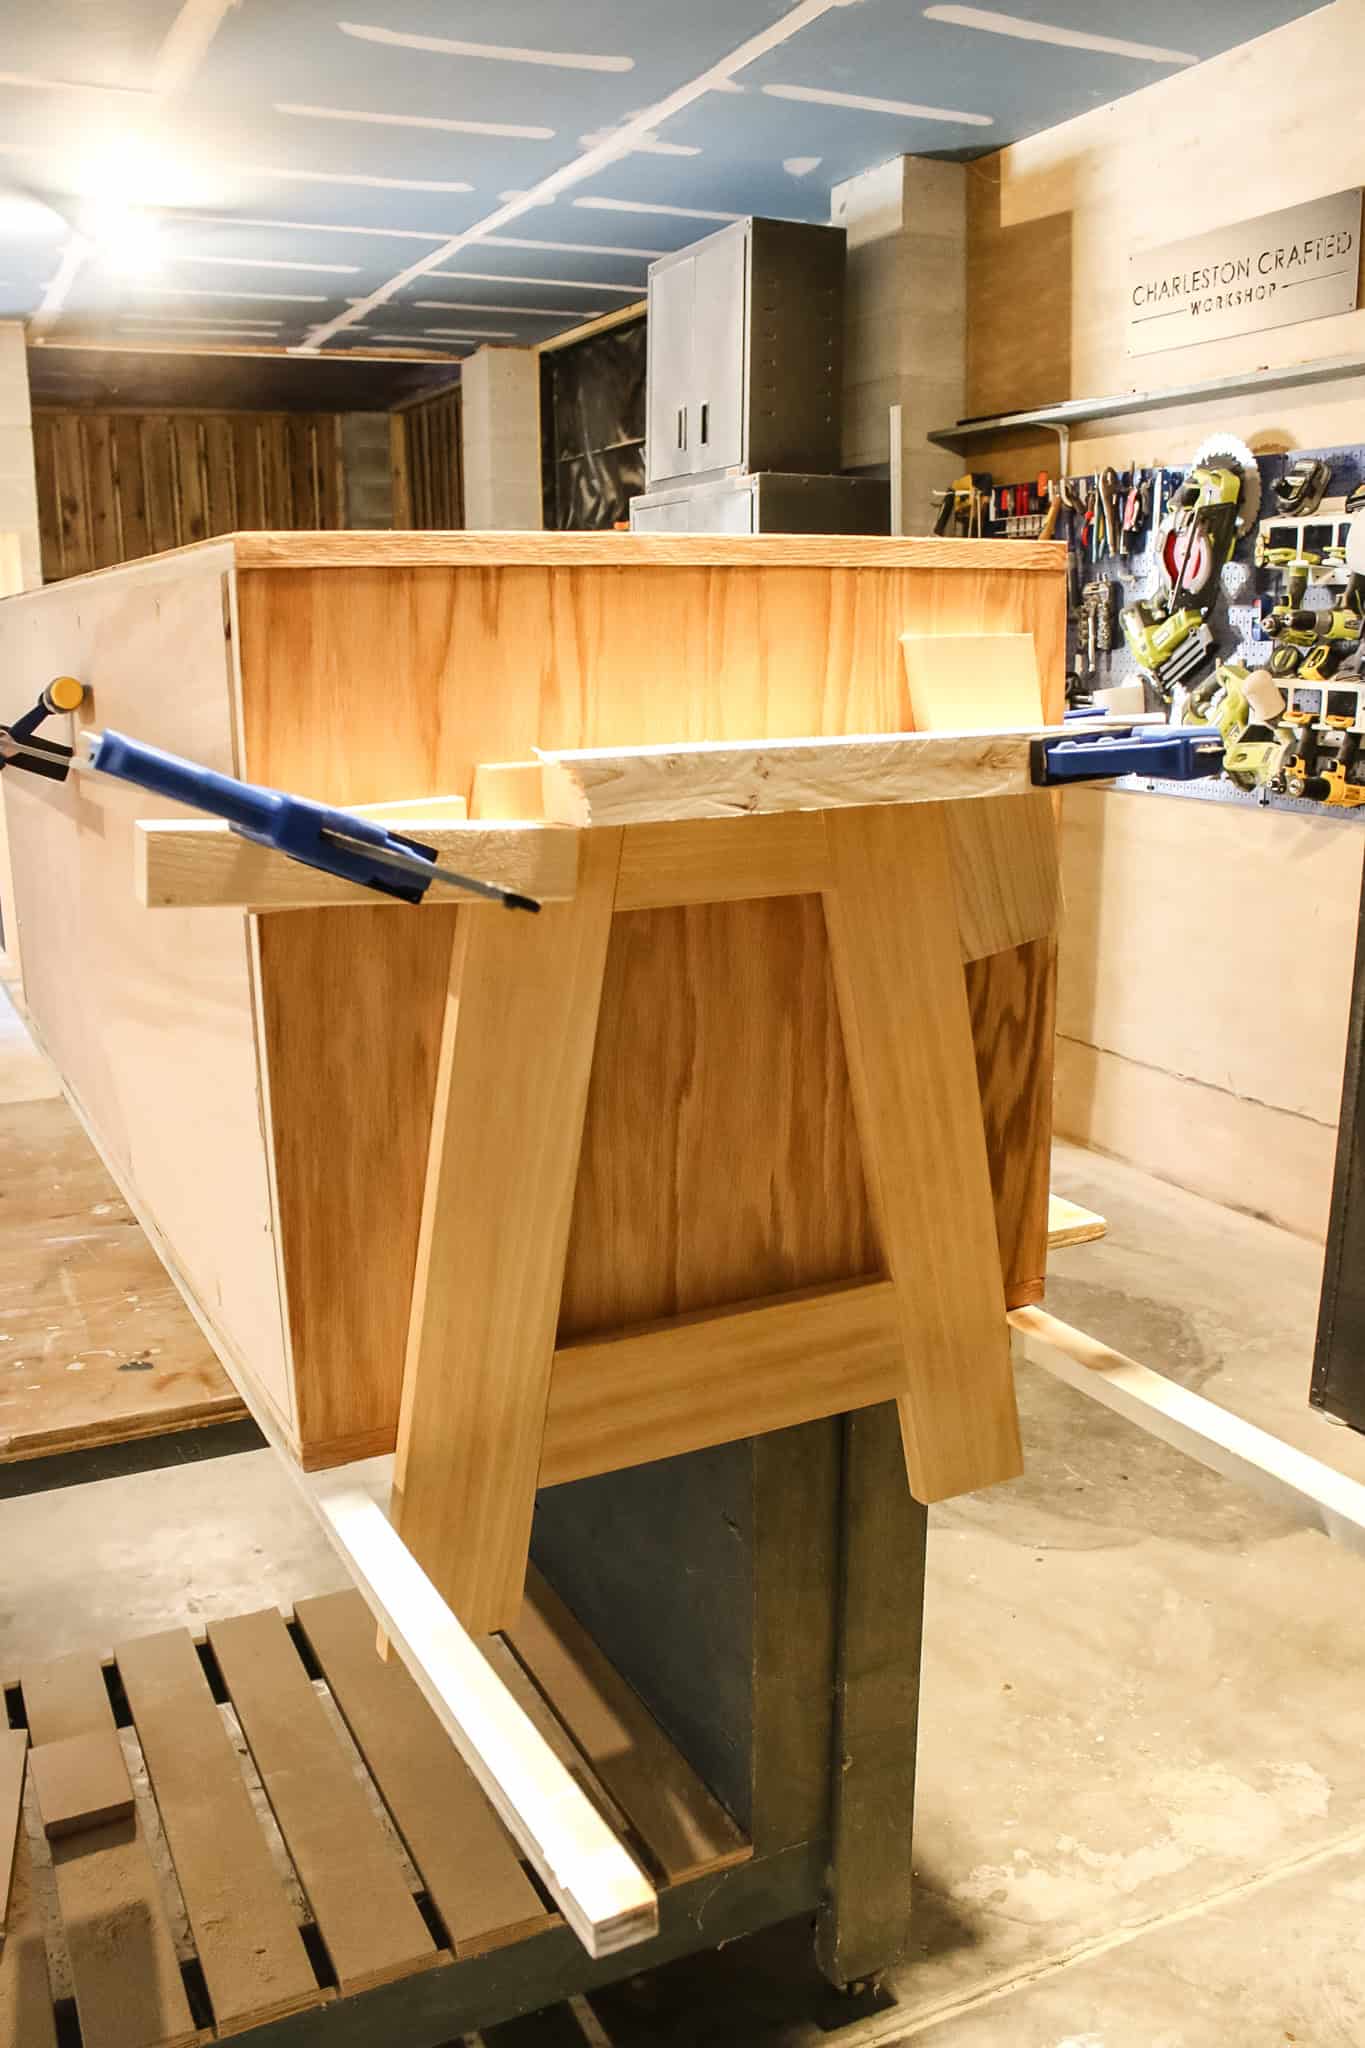
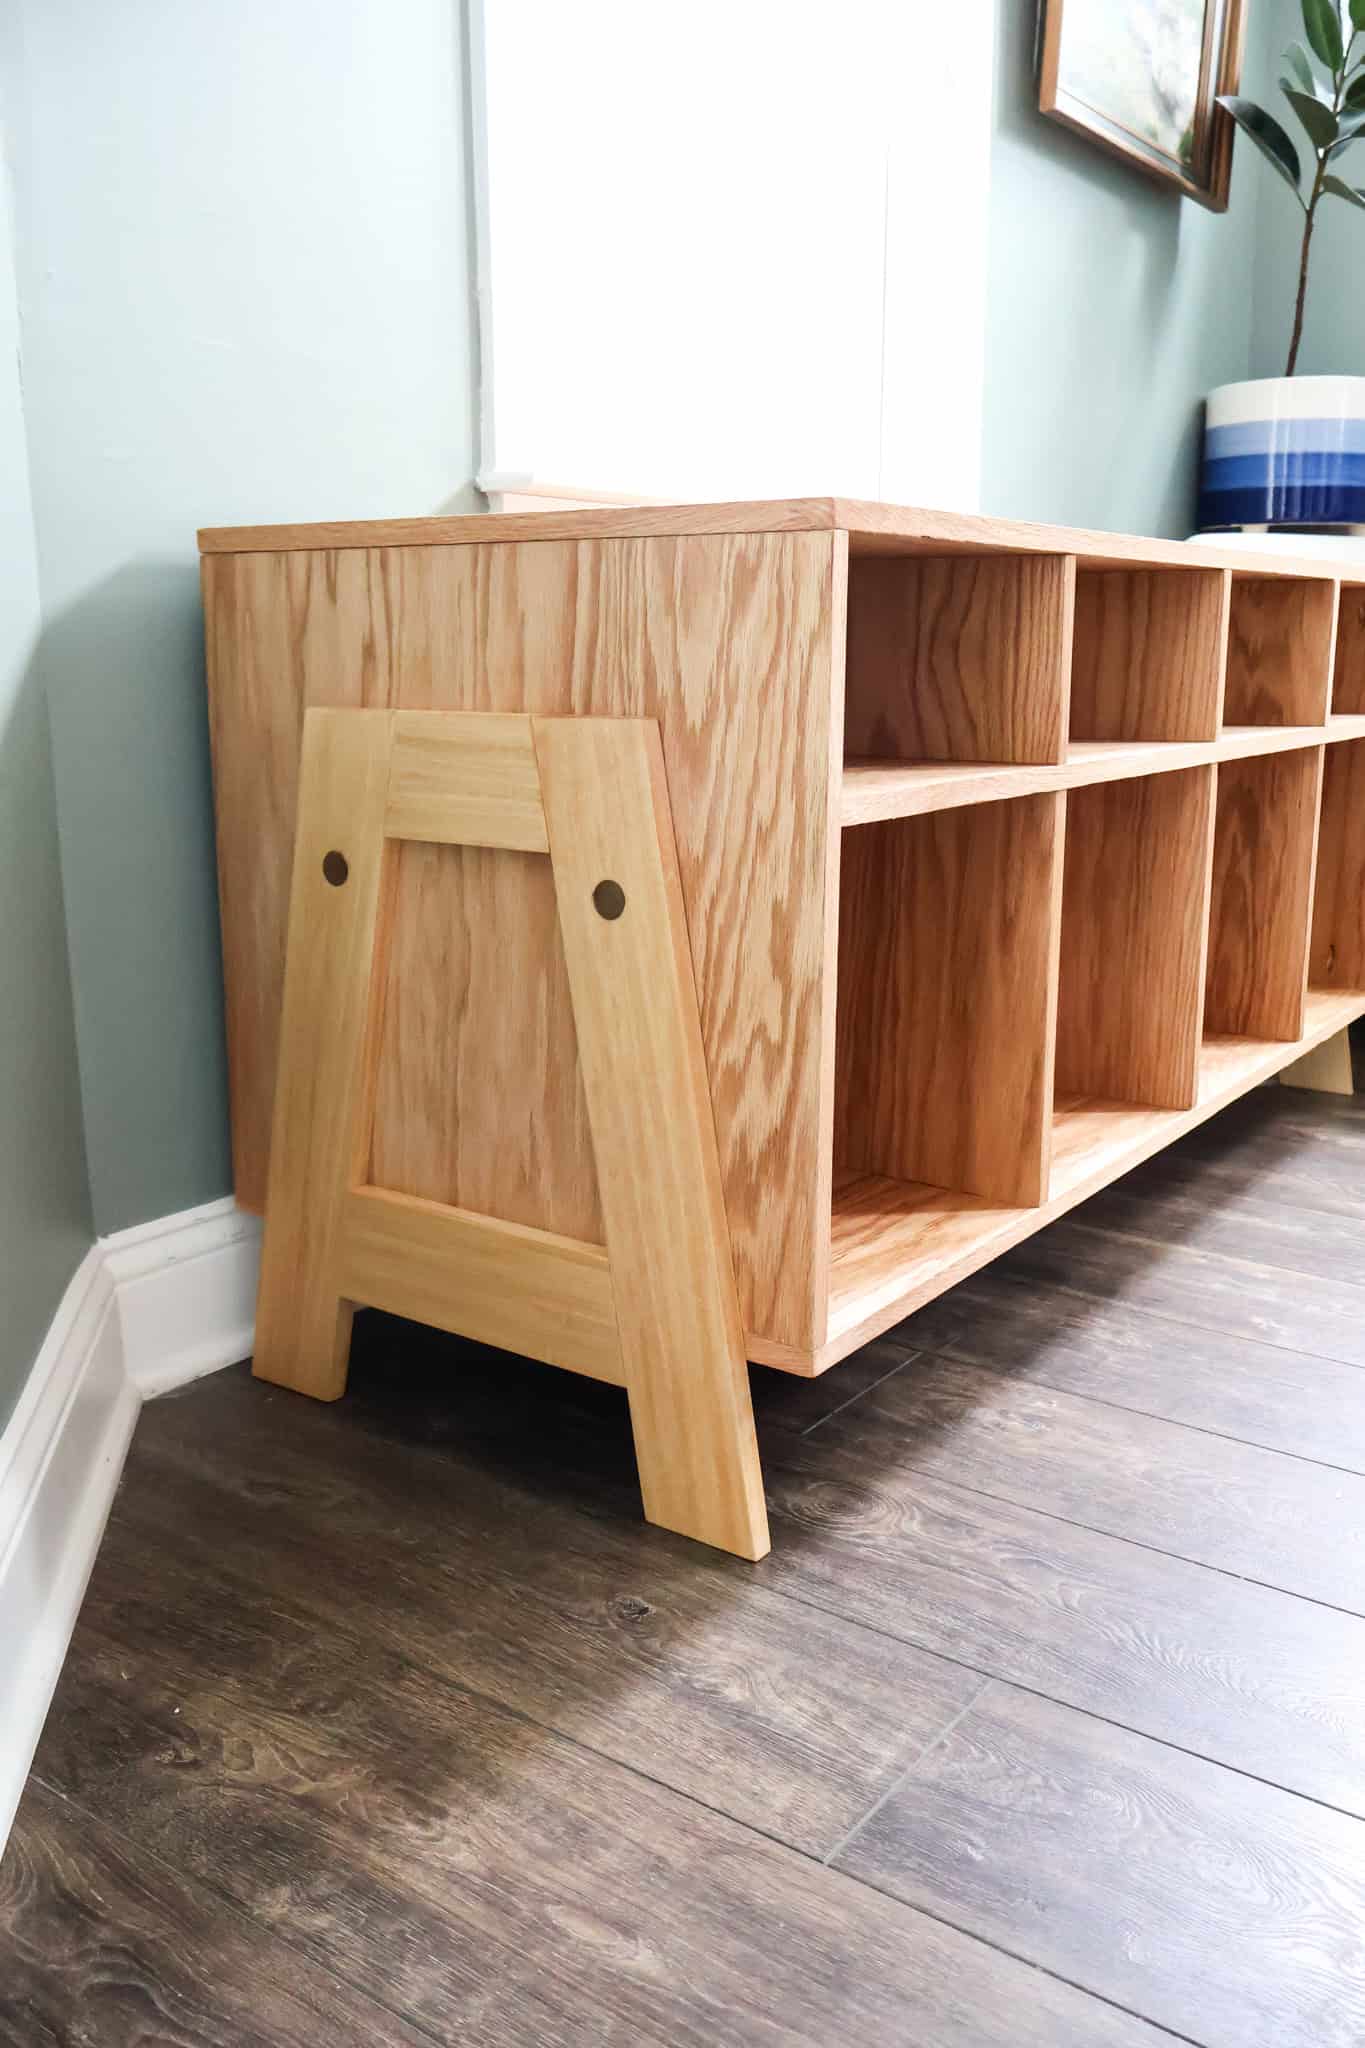
Step five: build legs
I decided to do something a little different for the legs on this piece. Instead of just attaching legs to the bottom of the table, I wanted the legs to be on the outside of the piece to be a statement.
The legs are a simple little midcentury design, with angled legs and two braces going between them on each side. They are put together with wood glue and pocket hole screws, but just wait on how they are attached.
Step six: attach legs
Alrighty, so attaching those two leg sets gets a little tricky, just so that they can withstand the weight of the table while being on the outside of it.
I actually attached the legs in three different ways. The first is just with wood glue all over the back of the legs and pushed against the sides, leaving 5" hanging down to give me room to slide the walking pad underneath.
Next, I used pocket holes on the underside of the base directly into the legs.
Finally, after the glue was dry, I drilled a 1" hole through each leg and through the sides. I pushed some 1" dowels into the holes with wood glue, then sawed them flush and sanded them smooth.
Step seven: oil, stain or paint
I opted to cover my entire piece with tung oil to give it a rich, solid finish and match some of the other oak pieces in our house. You could instead stain and poly or even paint your piece if you prefer!
DIY cube storage table woodworking plans
If you love this project, you're in luck because I've made the woodworking plans free!
I've partnered with Kreg Tool to put my DIY cube storage organizer woodworking plans on their Projects and Plans page. Here, you can get my free plans, plus dozens of other free plans for anything you can imagine to build.

Have a great time doing this build and let me know if you have any questions!

Looking for something?
We've been doing this since 2012 so we have a LOT of blog posts!
Search stuff like: Ceiling Projects | DIY Plant Stands | Thrift Flips

Hello, I'm Morgan, half of the creative force behind CharlestonCrafted.com! With a passion for DIY that dates back to 2012, I've transformed three homes and now I'm dedicated to helping others craft their dream spaces. Let's turn your house into a home together!