Renovating your bathroom and not sure how to mount your sink? Here's the tips and tricks on how to install and undermount bathroom sink!
We're working on renovating our kitchen and when the countertop people said they'd have a lot of extra stone after doing our counters, they suggested we add a new bathroom vanity.
Of course it cost extra on the labor, but we didn't have to lose out on thousands of dollars worth of material. Plus, the bathroom vanity in our primary bathroom matched the granite we were replacing in the kitchen that we hated, so it seemed like a great option.
Long story short, I tried to remove the old sinks from the old vanity and accidentally broke one of them and I couldn't find an exact match, so I had to buy two new sinks. But, of course the only one that fit at Lowe's only had one in stock, so the countertop guys only installed one and I had to install the other one a few days later.
Installing an undermount sink is definitely a job you can do alone, but it's best to have a helper. But you can save hundreds of dollars versus hiring it out and get this done for yourself.

How to replace a bathroom sink
Replacing a sink that sits on top of the vanity is a much easier job as it literally just sits down on top of the counter. But an undermount sink is basically the same concept, just a little harder to do.
Before I get into the steps on this, take note that I'm talking about installing a new sink to a new vanity top. If you are reusing the old vanity top, that's fine too, but you need to make sure that all of the old silicone or adhesive is completely removed from the underside of the countertop before you start the install.
Materials needed to install an undermount bathroom sink:
Here's what you need to knock this project off your list:
- Silicone adhesive
- 2x4 board that can reach across your sink hole
- Bar clamp with removable end
- Sink clips
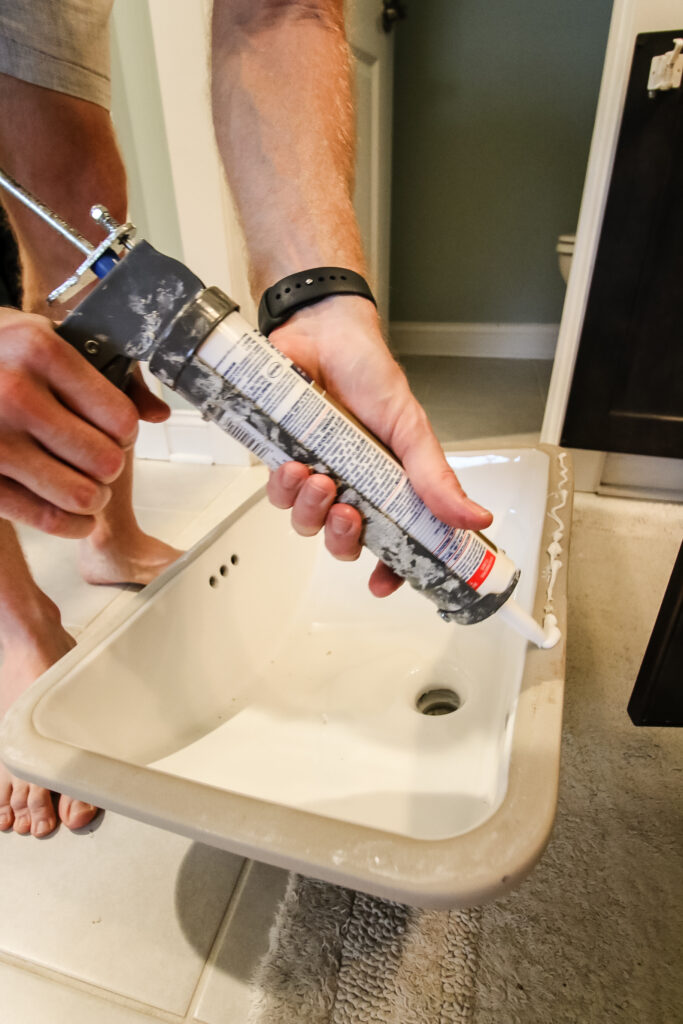
Step one: apply silicone to sink
Start out by applying a healthy amount of silicone to the top of the rim of the sink.
You don't want to skimp here because this is going to be the main hold of the sink onto the underside of the vanity. But also don't put so much on that it's going to be squirting out all over the counter when you apply pressure. So just a nice healthy amount.
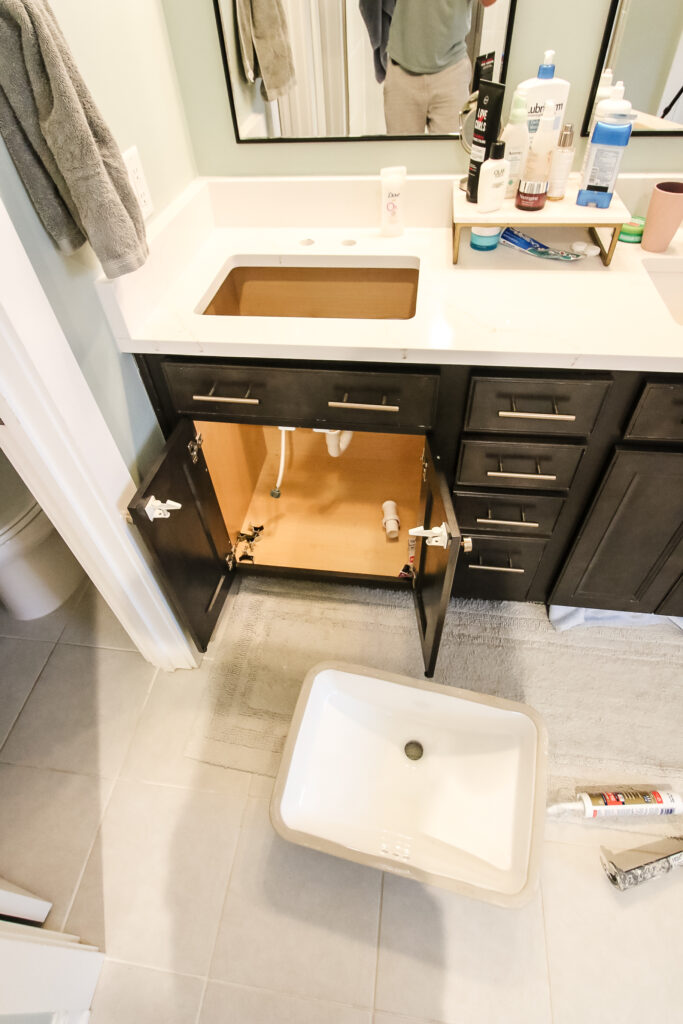
Step two: position sink in place
Next up, slide the sink up underneath the counter through the cabinet and align it around the sink cutout.
You have some wiggle room here and can definitely move it around as needed, but try to line it up as best you can first before pressing it up against the counter.
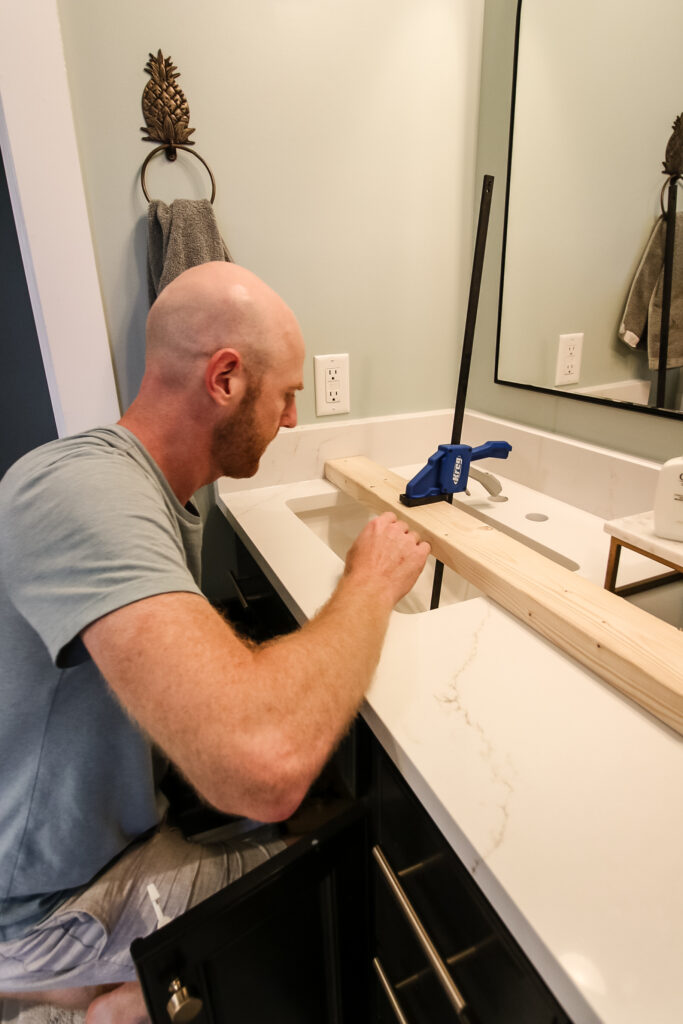
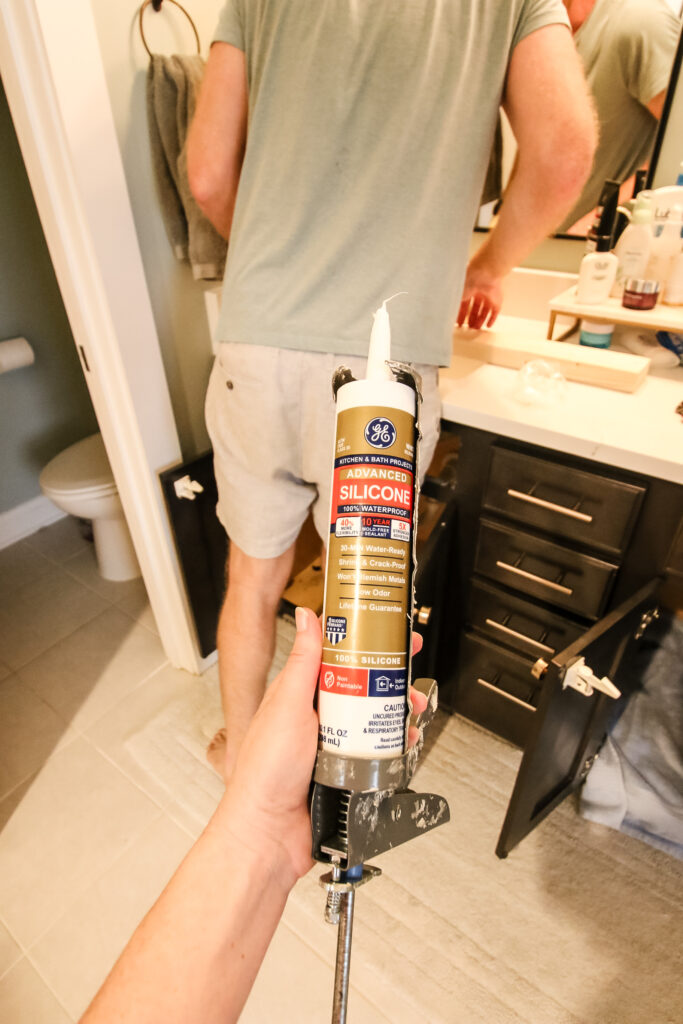
Step three: clamp sink onto board
This step is where it really helps to have a partner. You can do this step alone, but it won't be easy.
First, lay the 2x4 across the sink cutout just slightly off from above the drain hole. Then, take the end of the clamp off and drop the bar down through the sink hole and reattach the end.
Finally, apply pressure to the clamp so it is pulling up on the bottom of the sink and the 2x4.
Preferably, leave this on until the silicone is dry, but leave it on until at least the next step is finished.

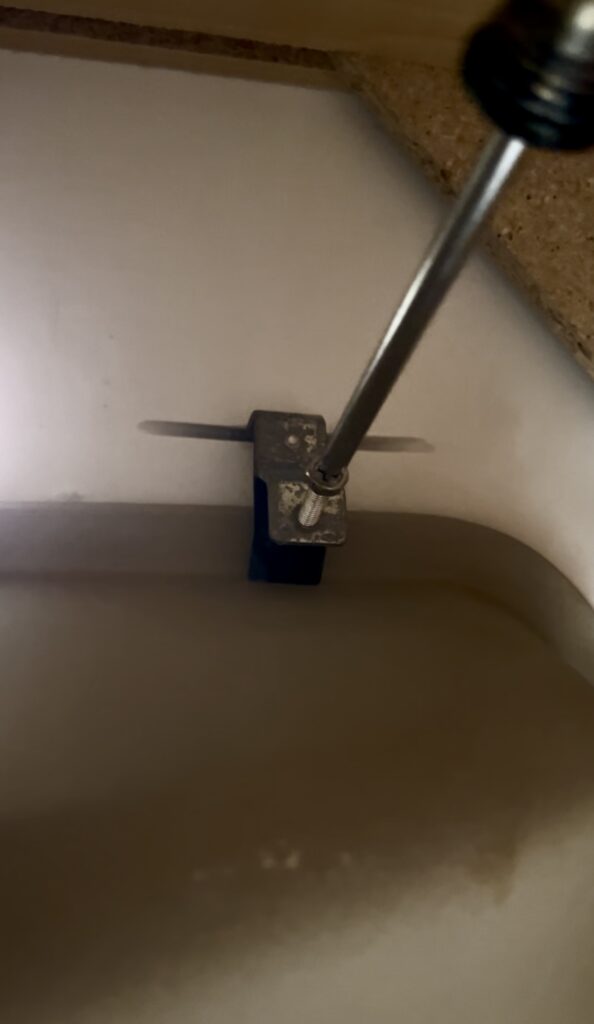
Step four: attach sink clips
Next, attach sink clips to the underside of the sink. Your countertop supplier should have notched out some grooves under the sink that are basically straight lines a couple inches away from the sink hole cutout.
Sink clips work by sliding the one end of the clip into the notch, then tightening the screw on the other end up against the sink rim itself. This creates a tension that keeps the pressure from the sink on the clip and held in in the notch.
Attach two of these on each side and then you can remove the clamp if you want and it should be fine.

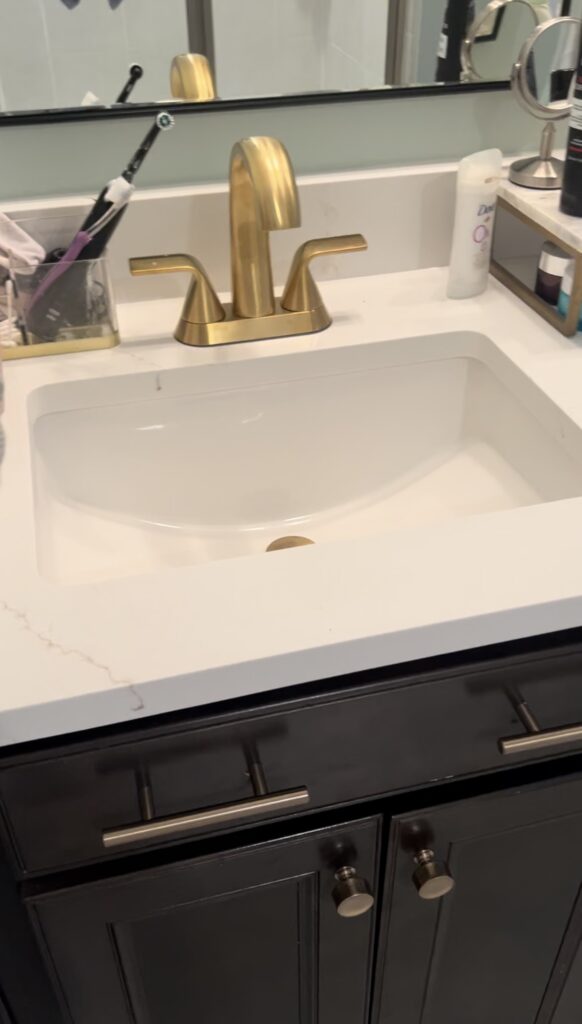
Step five: apply silicone around edge
Take the silicone and apply a small bead round the gap of the inside of the sink basin and the countertop to create a final full waterproof seal.
Step six: reconnect plumbing
Finish everything off by reconnecting your plumbing. Connect the faucet to the water lines and turn those back on.
Then, connect your drain pipe from the sink to the P-trap. You may have to re-angle the P-trap a little bit to reach the new sink placement, but most likely not, if you got a sink that has the drain in the same place.
Can I install a bathroom sink myself?
Yes, you can definitely install a bathroom sink by yourself. However, it would be easier with a helper. But if you don't have a helper, just make sure that the bar clamp end is removed before you are ready to drop it down the drain hole and then you should be able to do the rest one handed.

Looking for something?
We've been doing this since 2012 so we have a LOT of blog posts!
Search stuff like: Ceiling Projects | DIY Plant Stands | Thrift Flips

Hey there, I'm Sean, the woodworking enthusiast and builder behind CharlestonCrafted.com! Since 2012, I've been sharing the magic of turning raw materials into beautiful creations. I love teaching others the art and satisfaction of woodworking and DIY. I try to inspire fellow crafters to make something extraordinary out of nothing at all.