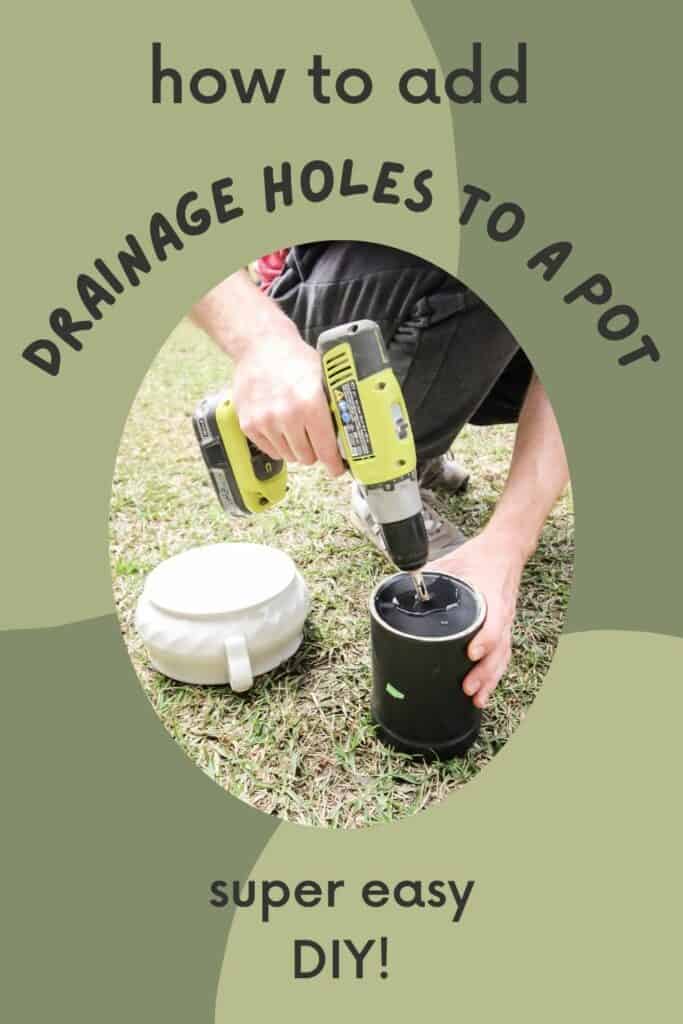
Have a beautiful pot you want to use - but it has no drainage holes? Here's how to drill them yourself to avoid soggy roots!
I love putting plants in pretty, ceramic containers but nice pots can be so expensive!
One of my favorite hacks for getting pots for a bargain is to shop thrift stores.
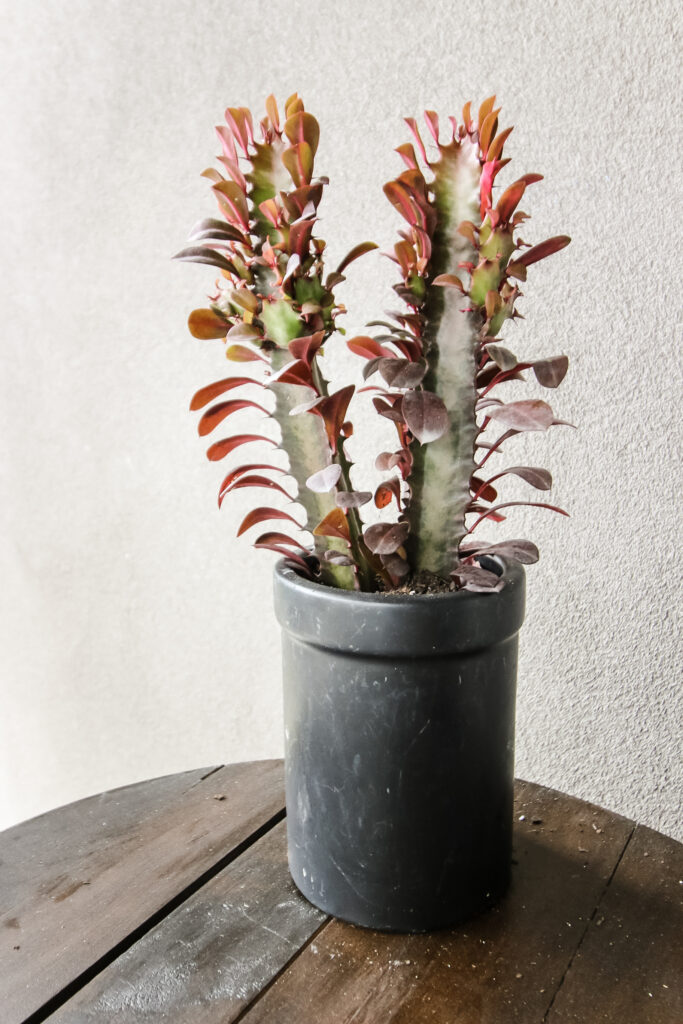
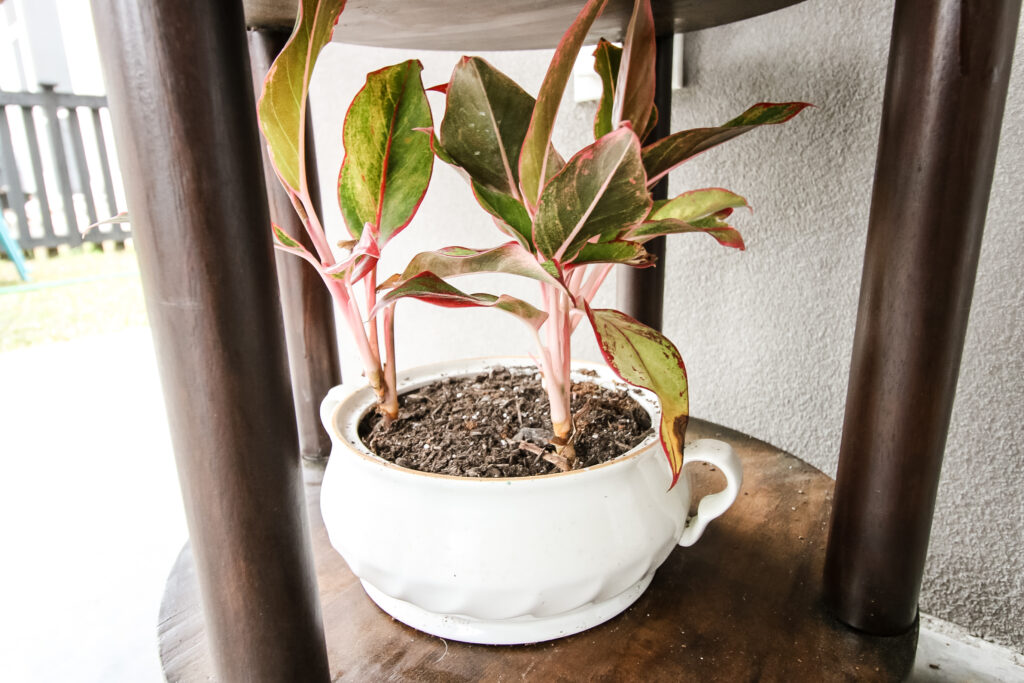
Think beyond pots designed for plants - at my latest thrift shop, I picked up this black canister and a white serving dish to use a pots on our patio.
They cost less than $5 total and are really heavy duty and pretty.
Put, neither container had drainage holes. Obviously - they weren't meant to hold plants. But I am excited to show you how I added my own holes!
Drilling holes in plant containers is an easy way to make your plants happy!
Why are drainage holes so important?
All plants have different needs, but no plants want soggy roots.
When you water plants, water usually settles down to the bottom of the pot. Sitting water can lead to mold or rot.
Drainage holes allow excess water to drain on out and will keep your plant and soil from getting soggy.
Should I drill holes in the bottom of my planter?
Drilling holes in the bottom of a pot is an easy way to add drainage. If there are holes - assuming they aren't clogged by anything - there's no way that your plant will get water logged.
However, drilling holes in your pot is not the only way to add drainage to a plant pot.
Ways to add drainage to a pot:
There are 3 main ways to add drainage to your potted plant.
- Double pot
Place a pot with drain holes (like the plastic nursery pot a plant comes in) inside a larger pot. Water can dribble out the inner pot and it won't get soggy. - Add pebbles to the bottom
Adding a layer of small rocks or pebbles creates open air space where water can settle, but your soil won't get soggy. - Drill holes in your planter
Drainage holes let excess water flow right out.
Beware if you have indoor house plants - put them on a saucer or drip tray if you drill holes in your pot or you risk a soggy shelf or floor!
How to drill a hole in a ceramic pot:
Supplies needed:
- Diamond drill bit for a ceramic pot (see my guide to drill bits for each pot type below)
- Good drill
- Ceramic pot
- Awesome plants!
How to drill a ceramic pot:
STEP 1: Get a diamond drill bit
If you have a ceramic pot, you will need a diamond drill bit to drill through it.
This is a bit designed for drilling into tile - kind of like a wet saw.
It sounds fancy but they are inexpensive and usually come in a 5 pack. They will fit any standard drill.
STEP 2: Wet the top (bottom) of the pot
Diamond bits are designed to be used on a wet surface, or else they will overheat and can break.
We drilled our pots upside down. This works fine for unglazed ceramic.
If you are drilling glazed ceramic pots, know that this can take off a bit of the glaze for about ½" surrounding the hole.
You might want to drill from the inside down instead of from the bottom if you mind the missing glaze. Just be sure your drill will fit.
STEP 3: Go in at an angle
Start by holding the drill at a 45 degree angle to establish your drilling.
I had a very hard time doing this on our wooden shop table. It was spinning and spinning.
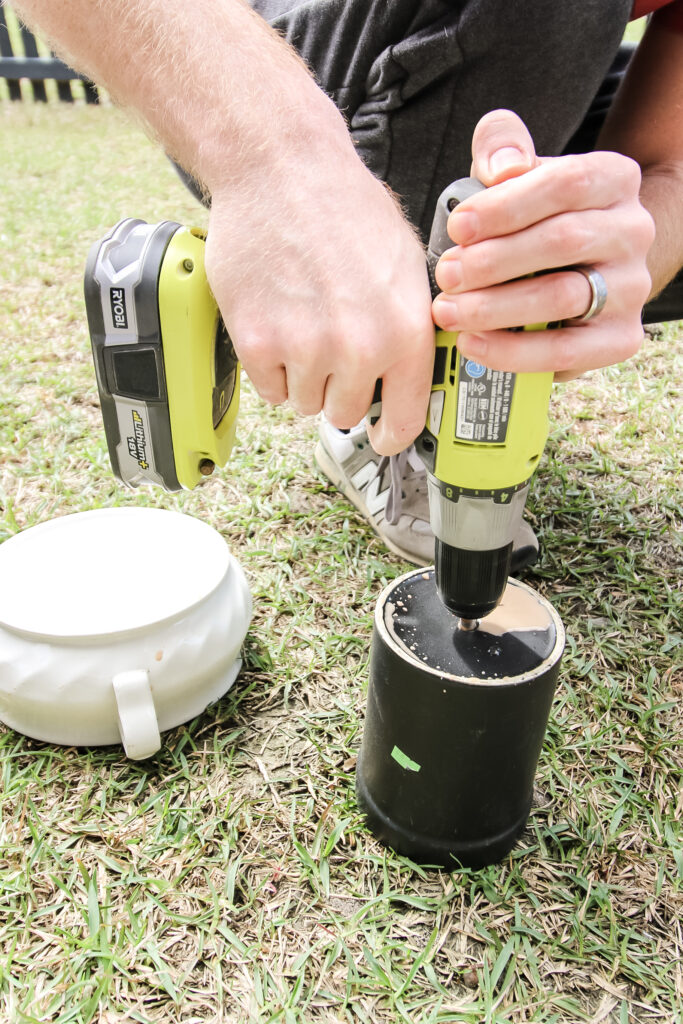
We finally had luck when Sean put the pot on the grass outside - it got a much better grip that way. A towel might have the same grippy effect.
Place your drill bit at a 45 degree angle towards your pot base. Begin to pull the trigger and slowly start drilling.
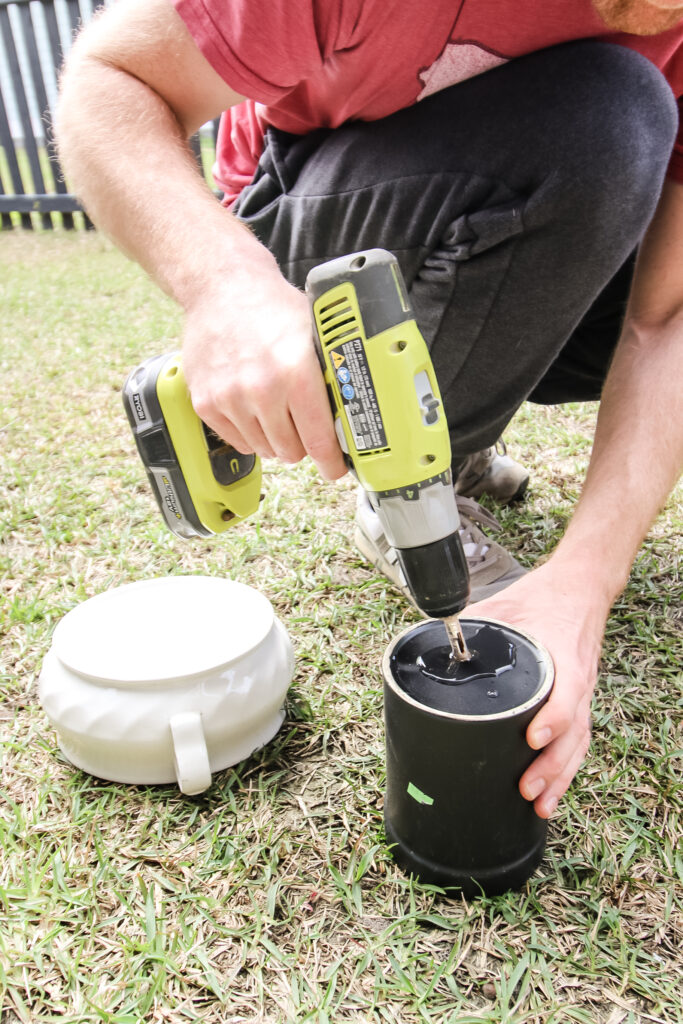
STEP 4: Straighten out
Once you feel the drill bit catching, straighten the drill to be at a 90 degree angle straight up and down and increase the speed of the drilling. Push firmly to fully drill your hole.
Warning - we did have one pot break on the bottom. This happened when the drill bit finished the hole and we kept pushing and the heavy body of the drill smashed into the delicate glazed pot. Be very careful to stop pushing once the hole is complete to avoid this.
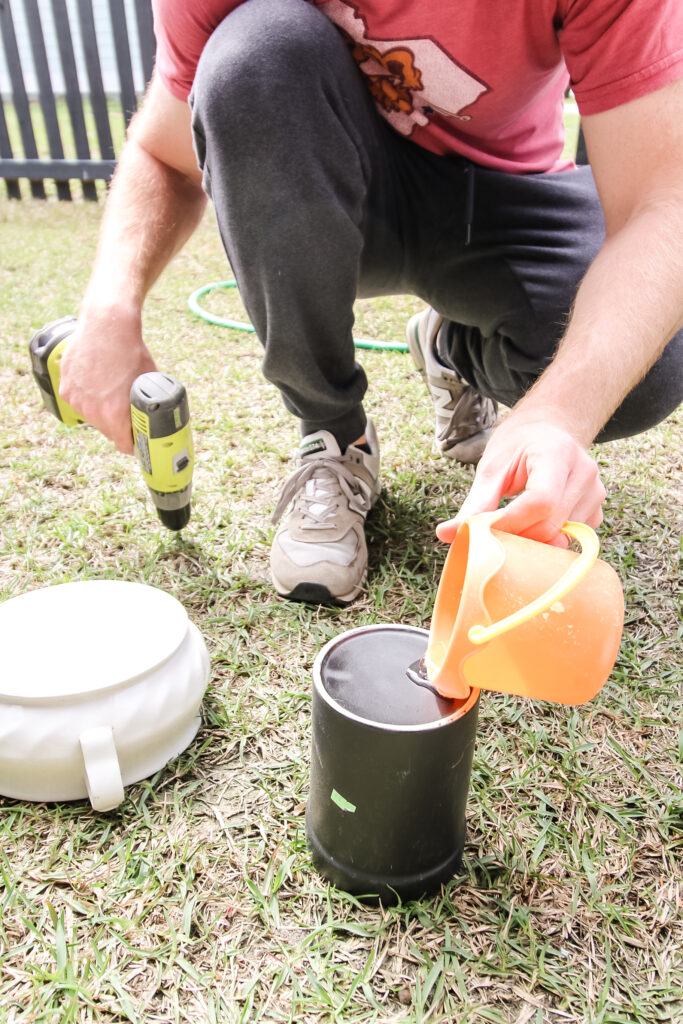
STEP 5: Add your plant
Add your plant and fresh soil to the pot. The drainage holes should give it proper drainage, but you can choose to add small pebbles below the soil if you like. Just be sure they are big enough to not fall thru the hole you just drilled!
If you plan to keep your pot indoors, add a drop tray underneath to avoid extra water dripping out onto your tabletop.
Types of drill bits for each type of pot:
This process works the same on any kind of pot, you'll just want a drill bit that will easily drill through each material!
| Pot type | Drill bit type |
| Terra Cotta | Diamond drill bit |
| Ceramic | Diamond drill bit |
| Plastic | Sharp twist bit |
| Metal | Cobalt steel bit |
| Thick Glass | Diamond drill bit |
How many drainage holes should I add to a pot?
Any pot over 8 inches in diameter I like to add 2 holes to, just to be sure water isn't pooling on one side.
For one hole, drill it in the center, for two or more holes, instead drill them halfway between the center of the pot and the edge, for increased stability.
You don't want 2 holes too close together or it could compromise the strength of the ceramic in between them.
Video demonstration
Want to show your houseplants some love?!
--> How to clean plant leaves
--> How to propagate a plant (free eBook!)
--> When to repot a plant
--> Rotating houseplants
--> When to cut leaves off of plants

Looking for something?
We've been doing this since 2012 so we have a LOT of blog posts!
Search stuff like: Ceiling Projects | DIY Plant Stands | Thrift Flips

Hello, I'm Morgan, half of the creative force behind CharlestonCrafted.com! With a passion for DIY that dates back to 2012, I've transformed three homes and now I'm dedicated to helping others craft their dream spaces. Let's turn your house into a home together!


[…] the pot had no drainage holes, either make some or get a new […]