• Skip to primary navigation
  • Skip to main content
  • Skip to primary sidebar
Charleston Crafted
  • DIY
  • Woodworking
  • Popular Posts
  • Blog
  • About
  • Shop
menu icon
go to homepage
  • DIY
  • Woodworking
  • Popular Posts
  • Blog
  • About
  • Shop
search icon
Homepage link
  • DIY
  • Woodworking
  • Popular Posts
  • Blog
  • About
  • Shop
×
Great Gifts

Epoxy River Candle Holder

Published: Feb 13, 2019 · Modified: Feb 5, 2025 by Sean · As an Amazon Associate, we earn from qualifying purchases. This site contains affiliate links. ·

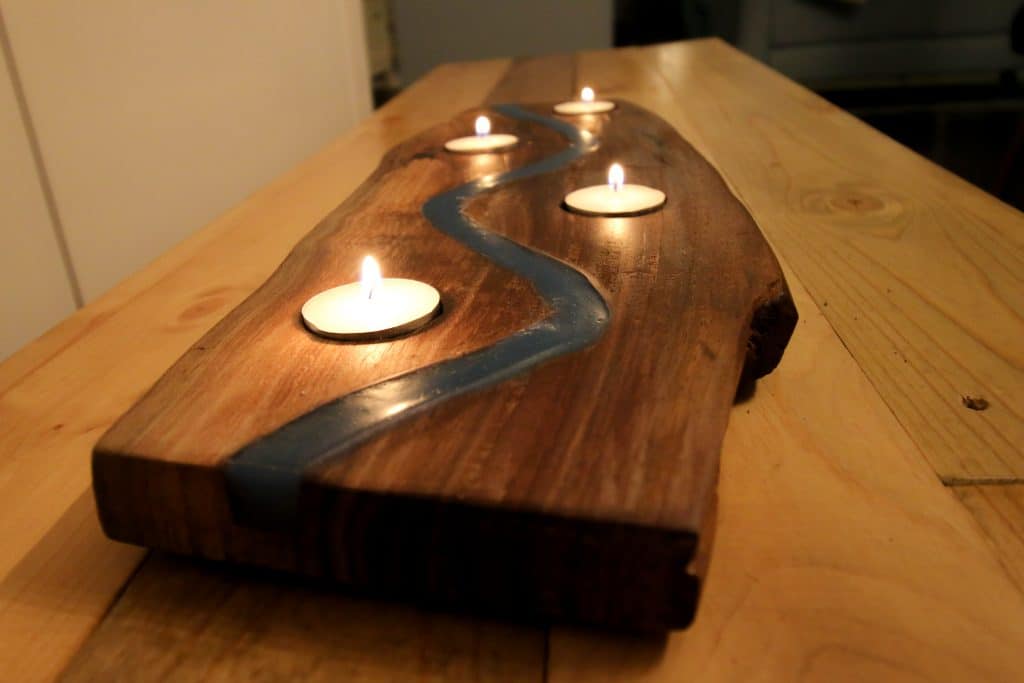
Check out this quick and easy tutorial for how I made an epoxy river tea light candle holder as a fun decor piece!

I made this easy epoxy river candle holder for my mom for Christmas. It makes a great gift for the candle lover in your family. It doesn't take lots or tools or equipment and is very customizable.

This live edge epoxy river candle holder is also made much easier with Gorilla Glue Two Part Epoxy versus expensive resins. I used this same epoxy to make a live edge river table, too. 

Epoxy River Candle Holder - Charleston Crafted

Epoxy River Candle Holder

Here's what you need to make this epoxy river candle holder and the simple steps to make it yourself!

What you need

  • A piece of live edge wood, about 18 inches long
  • Router
  • Several tubes of Gorilla Glue Two Part Epoxy
  • Color of your choice of craft paint
  • Tealight candles

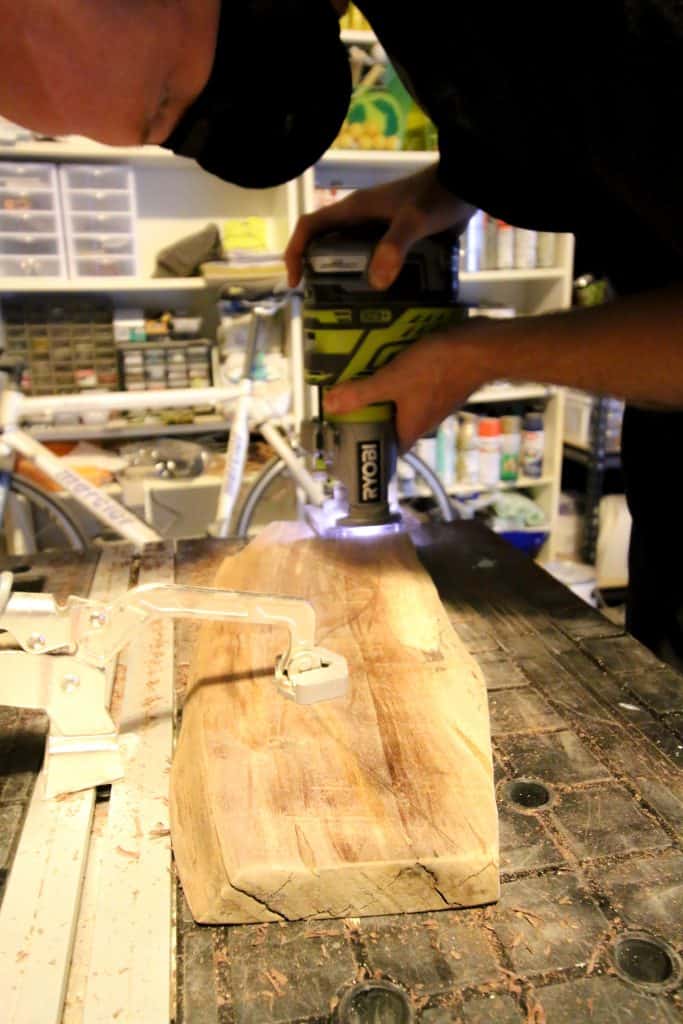
Step one: route out river

Start by tracing on your board where you want the river to go. Don't make it too windy, but more like natural curves. Make sure there is space for at least four tealight candles. Trace those circles as well.

Clamp your board in place and use a router to carve out the river you traced. Set your router to be about three quarters of the thickness of the board.

Epoxy River Candle Holder - Charleston Crafted

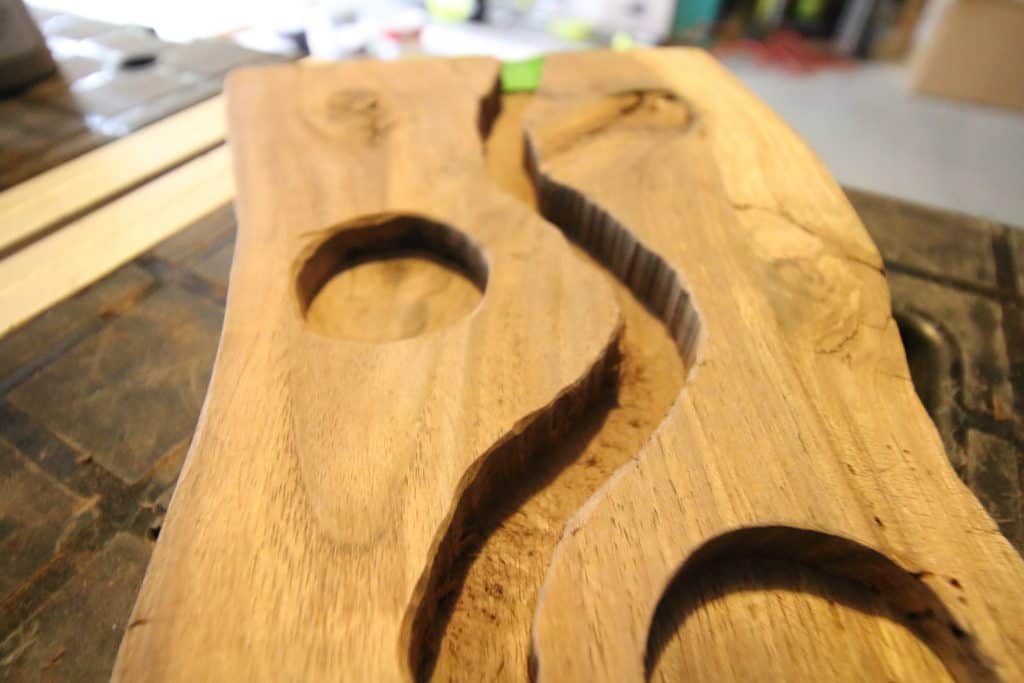
Step two: route out tea light holes

Use the router to carve out three holes the size and depth of a tealight candle.

Sand down the board completely.

Epoxy River Candle Holder - Charleston Crafted

Step three: pour epoxy

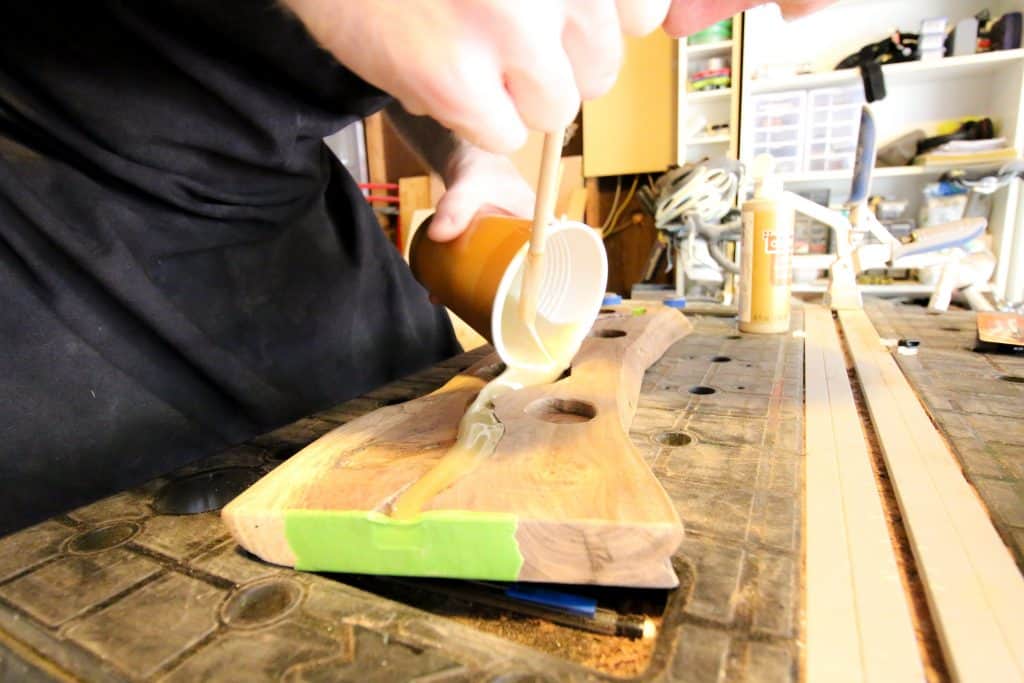
Use painters tape to seal off the edges of the board and create an edge.

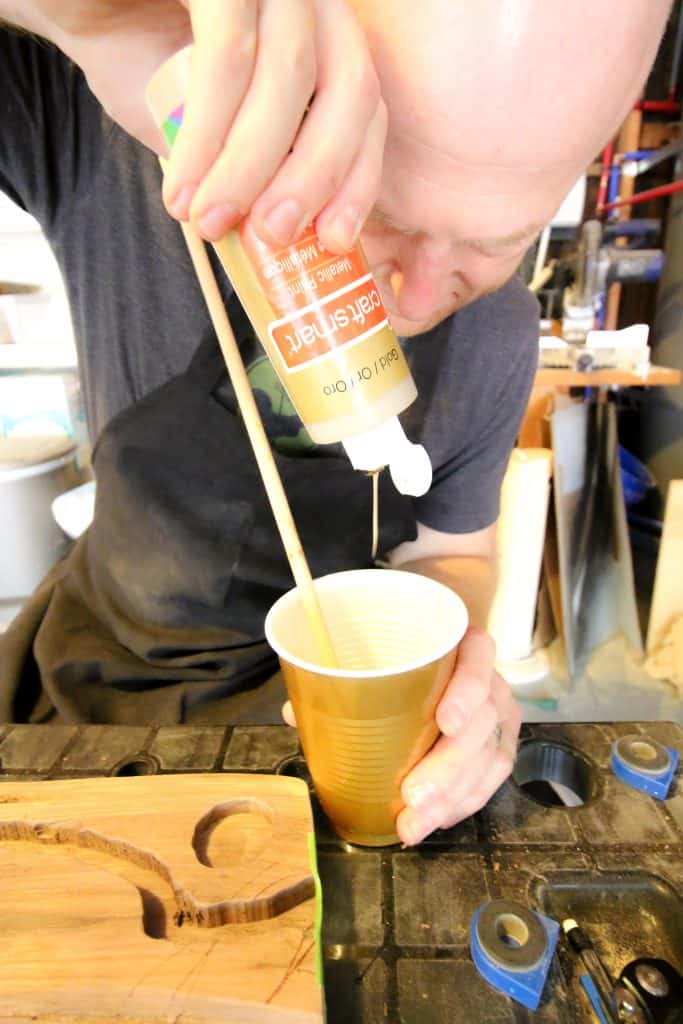
Using Gorilla Glue Two Part Epoxy, squirt out enough tubes to fill your river. For me, it was about six tubes for a half inch depth on a board about 18 inches long.

Epoxy River Candle Holder - Charleston Crafted

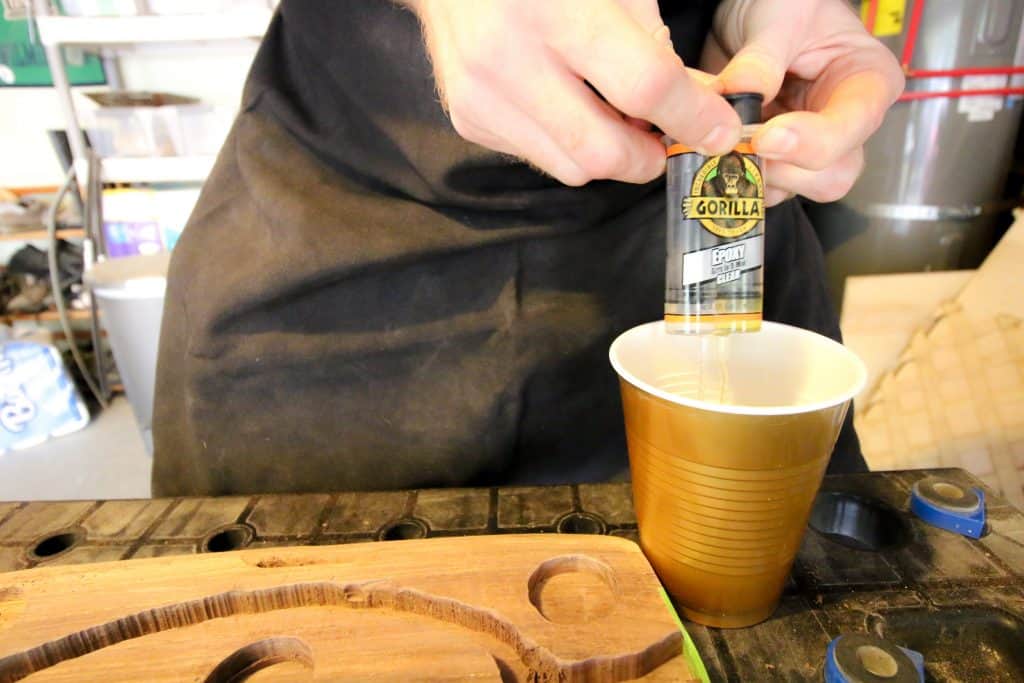
After you mix the epoxy together, drop in a few drops of whatever color craft paint you want and mix that together. 

Epoxy River Candle Holder - Charleston Crafted

Pour in the epoxy evenly throughout your river and let dry 24 hours.

Epoxy River Candle Holder - Charleston Crafted

Sand off any excess epoxy and then oil and seal the board. Add little felt feet to the bottom as well so the board doesn't scratch the surface it will be used on.

Epoxy River Candle Holder - Charleston Crafted

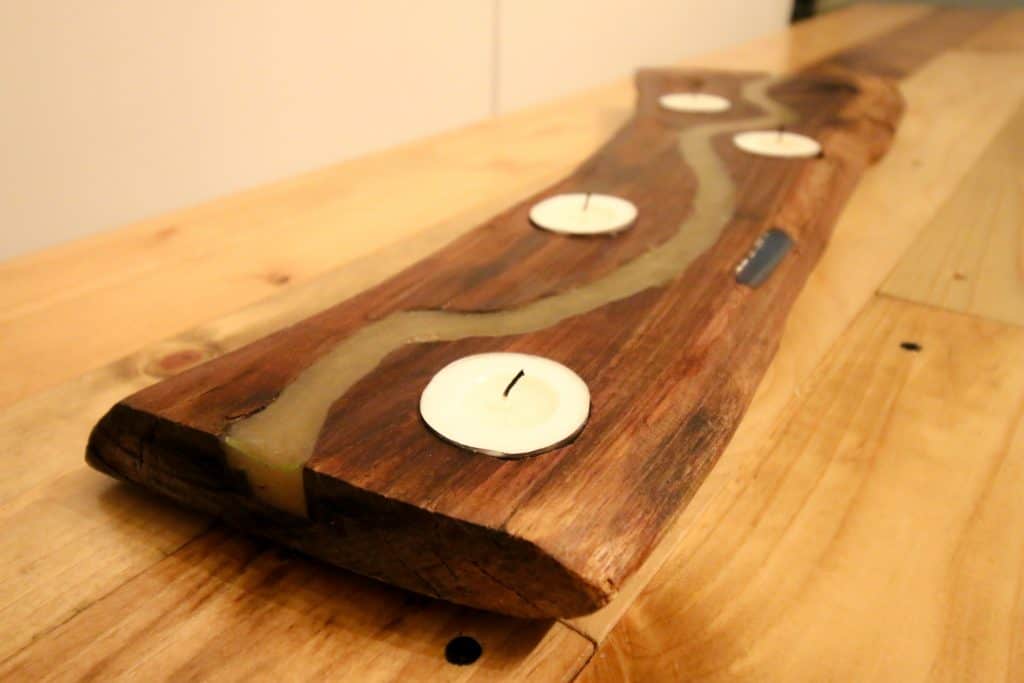
This epoxy river candle holder is super easy to make and makes for a great centerpiece. Make your river a color that will accent your decor or the decor of whomever you're gifting it to.

Charleston Crafted Signature

Follow us on:
Pinterest | Instagram | TikTok | YouTube | Facebook | Amazon Storefront | LTK Shop

Looking for something?

We've been doing this since 2012 so we have a LOT of blog posts!
Search stuff like: Ceiling Projects | DIY Plant Stands | Thrift Flips

Charleston Crafted logo banner
Sean headshot cropped
Sean

Hey there, I'm Sean, the woodworking enthusiast and builder behind CharlestonCrafted.com! Since 2012, I've been sharing the magic of turning raw materials into beautiful creations. I love teaching others the art and satisfaction of woodworking and DIY. I try to inspire fellow crafters to make something extraordinary out of nothing at all.

More Great Gifts

  • Father's Day deals at Lowe's - Charleston Crafted
    Lowe's Father's Day Gift Guide
  • DIY rotating photo frame - Charleston Crafted
    DIY rotating picture frame
  • DIY cookbook holder - Charleston Crafted
    One-board DIY cookbook stand
  • gift ideas for woodworkers
    Woodworking gifts for dad

Reader Interactions

Comments

  1. Frances says

    February 13, 2019 at 1:18 pm

    It is beautiful on my table. I love it.

  2. Kelly says

    February 15, 2019 at 11:09 am

    Where do you find your live edge wood, in Charleston?

    • Sean says

      February 15, 2019 at 2:55 pm

      Hey Kelly! So the wood for this project were cut offs from our live edge shelves. I got those beams from a guy on Facebook Marketplace. He's always posting about having new wood that has to go before his wife gets mad at him. There are others listed as well, but just have to wait for the right time.

  3. Anne says

    December 08, 2020 at 11:25 pm

    If I don’t have a router do you think a dremel would work?

    • Sean says

      December 09, 2020 at 3:18 pm

      Yeah, if you're handy with a Dremel too, you could definitely carve your river that way!

Trackbacks

  1. 37 DIY Resin Crafts You Have to See - Craftsy Hacks says:
    June 18, 2021 at 7:00 am

    […] Credit: charlestoncrafted.com […]

Primary Sidebar

Charleston Crafted about us image

Hey y'all!

We are Morgan & Sean McBride and we are crafting our home together in Charleston, South Carolina.

More about us

Popular Posts

  • DIY Coffered Ceiling
    DIY Coffered Ceiling
  • How to Make DIY Concrete Pumpkins via Charleston Crafted
    How to Make DIY Concrete Pumpkins
  • How to Make a Cupid's Arrow Valentine's Day Wall Hanging with felt on the Cricut
    How to make a Cupid's Arrow Valentine's Day Wall Hanging
  • Our Tropical Oasis - A backyard Hammock area - Charleston Crafted
    Our Tropical Oasis

Recent Posts

  • fisherman aesthetic home inspiration
    Fisherman Aesthetic Decor for Your Home
  • Senix Tools Review- Charleston Crafted
    Are Senix power tools any good?
  • Your Weekend To-Do List: 15 Things to Do for Summer Home Upkeep
    Your Weekend To-Do List: 15 Things to Do for Summer Home Upkeep
  • How to build a DIY gate pergola- Charleston Crafted
    How to build a DIY gate pergola

Privacy Policy

Footer

↑ back to top

Navigation

  • Home
  • Blog
  • Contact Us
  • Terms of Use
  • Disclaimer

Newsletter

  • Sign up for emails and updates
  • Follow us on Instagram
  • Work with Us

Browse by Category

  • Woodworking
  • Home Projects
  • Paint Colors
  • Room Reveals

© 2025 The Charleston Crafted Blog LLC DBA “Charleston Crafted” and “CharlestonCrafted” (also known as N/A) / All Rights Reserved.
Official Website: (Charleston Crafted)
Registered in USA (Co. Reg. No.: 565586)
Address: Charleston, USA 29414, South Carolina
Contact Phone: Not applicable — contact is via email: sean@charlestoncrafted.com

DISCLAIMER: The content on this website is provided for general informational purposes only and is not intended as professional advice. The Charleston Crafted Blog LLC and The Charleston Crafted Blog LLC make no representations or warranties—express or implied—regarding the accuracy, completeness, or suitability of the information contained herein. Any reliance you place on this information is strictly at your own risk. In no event shall The Charleston Crafted Blog LLC or The Charleston Crafted Blog LLC be liable for any loss or damage, including without limitation, indirect or consequential loss or damage, arising from the use or inability to use this website. This website is the official website of The Charleston Crafted Blog LLC.

AFFILIATE DISCLOSURE: This website contains affiliate links. If you click through and make a purchase, we may earn a commission at no extra cost to you.

As an Amazon Associate, I earn from qualifying purchases.

Site Editor: Morgan Smith McBride

Copyright © 2025 Charleston Crafted