• Skip to primary navigation
  • Skip to main content
  • Skip to primary sidebar
Charleston Crafted
  • DIY
  • Woodworking
  • Popular Posts
  • Blog
  • About
  • Shop
menu icon
go to homepage
  • DIY
  • Woodworking
  • Popular Posts
  • Blog
  • About
  • Shop
search icon
Homepage link
  • DIY
  • Woodworking
  • Popular Posts
  • Blog
  • About
  • Shop
×
Home » Home Improvements

DIY Wall Mounted Laundry Room Trash Can Hack

Published: Jun 20, 2017 · Modified: Jan 23, 2019 by Morgan · As an Amazon Associate, we earn from qualifying purchases. This site contains affiliate links. ·

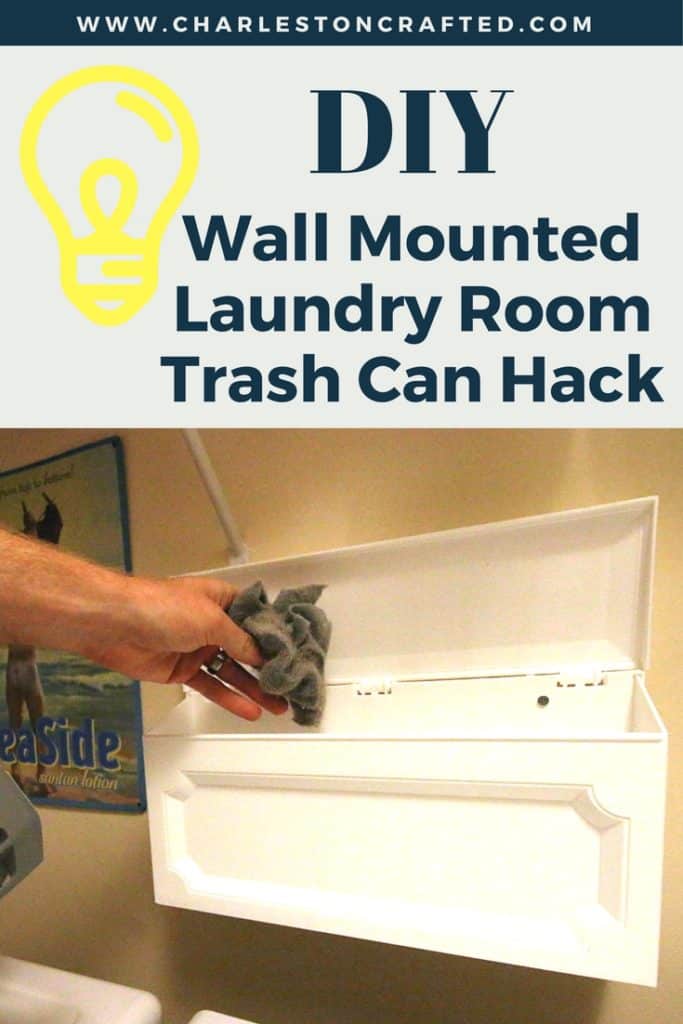
Looking for a DIY wall mounted trash can to serve as your laundry room trash can? You'll love this simple hack! 

Since we built the new litter box for Bear, we really no longer had space for a floor trash can in the laundry room. I was looking for something simple and wall mounted to hold mostly lint from the dryer. While I didn't find a trash can, I did find something else: a wall mounted mailbox! It turned into a really simple and inexpensive wall mounted trash can hack.

DIY Wall Mounted Laundry Room Trash Can Hack - Charleston Crafted

DIY Wall Mounted Laundry Room Trash Can Hack

I was looking all around for a wall mounted trashcan for the laundry room, but couldn't find anything that I liked. I didn't want a silver color or industrial look. A lot of them look like the waste receptacles inside public bathroom stalls, which is not a look I aspire to. 

A bit of poking around at my local hardware store led me to the idea of using a wall mounted letterbox. The store didn't have exactly what I wanted but I was able to find something perfect on Amazon. 

This is the mailbox that I ordered via Amazon 

I love that it is white and has a simple, crisp design. It was also important to me to have a wall mount trashcan with a lid. This mailbox has the perfect hinged lid for this project. 

This particular mailbox is made from plastic so it is very light weight, which also was a plus for me. 

DIY Wall Mounted Laundry Room Trash Can Hack - Charleston Crafted

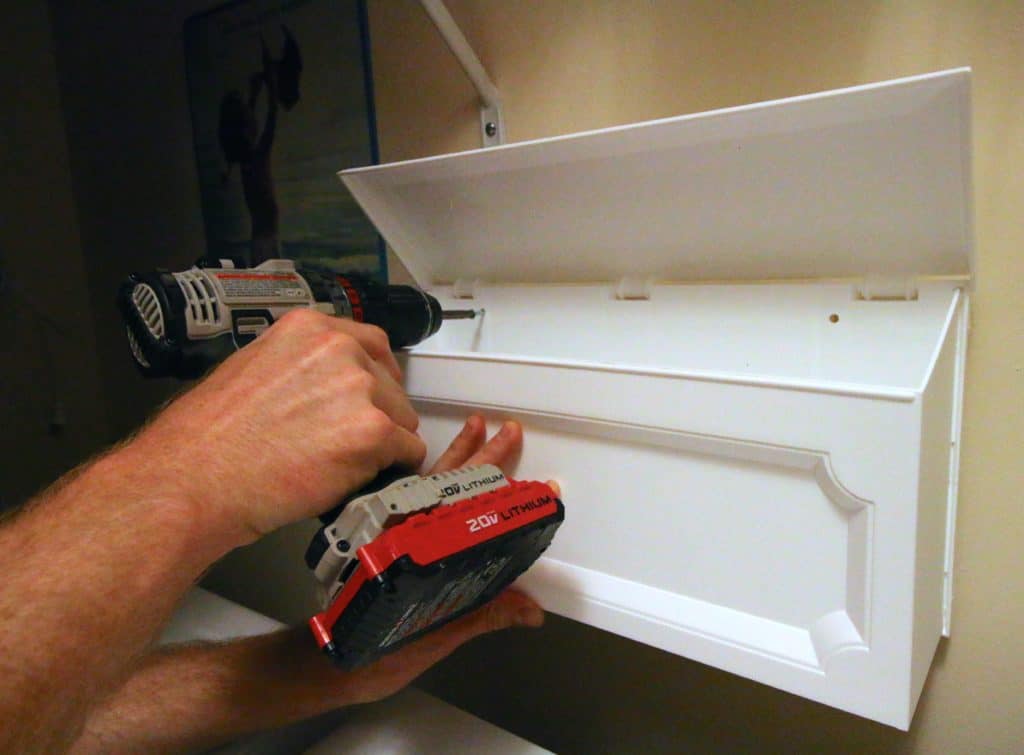
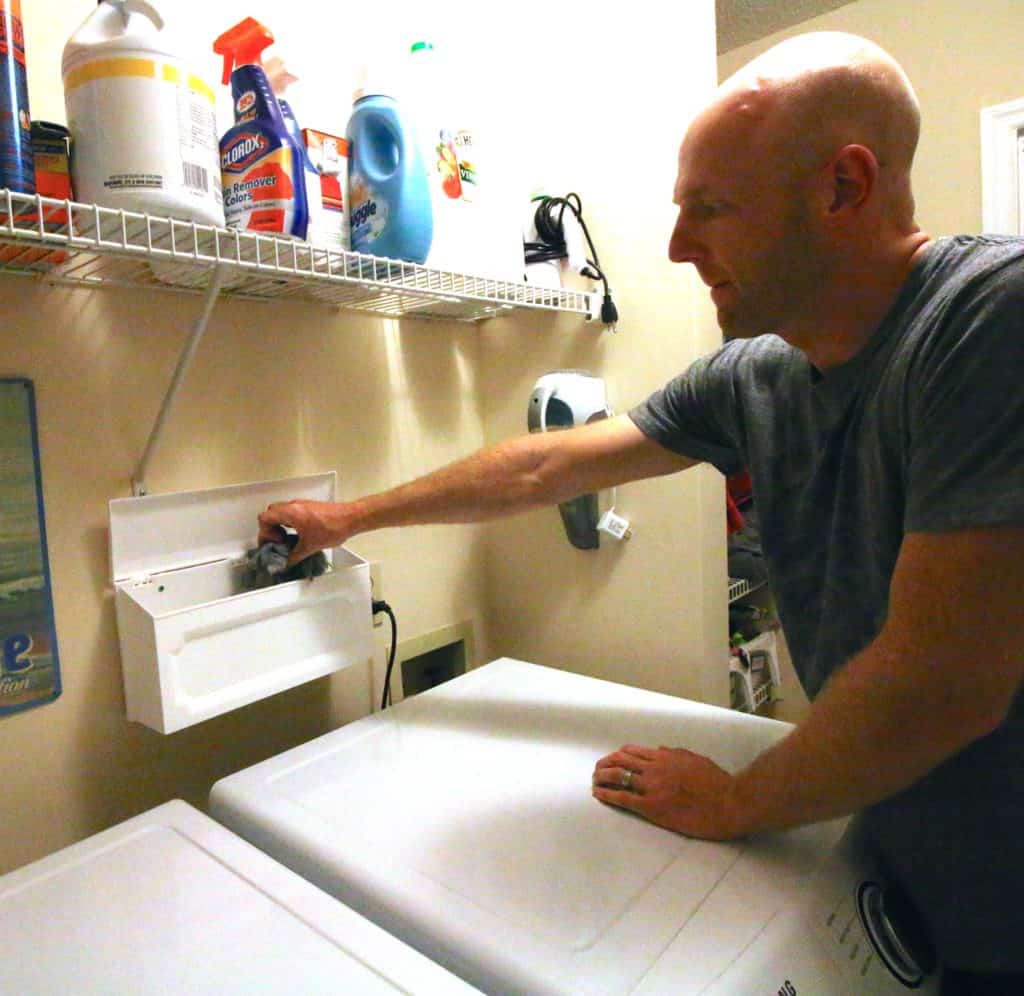
All we did was mount it to the wall using two screws. The mailbox had two screw holes in it already. Make sure when you pick a place for the trashcan that there is enough clearance to open the lid completely. You don't want it too close to a shelf or other obstruction. 

Hold the trash can up to the wall, using a level if necessary to make sure that it is not hanging crooked. Use a drill to drill screws through the existing holes. 

If you expect the trash to be heavy, you will want to add wall anchors or drill into a stud. The can itself is very light and we are just using ours for lint, so we didn't worry about that. 

You could use a trash bag inside the can. We pull the lint out bit by bit to use as firestarter in our firepit, so we left it bagless. 

DIY Wall Mounted Laundry Room Trash Can Hack - Charleston Crafted

DIY Wall Mounted Laundry Room Trash Can Hack - Charleston Crafted

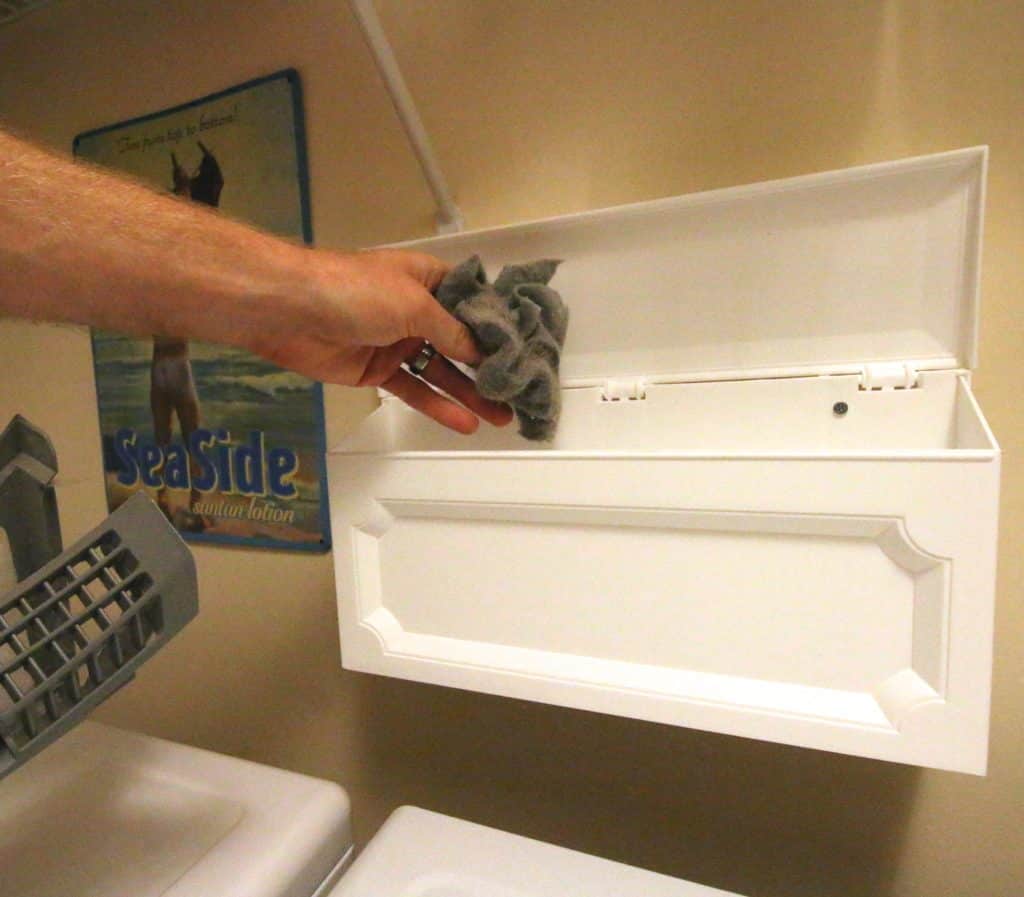
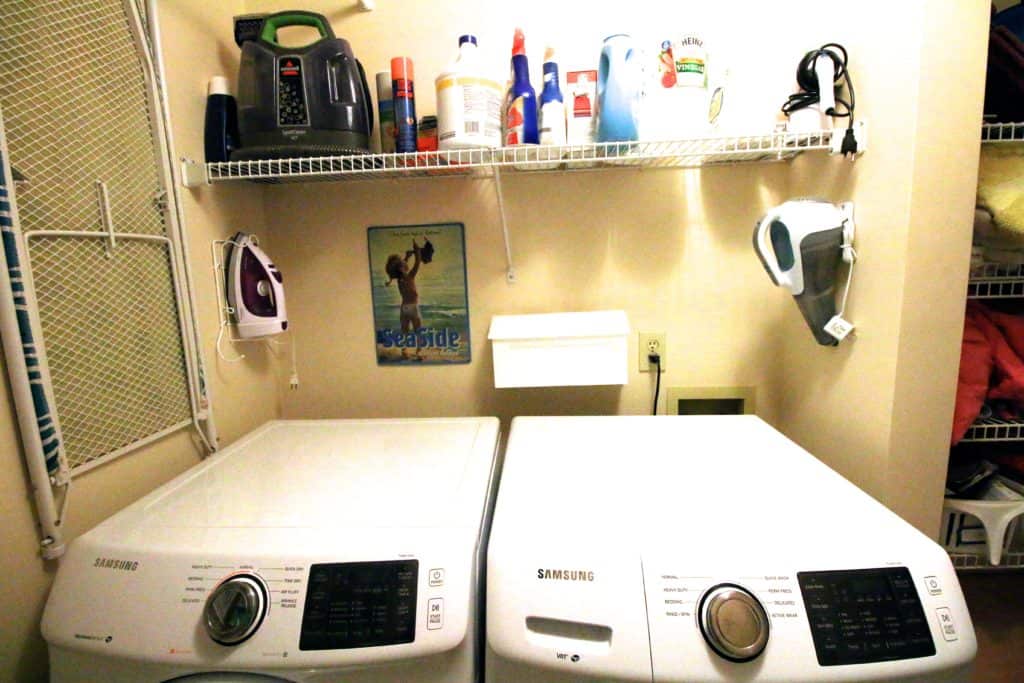
It's now the perfect place to toss out lint and other small trash. It's a super simple hack but it has made a big difference for us! We hope to re-do this room in the next year or so, but this will help to tide us over until then!

Click here to pin this project to your Pinterest board!

If you are looking for hidden trash storage in your kitchen, here's how we turned a cabinet into a tilt out trash can!

DIY Wall Mounted Laundry Room Trash Can Hack - Charleston Crafted

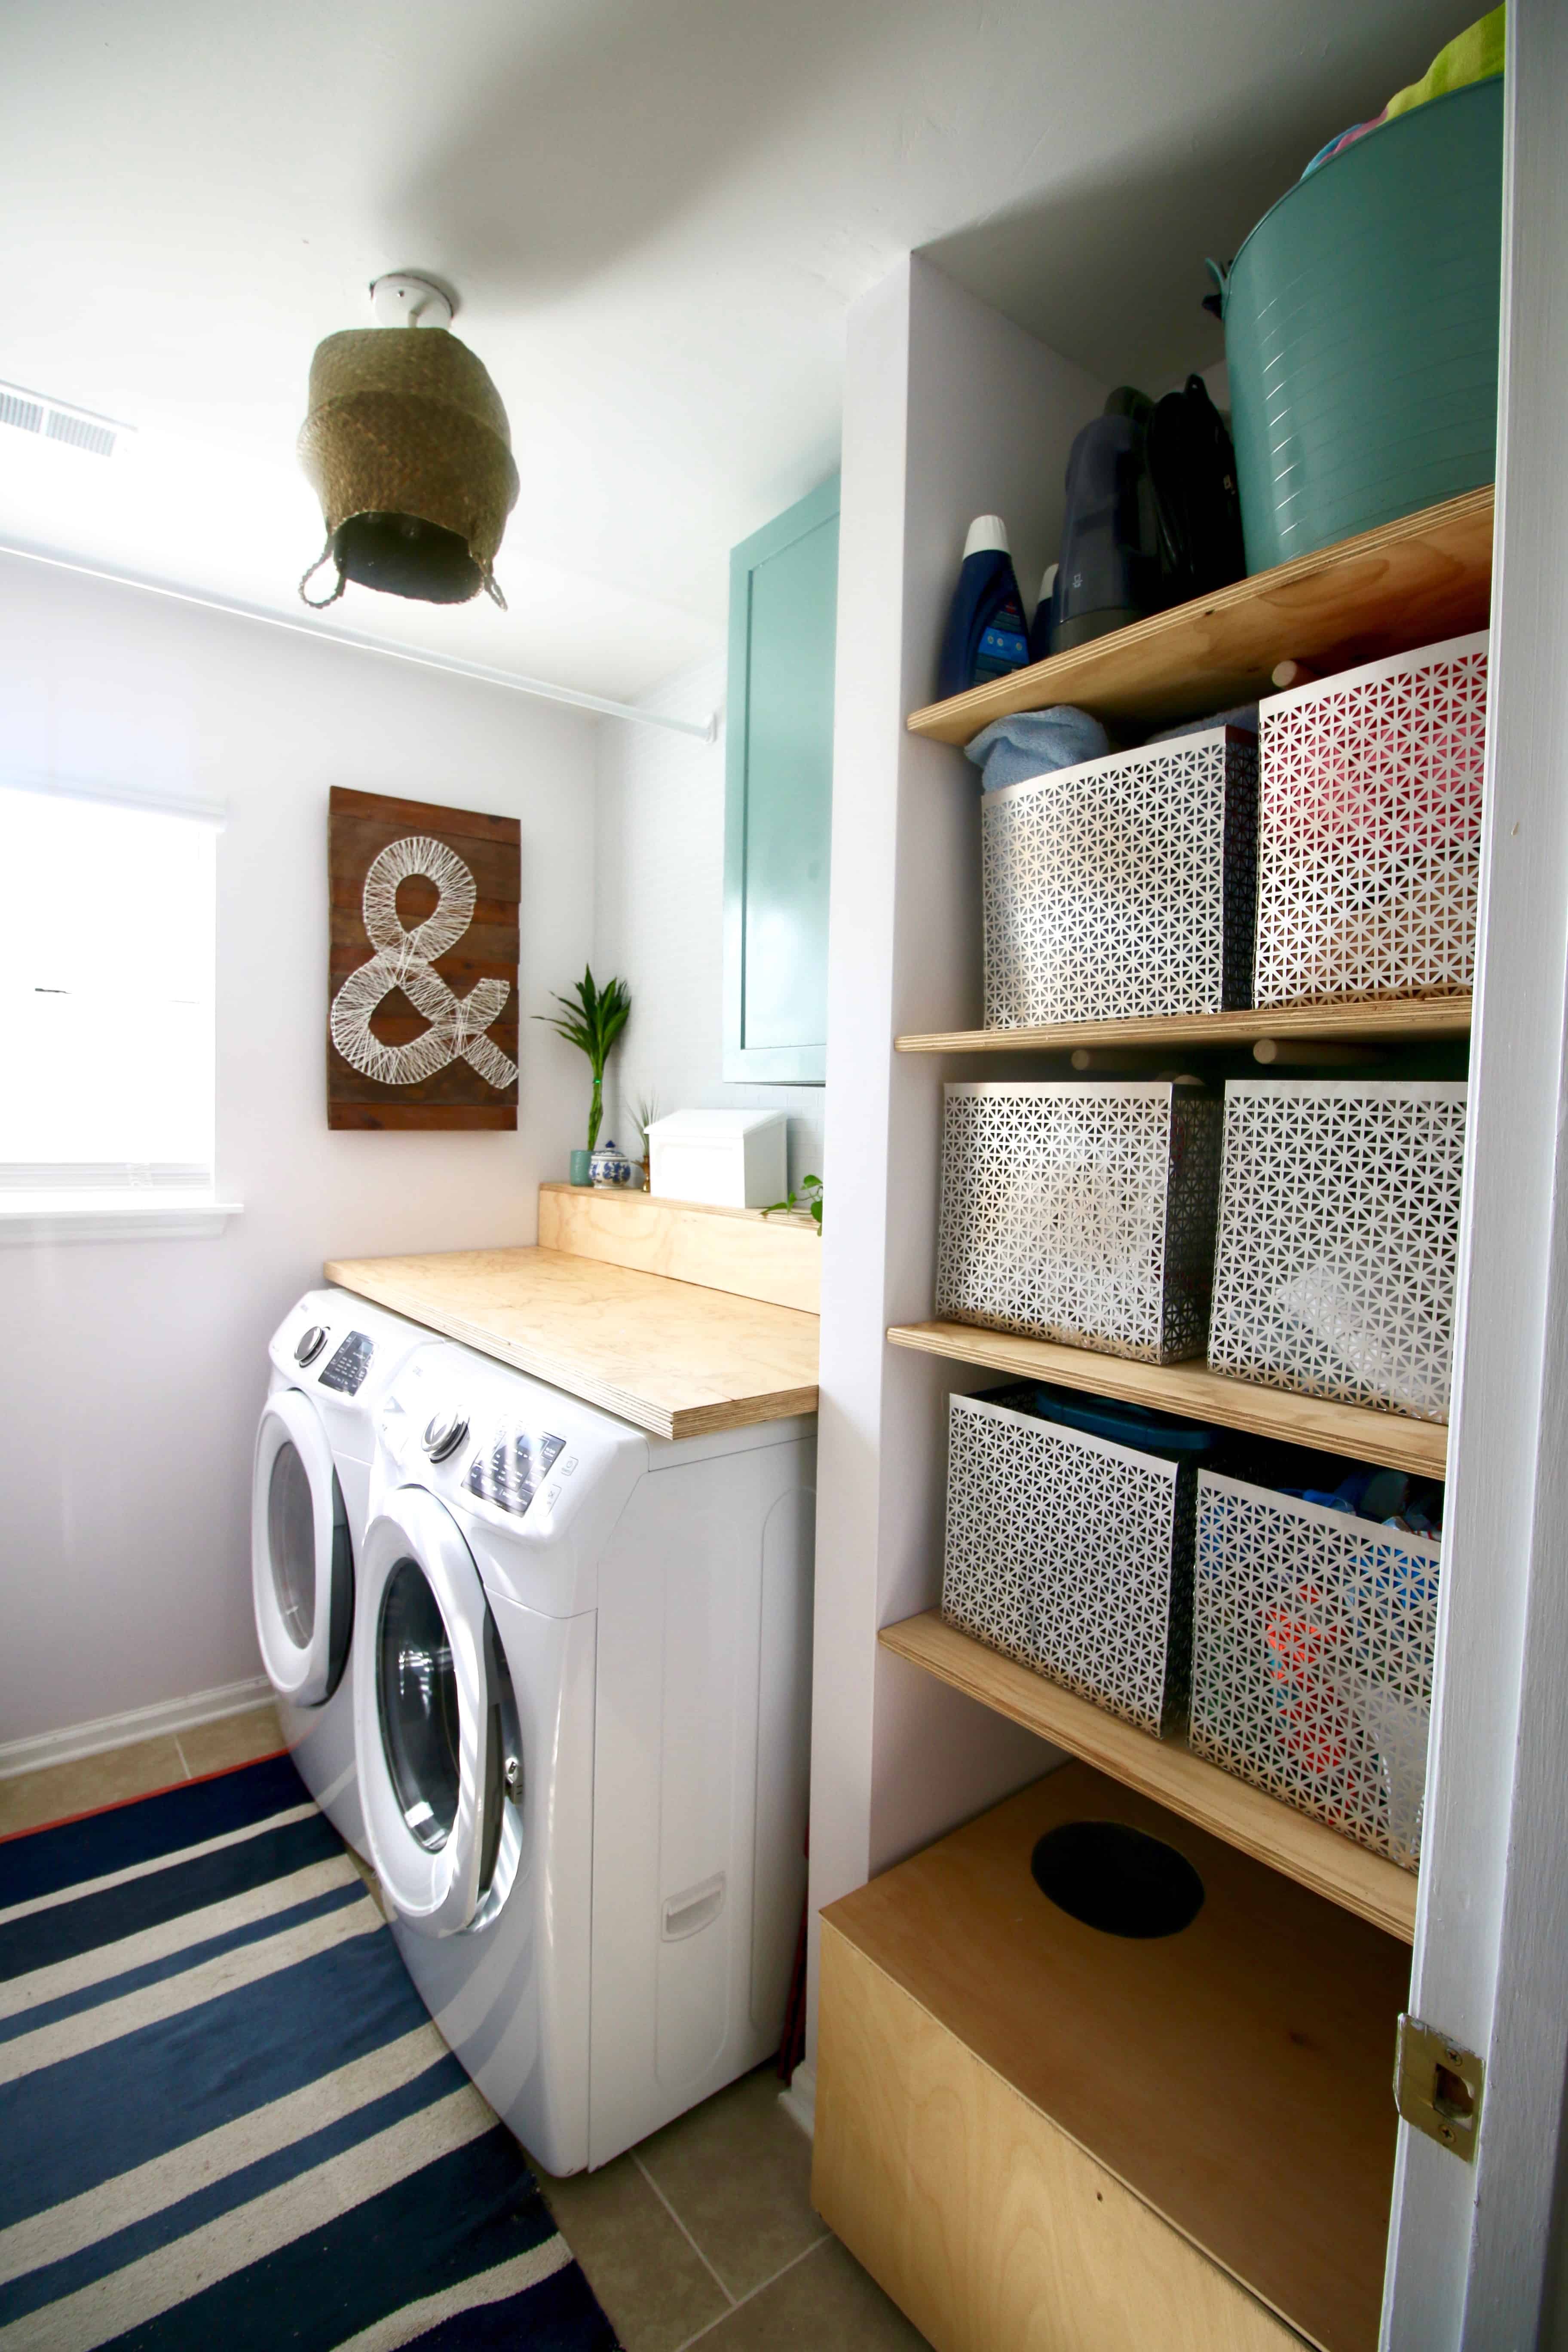
A few months after adding this trashcan to our laundry room, we gave the whole space a makeover! You can see the new laundry room here. We still use and love this wall mounted trash can!

ORC: Laundry Room Makeover Reveal via Charleston Crafted

This post contains affiliate links, which means that if you click through and make a purchase, we receive a small percentage of the sale. Thanks for your support!

 Charleston Crafted Logo heart
 Charleston Crafted Logo facebook
 Charleston Crafted Logo insta
 Charleston Crafted Logo pinterest
 Charleston Crafted Logo twitter


Morgan headshot cropped
Morgan

Hello, I'm Morgan, half of the creative force behind CharlestonCrafted.com! With a passion for DIY that dates back to 2012, I've transformed three homes and now I'm dedicated to helping others craft their dream spaces. Let's turn your house into a home together!

More Home Improvements

  • Keep outdoor rug from blowing up - Charleston Crafted
    How to keep your outdoor rug in place
  • how to stick to a budget on a home renovation
    How to stick to a budget on a home renovation
  • How to install an undermount sink - Charleston Crafted
    How to install an undermount bathroom sink
  • How to make your own quarter round - Charleston Crafted
    How to make your own quarter round trim

Reader Interactions

Comments

  1. Gillian says

    June 21, 2017 at 10:02 am

    This is such a simple idea to help keep things tidy!

  2. Sydney Gallimore says

    June 21, 2017 at 1:16 pm

    Wow, that's so simple, yet so genius! I can't believe I never though of it before! I think I'll try it in my own laundry room!

    • Sean says

      June 22, 2017 at 9:24 pm

      You should, it's so much better than a trash can on the floor!

Primary Sidebar

Charleston Crafted about us image

Hey y'all!

We are Morgan & Sean McBride and we are crafting our home together in Charleston, South Carolina.

More about us

Popular Posts

  • DIY Coffered Ceiling
    DIY Coffered Ceiling
  • How to Make DIY Concrete Pumpkins via Charleston Crafted
    How to Make DIY Concrete Pumpkins
  • How to Make a Cupid's Arrow Valentine's Day Wall Hanging with felt on the Cricut
    How to make a Cupid's Arrow Valentine's Day Wall Hanging
  • Our Tropical Oasis - A backyard Hammock area - Charleston Crafted
    Our Tropical Oasis

Recent Posts

  • fisherman aesthetic home inspiration
    Fisherman Aesthetic Decor for Your Home
  • Senix Tools Review- Charleston Crafted
    Are Senix power tools any good?
  • Your Weekend To-Do List: 15 Things to Do for Summer Home Upkeep
    Your Weekend To-Do List: 15 Things to Do for Summer Home Upkeep
  • How to build a DIY gate pergola- Charleston Crafted
    How to build a DIY gate pergola

Privacy Policy

Footer

↑ back to top

Navigation

  • Home
  • Blog
  • Contact Us
  • Terms of Use
  • Disclaimer

Newsletter

  • Sign up for emails and updates
  • Follow us on Instagram
  • Work with Us

Browse by Category

  • Woodworking
  • Home Projects
  • Paint Colors
  • Room Reveals

© 2025 The Charleston Crafted Blog LLC DBA “Charleston Crafted” and “CharlestonCrafted” (also known as N/A) / All Rights Reserved.
Official Website: (Charleston Crafted)
Registered in USA (Co. Reg. No.: 565586)
Address: Charleston, USA 29414, South Carolina
Contact Phone: Not applicable — contact is via email: sean@charlestoncrafted.com

DISCLAIMER: The content on this website is provided for general informational purposes only and is not intended as professional advice. The Charleston Crafted Blog LLC and The Charleston Crafted Blog LLC make no representations or warranties—express or implied—regarding the accuracy, completeness, or suitability of the information contained herein. Any reliance you place on this information is strictly at your own risk. In no event shall The Charleston Crafted Blog LLC or The Charleston Crafted Blog LLC be liable for any loss or damage, including without limitation, indirect or consequential loss or damage, arising from the use or inability to use this website. This website is the official website of The Charleston Crafted Blog LLC.

AFFILIATE DISCLOSURE: This website contains affiliate links. If you click through and make a purchase, we may earn a commission at no extra cost to you.

As an Amazon Associate, I earn from qualifying purchases.

Site Editor: Morgan Smith McBride

Copyright © 2025 Charleston Crafted