• Skip to primary navigation
  • Skip to main content
  • Skip to primary sidebar
Charleston Crafted
  • DIY
  • Woodworking
  • Popular Posts
  • Blog
  • About
  • Shop
menu icon
go to homepage
  • DIY
  • Woodworking
  • Popular Posts
  • Blog
  • About
  • Shop
search icon
Homepage link
  • DIY
  • Woodworking
  • Popular Posts
  • Blog
  • About
  • Shop
×
Home » Garden & Yard

How to DIY Shingle a Wood Shed Roof

Published: Jun 14, 2017 · Modified: Feb 4, 2023 by Sean · As an Amazon Associate, we earn from qualifying purchases. This site contains affiliate links. ·

This shop has been compensated by Collective Bias, Inc. and its advertiser. All opinions are mine alone. #RoofedItMyself #CollectiveBias

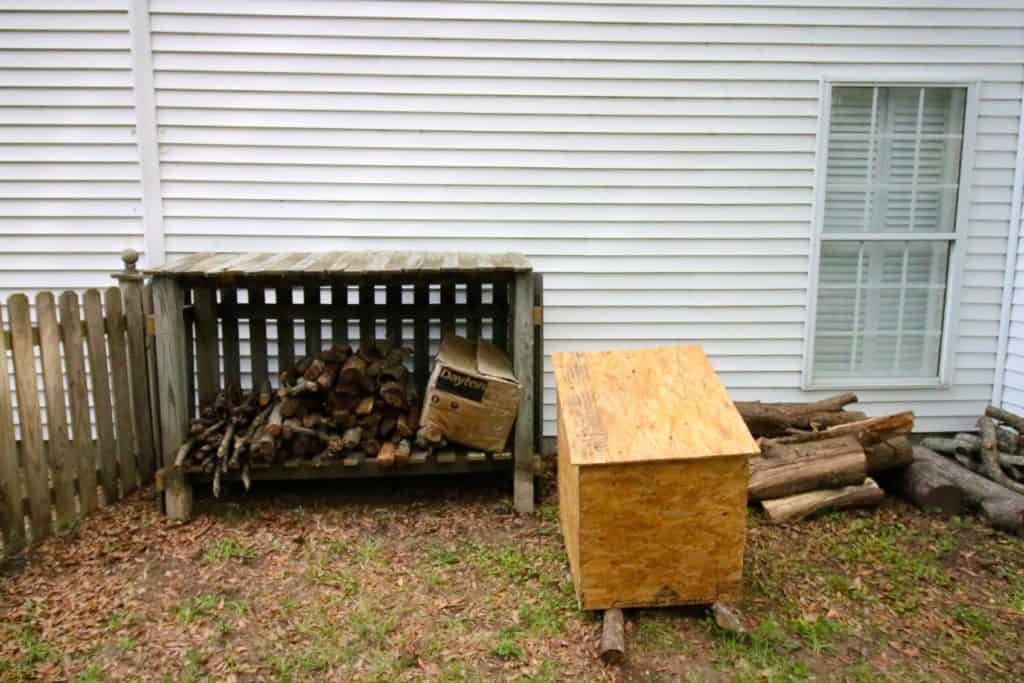
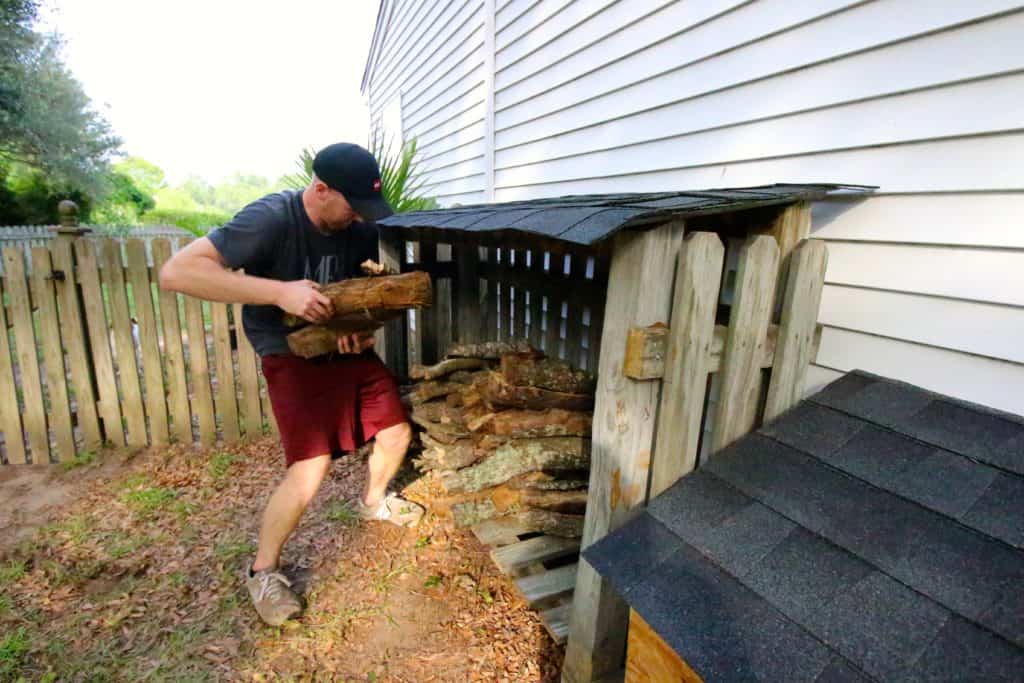
Summer is upon us in Charleston and that means we are spending a lot of time outside in the warm weather. Our backyard is the main reason we bought the house, so we love to spend time out there. One of our favorite backyard activities is to light a bonfire at night and look out over the lake and at the stars in the sky. A couple months back, we built a woodshed to hold all of our wood, but it was always lacking something that would truly keep the wood dry- a roof. It had a roof of wood, but nothing to keep it waterproof. That's why we used Timberline® Natural Shadow® shingles from Lowes to complete our project, as well as top off a new project.

How to DIY Shingle a Wood Shed Roof - Charleston Crafted

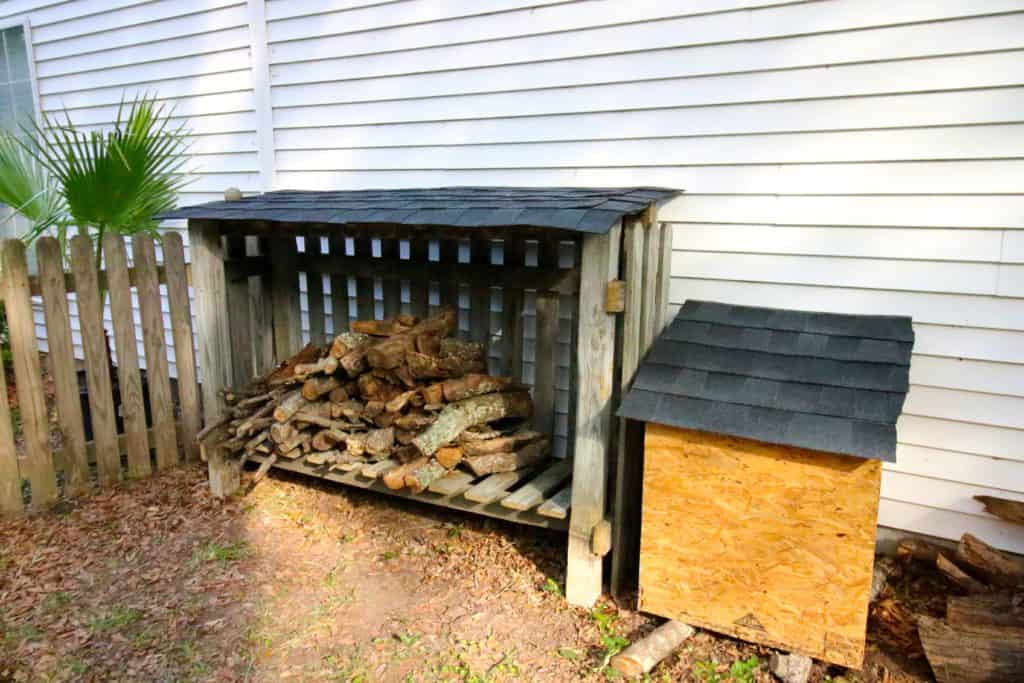
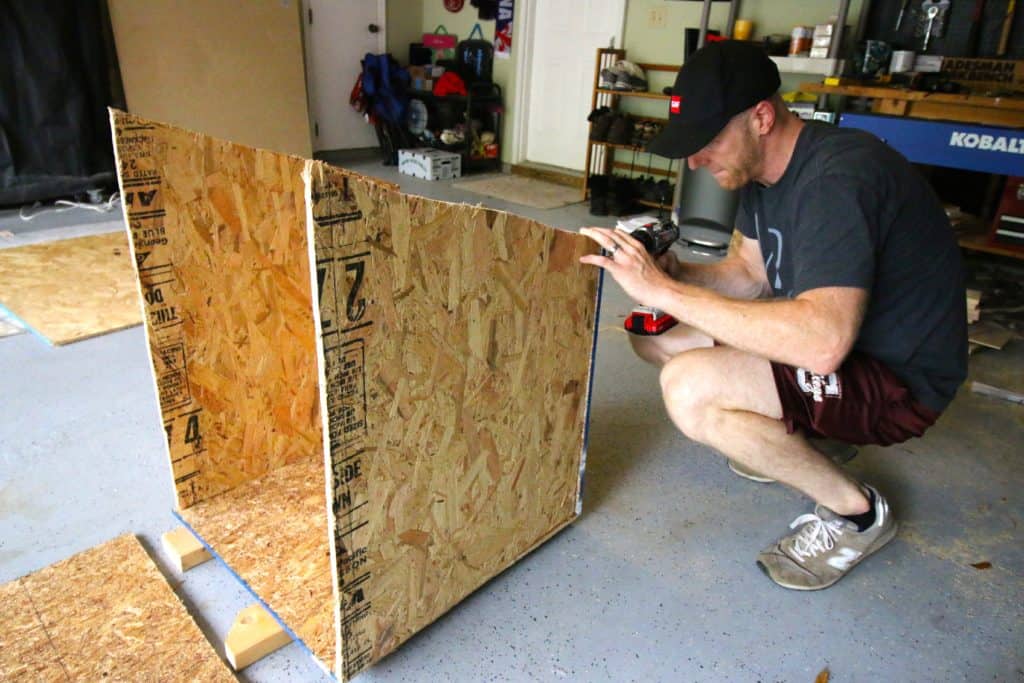
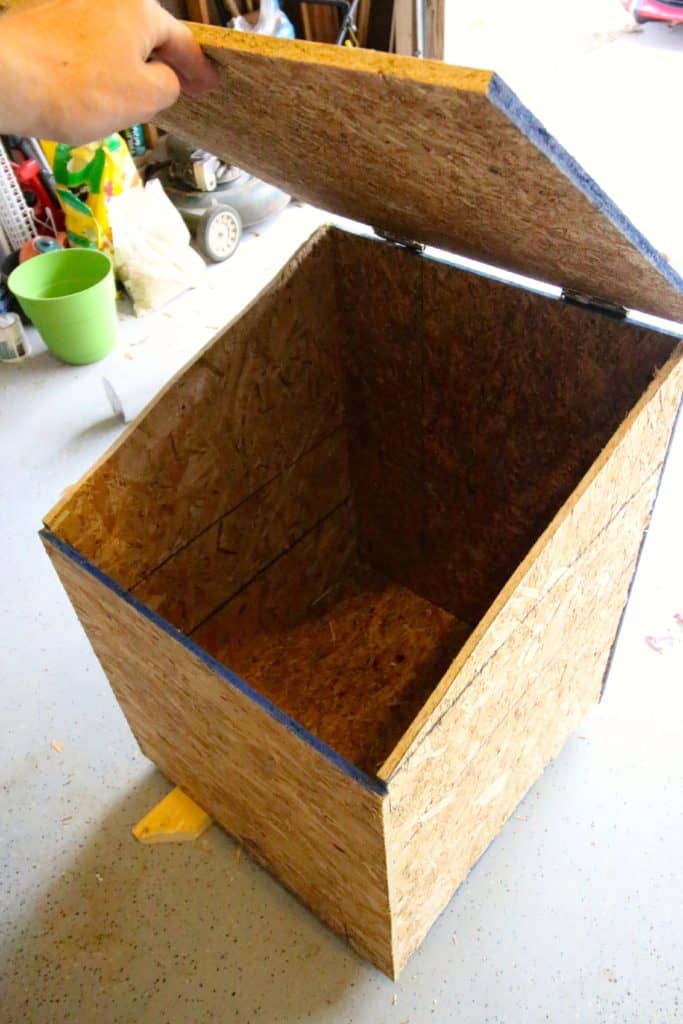
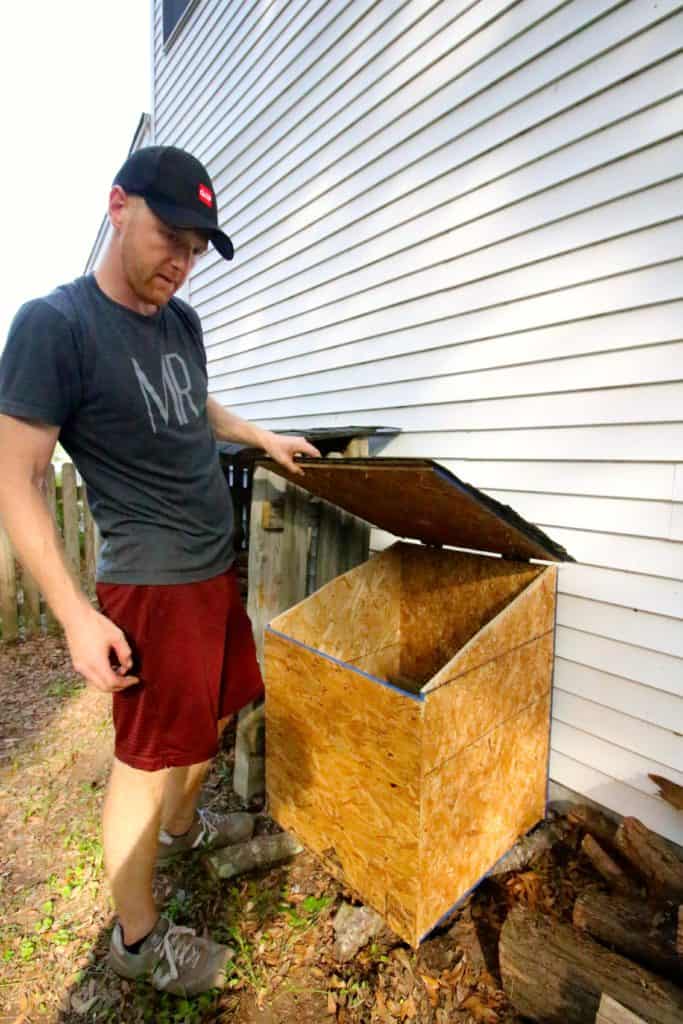
The woodshed is great, but we also wanted a place to store pallet wood that we always seem to have, and dryer lint to get the fires started. For this project, we built a simple cube box with a hinged lid to store all of these supplies that really need to be kept dry.

How to DIY Shingle a Wood Shed Roof - Charleston Crafted

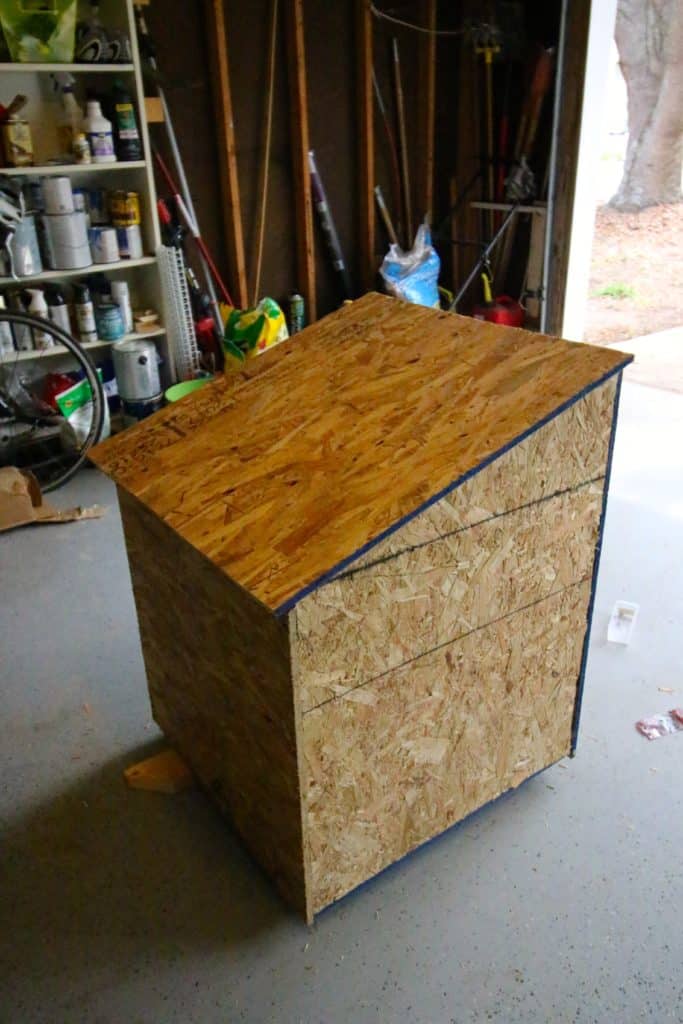
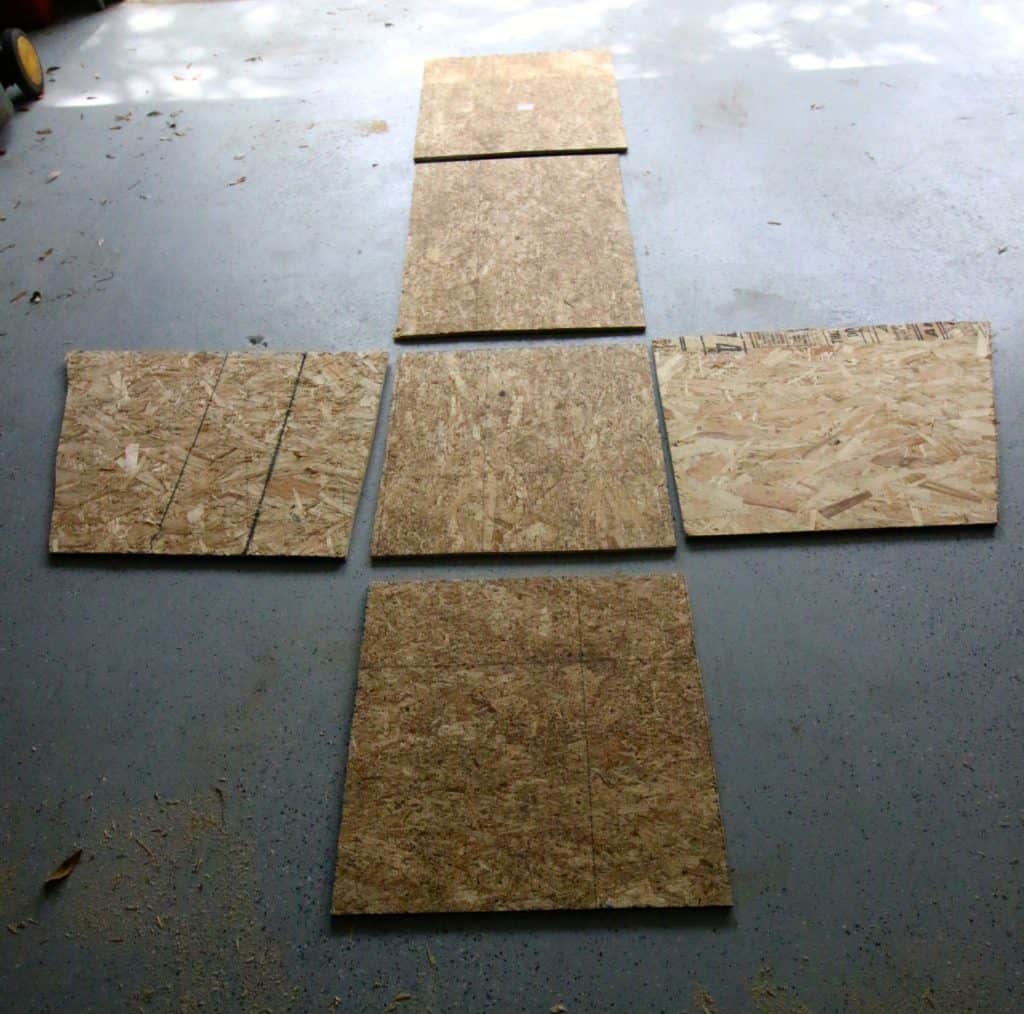
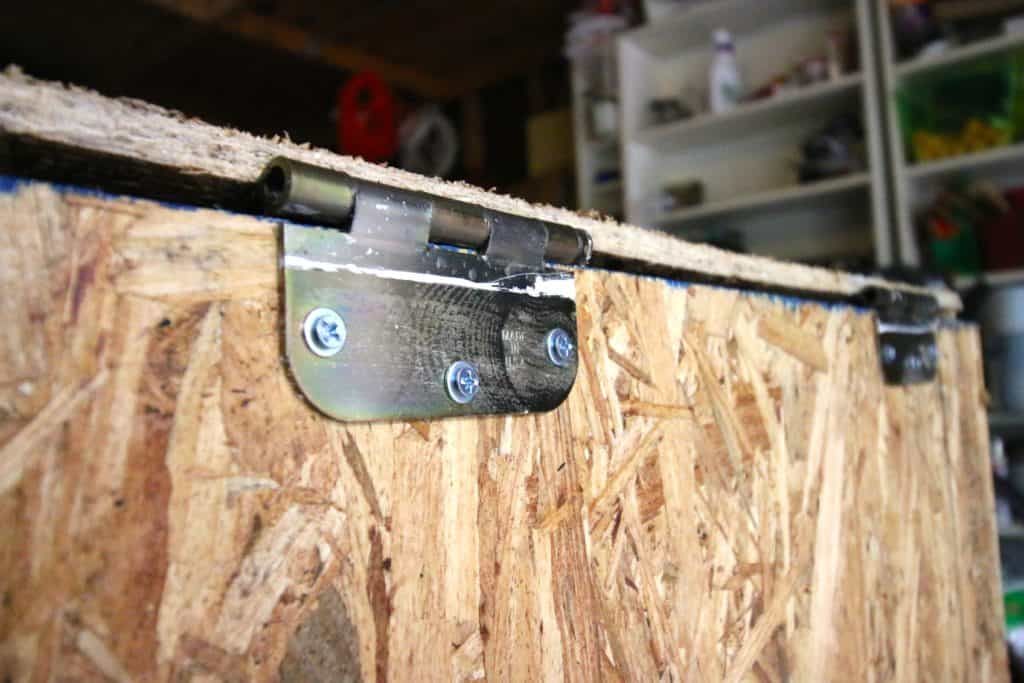
Using only plywood, we cut out a base, four sides and a top to screw together. The sides were cut with a slight upward angle so that the roof could slope down and be hinged.

How to DIY Shingle a Wood Shed Roof - Charleston Crafted

How to DIY Shingle a Wood Shed Roof - Charleston Crafted

How to DIY Shingle a Wood Shed Roof - Charleston Crafted

How to DIY Shingle a Wood Shed Roof - Charleston Crafted

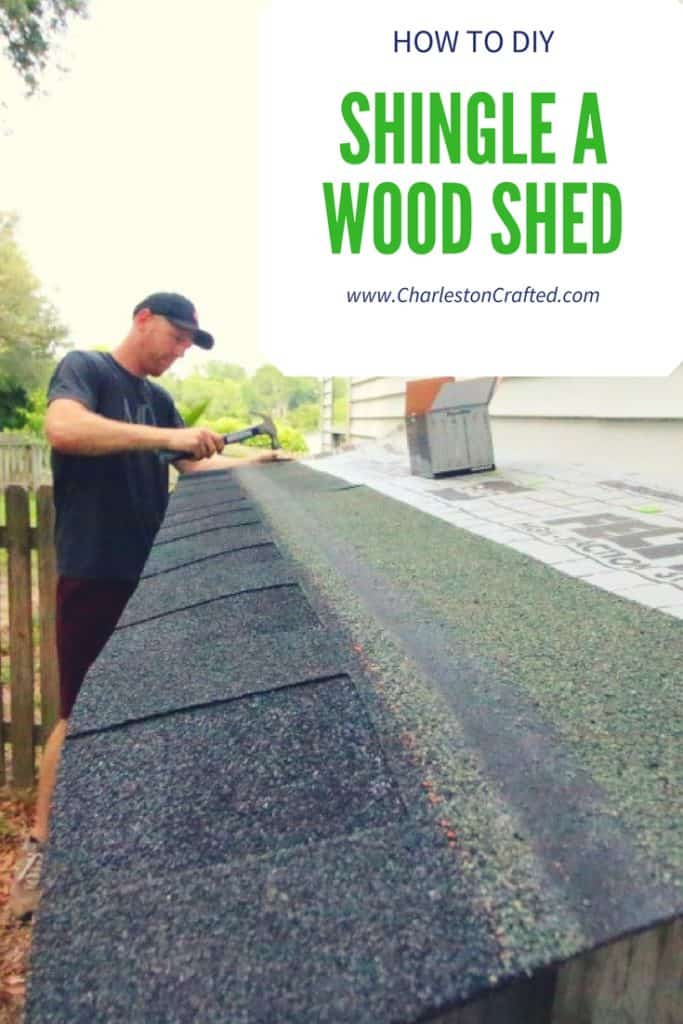
Once our new box was built, we started on adding our new Timberline® shingles from GAF. This stuff is pretty easy to use and really isn't hard to do yourself. GAF is customarily thought of as a professional product used by contractors but can be used by the average DIYer. You don't need an expert roofing company to put it up- you can do it!

How to DIY Shingle a Wood Shed Roof - Charleston Crafted

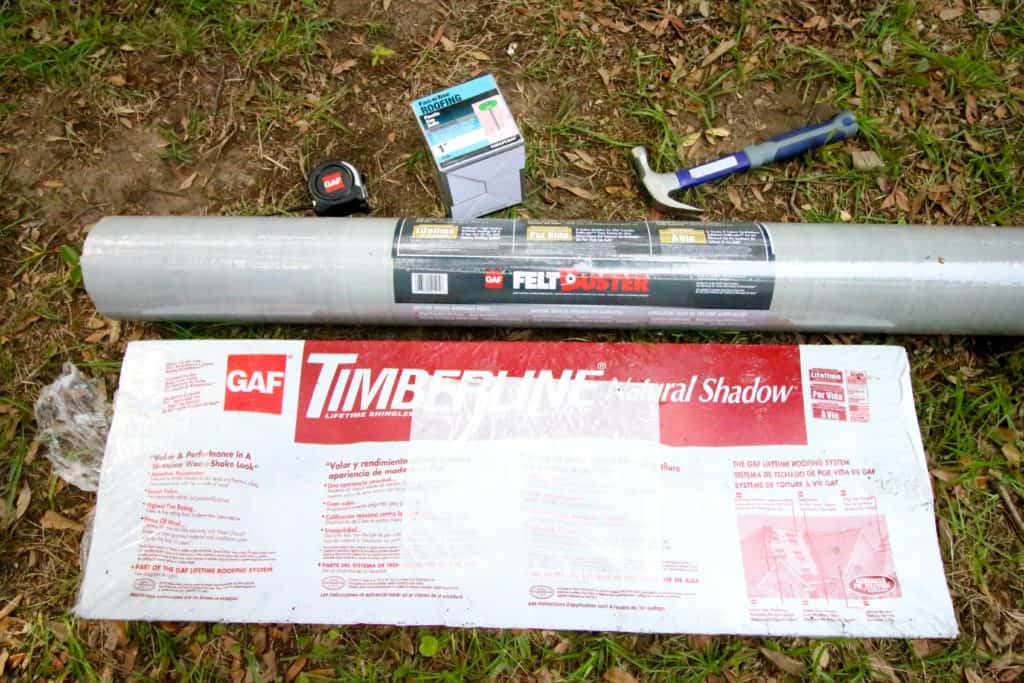
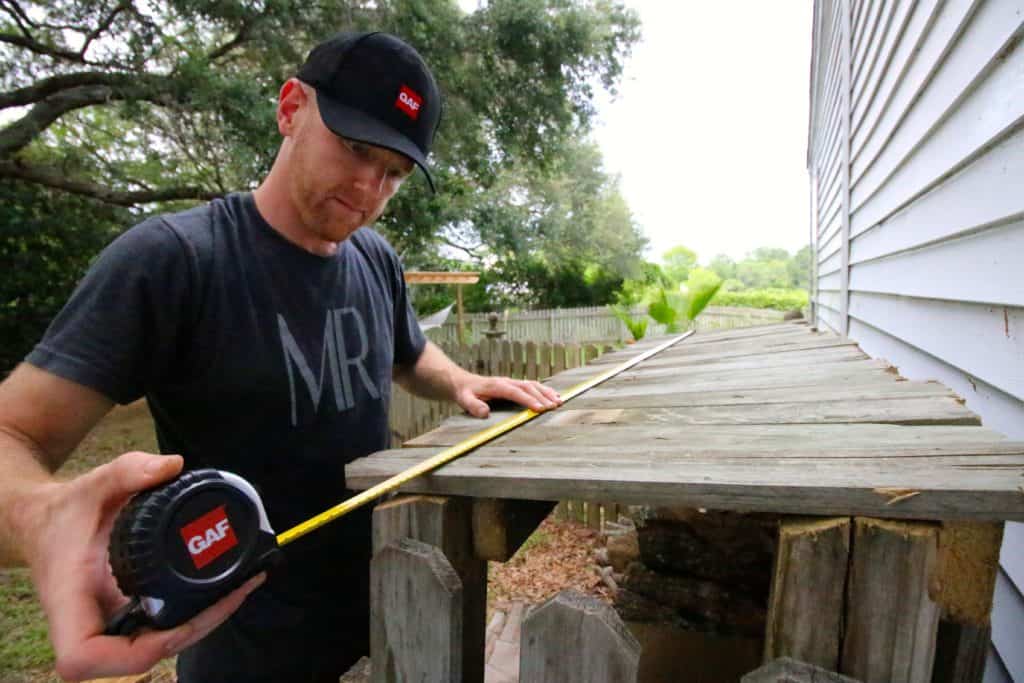
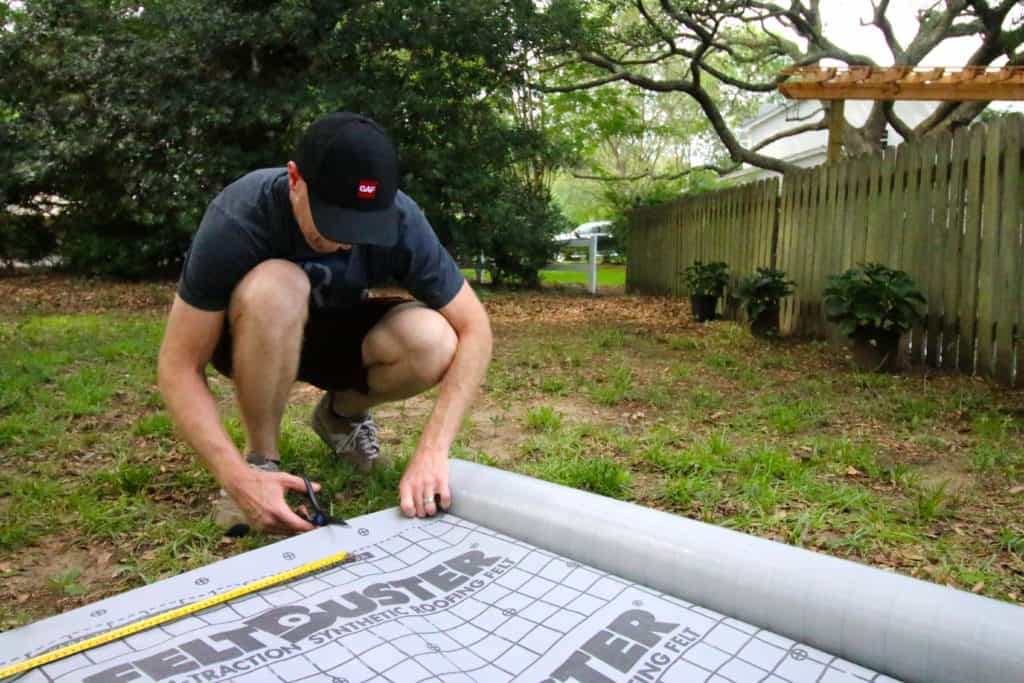
The first step to roofing our project was to install FeltBuster® High Traction Synthetic Roofing Felt. FeltBuster® comes in a long roll and is great for a first layer on your project. When we unrolled it, this tarp-like material has lines printed on it, making it super easy to make straight cuts. We started with the wood shed and measured the area of the roof before cutting the FeltBuster®.

How to DIY Shingle a Wood Shed Roof - Charleston Crafted

How to DIY Shingle a Wood Shed Roof - Charleston Crafted

How to DIY Shingle a Wood Shed Roof - Charleston Crafted

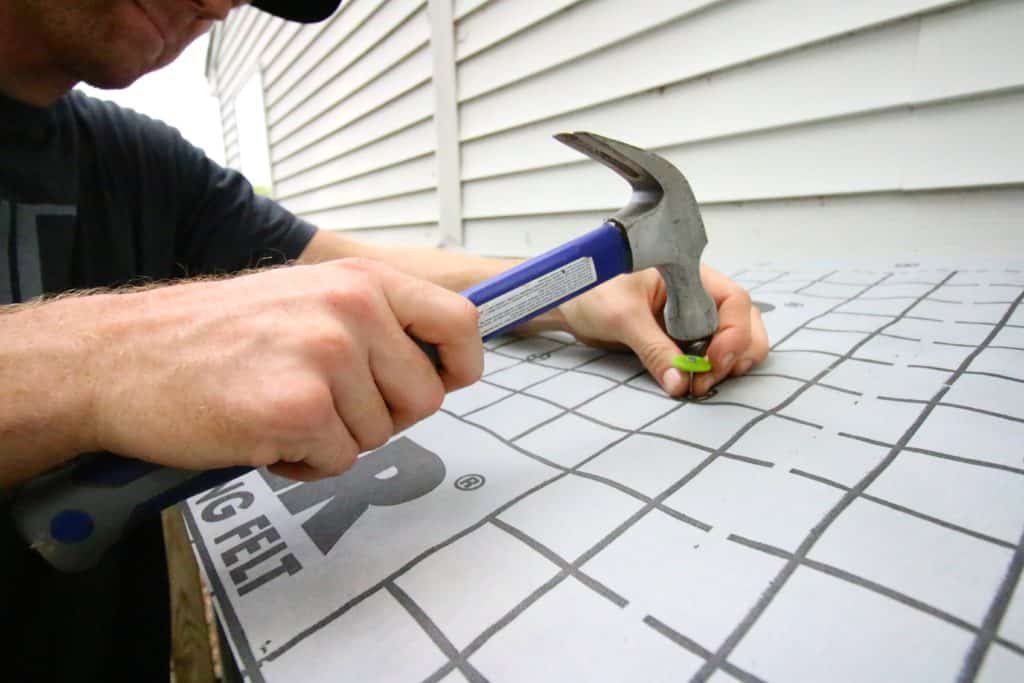
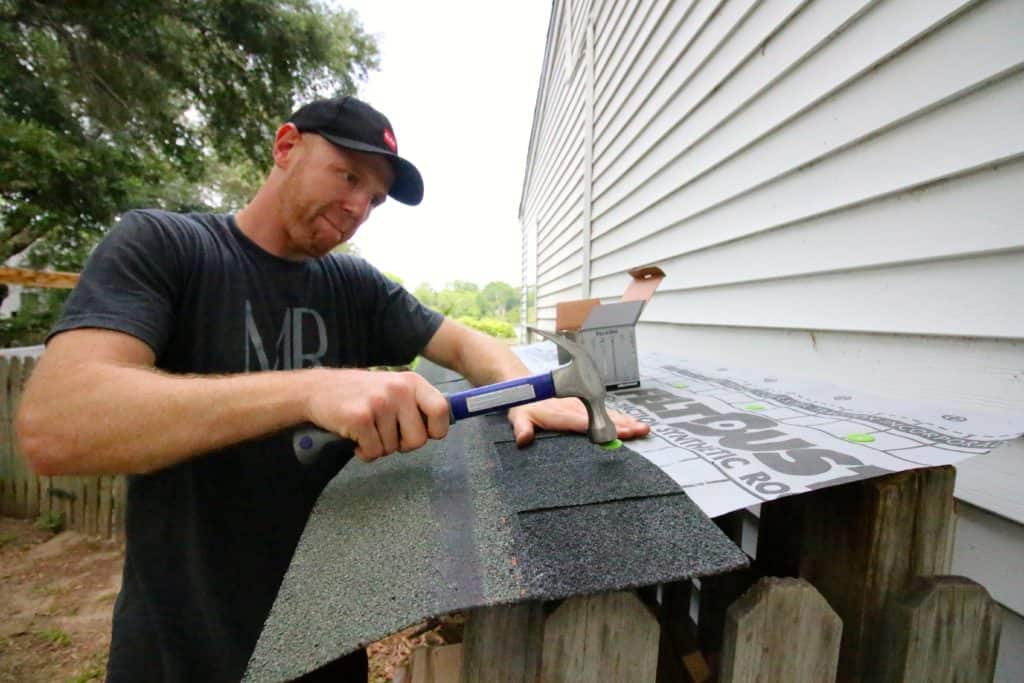
We used 1" round plastic cap roofing nails to hammer the FeltBuster® into place. It even had properly spaced markings for where to place your nails.

How to DIY Shingle a Wood Shed Roof - Charleston Crafted

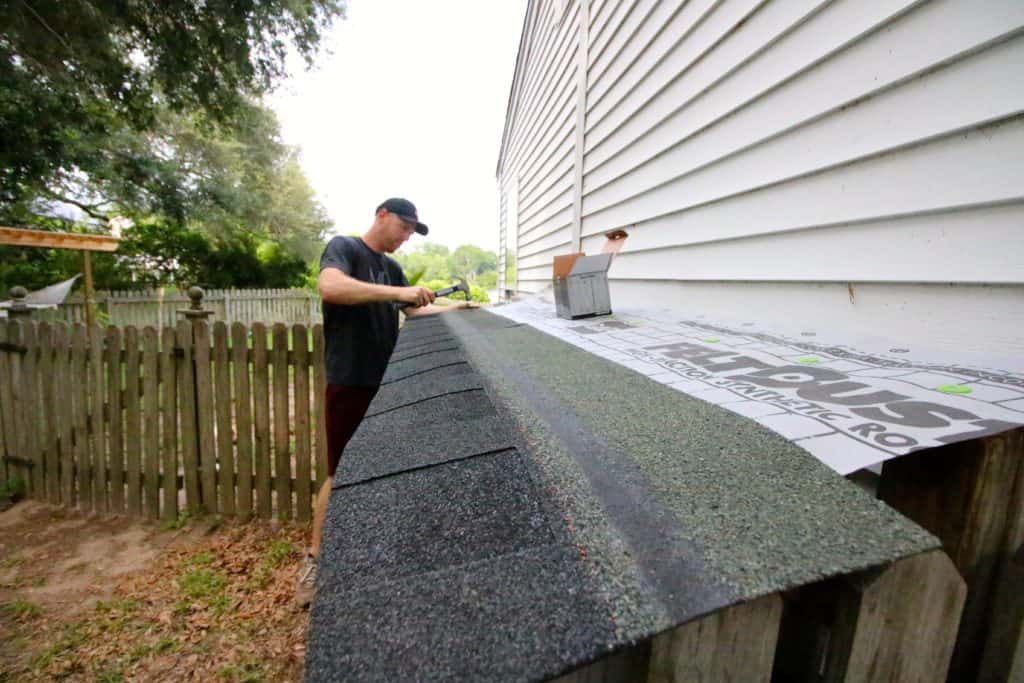
Once the FeltBuster® was in place, we were ready to move to shingles. We chose Timberline® Natural Shadow® for our color to keep it as close to what we already had on our home's roof as possible. We had never worked with shingles before, but they were perfect for this project and are extremely durable. We had to use basically two sheets of shingles per row. We started by installing our first row upside down to provide extra coverage on the edge.

How to DIY Shingle a Wood Shed Roof - Charleston Crafted

Next, we laid the Timberline® shingles right on top of the first row.

How to DIY Shingle a Wood Shed Roof - Charleston Crafted

For subsequent rows, you should start your shingles further to the left in order to keep the proper pattern on your roof and then just cut the excess off later. GAF provides a lot of great training videos, including one on how to do the entire shingles process.

How to DIY Shingle a Wood Shed Roof - Charleston Crafted

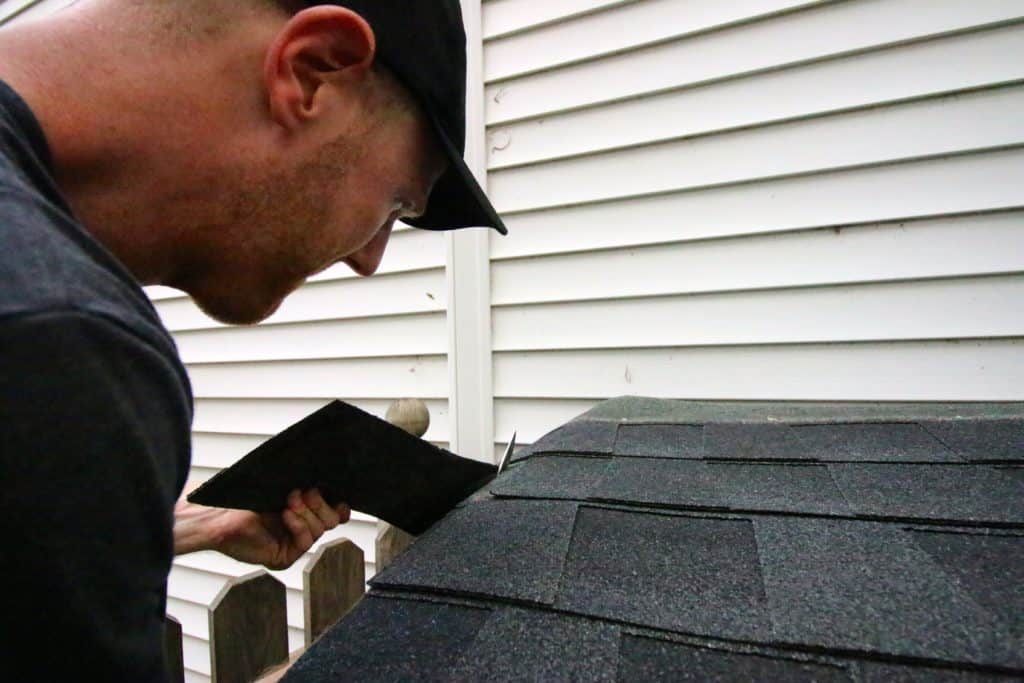
We worked our way up to the top of each structure, finishing by using a blade to carefully cut off the excess off from around the sides and back.

How to DIY Shingle a Wood Shed Roof - Charleston Crafted

How to DIY Shingle a Wood Shed Roof - Charleston Crafted

In the end, our projects now look incredibly professional and are definitely better off for the long-term now.

How to DIY Shingle a Wood Shed Roof - Charleston Crafted

How to DIY Shingle a Wood Shed Roof - Charleston Crafted

Our experience with GAF's FeltBuster® and Timberline® shingles was great. The products were easy to order online and pick up in store at Lowes. We would never have imagined doing our own roofing project, but it was so easy with GAF's products and step-by-step video instructions. We love how our project looks and can't wait to get out in the yard for another bonfire!

Make sure to check out lots of GAF roofing projects from other fabulous bloggers here!

How to DIY Shingle a Wood Shed Roof - Charleston Crafted

Have you ever installed your own roofing on any project? How'd it go??

 Charleston Crafted Logo heart
 Charleston Crafted Logo facebook
 Charleston Crafted Logo insta
 Charleston Crafted Logo pinterest
 Charleston Crafted Logo twitter
Sean headshot cropped
Sean

Hey there, I'm Sean, the woodworking enthusiast and builder behind CharlestonCrafted.com! Since 2012, I've been sharing the magic of turning raw materials into beautiful creations. I love teaching others the art and satisfaction of woodworking and DIY. I try to inspire fellow crafters to make something extraordinary out of nothing at all.

More Garden & Yard

  • DIY Faux Tropical Window Box That Looks Real (But Won’t Die!)
  • How to clean outdoor light fixtures - Charleston Crafted
    How to clean outdoor light fixtures
  • Easter decor reveal - Charleston Crafted
    Our fun and festive Easter yard decor!
  • Easy DIY Yard Carrot Patch for Easter
    Easy DIY Yard Carrot Patch for Easter

Primary Sidebar

Charleston Crafted about us image

Hey y'all!

We are Morgan & Sean McBride and we are crafting our home together in Charleston, South Carolina.

More about us

Popular Posts

  • DIY Coffered Ceiling
    DIY Coffered Ceiling
  • How to Make DIY Concrete Pumpkins via Charleston Crafted
    How to Make DIY Concrete Pumpkins
  • How to Make a Cupid's Arrow Valentine's Day Wall Hanging with felt on the Cricut
    How to make a Cupid's Arrow Valentine's Day Wall Hanging
  • Our Tropical Oasis - A backyard Hammock area - Charleston Crafted
    Our Tropical Oasis

Recent Posts

  • how to organize a pantry with zones
    How to Organize Your Pantry in Zones (And Why It’s a Game Changer)
  • Keep outdoor rug from blowing up - Charleston Crafted
    How to keep your outdoor rug in place
  • kitchen design mistakes to avoid
    Kitchen design mistakes to avoid
  • DIY folding desk for walking pad - Charleston Crafted
    DIY folding desk for walking pads

Privacy Policy

Footer

↑ back to top

Navigation

  • Home
  • Blog
  • Contact Us
  • Terms of Use
  • Disclaimer

Newsletter

  • Sign up for emails and updates
  • Follow us on Instagram
  • Work with Us

Browse by Category

  • Woodworking
  • Home Projects
  • Paint Colors
  • Room Reveals

© 2025 The Charleston Crafted Blog LLC DBA “Charleston Crafted” and “CharlestonCrafted” (also known as N/A) / All Rights Reserved.
Official Website: (Charleston Crafted)
Registered in USA (Co. Reg. No.: 565586)
Address: Charleston, USA 29414, South Carolina
Contact Phone: Not applicable — contact is via email: sean@charlestoncrafted.com

DISCLAIMER: The content on this website is provided for general informational purposes only and is not intended as professional advice. The Charleston Crafted Blog LLC and The Charleston Crafted Blog LLC make no representations or warranties—express or implied—regarding the accuracy, completeness, or suitability of the information contained herein. Any reliance you place on this information is strictly at your own risk. In no event shall The Charleston Crafted Blog LLC or The Charleston Crafted Blog LLC be liable for any loss or damage, including without limitation, indirect or consequential loss or damage, arising from the use or inability to use this website. This website is the official website of The Charleston Crafted Blog LLC.

AFFILIATE DISCLOSURE: This website contains affiliate links. If you click through and make a purchase, we may earn a commission at no extra cost to you.

As an Amazon Associate, I earn from qualifying purchases.

Site Editor: Morgan Smith McBride

Copyright © 2025 Charleston Crafted