• Skip to primary navigation
  • Skip to main content
  • Skip to primary sidebar
Charleston Crafted
  • DIY
  • Woodworking
  • Popular Posts
  • Blog
  • About
  • Shop
menu icon
go to homepage
  • DIY
  • Woodworking
  • Popular Posts
  • Blog
  • About
  • Shop
search icon
Homepage link
  • DIY
  • Woodworking
  • Popular Posts
  • Blog
  • About
  • Shop
×
Home » Home Projects

Replace a Door Ball Stop – Secure Your Doors

Published: Jan 18, 2013 · Modified: Jan 11, 2024 by CharlestonCrafted · As an Amazon Associate, we earn from qualifying purchases. This site contains affiliate links. ·

Learn how to replace a door ball stop and keep your doors from swinging open with this easy DIY guide. Say goodbye to pesky swinging mishaps!

Tired of dealing with those pesky laundry room doors that just won't stay shut? I feel your pain! 

When I moved into my new condo, I noticed that the laundry doors wouldn’t stay closed.

A photo of laundry room doors that are slightly open due to a problem with their door balls stops.

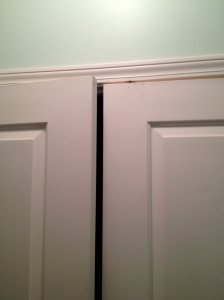
Something was missing – the ball stop.

These little guys are essential for keeping doors in line. Without the ball catch, my doors swung open like they had a mind of their own.

But fear not, there's a quick fix: replacing the missing ball stop. Join me as I show you how to bring those unruly doors back under control and regain your peace and privacy.

how to replace a door ball stop

How to Replace a Door Ball Stop

Supplies needed:

Before you begin, here’s what you need:

  • Ball catch replacement parts
  • Electric drill with appropriate drill bits
  • screws
  • wood file

Steps to Installing a Ball Catch on a Door

STEP 1: Remove the Old Casing

Begin by checking the old ball stop casing – you might be able to keep using it if it’s in good condition. 

Otherwise, if it's damaged or incompatible with the new one, unscrew it and remove it. We’re going to have to do a door ball catch replacement. 

A photo of a ball stop catch being removed with a multi-tool.

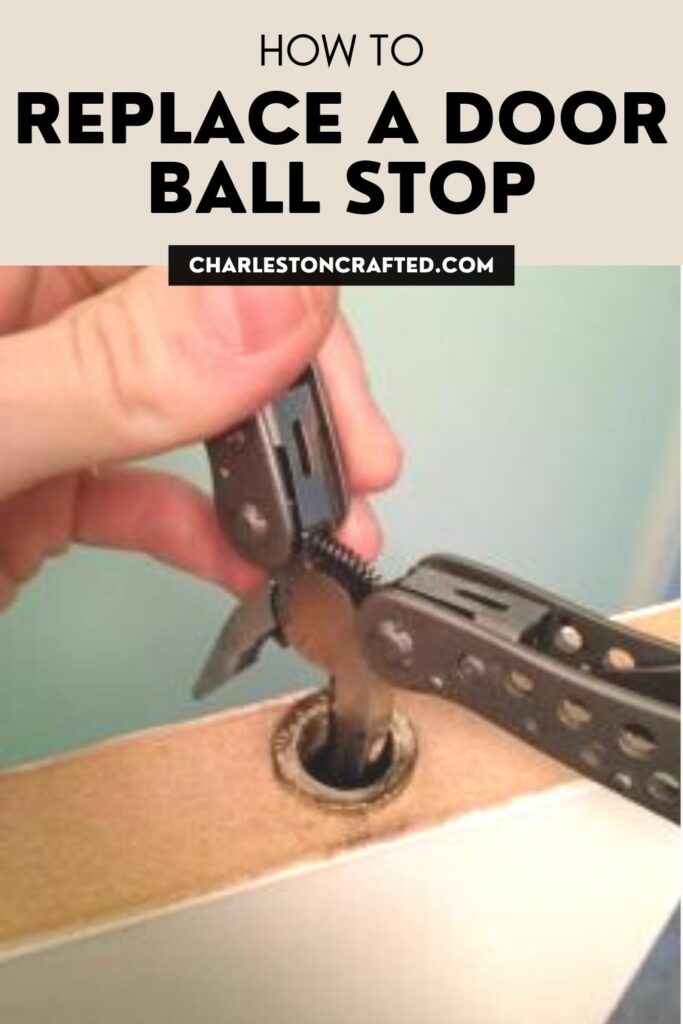
STEP 2: Install the New Ball Stop

If your door doesn't already have a ball stop hole, you'll need to drill one using the appropriate drill bit. 

A photo of  a ball stop fitting hole being expanded using a drill.

Then, simply insert the new ball stop fitting into the hole and secure it in place using the provided screws. 

A photo of a ball stop fitting being secured in a door with an electric drill.

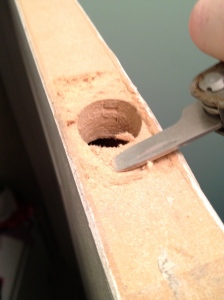
STEP 4: Adjust for Proper Fit (if necessary)

In some cases, like uneven doors, you may encounter alignment issues. If the ball stop rests too high or too low, you can make adjustments. 

First, drill shallow holes in a square shape where you want the ball stop to sit. Then, carefully use the drill or a wood file to remove any excess material until the ball stop fits properly (I used a multi-tool with a file attachment).

A photo of a door being filed to aid in the fitting of a door stop mechanism.

STEP 5: Test and Finalize

After making adjustments, ensure that the door closes securely with the ball stop in place. Make any final tweaks if needed. 

A photo of the finished door stop fitting installation.

Once you're satisfied with the fit, your DIY door ball stop installation is complete.

With these simple steps, you can restore functionality to your door and bid farewell to those annoying swinging mishaps! 

A photo of the laundry door that now remains closed properly due to a new door stop catch.

If you want a quieter option – you could even replace the ball catch with a magnet, though we’ll leave that guide for another day!

Want More Door DIY Guides?

Check out these door-related how-to guides:

  • A Guide to Adjusting Cabinet Doors
  • Preventing Cabinet Doors from Opening Too Far
  • Replacing a Front Door Peep Hole
  • Fixing a Screen Door
Charleston Crafted Signature

Follow us on:
Pinterest | Instagram | TikTok | YouTube | Facebook | Amazon Storefront | LTK Shop

Looking for something?

We've been doing this since 2012 so we have a LOT of blog posts!
Search stuff like: Ceiling Projects | DIY Plant Stands | Thrift Flips

Charleston Crafted logo banner
CharlestonCrafted

More Home Projects

  • DIY floating corner shelves - Charleston Crafted
    How to make floating corner shelves
  • how to assess your home renovation needs
    How to assess your home renovation needs
  • Top Mistakes to Avoid When Renovating Your Home
    Top Mistakes to Avoid When Renovating Your Home
  • How to create a DIY home renovation plan
    How to create a DIY home renovation plan

Primary Sidebar

Charleston Crafted about us image

Hey y'all!

We are Morgan & Sean McBride and we are crafting our home together in Charleston, South Carolina.

More about us

Popular Posts

  • DIY Coffered Ceiling
    DIY Coffered Ceiling
  • How to Make DIY Concrete Pumpkins via Charleston Crafted
    How to Make DIY Concrete Pumpkins
  • How to Make a Cupid's Arrow Valentine's Day Wall Hanging with felt on the Cricut
    How to make a Cupid's Arrow Valentine's Day Wall Hanging
  • Our Tropical Oasis - A backyard Hammock area - Charleston Crafted
    Our Tropical Oasis

Recent Posts

  • fisherman aesthetic home inspiration
    Fisherman Aesthetic Decor for Your Home
  • Senix Tools Review- Charleston Crafted
    Are Senix power tools any good?
  • Your Weekend To-Do List: 15 Things to Do for Summer Home Upkeep
    Your Weekend To-Do List: 15 Things to Do for Summer Home Upkeep
  • How to build a DIY gate pergola- Charleston Crafted
    How to build a DIY gate pergola

Privacy Policy

Footer

↑ back to top

Navigation

  • Home
  • Blog
  • Contact Us
  • Terms of Use
  • Disclaimer

Newsletter

  • Sign up for emails and updates
  • Follow us on Instagram
  • Work with Us

Browse by Category

  • Woodworking
  • Home Projects
  • Paint Colors
  • Room Reveals

© 2025 The Charleston Crafted Blog LLC DBA “Charleston Crafted” and “CharlestonCrafted” (also known as N/A) / All Rights Reserved.
Official Website: (Charleston Crafted)
Registered in USA (Co. Reg. No.: 565586)
Address: Charleston, USA 29414, South Carolina
Contact Phone: Not applicable — contact is via email: sean@charlestoncrafted.com

DISCLAIMER: The content on this website is provided for general informational purposes only and is not intended as professional advice. The Charleston Crafted Blog LLC and The Charleston Crafted Blog LLC make no representations or warranties—express or implied—regarding the accuracy, completeness, or suitability of the information contained herein. Any reliance you place on this information is strictly at your own risk. In no event shall The Charleston Crafted Blog LLC or The Charleston Crafted Blog LLC be liable for any loss or damage, including without limitation, indirect or consequential loss or damage, arising from the use or inability to use this website. This website is the official website of The Charleston Crafted Blog LLC.

AFFILIATE DISCLOSURE: This website contains affiliate links. If you click through and make a purchase, we may earn a commission at no extra cost to you.

As an Amazon Associate, I earn from qualifying purchases.

Site Editor: Morgan Smith McBride

Copyright © 2025 Charleston Crafted