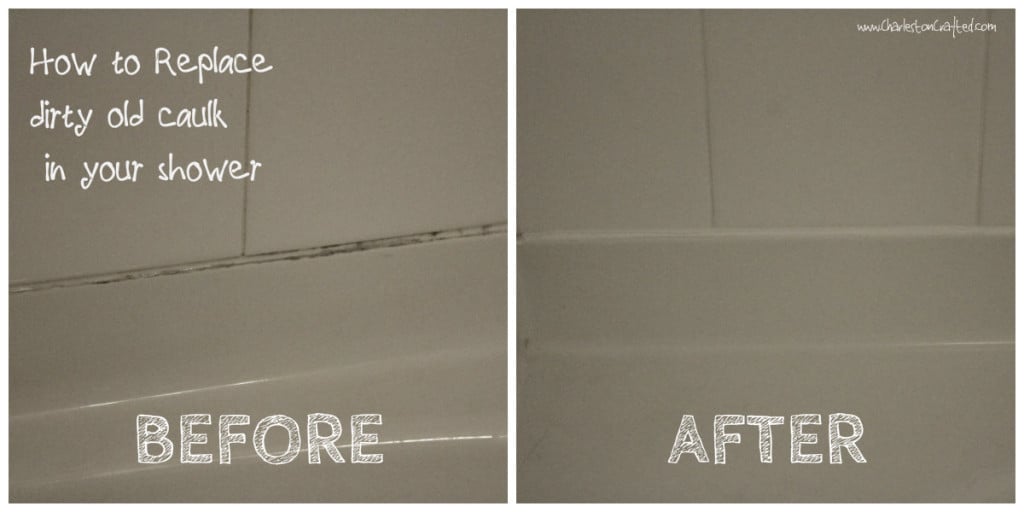
One easy way to refresh your tub is to replace the moldy caulk. It's an easy DIY project with these simple steps!
My number one least-favorite chore is cleaning the tub. Our shower-tub combo has an acrylic base and no matter how hard we scrub it, I feel like it never gets fully clean.
A big problem with that was the caulk line around the tub. That's the thin seam between the plastic tub and the ceramic tile.
It wears away over time, and water gets in there. Since its small and dark and wet, mold grows. Mine was looking black and gross and no amount of bleach could save it.
So, Sean offered to replace it. We have caulked before and had all of the supplies on hand. It took the two of us about 45 minutes to do from start to finish.
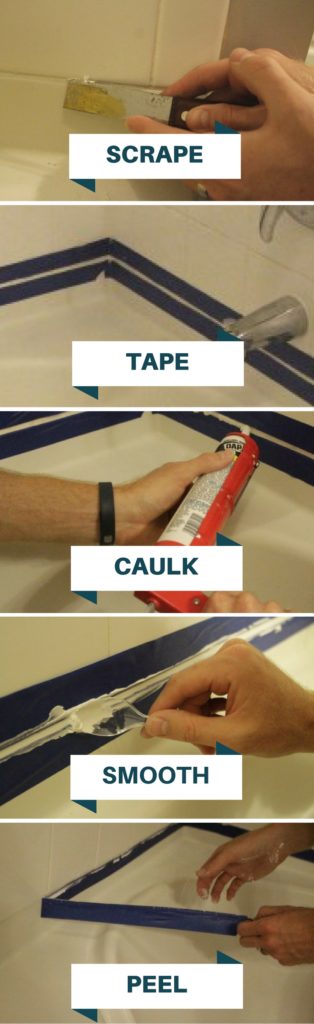
How to replace the caulk in your tub
Replacing the caulk in your tub is a quick and easy DIY project that makes a big difference. Here's what you need and how to do it.
What you need:
- Paint scrapers/putty knife (one per person to speed things up)
- Painter's tape (any width)
- Waterproof white caulk
- Caulk gun
- Plastic spoon
- Paper towels
- Bowl of water
- Plastic bag (for clean up)
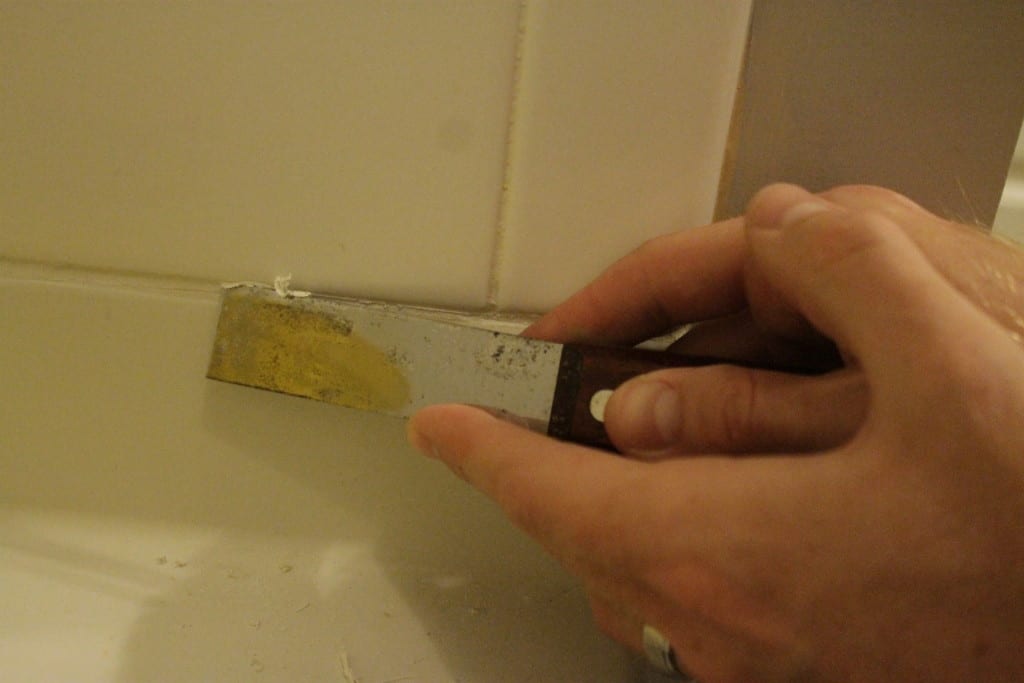
Step one: remove old caulk
First, you want to remove all the old caulk. This is important so that the new caulk has a clean surface to latch onto.
Just use the corner of a paint scraper to scrape it out. We found that it was easiest if you scored the top and bottom edges of each seam with the corner of the scraper, and then used the flat edge to scrape it out.
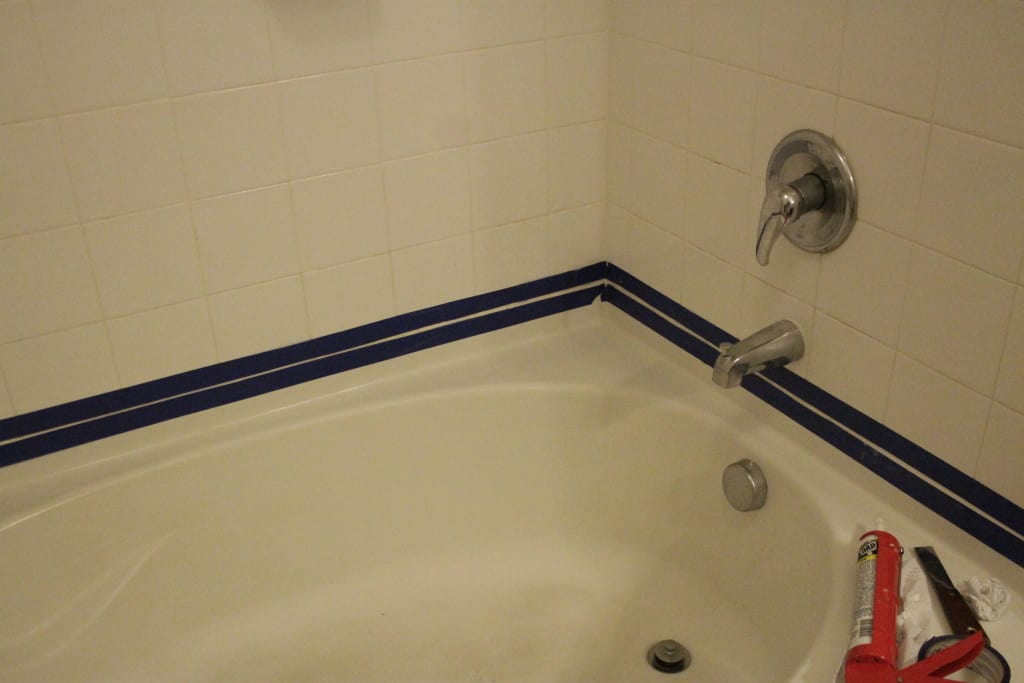
Step two: tape
Next, you are ready to caulk. To make it easiest, tape off your seam using painter's tape. This will give you a clean edge.
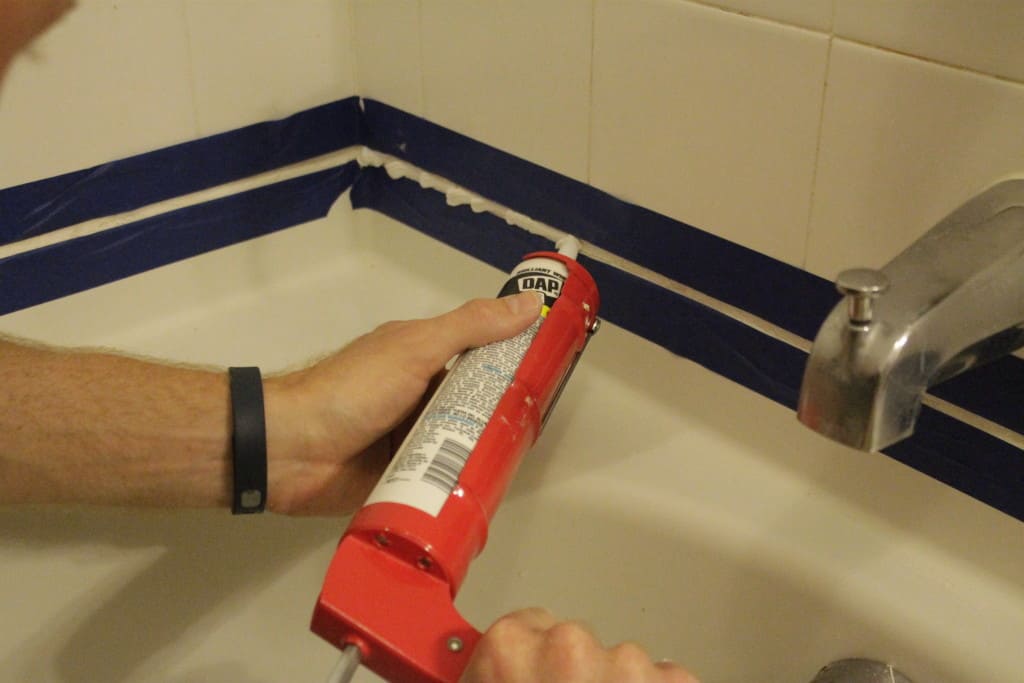
Step three: apply caulk
Next, apply caulk to the seam. We had the best luck making a "pulling" motion and not a "pushing" motion. In other words, squeeze out the caulk and move the gun away from the line as you go, don't push the gun back over the caulk you just squirted out.
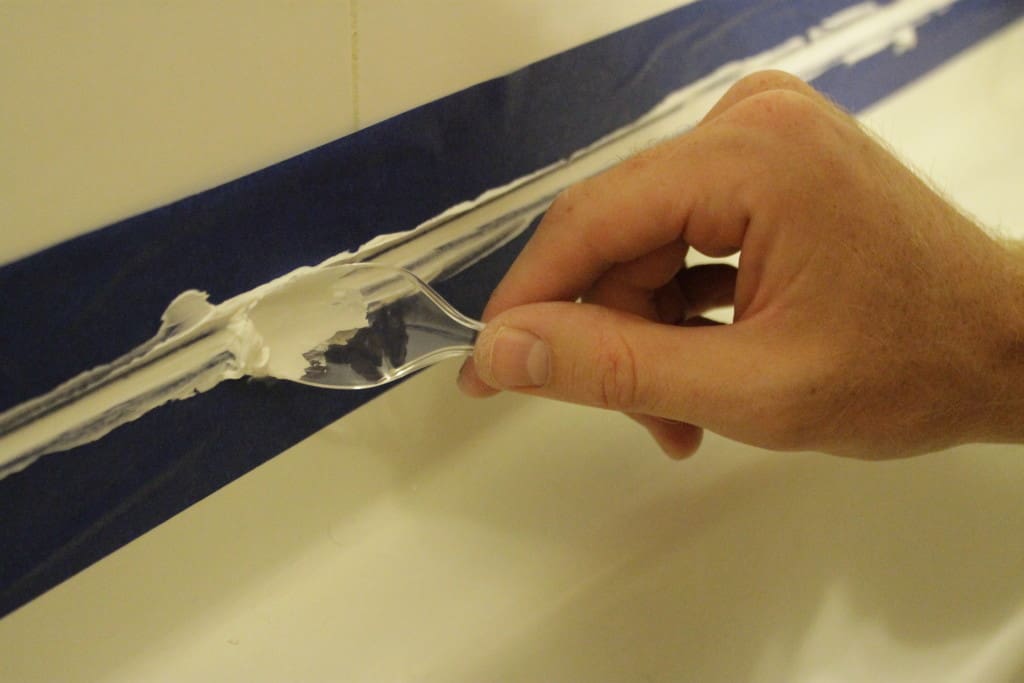
Step three: smooth caulk
Right after you squirt a line, use the plastic spoon or your finger to smooth it down. You will want a bowl of water and paper towels to clean the spoon, because it does get messy and the spoon leaves the smoothest finish when it is clean.
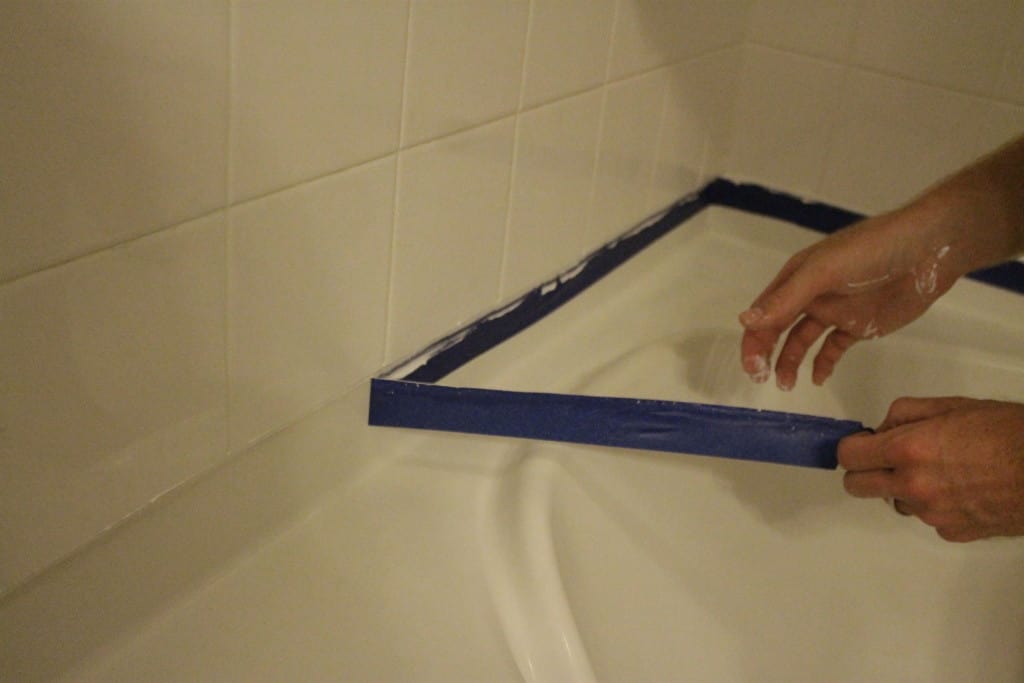
Step four: remove tape
Peel the tape off immediately. Allow to dry completely before taking a shower.
Enjoy your new tub!
It was so easy and made such an impact. I love little projects like this!


Looking for something?
We've been doing this since 2012 so we have a LOT of blog posts!
Search stuff like: Ceiling Projects | DIY Plant Stands | Thrift Flips

Hey there, I'm Sean, the woodworking enthusiast and builder behind CharlestonCrafted.com! Since 2012, I've been sharing the magic of turning raw materials into beautiful creations. I love teaching others the art and satisfaction of woodworking and DIY. I try to inspire fellow crafters to make something extraordinary out of nothing at all.