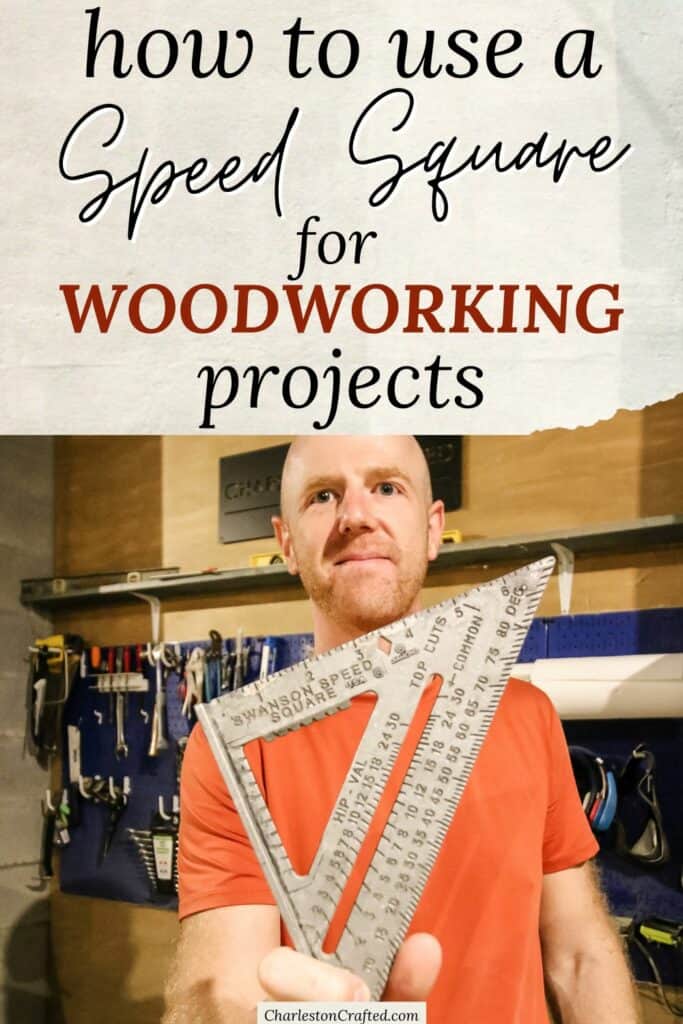
Want your next build to be perfectly square and well measured? Here's our guide on how to use a speed square for woodworking projects!
Woodworking is a fun hobby that can get math-y really quickly. That is not my strong suit.
While it is fun to be creative, it is also super important to pay attention to measurements and angles so that your finished piece looks square and sturdy.
One simple tool that can do a lot for your project is the speed square tool.
The speed square is an essential tool for achieving precise measurements and angles while woodworking.
Today we want to chat about the speed square (also known as the carpenters square), how to use it, and some tips and tricks you might not know about!
What is a speed square?
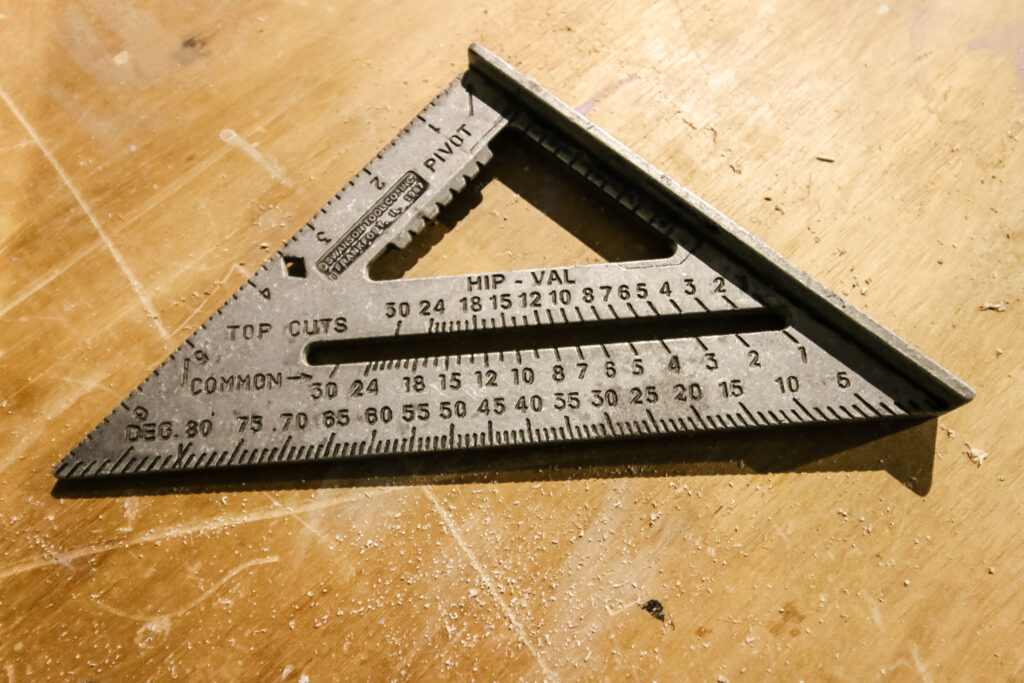
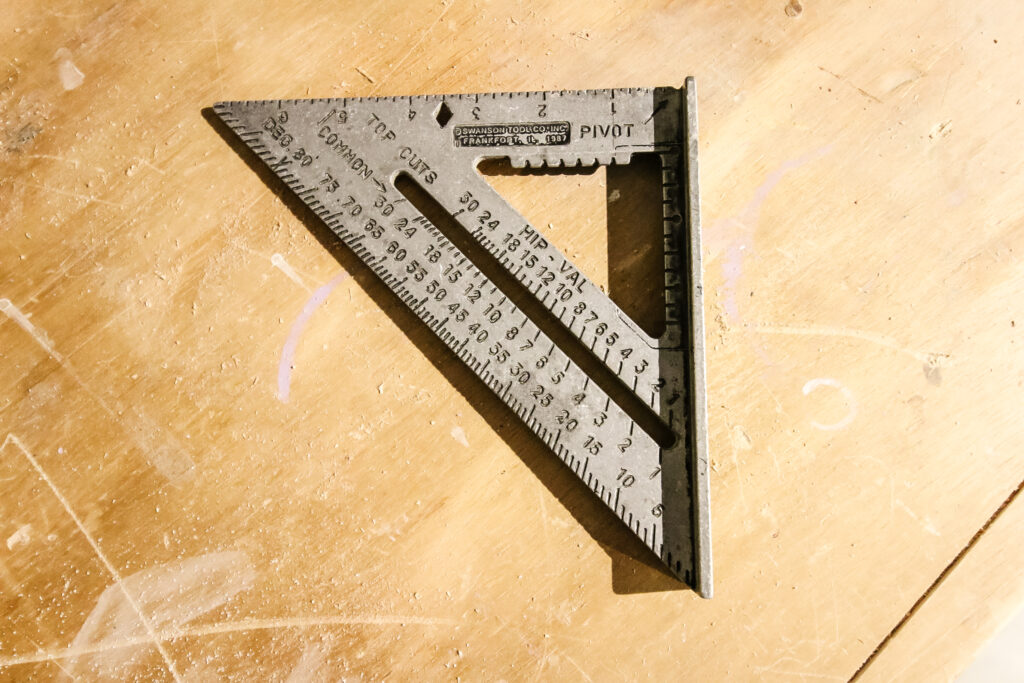
A speed square, also known as a triangle square or a carpenter's square, is a versatile and essential tool for carpentry, woodworking, and construction.
This triangular-shaped, flat piece of metal or plastic has various markings and measurements on its surface. They can be used to verify measurements, angles, and straight lines throughout your build process.
What can you do with a speed square?
The primary functions of a speed square are marking angles, measuring short lengths, and determining pitch.
However, there are many uses for a speed square! Some of them include:
- Measuring + marking small distances
- Drawing long lines at an accurate measurement along a board
- Measuring angles
- Determining pitch
- Guide saw cuts
- Setting miter saw angles
- Set a table or circular saw blade to 90 or 45 degrees
Understanding the Anatomy of a Speed Square
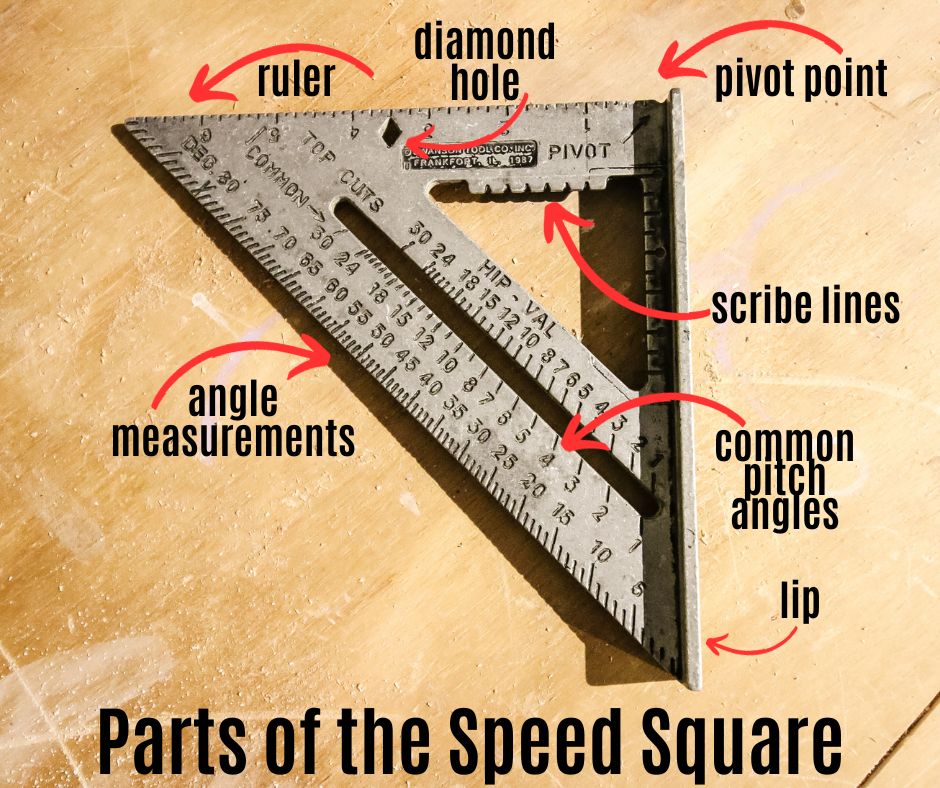
The key components of a speed square are the body, lip, and pivot point.
The lip is sometimes called the fence, and is along the 90 degree angled side of the square. This is the best edge to press against boards or surfaces. The lip holes the square flush against one edge of your workpiece so you can determine everything else you need.
The pivot point is at the end of the lip. This is where you rotate the square to find angled lines.
The body is the remaining bulk of the framing square.
The sides of the speed square typically have markings and measurements in degrees and inches.
Scribe lines are notches in the body of the speed square. They line up with outer angles, allowing you to press the square firmly against the surface you are measuring and still mark the angles.
The hypotenuse is the long side of the triangle. This side is typically labeled with angles in degrees.
Types of speed squares
There are a few types of speed squares to choose from when doing your woodworking project!
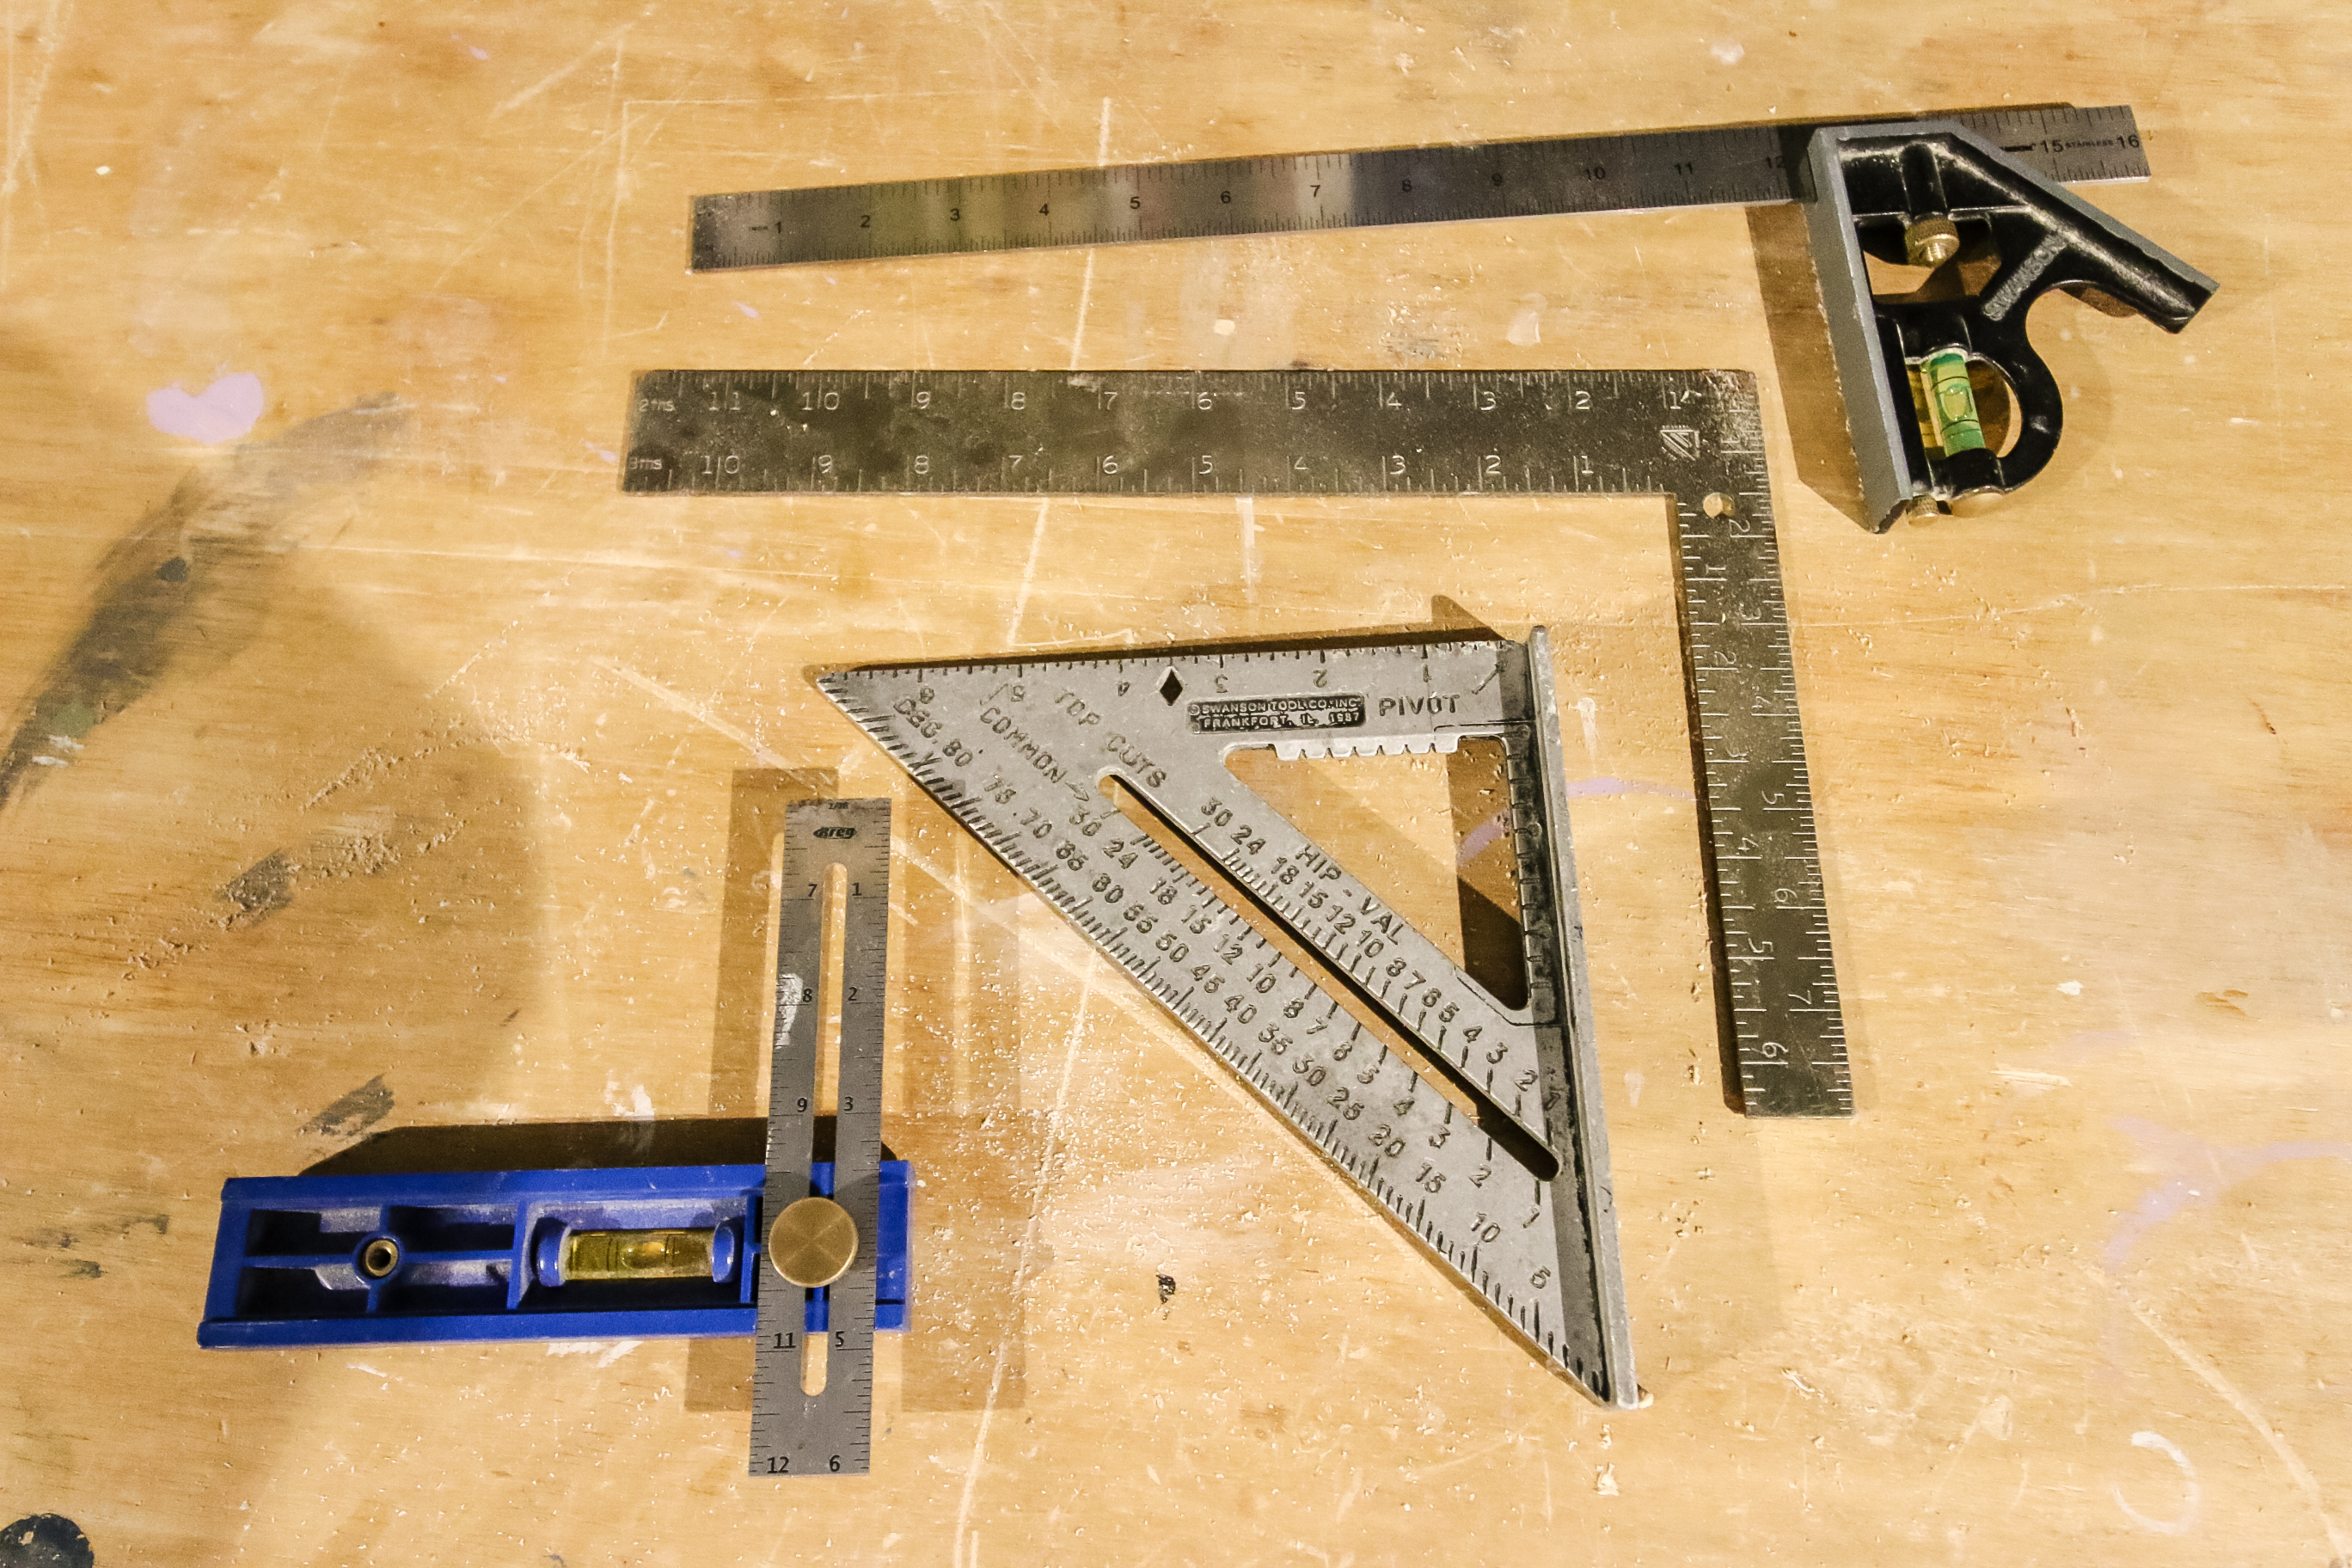
Carpenter's Square
This is the standard speed square used by carpenters, woodworkers, and DIY enthusiasts. It typically features markings for 90-degree and 45-degree angles, a degree scale for measuring other angles, and additional markings for common rafter lengths.
Carpenter's squares are versatile and suitable for a wide range of tasks, from marking angles to determining roof pitches.
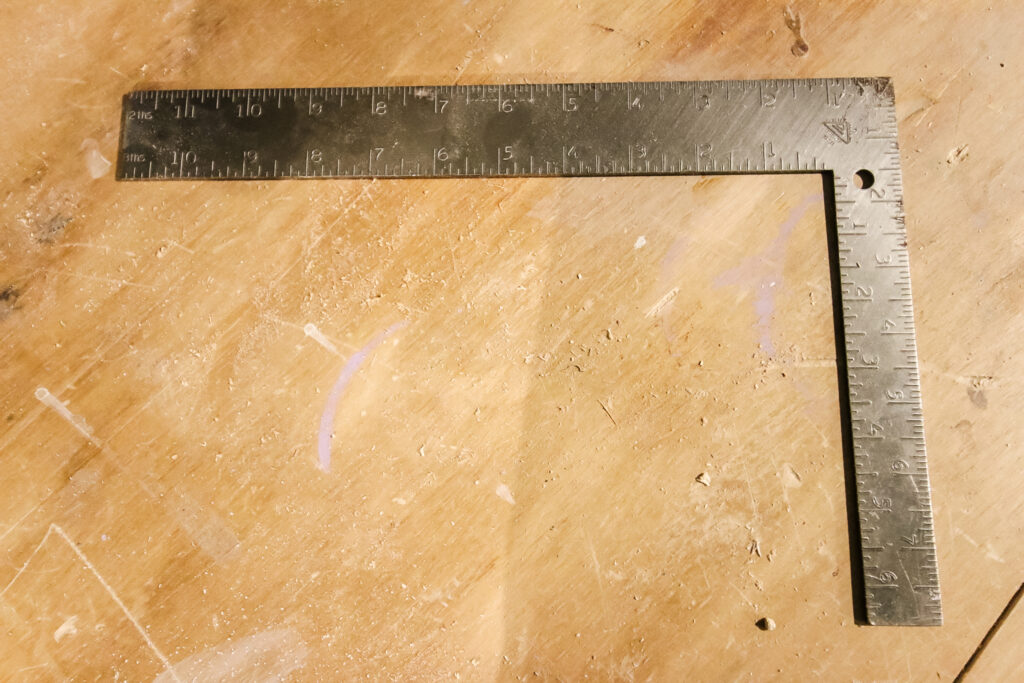
Framing Square
Framing squares are larger versions of speed squares, typically measuring 16 inches by 24 inches.
They have the same 90-degree and 45-degree angles but offer a larger surface area for framing tasks, making them ideal for laying out cuts on larger materials and checking squareness in framing projects.
Framing squares lack the ability to pivot and check additional angles besides the 90 and 45.
Try Square
A try square is a smaller, precision tool used primarily in woodworking and cabinetry. It features a 90-degree angle for checking the squareness of edges and corners.
Try squares are valuable for tasks that require high precision, such as joinery and fine woodworking.
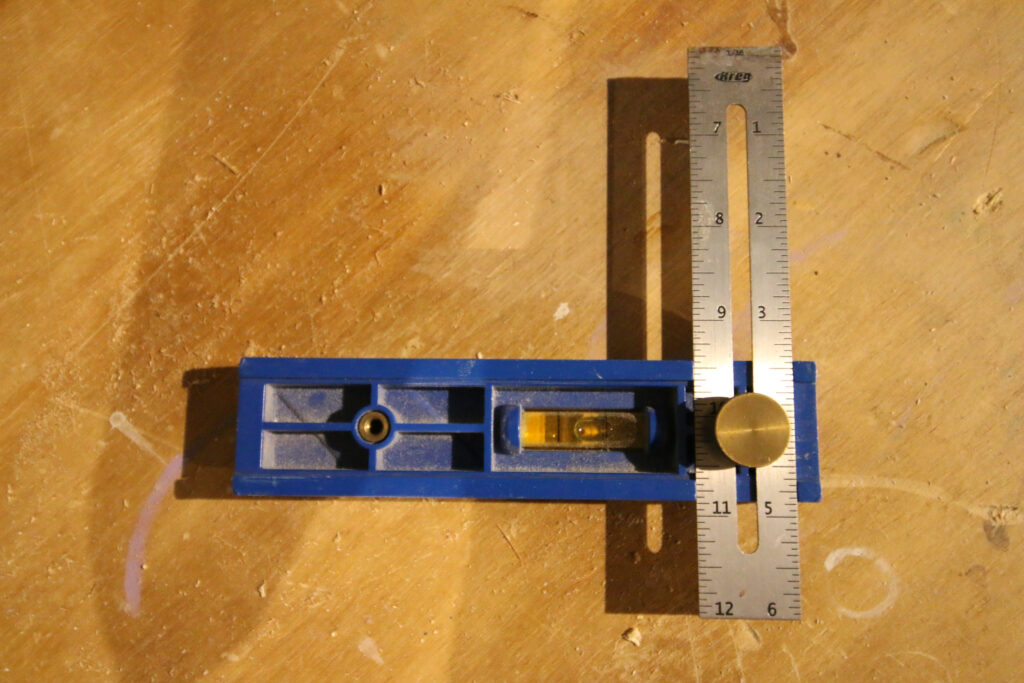
Something similar to a try square is the Kreg Multi-Mark, which is one of our favorite small and handy tools. It is small like the try square and allows for precise measurements and 90 degree angles.
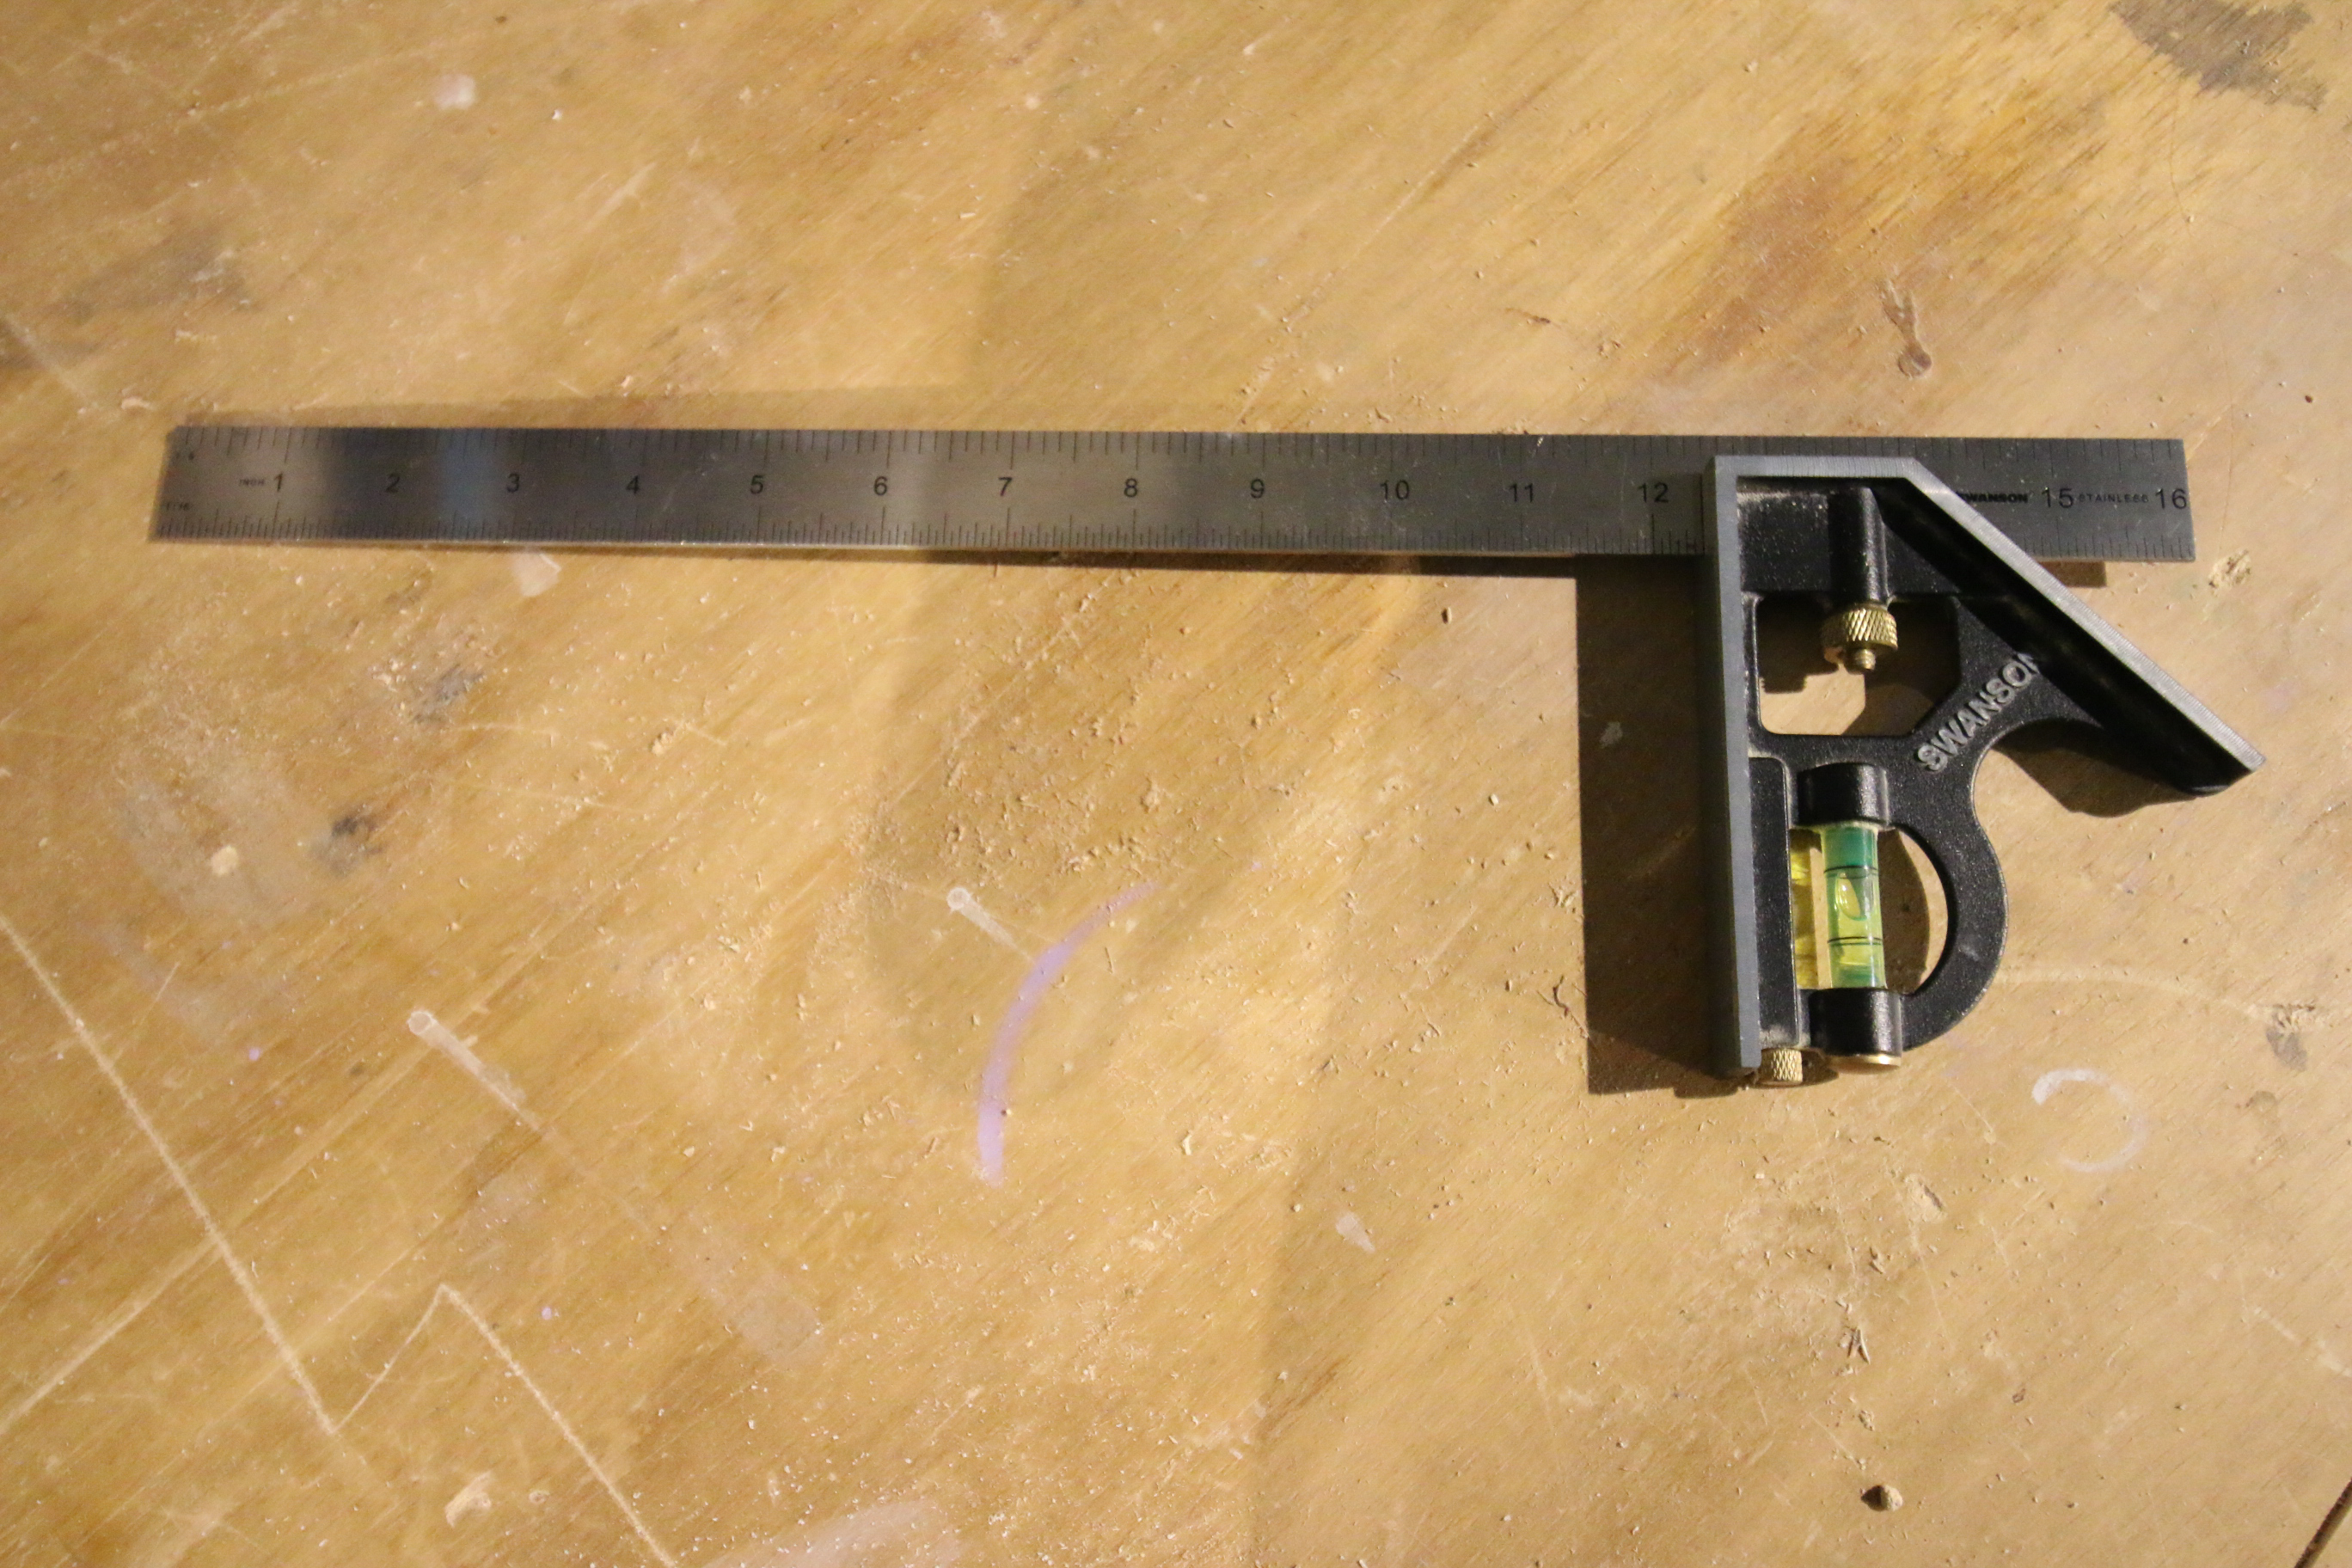
Combination Square
A combination square is a versatile measuring tool that includes a ruler, a 90-degree head (similar to a try square), and often a protractor head for measuring and marking angles.
It's a multi-purpose tool suitable for a wide range of layout and measurement tasks in both woodworking and metalworking.
The thin metal ruler extension of the combination square makes it really good for precision measurements and repeatable lines.
Miter Square
Miter squares are specialized tools designed specifically for marking and measuring angles for miter cuts. They have a protractor-like head that allows for precise angle adjustments.
Miter squares are commonly used in picture framing, trim carpentry, and other applications where accurate miter angles are essential.
Sliding T-Bevel
A sliding T-bevel is a tool used to transfer angles from one surface to another. It consists of a handle and a blade that can be locked at various angles.
Woodworkers often use it to replicate and transfer angles for cutting and fitting joints accurately.
How to Use a Speed Square for Square Cuts
One of the most common uses of a speed square is to draw a square line or make square cuts. Here's how to do it:
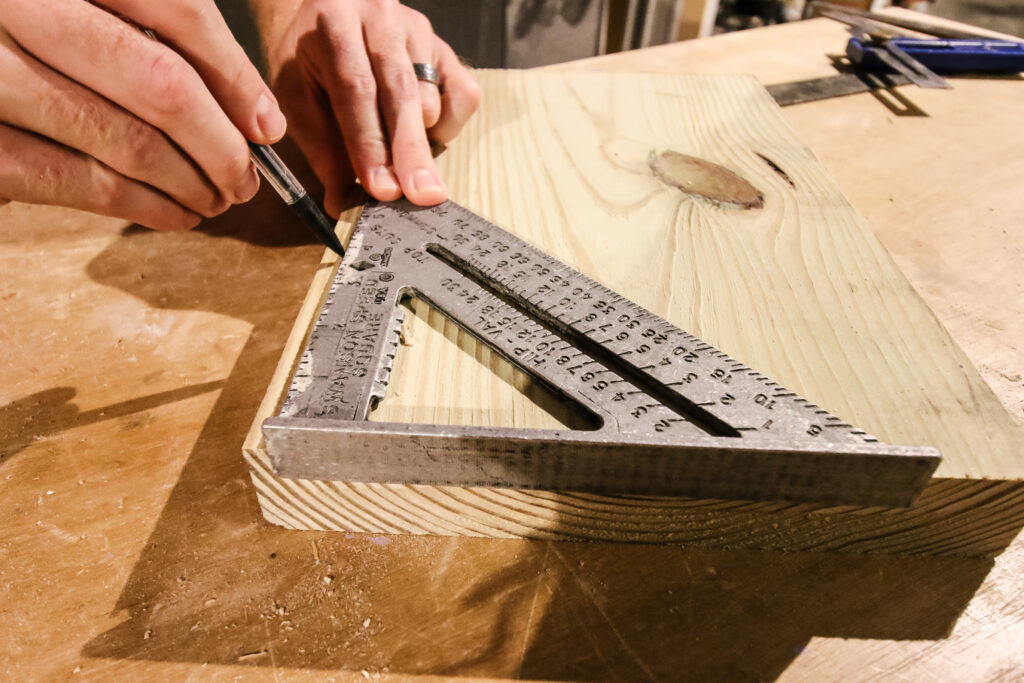
- Place the lip of the speed square firmly against the edge of the wood.
- Align the body of the square with the desired cut line or measurement.
- Use a pencil to trace along the edge of the square.
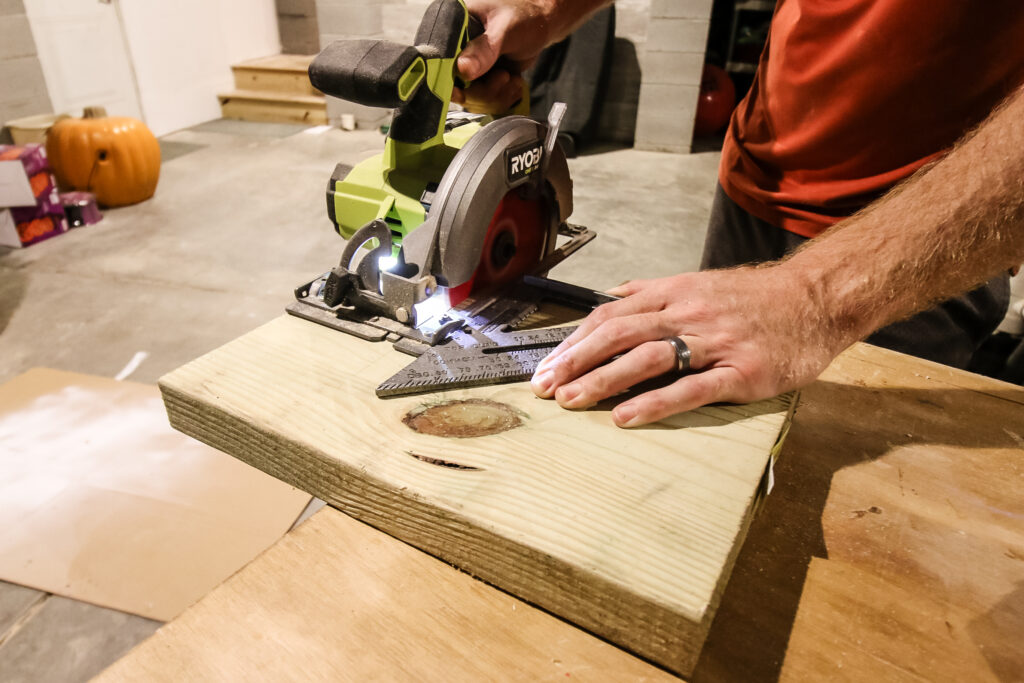
- Make the cut along the marked line with the appropriate saw. you can hold the edge of the square against a circular saw blade to help keep it straight and flush.
How to draw a circle with a speed square
While speed squares are usually for drawing straight lines, the pivot point means that you can also use it to draw a circle!
- Determine the Circle's Radius: Decide on the radius of your circle, which is the distance from the center point to the edge of the circle. Measure this distance and make a note of it.
- Place the Speed Square: Position the speed square so that one of its corners aligns with the center point of your circle. This corner will be your starting point for drawing the circle.
- Mark the Radius: Use your pencil to mark the distance of the radius along the edge of the speed square. For example, if your radius is 4 inches, measure 4 inches from the corner along the edge of the square and make a small mark.
- Create a Pivot Hole: At the marked radius point, use a nail or screw to create a small hole through the speed square. This hole will serve as the pivot point for your string.
- Tie the String: Tie one end of a piece of string to the nail or screw, ensuring it's secure. The length of the string should be at least equal to the radius of your circle.
- Draw the Circle: Hold the speed square firmly with the marked radius point at the center of your circle. Extend the string to the desired length (the radius) and keep it taut. Now, move the free end of the string around the speed square while keeping the string taut. As you do this, the pencil will mark the circumference of your circle.
- Complete the Circle: Continue moving the string around the speed square until you've drawn a complete circle.
How to create angles with a Speed Square
One of the best uses of a speed square is creating and determining angles.
Examine your speed square. It should have markings on a 90-degree corner as two 45 degree angles.
Here's how to create angles with a speed square:
How to create a 90-Degree Angle with a speed square
To make a perfect 90-degree angle, align the long edge (hypotenuse) of the speed square with the edge of your wood, making sure that the corner marked "90" is flush against the edge.
Use your pencil to mark along the vertical edge (the side opposite the 90-degree corner) of the speed square. This mark represents a 90-degree angle relative to the edge of your workpiece.
How to create a 45-Degree Angle with a speed square
To create a 45-degree angle, align the same long edge of the speed square with the edge of your wood, but this time, use one of the 45-degree corners (marked "45").
Ensure that the chosen 45-degree corner is flush against the edge of the wood.
Use your pencil to mark along the horizontal edge (the side adjacent to the 45-degree corner) of the speed square. This mark represents a 45-degree angle relative to the edge of your workpiece.

Creating Other Angles with a speed square
If you need angles other than 45 or 90 degrees, you can use the degree scale on the speed square.
The degree scale is typically located along one of the edges of the square and allows you to measure and mark angles of various degrees.
To create a specific angle, align the speed square so that the desired degree measurement on the scale corresponds with the edge of your workpiece.
Then, use your pencil to mark along the leg of the speed square that extends out from the corner you're using as your pivot point.
How to determine Roof Pitches with a Speed Square
One other cool use of a speed square is to determine roof pitch. Here's how to determine roof pitch with a speed square!
- Place the Speed Square:
- Position the speed square on the roof rafter or the edge of the roof framing where you want to determine the pitch.
- Ensure that the base (the long edge with the 90-degree mark) of the speed square is aligned with the edge of the rafter or framing material.
- Locate the Common Pitch Ratios:
- On most speed squares, you'll find a series of numbers and marks along the "Common Top Cut" or "Common Rafter" side. These numbers correspond to common roof pitch ratios.
- Common roof pitch ratios include 4/12, 6/12, and 8/12. These numbers indicate the number of inches of rise for every 12 inches of run.
- Match the Pitch Ratio:
- Identify the pitch ratio that matches the angle you want for your roof. For example, if you want a 6/12 pitch, locate the "6" on the Common Top Cut side of the speed square.
- Mark the Angle:
- Once you've found the correct pitch ratio on the speed square, mark along the edge of the speed square where it meets the rafter or framing. This mark represents the angle you need for your roof pitch.
- Double-Checking the Angle:
- To ensure accuracy, you can use a protractor or an angle measuring tool to double-check the angle you've marked. This step is especially important for critical roof angles.
Tips for Using a Speed Square
Are you having fun with your speed square yet? Here are a few more hacks to help you get the most out of it!
Use the Notches and Scribe Bar:
Many speed squares have notches and a scribe bar on the square's body. These features are useful for marking consistent measurements and layouts. The scribe bar can be used to mark parallel lines quickly, while the notches can be used for marking measurements at a consistent width from the edge.
Create a Pivot Point Hole:
To use your speed square as a pivot point for drawing arcs or circles, create a small hole at the center of the square. Insert a nail or screw through the hole, and tie a string to it. Now, you can draw circles with precision.
Utilize the Degree Scale:
The degree scale on your speed square can help you measure and mark angles accurately. This is especially helpful for creating custom angles beyond 45 and 90 degrees. Take advantage of this feature when designing projects with specific angle requirements.
Cutting Guide:
To make straight cuts with a circular saw, use your speed square as a cutting guide. Align the edge of the square with your cutting line, and the lip of the square on the edge of the board perpendicular to your cut. Then, place the base of the saw against the square on the board. This ensures a straight and accurate cut.
You can also use the Kreg Portable Cross Cut for this same task!
Mark Studs and Joists:
When framing walls or installing joists, use the speed square to mark stud or joist layout lines quickly. Simply position the square along the edge of the material and mark at the desired intervals.
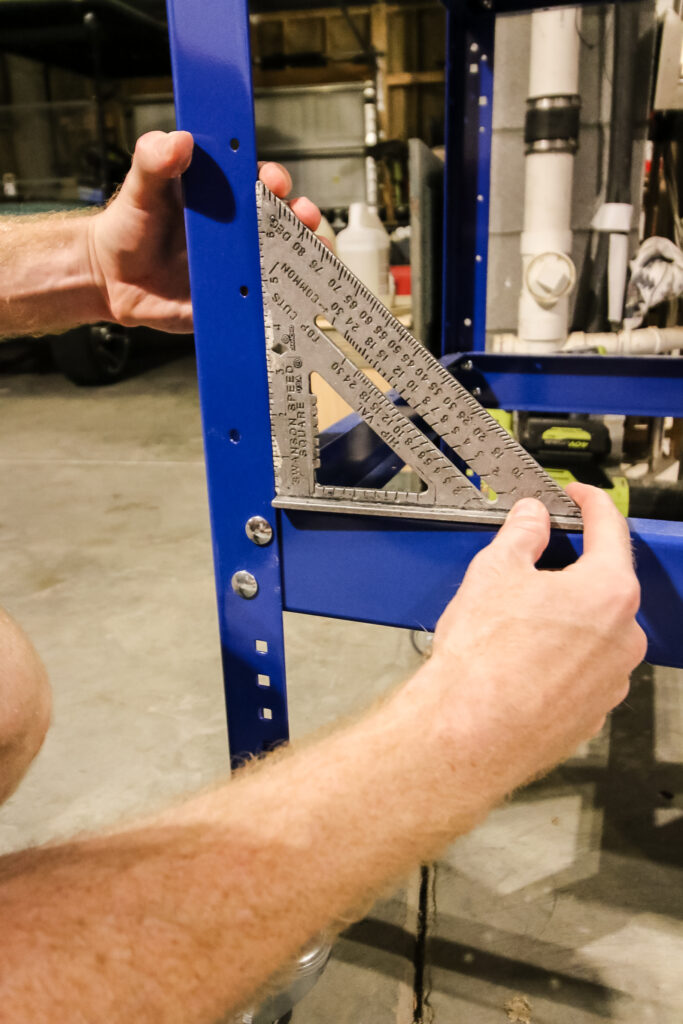
Check for Squareness:
Use your speed square to check if corners or edges are square. Place the square in the corner you want to check, and if the square fits perfectly, it confirms that the corner is square.
Use It as a Straight Edge:
In addition to measuring and marking angles, a speed square can serve as a straight edge for drawing or cutting straight lines. It is a great way to ensure clean, straight lines.
Combine with Other Tools:
Use your speed square with a carpenter's pencil, a utility knife, or a chalk line for precise measurements and marking. These tools complement each other well and can make your tasks more efficient.
Practice and Familiarity:
Like any tool, practice using your speed square regularly to become comfortable with it. The more you use it, the more comfortable you'll become with its various features and functions.
Any more questions about using a speed square?

Looking for something?
We've been doing this since 2012 so we have a LOT of blog posts!
Search stuff like: Ceiling Projects | DIY Plant Stands | Thrift Flips

Hello, I'm Morgan, half of the creative force behind CharlestonCrafted.com! With a passion for DIY that dates back to 2012, I've transformed three homes and now I'm dedicated to helping others craft their dream spaces. Let's turn your house into a home together!


