Are you using your tape measure correctly - or to it's full potential? Here are a ton of tips and tricks on how to read a tape measure!
A tape measure is definitely an essential tool for beginning, woodworkers, and DIYers alike.
In fact, even if you've never done a DIY project before, a tape measure is one of those tools that you're most likely to already have on hand.
So, if most people have a tape measure, it would make sense that they know how to use it right?
In reality, there are a lot of intricacies and tiny details that come with a lot of tape measures that you might not know from a first glance.
Today we wanted to dive into a full tutorial on how to read a tape measure, and to share some of our favorite tips and tricks and hacks for using tape measures in your home.
Mastering the Basics: A Guide on How to Read a Tape Measure
Tape measures are a basic tool for homeowners and DIYers, but we do have a few tips that make it easier to read a measuring tape.
Understanding the Tape Measure
Tape measures are flexible rulers that bend and roll up into themselves inside a protective case.
They can be pulled out to long lengths to measure larger areas, and will generally suck themselves back in when you let go.
The main components of a tape measure are: the tape blade, the hook (on the end), and the housing (case).
Types of measures
There are two common types of tape measures: imperial (inches/feet) and metric (centimeters/meters). Standard tape measures generally have tick marks or numbered markings for both types of measures.
Imperial Measurements
Imperial measurements are inches and feet.
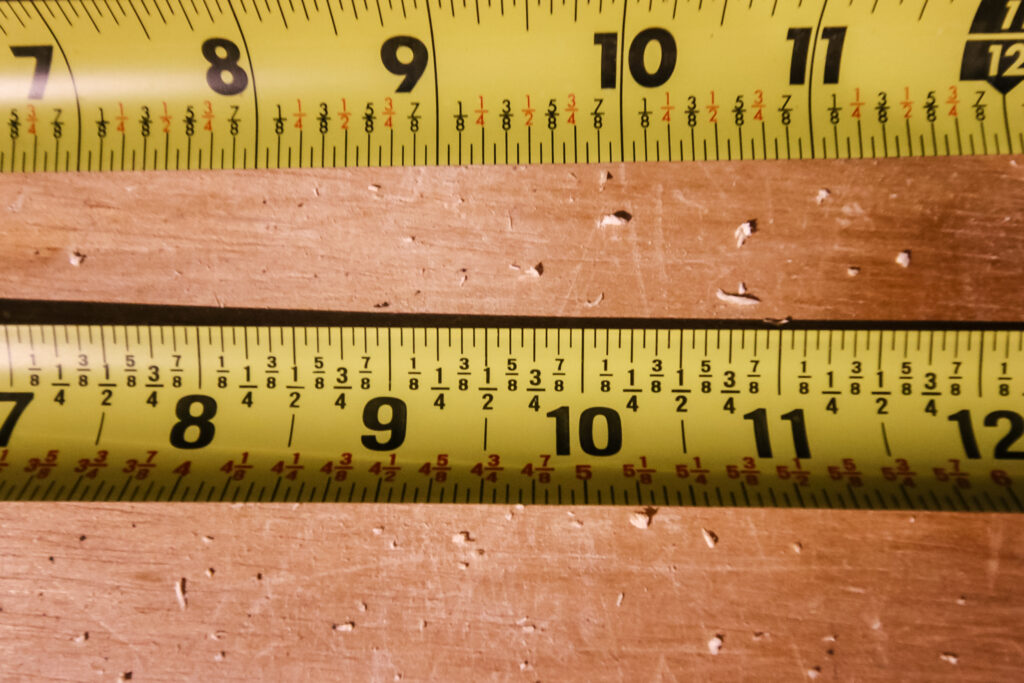
Tape measures that are measured in imperial will generally have large numbers for the inch marks and smaller numbers for the incremental fractions.
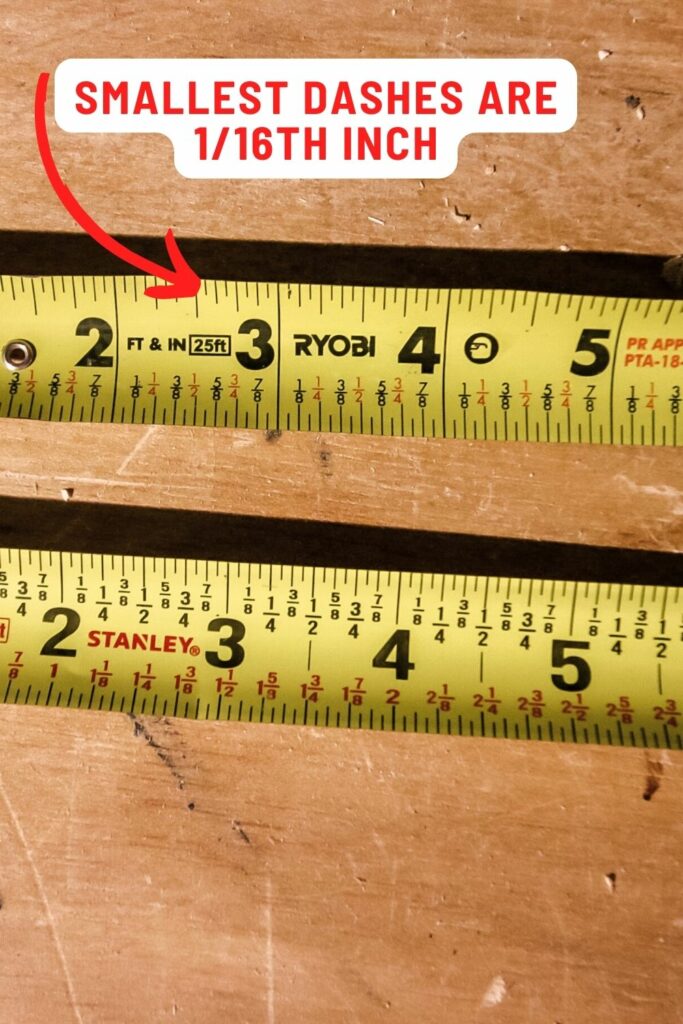
The tick marks on the tape measure are generally longer for whole numbers, medium for common fractions, and smallest for less common fractions.
The fractions commonly found on tape measures are ½, ¼, ⅛, and 1/16 inches.
Metric Measurements
Metric measurements include centimeters and millimeters.
They typically have large labeled centimeter marks and the smaller millimeter divisions.
The tick marks on the tape measure are generally longer for centimeters and shorter for millimeters.
The zero point
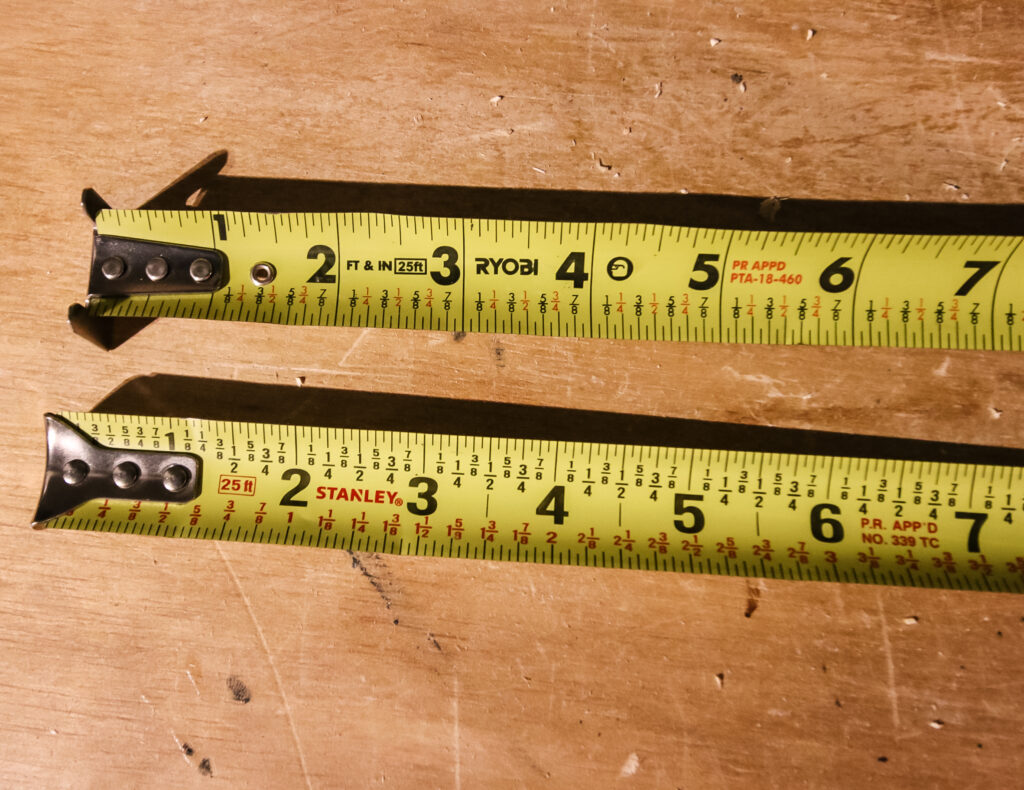
The "zero point" on a tape measure is the starting point for measurements. It is typically located at the end of the metal hook on one side of the tape measure.
When you're measuring, you place this hooked end of the tape measure against the end of the surface you want to measure from, ensuring that the zero point is aligned precisely with the edge or starting point.
Accurate readings from the zero point are crucial for successful DIY projects, as even a small error in measurement can lead to significant discrepancies in your final results. Always double-check your measurements and use the proper technique to ensure precision.
Here's how measurements are taken from the zero point:
- Positioning the Zero Point: Place the end of the tape measure with the metal hook against the starting point of the object or surface you're measuring. Make sure the hook is touching the edge, corner, or surface, and that the zero point aligns accurately with the starting point.
- Extending the Tape: Hold the tape measure securely with one hand on the housing and the other hand on the tape blade. Gently pull out the tape to extend it along the object you're measuring. Keep the tape taut but not stretched to prevent inaccurate readings.
- Reading the Measurement: Look at where the tape measure's tape blade crosses the object or surface you're measuring. The point where the tape crosses the edge is the measurement you're looking for. Read the measurement from the zero point (the starting reference) to the point where the tape crosses the object.
- Imperial (Inches/Fractions): If you're using an imperial tape measure (inches and fractions), read the largest whole number on the tape blade that falls to the left of the point where the tape crosses the object. Then, add on any fractional markings to the right of that whole number to get the precise measurement.
- Metric (Centimeters/Millimeters): For a metric tape measure, simply read the measurement in centimeters and millimeters directly from the tape blade where it crosses the object. The numbered markings on the tape correspond to centimeters, and the smaller divisions are millimeters.
Always keep in mind the length of the hook at the end of the tape measure. The measurement is taken from this hook, so if you need to start from an edge or corner, account for the hook's length to ensure accurate measurements.
Fun features on tape measures
Here are some fun features that you might not know are included on many tape measures!
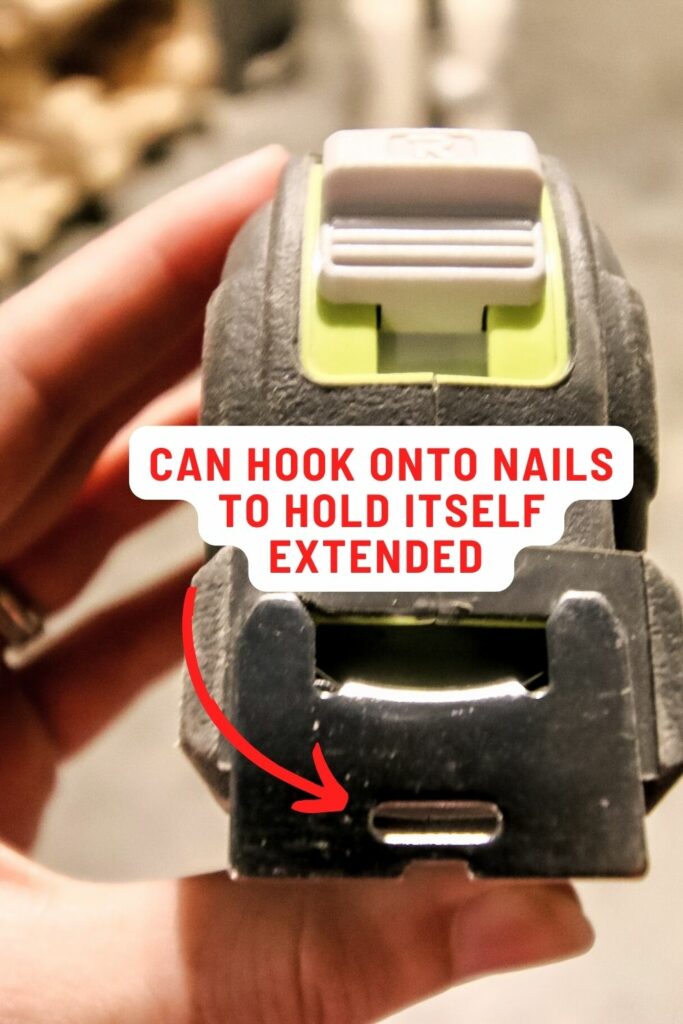
- Nail grab - the hole on the metal hook at the end of your tape measure is for hooking onto small nails!
- Lock - the lock button will freeze your tape measure in place so it doesn't get sucked back into the housing until you unlock it.
- Scribing tool - a serrated edge on the metal hook is to make it easier to use the tip of the measure to gently scratch a surface to mark a length if you don't have a pencil.
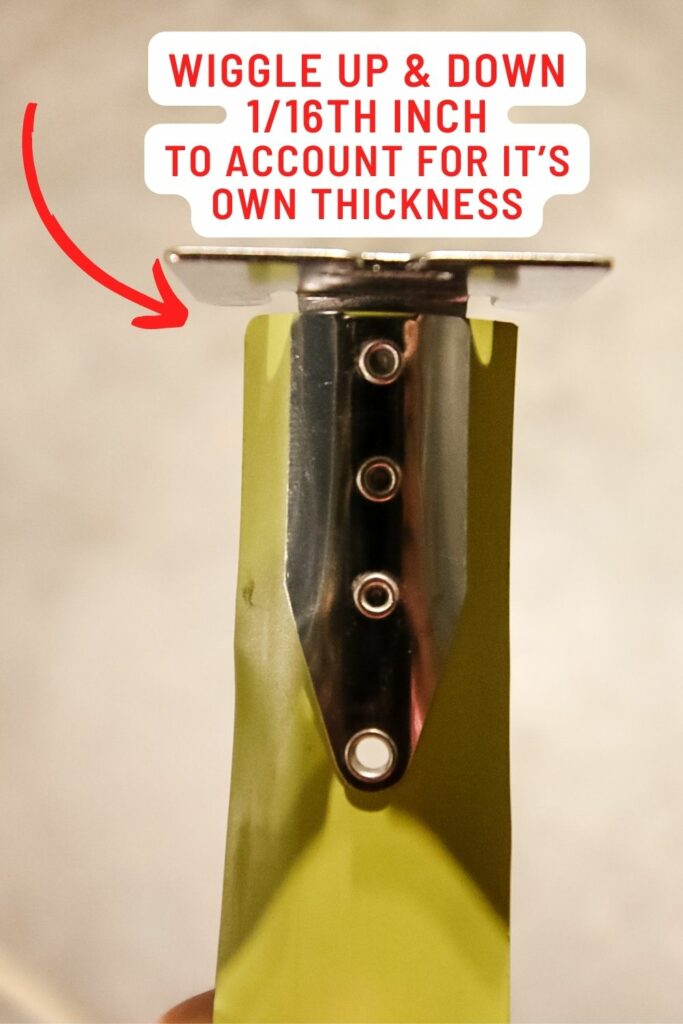
- Loose end - the hook is usually loosely attached to the tape - and this is for a reason. It usually has enough wiggle to account for it's own thickness - 1/16th an inch - so you can pull it out if it's on the outside of a measurement or push it in if the hook is on the inside of a measurement.
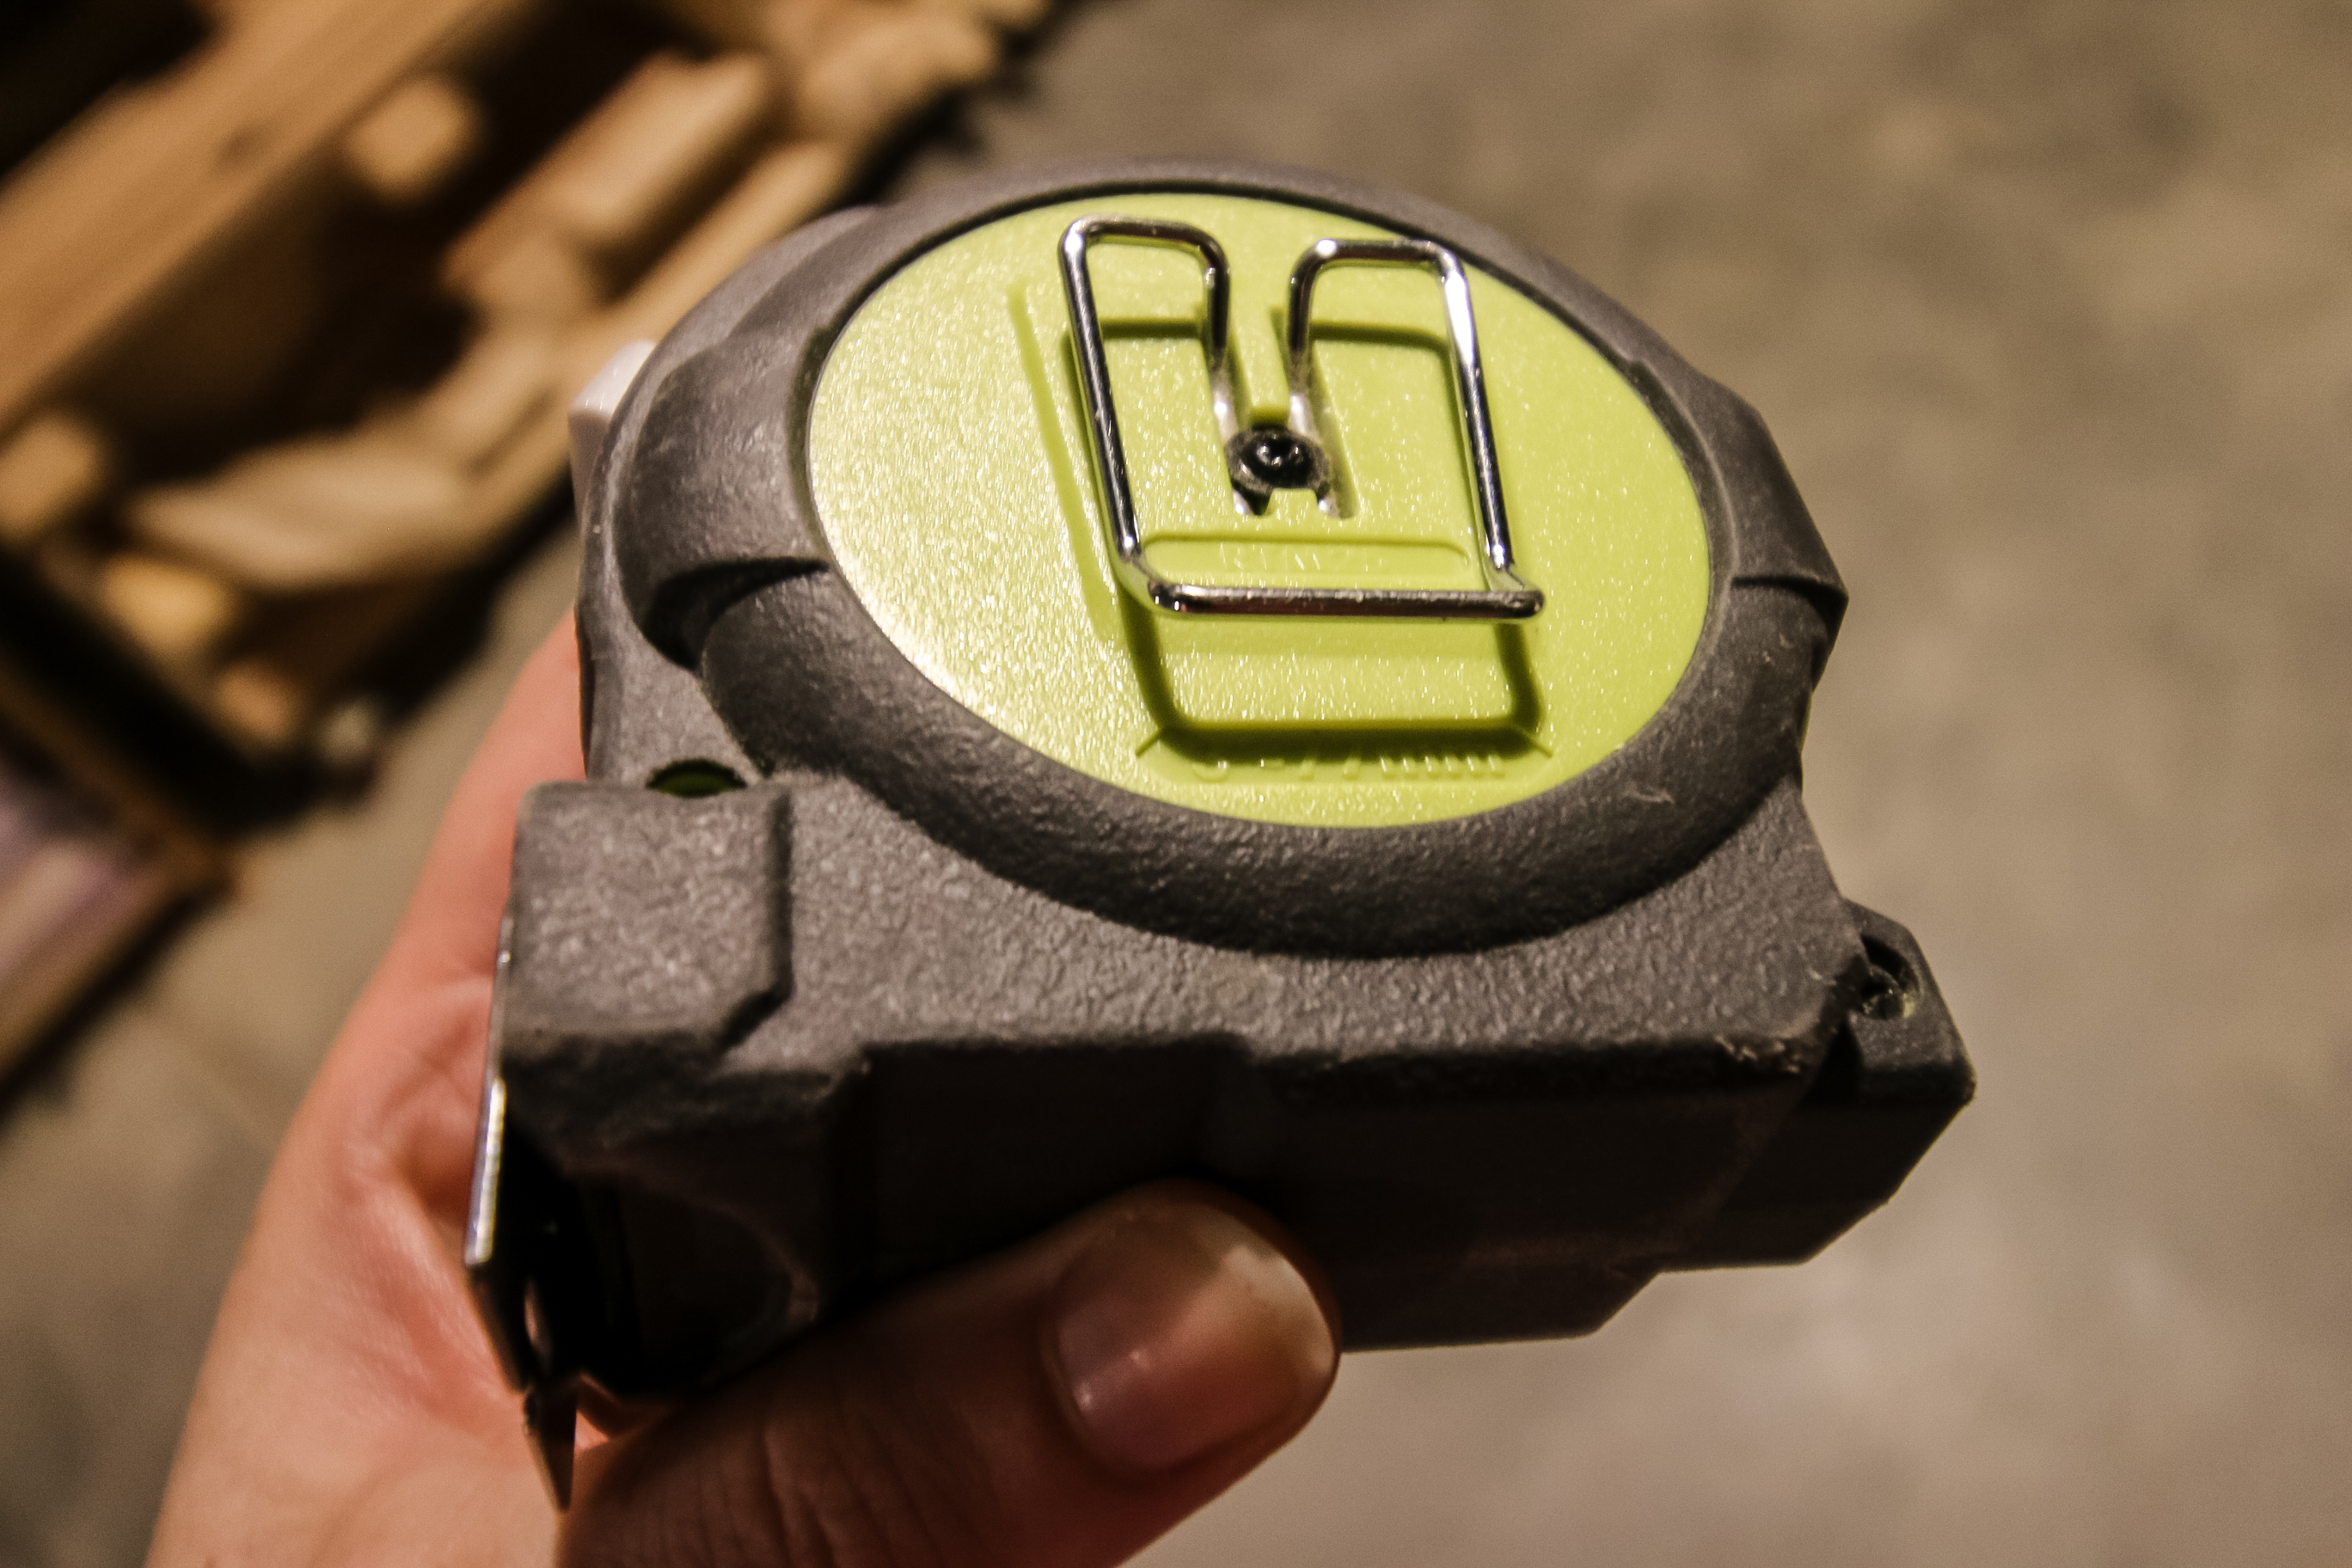
- Belt clip - this is so you can hook it onto your pants or belt.
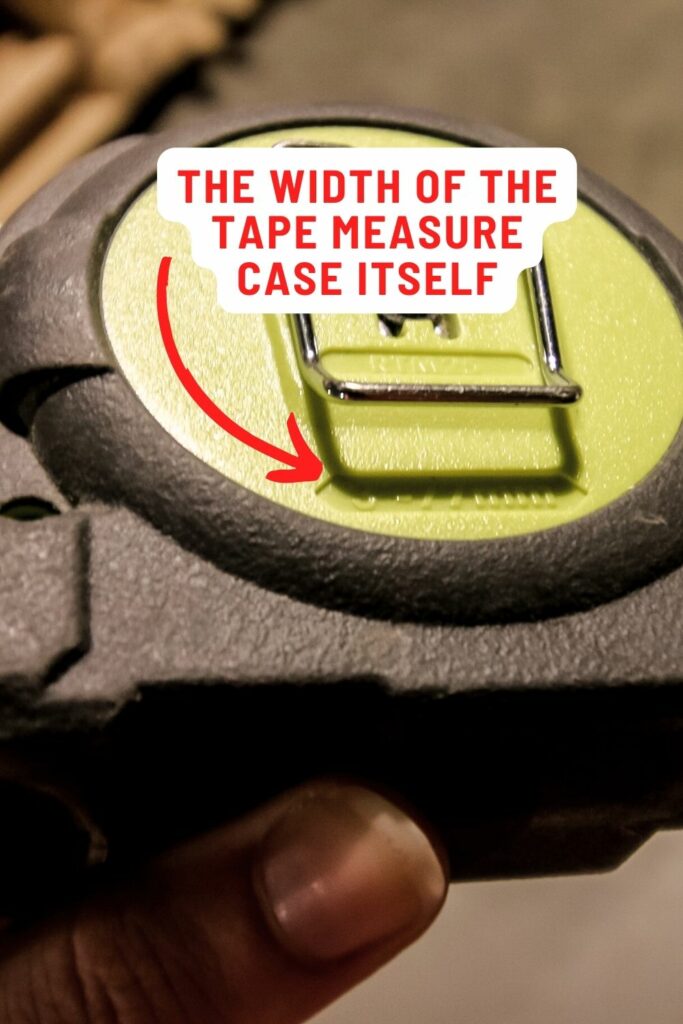
- Housing measurement - most tape measures are labeled with the size of the case on the outside. This is so you can usually add this measurement on to the tape measurement if needed.
- Standout - this is often listed on the packaging for a tape measure and marks the length the tape can stick out unsupported without flopping or sagging. A longer standout = a stronger tape = most likely a more expensive tape measure.
How to measure using a tape measure
Here is your guide on how to use a tape measure for dummies 🙂
- Place the case for the tape measure on one end of what you want to measure and pull the hook to extend the tape to span the length you want to measure.
- Look at the last measuring tape mark pulled out of the base of the tape measure along your length.
- Note the large number at this point - this is how many inches you have pulled out.
- Count the smallest marks to determine the fraction of an inch beyond that - typically, quarter inches or even eighths are marked with a number. The small tick marks in between are 16ths.
Measuring Tips and Techniques
Here are a few important tips and tricks for using a measuring tape:
Double-Check Your Starting Point: Before taking a measurement, ensure that the hook of the tape measure is firmly and accurately positioned against the starting point. This will help eliminate any errors caused by gaps or misalignment.
Use Both Hands: When extending the tape measure for longer measurements, use both hands—one to hold the hook in place and the other to hold the housing. This provides better control and stability. If you are spanning a long length, it helps to have a friend!
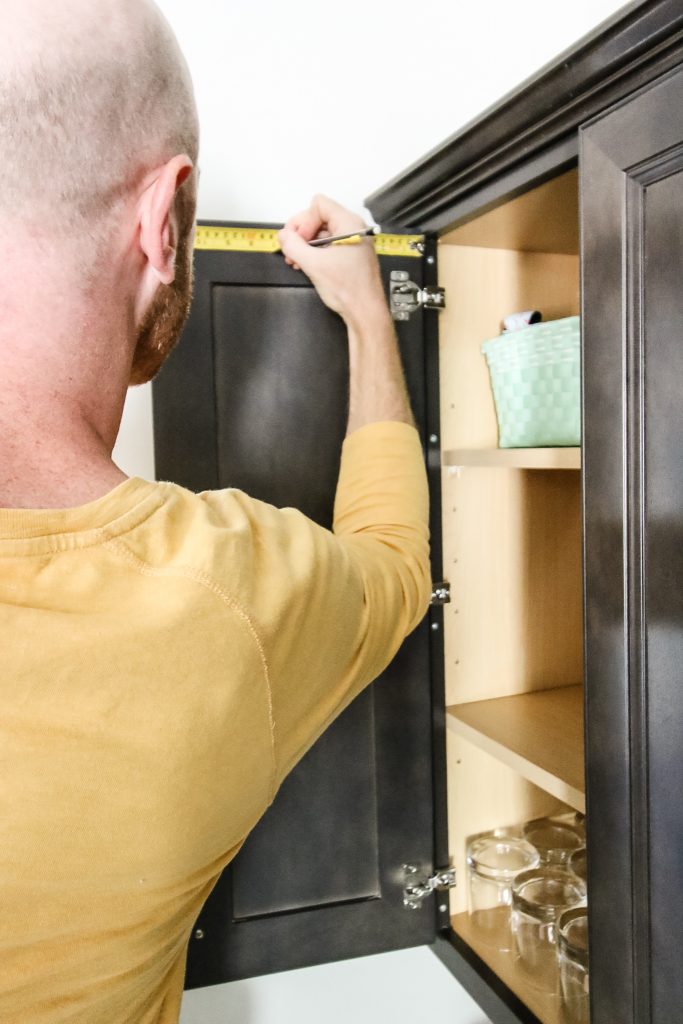
Eye-Level Reading: When measuring vertically, such as marking a wall for hanging decor, stand at eye level with the tape measure to ensure accurate readings.
Account for the Hook: Remember that the hook at the end of the tape measure has a specific length (usually around 1/16 to ⅛ inch). When measuring, the hook should be considered as part of the measurement, especially when measuring from a corner or edge.
Avoid Tape Sag: When measuring long distances, the tape can sag, leading to inaccurate readings. Have a friend hold the tape measure at the other end or use a temporary support to keep the tape level.
Mark Key Measurements: Use a pencil or a piece of masking tape to mark key measurements on the surface you're measuring. This can be especially helpful for longer distances or complex projects where you might need to refer back to measurements.
Measure Twice, Cut Once: The old adage holds true. Always double-check your measurements before making any cuts or permanent changes to your project. This can save you from costly mistakes and rework.
Account for Obstacles: When measuring around obstacles, such as furniture or corners, bend the tape measure to follow the contours accurately. Add the measurements of each segment to get the total length.
Read Across for Accuracy: For precise measurements, read the tape measure from left to right. Reading from right to left can affect accuracy.
Record Measurements: Keep a notepad handy to record measurements as you go. This prevents you from forgetting or mixing up numbers, especially when working on multiple measurements.
Practice Consistency: Try to use the same measurement units throughout your project to avoid confusion. Mixing imperial and metric measurements can lead to errors.
Clean and Maintain: Regularly clean your tape measure to ensure the markings are clear and legible. Store it properly to prevent damage that could affect its accuracy.
Account for Material Thickness: When measuring for materials like fabric or molding, consider their thickness in your measurements, especially if the thickness will impact the final result.
Practice Precision: Use your fingertip to hold the tape measure firmly in place when measuring smaller increments, allowing for more accurate readings.
Incorporating these additional tips into your measuring techniques will help ensure that your DIY home decor projects are precise and successful.
Reading Fractions and Decimals
One of the hardest parts of using a tape measure can be dealing with fractions and decimals, especially if you aren't a math person.
There's no getting around the fractions, but I suggest keeping it as simple as possible.
You can convert common fractions to decimals to make math easier. For example, change ¼ to 0.25 for your math you might be doing in your notebook.
However, if you have a lot of tiny fractions like eighths or sixteenths, I suggest converting all of your fractions to that base and adding them that way.
So, if you have 4 ⅜ inches and you need to add that to 10 ½ inches instead do 4 ⅜ inches +10 4/8 inches.
This makes it easier for your brain to see that that should be 14 ⅞.
I'm not a math teacher, this is just what works for me.
Converting Between Imperial and Metric
You don't want to mix imperial and metric measurements in one project. It never goes well!
If you end up with mixed measurements, convert them to be the same. I suggest using a conversion calculator, or remember that 1 inch = 2.54 cm.
Common Tape Measure Mistakes to Avoid
Here are some common errors and solutions to these mistakes to ensure accurate measurements.
Misreading Fractions
- Mistake: Misinterpreting fractions on the tape measure, leading to incorrect measurements.
- Solution: Pay close attention to the fractional markings. Count the number of lines between whole number markings to accurately read fractions. For example, two lines between ¼ and ½ indicate ⅜.
Not Accounting for the Hook's Length
- Mistake: Neglecting to include the hook's length in your measurement.
- Solution: Remember that the measurement starts from the hook, not the edge of the tape measure. Add the hook's length to your measurement when determining the total length.
Tape Sag
- Mistake: Allowing the tape measure to sag when measuring long distances, leading to inaccurate measurements.
- Solution: Have someone hold the tape measure at the other end to maintain its level position. Alternatively, use temporary supports (like a step ladder or piece of furniture)to keep the tape straight.
Parallax Errors
- Mistake: Reading the tape measure from an angle, causing parallax errors that result in inaccurate measurements.
- Solution: Always read the tape measure directly from the front, ensuring your line of sight is perpendicular to the tape for accurate readings.
Misaligned Zero Point
- Mistake: Failing to align the zero point accurately with the starting point.
- Solution: Ensure the hook is flush against the starting point, and the zero mark lines up precisely for an accurate baseline measurement.
Inconsistent Units
- Mistake: Mixing different measurement units (imperial and metric) within the same project.
- Solution: Choose one unit of measurement and stick to it throughout the project to avoid confusion and calculation errors.
Ignoring Material Thickness
- Mistake: Not accounting for the thickness of materials like fabric or molding in measurements.
- Solution: Measure the material's thickness separately and factor it into your overall measurements to ensure accurate sizing.
Rushing Measurements
- Mistake: Taking measurements too quickly, leading to errors.
- Solution: Take your time and double-check measurements. It's better to spend a few extra moments ensuring accuracy than to make mistakes that could result in wasted materials or time.
Not Using the Locking Mechanism
- Mistake: Neglecting to lock the tape measure in place when measuring longer distances.
- Solution: Utilize the locking mechanism to secure the tape at the desired length, especially when working alone.
Disregarding Surface Irregularities
- Mistake: Ignoring uneven or irregular surfaces when measuring.
- Solution: Adjust the tape measure to conform to the contours of the surface you're measuring, ensuring accurate readings.
Skipping Overlapping Measurements
- Mistake: Overlooking overlaps in measurements when measuring around corners or obstacles.
- Solution: Break down the measurement into segments, ensuring you account for overlaps and summing up the segments for the total length.
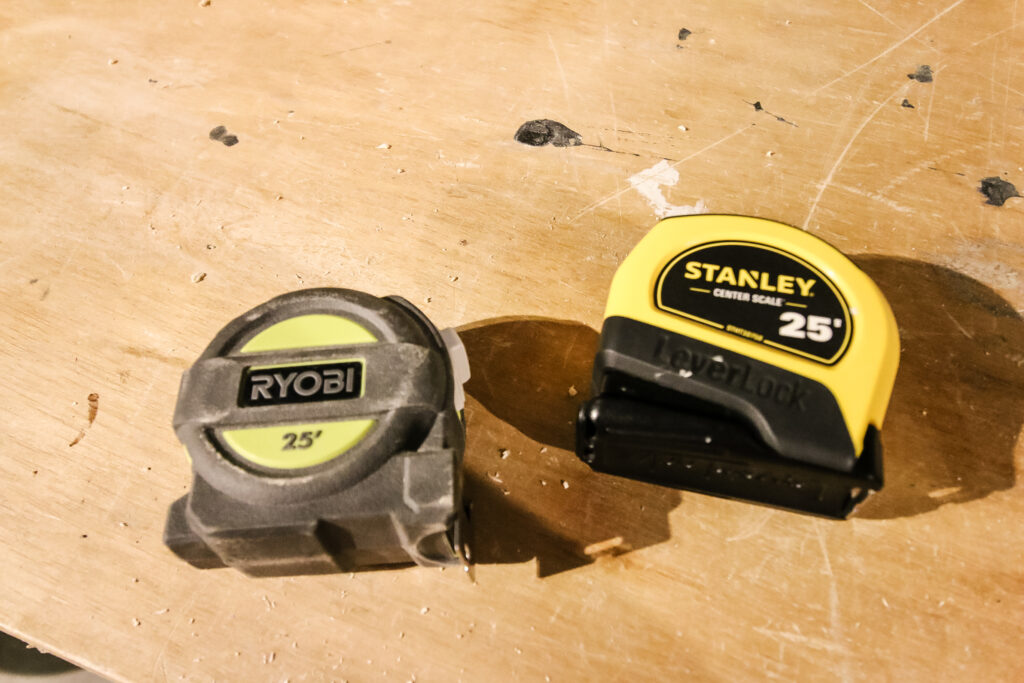
Shop tape measures
Here are some of my favorite tape measures!

Any more questions about reading a tape measure?

Looking for something?
We've been doing this since 2012 so we have a LOT of blog posts!
Search stuff like: Ceiling Projects | DIY Plant Stands | Thrift Flips

Hello, I'm Morgan, half of the creative force behind CharlestonCrafted.com! With a passion for DIY that dates back to 2012, I've transformed three homes and now I'm dedicated to helping others craft their dream spaces. Let's turn your house into a home together!