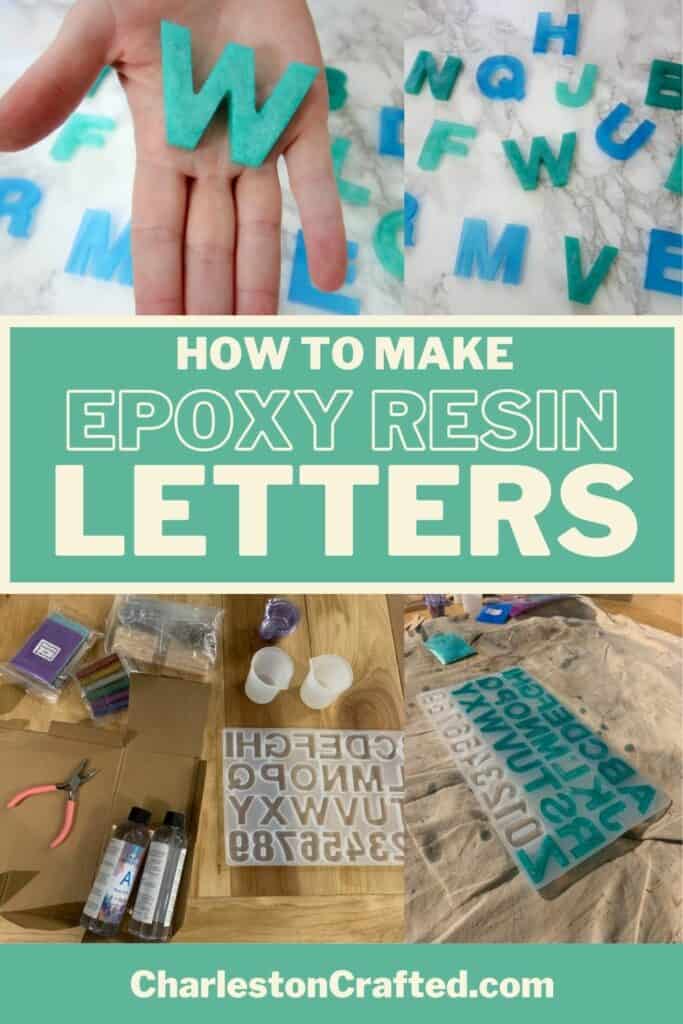
Want to make DIY epoxy resin letters for decor or as a kid's toy? Here's a step by step tutorial on how to do it yourself!
We have been slowly working on making some DIY Christmas presents for our kids.
One thing that I have been oogling over lately is beautiful resin epoxy letter kits for kids.
These resin alphabet letters are perfect for kids to start to learn spelling, plus they are just really beautiful.
They average about $40 (plus shipping) a set online. And I totally value creators and their work and skills. But, as a professional DIYer, I had to set out to make my own.
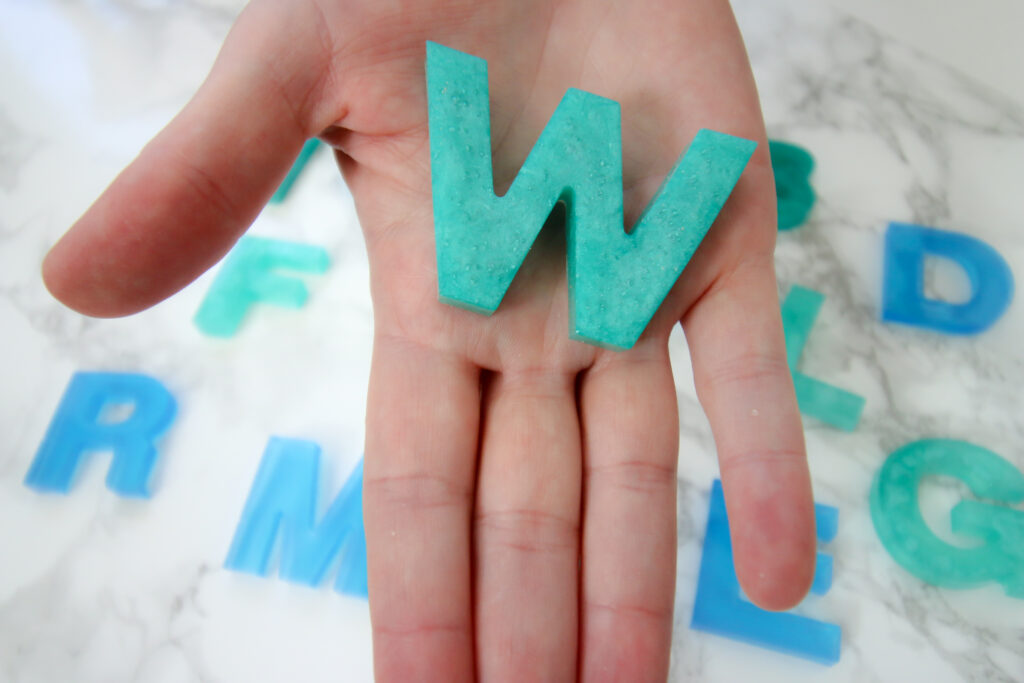
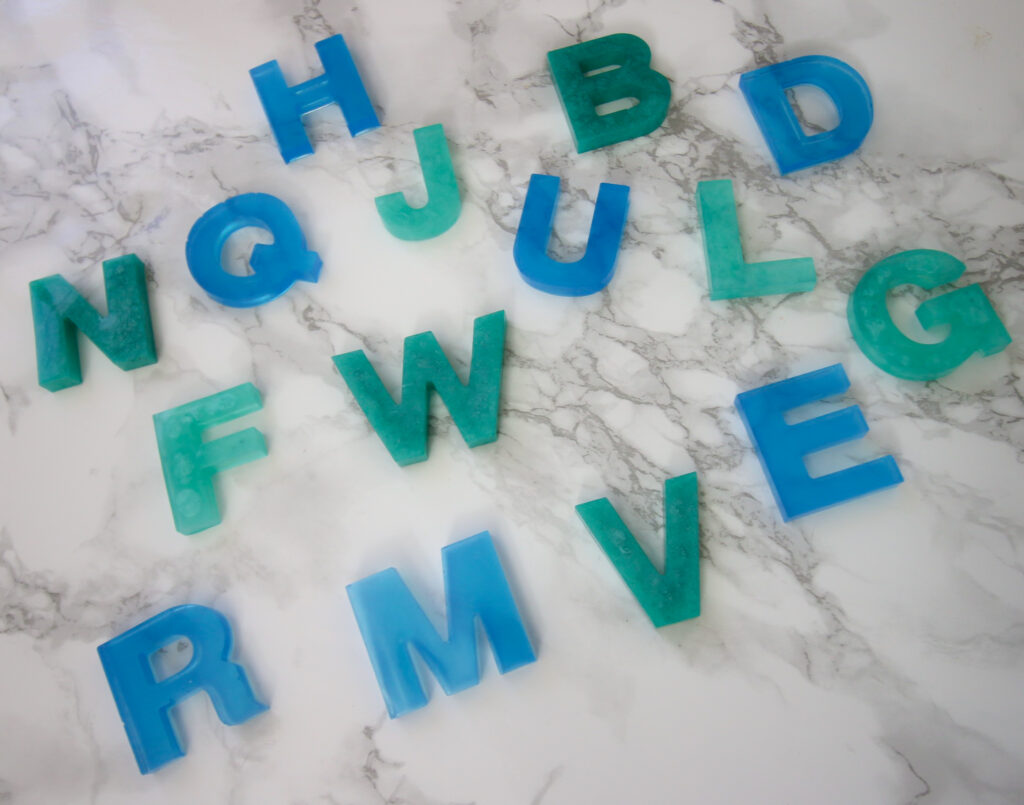
So, here's how to make DIY resin letters. I made 2 sets - both really simple, just blue and green.
That used up all of my epoxy. If they are a hit with the kids, I will probably order some more epoxy and make more themed ones with beads or chunky shaped glitter inside.
These would also be a great gift - gift the whole alphabet or just spell out a kid's name! So fun!
How to make epoxy resin letters
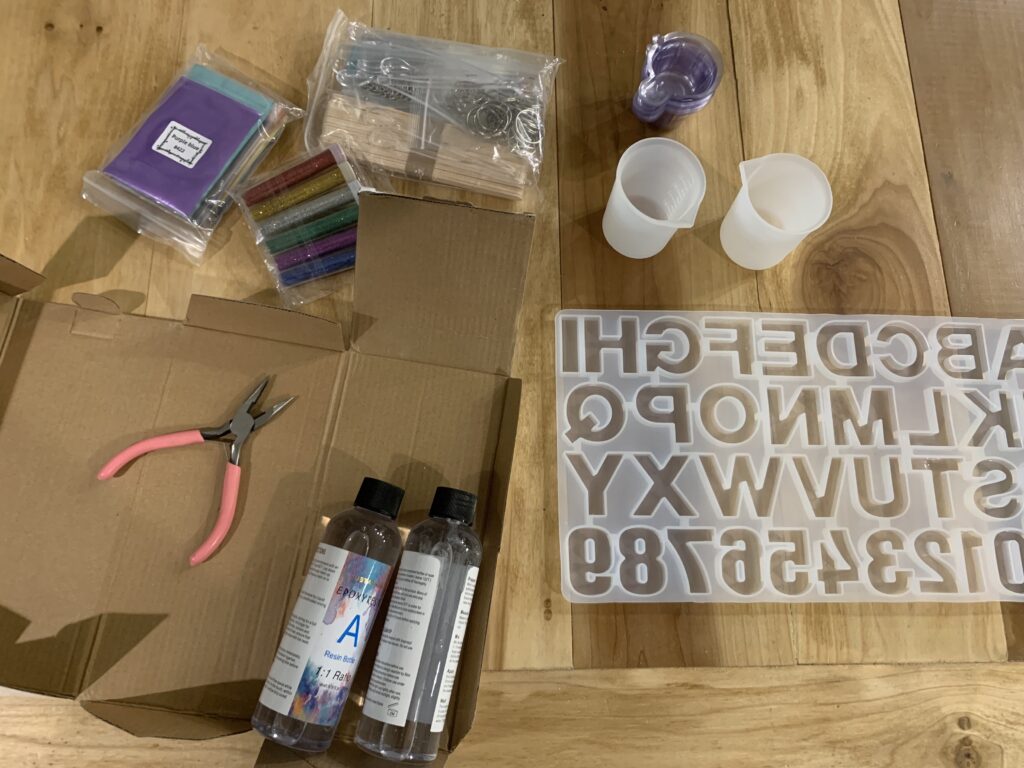
Supplies needed
You can purchase an epoxy letter resin kit - that's what I did! Or, buy these parts separately:
- Silicone alphabet letter molds - make sure it does NOT have holes for keychains (unless you want to make keychains)
- 2 part epoxy - resin and hardener
- Containers to mix epoxy in such as disposable cups
- Stir sticks
- Pigment or glitter or other mix ins
- Gloves
How to make an epoxy resin alphabet
Always work on resin projects with epoxy in a well ventilated space! It stinks!
STEP 1: Prep your work area
Prepare a clean, flat surface to work on. Put down paper or a drop cloth to protect your surface. Make sure there isn't dust or debris (like saw dust!) in the air.
Get all of your supplies ready and laid out. It's helpful to pull up a timer, too. Epoxy mixing is very time-sensivitve and you can't skips those steps or it won't cure properly.
STEP 2: Mix the epoxy
Mix your epoxy according to the package directions. Usually that means equal parts of part A and part B.
I used 100ml of each part for a total of 200ml. That was BARELY enough to do the letters and I did no numbers on my mold.
STEP 3: Add dye or mix ins
Once the epoxy has been fully mixed, add your pigment or glitter. Stir for a full minute to fully incorporate it.
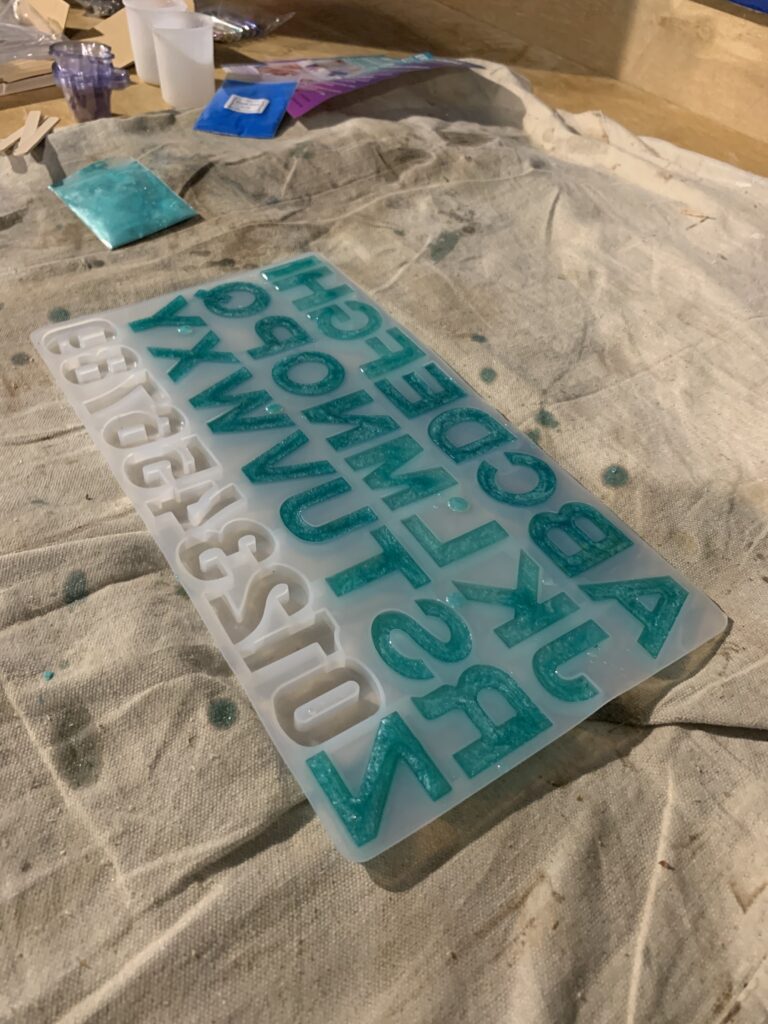
STEP 4: Pour into the mold
Carefully and slowly pour your mixed resin into the molds. Go back every few letters to see if any need a top off.
If you have chunky letters, beads, or dried flowers, you can add them to the molds now. Use a stir stick to press them down so they don't rise to the top.
If you see air bubbles in your epoxy, you can use a heat gun or hair dryer to blow them out. I had my heat gun ready, but had essentially no bubbles with this epoxy! Pretty great!
STEP 5: Let cure
Allow to cure for at least 24 hours. After that time, you can gently feel them to see if they feel firm.
If they still have a bit of give to them, let them sit for another 24 hours to fully firm up.
STEP 6: Remove from the molds
Flip the molds upside down and gently pop them out by inverting the silicone molds. They should pop out easily.
If they are not fully firm, lay on a flat surface and allow to dry another 24 hours.
How do you make resin letters not sharp?
If your epoxy letters are sharp on the corners, you can sand them smooth. Use a very fine sand paper - or even a brown paper grocery bag - to gently buff the edges smooth.
Now, enjoy your resin letters! Let me know how you'll be using them!

Looking for something?
We've been doing this since 2012 so we have a LOT of blog posts!
Search stuff like: Ceiling Projects | DIY Plant Stands | Thrift Flips

Hello, I'm Morgan, half of the creative force behind CharlestonCrafted.com! With a passion for DIY that dates back to 2012, I've transformed three homes and now I'm dedicated to helping others craft their dream spaces. Let's turn your house into a home together!