Does your screen door need repairs? Whether you want to patch it, replace the screen, or replace the whole door, here's tutorials to help you do it yourself!
I love having a screened in porch.
But dang, in the 4 years we lived in our old house, we did a lot of repairs to ours!
We patched holes, replaced the screen 3 times (we finally splurged on the "pet grade" screen which lasted much longer than the standard, and we ended up replacing the whole door when we moved!
Anyways, I feel basically like a screen door repair expert.
So, I am excited to share tutorials for the three ways that we have repaired our screen door.
Each has it's pros and cons and each has it's purpose.
For more details, I have linked the full tutorials (with step by step photos) for each of these processes below, too!
But, the info below is enough for you to make these repairs yourself!
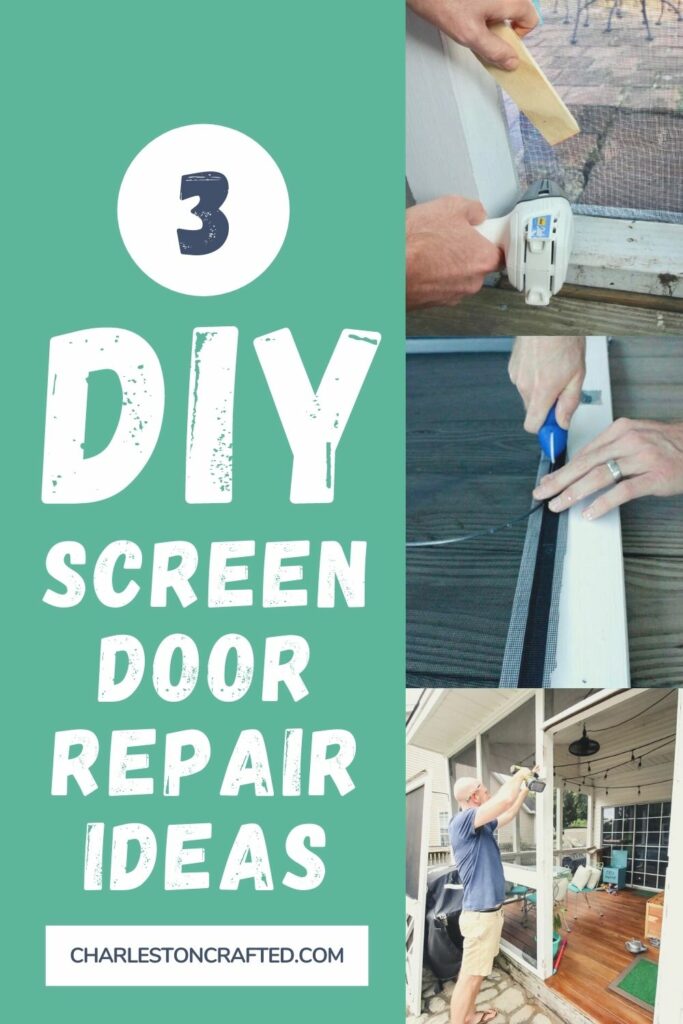
Screen Door Repair
When it comes to DIY screen door repair, you have 3 options. Escalate these options depending on how damaged your door is:
- Patch the screen
- Re-screen the door
- Replace the entire screen door
How to patch a screen door
Patching a screen is an option for small holes in door and window screen.
Warning: it's not invisible, it's not perfect. But a screen patch can be great if you have a spot that you don't really care if it look perfect and just want to patch the hole.
Read our complete guide to patching a screen.
Supplies:
- Plastic screen, slightly larger than your hole
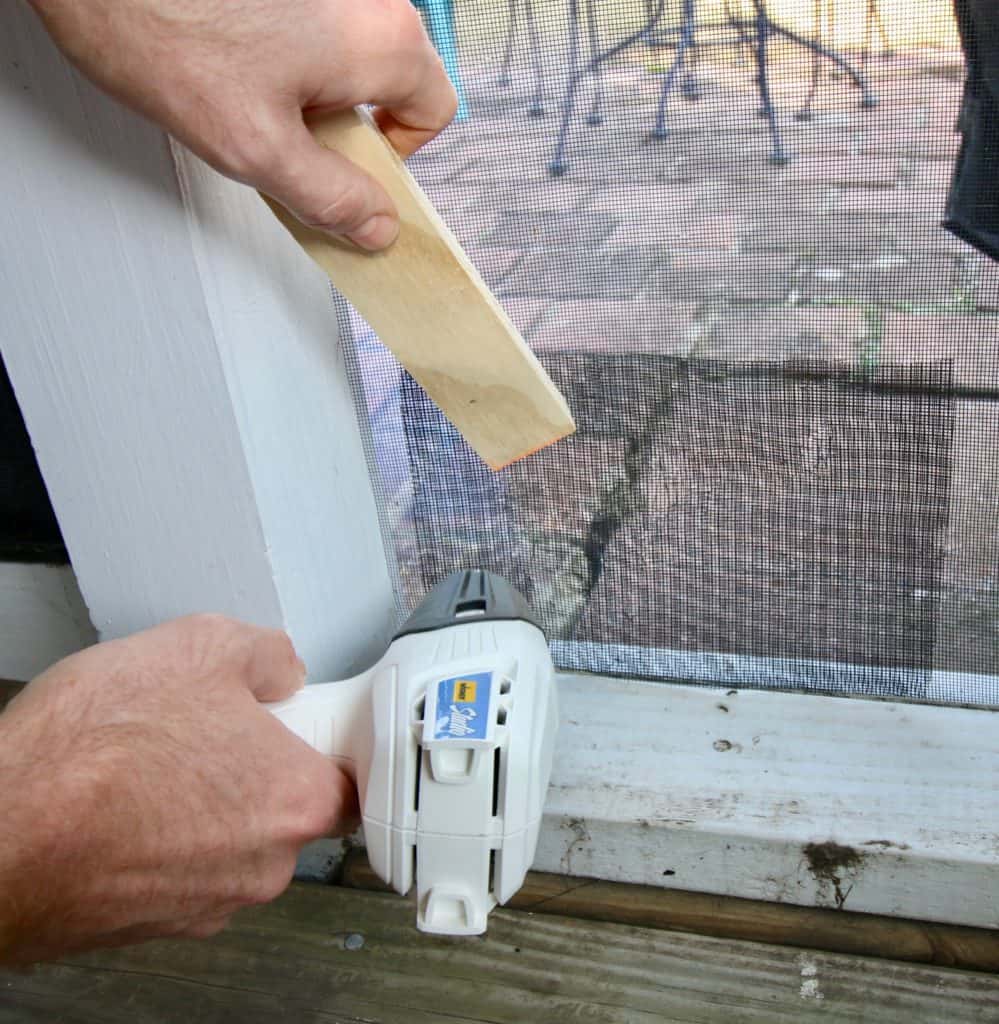
- Heat gun
- Piece of wood such as a stir stick
- Breathing protection such as a face mask
Steps:
- Cut your screen to be slightly larger than your hole.
- Place the screen over the hole. Hold in place with the stir stick or similar.
- Heat up the heat gun. Apply heat where the patch is, enough to slightly melt the plastic and stick it to the underlying screen.
- Work around the patch until it has completely adhered.
How to rescreen a door
If you have a few holes in a screen or want a perfect like-new look, replacing the screen material is the right choice.
This is a surprisingly easy task that any beginner DIYer can do!
Read our complete guide to re-screening a screen door.
Supplies:
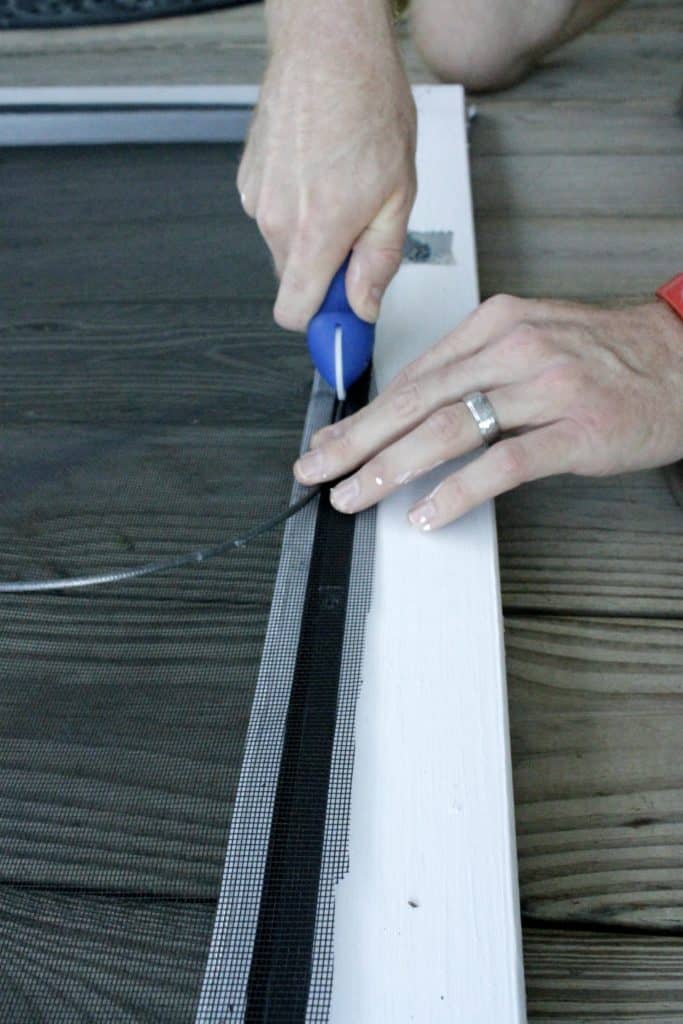
- Drill or screwdriver
- Flat head screwdriver
- Replacement screen
- Spline roller tool
- Scissors
Steps:
- Remove the door from the hinges. Use the drill to unscrew the screws holding it to the door frame and lay it flat. This is much easier to work with!
- Remove the handle if it's in the way - just unscrew the screws.
- Look at the groove between your screen and the door. There should be a tiny rubbery strip in that groove. This is called the SPLINE. Find the loose end of the spline, pull it out (a flat head screwdriver can help) and pull the whole spline out.
- Remove the old screen. It should be loose and easy to remove now.
- Roll out the new screen and cut so there is about 1 inch of excess screen beyond the spline.
- You can re-use the old spline if it's in good shape or use new. Place it along the line and use the spline roller to press the spline into the groove. A flat head screwdriver helps in the corners.
- Use scissors to trim any excess screen.
- Re-screw the door handle back in place.
- Screw back onto the hinges and re-hang the door.
How to replace a screen door
In some cases, you might want to replace the entire screen door.
Our old door was made of wood and the wood had rotted and cracked in spots.
When we were preparing to sell our home, we decided to replace the entire door with a fiberglass option.
This is the most expensive option, but it still isn't hard to do and is the best choice if your actual door is damaged.
Read our complete guide to replacing a screen door.
Supplies:
- New screen door
- Drill
- Pencil
Steps:
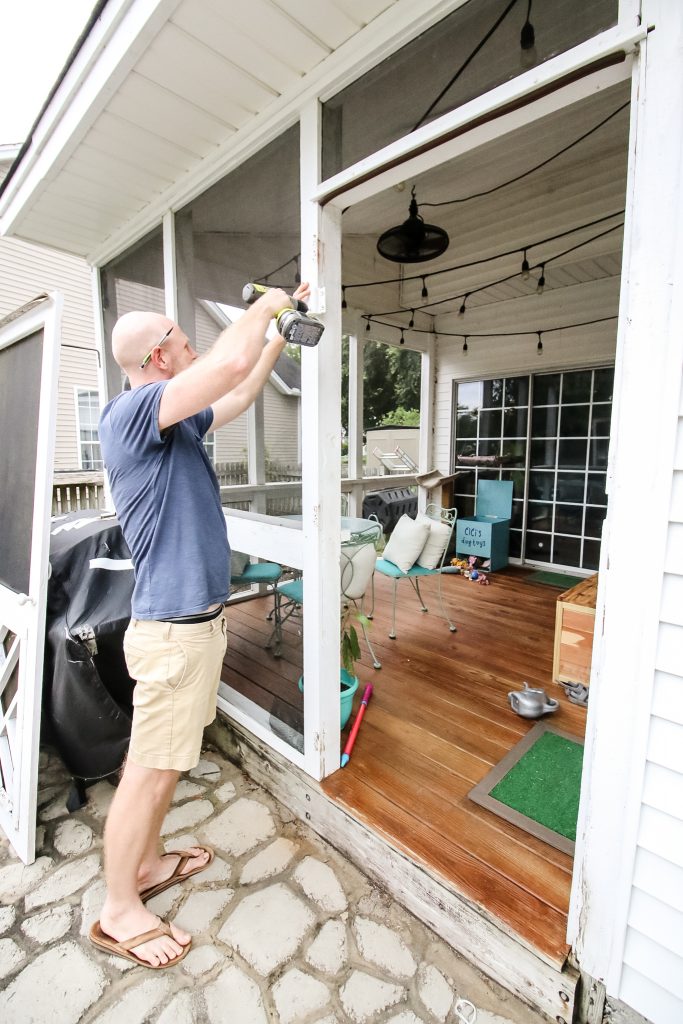
- Pre-drill holes for your hinges. Mark your door from the top at 12", 40" and 68". Center a hinge on each of these points and make marks where the screw holes are.
- Attach two of the hinges into place, but don’t fully screw them in. Leave them a little loose for adjustment on the door frame later.
- Use a drill to remove your old screen door by removing the screws holding the hinges in place on the door frame.
- Prepare the door frame the same way you prepared the door. Make your marks at the same 12", 40" and 68" measurements from the top of the door frame.
- Attach the hinge center to the door frame and mark where the screw holes need to be. Drill pilot holes for the screws. Attach that hinge into the final spot on the door.
- Line up the top hinge of the door centered on your pilot holes in the door frame. Screw the top hinge in, leaving a little room for wiggle. Screw in the middle and bottom hinges.
- Go back and adjust the door up or down or side to side as needed, utilizing the wiggle room left in the screws. Tighten the screws into place.
- Attach a handle and a latch if your door did not come with one.
Any more questions about repairing screen doors?

Looking for something?
We've been doing this since 2012 so we have a LOT of blog posts!
Search stuff like: Ceiling Projects | DIY Plant Stands | Thrift Flips

Hello, I'm Morgan, half of the creative force behind CharlestonCrafted.com! With a passion for DIY that dates back to 2012, I've transformed three homes and now I'm dedicated to helping others craft their dream spaces. Let's turn your house into a home together!