Wondering how to change the panels on a Samsung Bespoke refrigerator? Here is a step-by-step tutorial with video and photos of how we did it!
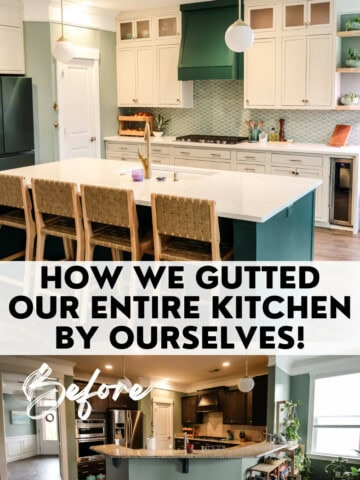
When we were designing our kitchen renovation, I decided that I didn't want a giant silver stainless steel fridge taking up one wall.
We looked at a few sleek, white fridges - and I liked the vibe much more.
But, then I learned about the Samsung Bespoke fridge. This refrigerator has interchangeable panels that can be easily swapped out for a totally new look.
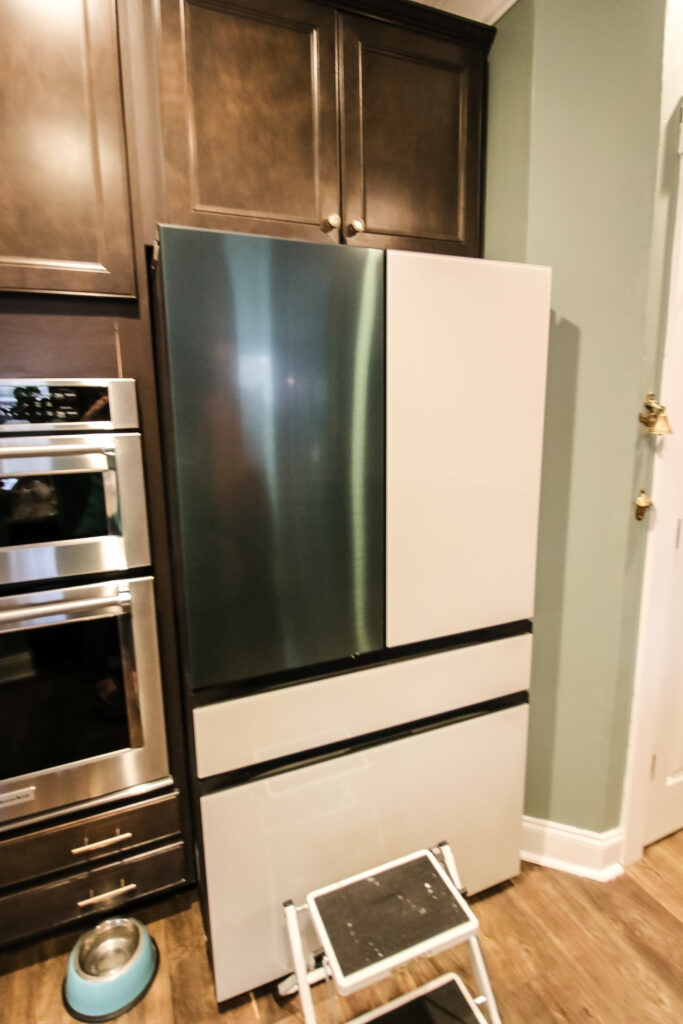
When I saw that the panels came in a deep emerald green stainless steel that almost exactly matched our planned island paint color, I was done for.
However, when you order this fridge it comes in traditional stainless steel or white glass. You have to swap out the panels yourself for a new look.
We ordered the fridge initially in silver stainless. It arrived damaged and we ended up re-ordering in the white glass and then swapping out for the green panels. We kept the white glass panels in our attic in case we ever move away from the green aesthetic.
Anyways, here's how easy it is to swap out the Samsung refrigerator panels!
Be sure to check out our full Samsung Bespoke fridge review here!
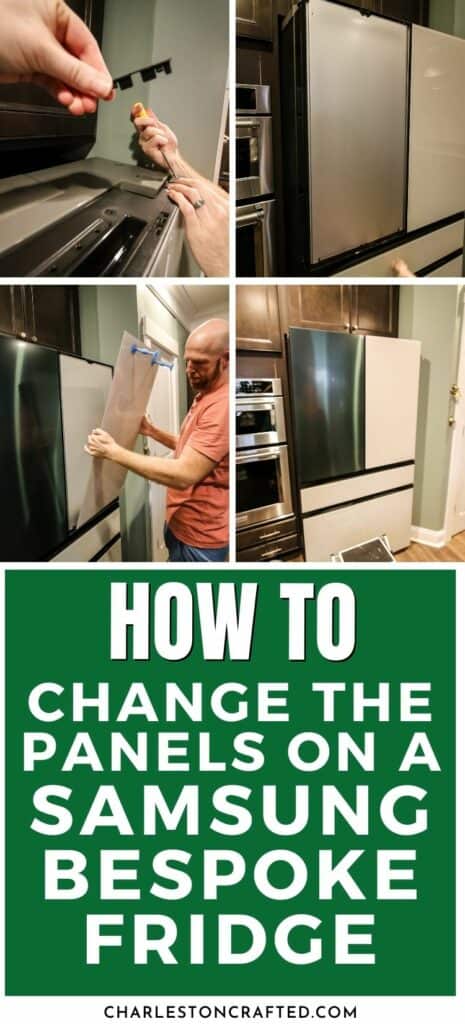
How to change the panels on a Samsung Bespoke refrigerator
Here's how easy it is to change out the panels on your Samsung Fridge!
Tools needed:
- Samsung Bespoke Fridge
- Replacement Samsung Bespoke Fridge Panels
- Flat head screwdriver
- Suction cups - ideally one of these, though we actually used non-tool suction cups and it was fine, you just need them to be fairly strong and grip-able.
Steps to swap out Bespoke fridge panels:
Here are the steps we followed to swap out our fridge panels.
STEP 1: Make sure you have the right fridge
This might seem obvious, but double check that your fridge has the removable panels. Samsung makes a lot of fridge models, and most of them do not have removable panels.
STEP 2: Unpack the panels
Fully unpack your panels and peel the protective covering off at least the side edges of them so that they can be slid into place. If you leave it on the edges, it will be clipped into the fridge and you'll inevitably have pieces rip off and hang from the gaps.
This took longer than the rest of the install, that peel-y cover was hard to get off!
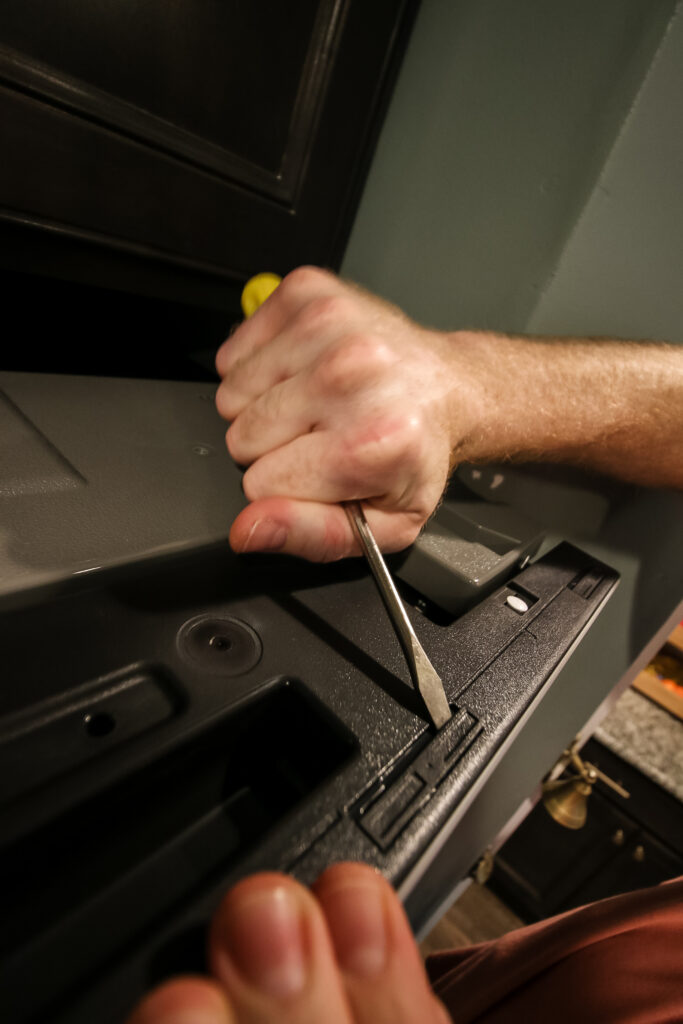
STEP 3: Remove the pins
Start with your top panel. Hop on a step stool and look at the top of the fridge. You should see these raised black plastic clips. They cover the pegs holding the panel in place.
Carefully use a flat head screwdriver to pop them out. Slide the screwdriver head under the edge and twist to pop out each side.
Repeat for all of the pegs across the top.
When it comes to the middle and lower drawers, those have small pegs that need to be leveraged out instead of the clips.
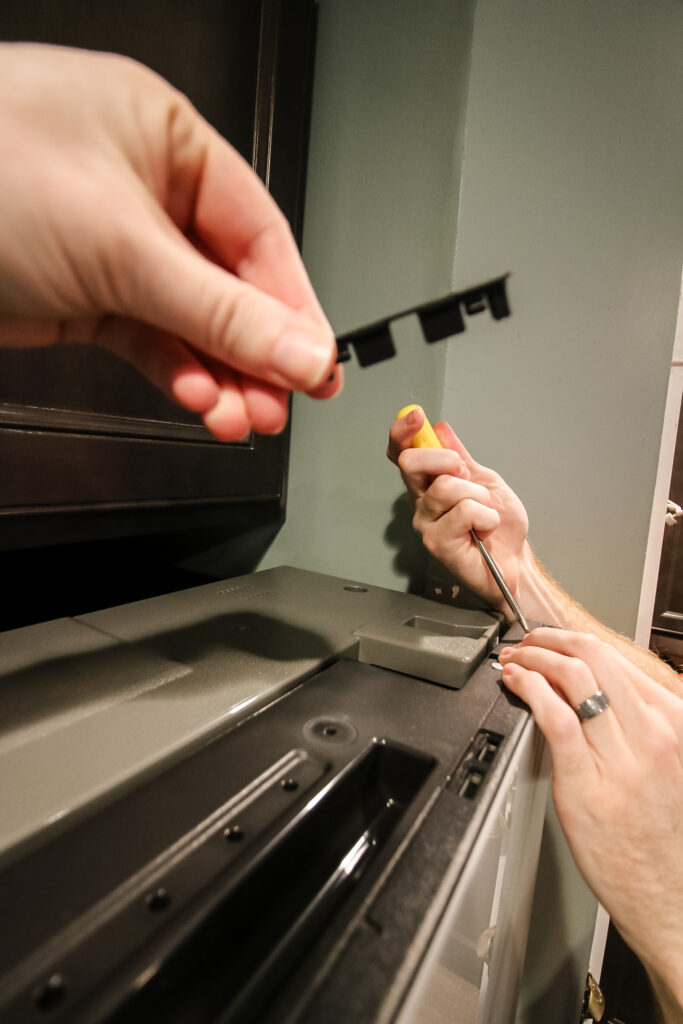
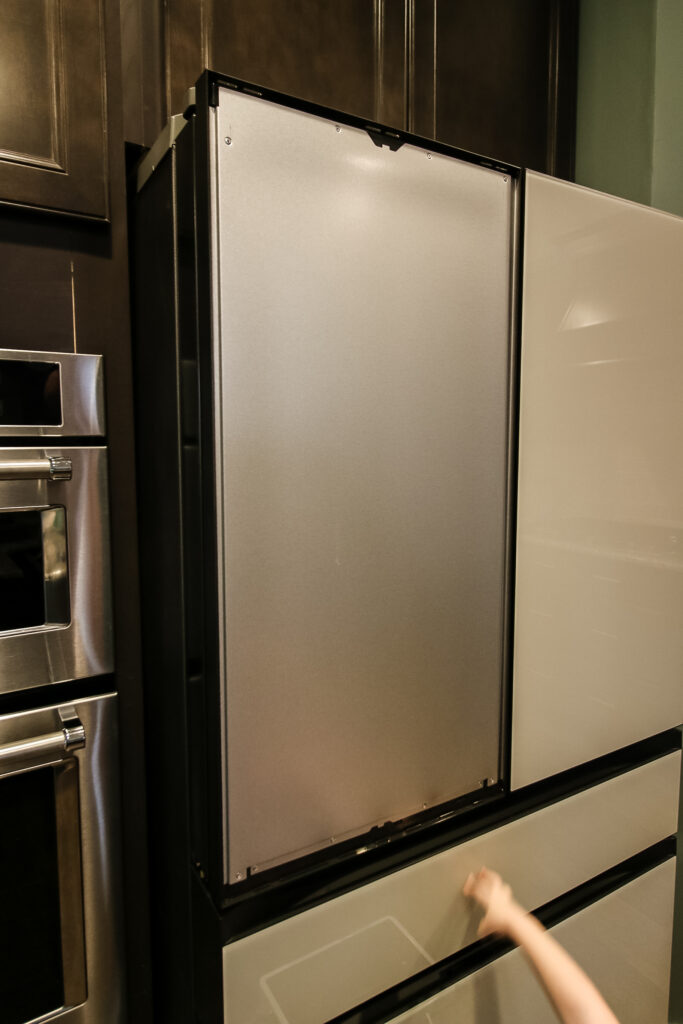
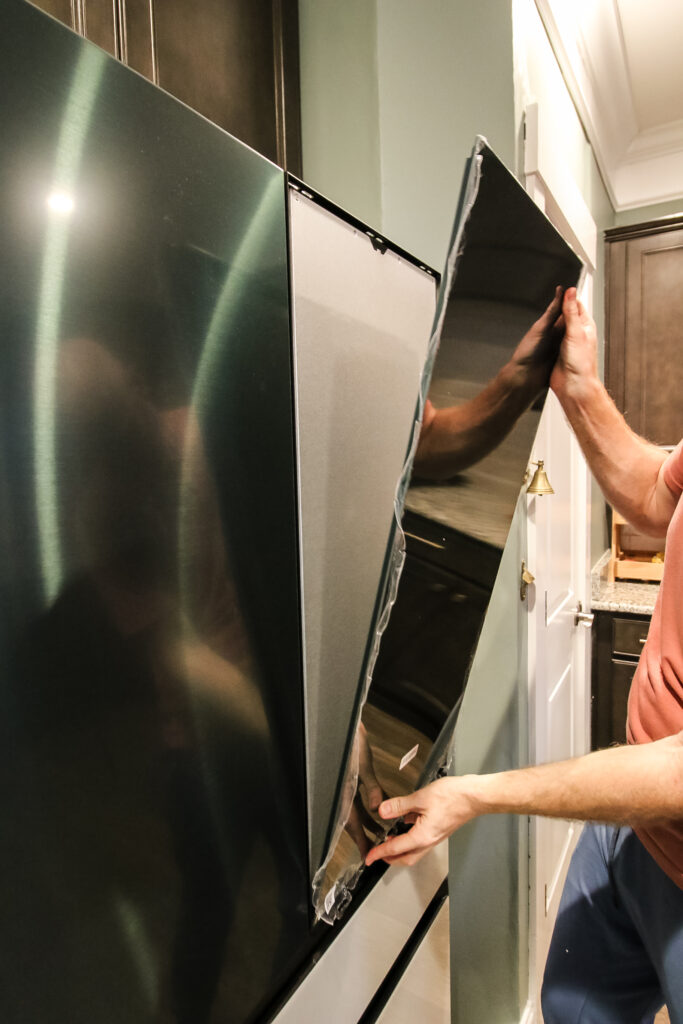
STEP 4: Remove the panels
Apply a suction cup to the top of the panel near each side pull straight out. Then lift up to get out the bottom clips. They should slide right off.
We packed our panels in the packaging for the new panels to keep them protected in our attic in case we ever want to switch back.
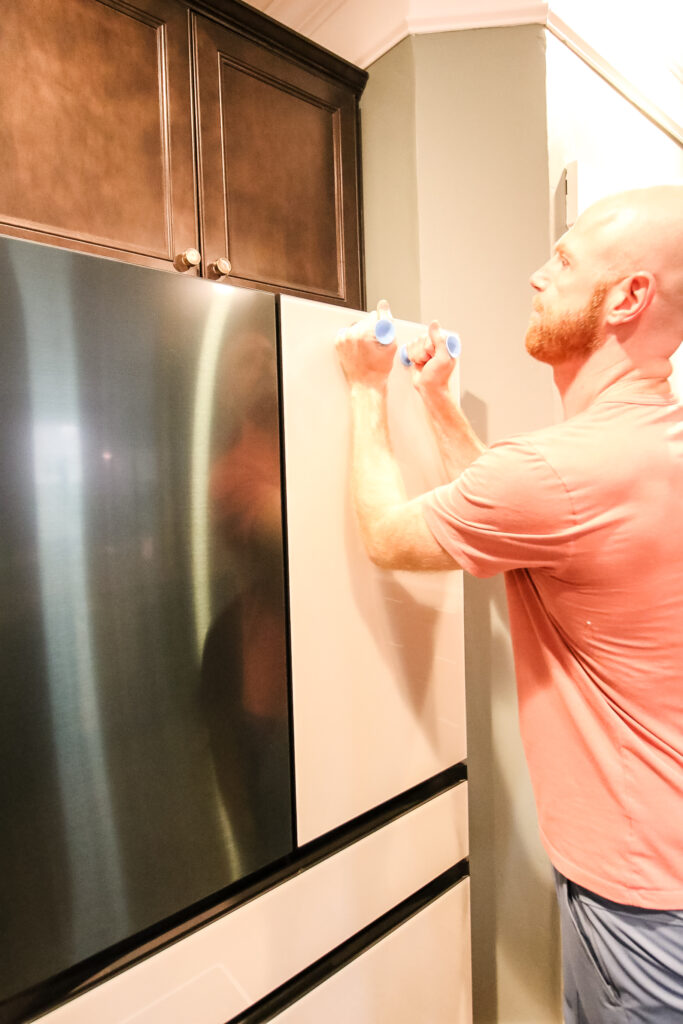
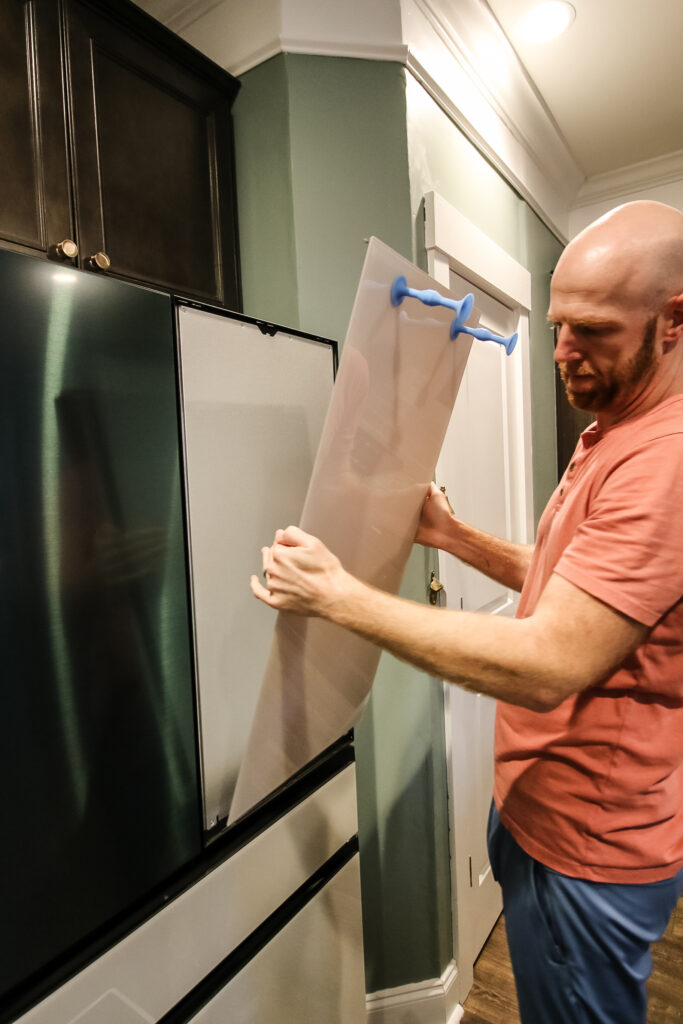
STEP 5: Replace the panels
Place your new panel in at the bottom and then press firmly into place at the top.

STEP 6: Replace the pins
Head back to the top of the fridge and stick the pins back in. They should pop in easily by hand. If they are NOT going in, then the panel is most likely not pushed in far enough. Push it in a bit more and try again.
We did find that one of our panels was bent/warped and would not go in 100% of the way. We had to exchange this one for one that was flat to get it to work properly.
STEP 7: Repeat
Repeat this for each panel. The two door panels are fastened on top, but the drawers are fastened from underneath.
We had a very hard time getting the plugs off of the lower panel of the bottom drawer because they were so close to the floor.
A screwdriver was too long to properly pop them off. We were able to use this keychain multi-tool, which is much shorter. Look for something firm, flat, and short you can use for this spot.
It's easy to get your panels off as long as they are straight and flat. You can do it!
Video Tutorial - How to change Samsung Bespoke Fridge panels
Prefer to watch a video? Click here to watch our full tutorial video!

Looking for something?
We've been doing this since 2012 so we have a LOT of blog posts!
Search stuff like: Ceiling Projects | DIY Plant Stands | Thrift Flips

Hello, I'm Morgan, half of the creative force behind CharlestonCrafted.com! With a passion for DIY that dates back to 2012, I've transformed three homes and now I'm dedicated to helping others craft their dream spaces. Let's turn your house into a home together!