• Skip to primary navigation
  • Skip to main content
  • Skip to primary sidebar
Charleston Crafted
  • DIY
  • Woodworking
  • Popular Posts
  • Blog
  • About
  • Shop
menu icon
go to homepage
  • DIY
  • Woodworking
  • Popular Posts
  • Blog
  • About
  • Shop
search icon
Homepage link
  • DIY
  • Woodworking
  • Popular Posts
  • Blog
  • About
  • Shop
×
Garden and Yard

How to build a DIY pea trellis

Published: Sep 1, 2025 by Sean · As an Amazon Associate, we earn from qualifying purchases. This site contains affiliate links. ·

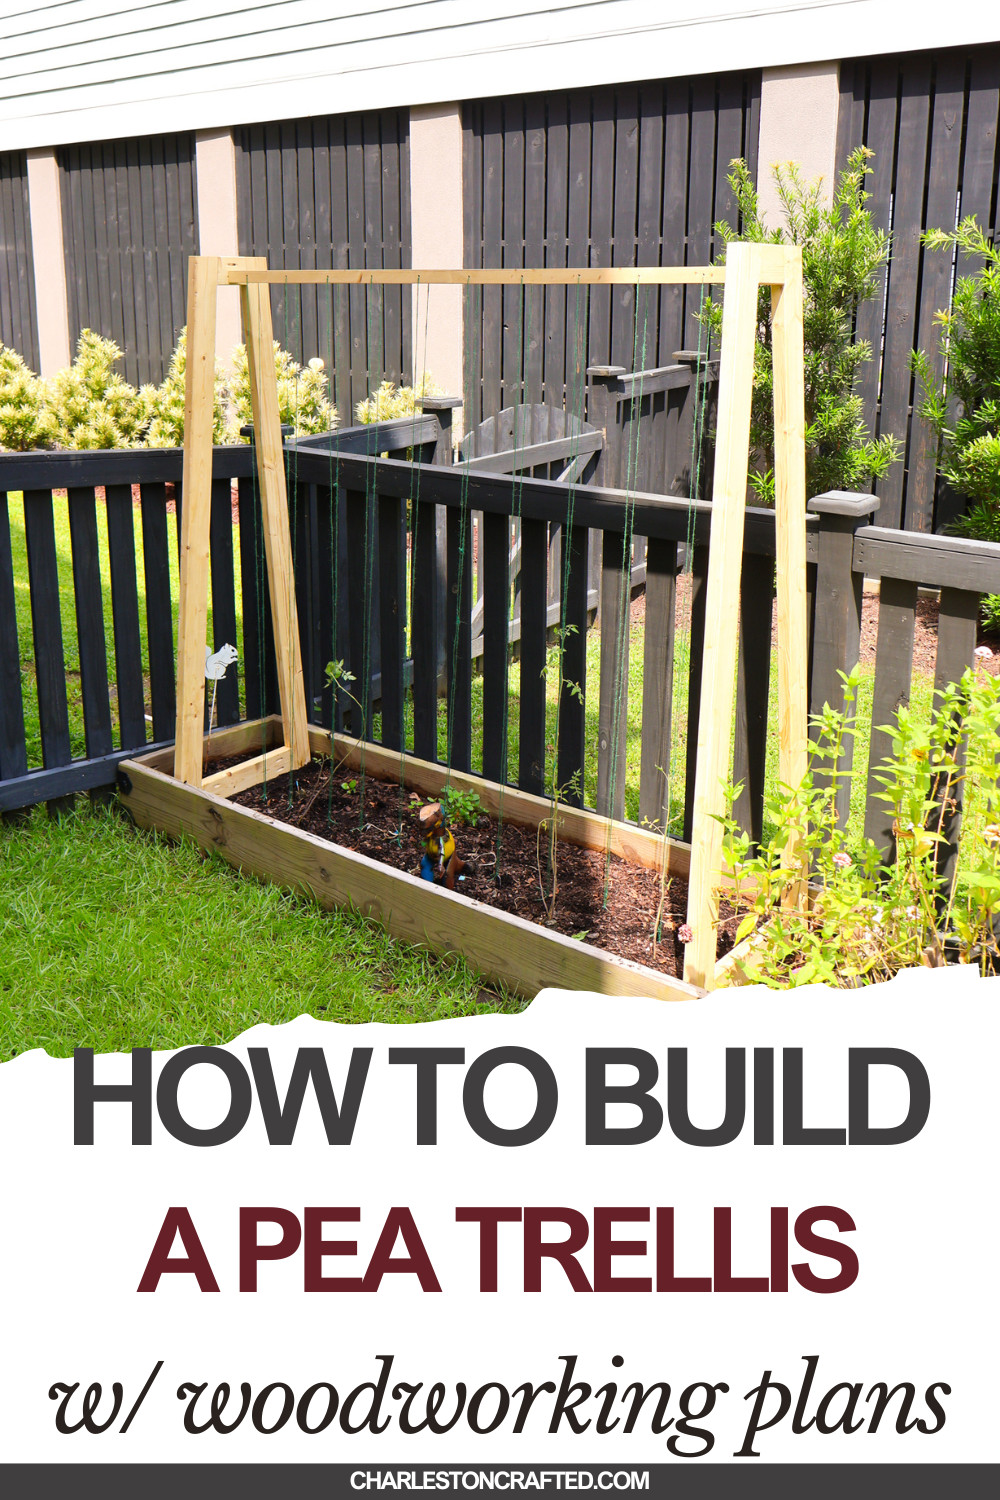
Want to grow climbing veggies for your garden this season? This pea trellis works great for all kinds of climbing veggies and is an easy build!

As the fall planting season came around, I decided I wanted to try planting something different that I haven't previously grown in our gardens- peas.

I know peas are a climbing vegetable, so I needed a trellis. I looked around at some of the trellises we had in place, like these pyramid style tomato cages and this chicken wire frame we built for loofah, but they didn't seem quite right.

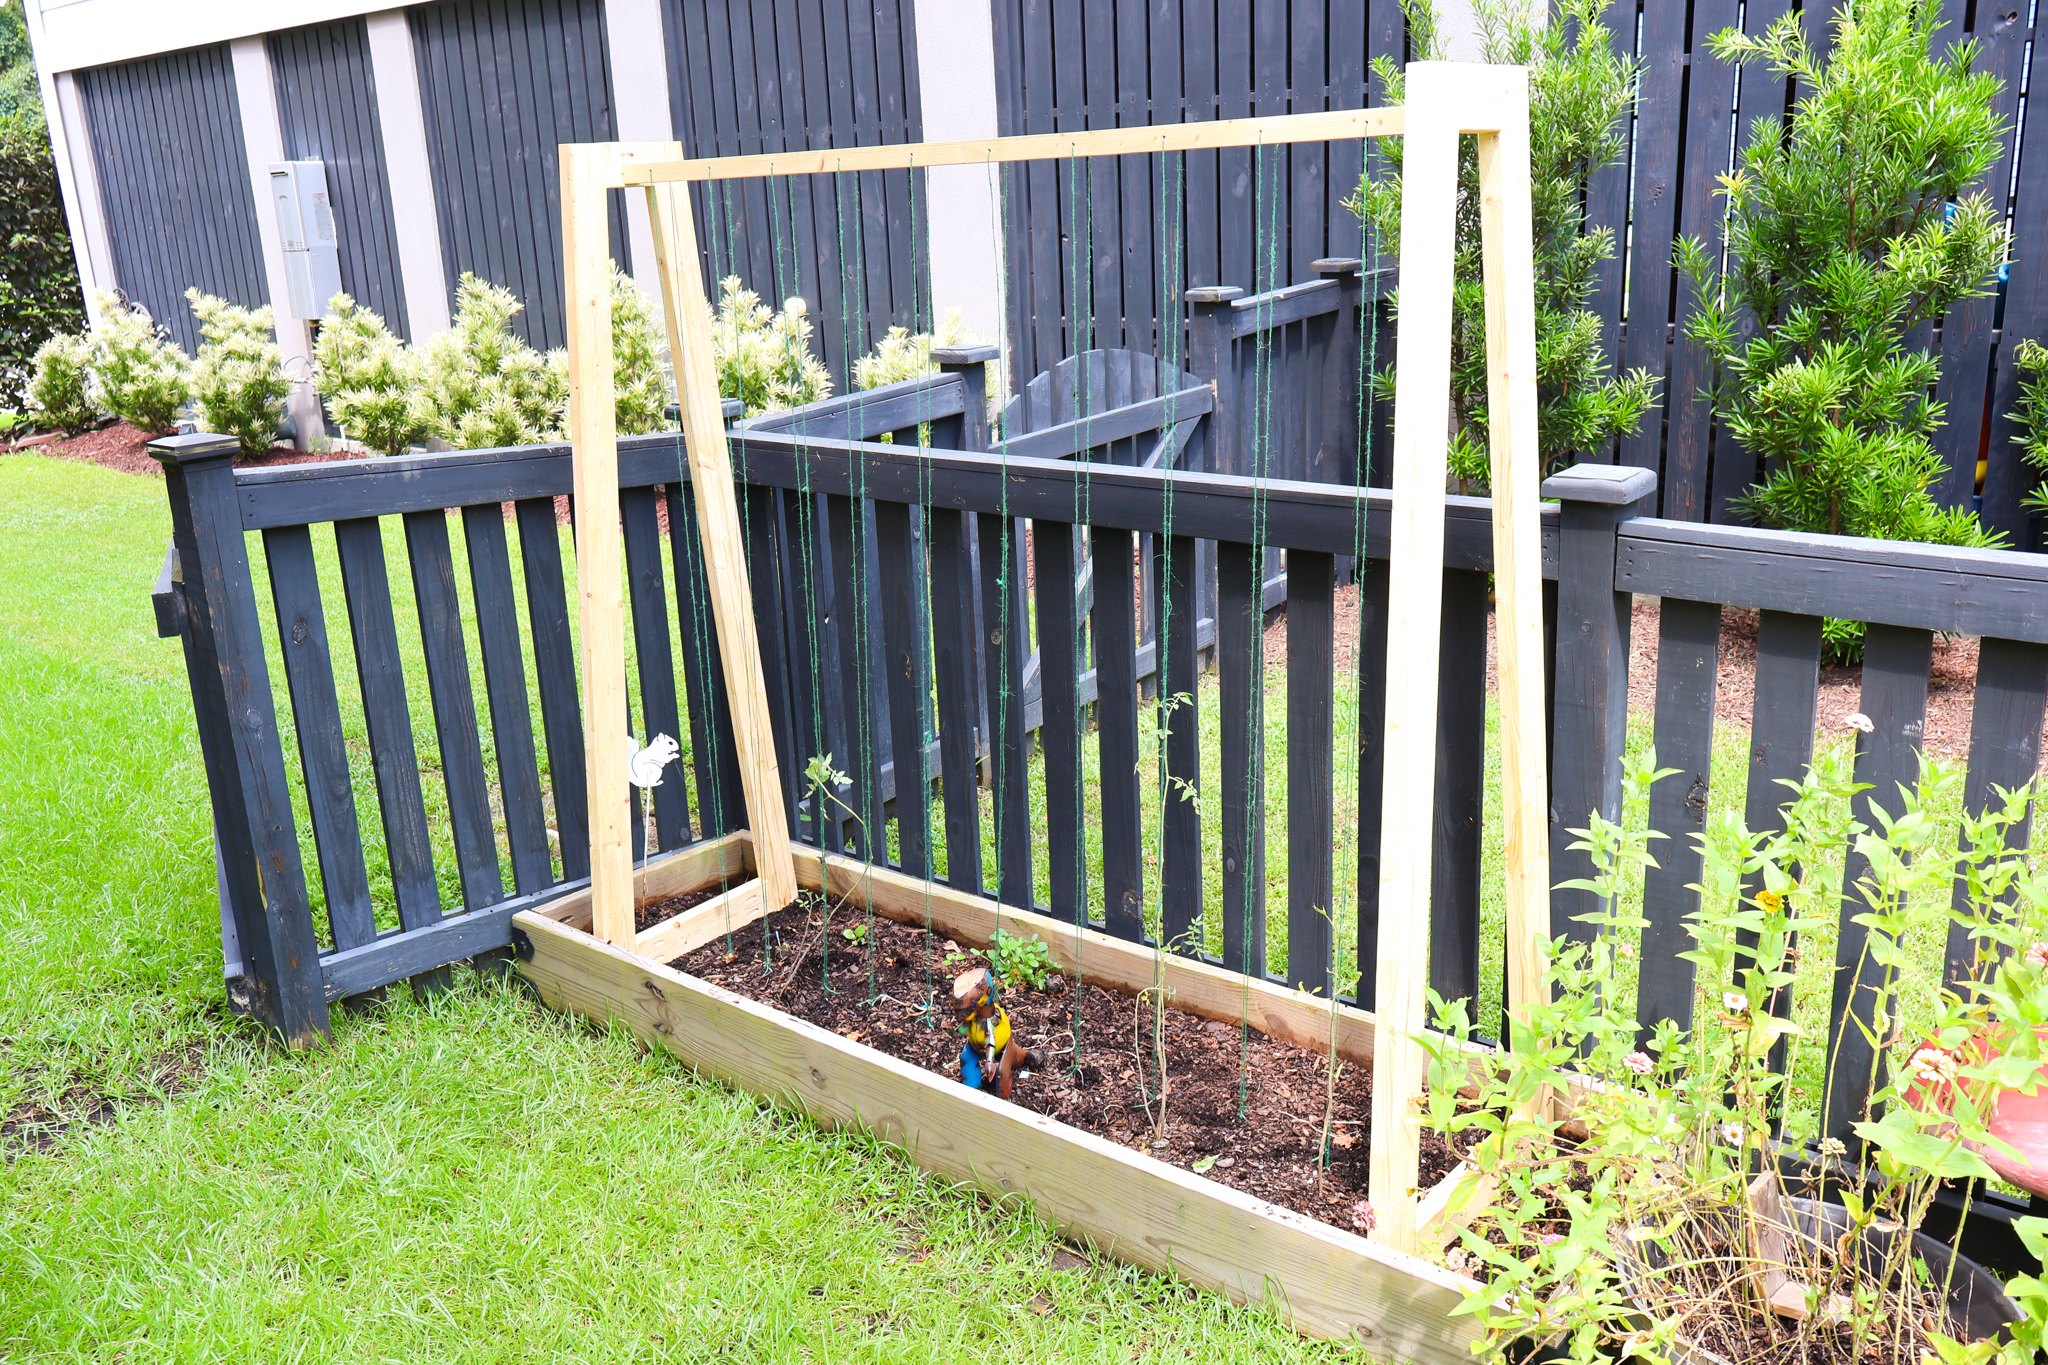
So, I decided to build a simple trellis frame with garden twine spaced out evenly to give my peas somewhere to grow up and thrive!
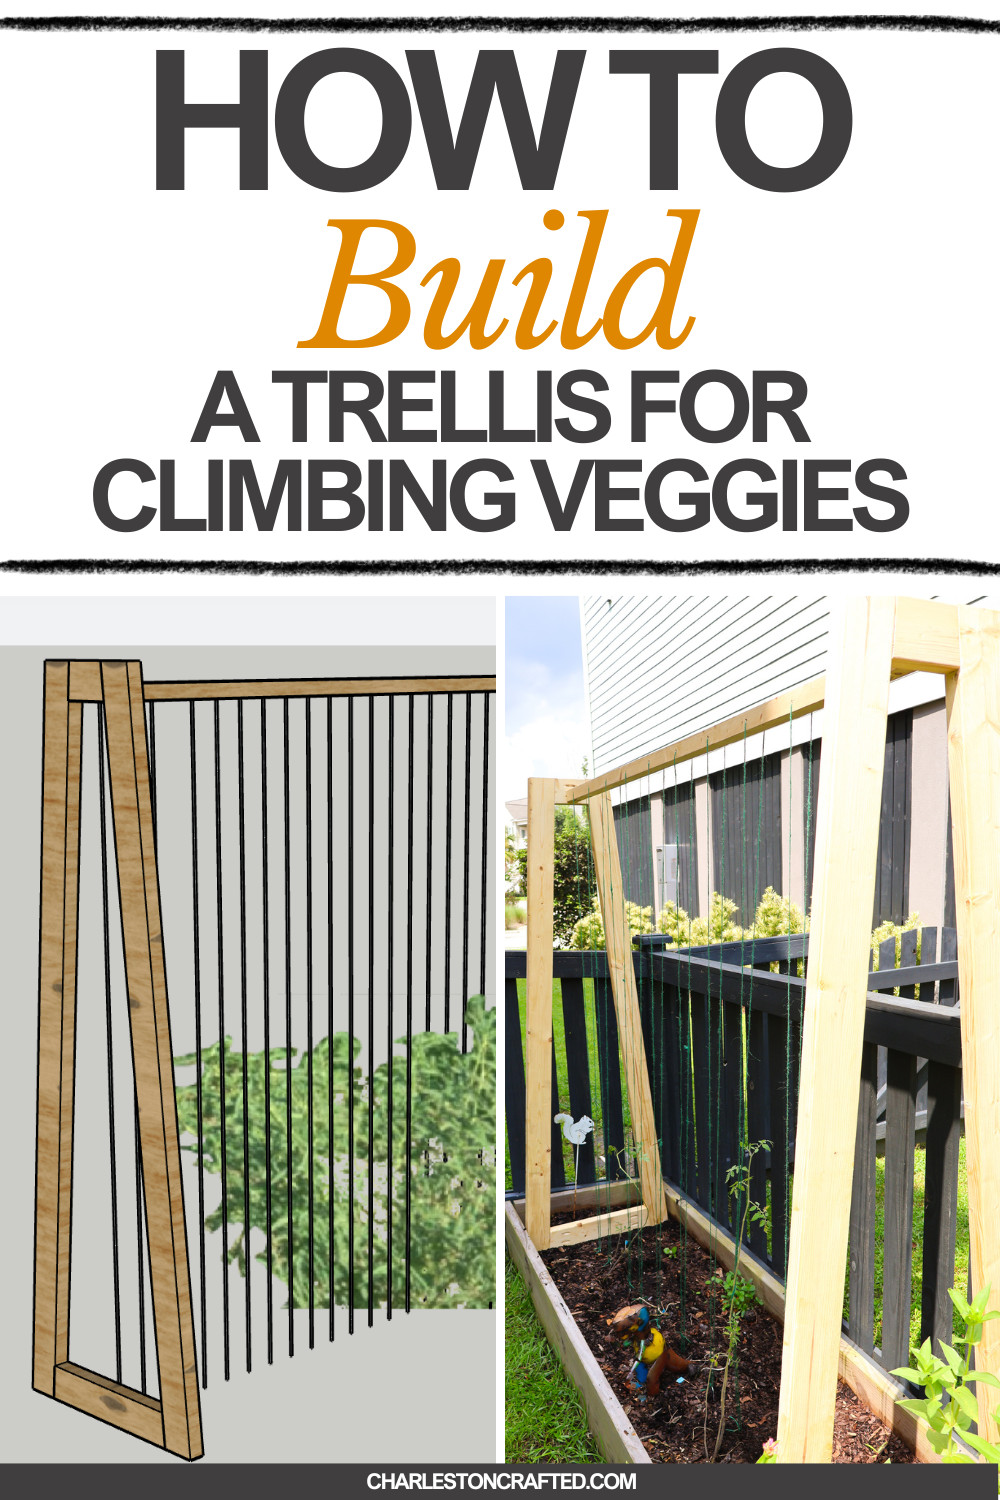
How to build a DIY pea trellis - Charleston Crafted

DIY veggie trellis

I built this project as a pea trellis, but you can definitely grow any climbing veggies on here. You can easily use extra pieces of twine or cables to help hold the vines as they're growing if they don't grab onto the twine as well.

Use this for any garden you want to plant and it is very inexpensive to make!

How to build a DIY pea trellis - Charleston Crafted

Materials and tools needed

Here's a list of the materials and tools needed to build this project. To get the exact material list and cut list, grab my PDF woodworking plans to get the job done!

  • 2x4s
  • Garden twine
  • Wood glue
  • 2 ½" Kreg pocket hole screws
  • Outdoor sealant
  • Garden stakes

Step one: make cuts and drill pocket holes

I like to start by making all my cuts at once, that way I can rip through the building part easily. This project doesn't require much wood and if you use 8' 2x4s, you can get multiple cuts out of each board.

Then, I drilled pocket holes into the brace boards to be the connections to hold the frame together.

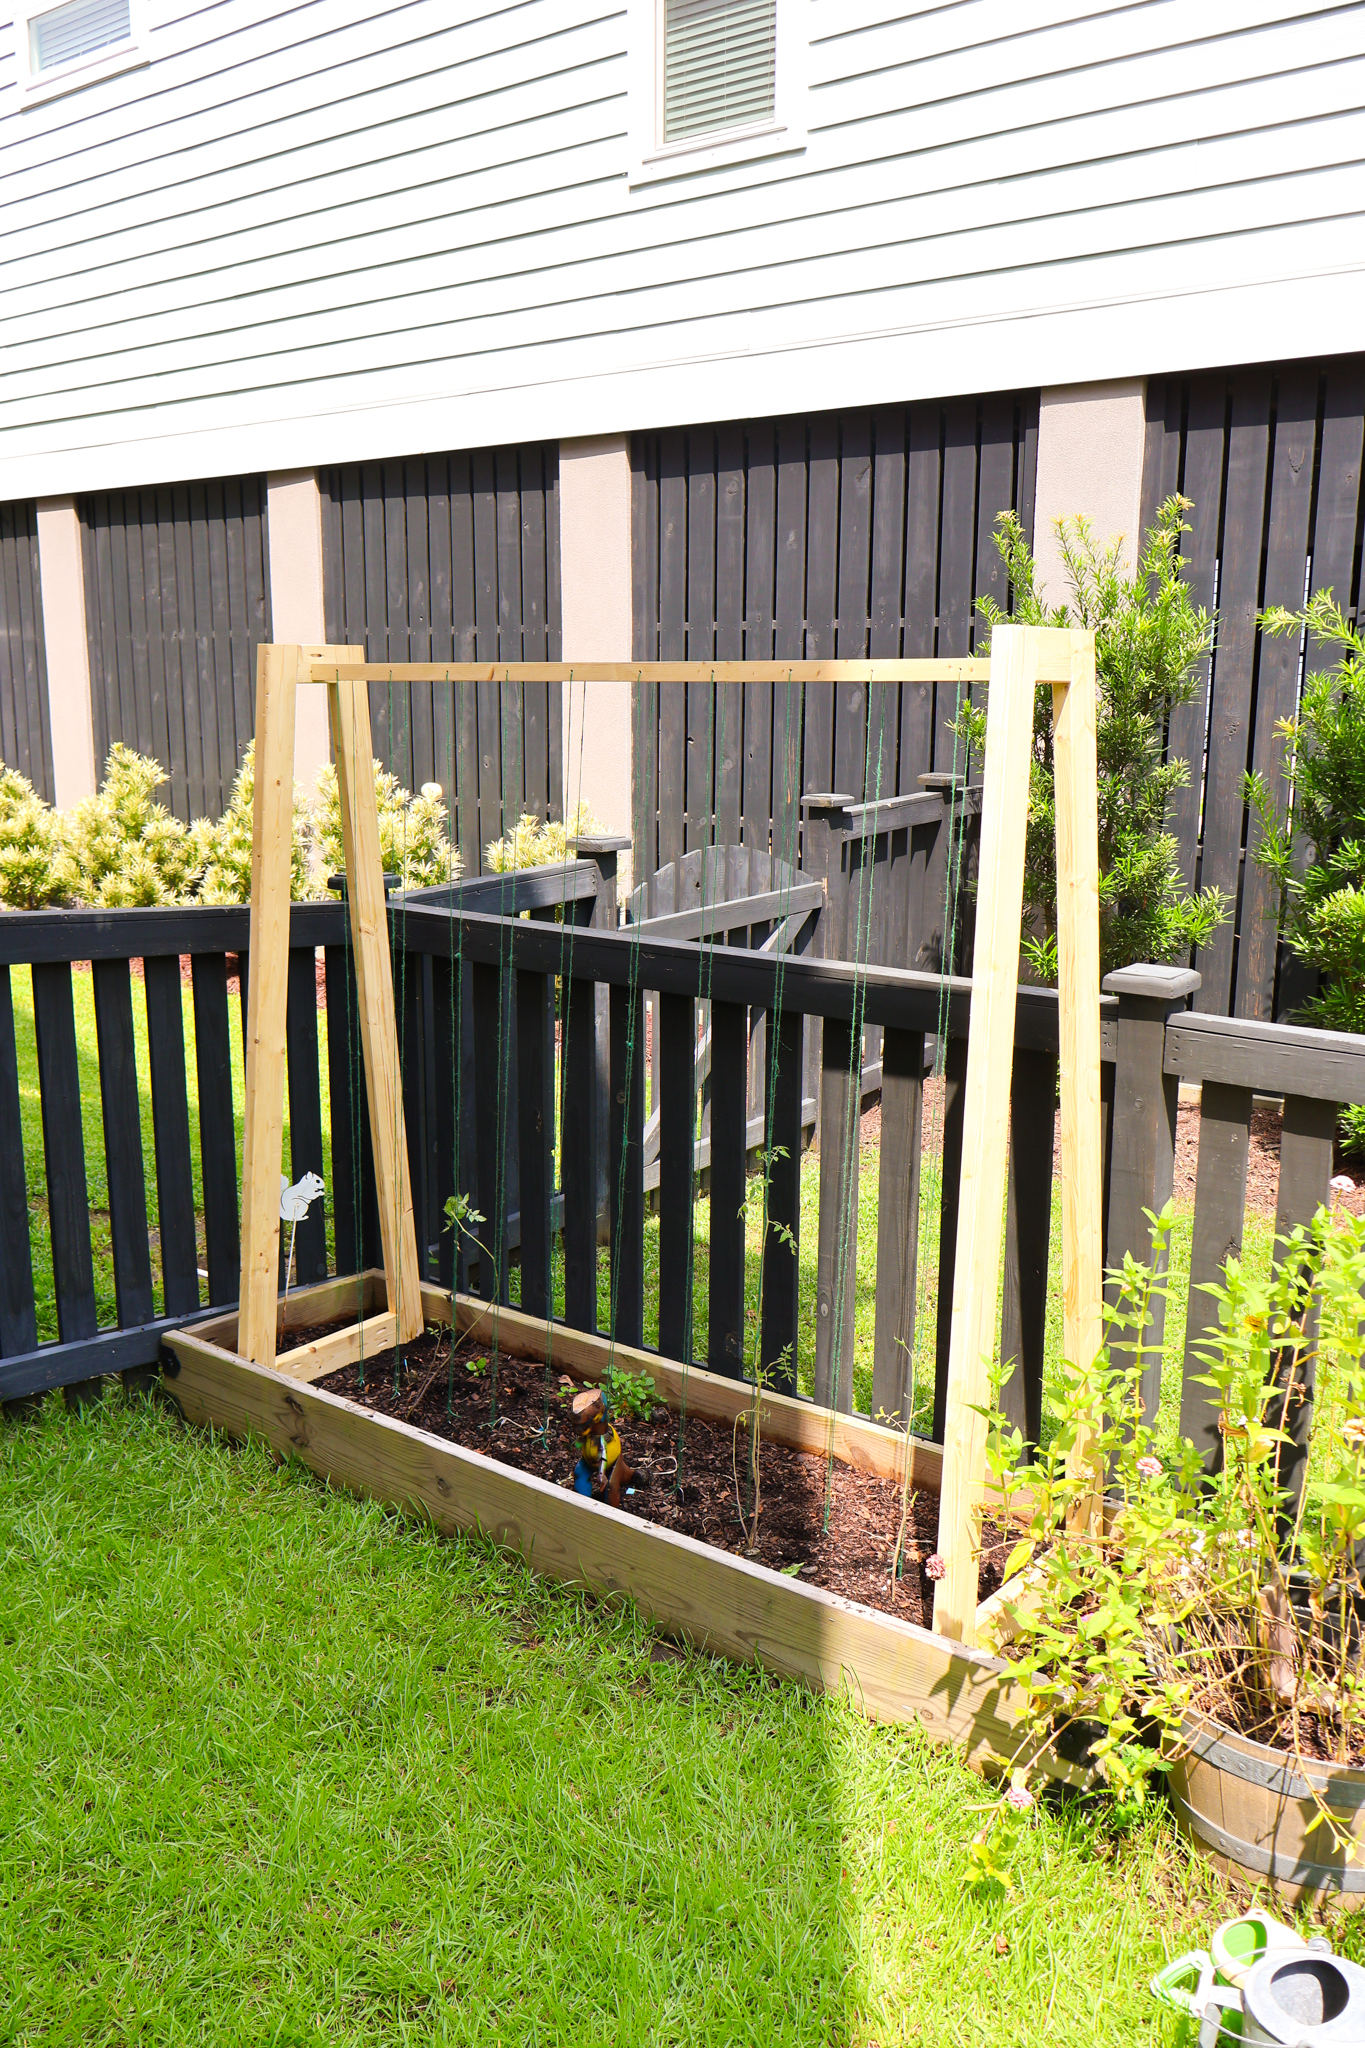
Step two: build sides

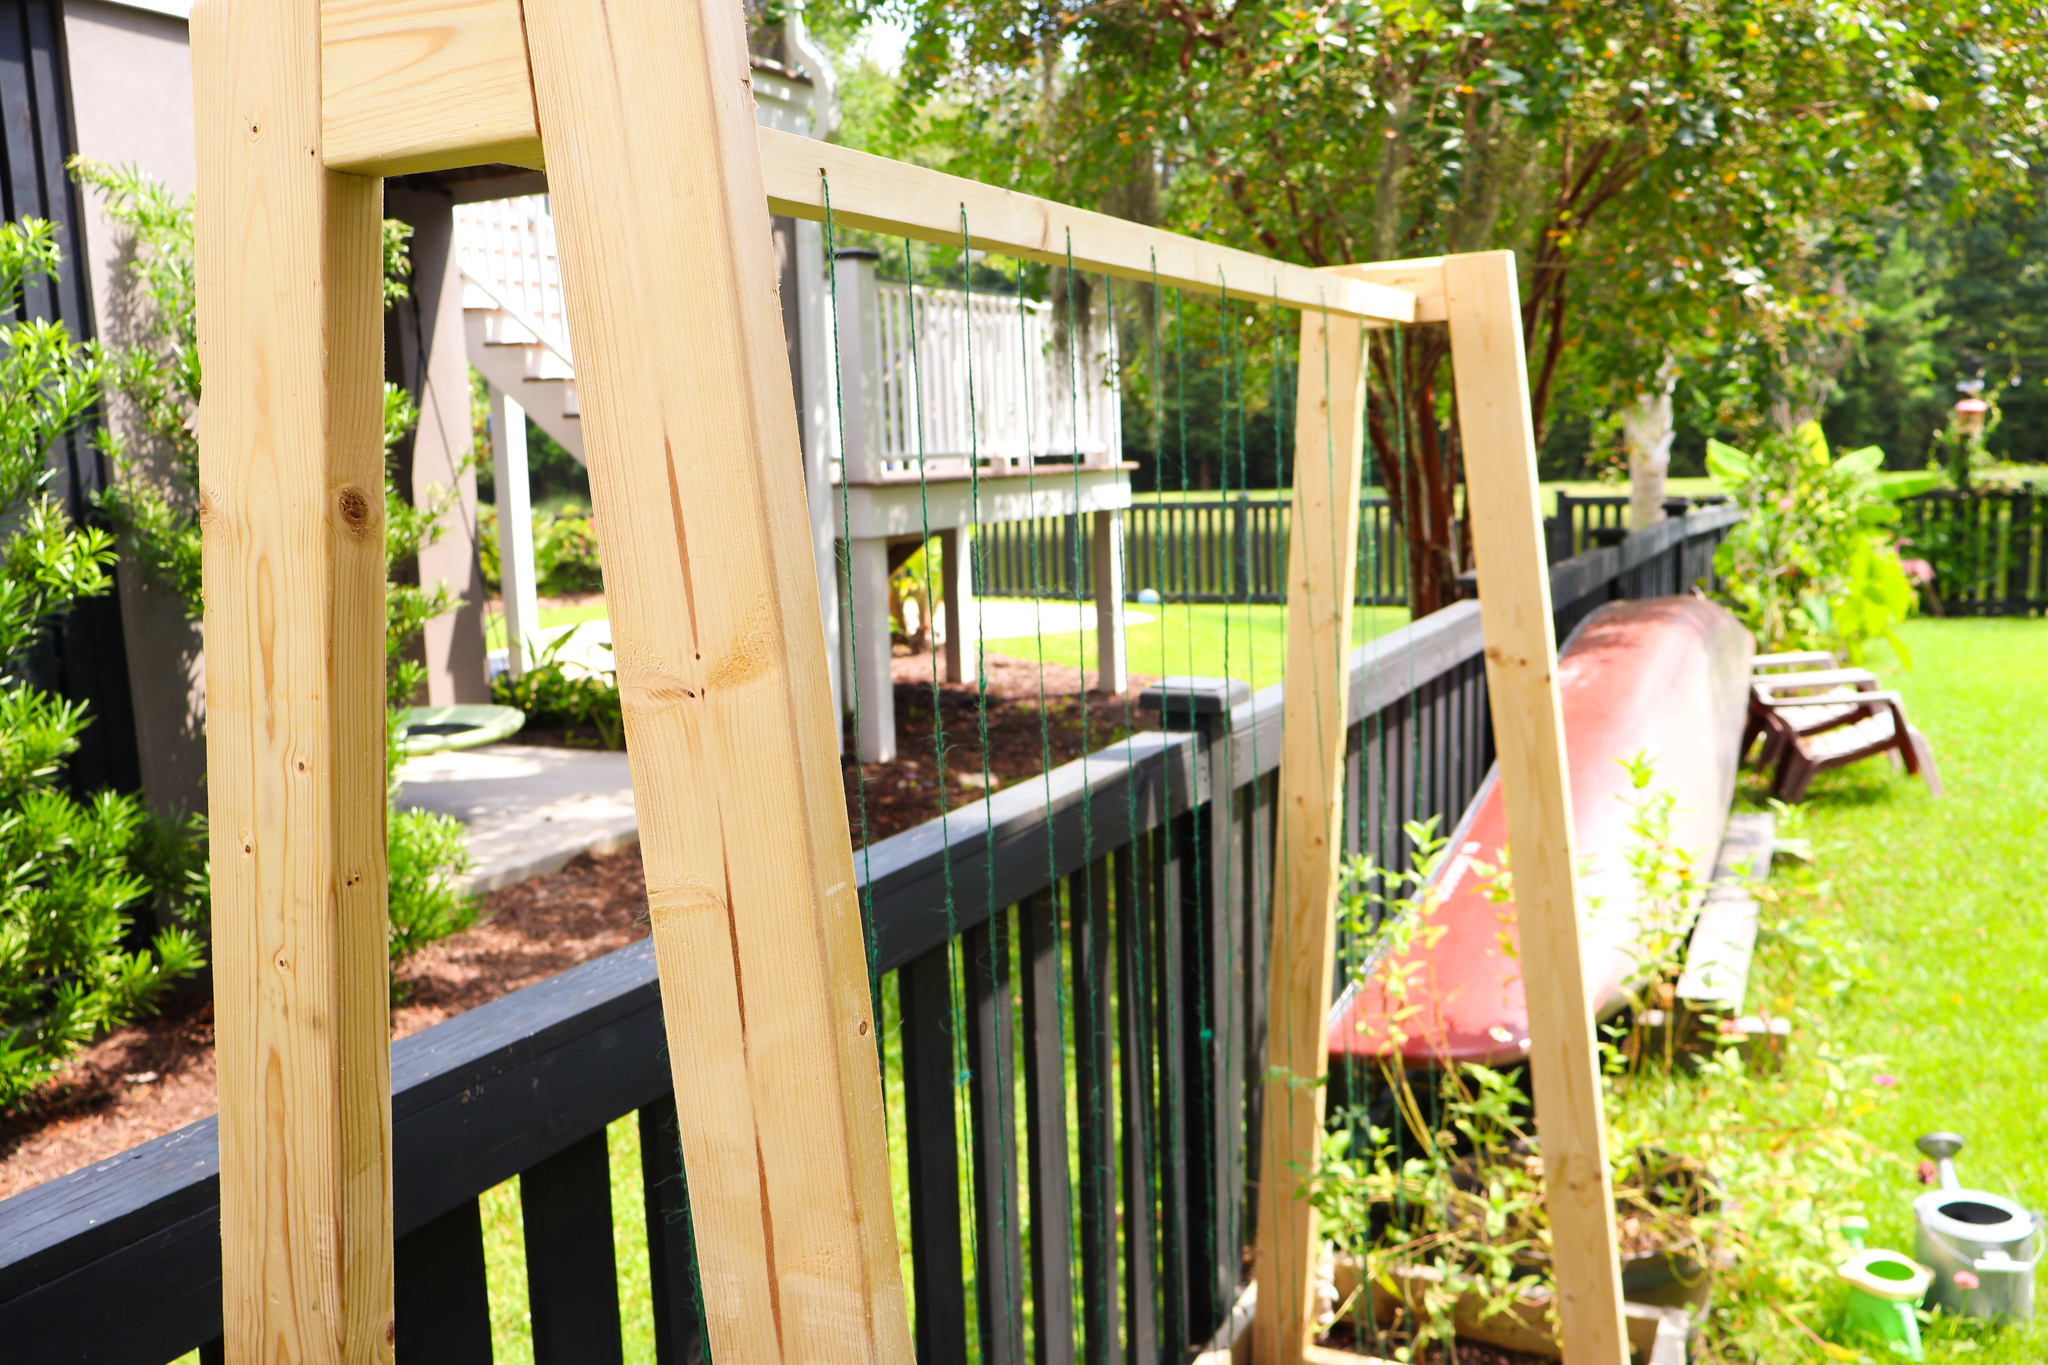
After sanding everything down, I built the two sides. These are just made of two posts with a top and bottom brace between them.

These each have opposing angles, so the posts line up with the braces to be flush on the bottom and top. The angles make it a little more balanced when standing, but technically, you can feel free to do what you want.

Sides of pea trellis

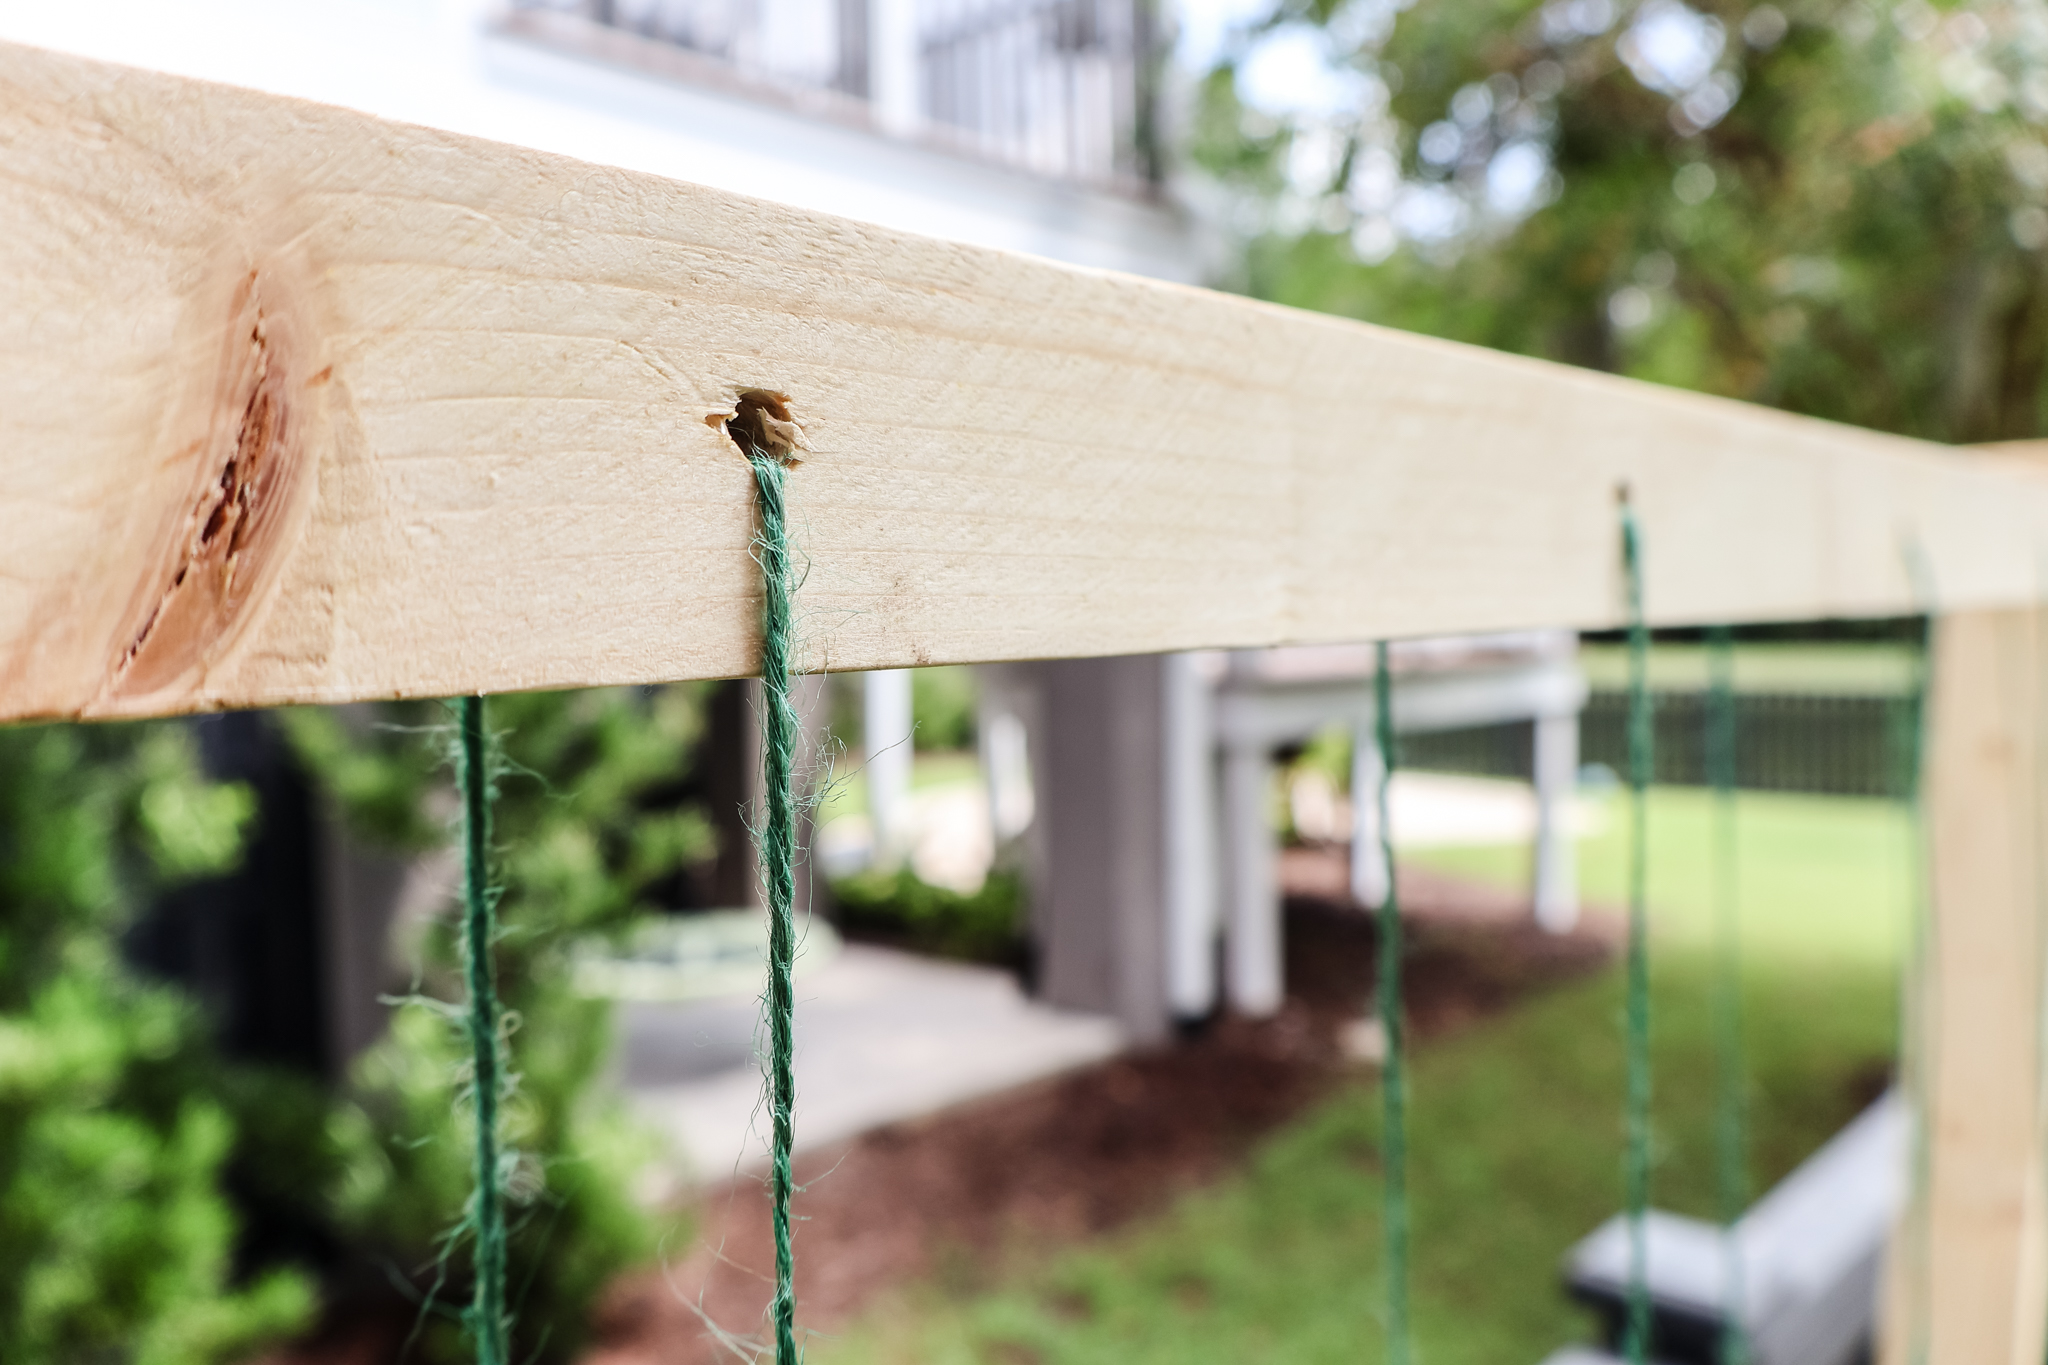
Step three: drill holes in top

Next I drill holes in the top board. I used a tape measure and marked out evenly spaced holes across the side of the board.

Then, I used my Kreg Drilling Guide to make sure I got perfectly centered holes and used a ¼" drill bit to drill through the board from side to side. This is where the cord is going to go through later.

Holes drilled on top of trellis

Step four: connect sides

To connect the sides, you simply use wood glue and pocket hole screws to attach the top to the top of the two side piece you built before.

It's a simple connection, but stays plenty strong with both methods of joinery.

Connected trellis

Step five: thread cord

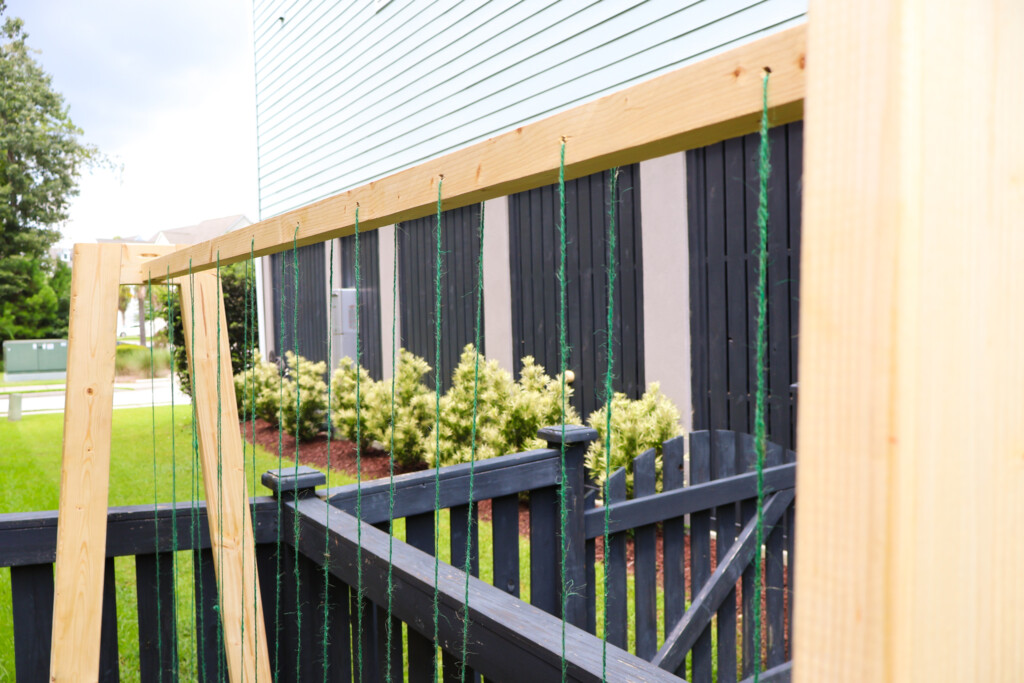
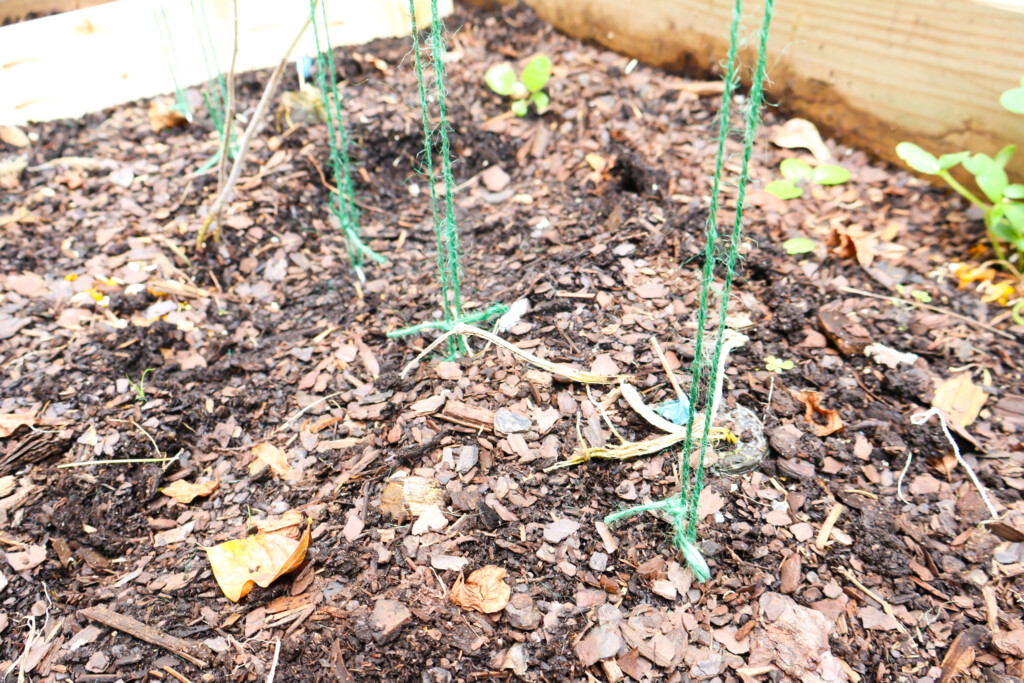
Finally, I threaded the cord through the holes. For each one, I pushed the end of the twine through the hole and pulled it down to the ground.

I had both ends be slightly longer than ground level and then pushed a garden stake into the dirt. Looping one end of the twine under the stake, I then tied the ends of the twine together so that the line was taught.

Then I repeated it for the rest of the cords.

Cords threaded through top board
Twine staked in ground

DIY pea trellis woodworking plans

If you like my pea trellis and want to build it yourself, I've got really simple to follow woodworking plans available for you!

Pea Trellis Woodworking Plans

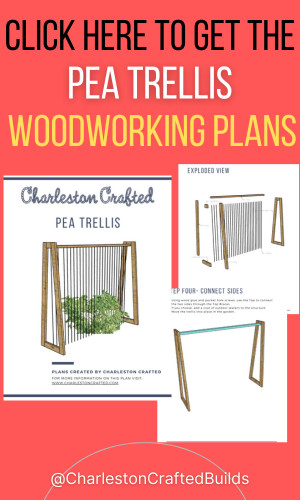
My woodworking plans come with a full material list, cut list and step-by-step instructions that break down exactly what you need to do to make this project a reality.

Go build this trellis and start growing your own food!

How to build a DIY pea trellis - Charleston Crafted
Charleston Crafted Signature

Follow us on:
Pinterest | Instagram | TikTok | YouTube | Facebook | Amazon Storefront | LTK Shop

Looking for something?

We've been doing this since 2012 so we have a LOT of blog posts!
Search stuff like: Ceiling Projects | DIY Plant Stands | Thrift Flips

Charleston Crafted logo banner
Sean headshot cropped
Sean

Hey there, I'm Sean, the woodworking enthusiast and builder behind CharlestonCrafted.com! Since 2012, I've been sharing the magic of turning raw materials into beautiful creations. I love teaching others the art and satisfaction of woodworking and DIY. I try to inspire fellow crafters to make something extraordinary out of nothing at all.

More Garden and Yard

  • DIY modern birdhouse - Charleston Crafted
    DIY modern bird house
  • DIY hanging birdhouse - Charleston Crafted
    DIY hanging bird house
  • DIY modern angled bird house - Charleston Crafted
    DIY modern angled bird house
  • Outdoor Storage Ideas That Don’t Ruin Your Vibe
    Outdoor Storage Ideas That Don’t Ruin Your Vibe

Primary Sidebar

Charleston Crafted about us image

Hey y'all!

We are Morgan & Sean McBride and we are crafting our home together in Charleston, South Carolina.

More about us

Popular Posts

  • DIY Coffered Ceiling
    DIY Coffered Ceiling
  • How to Make DIY Concrete Pumpkins via Charleston Crafted
    How to Make DIY Concrete Pumpkins
  • How to Make a Cupid's Arrow Valentine's Day Wall Hanging with felt on the Cricut
    How to make a Cupid's Arrow Valentine's Day Wall Hanging
  • Our Tropical Oasis - A backyard Hammock area - Charleston Crafted
    Our Tropical Oasis

Recent Posts

  • How to build a DIY pea trellis - Charleston Crafted
    How to build a DIY pea trellis
  • How to build standing shelves for the attic
  • Neutral Halloween Decor (1)
    Spooky but Stylish: Neutral Halloween Decor for Your Home
  • How to Prep Your Home for Fall with Cozy, Functional Upgrades (4)
    How to Prep Your Home for Fall with Cozy, Functional Upgrades

Privacy Policy

Footer

↑ back to top

Navigation

  • Home
  • Blog
  • Contact Us
  • Terms of Use
  • Disclaimer

Newsletter

  • Sign up for emails and updates
  • Follow us on Instagram
  • Work with Us

Browse by Category

  • Woodworking
  • Home Projects
  • Paint Colors
  • Room Reveals

© 2025 The Charleston Crafted Blog LLC DBA “Charleston Crafted” and “CharlestonCrafted” (also known as N/A) / All Rights Reserved.
Official Website: (Charleston Crafted)
Registered in USA (Co. Reg. No.: 565586)
Address: Charleston, USA 29414, South Carolina
Contact Phone: Not applicable — contact is via email: sean@charlestoncrafted.com

DISCLAIMER: The content on this website is provided for general informational purposes only and is not intended as professional advice. The Charleston Crafted Blog LLC and The Charleston Crafted Blog LLC make no representations or warranties—express or implied—regarding the accuracy, completeness, or suitability of the information contained herein. Any reliance you place on this information is strictly at your own risk. In no event shall The Charleston Crafted Blog LLC or The Charleston Crafted Blog LLC be liable for any loss or damage, including without limitation, indirect or consequential loss or damage, arising from the use or inability to use this website. This website is the official website of The Charleston Crafted Blog LLC.

AFFILIATE DISCLOSURE: This website contains affiliate links. If you click through and make a purchase, we may earn a commission at no extra cost to you.

As an Amazon Associate, I earn from qualifying purchases.

Site Editor: Morgan Smith McBride

Copyright © 2025 Charleston Crafted