Want to build a simple DIY bird feeder? Here's how to build this pretty copper bird bath - with a solar fountain!
We have been working hard to fix up our yard this year. We really focused on the front yard - completely re-landscaping the plants.
We will really save our backyard for next year, though we have been working on improving the grass.
I also got 2 fruit trees - a tangerine and a variegated lemon tree. I decided to leave them in pots until we figure out the layout out here.
We actually have a surprising amount of birds in our yard - considering there are no trees. We back up to a pond that backs up to land owned by the agriculture school, so we are really kind of up against the wild woods!
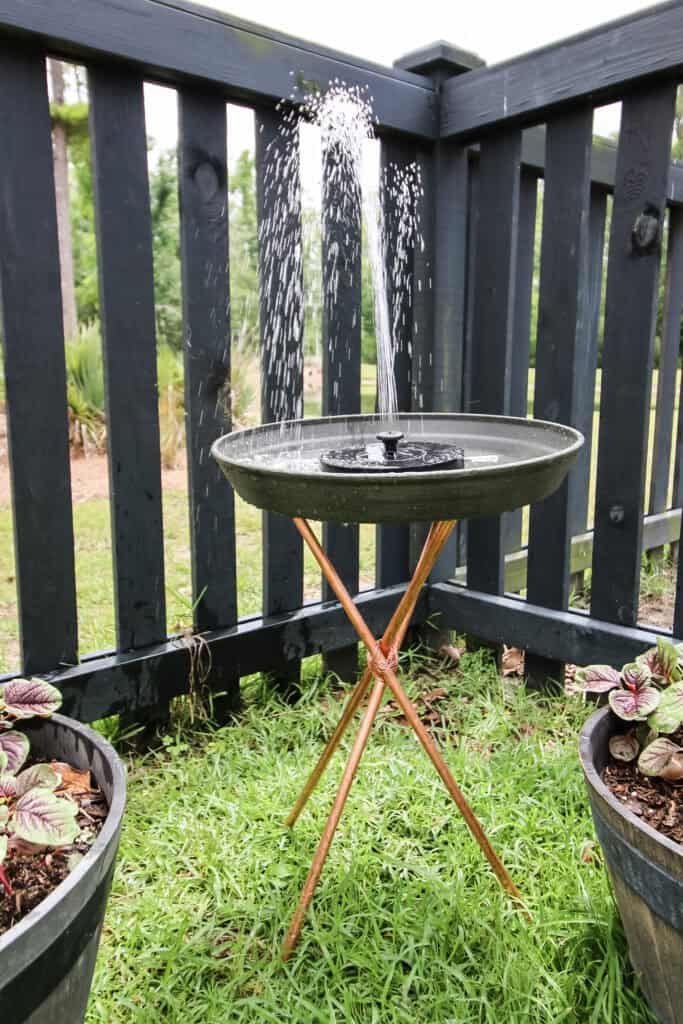
Anyways, Luke loves watching the birds. We already have a bird feeder, so I decided it would be fun to add a bird bath to the corner by our two potted trees.
I whipped this. bird bath up using copper piping and copper wire, both from the hardware store. I used a plant drip tray for the tray and the whole thing came together in less than 15 minutes!
How to build a bird bath
I built this simple bird bath with copper legs and a plastic top!
Supplies needed:
- Plastic plant saucer
- 3 3 foot copper pipes, ½" diameter
- Copper wire, 18 gauge
- Gorilla glue OR 2 part epoxy
- Bird bath solar fountain
How to build a DIY copper bird bath:
STEP 1: Arrange the pipes
Arrange your 3 pipes in an X pattern until you have the desired shape. You can make it a wider or more narrow triangle, depending on the shape you prefer.
The wider your plant saucer, the wider the top part of your base should be.
STEP 2: Wrap with wire
Once you are satisfied with your arrangement, wrap it with copper wire, tucking the ends in as you do so.
Wrap around the whole thing as well as weaving in and out of the bars to make it very secure.
STEP 3: Add glue
I added a few drops of gorilla glue to the joint to help further secure it. Use a paper towel to wipe off excess and allow to dry.
STEP 4: Glue to saucer
Use glue to adhere the top of your copper base to the bottom of the plastic saucer.
We tried this two ways. First we used Gorilla Glue. This broke off after a few days.
Then, we used two part epoxy (also by Gorilla Glue). This was a much stronger hold and has not broken!
Allow to dry completely, upside down.
STEP 5: Put in place and add the solar fountain and water
Place on the ground - you can gently press the copper poles into soft earth to help level it out.
Add the solar fountain and then cover with water. Enjoy!
How to add a fountain to a bird bath
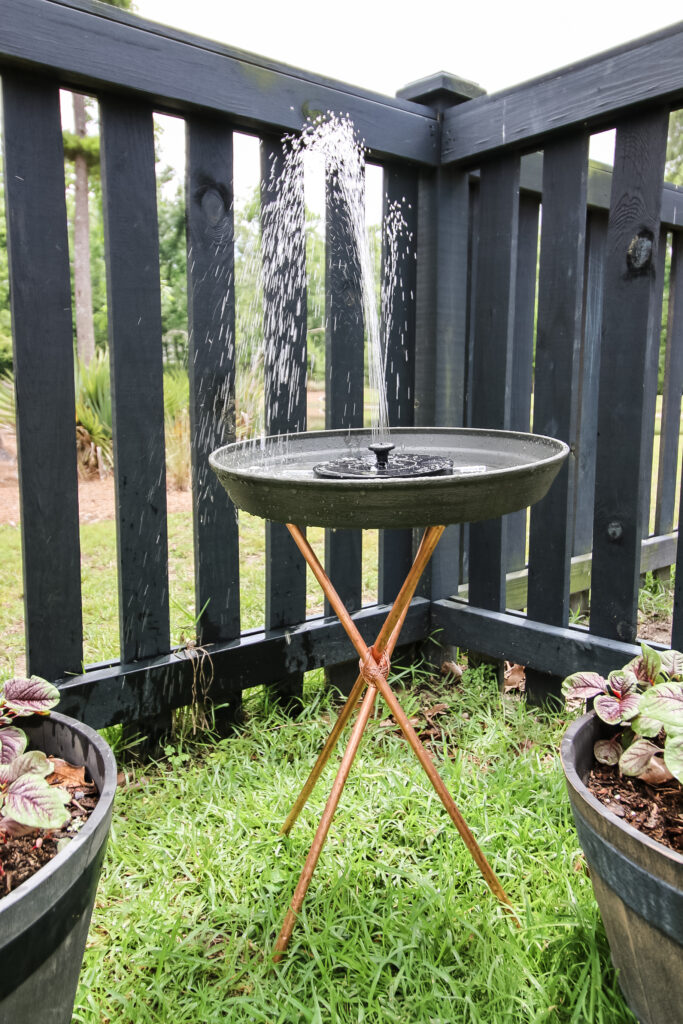
Luke's favorite part of this bird bath is the fountain.
I was so pleased to find these solar bird bath fountains for a great price.
This fountain is completely solar powered and just runs non-stop without batteries or anything - as long as the sun is out.
It's basically a round solar panel with a fountain in the middle. You can even swap out the nozzle for different spray effects!
Note that the actual panel is about 7" across but it comes with 4 basically clear straws for each side that made it WAY wider.
I ended up trimming the straws to about 2" long each (just with scissors) and it didn't effect performance at all.
My only complaint about this fountain is that if the bird bath is dry/empty and it gets sunny, it keeps running. Obviously no water squirts, but it makes this grinding noise that's surprisingly loud and annoying.
I am really impressed by this fountain and think that it really takes this bird bath up a notch!
Video demonstration
Check out our video to see exactly how we built this DIY copper bird bath!
Have you ever built a bird bath?

Looking for something?
We've been doing this since 2012 so we have a LOT of blog posts!
Search stuff like: Ceiling Projects | DIY Plant Stands | Thrift Flips

Hello, I'm Morgan, half of the creative force behind CharlestonCrafted.com! With a passion for DIY that dates back to 2012, I've transformed three homes and now I'm dedicated to helping others craft their dream spaces. Let's turn your house into a home together!