Here's how we hung up a tile backsplash in our coastal kitchen and how you can do it yourself too!
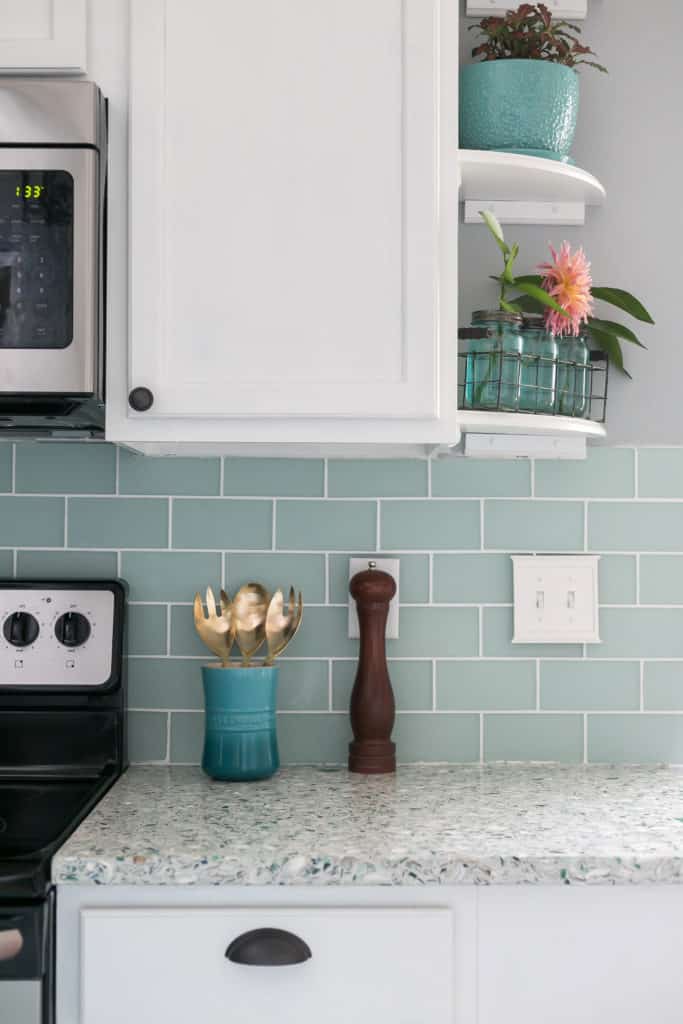
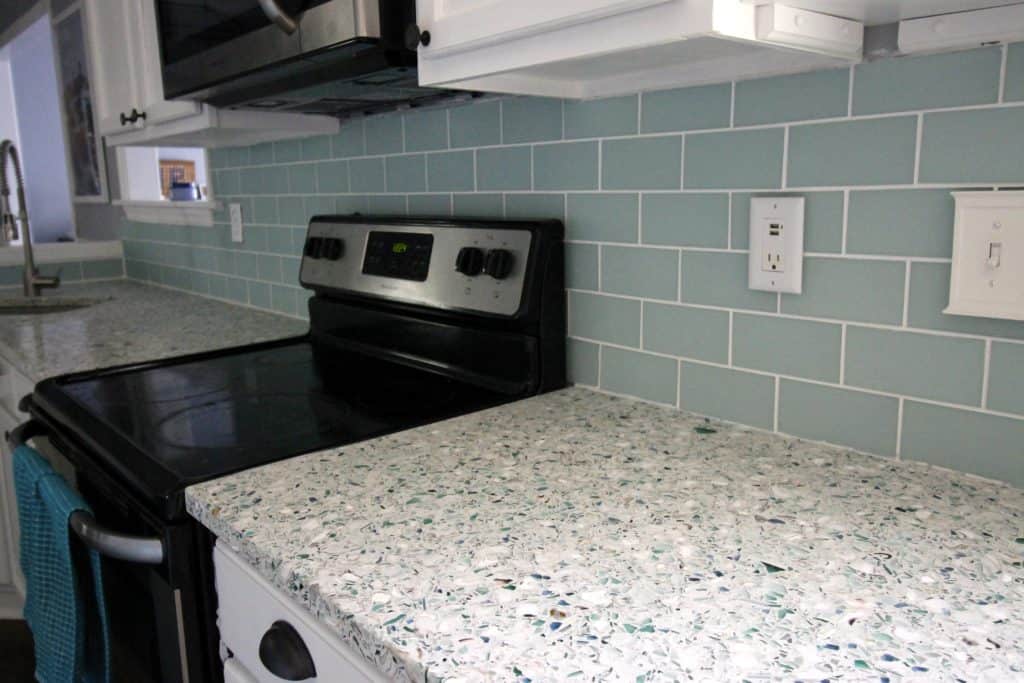
We are winding up our kitchen makeover, and one of the last big projects was adding a tile back splash. I envisioned a sea glass look that would tie into our recycled glass counter tops.
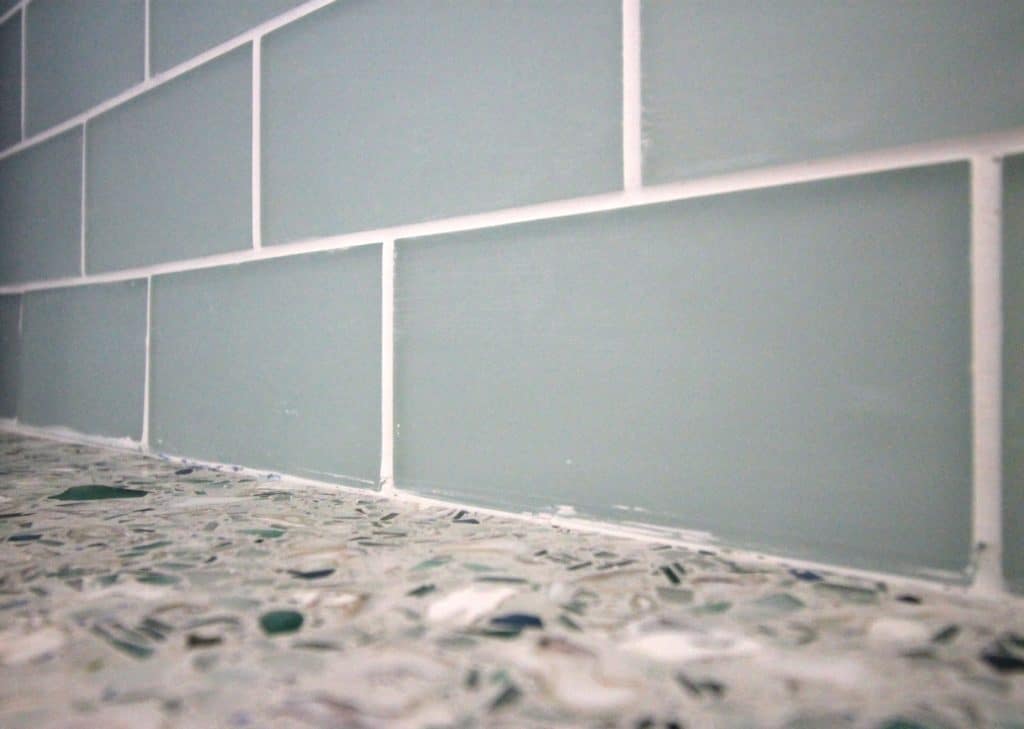
I ordered samples from a few tile places, all in shades of blue & green. It was easy for me to decide that I loved the 3x6" glass subway tile from Tile Bar the most. I debated a few different shades, but really fell for the frosted glass look.
So, I decided to go with the Loft Seafoam 3X6 Frosted Glass Tile from Tile Bar. We feel so lucky that Tile Bar wanted to partner with us and offered to send us the tile.
Here is the final reveal of our DIY coastal kitchen makeover!
How to Hang a Tile Bar Glass Subway Tile Kitchen Backsplash
Hanging a glass tile back splash is really easy, but just a little bit time consuming. We started by watching a few videos to get the best tips ourselves and here's one that's good for glass subway tiles.
Check out a TON of DIY kitchen backsplash ideas!
What you need:
- Newspaper or plastic
- Painters tape
- Mortar
- Mortar spreader
- Bucket + water
- Mixing drill attachment
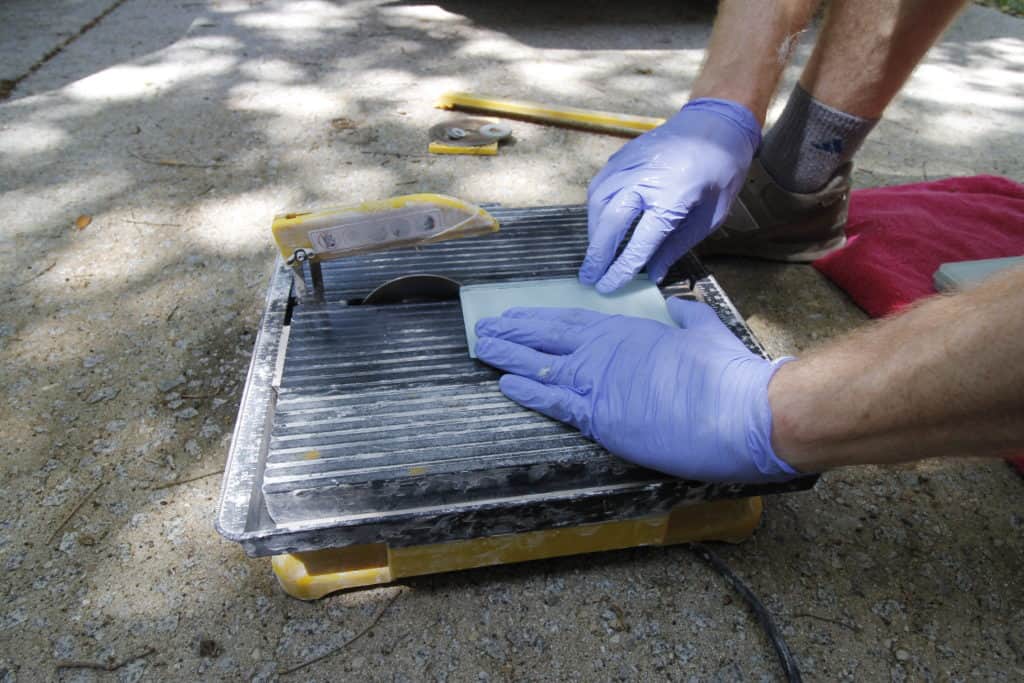
- Wet saw
- Tile spacers (we used ¼")
- Tile for your square footage + 10% extra just in case
- Unsanded grout
- Grout float
What you do:
Here's what you need to do when hanging a tile backsplash yourself!
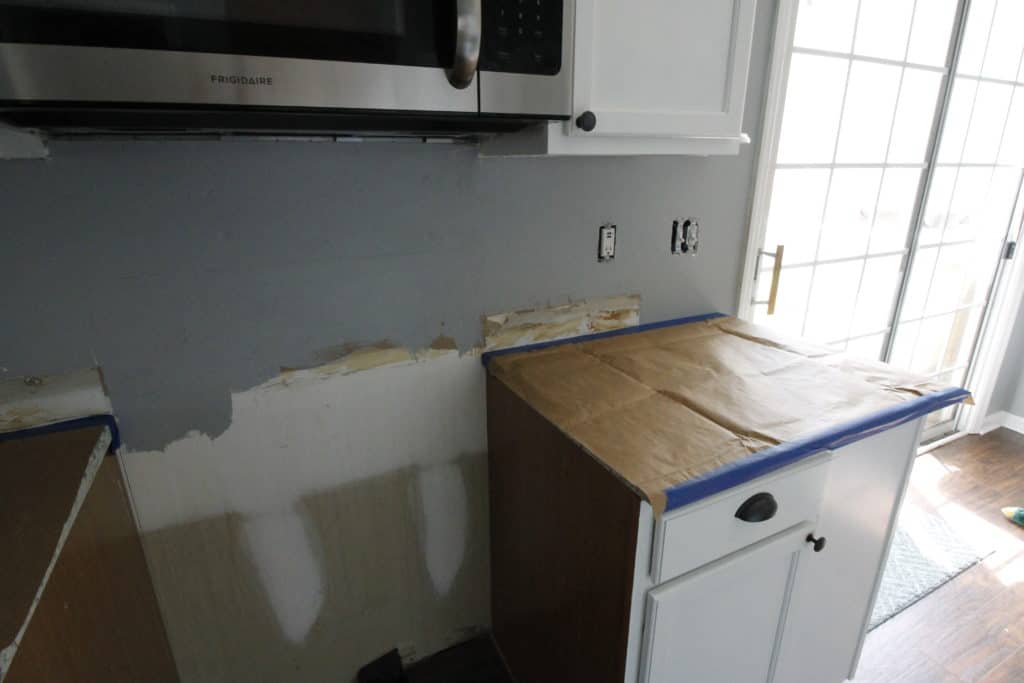
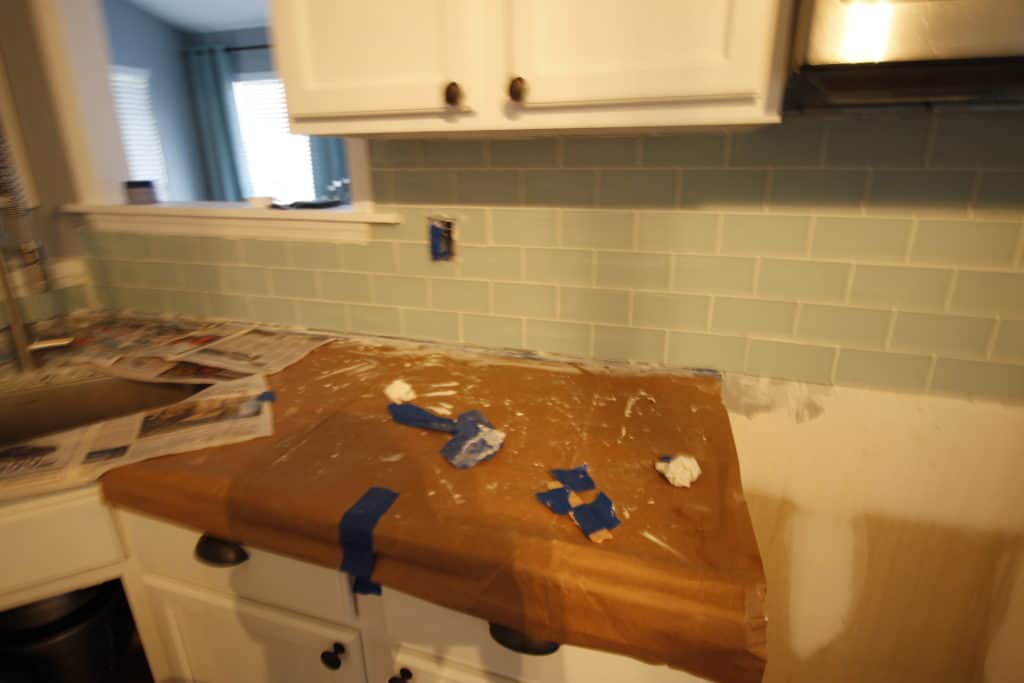
Step one: prep your work area.
- Remove everything from the counter tops.
- Use painters tape + newspaper to cover all of your surfaces. You will make a mess!

- If your wall is painted, you can score the paint. We used a scoring tool but any sharp edge would do. (optional)
- Use a drill to drill screws into the studs. This will hold the drywall extra-securely to the wall under the weight of the tile. (optional)
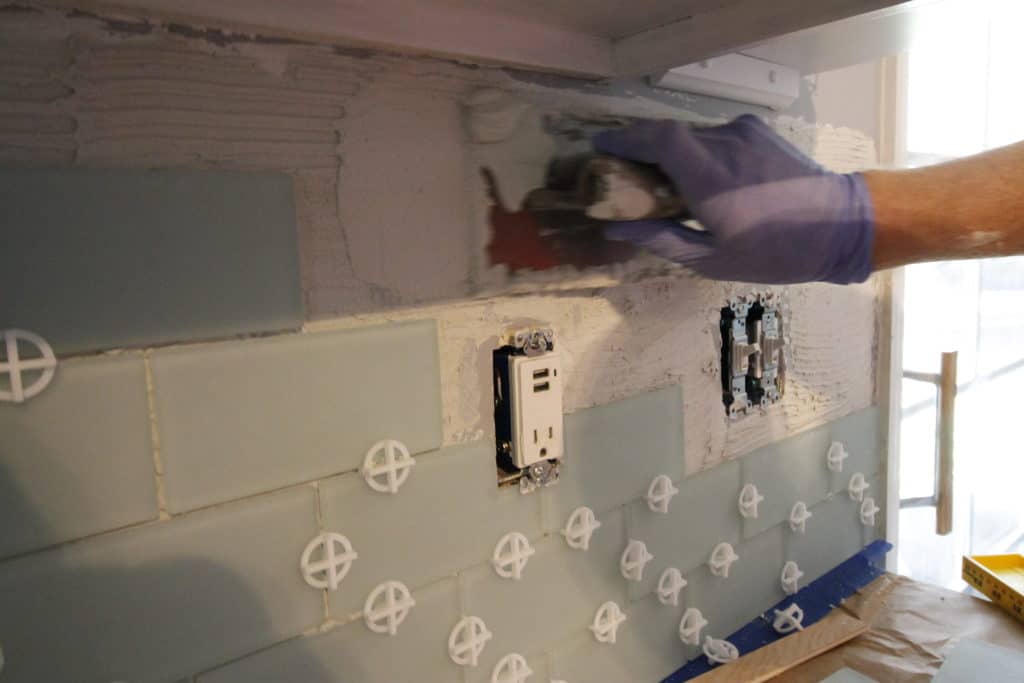
- Turn off power to your outlets
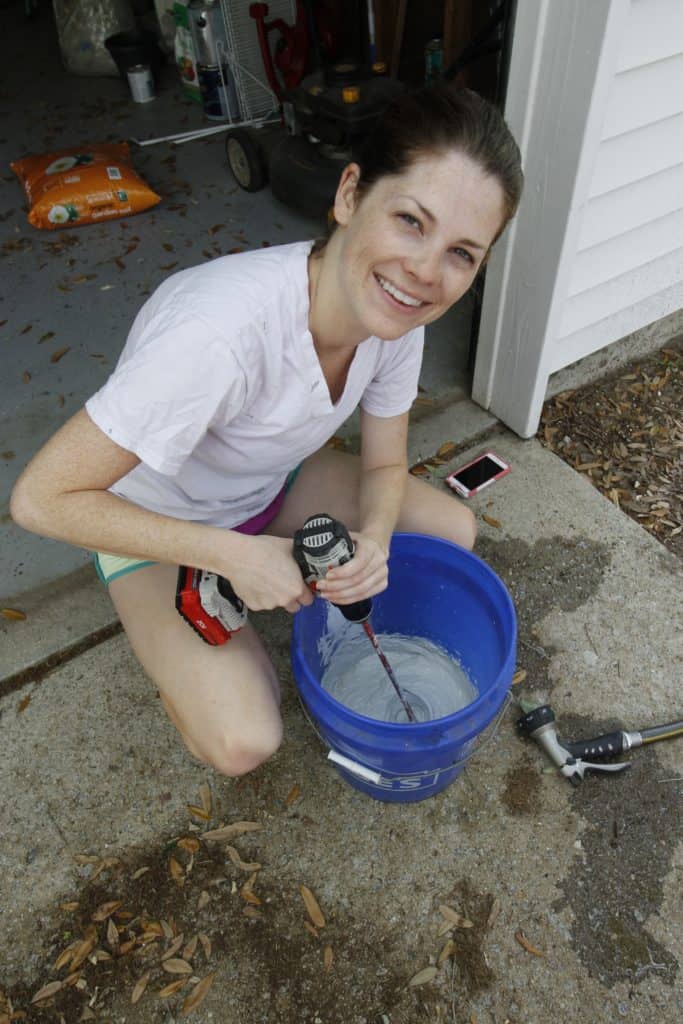
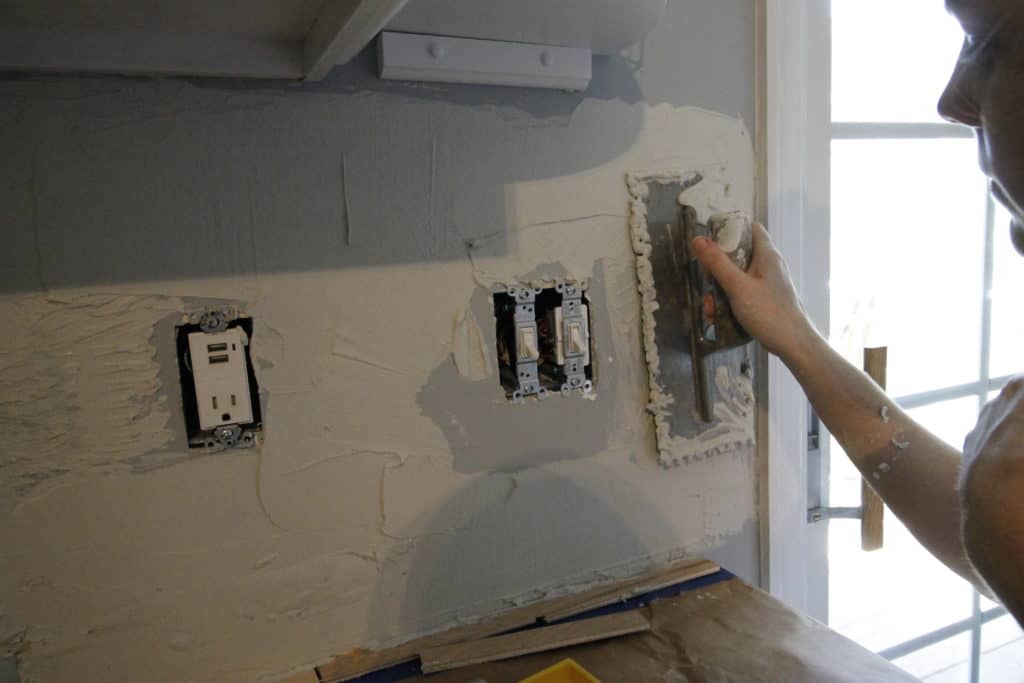
Step two: mortar
Mortar is the glue that will hold the tile to the wall. You apply this first to the wall before putting up your tile.
- Mix your mortar according to the instructions on the package. This should require mixing the powder with water using a mixing attachment to your drill and you'll mix a few minutes, wait a few minutes, then mix a couple of more minutes.

- Using your mortar spreader, grab some globs of mixed mortar and spread it on a small section of wall. Spread enough for what you can do in 15 minutes or so.
- Use a wet saw to cut your tiles in the patterns you need, being sure you've drawn the appropriate cuts for around your outlets.
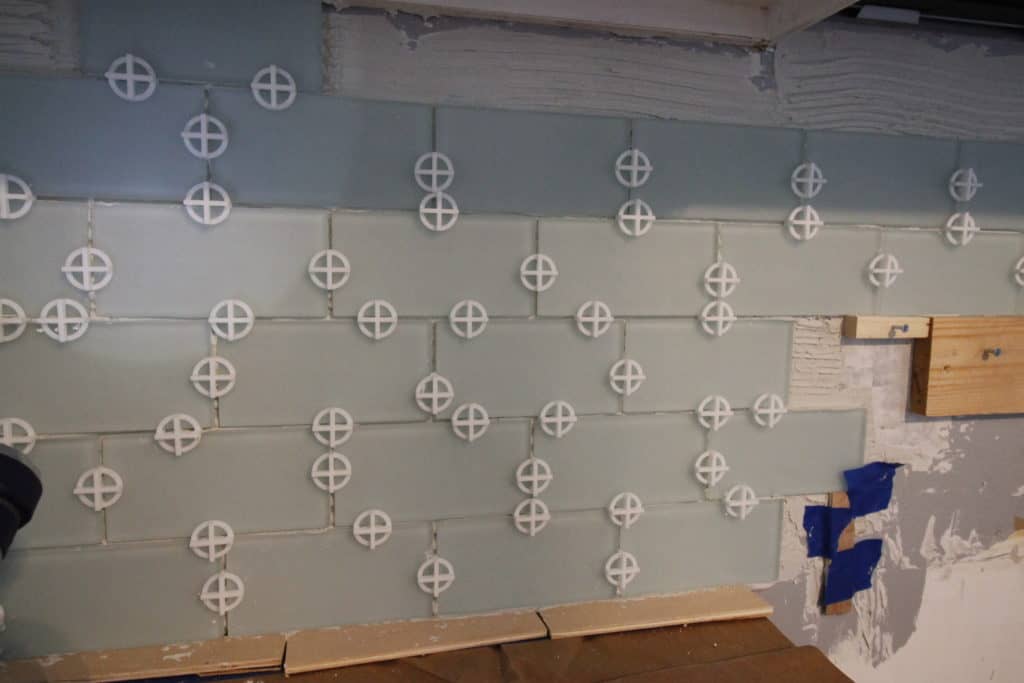
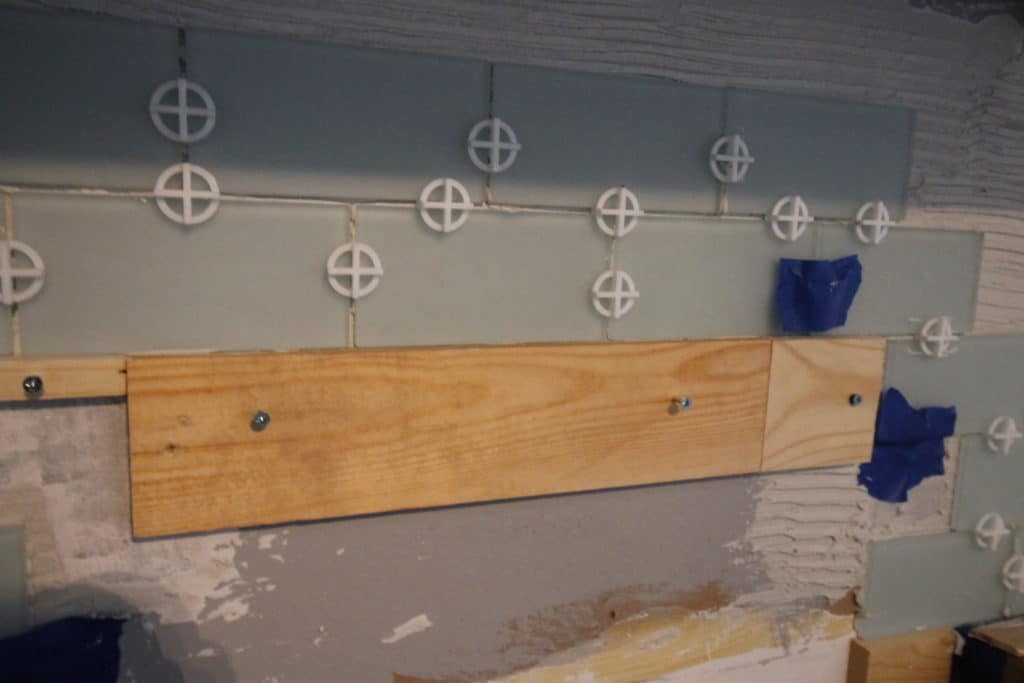
- Place your tiles in the pattern you choose (we chose a 50-50 split on each level) and place your tile spacers in between.
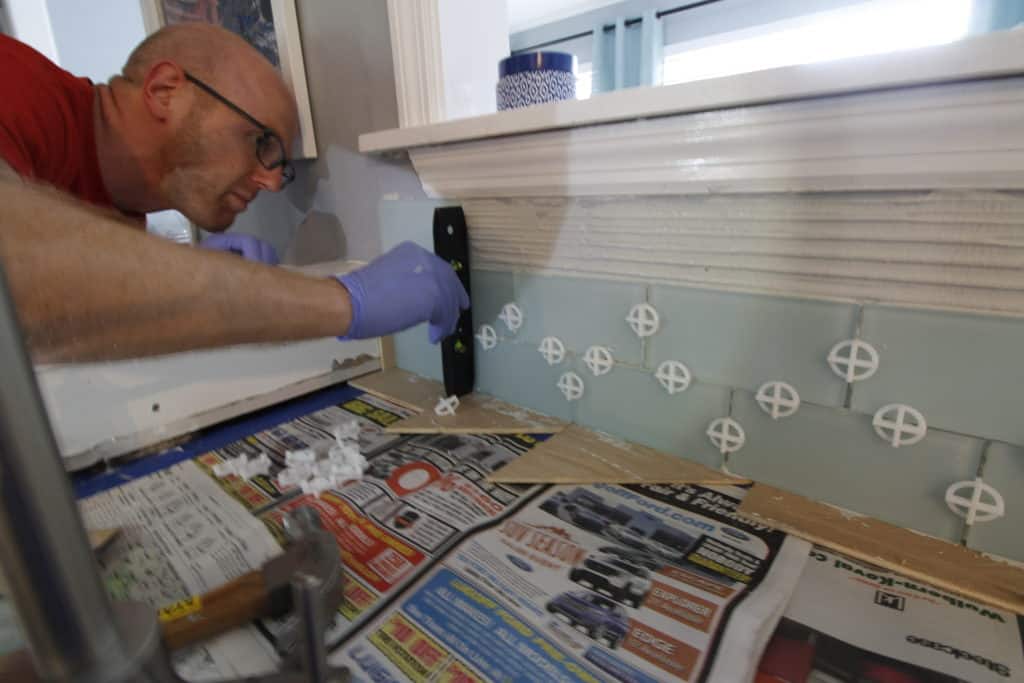
- One tip for areas not up against a counter is to drill a piece of wood level across the wall for the tiles to rest on. Then you can remove the board when the mortar is dry.
- Let your tiles sit for 24 hours to solidify.
Step three: add grout
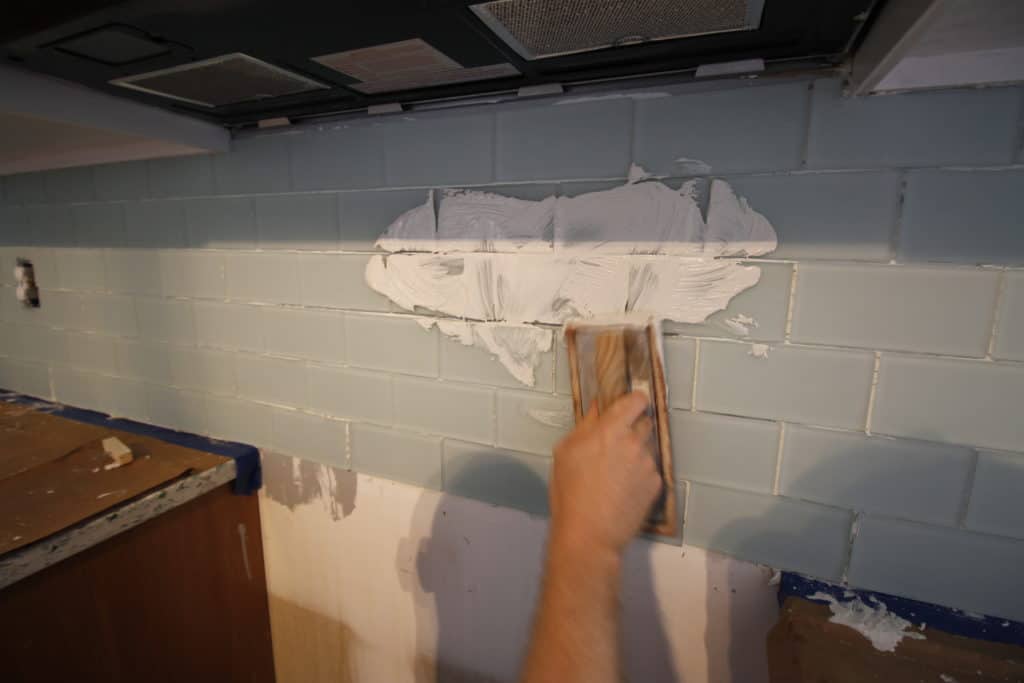
The next step is to grout. If you have glass tile, you want unsanded grout - the sand can scratch the tile!
- After waiting 24 hours, mix your grout according to the package instructions. It should be roughly the same as the mortar mix.
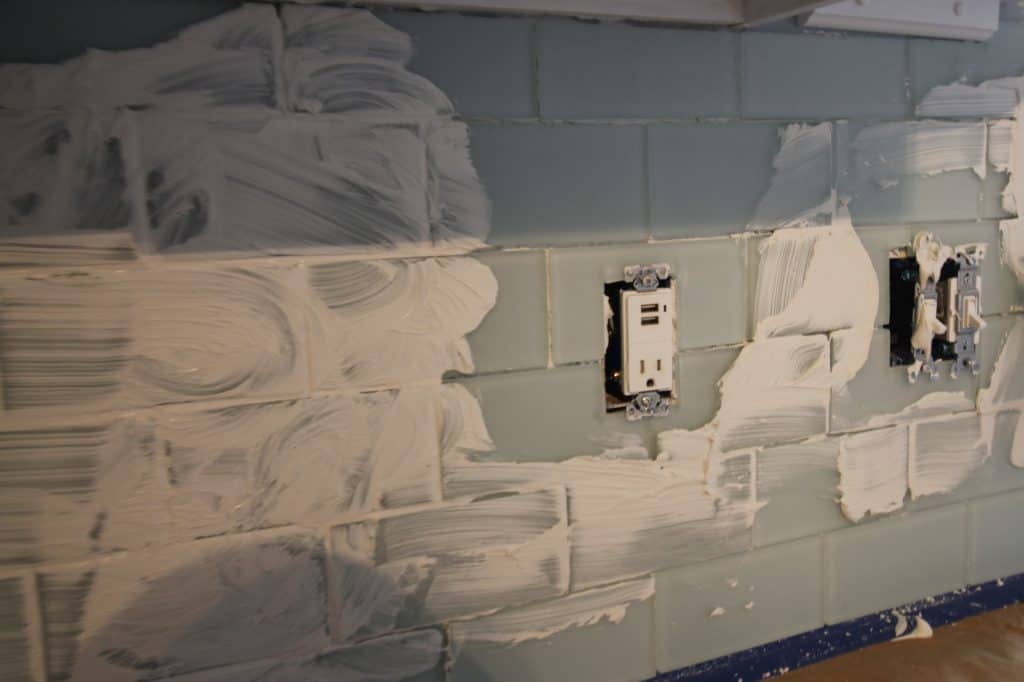
- Spread the grout all over your beautiful new tiles. Yes, it's sad. I was terrified when I started spreading this gross stuff all over the gorgeous tiles I had just laid yesterday. Spread the grout in small areas and try to go over all the lines from multiple directions to try to get the grout into the lines as best as possible.

- Use the edge of the grout float to scrape flat across the surface of your tile to wipe some of it away as best as possible.
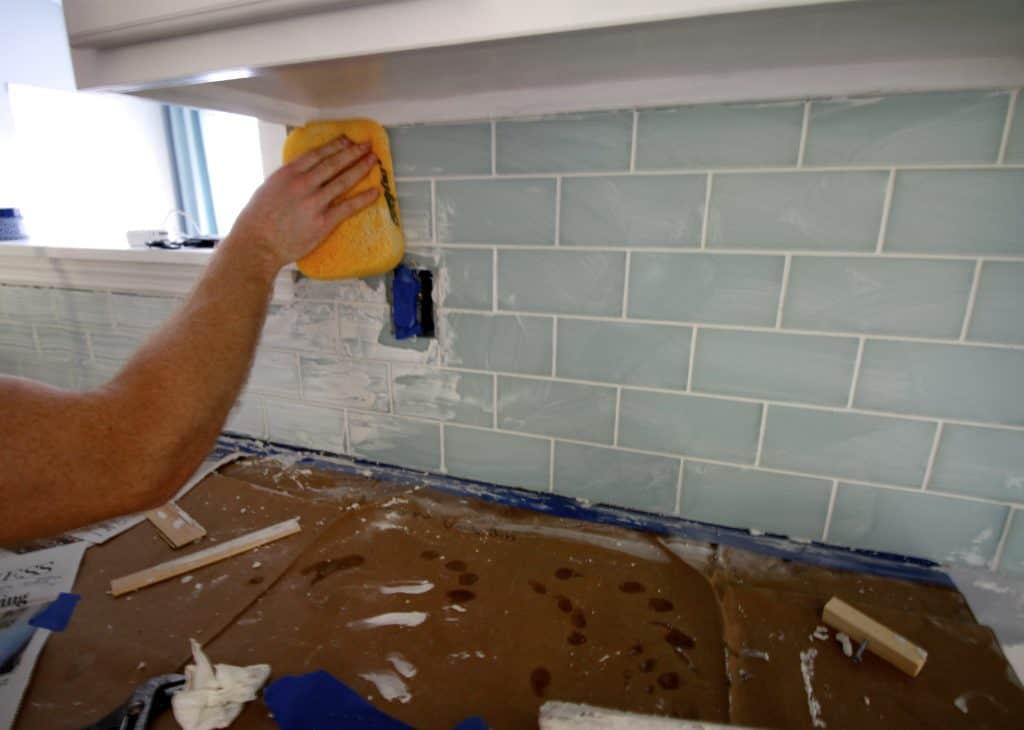
- Once you're completely done grouting, use a sponge, dipped in water and wrung out so it's only a little damp, to wipe your tiles clean. Try to wipe in just one direction so you aren't spreading the grout back over the areas you just wiped. Continuously clean off your sponge and do this over and over again. Once it looks pretty clean, let everything dry for 24 hours.

- Next you want to de-haze the tile to remove the lingering film of grout. We used de-haze gloves. You can also use the spray and a soft cloth.
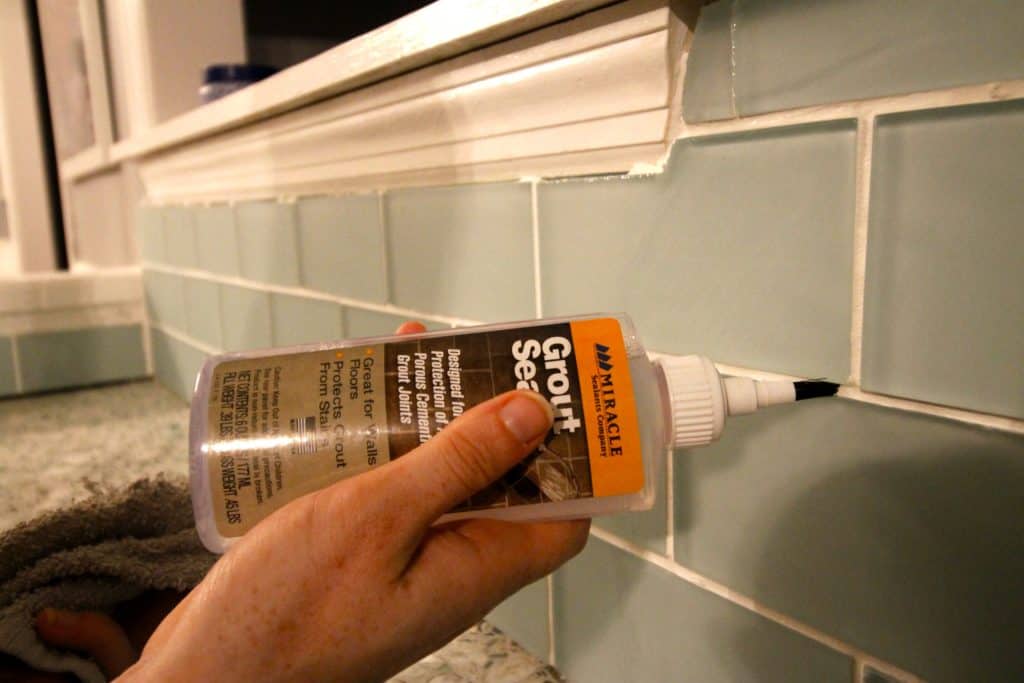
Step four: seal grout
The final step is to seal your grout.
- Apply the sealant to your grout. Let sit according to the directions on your packaging. This will help protect the grout from being stained.
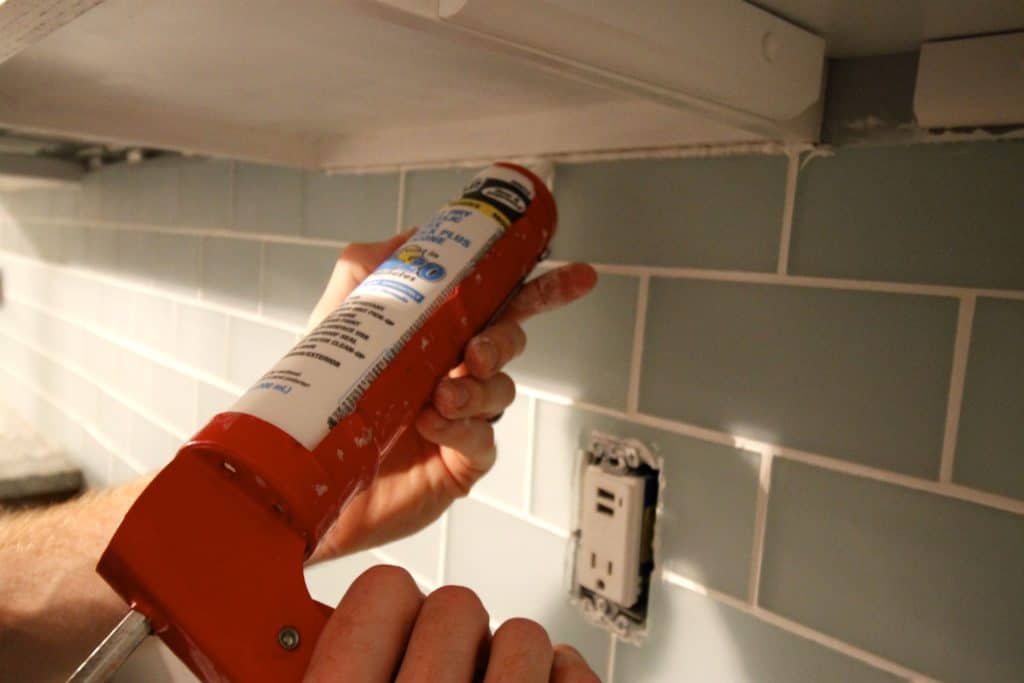
- Then caulk the bottom and top of the tile to the wall and counter so it looks like a smooth transition.
DIY tile installation
In the end, it looks AMAZING!
We don't have too much kitchen work left. I need to take down the cabinet over the fridge & paint and reconfigure it a little bit, but other than that it is just tweaks.
I am planning to do a great big reveal when it is totally done - and I can't wait to share it with you!
Thank you to Tile Bar for providing the tile for our back splash. All opinions are true & my own. Thanks for supporting the brands that make Charleston Crafted possible.

Looking for something?
We've been doing this since 2012 so we have a LOT of blog posts!
Search stuff like: Ceiling Projects | DIY Plant Stands | Thrift Flips

Hello, I'm Morgan, half of the creative force behind CharlestonCrafted.com! With a passion for DIY that dates back to 2012, I've transformed three homes and now I'm dedicated to helping others craft their dream spaces. Let's turn your house into a home together!


Amanda says
It looks amazing! Love the color of the tile you chose!
Maria Brittis says
You are a rock star my dear! what a bang up job you did on this tile work. You should be proud of yourself.
Maria
Gillian says
Your kitchen looks so good! And it must feel nice to know you did it yourself~
Kati says
It looks so beautiful! I love the color you chose and the kitchen is looking amazing. I'm pretty jealous, I need a kitchen reno 🙂
Jenny says
Your tile looks amazing! I love the blue/green glass color.