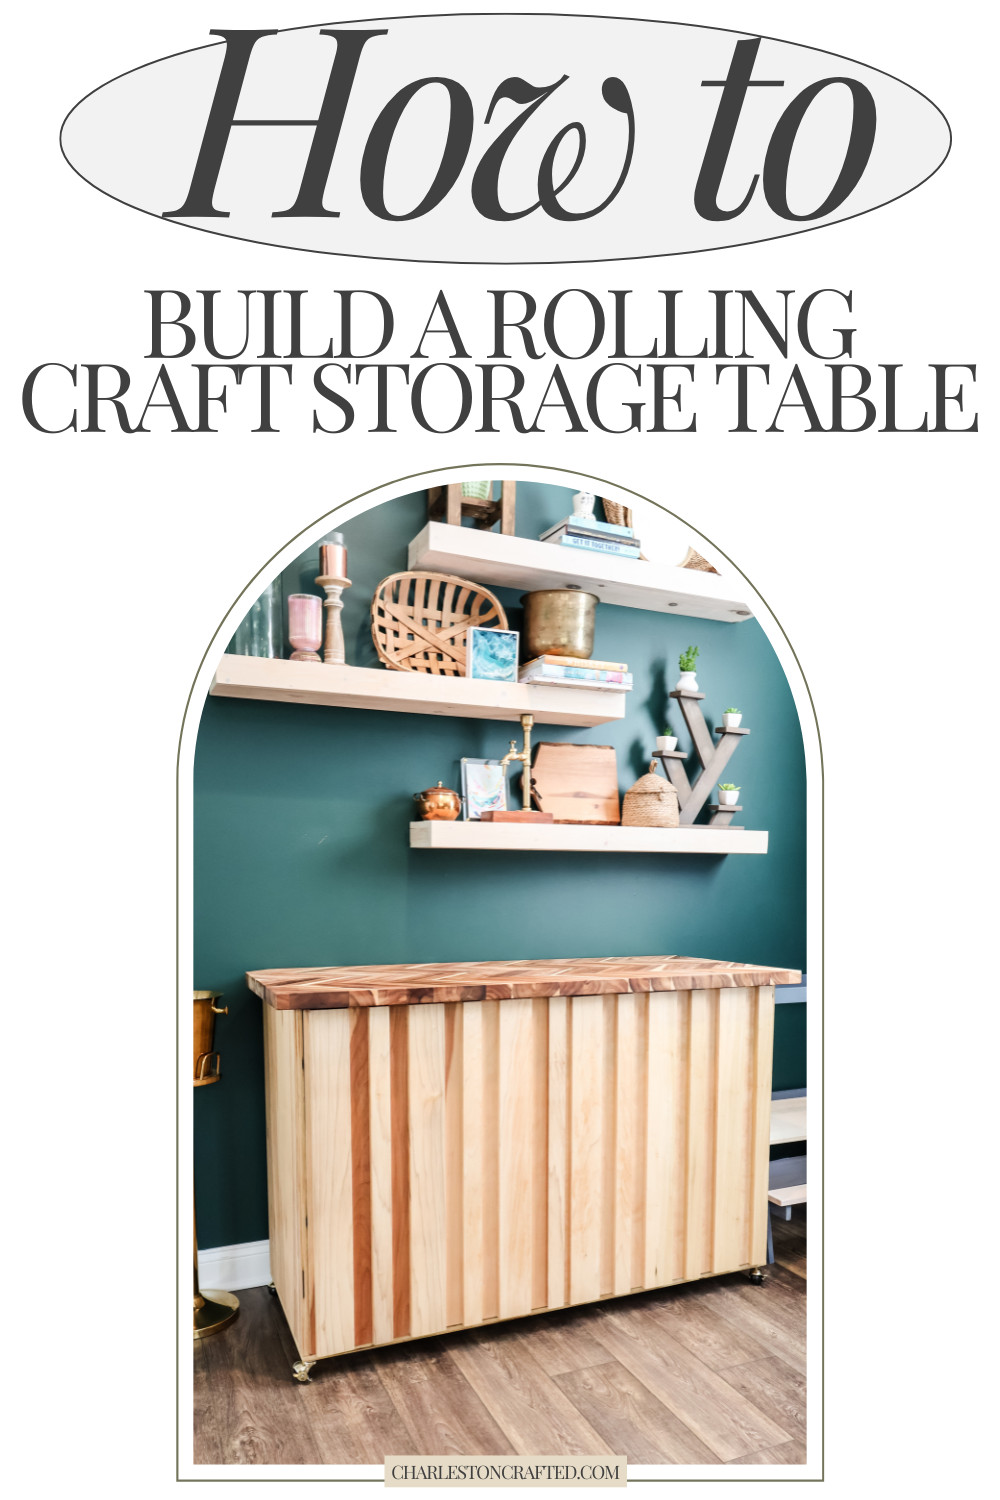
This modern-style rolling storage table is a great place to store items, display decor, or use as a work station. Check out how to build it yourself!
When you run a business building things and making crafts, you have to have a lot of spaces to do those activities. But you also need to have good surfaces to create the content on!
Last year, Morgan started a new Instagram page where she has been showcasing a lot more craft content and small things to do with kids. For most of that content, she's been filming all of her tutorials on our kitchen island.
Now, as nice as our new DIY kitchen remodel is, she wanted a more permanent space that she could do her filming and photos. Somewhere she didn't have to be right next to the sink.
So, I built her this rolling storage table with a gorgeous butcher block top to be her new filming spot!
DIY crafting table tutorial
I designed this table to be able to push against the wall in our guest room where our bar currently is. Then, when she is working, she can roll it out off the wall and film.
So even if you don't need this as a crafting table, you can use it as a storage table! It's got a ton of storage inside and has an ultra-modern look to it.
Check out this other console table with fluted doors as another option!
Materials needed for this build
Here's the tools and supplies you'll need for this build. To get the full materials list and cut list, make sure you grab my printable PDF woodworking plans!
- allen + roth Chevron Butcher Block Countertop
- ¾" plywood
- ½" plywood
- 3 ½" boards
- 2" gold locking casters
- Pocket hole screws
- Stain/oil
Step one: Build body
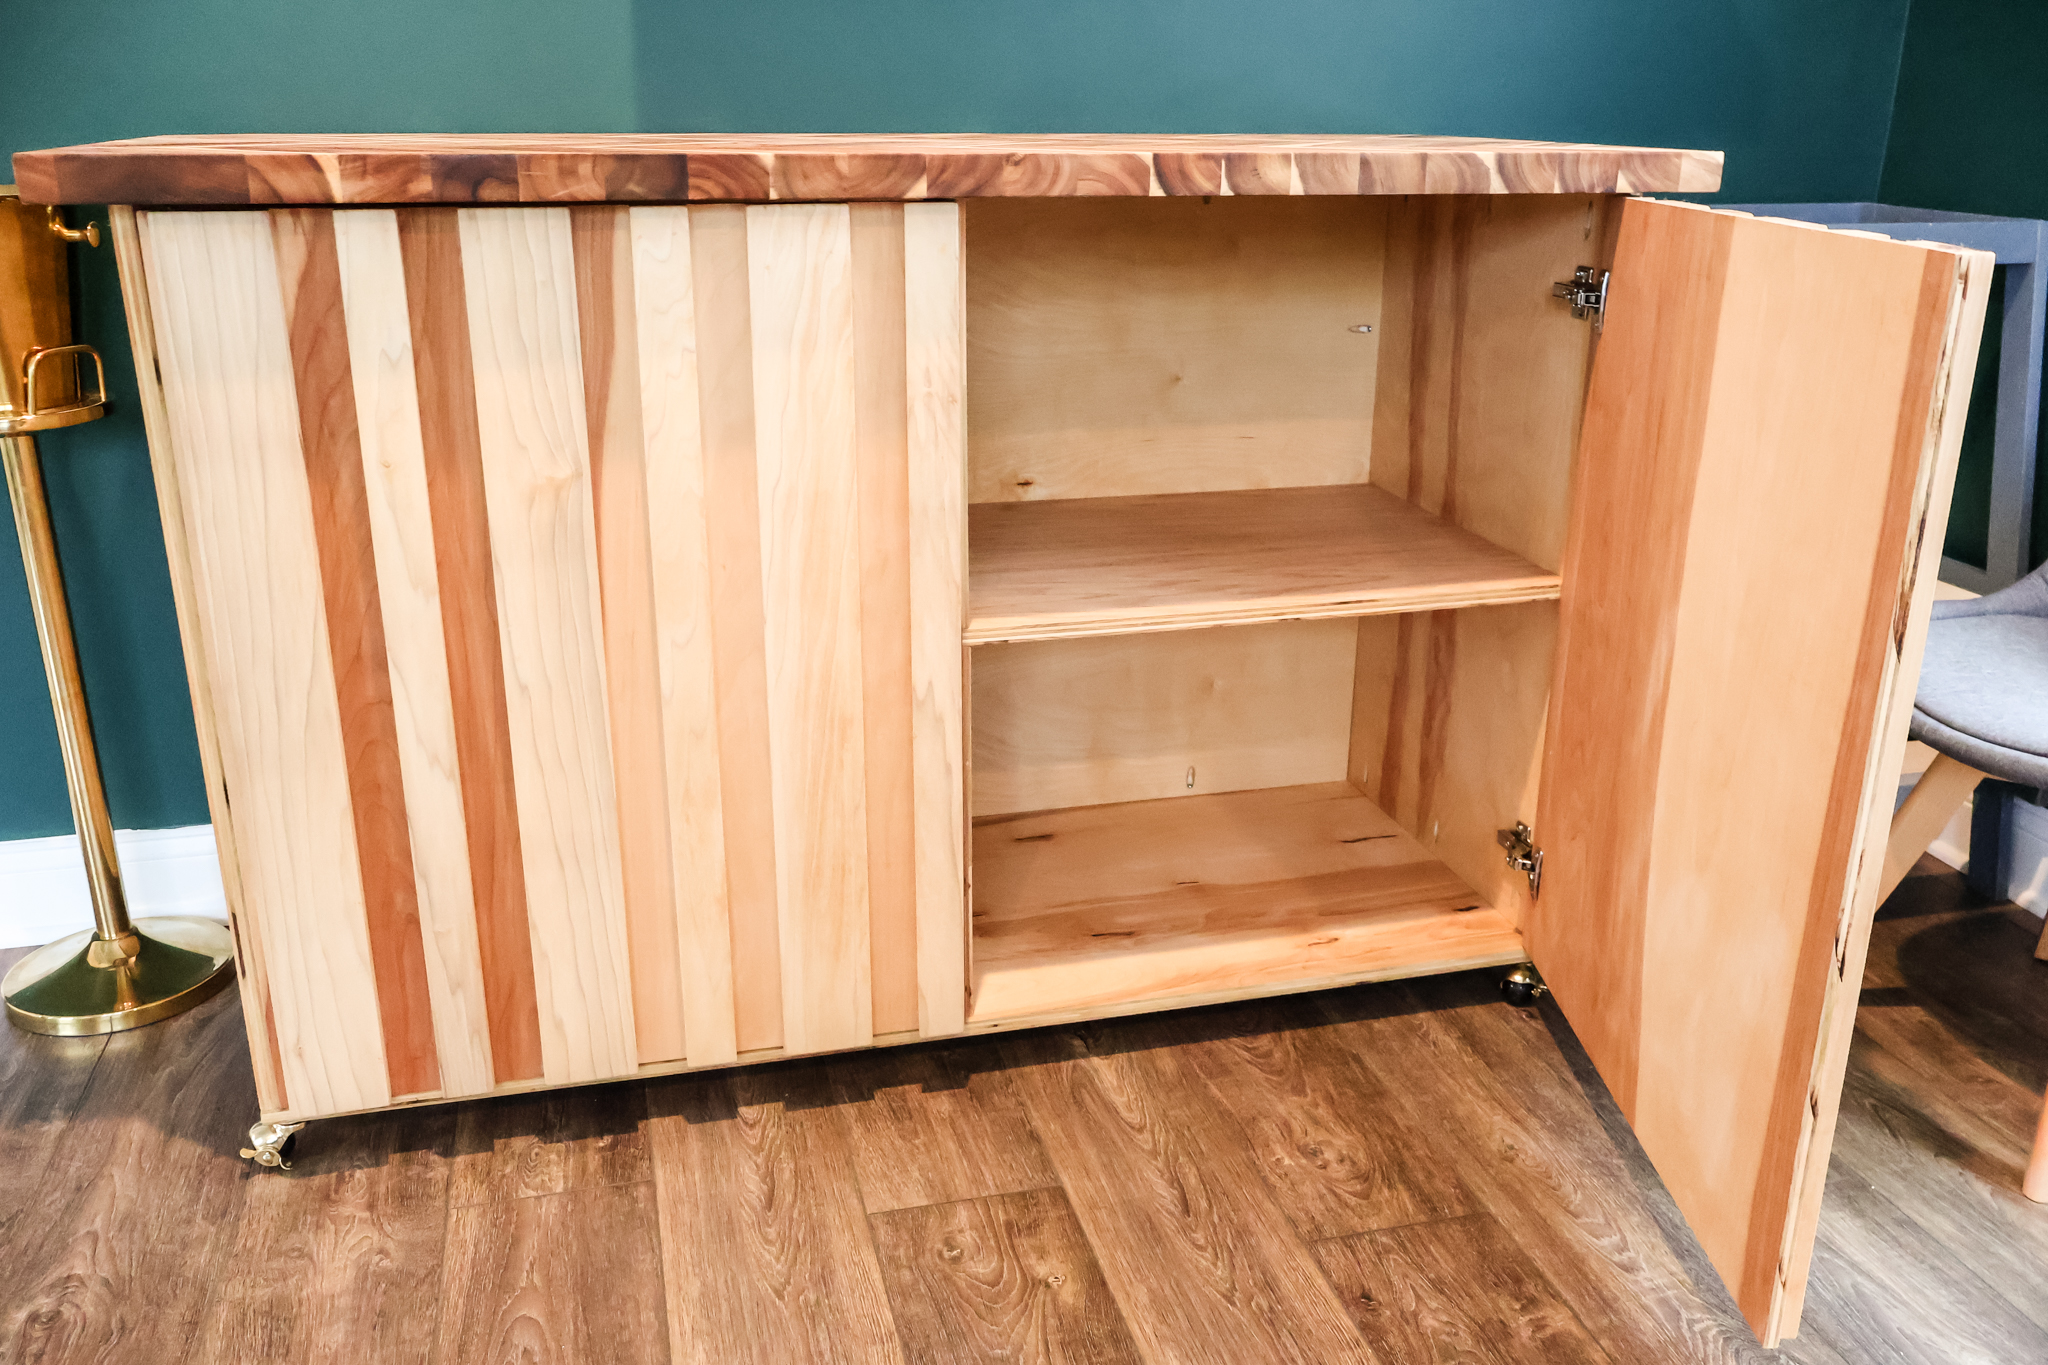
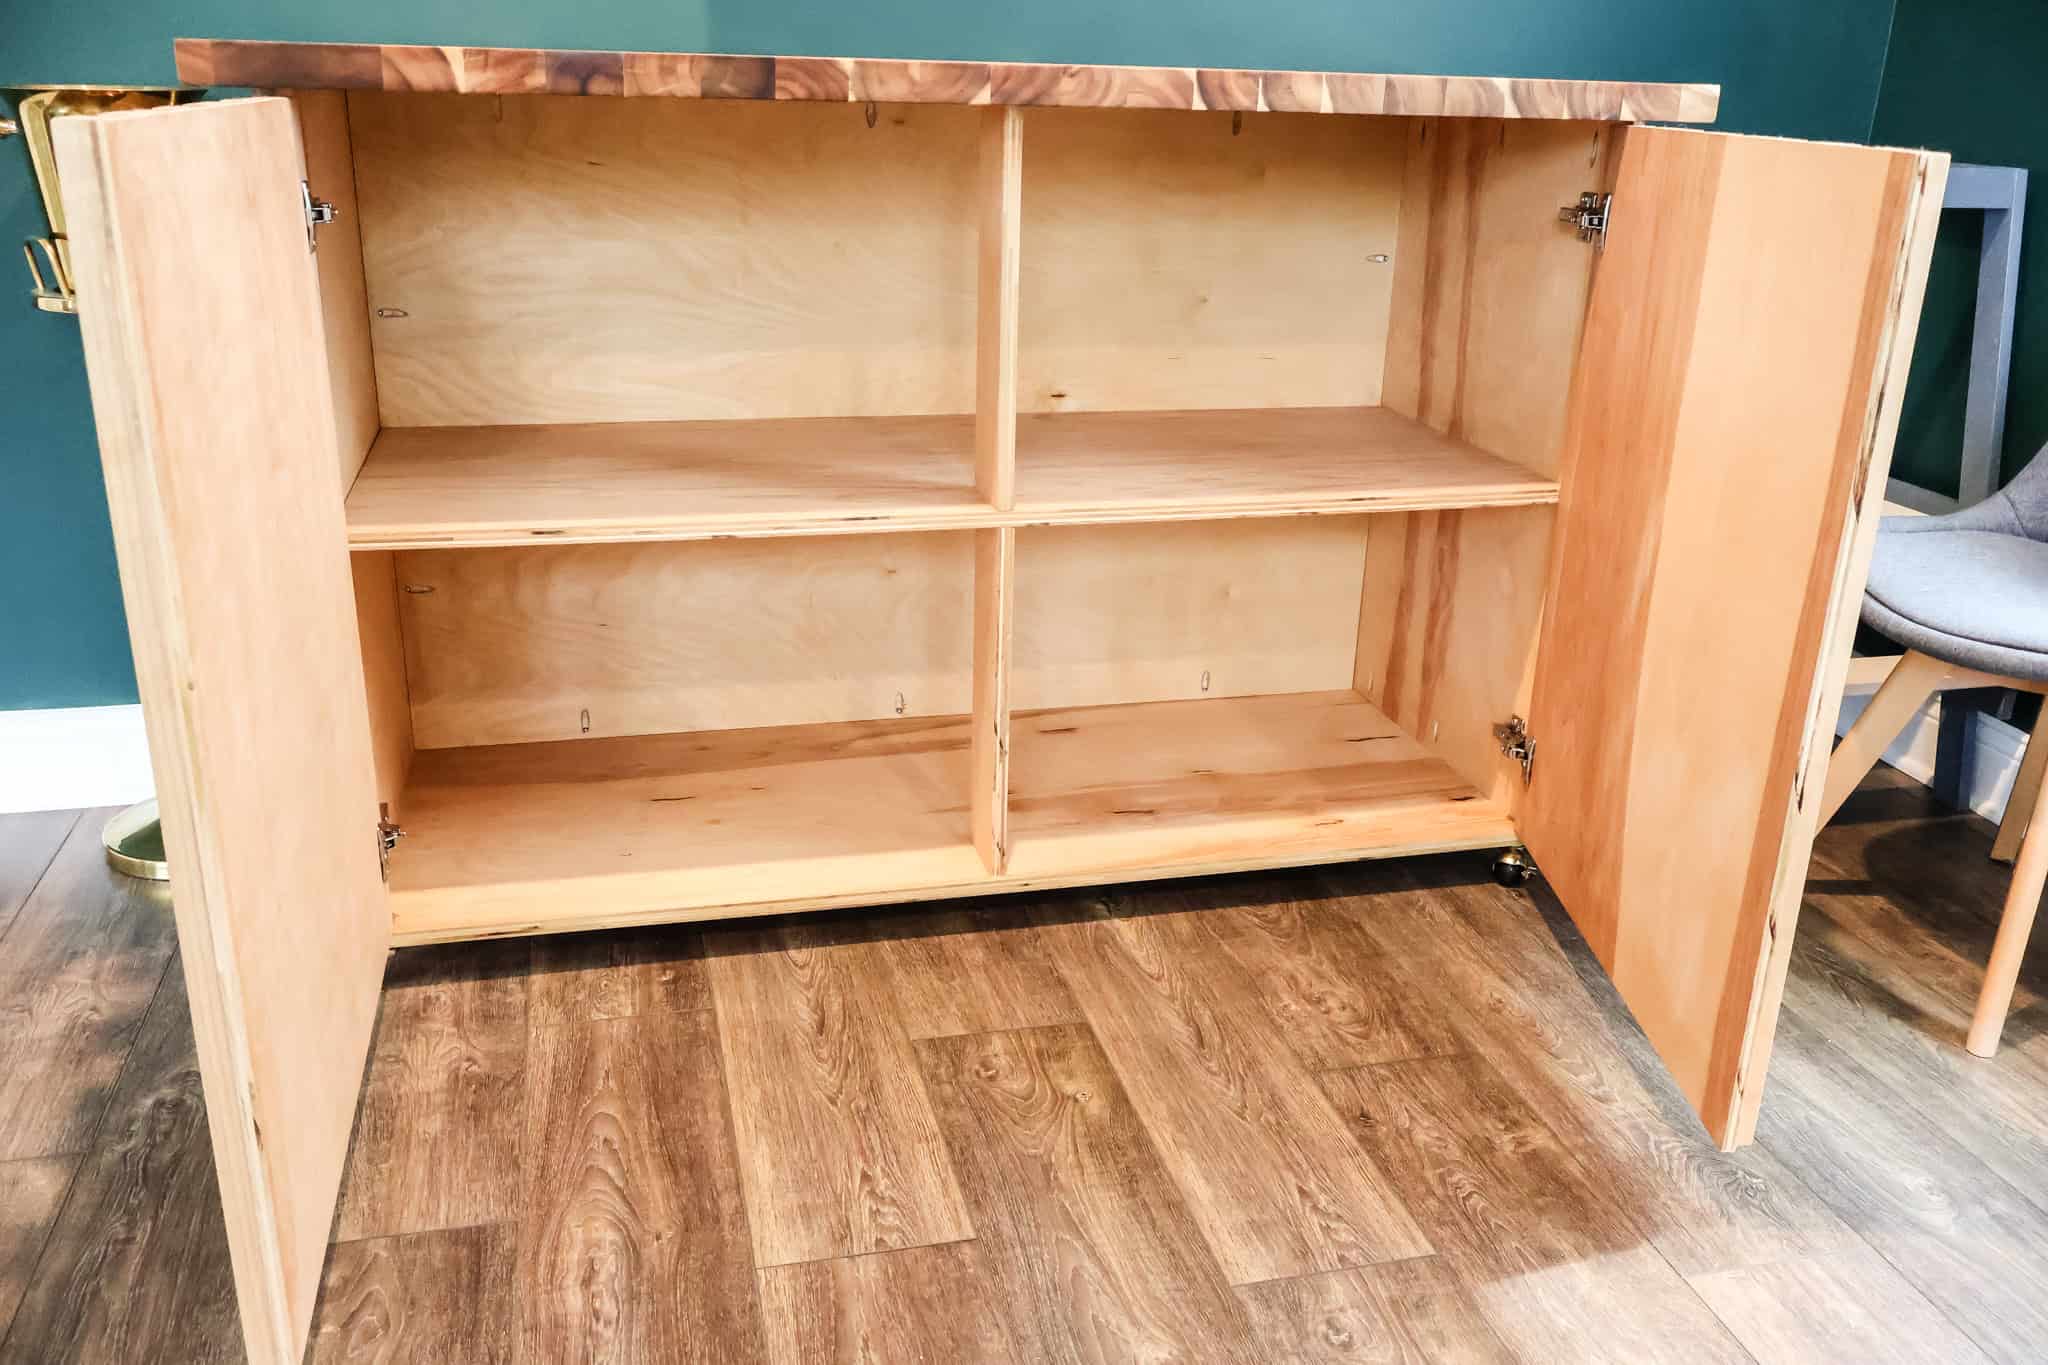
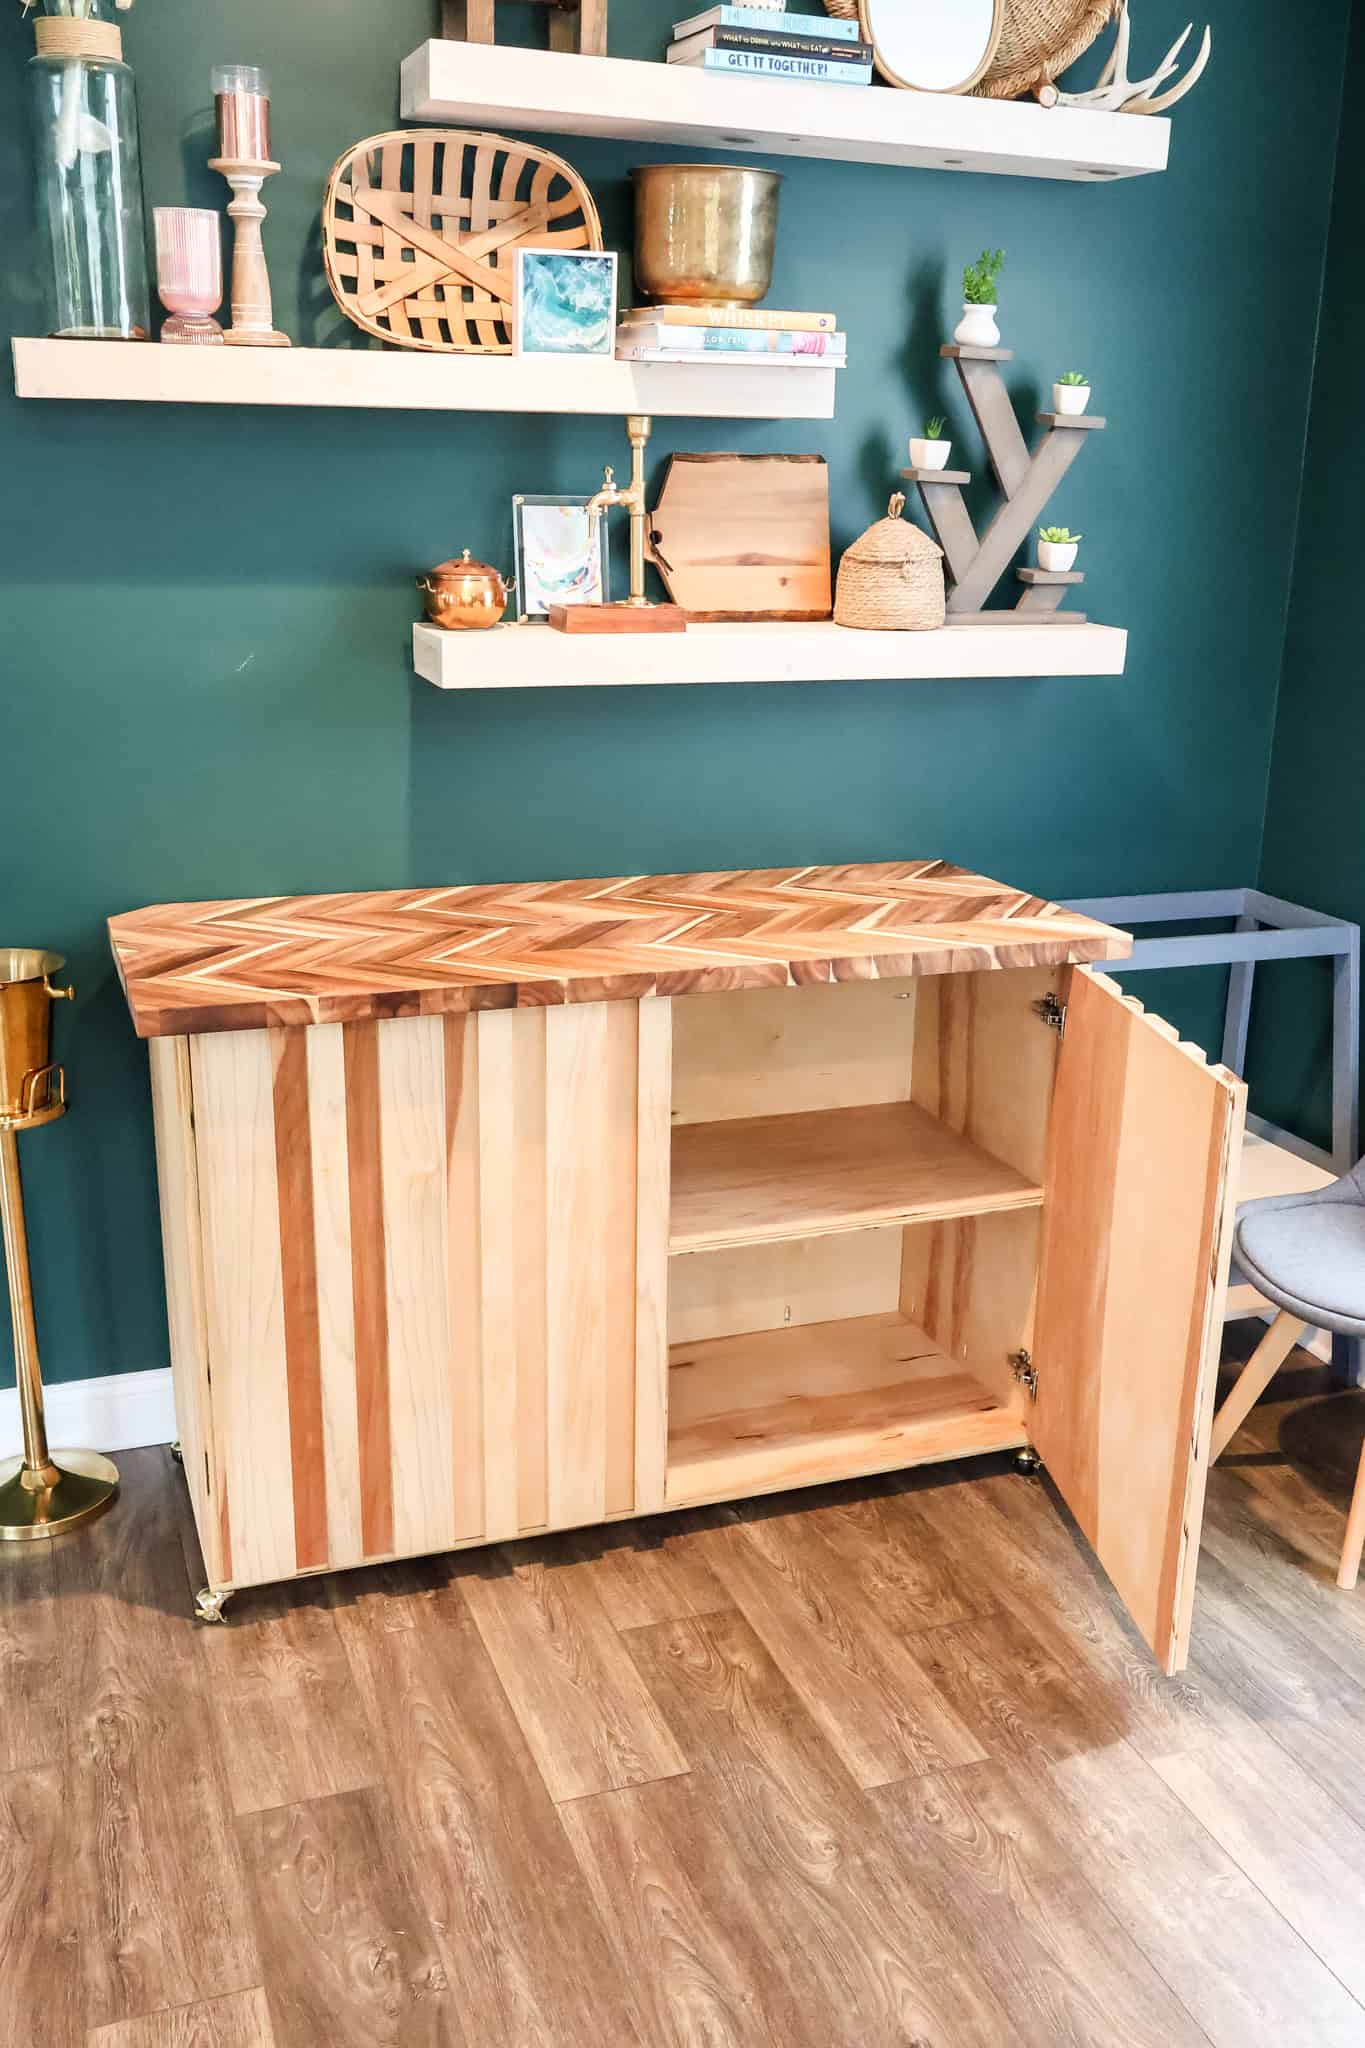
Start out by building the body of the table. It has a base and two sides, with a back and one shelf down the middle. You can obviously have more shelves if you'd prefer.
I also added two support beams in the middle to both help with the structural support of the long shelf and heavy top, but also to be a stopper between the doors.
I also attached four gold casters to the base. This is so Morgan can push it in and out from the wall as needed. They lock and she liked the look of the gold!
Step two: Build doors
For the doors, we wanted to go with an alternating pattern of different width boards. For these, I used poplar boards instead of plywood strips so that the plywood edge wouldn't show.
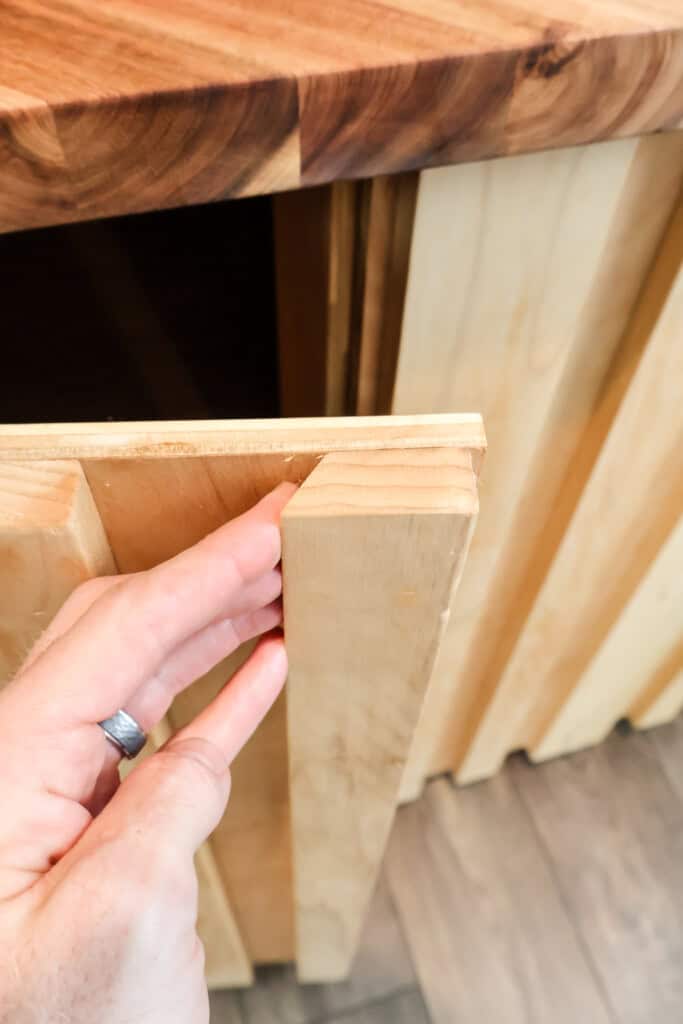
I alternated the width, using a full 1x4 and a 1x4 cut in half, with less than 2" in between. Each of these is glued and nailed into place.
For one board on each door, I cut a 33 degree angle on one side before attaching it. This edge will serve as an invisible handle for the doors to be opened!

Step three: Attach top
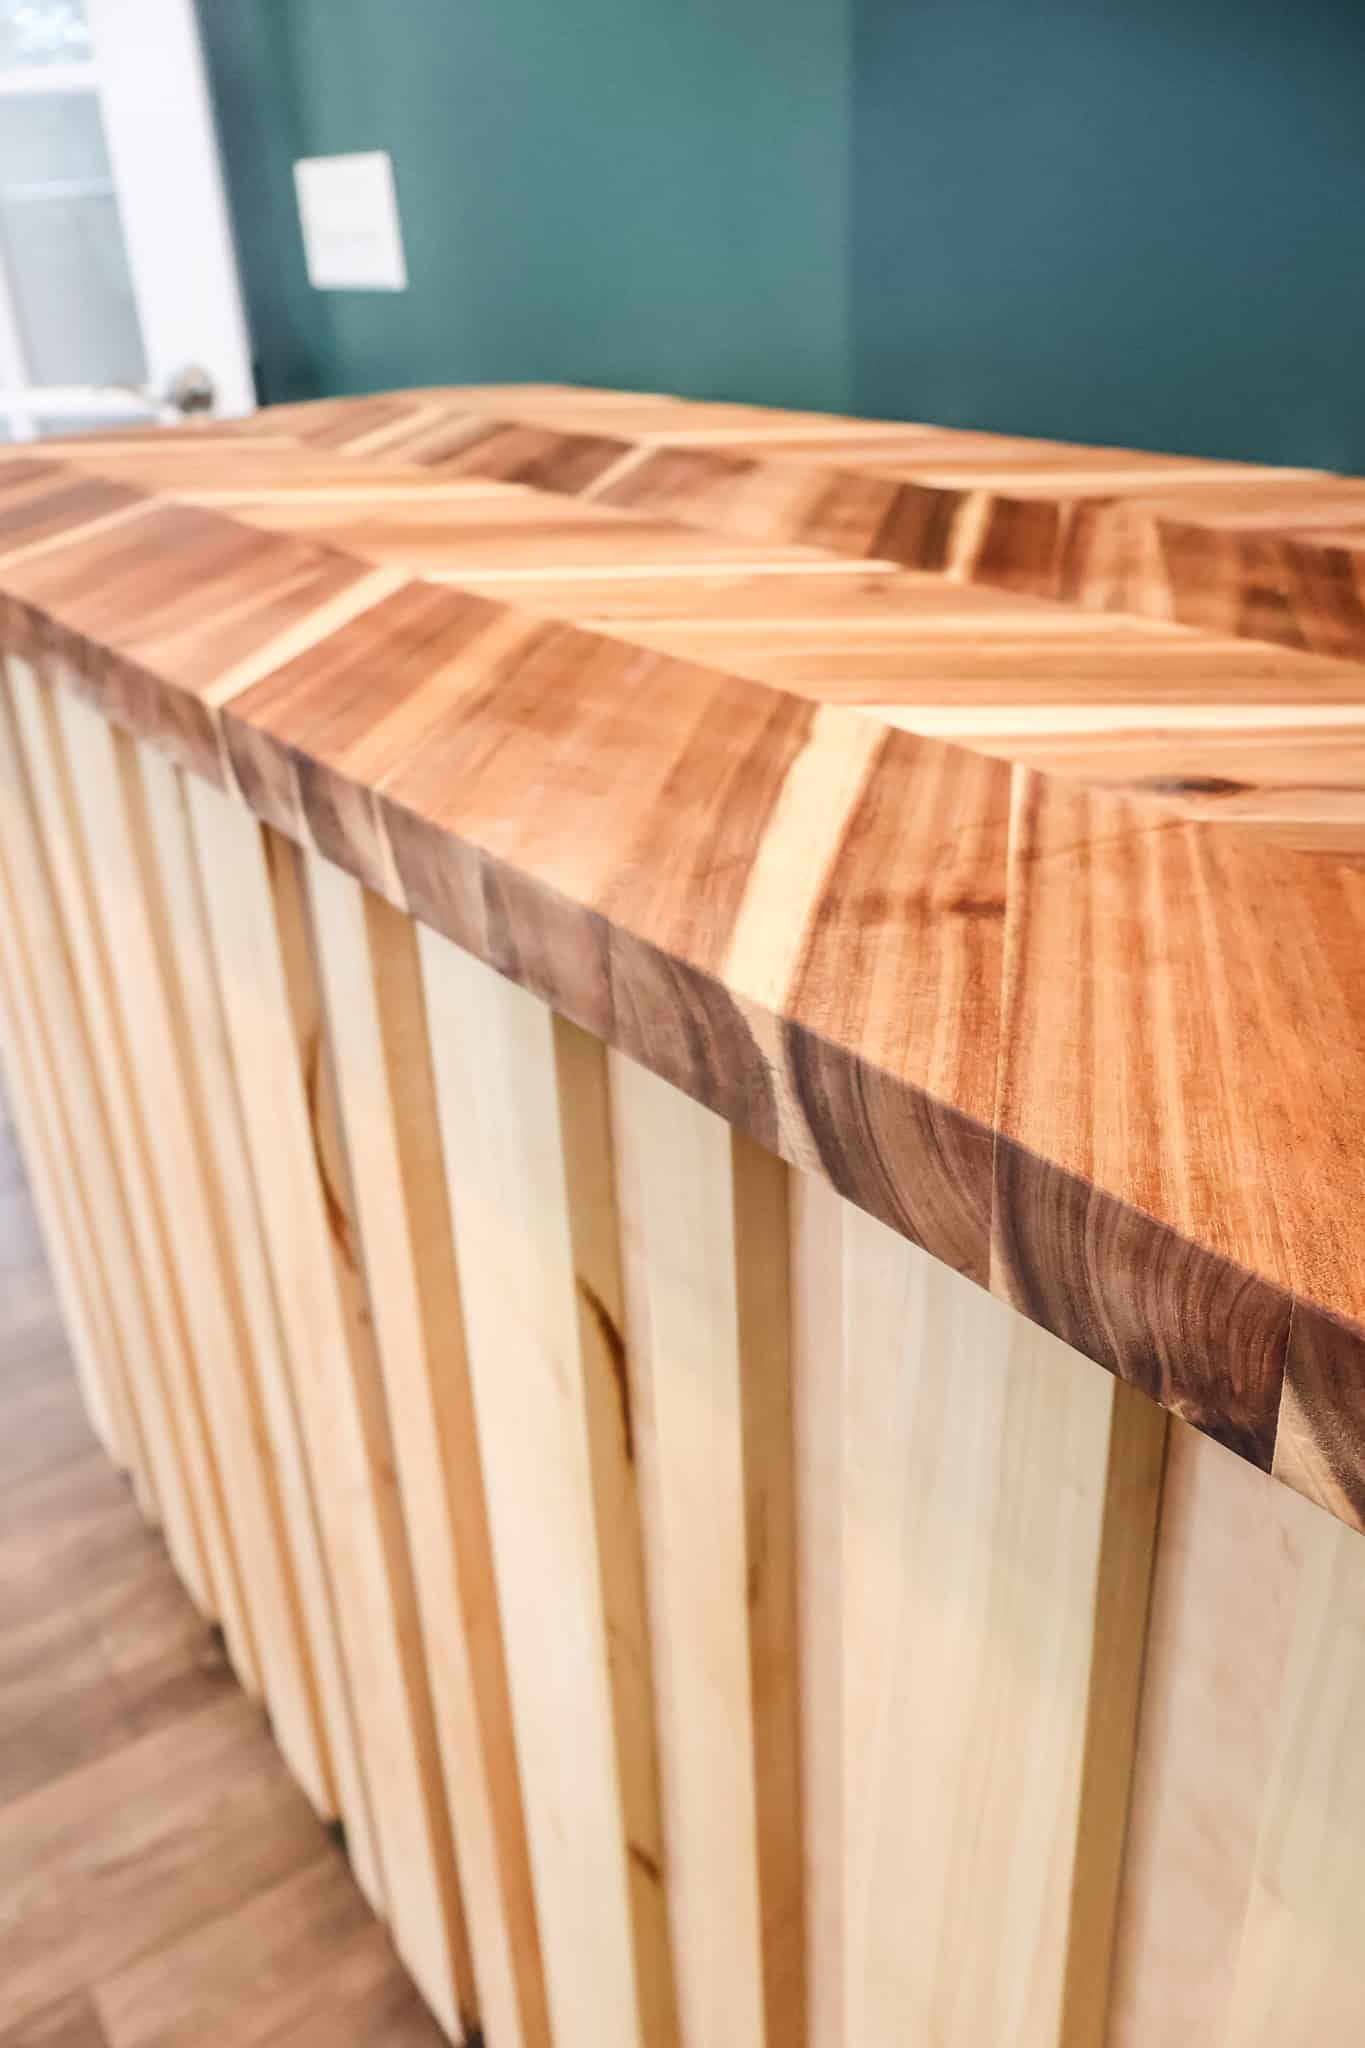
For the top of this piece, we chose this beautiful Acacia butcher block top from Lowe's. We picked one in a chevron pattern and it looks incredible, especially once it has been oiled!
After cutting the top to length, we took it and the body upstairs to their spot for final assembly. Using pocket hole screws from the inside, I attached the top.
Step four: Attach doors
To attach the doors, I used the used the Kreg cabinet hinge jig to drill hinge holes on both the doors and then attached them to the inside of the cabinet.
I used slow close hinges that I used on my kitchen cabinets that snap into two pieces, so I could attach the base to the inside of the table and then click the doors into place once upstairs.
Close the doors and it was looking perfect!
DIY rolling storage table woodworking plans
If you think this would be a good addition to your home, I've made printable woodworking plans!
My rolling storage table woodworking plans come with a full material list, cut list and step-by-step instructions so you can make your own. You can also make any of your own substitutions as well!
I think this project turned out super nice and I love how it looks good while also functioning for my wife how she wants!


Looking for something?
We've been doing this since 2012 so we have a LOT of blog posts!
Search stuff like: Ceiling Projects | DIY Plant Stands | Thrift Flips

Hello, I'm Morgan, half of the creative force behind CharlestonCrafted.com! With a passion for DIY that dates back to 2012, I've transformed three homes and now I'm dedicated to helping others craft their dream spaces. Let's turn your house into a home together!