Want to add drawers to a woodworking project? Here is the easiest way to install drawer slides for perfect working drawers every time!
Building DIY furniture comes with a wide range of difficulty depending on the project. It's pretty simple to build a side table with a top and shelves, it's more difficult to build a side table with a functional drawer.
The reason it's more difficult to build a table with a drawer is because there are the extra elements of building the drawer box and properly installing drawer slides.
Fear not. We're here to show you how to install drawer slides the simple and easy way so that you can tackle new projects!
What type of drawer slides do I need?
There are a few types of drawer slides available. Here are things to look for:
Full extension
Full extension drawer slides pull out further so you can reach things way in the back!
Weight limit
Different slidew have different weight limits. Ths could be an issue if you plan to put heavier things in your drawers.
Soft close
We have installed soft close drawer slides in our old kitchen. Read how to add soft close hardware here!
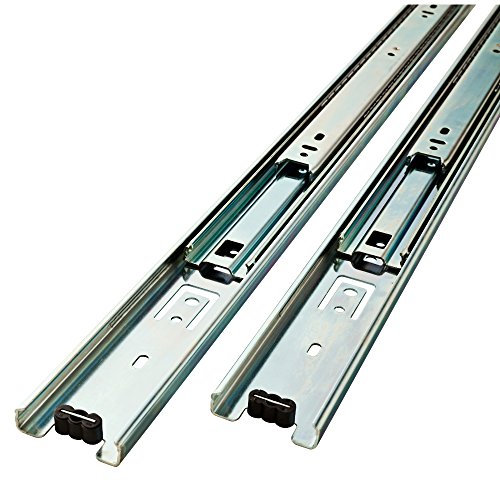
Ball bearing
Ball bearing slides are a great option for slides. They roll really well, have a high weight limit, and come in full extension and soft close!

How to Install Drawer Slides
There are lots of ways to install drawer slides.
I mean, right off the bat, there will always be manufacturer's instructions that come with any drawer slides you purchase.
You can choose to follow those and it will probably work out.
You can also use a drawer slide jig, like the one from Kreg Tool. Their drawer slide jig clamps onto a cabinet and allows you to line up your slides for best use.
However, the easiest way to install drawer slides is to use a small piece of ¼" plywood. Here's how:
Click here to download FREE PDF plans for a DIY nightstand with a drawer and two shelves!
Installing Drawer Slides with Plywood
Tools needed:
- Drill
- Drawer slide hardware
- Drawer box (cabinet or piece of furniture!)
- ¼ plywood scrap - any size
Steps to install drawer slides without a jig:
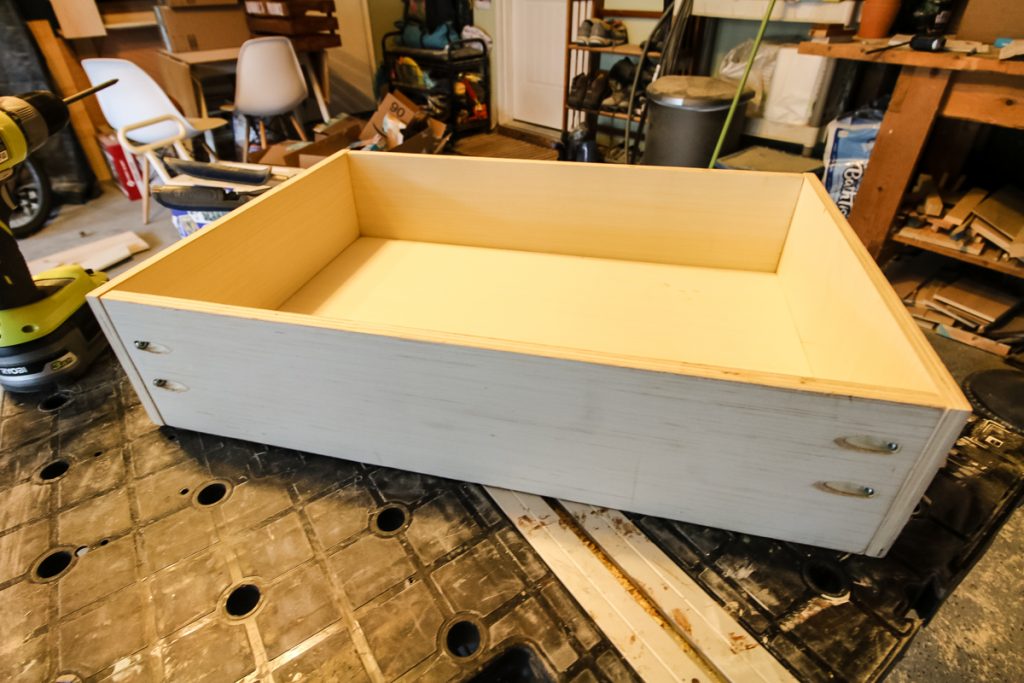
Start by building your drawer box and the drawer itself.
The width of your drawer usually needs to be 1" shorter than the inside with of your drawer box.
This allows for ½" on each side for the side mount drawer slides to fit into.
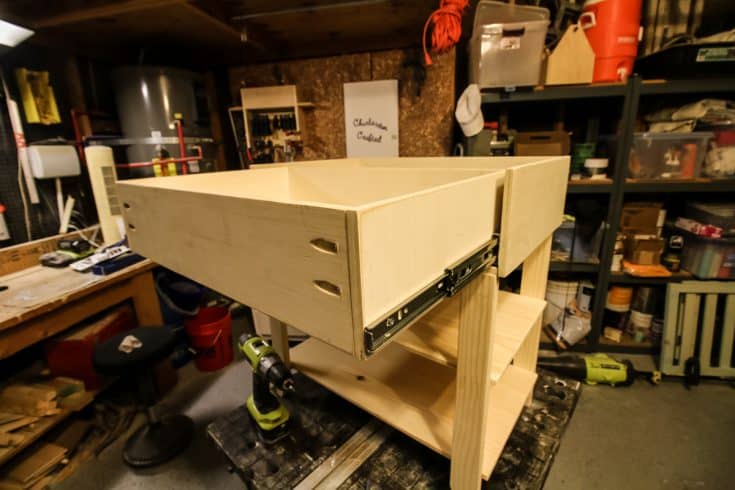
To install the drawer slides, place a strip of ¼" thick plywood on the bottom of your drawer box along each side.
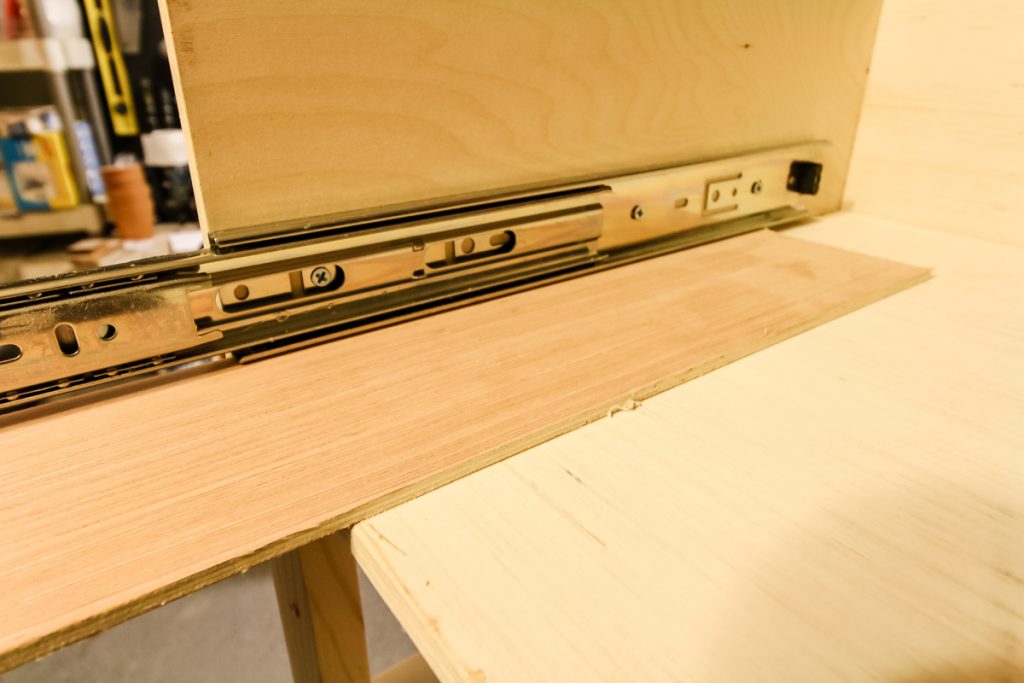
Then, set your slide on top of the plywood and line it up (closed) with the front of the drawer box.
Extend the drawer slide and then screw into place in the appropriate places on the side of the drawers. Boom.
You can drill pilot holes before drilling in the screws, but I didn't have any issues with cracking or splintering without them.
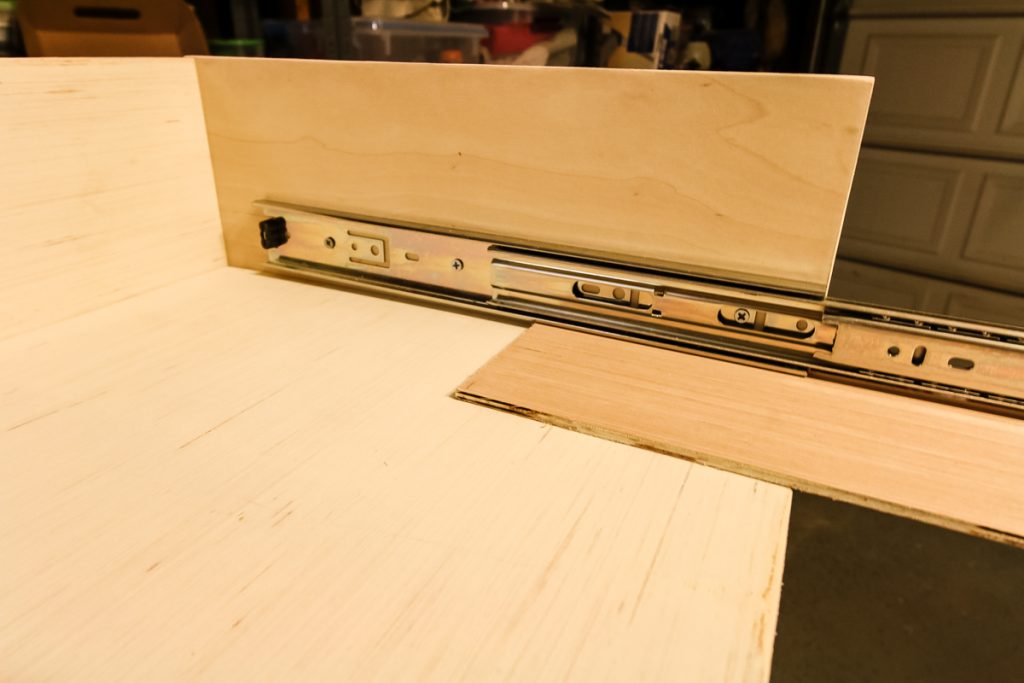
Now that the slide is secure in the drawer box, slide the plywood out so that it extends off the edge of the box.
Set the drawer on top of the plywood, extend out the drawer slides, and screw into place aligned with the front of the drawer.
Finally, pull the plywood out. There you have it. Perfectly aligned drawer slides.
Insert the drawer into the box and you are ready to add the drawer front or drawer face and finish up your build!
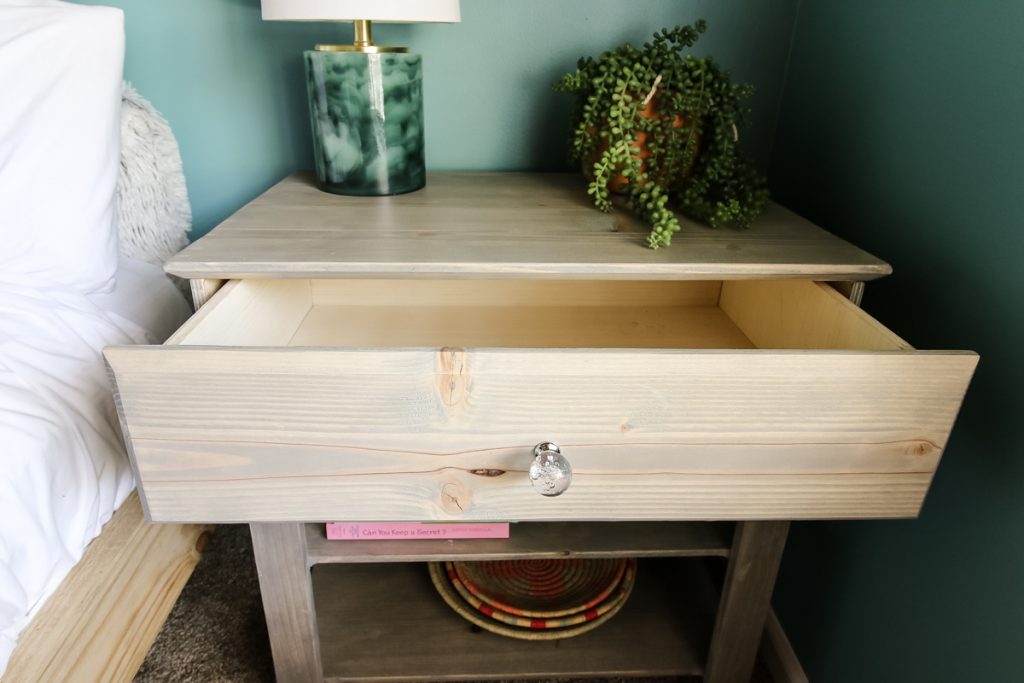
This method worked perfectly with the DIY nightstand we built.
No more guesswork when it comes to aligning drawer slides. This DIY-friendly method for installing drawer slides should be your go to method!
Easiest Way to Install Drawer Slides
The easiest way to install drawer slides is to use a piece of ¼" plywood as a spacer. Use that to set the same spot for the slide in the box and on your drawer. Here's how to do it.
Materials
- Drawer Slides
- ¼" plywood strips
Tools
- Cordless Drill
Instructions
- Place a strip of ¼" plywood inside your drawer box against each side.
- Set your drawer slide on top of the strip, lined up with the front edge.
- Extend the slide out and screw into place in the box.
- Slide the plywood strips out and set the drawer on top of the strips.
- Screw the slides into place on the drawer.
- Remove plywood.
Recommended Products
As an Amazon Associate and member of other affiliate programs, I earn from qualifying purchases.

Looking for something?
We've been doing this since 2012 so we have a LOT of blog posts!
Search stuff like: Ceiling Projects | DIY Plant Stands | Thrift Flips

Hey there, I'm Sean, the woodworking enthusiast and builder behind CharlestonCrafted.com! Since 2012, I've been sharing the magic of turning raw materials into beautiful creations. I love teaching others the art and satisfaction of woodworking and DIY. I try to inspire fellow crafters to make something extraordinary out of nothing at all.


Zulema says
How do u fill the pocke hole... do u know a diy for do ur own fillers?
Sean says
We fill pocket holes either with wood filler (https://amzn.to/3hWShjt) that we let dry then sand, or with special Kreg pocket hole plugs (https://amzn.to/3eGQ3CA) that you glue in and then cut down!