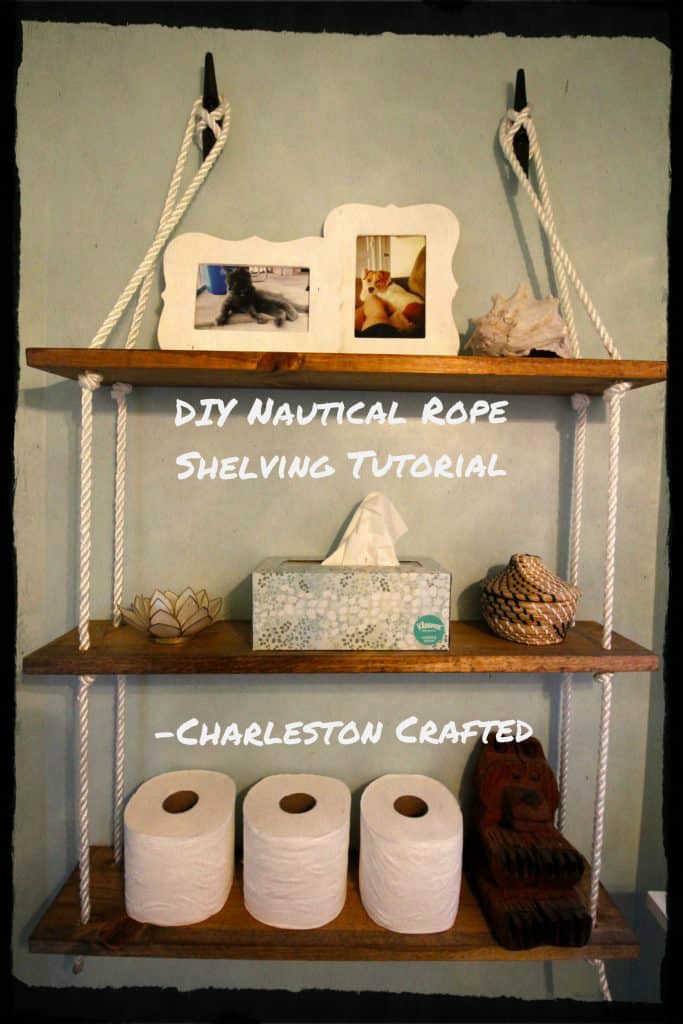
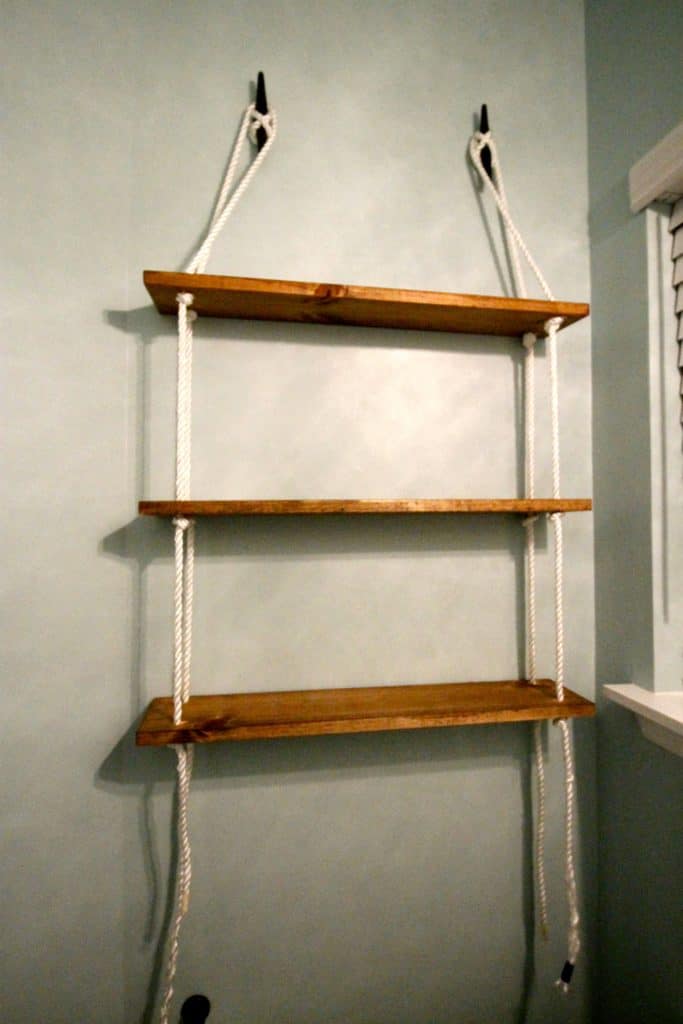
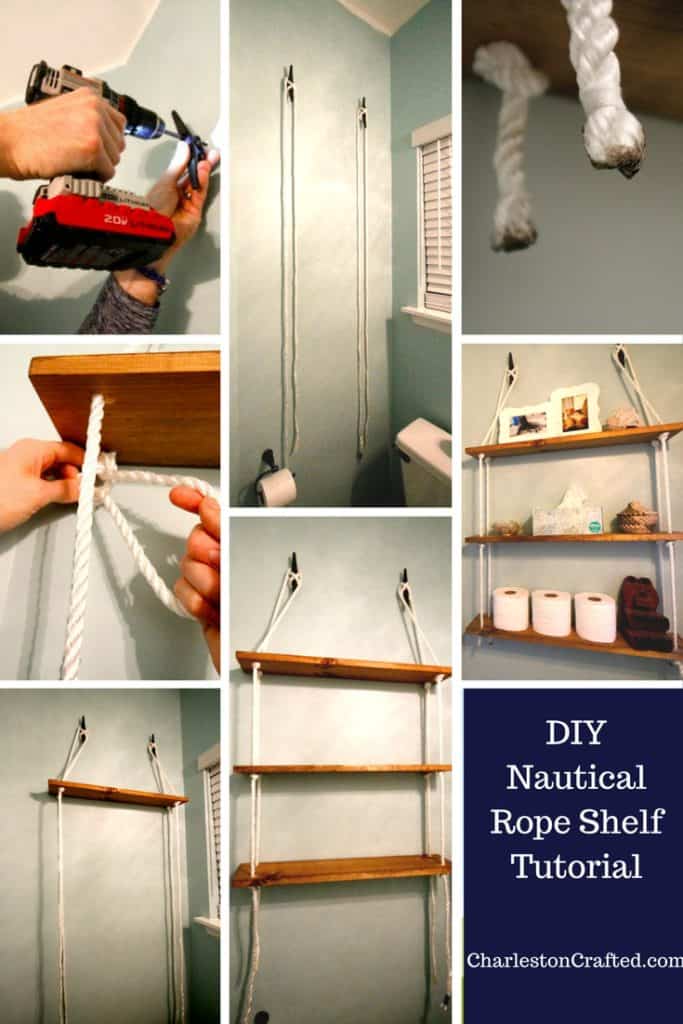
We added some DIY nautical rope shelving to both store practical items and house pretty decor. We have been contemplating this idea for somewhere in our house for a few months now and this was the PERFECT opportunity for it.
DIY rope shelving
This project is super easy and adds a great coastal/nautical touch to your home. based on the measurements of the wall we wanted to hang the shelves on, we needed four supplies:
- Two deck cleats: $2.60 x 2
- 6 foot 1x4 board: $12.50
- 25 feet white nylon rope: $8
- Total Cost: $25.70
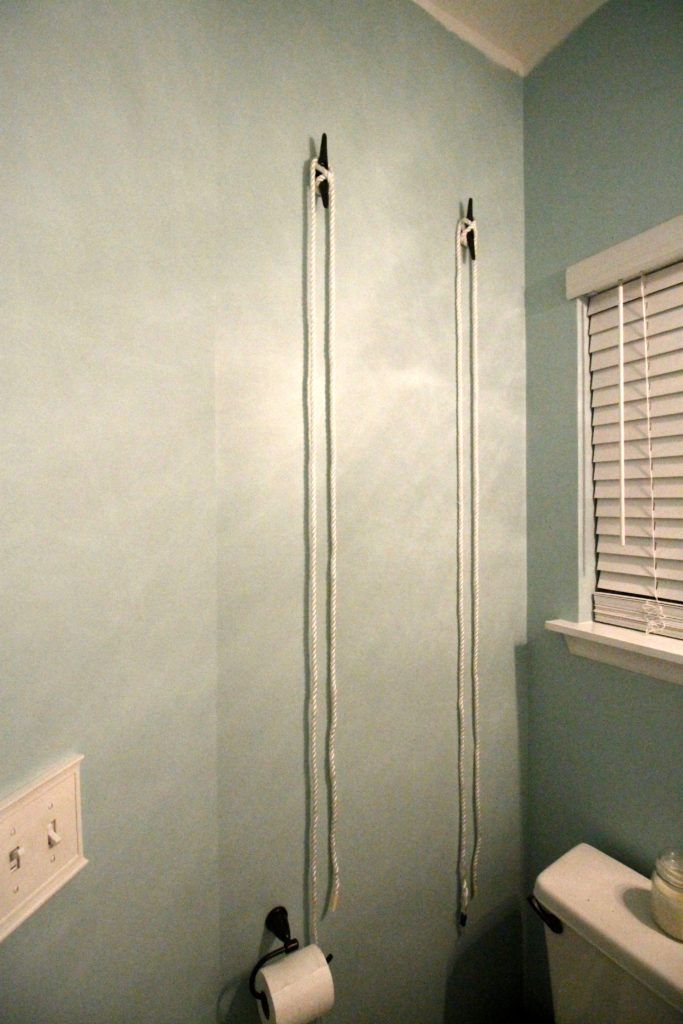
Step one: measure
We started by determining the height of the shelves and, therefore, the height of the cleats that would hold them. Then we drilled drywall anchors in to secure the cleats.
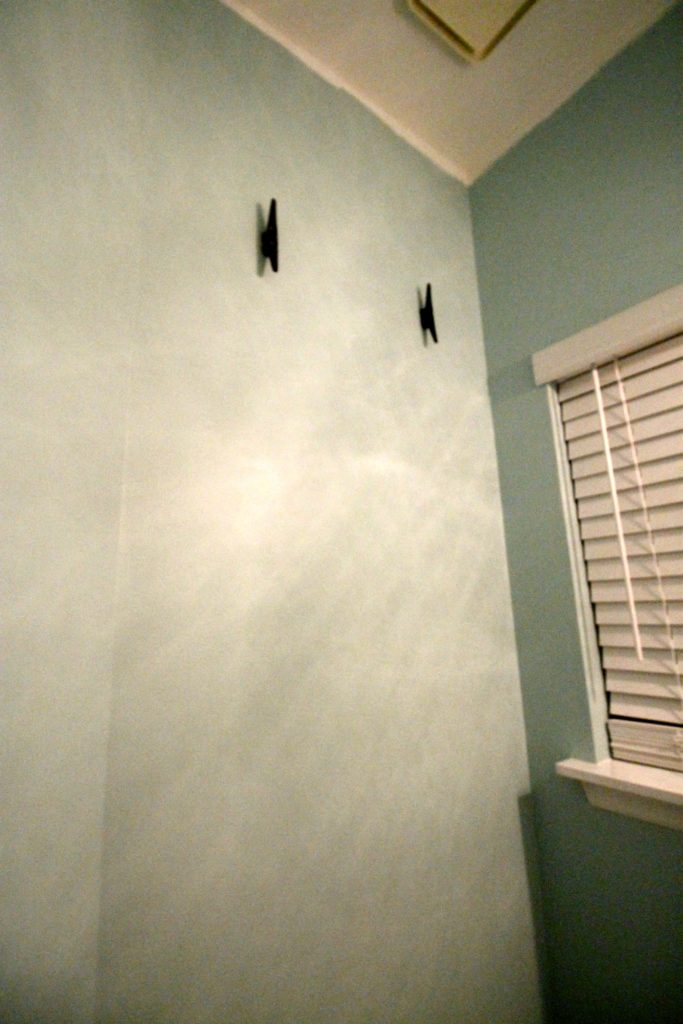
We actually painted the cleats using our new favorite oil-rubbed bronze spray paint so they would match the rest of the finishes in the bathroom.
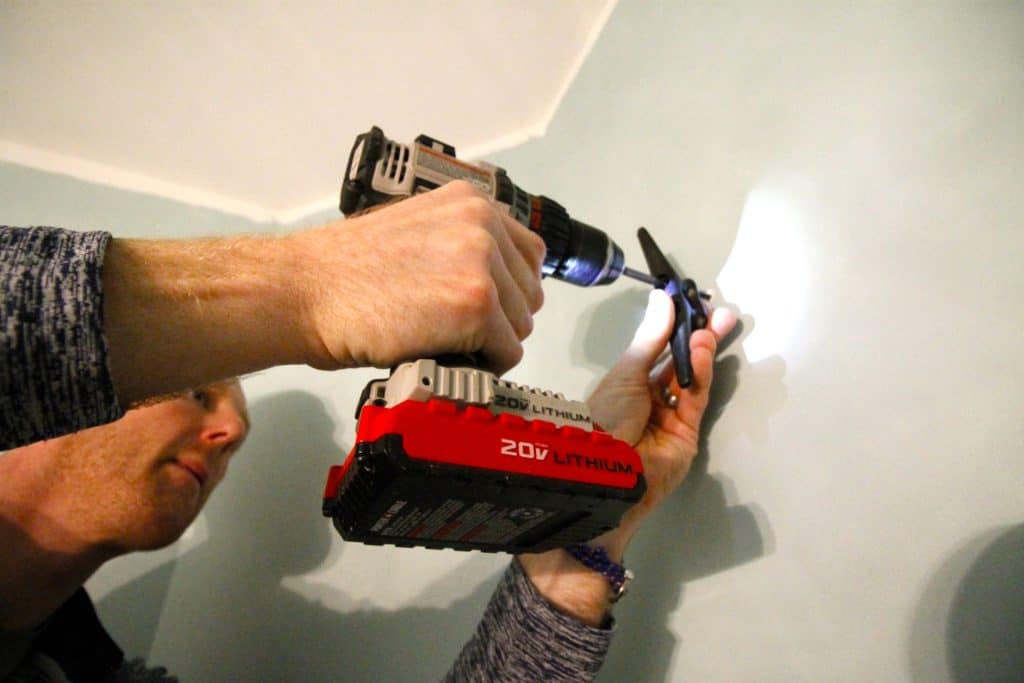
Step two: install cleats
When it's time to install, start by installing the cleats into the wall using the studs or drywall anchors.
Step three: add rope
Next, we cut our rope in half and hung each half decoratively around each cleat.
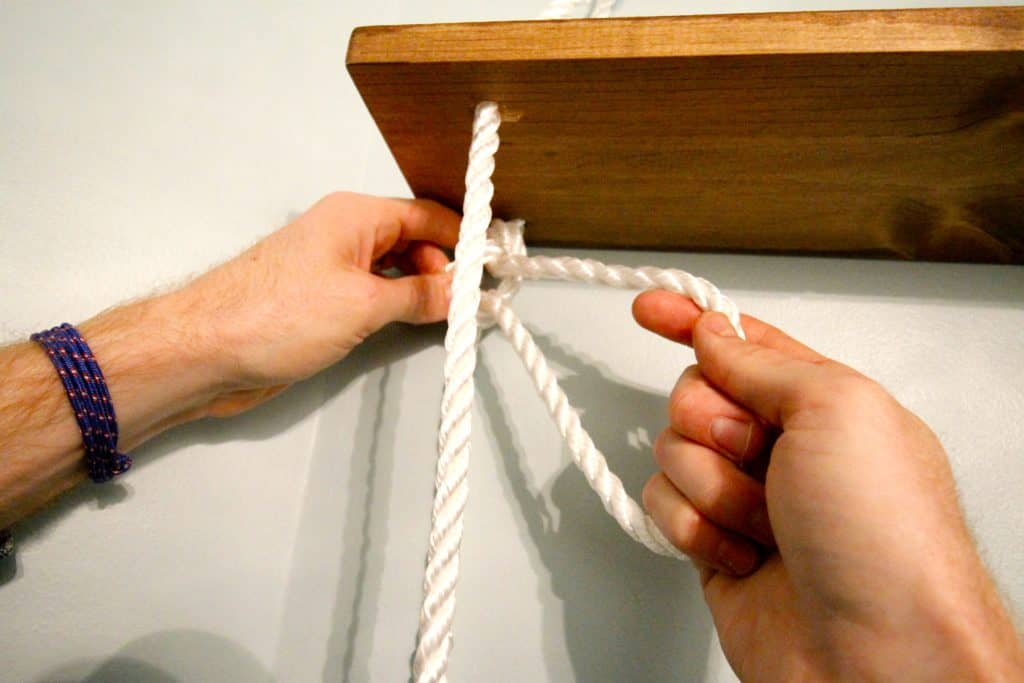
Step four: Install boards
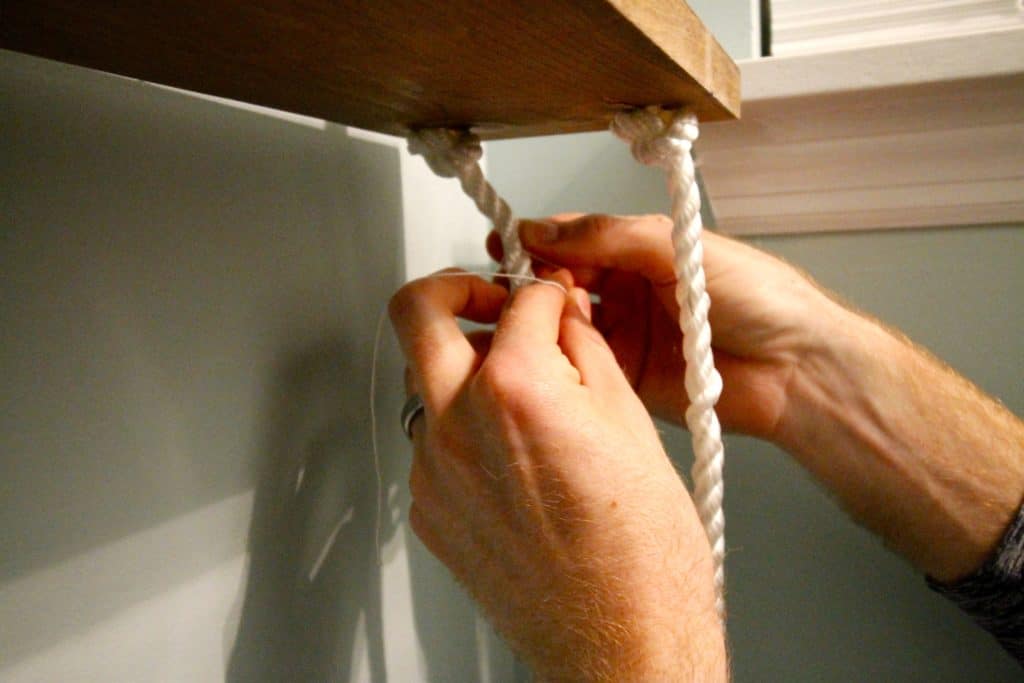
Next up was hanging the boards. The boards we cut three equally sized pieces, sanded, stained and drilled four ½ inch holes in the corners.
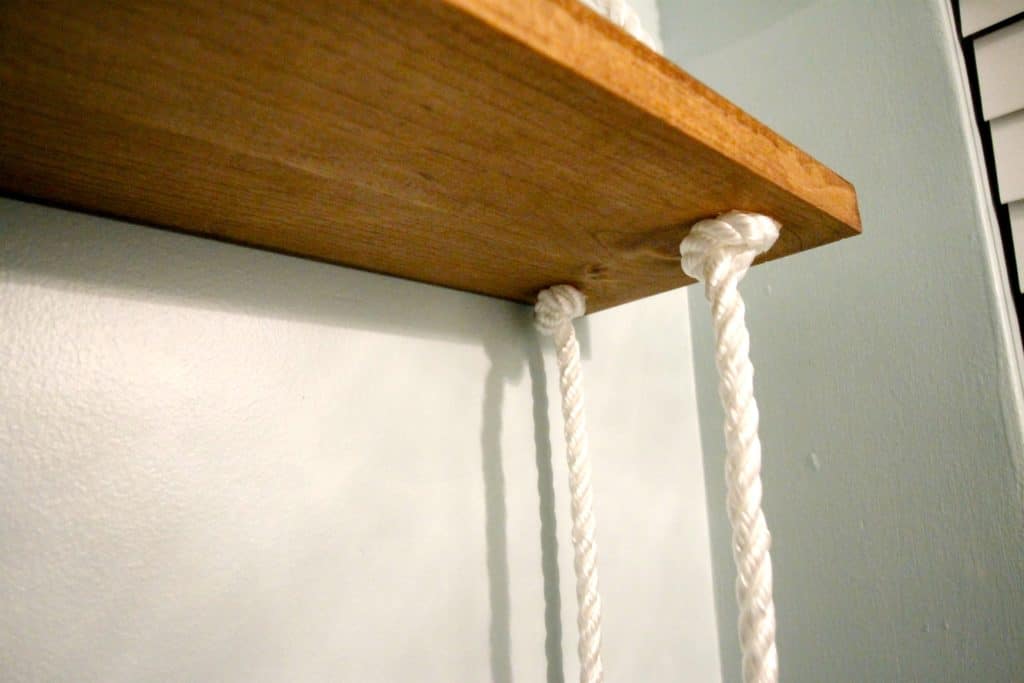
We threaded the four hanging ends of rope through the four holes and tied a single knot under each so that the shelf was level.
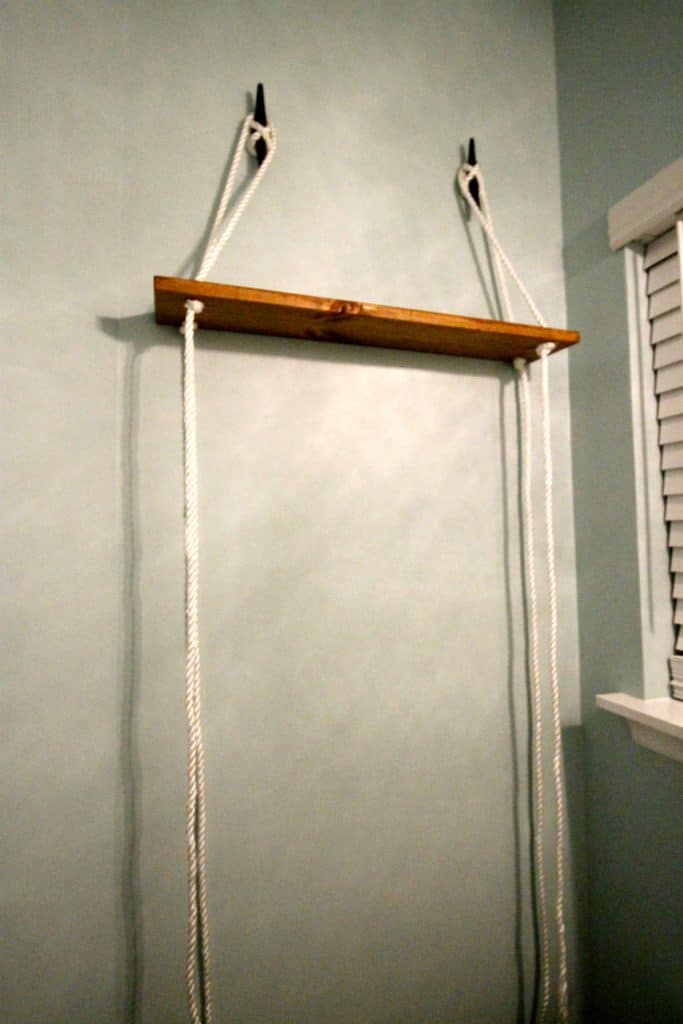
Step five: continue with additional boards
Add as many more shelves you want in the same way until you reach the end of your rope. Then cut of any excess.
Then we continued that same thing with the next two shelves.
Step six: tidy the ends of the rope
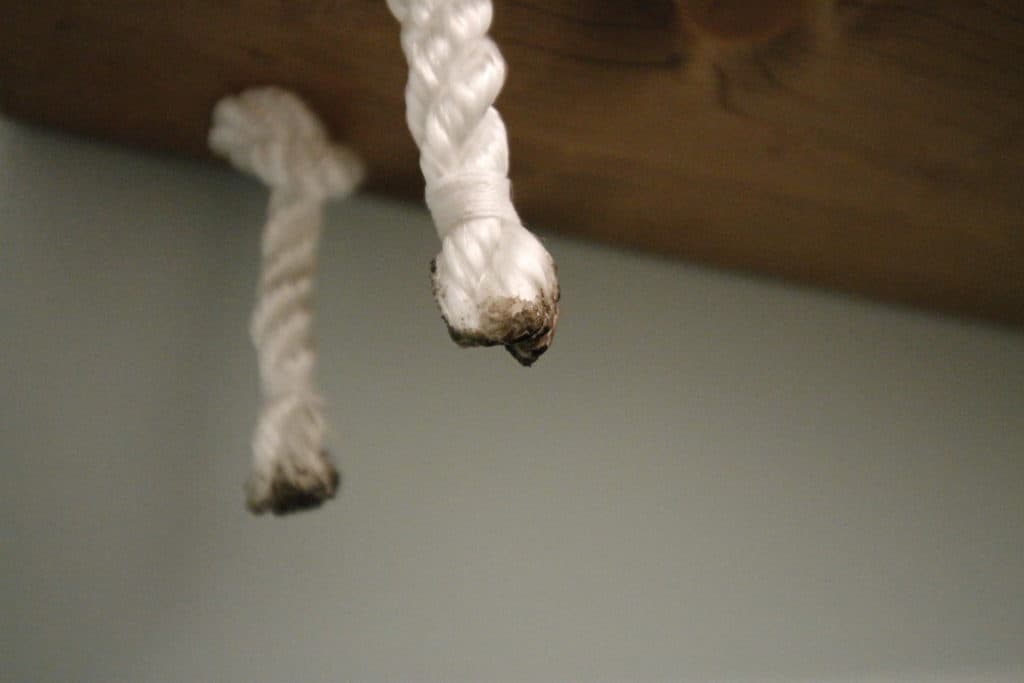
To finish it off, we wound a thin piece of string around each rope end a few times to tie it off and keep the rope from fraying. We guaranteed that wouldn't happen by using a lighter to melt the ends together.
Step six: style the shelves
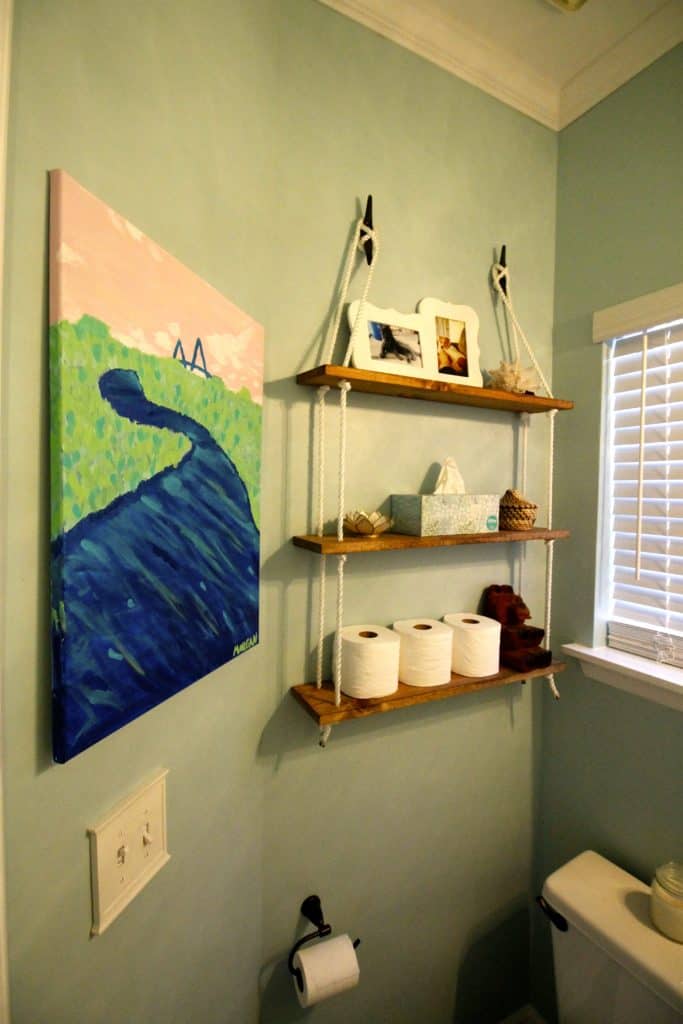
The last step was to style the shelves with a good mix of practical items and decor.
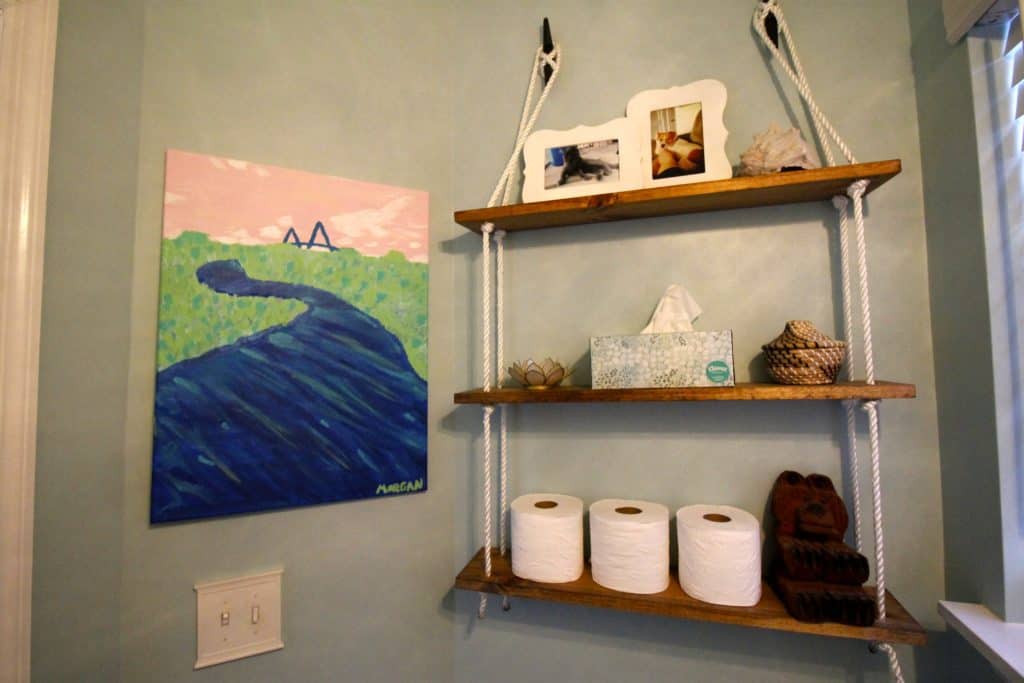
We absolutely love how these shelves turned out. They were super simple and cheap and really turn into a statement piece for our bathroom. Plus, they work great for storage because the room is so small and has very little floor space, so this was a great solution and would work well for you too!

Looking for something?
We've been doing this since 2012 so we have a LOT of blog posts!
Search stuff like: Ceiling Projects | DIY Plant Stands | Thrift Flips

Hey there, I'm Sean, the woodworking enthusiast and builder behind CharlestonCrafted.com! Since 2012, I've been sharing the magic of turning raw materials into beautiful creations. I love teaching others the art and satisfaction of woodworking and DIY. I try to inspire fellow crafters to make something extraordinary out of nothing at all.


Colleen says
It's the perfect accent for this bathroom! I love it.
Cindy says
This shelf is such a cool addition to your nautical bathroom!
Liz says
These are great! I love how the cleats look on the wall. Very clever storage solution!
Amanda says
This is so pretty and is definitely worth spending a lot of your budget on!! I love it!
Jenny says
Stopping by from The Creative Circle linkup. I absolutely love these shelves! So nautical and unique!
-Jenny
http://sweetteal.com
Brittany Goldwyn says
Very cute, but I have a feeling this would turn into a giant cat toy/cat swing in my house LOL.
Tracy says
They are super cute!!!
Kati says
I love the nautical touches on your rope shelves! The space is looking so great, can't wait to see it done.
Nicki Parrish says
Great job on the shelving! I love the nautical vibe your room is taking on, can't wait to see the reveal!
Bharati suragimath says
Shelves look amazing
Erin @ Lemons, Lavender, & Laundry says
Such a great idea! I love how this shelving turned out!!! Pinning 'cause I might have to try this out somewhere in our house 🙂