• Skip to primary navigation
  • Skip to main content
  • Skip to primary sidebar
Charleston Crafted
  • DIY
  • Woodworking
  • Popular Posts
  • Blog
  • About
  • Shop
menu icon
go to homepage
  • DIY
  • Woodworking
  • Popular Posts
  • Blog
  • About
  • Shop
search icon
Homepage link
  • DIY
  • Woodworking
  • Popular Posts
  • Blog
  • About
  • Shop
×
Home » Garden & Yard

Repurposing an Old Stone Fire Pit

Published: Apr 9, 2018 by Morgan · As an Amazon Associate, we earn from qualifying purchases. This site contains affiliate links. ·

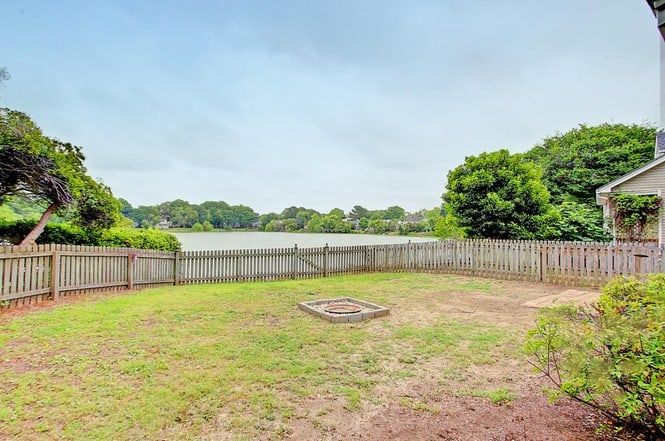
We are having a lot of fun working on our yard this season. We already shared our new patio and if you follow us on Instagram, you've seen some sneak peeks of the work that we are doing on a hardscape bench and fire pit area off the end of the fire pit. Since we are building this new fire pit, it was time to get rid of the old fire pit. It was oddly placed (by previous owners) in the center of the yard. We hate to waste anything, so we challenged ourselves to repurpose the fire pit. And here's how we did it!

initial back yard - charleston crafted

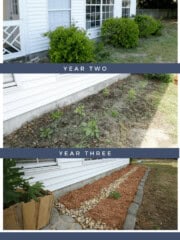
The old fire pit was square with the outline framed with 6"x12" pavers. We dug those up and used them to create a border along the flower garden on the back of our house. The flower bed was already there (last year we dug up some old bushes and planted dahlias) but adding a border and some fresh mulch made it much more defined and purposeful.

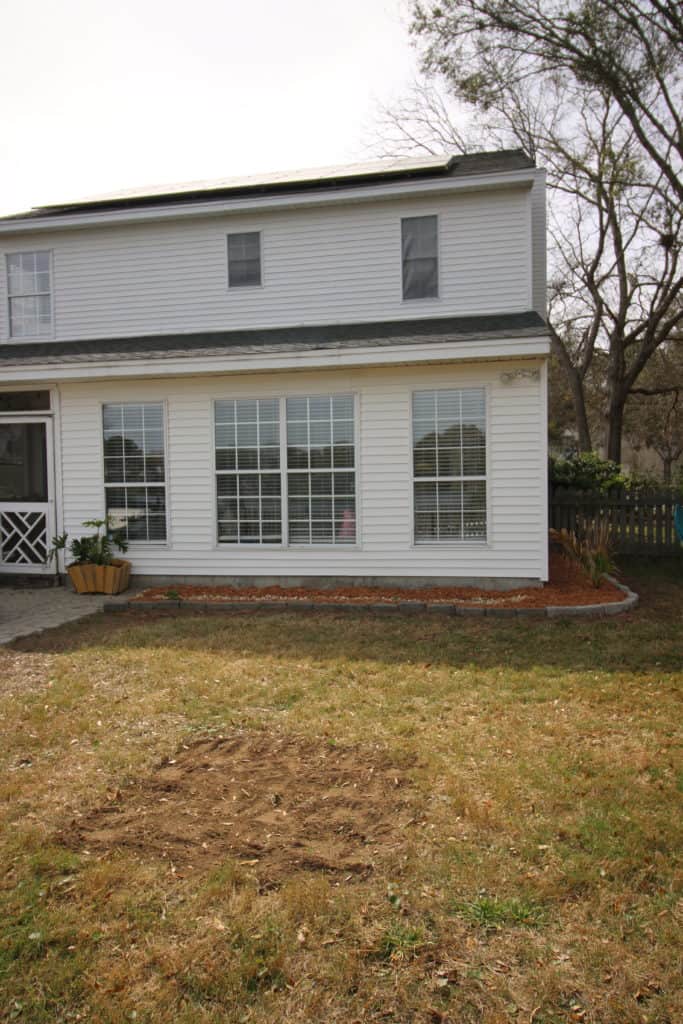
The old fire pit was filled with medium sized white pebbles. We placed these pebbles in a "river" pattern along the center of the flower garden. Why the heck would we do that?! Our house has no gutters, so rain just waterfalls off the roof. When it hits this garden, it creates a small ditch in the mulch. So, there's always a naked gap in the middle. The stones catch the water, help it drain, and keep the mulch from getting messed up!

Repurposing an Old Stone Fire Pit via Charleston Crafted

The old fire pit also had a metal bowl inside it. When we went to lift it out, it was so rusted that it dissolved into crumbs. The remaining rim was trashed.

Repurposing an Old Stone Fire Pit via Charleston Crafted

We added some fresh dirt to level out the area and spread grass seed. Hopefully, following our previously successful grass growing plan, this area will blend in with the rest of the yard before we know it!

 Charleston Crafted Logo heart
 Charleston Crafted Logo facebook
 Charleston Crafted Logo insta
 Charleston Crafted Logo pinterest
 Charleston Crafted Logo twitter

Charleston Crafted email newsletter sign up

Morgan headshot cropped
Morgan

Hello, I'm Morgan, half of the creative force behind CharlestonCrafted.com! With a passion for DIY that dates back to 2012, I've transformed three homes and now I'm dedicated to helping others craft their dream spaces. Let's turn your house into a home together!

More Garden & Yard

  • How to build a DIY gate pergola- Charleston Crafted
    How to build a DIY gate pergola
  • the best faux plants for your porch
    The best faux plants for your front porch
  • How to keep your neighbors grass out of your garden - Charleston Crafted
    How to keep your neighbor's grass out of your garden
  • DIY Faux Tropical Window Box That Looks Real (But Won’t Die!)

Primary Sidebar

Charleston Crafted about us image

Hey y'all!

We are Morgan & Sean McBride and we are crafting our home together in Charleston, South Carolina.

More about us

Popular Posts

  • DIY Coffered Ceiling
    DIY Coffered Ceiling
  • How to Make DIY Concrete Pumpkins via Charleston Crafted
    How to Make DIY Concrete Pumpkins
  • How to Make a Cupid's Arrow Valentine's Day Wall Hanging with felt on the Cricut
    How to make a Cupid's Arrow Valentine's Day Wall Hanging
  • Our Tropical Oasis - A backyard Hammock area - Charleston Crafted
    Our Tropical Oasis

Recent Posts

  • fisherman aesthetic home inspiration
    Fisherman Aesthetic Decor for Your Home
  • Senix Tools Review- Charleston Crafted
    Are Senix power tools any good?
  • Your Weekend To-Do List: 15 Things to Do for Summer Home Upkeep
    Your Weekend To-Do List: 15 Things to Do for Summer Home Upkeep
  • How to stain wood with RIT dye - step by step instructions
    How to stain wood with RIT dye

Privacy Policy

Footer

↑ back to top

Navigation

  • Home
  • Blog
  • Contact Us
  • Terms of Use
  • Disclaimer

Newsletter

  • Sign up for emails and updates
  • Follow us on Instagram
  • Work with Us

Browse by Category

  • Woodworking
  • Home Projects
  • Paint Colors
  • Room Reveals

© 2025 The Charleston Crafted Blog LLC DBA “Charleston Crafted” and “CharlestonCrafted” (also known as N/A) / All Rights Reserved.
Official Website: (Charleston Crafted)
Registered in USA (Co. Reg. No.: 565586)
Address: Charleston, USA 29414, South Carolina
Contact Phone: Not applicable — contact is via email: sean@charlestoncrafted.com

DISCLAIMER: The content on this website is provided for general informational purposes only and is not intended as professional advice. The Charleston Crafted Blog LLC and The Charleston Crafted Blog LLC make no representations or warranties—express or implied—regarding the accuracy, completeness, or suitability of the information contained herein. Any reliance you place on this information is strictly at your own risk. In no event shall The Charleston Crafted Blog LLC or The Charleston Crafted Blog LLC be liable for any loss or damage, including without limitation, indirect or consequential loss or damage, arising from the use or inability to use this website. This website is the official website of The Charleston Crafted Blog LLC.

AFFILIATE DISCLOSURE: This website contains affiliate links. If you click through and make a purchase, we may earn a commission at no extra cost to you.

As an Amazon Associate, I earn from qualifying purchases.

Site Editor: Morgan Smith McBride

Copyright © 2025 Charleston Crafted