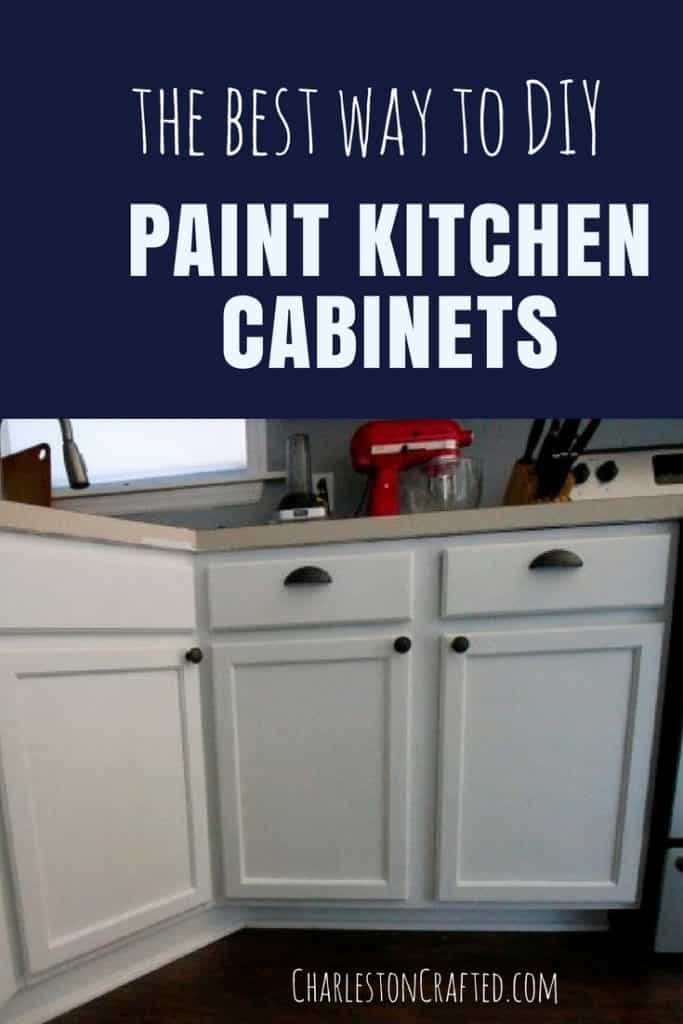
Painting your kitchen cabinets is a great way to save money on a kitchen renovation or just to brighten up the space in a weekend! Here's our best tips!
Over the past 2 weekends, we have been slowly painting our kitchen cabinets. As you know, painting old cabinets that are in good shape is a great way to save money compared to buying all new cabinets.
There was nothing wrong with ours and we liked the existing layout enough (with the addition of a pull out trashcan and an open shelving unit) that painting was perfect for us.
Here's how we painted the cabinets and some lessons that we learned along the way.
Click here to get this full tutorial in a FREE printable PDF!
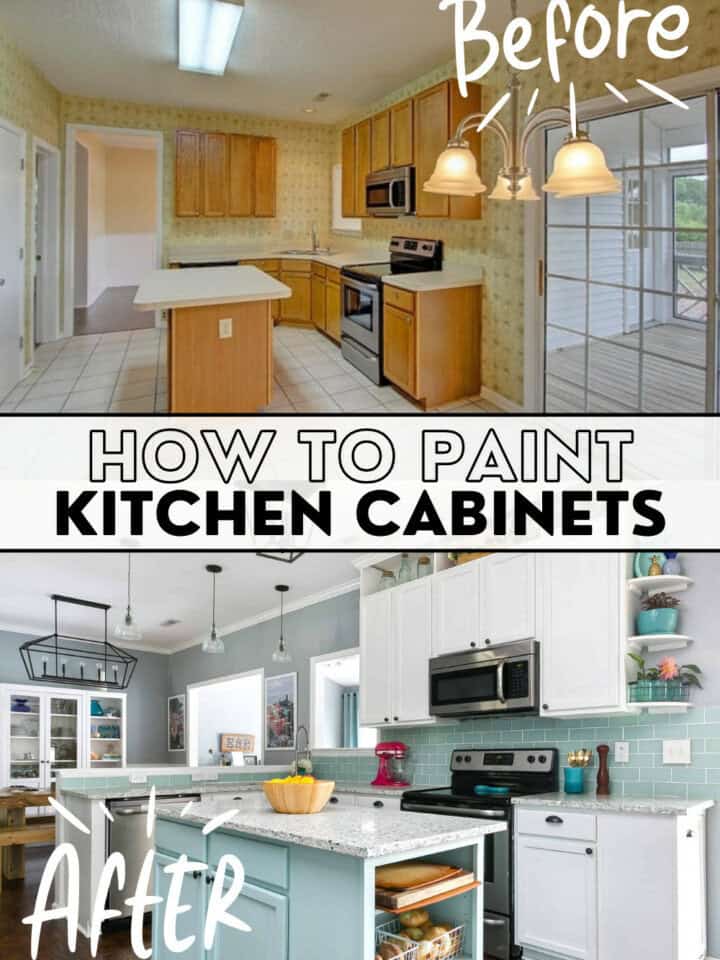
How to DIY paint kitchen cabinets
We actually painted our bathroom vanities last fall as a test for this project. We wanted to see how hard it was to do and how durable that finish was.
Like then, we used Valspar Cabinet Enamel paint. We were pleased with the painting process and also how they held up, so we used the exact same method for these cabinets.
Here's everything we learned about painting cabinets so you can be successful too!
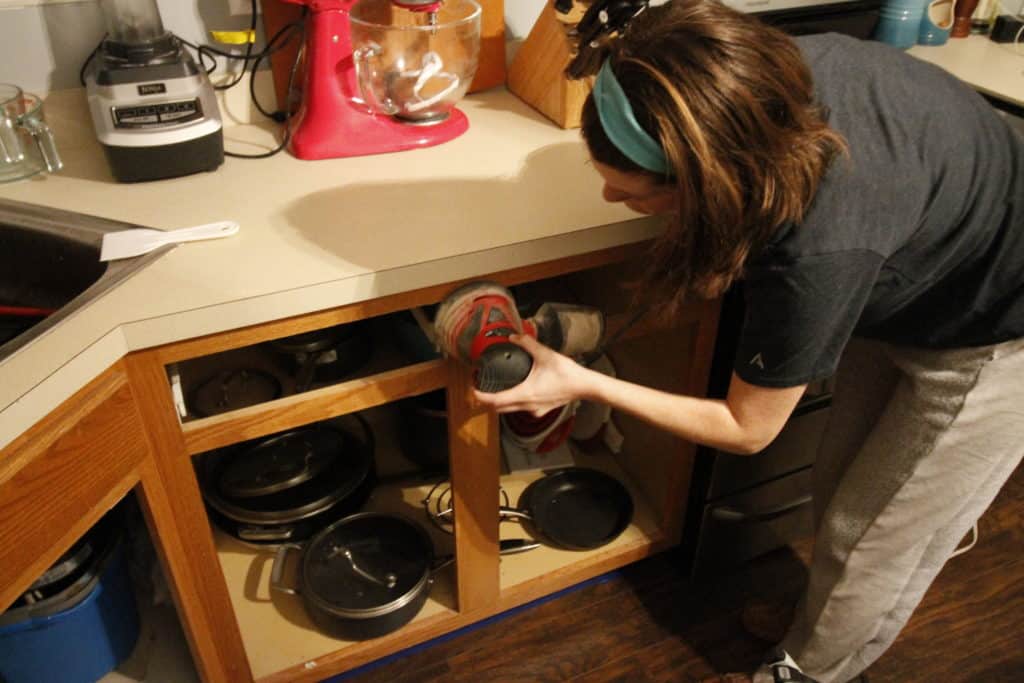
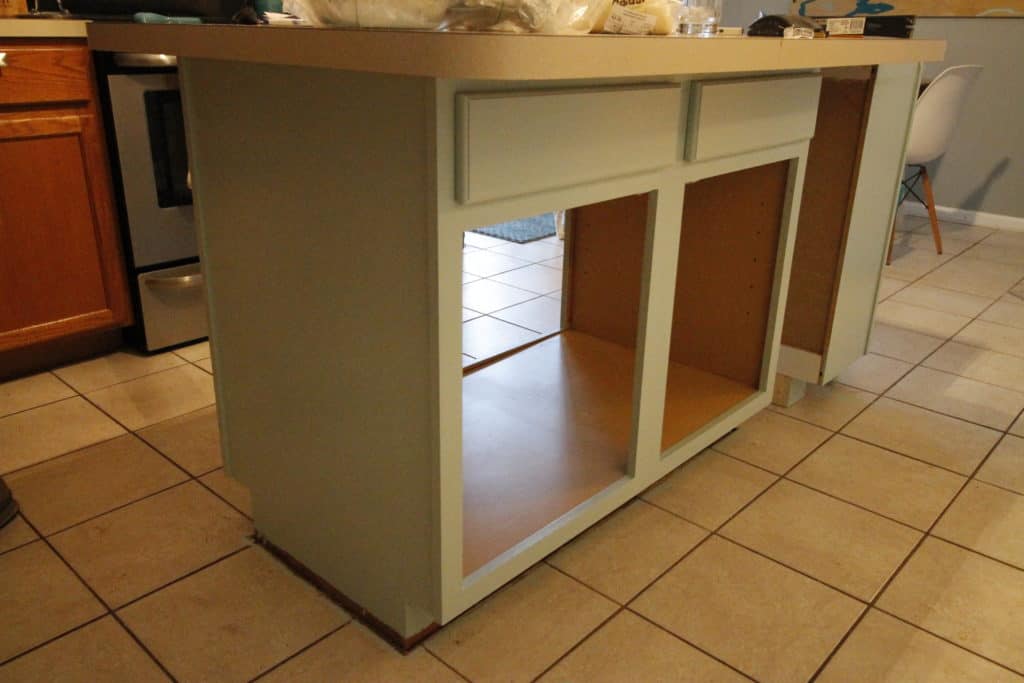
Step one: remove hardware and doors
To prep, we unscrewed all hardware and removed the doors and hinges from the cabinet bodies. We took the hinges off the doors as well as all of the knobs and pulls.
Also remove any outlet covers (if necessary) and cover the outlets. If you can, pull out any appliances that will be in the way so you don't have to cover them or risk getting paint on them.

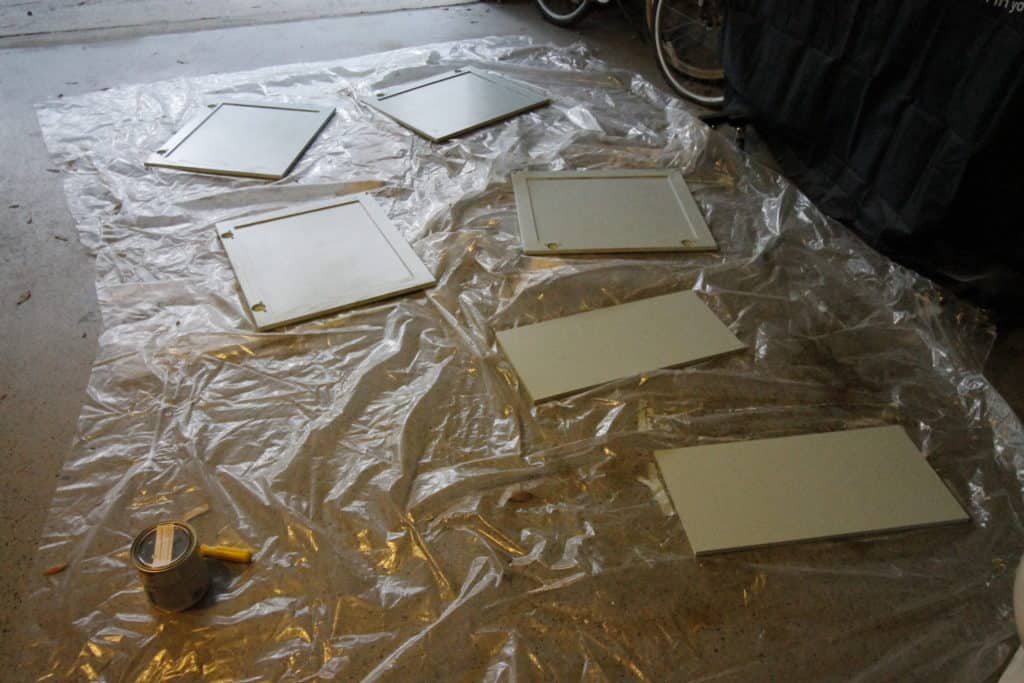
Step two: sand doors and cabinets
I then used the Orbital Sander on each door and on the box of the cabinets.
The goal of sanding is to remove the glossy protective finish and make it easier for paint to stick. After sanding, be sure to wipe everything down with a rag.
Step three: paint with foam roller
The next step was to paint. I love using a high density foam mini roller for the smoothest possible finish.
The thing with this paint is that it takes a lot of coats - it took me 6 to be exact. But, it was worth it for the smooth finish in the end.
Here are our best tips for how to open a paint can.
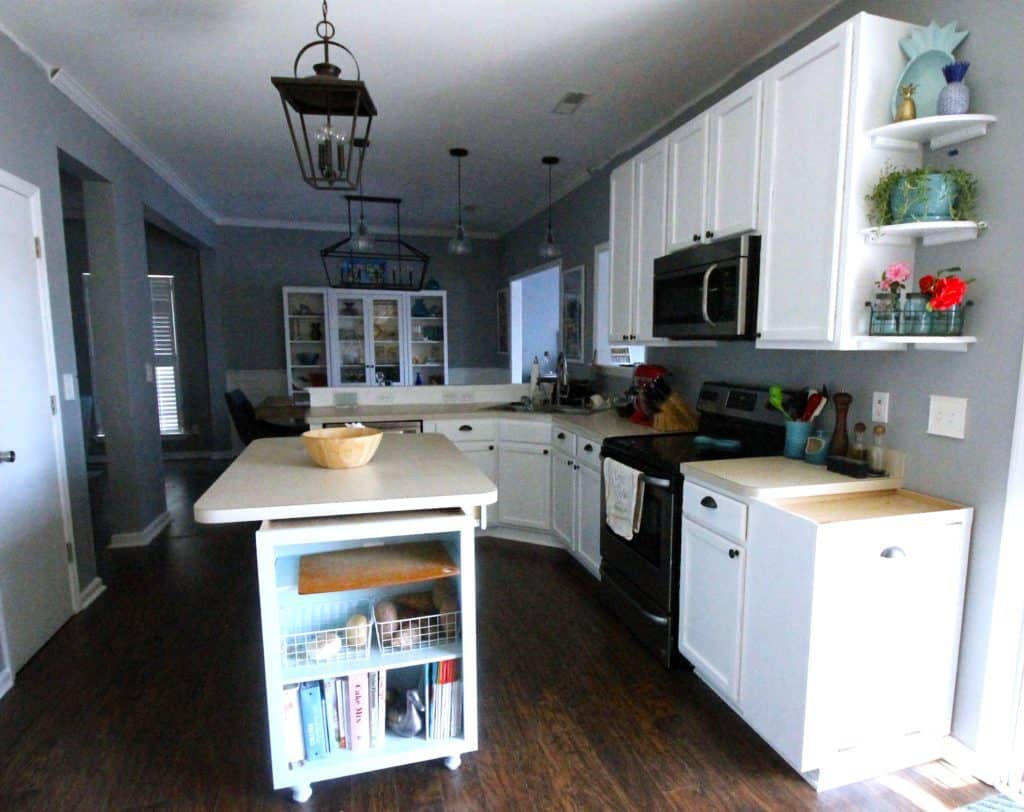
Our island is Sherwin Williams Watery (like our front door) and the rest of the cabinets were white color matched to our trim.
My life tip that Sean never wants to follow: always buy more paint than you think that you need. A quart is almost never enough for anything. Ahem. We used 1 quart of Watery (like, every drop) and almost 2 quarts of the white (should have got a gallon).
Step four: rehang doors and add hardware
I got these door knobs and these drawer pulls to put on our cabinets to replace the ugly silver ones that were on there before. I love that they come in 10 packs for economical reasons and because we now have a few spare that we can use on furniture around the house to tie the spaces together.
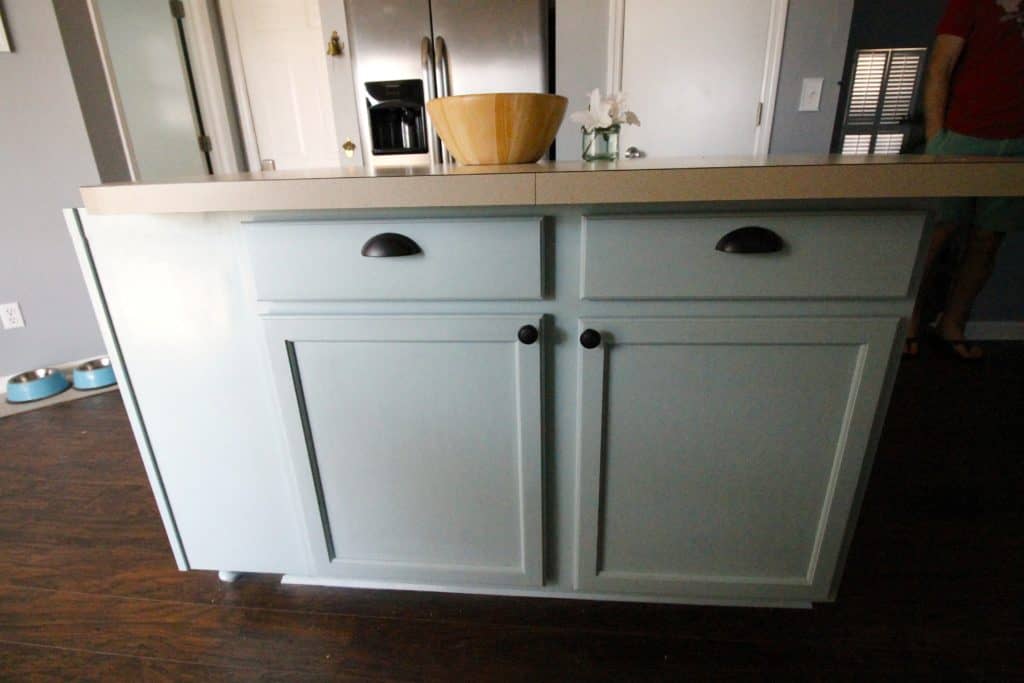

DIY painted cabinets
So far, how am I feeling about it? A big part of me wishes that I had painted them all with Sherwin Williams Watery. I love love love the color and just think that it is so me.
However, I know that our countertops and our backsplash will bring in a lot more color - so I will reserve judgement until those are in place. And if I still want Watery then, I'll just take them off the hinges and do it again.
Here are our tips for organizing kitchen cabinets!
Here is my advice on adding soft close to existing drawers.
Have you painted your cabinets? How did you like the results?

Looking for something?
We've been doing this since 2012 so we have a LOT of blog posts!
Search stuff like: Ceiling Projects | DIY Plant Stands | Thrift Flips

Hello, I'm Morgan, half of the creative force behind CharlestonCrafted.com! With a passion for DIY that dates back to 2012, I've transformed three homes and now I'm dedicated to helping others craft their dream spaces. Let's turn your house into a home together!


Darcy Gonzales says
Did you clean cabinets before sanding? We've heard both yes and no to this. We are actually taking ours out and painting then redoing the layout. We tried our bathroom cabinet with deglosser then painting and the results were not great. So with the kitchen we will do sanding instead of deglosser. I'm torn between safe white cabinets and doing a slate blue -grey...resale value says white over color.
Morgan says
we did not clean them before sanding but did wipe them down after sanding!
if you don't plan on selling soon, do what makes you happiest. it would be no big deal to paint it white before selling. design your house for you!
Kayla says
I LOVE your kitchen remodel! Thank you for the inspiration, you did an amazing job! So glad I found you on Pinterest, I will be following you because we have the same style & taste. We recently bought a house and the kitchen looks just like your "before". We are about to paint our walls & cabinets, but I'm having a hard time choosing the right white for cabinets and grey for walls that look as beautiful at night as during the day. What colors/brand did you use? Are the cabinets easy to wipe clean and are you still happy with they've help up?
thanks so much!
Morgan says
Hi Kayla - I am so glad that you found me, too! My biggest tip for choosing paint colors is:
1. get a ton of paper swatches and hold them up. narrow down to 3-5
2. buy samples on that color. paint on several walls. some next to trim, cabinets, floors, in different lighting etc. Look at the in different lighting, 3x a day for several days. Wait at least a week. pick from there!
Our walls are Sherwin Williams Online grey. I love that it is a nice cool grey. It has held up really well and we still love it!!