• Skip to primary navigation
  • Skip to main content
  • Skip to primary sidebar
Charleston Crafted
  • DIY
  • Woodworking
  • Popular Posts
  • Blog
  • About
  • Shop
menu icon
go to homepage
  • DIY
  • Woodworking
  • Popular Posts
  • Blog
  • About
  • Shop
search icon
Homepage link
  • DIY
  • Woodworking
  • Popular Posts
  • Blog
  • About
  • Shop
×
Home » Home Projects

No Sew Pillow Cover - With Piping!

Published: Feb 19, 2014 · Modified: Dec 13, 2018 by Morgan · As an Amazon Associate, we earn from qualifying purchases. This site contains affiliate links. ·

Y’all know I’m a sucker for a no sew pillow cover. I’ve made them envelope style, from sweaters, faux fur, and in a bow. I was recently at Jo Ann’s and saw this awesome rope piping. I’m super obsessed with rope, too. So, it was a match made in heaven. Here's a tutorial for how I made a no sew pillow with piping.

Click here to pin this project to your Pinterest board!

How to Make a No Sew Pillow with Piping

No Sew Pillow Cover with Piping - Charleston Crafted

I’d never made a pillow with piping before but it turned out to be super easy.

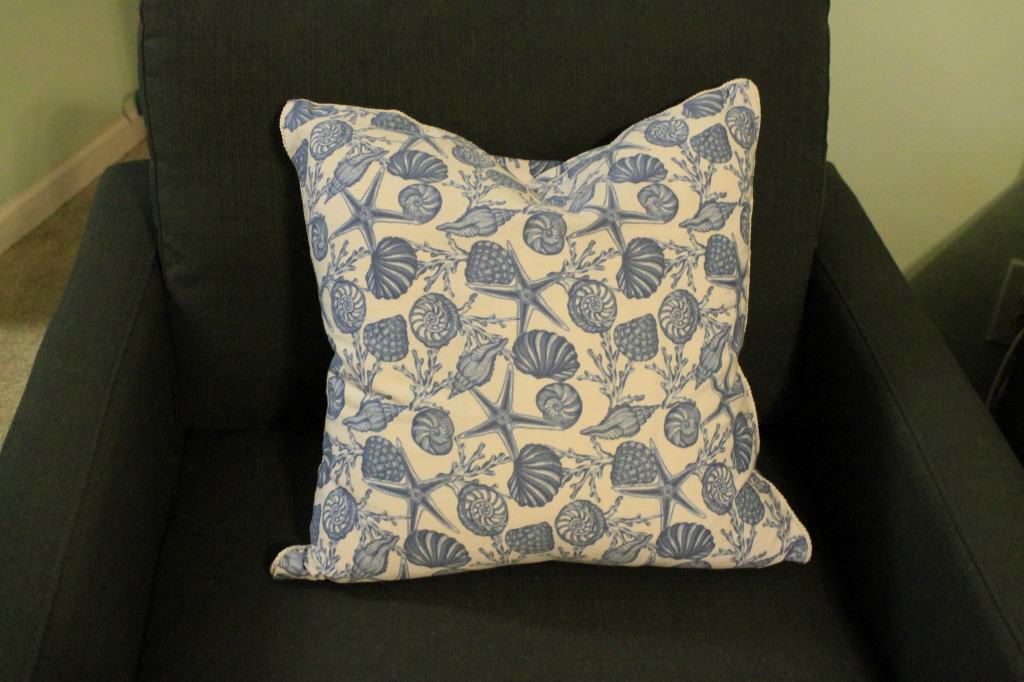
It helps if you start with a pillow with a cover. This one is from Homegoods.

No Sew Pillow Cover with Piping - Charleston Crafted

I took the cover off and used that to measure my fabric. You need the size of your cover plus 1 inch in each direction except 2 inches on one side. So, add 2 inches to the length and 3 inches to the width.

No Sew Pillow Cover with Piping - Charleston Crafted

No Sew Pillow Cover with Piping - Charleston Crafted

No Sew Pillow Cover with Piping - Charleston Crafted

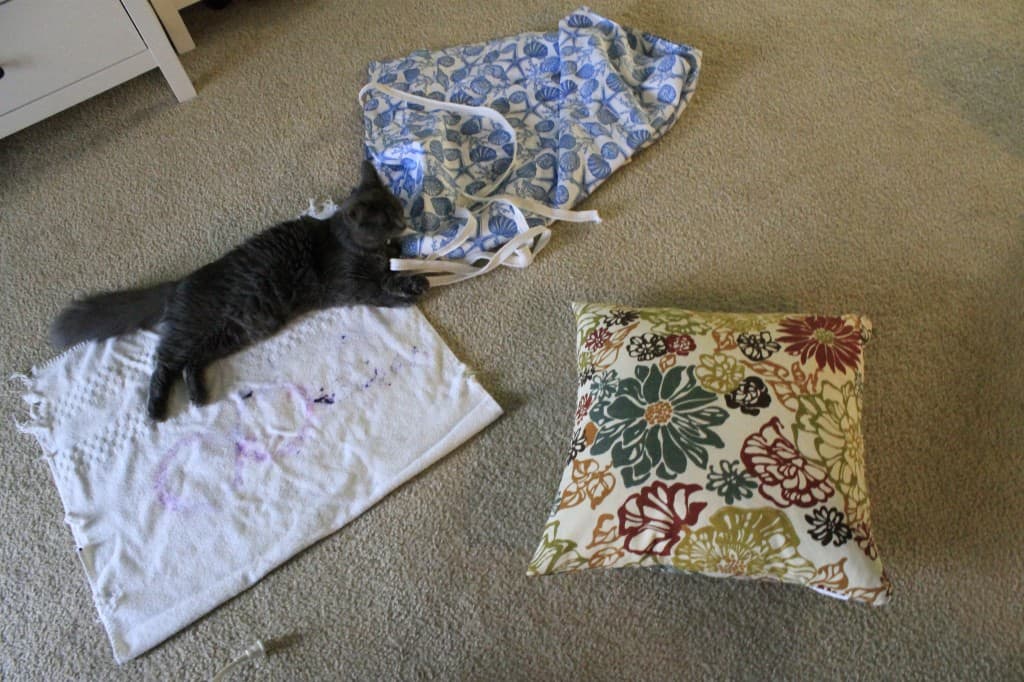
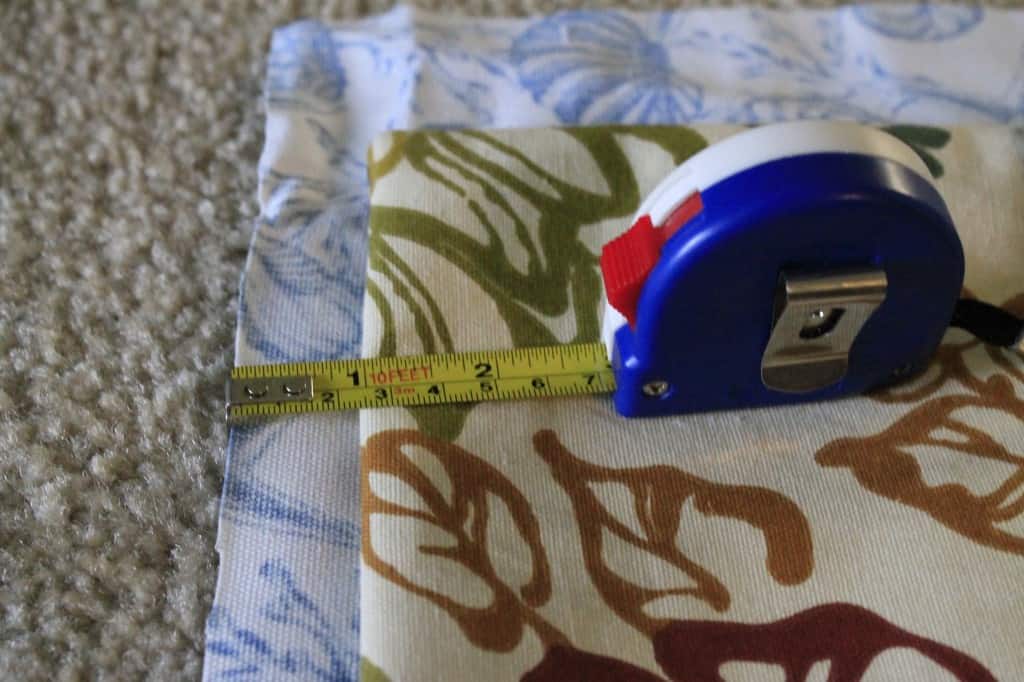
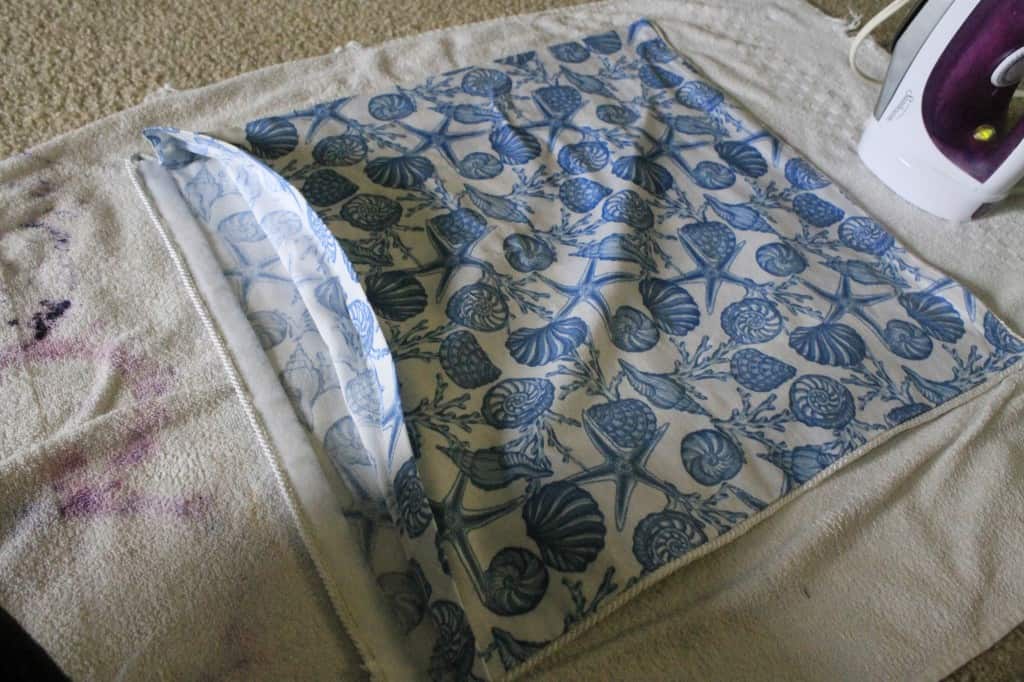
Cut out two pieces of fabric this size. My fabric is a table cloth. I cut off the hem. Iron the whole thing so it is nice and smooth.

No Sew Pillow Cover with Piping - Charleston Crafted

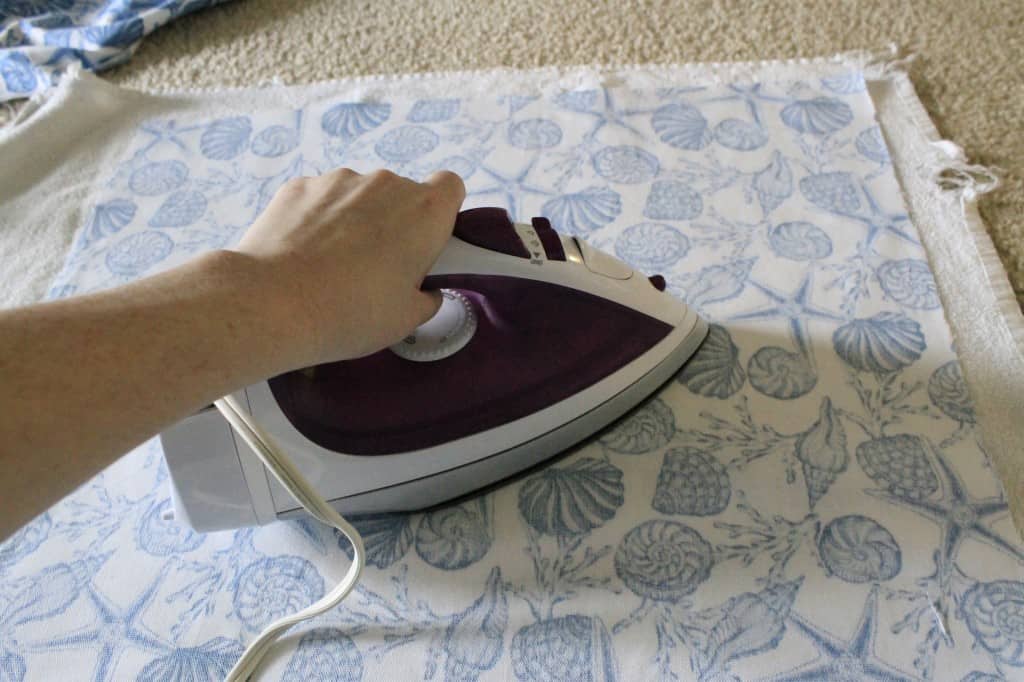
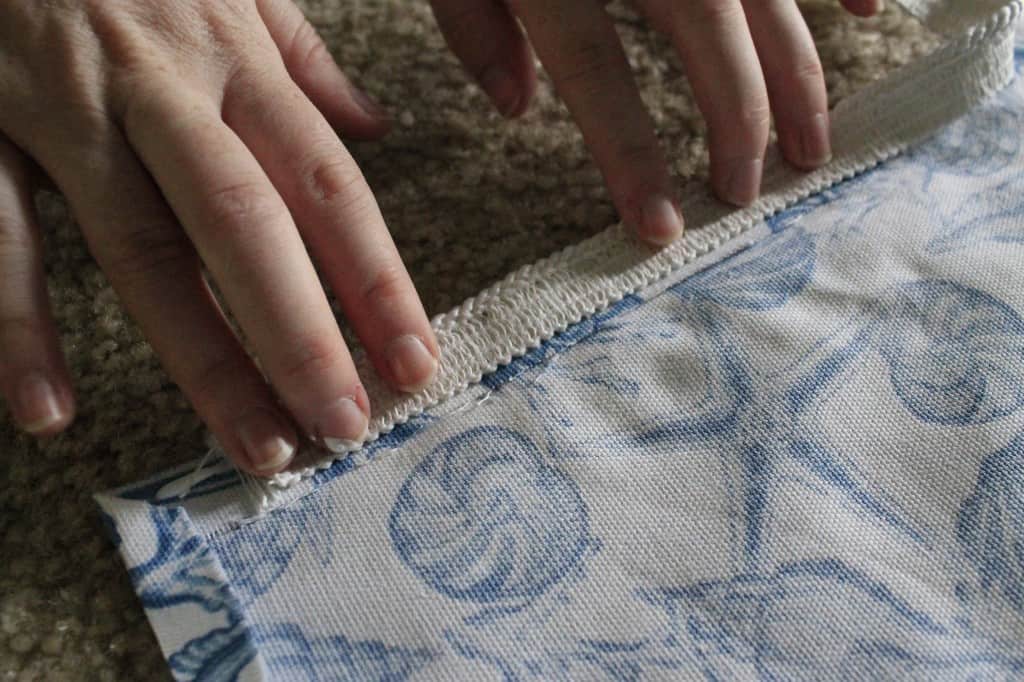
Now, iron a 1 inch hem crease around all 8 sides.

No Sew Pillow Cover with Piping - Charleston Crafted

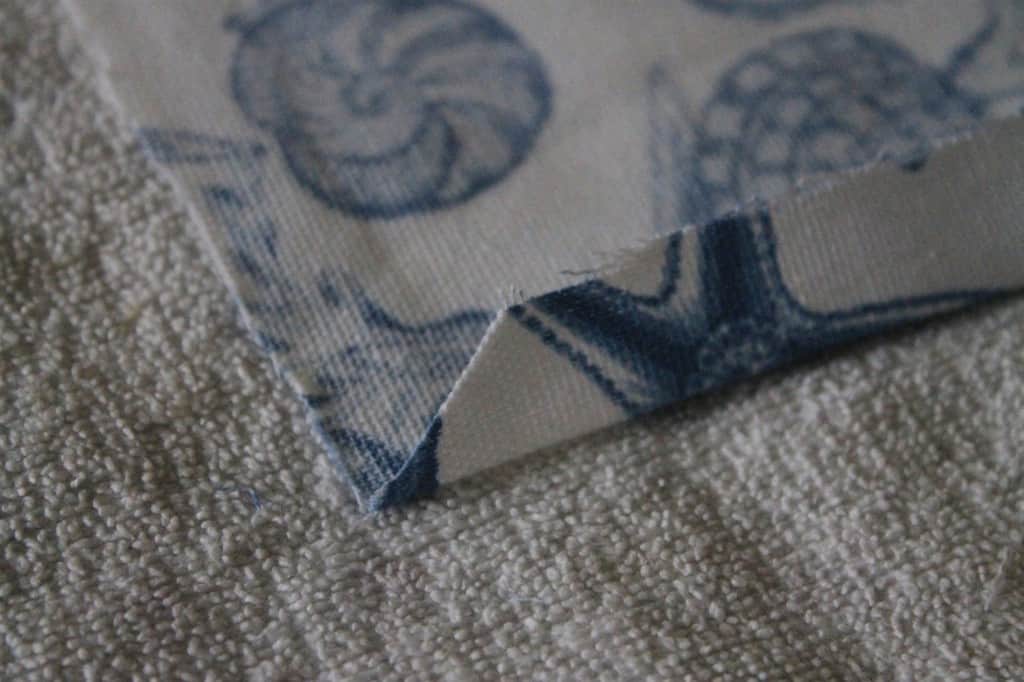
I have learned that its super awesomely helpful later to diagonal cut your ends of folds when you first iron them.

No Sew Pillow Cover with Piping - Charleston Crafted

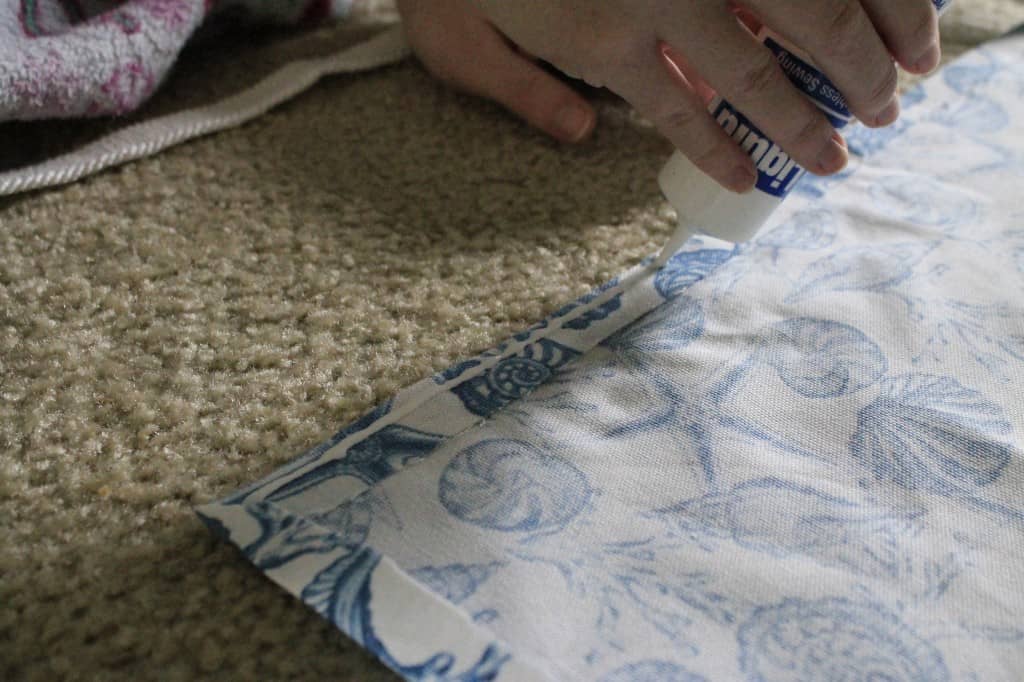
Now, on the side that you left the extra inch, use fusible hem tape to glue that flap down. Follow the instructions on your hem tape. Do this on both pieces of fabric.

No Sew Pillow Cover with Piping - Charleston Crafted

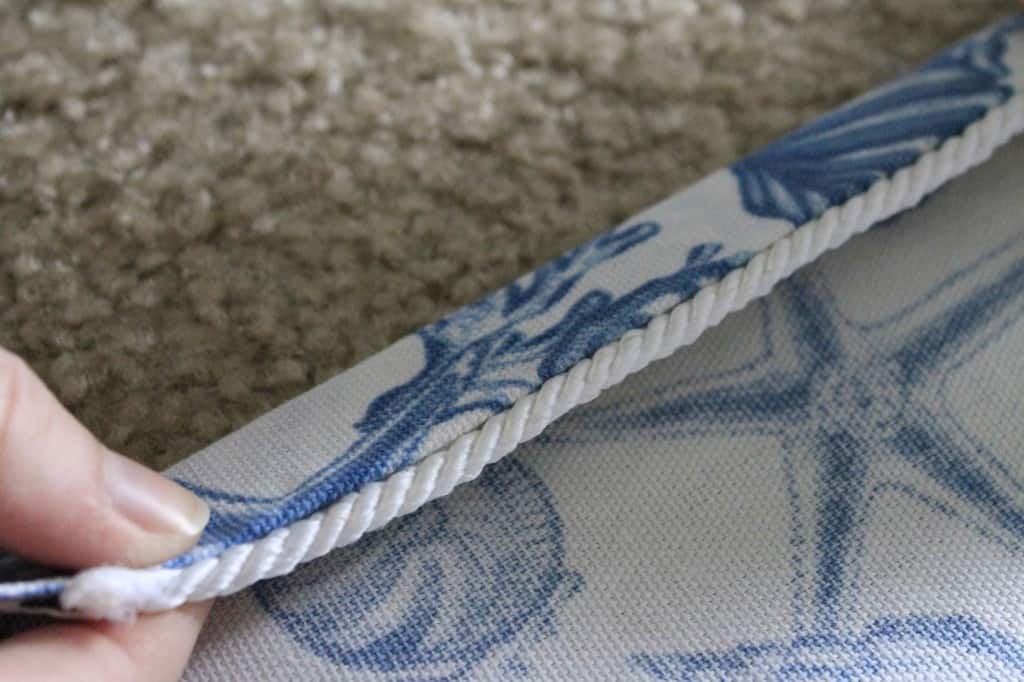
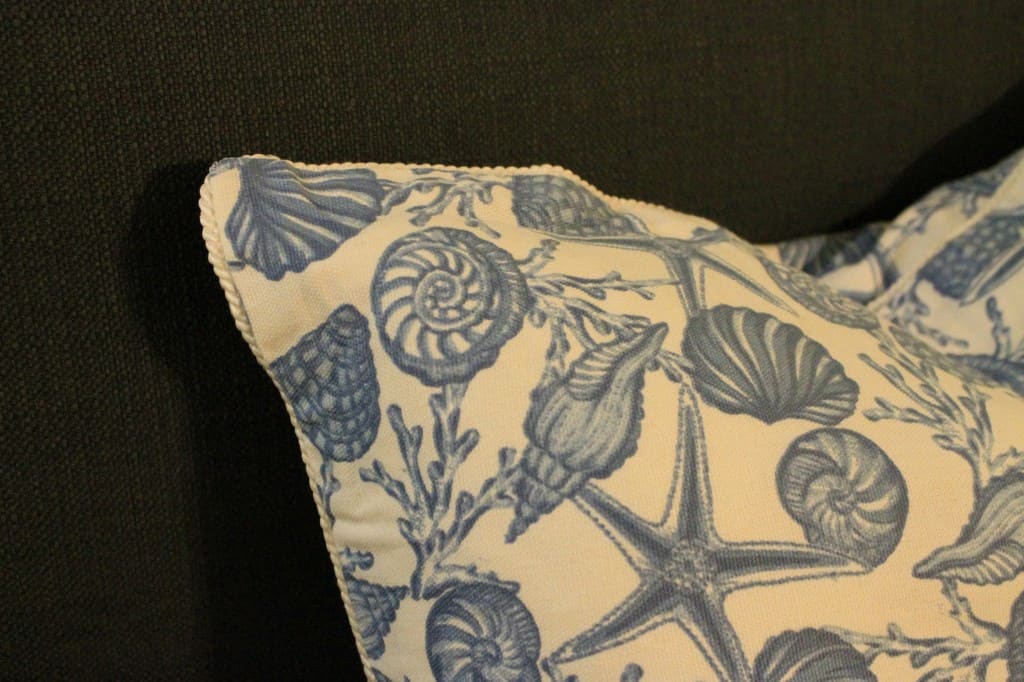
Now is the time to add your piping. Start on a straight edge. You want to use Stitch Witch no sew glue to glue the flat part of your piping to the edge of the good side of your fabric. Line it up so the piping pokes out just over the crease.

No Sew Pillow Cover with Piping - Charleston Crafted

No Sew Pillow Cover with Piping - Charleston Crafted

No Sew Pillow Cover with Piping - Charleston Crafted

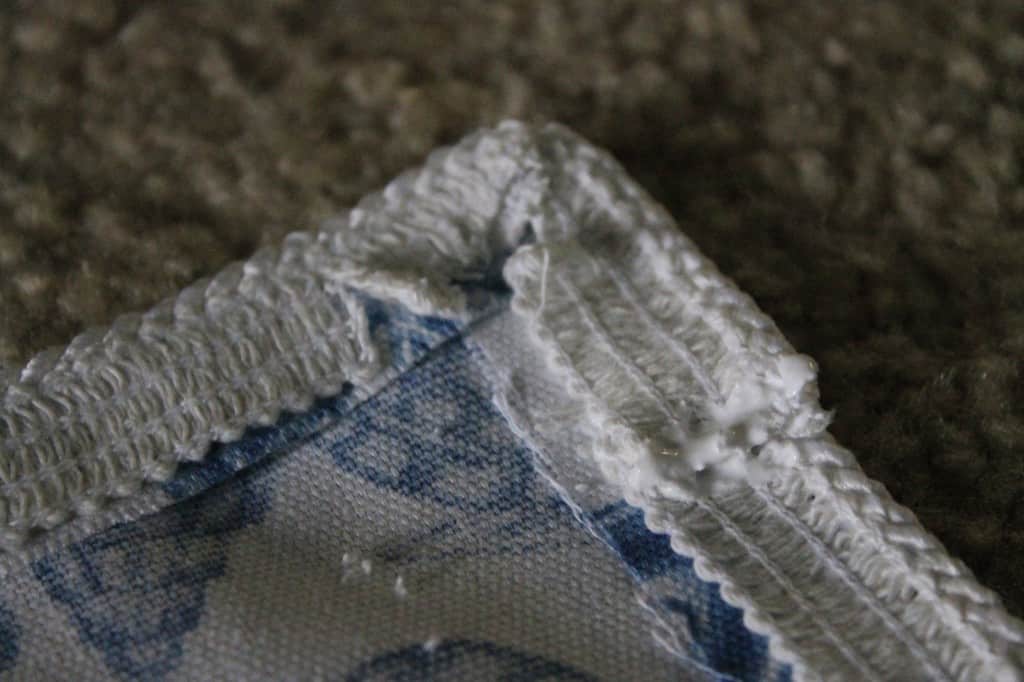
The corners seem tricky but are not. Just cut slits in the flat part of the piping. It helped me to cut out some of the flat part. Then just glue as usual.

No Sew Pillow Cover with Piping - Charleston Crafted

No Sew Pillow Cover with Piping - Charleston Crafted

No Sew Pillow Cover with Piping - Charleston Crafted

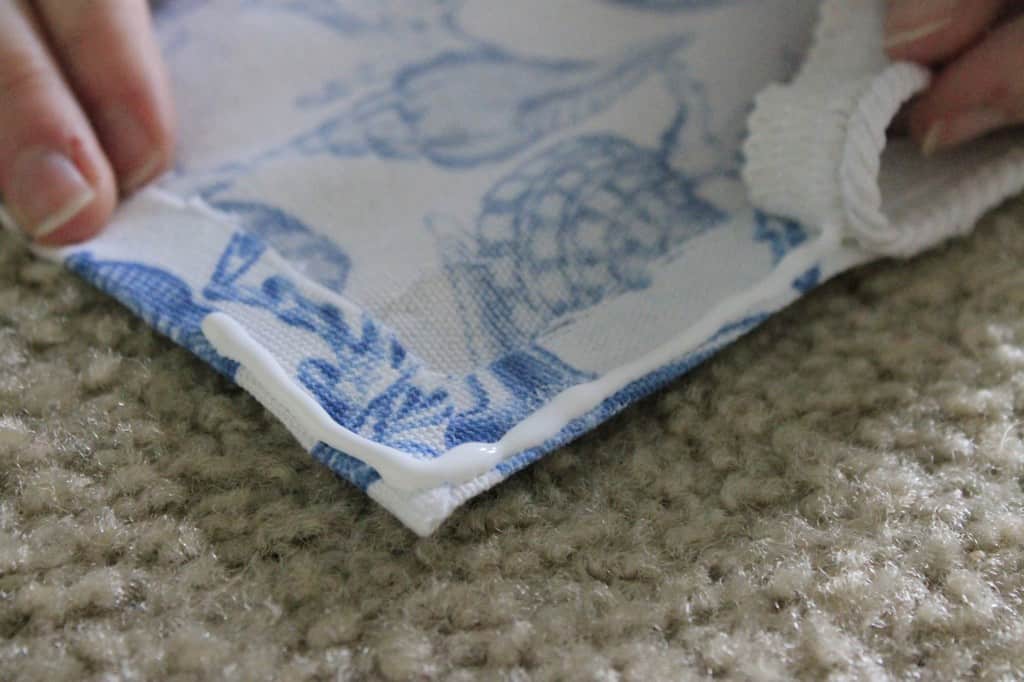
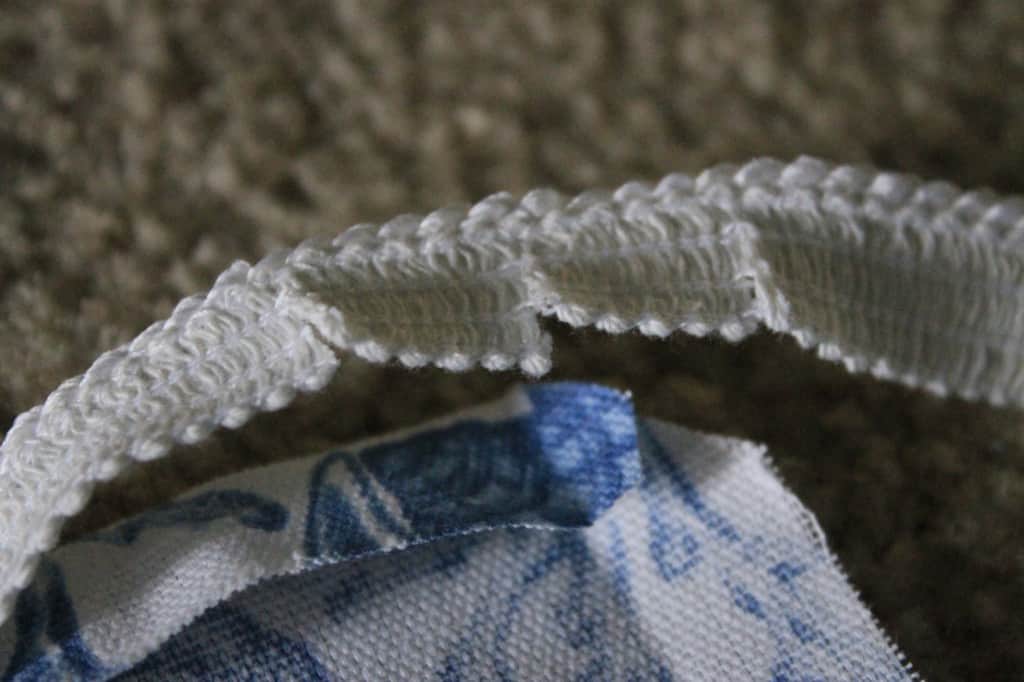
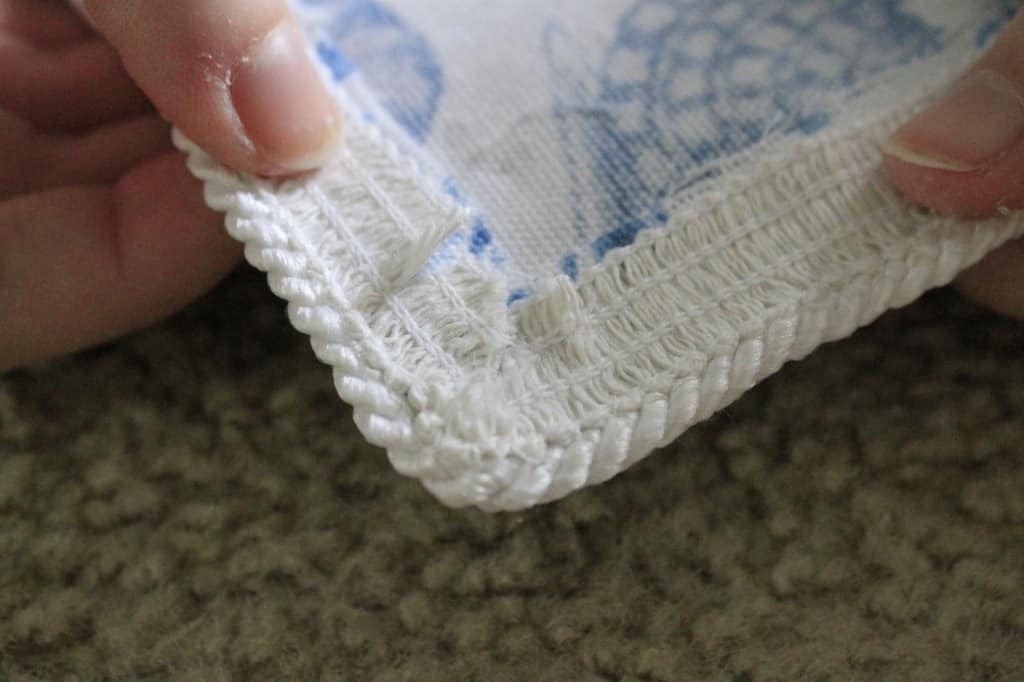
Overlap the end of your piping a bit and use extra glue to hold it down. Allow to dry according to glue’s directions – mine said an hour.

No Sew Pillow Cover with Piping - Charleston Crafted

No Sew Pillow Cover with Piping - Charleston Crafted

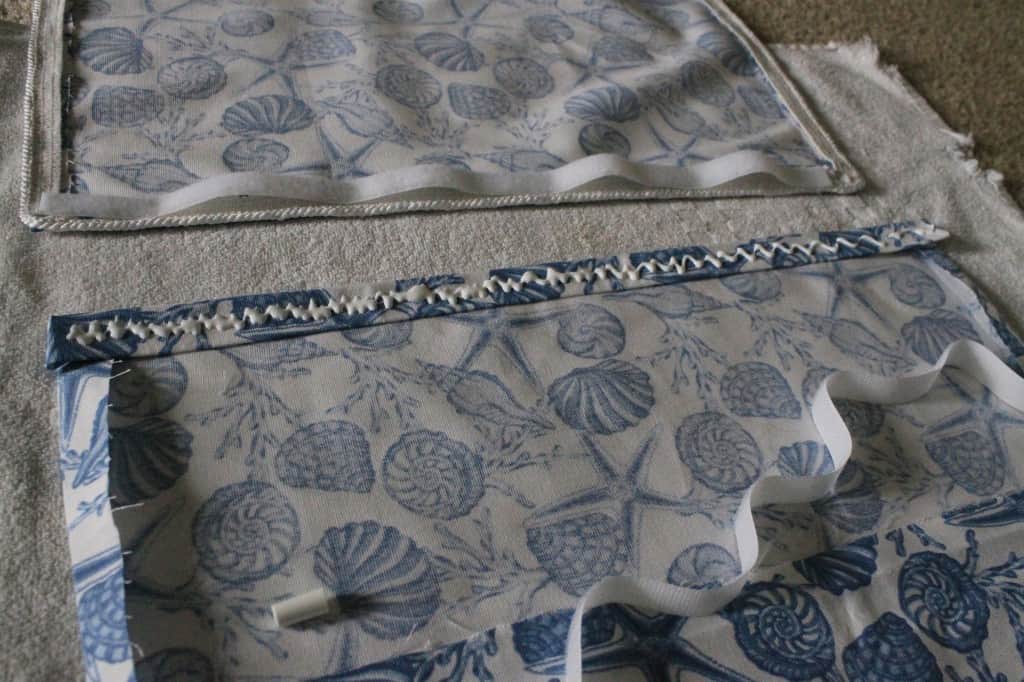
Meanwhile, attach your Velcro closing. I like using Velcro better than the envelope style pillows, but you can use that method if you don’t have or like Velcro.

Glue Velcro to the 2 sides that you left an extra inch on and hemmed earlier. Make sure it is lined up correctly – it should be on the “good” side of one piece and “bad” side of the other. Place something heavy and flat on top (like books) and allow to dry completely.

No Sew Pillow Cover with Piping - Charleston Crafted

No Sew Pillow Cover with Piping - Charleston Crafted

No Sew Pillow Cover with Piping - Charleston Crafted

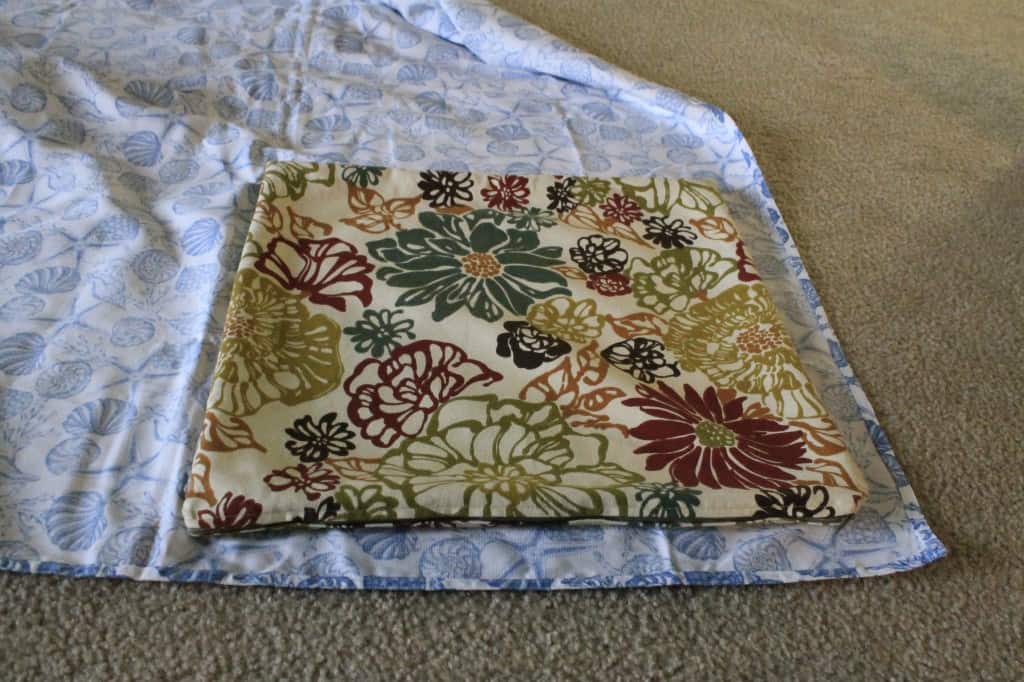
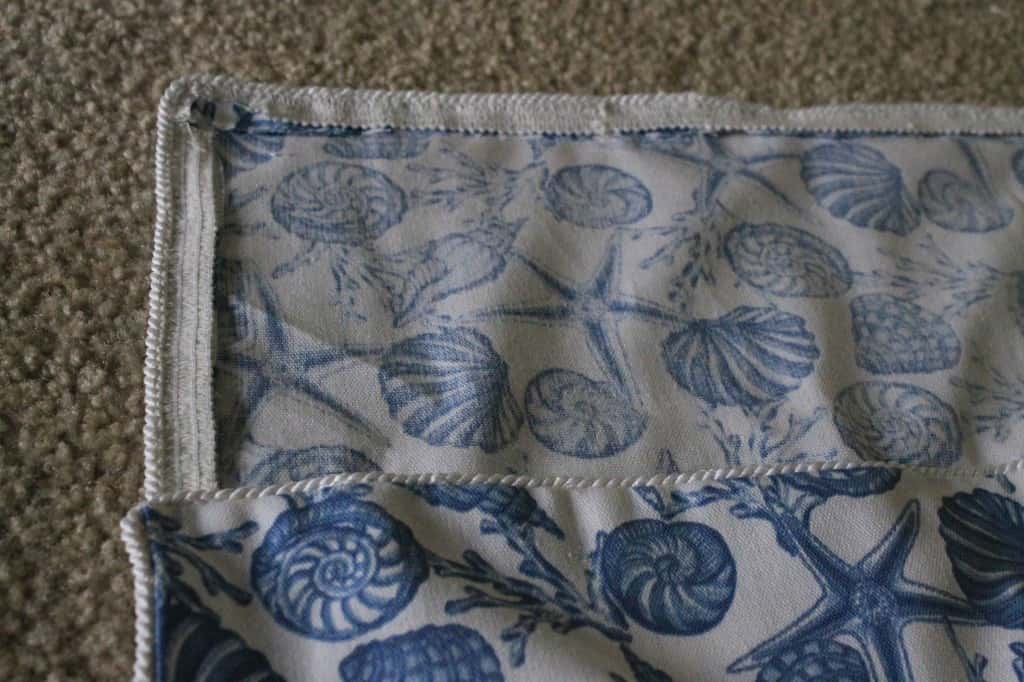
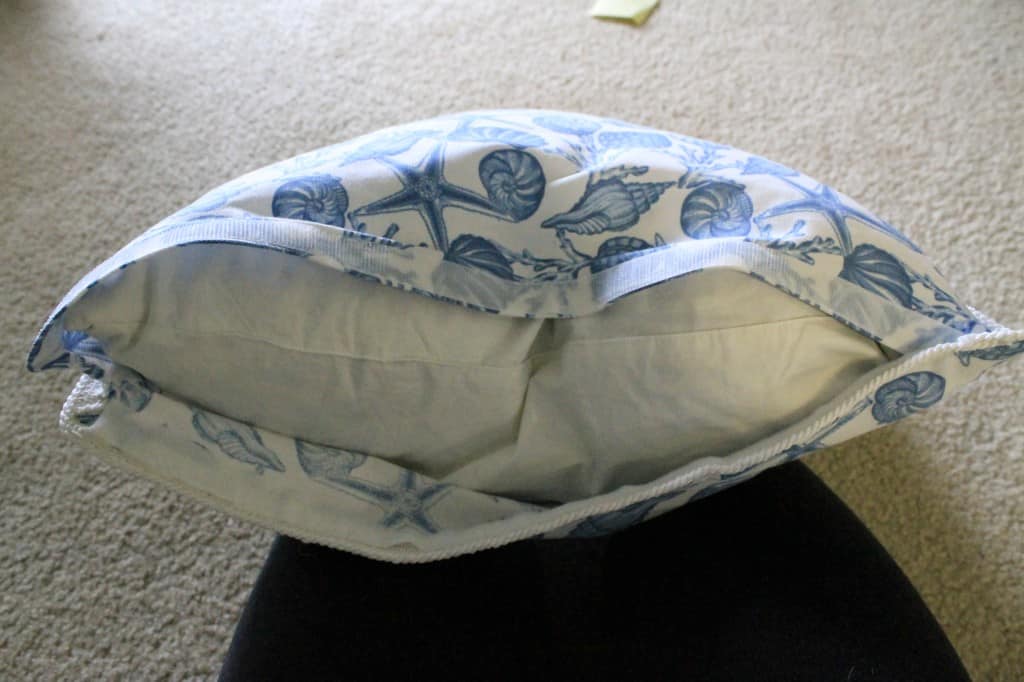
Then, attach the two sides. I laid the non-piped side on top of the piped side, with the hem tape in between. Iron to seal.

It’s important to line the edge up right next to the piping for a flush finish.

You should be attaching flap to flap, fabric-wise. This way, you create one double fabric “sandwich” – flap, piping, flap. You can push this to the front or back so the pillow will go in all the way to the seam.

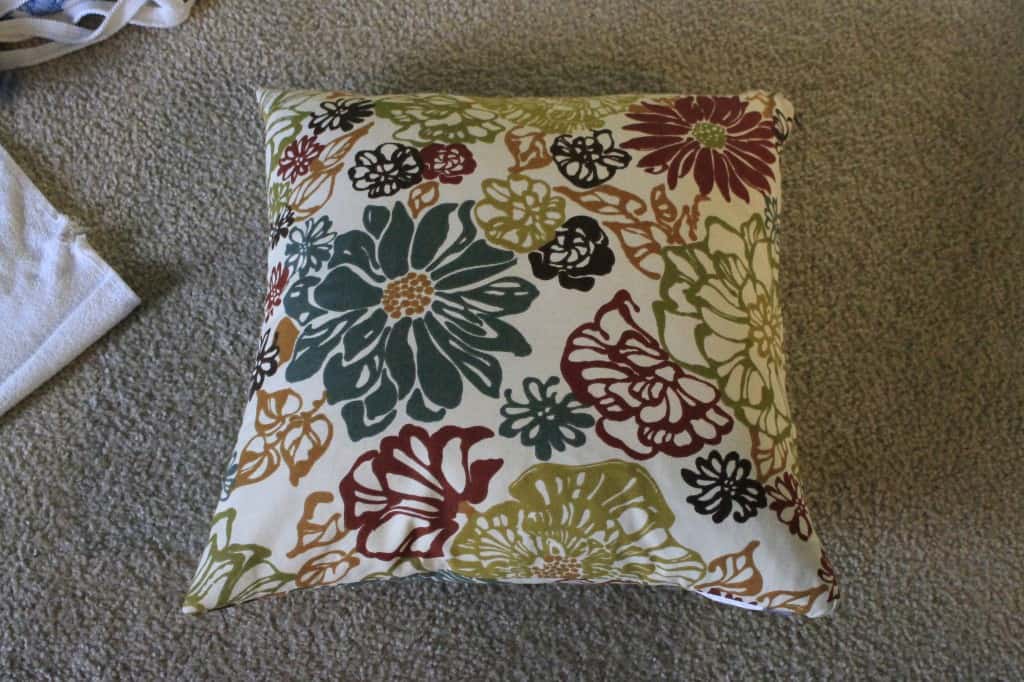
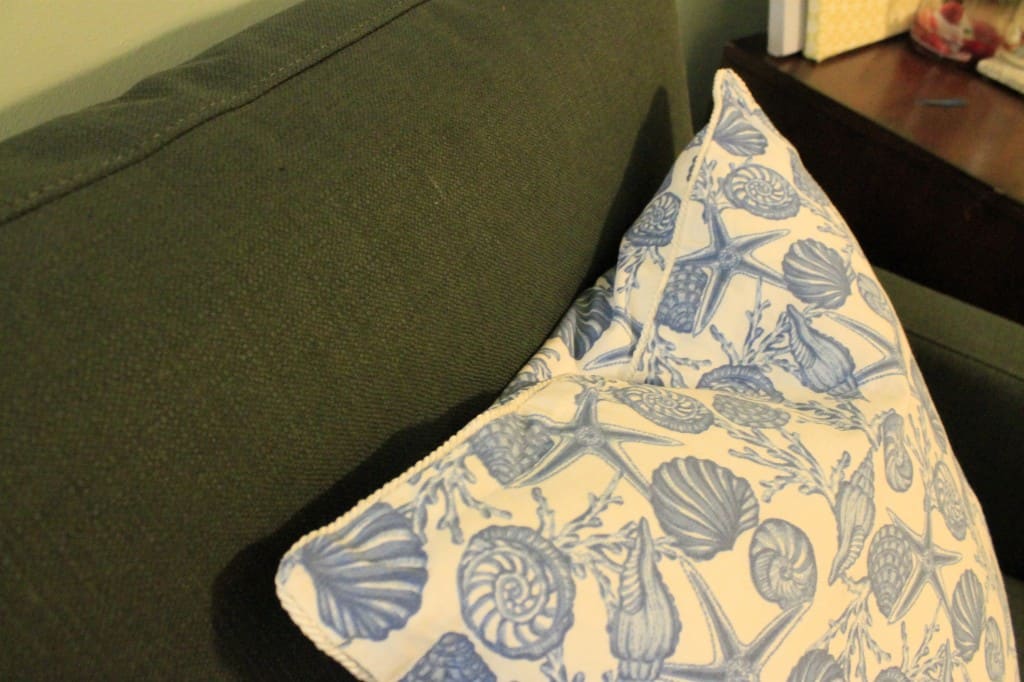
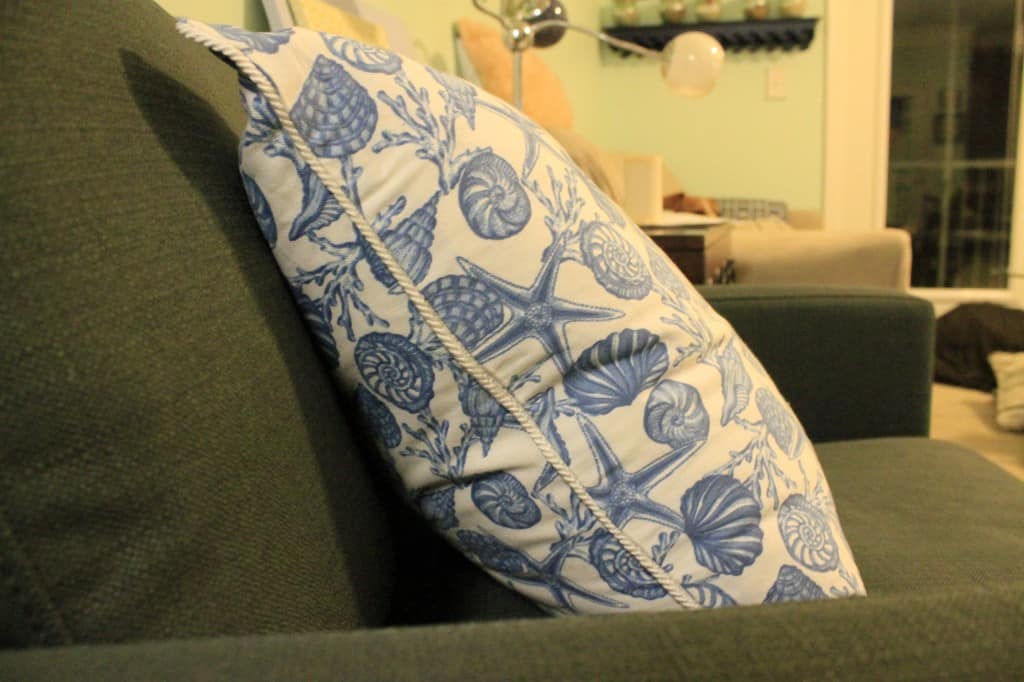
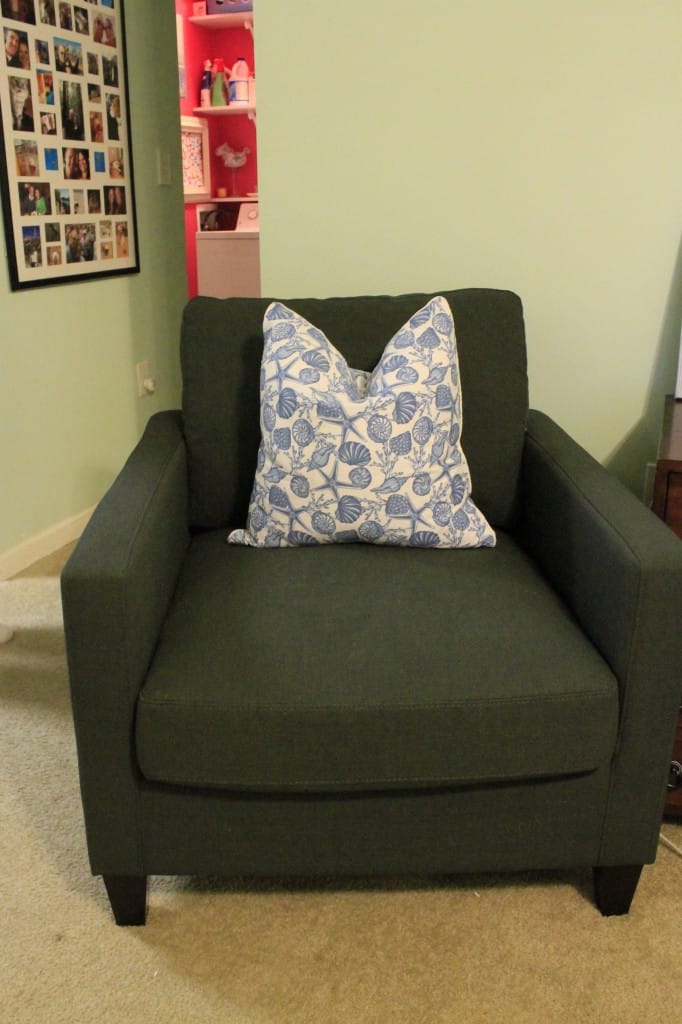
You should have a piped pillow cover now. Insert your pillow and enjoy!

No Sew Pillow Cover with Piping - Charleston Crafted

No Sew Pillow Cover with Piping - Charleston Crafted

No Sew Pillow Cover with Piping - Charleston Crafted

No Sew Pillow Cover with Piping - Charleston Crafted

No Sew Pillow Cover with Piping - Charleston Crafted

Click here to pin this project to your Pinterest board!

Check out my other no sew projects:

No sew envelope style pillow covers

Tutorial for a No sew bow pillow

No sew curtains

How to make No sew towel pillows

No sew pillows from sweaters

No sew fur snood

Note: for real y’all, I love this no sew stuff, but a 2014 goal of mine is to get on using my sewing machine! I’m having trouble getting it to work after years in the closet – if anyone is willing to help, please reach out!

  signature 2
 logo facebook  logo instagram  logo pinterest  logo twitter


Morgan headshot cropped
Morgan

Hello, I'm Morgan, half of the creative force behind CharlestonCrafted.com! With a passion for DIY that dates back to 2012, I've transformed three homes and now I'm dedicated to helping others craft their dream spaces. Let's turn your house into a home together!

More Home Projects

  • DIY floating corner shelves - Charleston Crafted
    How to make floating corner shelves
  • how to assess your home renovation needs
    How to assess your home renovation needs
  • Top Mistakes to Avoid When Renovating Your Home
    Top Mistakes to Avoid When Renovating Your Home
  • How to create a DIY home renovation plan
    How to create a DIY home renovation plan

Reader Interactions

Trackbacks

  1. No Sew Pillow and A Dose of DIY Blog Hop - CHATFIELD COURT says:
    July 20, 2015 at 7:00 am

    […] tutorials online for no sew pillows, so that’s where I started (this is a good one and one this one was very helpful). I decided to try fusible tape to “sew” my pillow and after […]

Primary Sidebar

Charleston Crafted about us image

Hey y'all!

We are Morgan & Sean McBride and we are crafting our home together in Charleston, South Carolina.

More about us

Popular Posts

  • DIY Coffered Ceiling
    DIY Coffered Ceiling
  • How to Make DIY Concrete Pumpkins via Charleston Crafted
    How to Make DIY Concrete Pumpkins
  • How to Make a Cupid's Arrow Valentine's Day Wall Hanging with felt on the Cricut
    How to make a Cupid's Arrow Valentine's Day Wall Hanging
  • Our Tropical Oasis - A backyard Hammock area - Charleston Crafted
    Our Tropical Oasis

Recent Posts

  • fisherman aesthetic home inspiration
    Fisherman Aesthetic Decor for Your Home
  • Senix Tools Review- Charleston Crafted
    Are Senix power tools any good?
  • Your Weekend To-Do List: 15 Things to Do for Summer Home Upkeep
    Your Weekend To-Do List: 15 Things to Do for Summer Home Upkeep
  • How to build a DIY gate pergola- Charleston Crafted
    How to build a DIY gate pergola

Privacy Policy

Footer

↑ back to top

Navigation

  • Home
  • Blog
  • Contact Us
  • Terms of Use
  • Disclaimer

Newsletter

  • Sign up for emails and updates
  • Follow us on Instagram
  • Work with Us

Browse by Category

  • Woodworking
  • Home Projects
  • Paint Colors
  • Room Reveals

© 2025 The Charleston Crafted Blog LLC DBA “Charleston Crafted” and “CharlestonCrafted” (also known as N/A) / All Rights Reserved.
Official Website: (Charleston Crafted)
Registered in USA (Co. Reg. No.: 565586)
Address: Charleston, USA 29414, South Carolina
Contact Phone: Not applicable — contact is via email: sean@charlestoncrafted.com

DISCLAIMER: The content on this website is provided for general informational purposes only and is not intended as professional advice. The Charleston Crafted Blog LLC and The Charleston Crafted Blog LLC make no representations or warranties—express or implied—regarding the accuracy, completeness, or suitability of the information contained herein. Any reliance you place on this information is strictly at your own risk. In no event shall The Charleston Crafted Blog LLC or The Charleston Crafted Blog LLC be liable for any loss or damage, including without limitation, indirect or consequential loss or damage, arising from the use or inability to use this website. This website is the official website of The Charleston Crafted Blog LLC.

AFFILIATE DISCLOSURE: This website contains affiliate links. If you click through and make a purchase, we may earn a commission at no extra cost to you.

As an Amazon Associate, I earn from qualifying purchases.

Site Editor: Morgan Smith McBride

Copyright © 2025 Charleston Crafted