• Skip to primary navigation
  • Skip to main content
  • Skip to primary sidebar
Charleston Crafted
  • DIY
  • Woodworking
  • Popular Posts
  • Blog
  • About
  • Shop
menu icon
go to homepage
  • DIY
  • Woodworking
  • Popular Posts
  • Blog
  • About
  • Shop
search icon
Homepage link
  • DIY
  • Woodworking
  • Popular Posts
  • Blog
  • About
  • Shop
×
Home » Home Projects

A Kate Spade Inspired No Sew Bow Pillow

Published: Jan 15, 2014 · Modified: Jan 25, 2023 by Morgan · As an Amazon Associate, we earn from qualifying purchases. This site contains affiliate links. ·

Want to make a No Sew Bow Pillow? You'll love this easy tutorial!

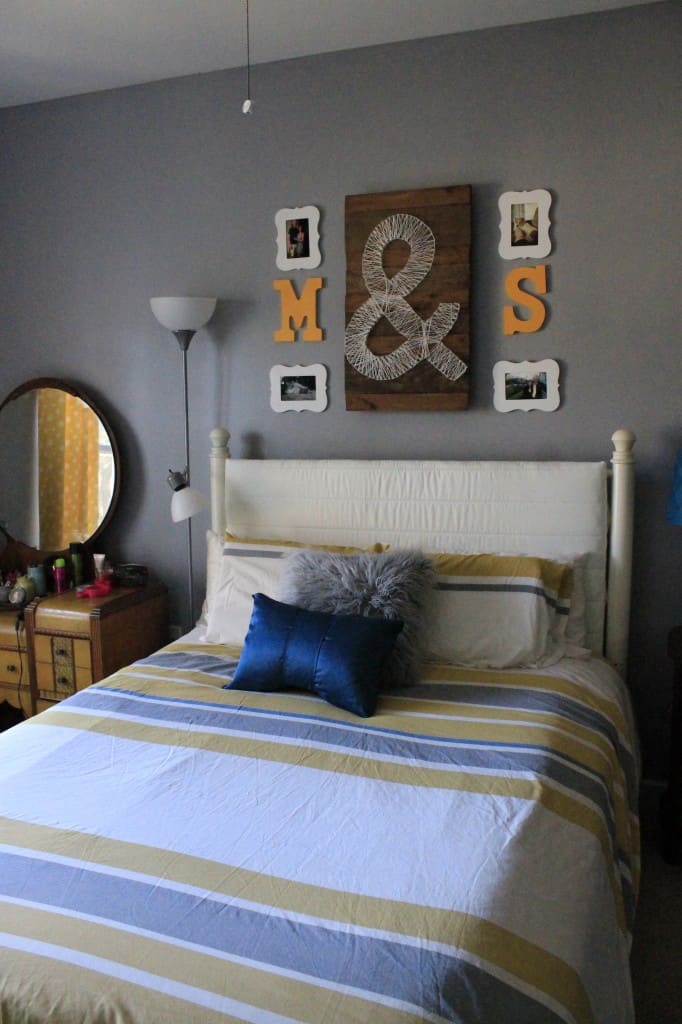
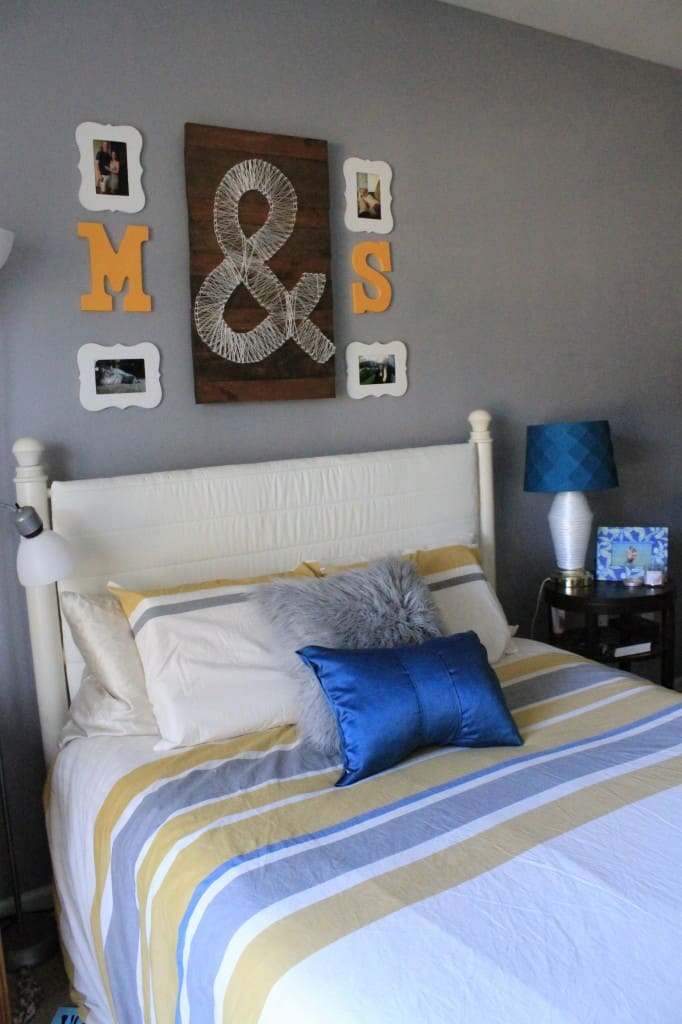
I'm obsessed with bows & also love pillows. Since we re-vamped our bedroom side table lamp to have a teal shade, I decided what better way to tie that color into the room than to add a pillow. I instantly thought of this bow pillow tutorial that Kate Spade posted on their blog last year.

Click here to add this project to your pinterest board! 

No Sew Bow Pillow

However, I no longer have a {functioning} sewing machine, so I knew that I would have to modify the tutorial to be able to use my no - sew hem tape. For a step by step tutorial on how to use the tape, check out my no sew pillow covers or no sew curtains.

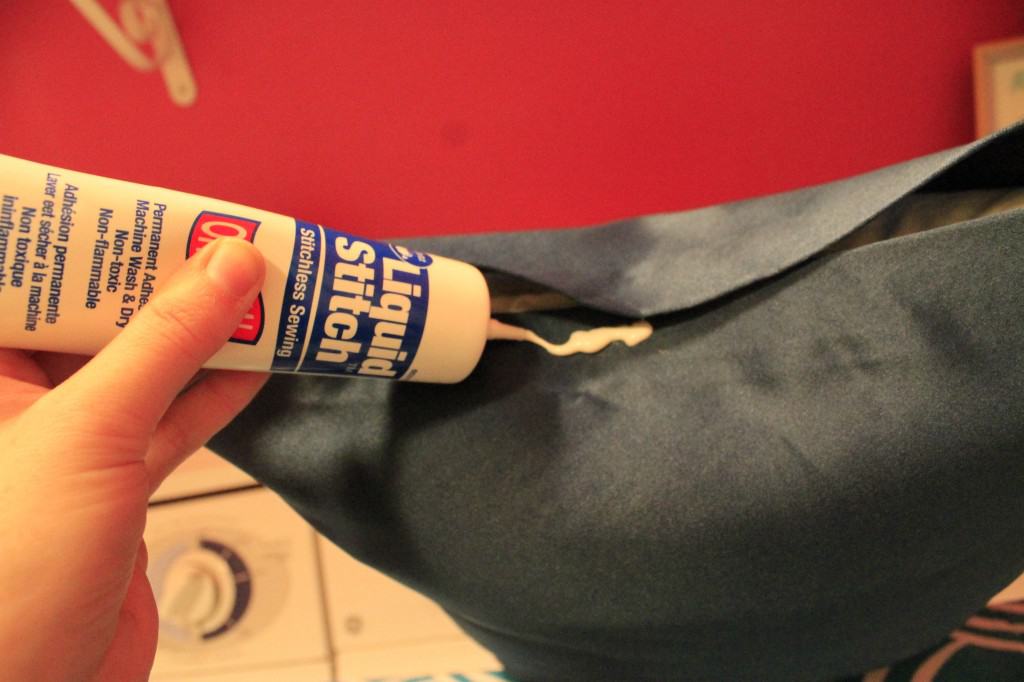
If you do not have or do not feel comfortable using an iron and hem tape, you can also use stitch witch no sew hem glue, like I did with my sweater pillows. However, the glue takes about an hour to dry, so it takes a bit longer (including wait time - actually applying the glue is quick) than the hem tape that dries basically instantly.

No Sew Bow Pillow

No Sew Kate Spade Inspired Bow Pillow Cover - Charleston Crafted

No Sew Kate Spade Inspired Bow Pillow Cover - Charleston Crafted

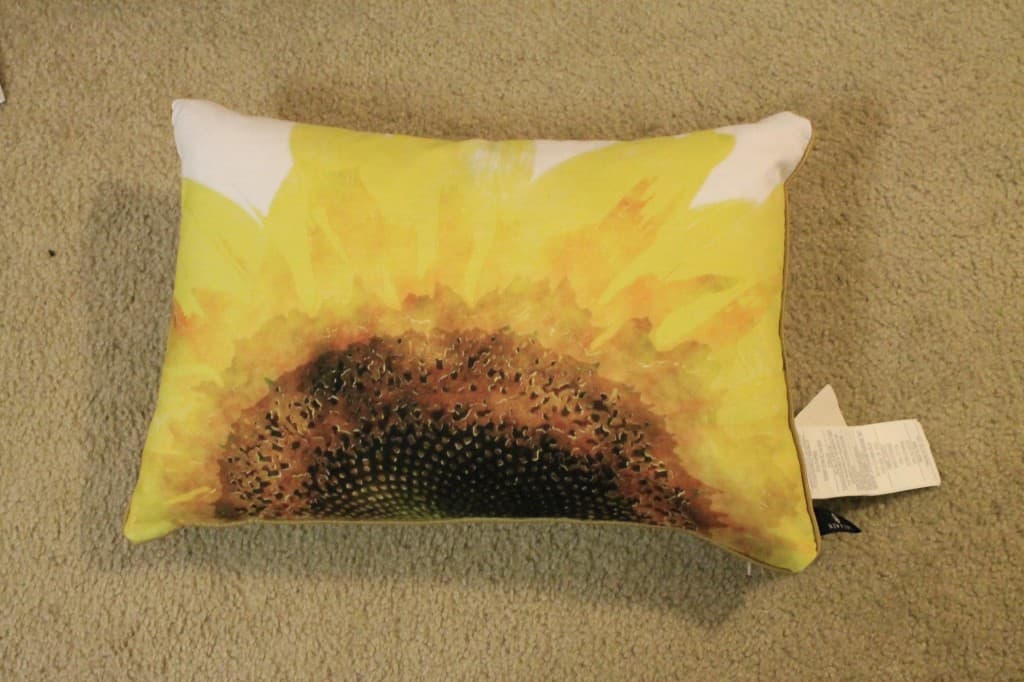
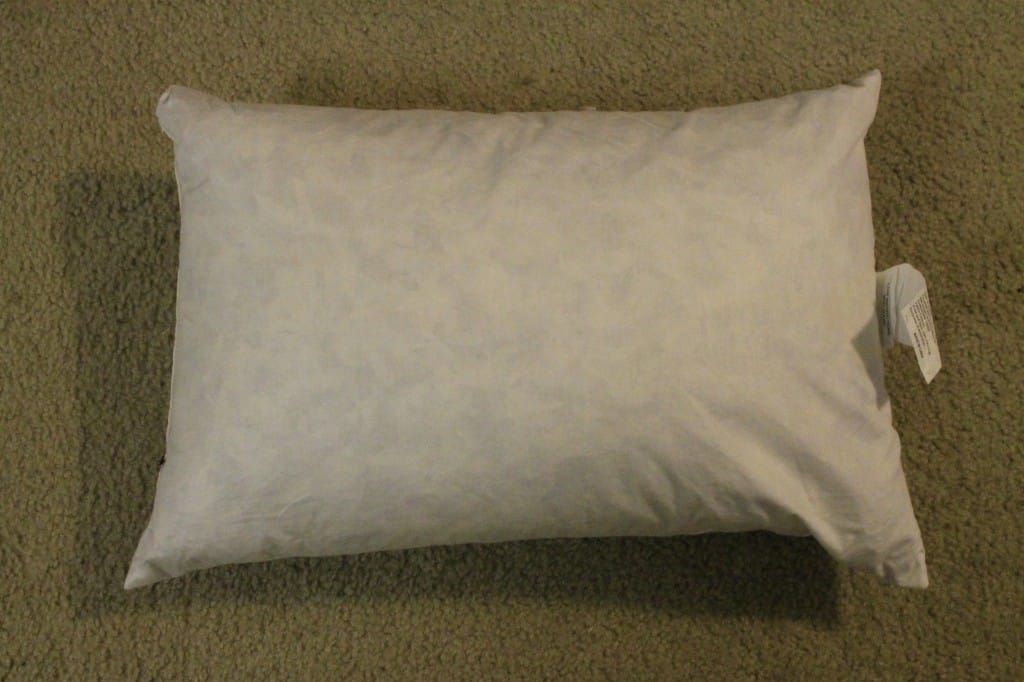
I used one down filled rectangular shaped throw pillow from Homegoods. I actually got 3 (!) of these for $10 each. I shared one with you in the no sew fur covered pillow tutorial.

No Sew Kate Spade Inspired Bow Pillow Cover - Charleston Crafted

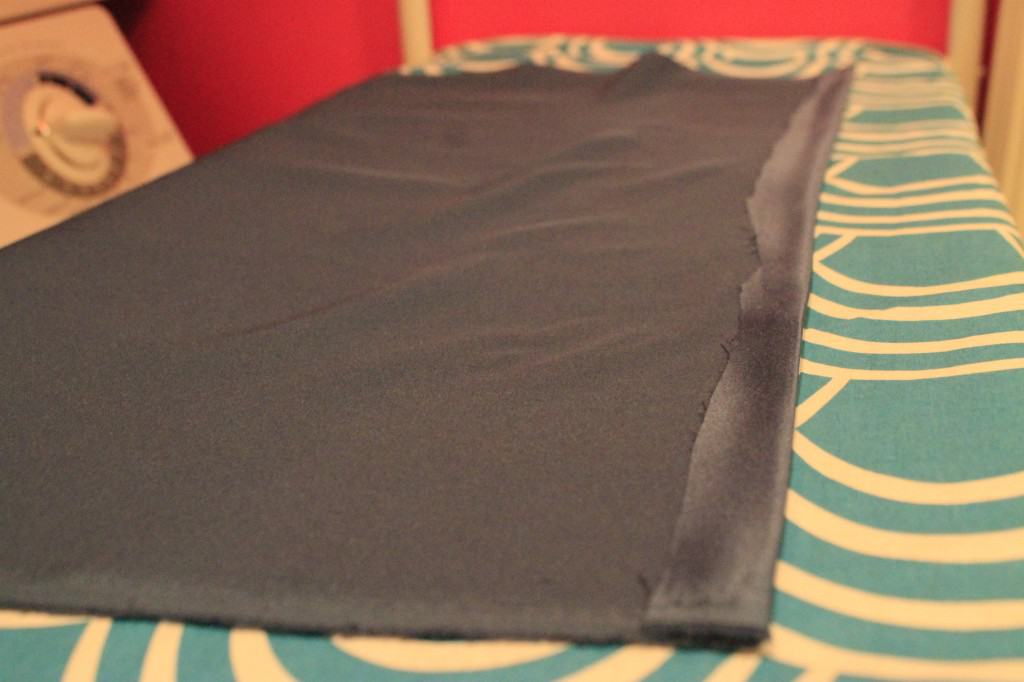
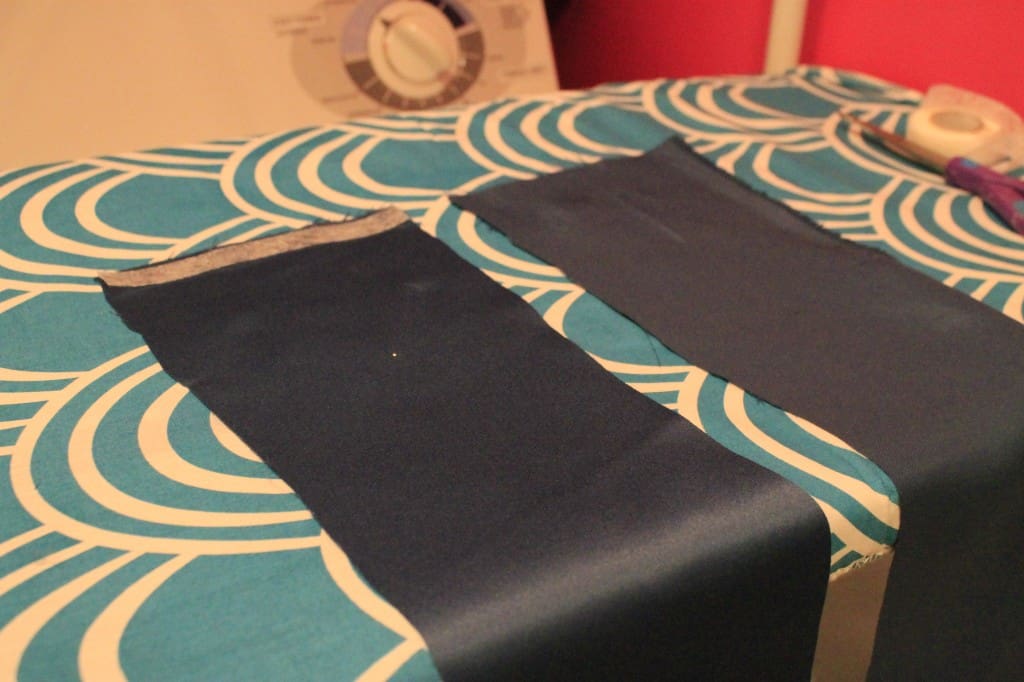
Back to this pillow. I started by cutting 1 rectangles of fabric. I laid the cover of my pillow on top of my fabric and cut the piece to be approximately 2 inches wider than the pillow cover on each side. So, if you measure your case, add 4 inches to each the length and the width.

No Sew Kate Spade Inspired Bow Pillow Cover - Charleston Crafted

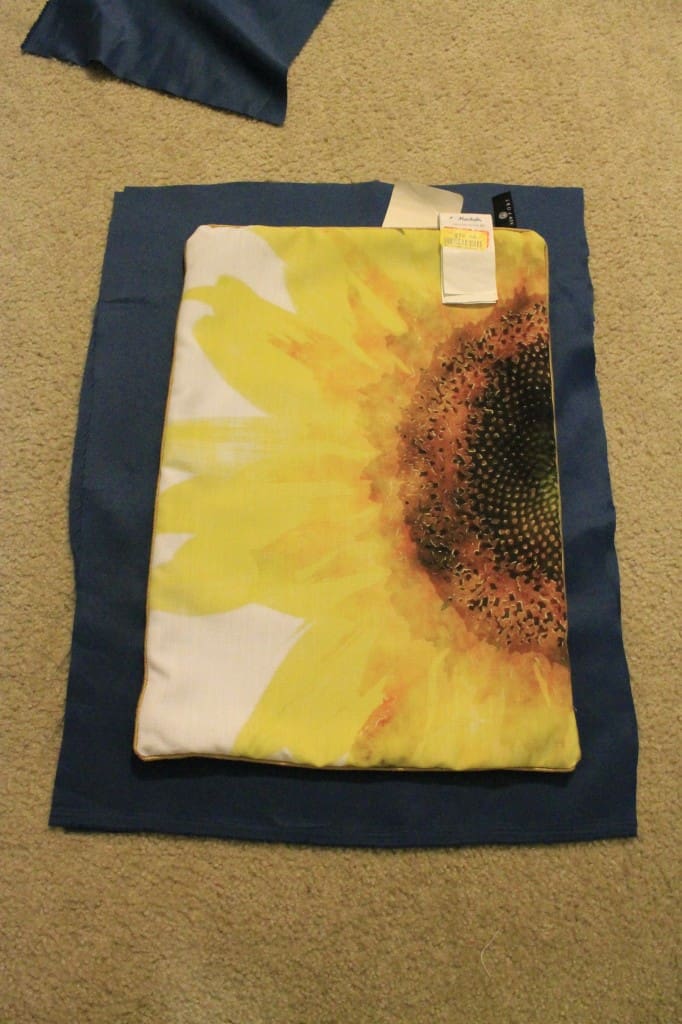
Then, lay that fabric out and cut a second piece exactly the same size.

No Sew Kate Spade Inspired Bow Pillow Cover - Charleston Crafted

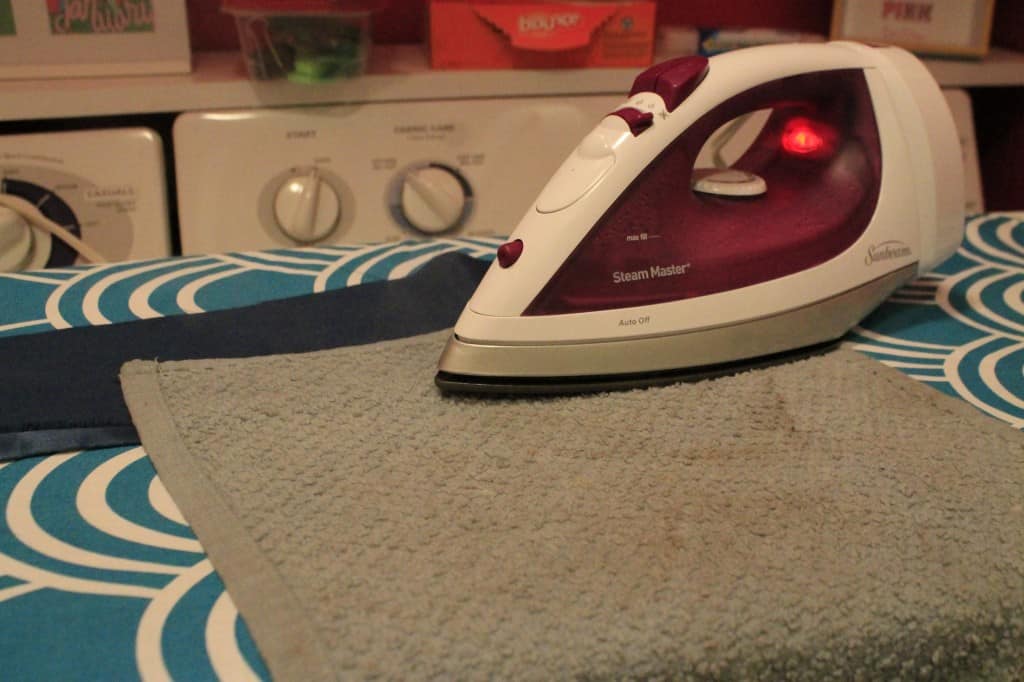
Now, take those 2 pieces of fabric and give them a rough iron. You will have another chance to iron it later in the project, but try to get it at least 90 percent smooth now. Trust me, you'll be sick of ironing soon and less likely to do a good job.

No Sew Kate Spade Inspired Bow Pillow Cover - Charleston Crafted

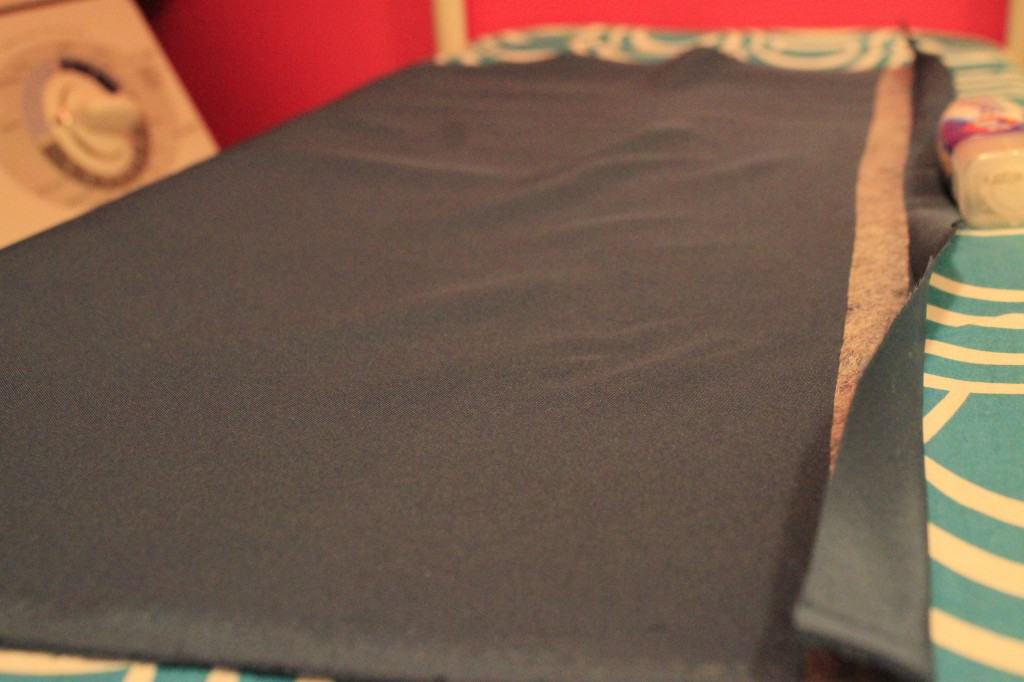
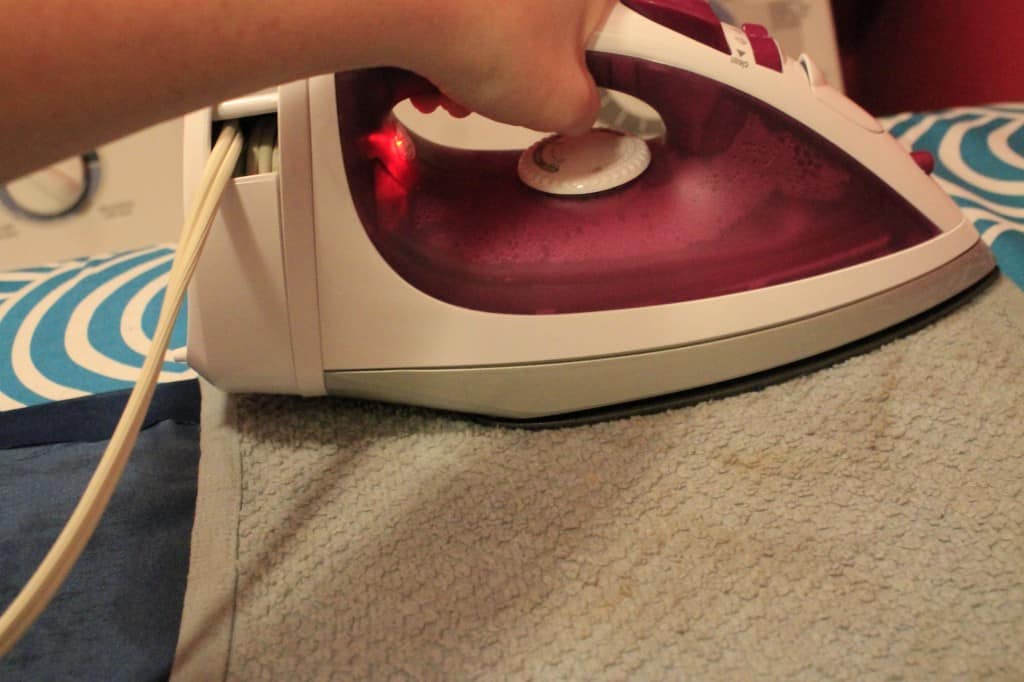
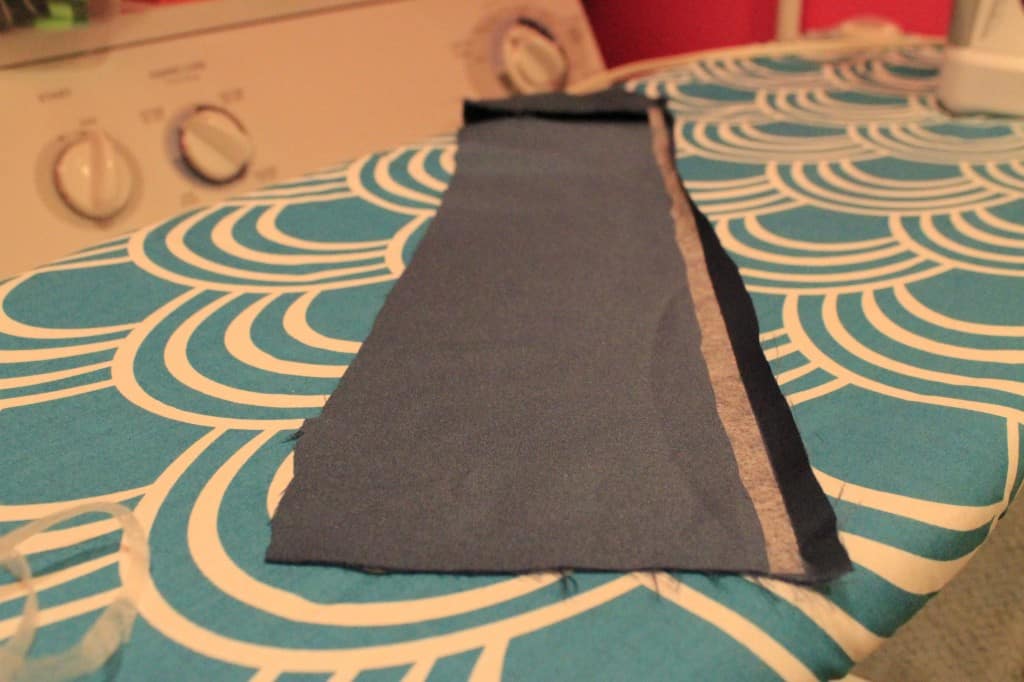
Now is time to hem your fabric. I do this by folding the edge of the fabric over approximately 1 inch and ironing a tight crease. Make sure that your fabric is good side down, if it has a good side.

No Sew Kate Spade Inspired Bow Pillow Cover - Charleston Crafted

Then, place your hem tape inside the fold.

No Sew Kate Spade Inspired Bow Pillow Cover - Charleston Crafted

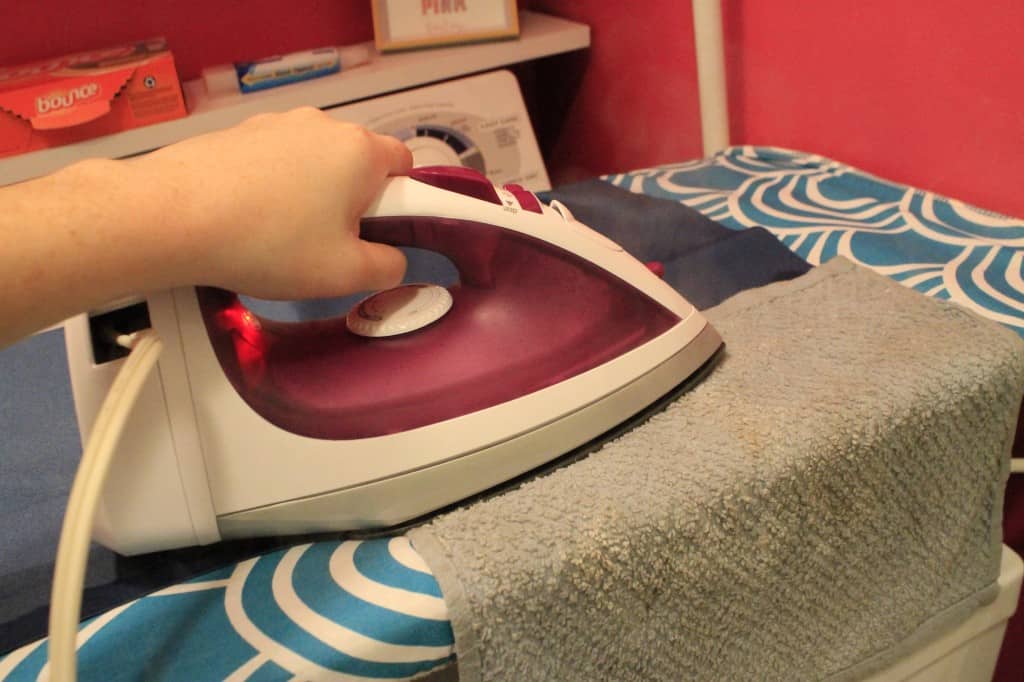
Now - look at the directions on your hem tape. Some require a damp cloth. I prefer the ones that don't but I usually just buy whatever is cheapest.

Follow those directions to iron seal your hem. Mine involved placing down a damp cloth and ironing over that for 10 seconds per section. READ YOUR DIRECTIONS! I can't say it enough because some tapes are 3 seconds and some are as much as 20 seconds - it won't work unless you do what your tape requires.

Now, this might sound dumb but it's come up before - the fabric, the damp cloth, the steam, and especially the melted hem tape will be hot. Do not touch them when they are hot. You will burn yourself, ouchie. Not good. It's better to take a 10 second break to let it cool than scald your hand & never finish your pillow.

No Sew Kate Spade Inspired Bow Pillow Cover - Charleston Crafted

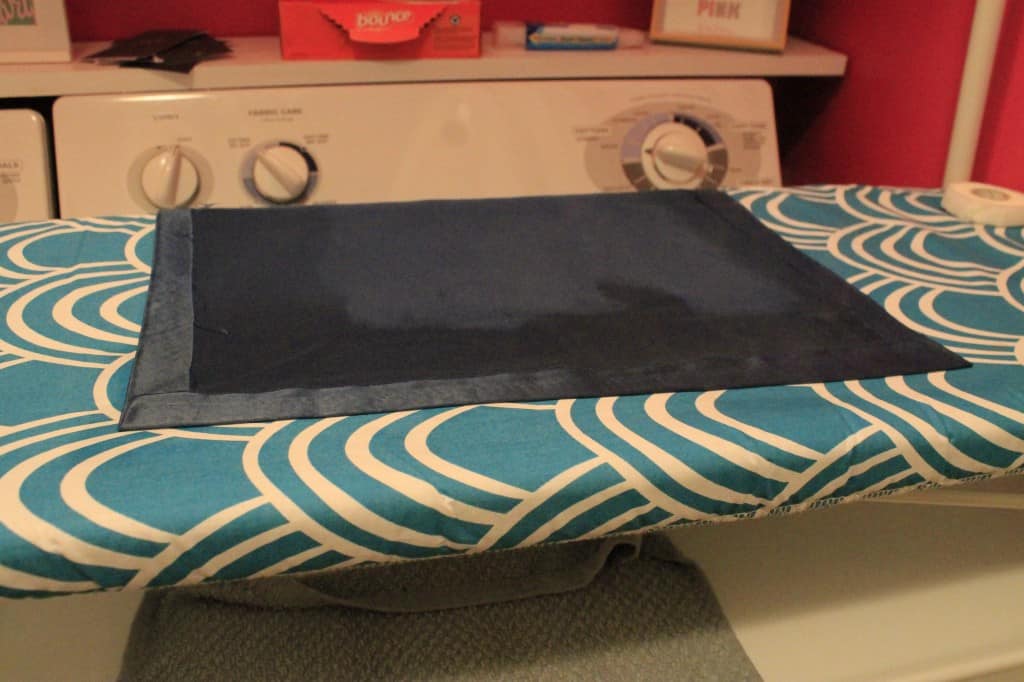
Now, hem all 4 sides of both fabric pieces. When you finish each one, give it a quick iron to clean up any creases you might have made.

No Sew Kate Spade Inspired Bow Pillow Cover - Charleston Crafted

No Sew Kate Spade Inspired Bow Pillow Cover - Charleston Crafted

No Sew Kate Spade Inspired Bow Pillow Cover - Charleston Crafted

No Sew Kate Spade Inspired Bow Pillow Cover - Charleston Crafted

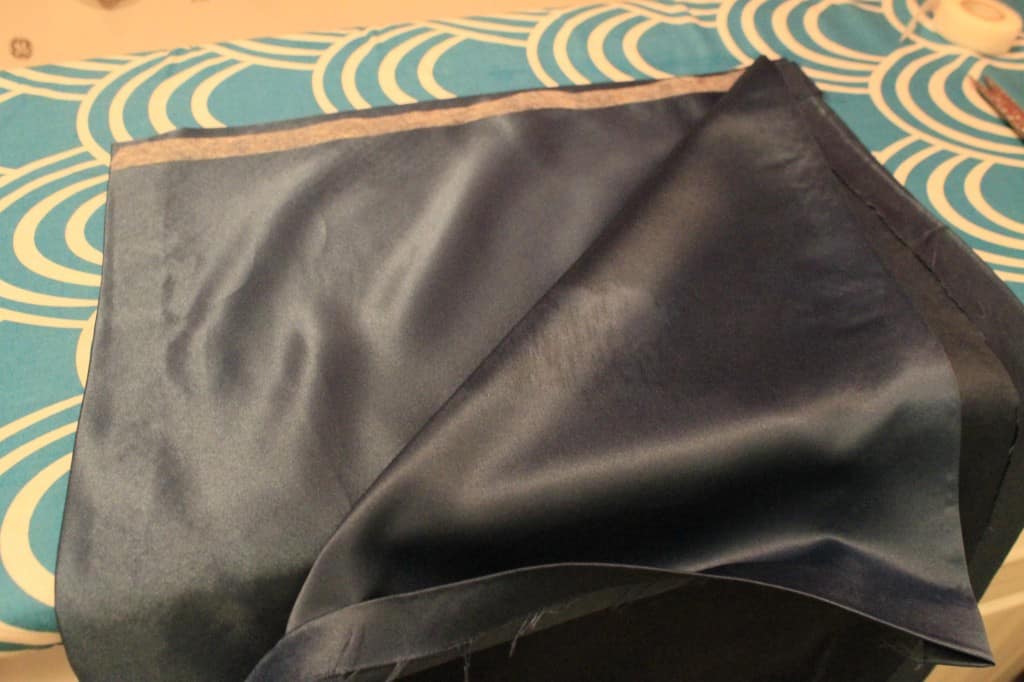
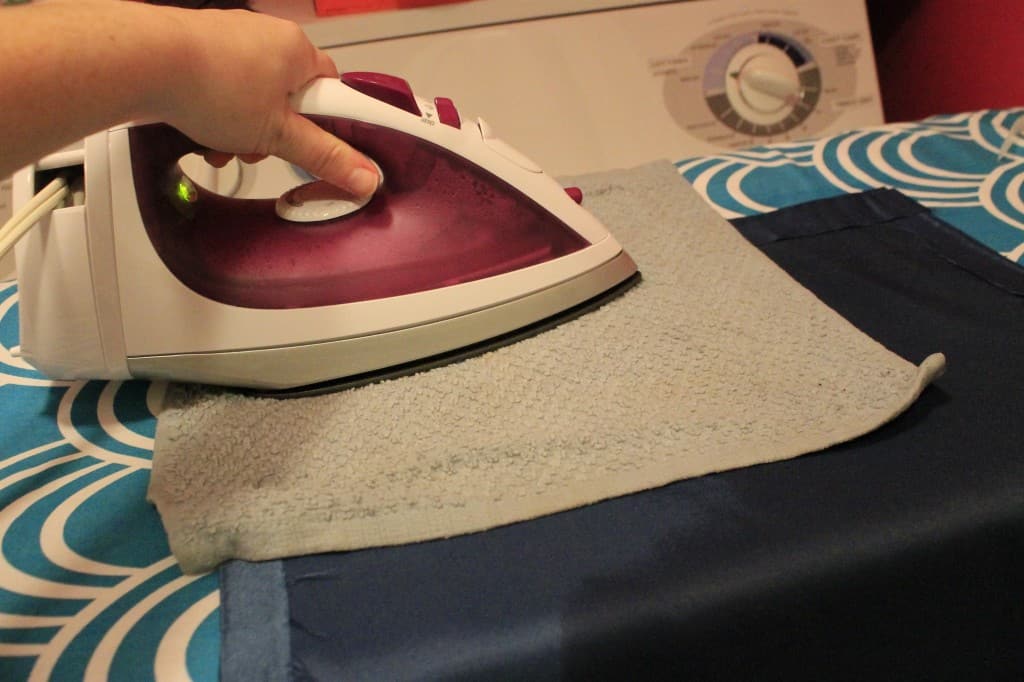
Now, place your 2 pieces together (good sides on the inside of the sandwich if your fabric has good sides) and attach them along 3 of the 4 hems. I like to leave a short edge open.

No Sew Kate Spade Inspired Bow Pillow Cover - Charleston Crafted

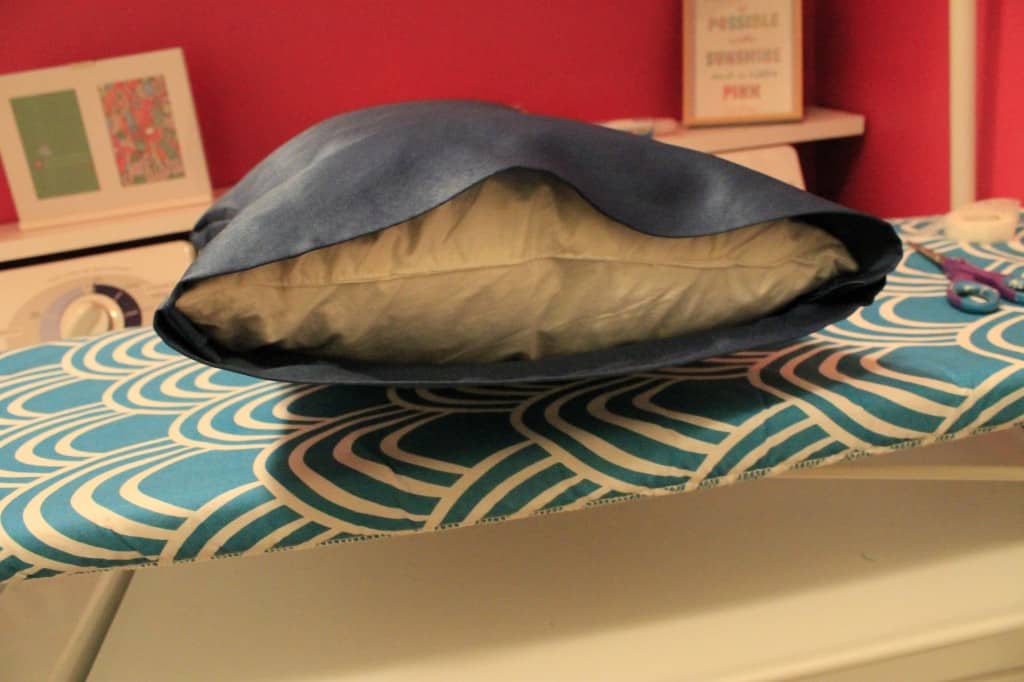
Turn it inside out and stuff in your pillow.

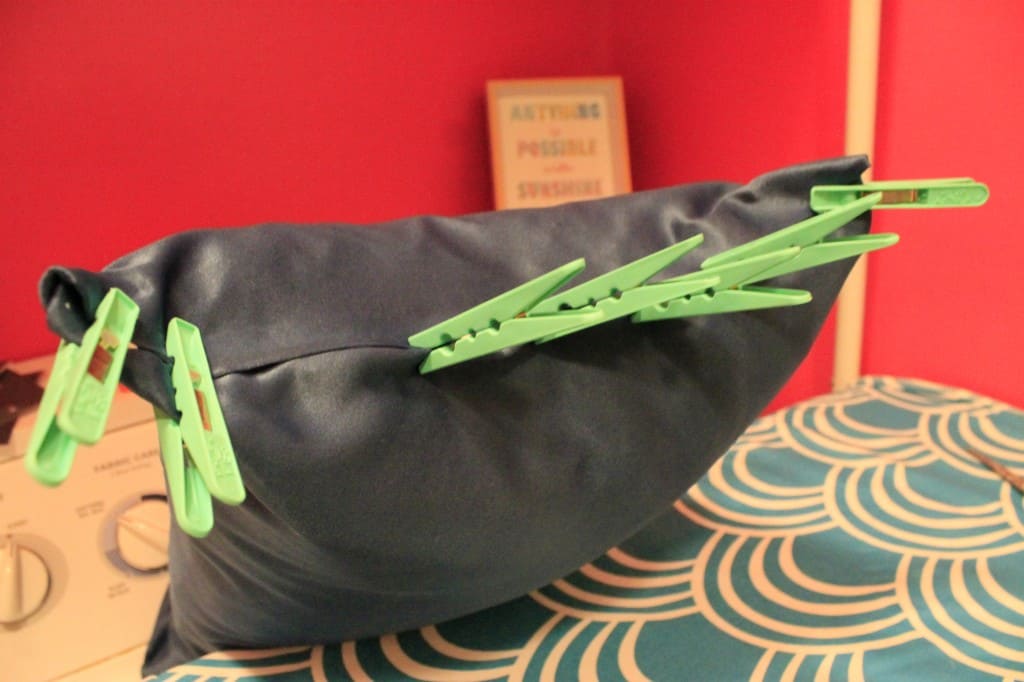
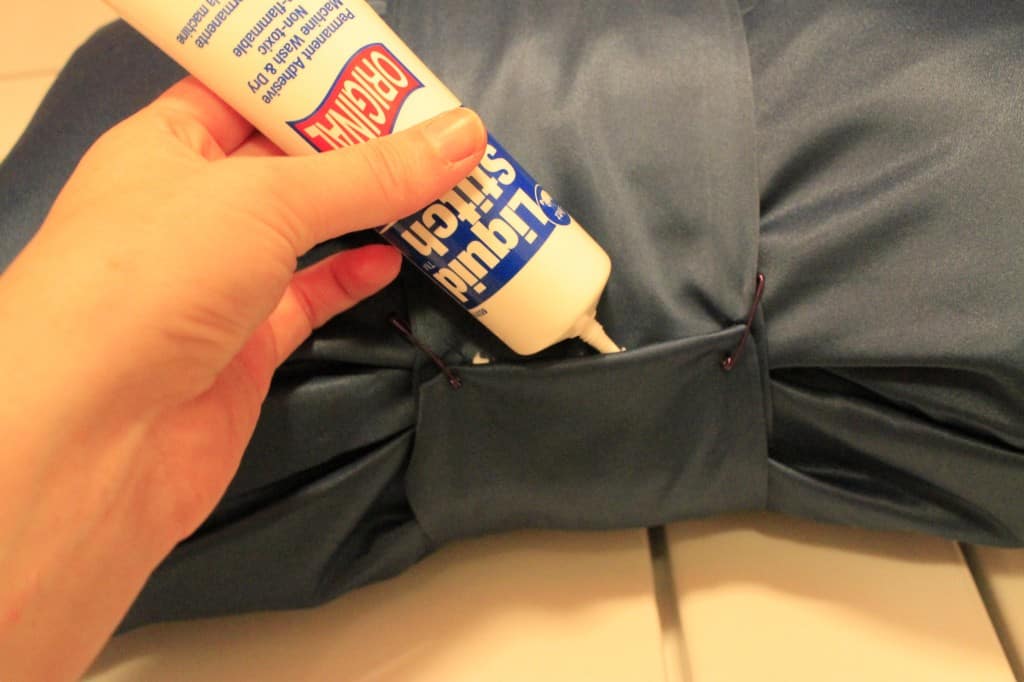
Now you have to hem the final side. The easiest way that I have found to do this is to use stitch witch no sew glue and then pin it in place. Leave it alone for at least one hour to cure. I left mine over night.

No Sew Kate Spade Inspired Bow Pillow Cover - Charleston Crafted

No Sew Kate Spade Inspired Bow Pillow Cover - Charleston Crafted

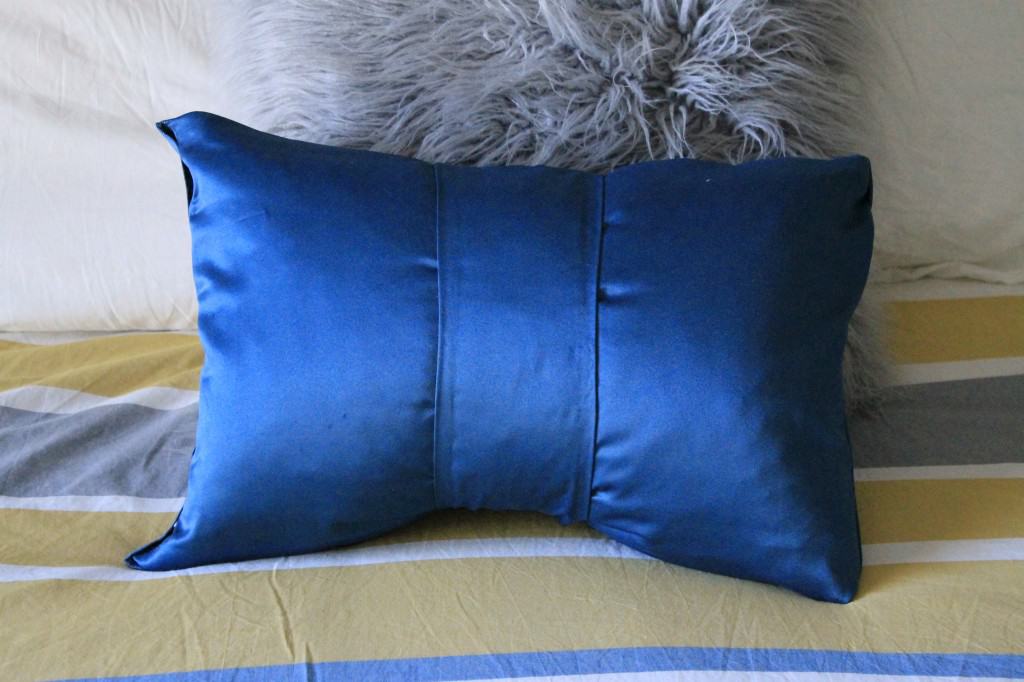
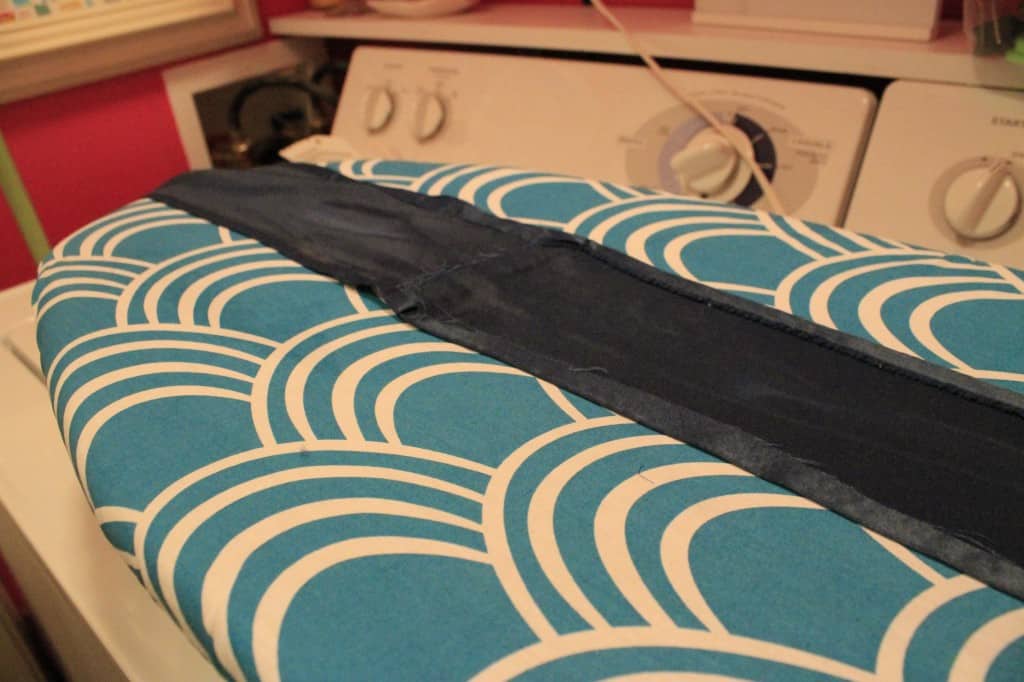
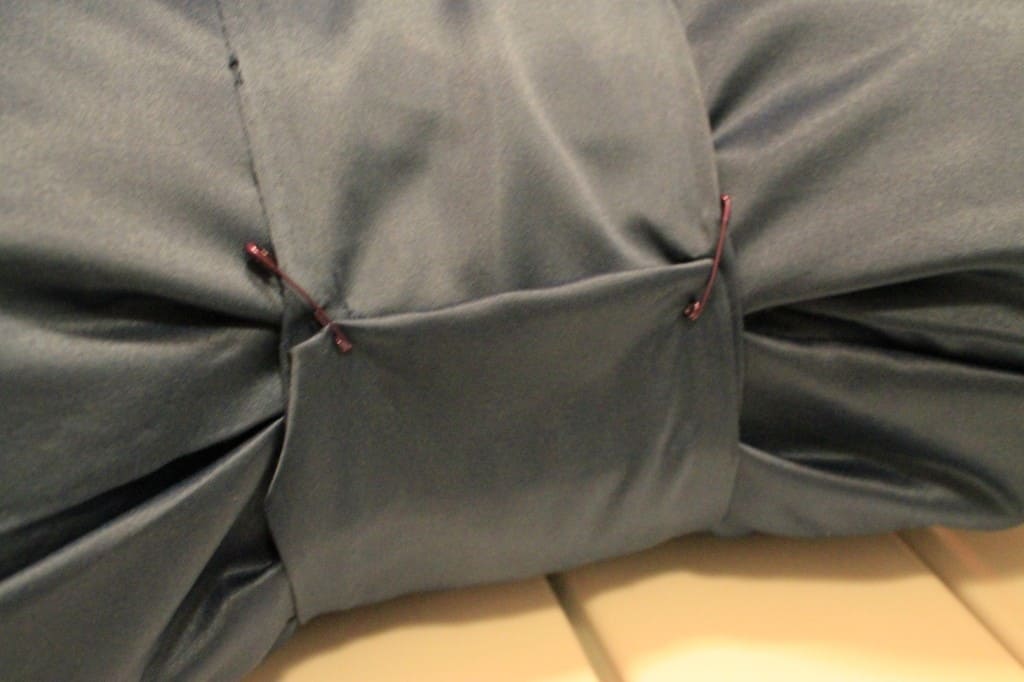
Meanwhile, you can work on the center bow piece. Cut a strip of fabric as wide as you'd like it to be - I made mine about ¼ the width of my pillow. I also used 2 strips and hemmed them together, just because of the shape of the fabric that I had left.

No Sew Kate Spade Inspired Bow Pillow Cover - Charleston Crafted

Them both sides of the fabric strip using your hem tape. I actually cut my hem tape in half hotdog style so that I could have a smaller hem.

No Sew Kate Spade Inspired Bow Pillow Cover - Charleston Crafted

No Sew Kate Spade Inspired Bow Pillow Cover - Charleston Crafted

No Sew Kate Spade Inspired Bow Pillow Cover - Charleston Crafted

Wrap the strip around your pillow. Play with how tight you want it to get the right amount of cinch for your bow. I trimmed my strip and then pinned it how I liked it with safety pins.

No Sew Kate Spade Inspired Bow Pillow Cover - Charleston Crafted

No Sew Kate Spade Inspired Bow Pillow Cover - Charleston Crafted

No Sew Kate Spade Inspired Bow Pillow Cover - Charleston Crafted

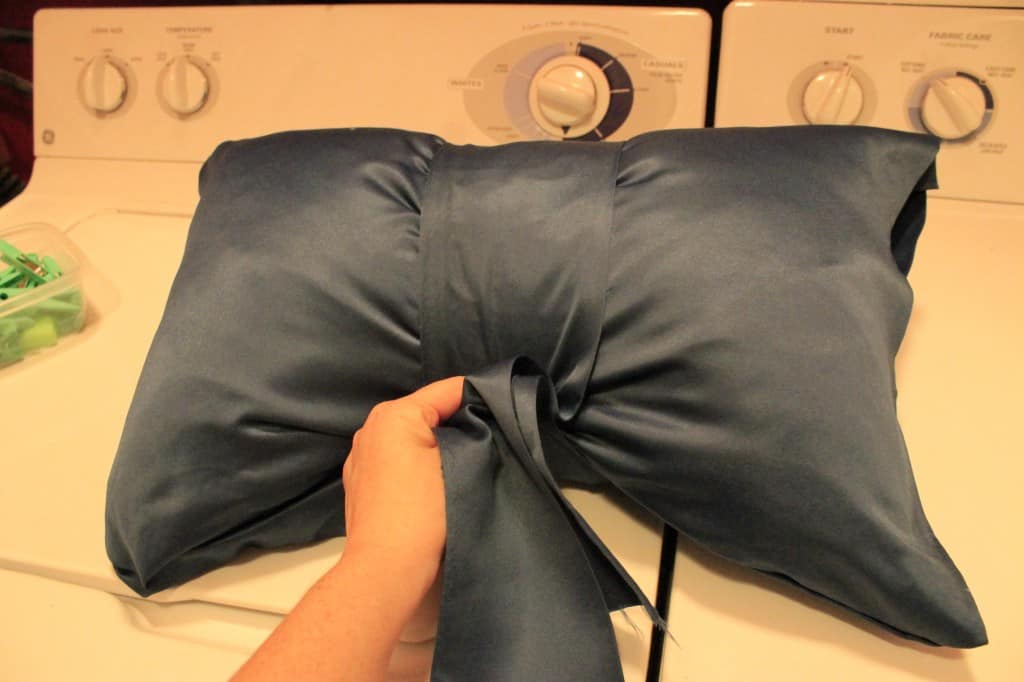
Use no sew glue to hold in place and allow to dry, preferably over night.

No Sew Kate Spade Inspired Bow Pillow Cover - Charleston Crafted

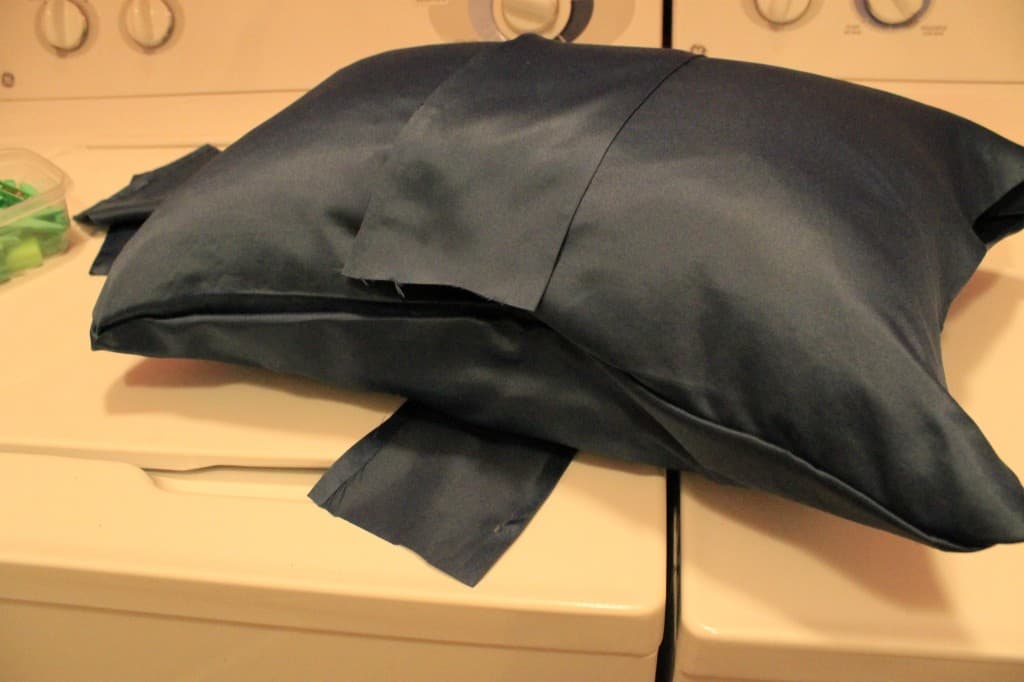
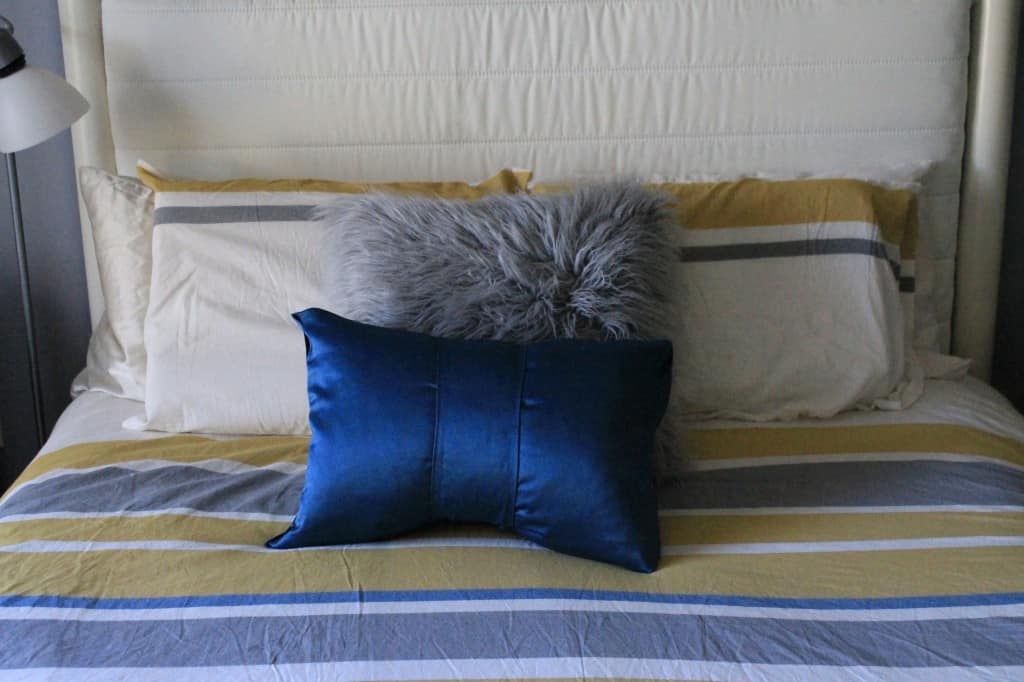
Here it is. Not overly bow-y, just the right amount of fun for this room.
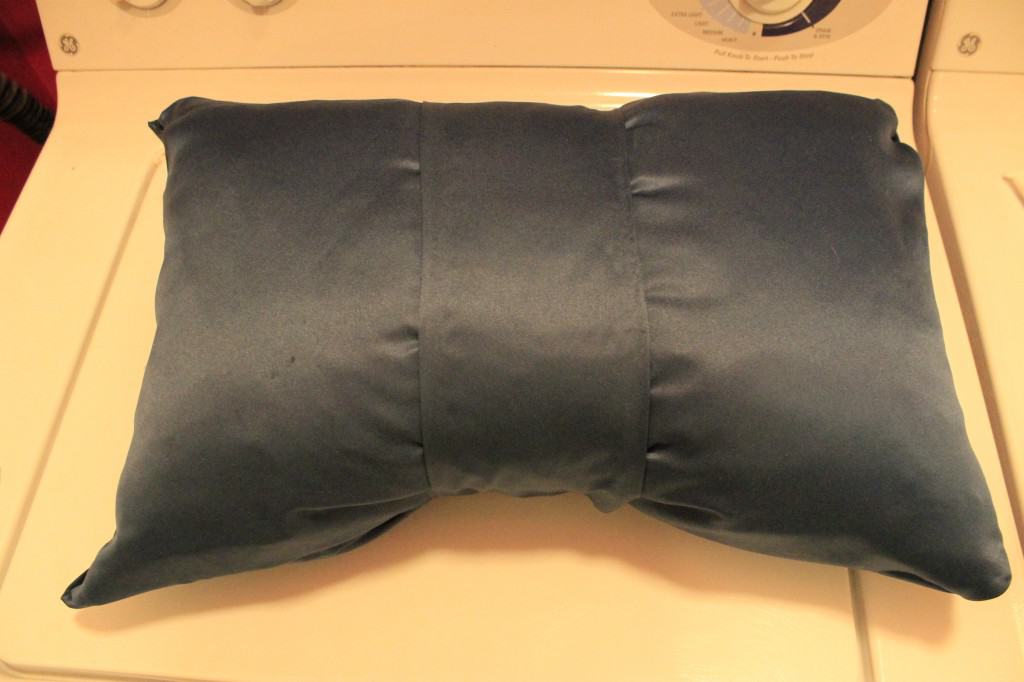
No Sew Bow Pillow

I love it!

No Sew Kate Spade Inspired Bow Pillow Cover - Charleston Crafted

No Sew Kate Spade Inspired Bow Pillow Cover - Charleston Crafted

No Sew Kate Spade Inspired Bow Pillow Cover - Charleston Crafted

Check out my other no sew projects:

No sew envelope style pillow covers

No sew pillows from sweaters

No sew curtains

No sew towel pillows

No sew pillow with piping

No sew fur snood

What have you been {non}sewing lately?

  signature 2
 logo facebook  logo instagram  logo pinterest  logo twitter


Morgan headshot cropped
Morgan

Hello, I'm Morgan, half of the creative force behind CharlestonCrafted.com! With a passion for DIY that dates back to 2012, I've transformed three homes and now I'm dedicated to helping others craft their dream spaces. Let's turn your house into a home together!

More Home Projects

  • DIY floating corner shelves - Charleston Crafted
    How to make floating corner shelves
  • how to assess your home renovation needs
    How to assess your home renovation needs
  • Top Mistakes to Avoid When Renovating Your Home
    Top Mistakes to Avoid When Renovating Your Home
  • How to create a DIY home renovation plan
    How to create a DIY home renovation plan

Primary Sidebar

Charleston Crafted about us image

Hey y'all!

We are Morgan & Sean McBride and we are crafting our home together in Charleston, South Carolina.

More about us

Popular Posts

  • DIY Coffered Ceiling
    DIY Coffered Ceiling
  • How to Make DIY Concrete Pumpkins via Charleston Crafted
    How to Make DIY Concrete Pumpkins
  • How to Make a Cupid's Arrow Valentine's Day Wall Hanging with felt on the Cricut
    How to make a Cupid's Arrow Valentine's Day Wall Hanging
  • Our Tropical Oasis - A backyard Hammock area - Charleston Crafted
    Our Tropical Oasis

Recent Posts

  • fisherman aesthetic home inspiration
    Fisherman Aesthetic Decor for Your Home
  • Senix Tools Review- Charleston Crafted
    Are Senix power tools any good?
  • Your Weekend To-Do List: 15 Things to Do for Summer Home Upkeep
    Your Weekend To-Do List: 15 Things to Do for Summer Home Upkeep
  • How to build a DIY gate pergola- Charleston Crafted
    How to build a DIY gate pergola

Privacy Policy

Footer

↑ back to top

Navigation

  • Home
  • Blog
  • Contact Us
  • Terms of Use
  • Disclaimer

Newsletter

  • Sign up for emails and updates
  • Follow us on Instagram
  • Work with Us

Browse by Category

  • Woodworking
  • Home Projects
  • Paint Colors
  • Room Reveals

© 2025 The Charleston Crafted Blog LLC DBA “Charleston Crafted” and “CharlestonCrafted” (also known as N/A) / All Rights Reserved.
Official Website: (Charleston Crafted)
Registered in USA (Co. Reg. No.: 565586)
Address: Charleston, USA 29414, South Carolina
Contact Phone: Not applicable — contact is via email: sean@charlestoncrafted.com

DISCLAIMER: The content on this website is provided for general informational purposes only and is not intended as professional advice. The Charleston Crafted Blog LLC and The Charleston Crafted Blog LLC make no representations or warranties—express or implied—regarding the accuracy, completeness, or suitability of the information contained herein. Any reliance you place on this information is strictly at your own risk. In no event shall The Charleston Crafted Blog LLC or The Charleston Crafted Blog LLC be liable for any loss or damage, including without limitation, indirect or consequential loss or damage, arising from the use or inability to use this website. This website is the official website of The Charleston Crafted Blog LLC.

AFFILIATE DISCLOSURE: This website contains affiliate links. If you click through and make a purchase, we may earn a commission at no extra cost to you.

As an Amazon Associate, I earn from qualifying purchases.

Site Editor: Morgan Smith McBride

Copyright © 2025 Charleston Crafted