Love no-sew projects? Be sure to check out my tutorial for no sew envelope style pillows here & all of our simple sewing and no-sewing tutorials here!
I really believe that, second to painting the walls, the easiest way to transform a room is to add window treatments. Though I've been living in my condo since mid-October (wow the time has flown!) I still am seriously lacking in curtains.
Until now.
Click here to add this project to your Pinterest board!
I knew that I wanted to keep the gold & grey look going in my bedroom. I wanted something bold in color but subtle in pattern. And I wanted grommets. So, after poking around the interwebs a little bit, I decided to just dive in & make my own.
One evening while Sean was out of town, I bombarded his email with about 30 fabric ideas. Once he put on his wellies & dug thru his flooded inbox, we came out with one design we both loved - this Premier Prints Small Dandelion Twill Storm in yellow/white. I love the sweet little dandelions & Sean dubbed them "subtly and not too girly." Win, win.
So I ordered 6 yards of the fabric. I also ordered 6 yards of white blackout fabric & two packs of white no-sew grommets. The blackout fabric ended up being on back order so I just picked that up at our local Hancock's.
Then I set out to get going on these bad boys. I actually contemplated sewing them, then opened my craft closet, saw all the junk piled on top of my sewing machine, and ran out and bought more Hem Tape (Steam & Seam for curtain #1 (Hancocks) and Ultra Bond (Walmart) for #2).
Check out my other no sew projects:
No sew envelope style pillow covers
Let me take a beat to tell you about these two no-sew tapes. They were both awesome and both had a major pro and a minor con. The Steam & Seam was awesome because you peel off a layer of paper & it was sticky - but still re-positionable.
This made it stay in place really well while you were waiting to iron it. However, you had to iron each spot for 20-30 seconds to fully melt it. The Ultra Bond melted in under 5 seconds, but wasn't sticky, so it slid around a little bit, but no big deal. Both were awesome & I recommend both!
You might of seen my no-sew tutorial here and here, but I'd be glad to reiterate it.
How to Make No Sew Black Out Curtains
First, lay out your main fabric, face down. Iron it flat. I just ironed it flat on the carpet.

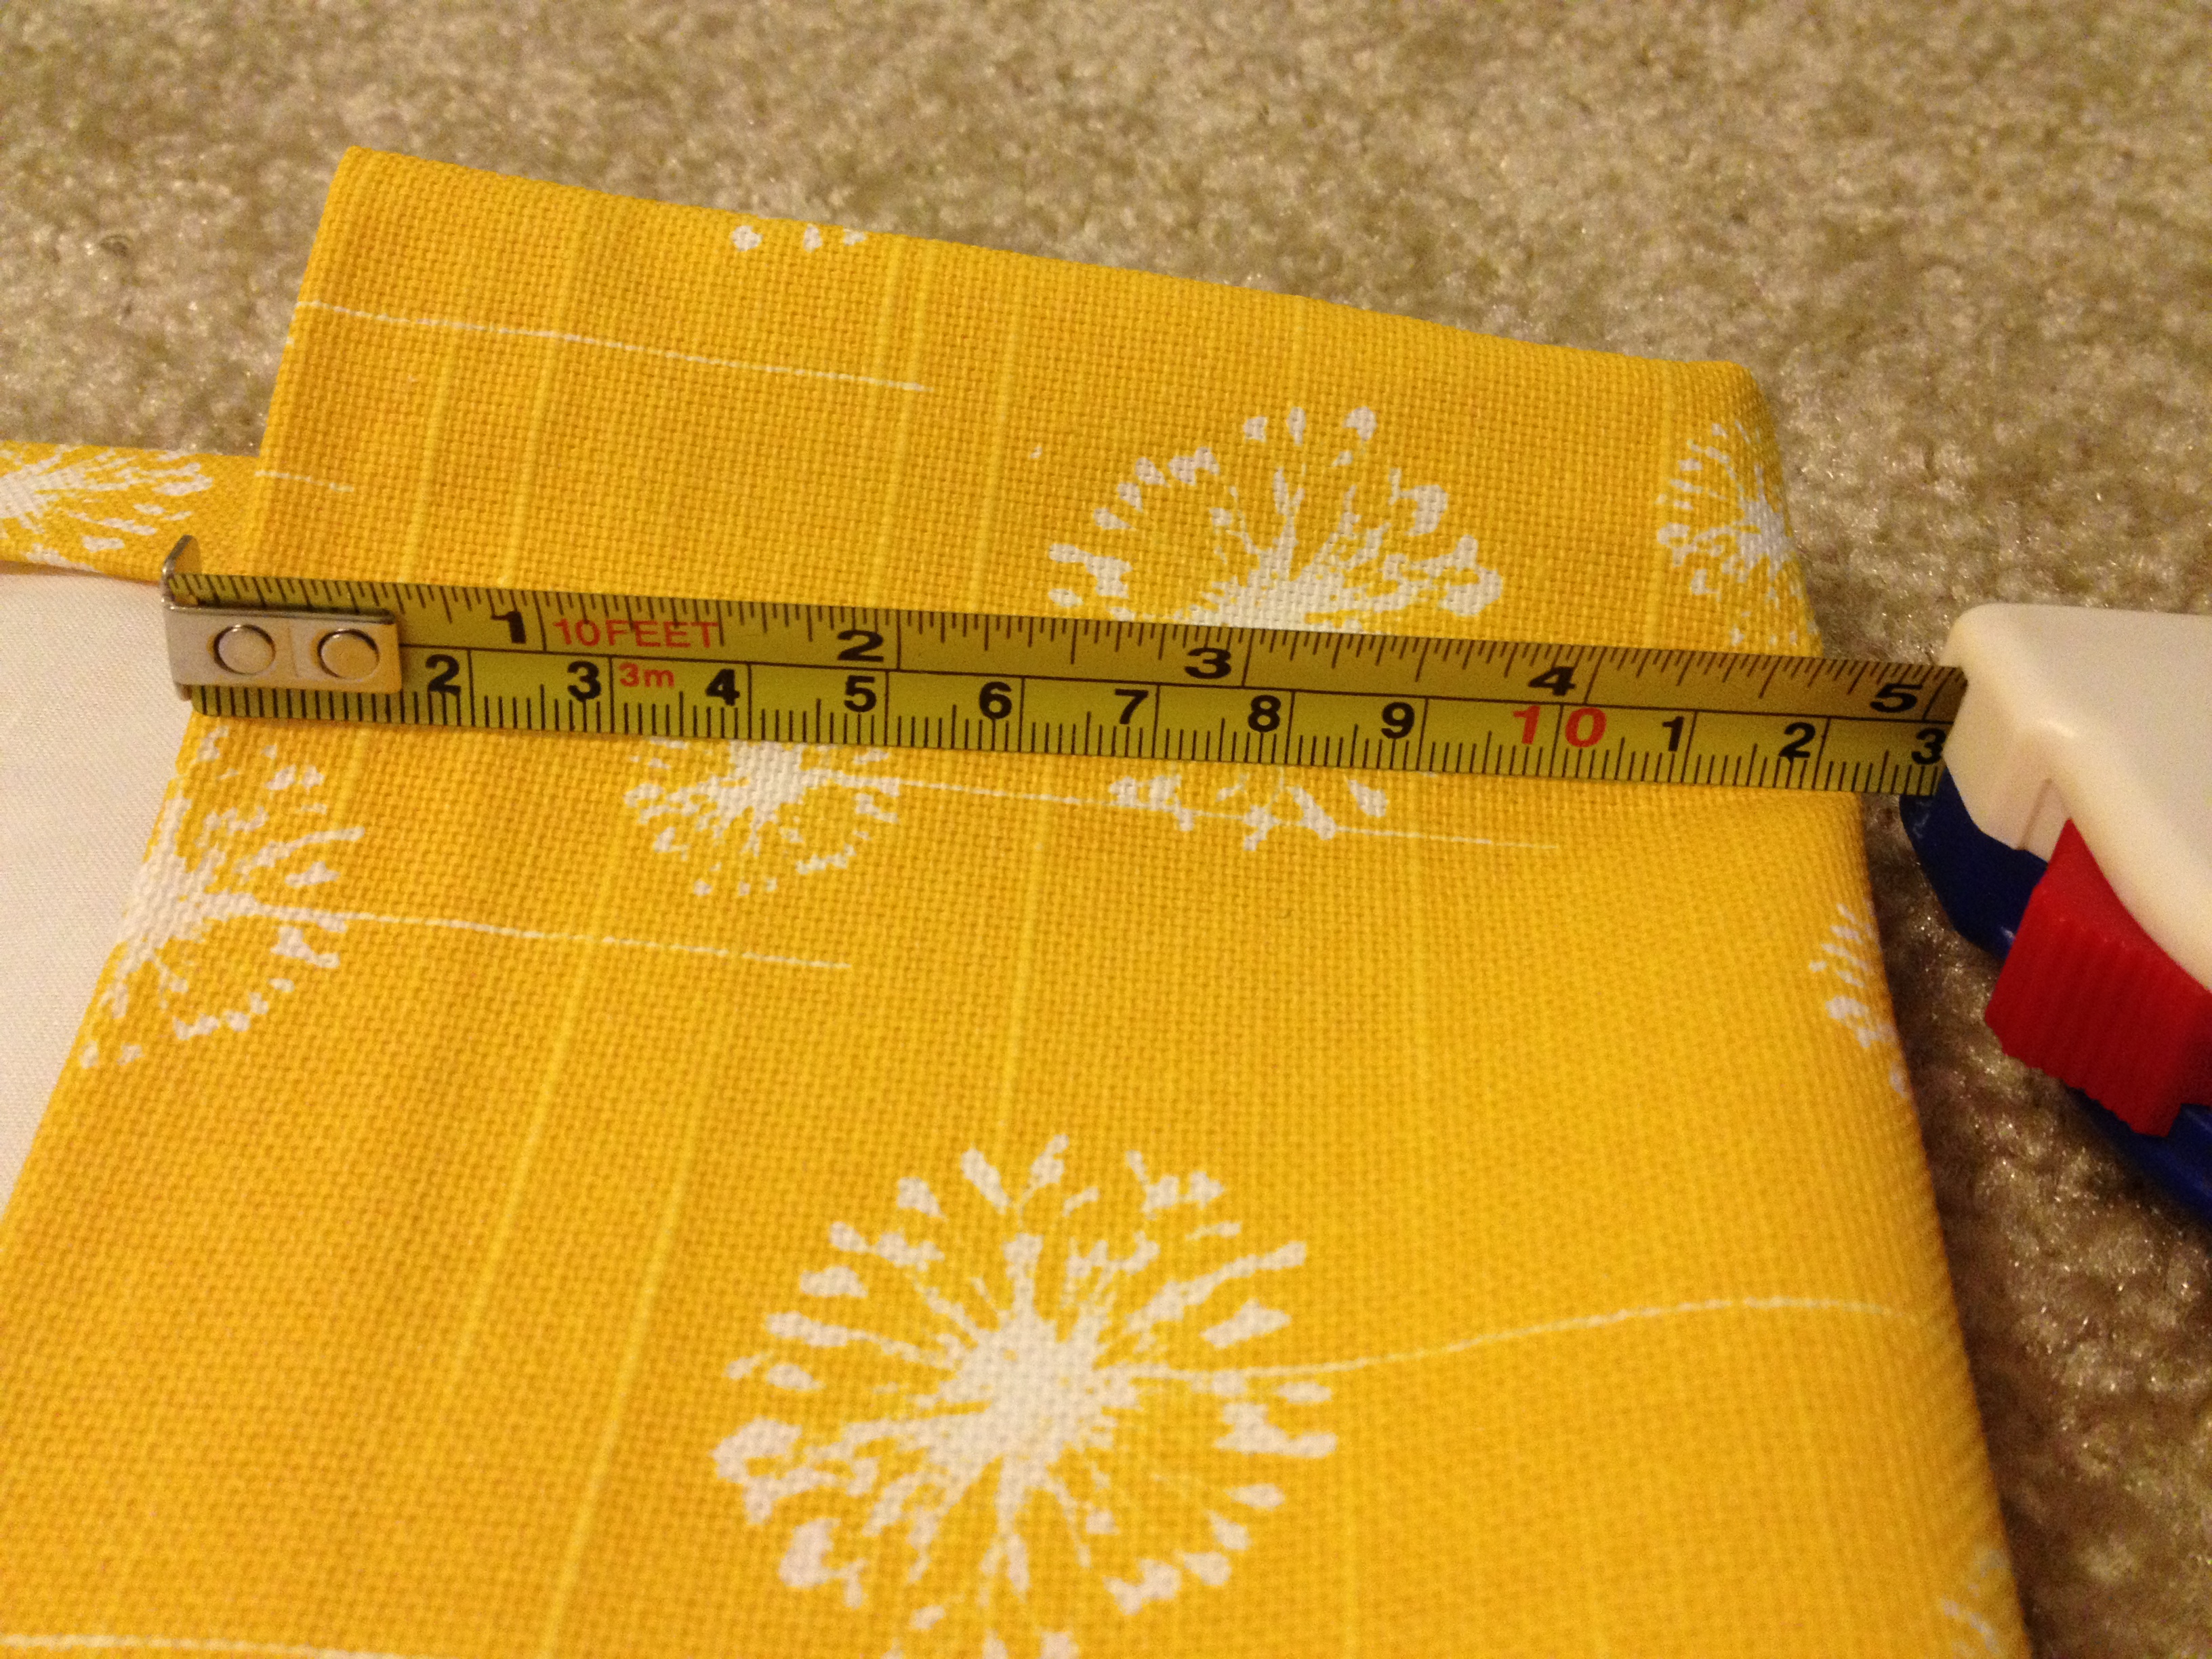
Then, I measured the length I wanted & cut it flat across. I used 8 feet of fabric for each panel. This resulted in curtains about 7'4" long. I hung the grommets 2" from the top so they ended up being able to be hung 2" above my window that was 7' above the ground.... but more on that later.

I measured & marked both sides of the fabric & then used the straight edge to draw a line connecting them.
Now, go around the entire edge of the fabric and hem it 1 inch. I did the long sides first and then went back to hem the top and the bottom. To do this, first fold over the edge & iron it to make a crisp fold.


Then, place a strip of hem tape in the fold. Following the directions on your pack of tape, iron each section until the tape melts. Slowly work your way around the fabric. It takes a little while but is E-A-S-Y.

Once you have a clean edge all of the way around, lay your liner on top, good side out.

Now, starting with the long ends again, fold over the edge & hem. I folded over approximately 1 inch, same as the previous hem, on the 2 sides and the bottom.

If you end up hemming liner-to-liner & not getting any of the outside fabric on your hem, it's ok. That's the beauty of hem tape! Just add more & iron again.
To hem the top, I folded the edge over 5 inches. This allowed space for my grommets and a little wiggle room.

Iron away & remember to hem the sides of the folded part closed, too, if you're going to use grommets. If not, you can leave it open and stick the curtain thru that fabric tube. If you're not using grommets, ta-d-a! You're done!

I, however, had to be fancy. My grommets came with a nifty circle tracer tool. So, I eyeballed where I wanted the holes to be (uniformly 2" from the top- you want it to hang straight) then traced circles to cut out.

I actually used a knife to stab the first holes... very theraputic.

Then I used craft scissors to cut out the hole.

Then I added the grommets. You put the edge with the lip on the good side & the edge with the teeth on the back. Use the palm of your hand to snap them closed.

Some went easy and some were a pain in the butt. You have to make sure that you cut out the entire hole or they won't work. If you have too many layers of fabric, you might want to trim back some of the innter layers. Once I did that, it was very easy.

The whole thing took about 2 hours a curtain. I did it on the living room floor while watching TV. It was easy, the ironing just takes a while.
![IMG_3816[1]](https://charlestoncrafted.files.wordpress.com/2013/02/img_38161.jpg)
I have to wait until Sean gets home to hang them. It is so hard to wait!
Click here to add this project to your Pinterest board!
Have you been up to any projects lately?
Update: Click here to see the curtains in action in our master bedroom!

Hello, I'm Morgan, half of the creative force behind CharlestonCrafted.com! With a passion for DIY that dates back to 2012, I've transformed three homes and now I'm dedicated to helping others craft their dream spaces. Let's turn your house into a home together!


Allyson says
Did you hang these up yet?!?! I can't wait to see them! I looked at that fabric for pillows, too, i love it! I would love if you would come over and share this or another project at my link party going on right now! http://domesticsuperhero.com/2013/03/14/sharing-with-domestic-superhero-thursday-link-party-2/ Hope to see you!
Morgan says
No! Sean gets back Saturday and they are one of the first things on his to do list- I just need a second person so we can hang them at the right length! I will share as soon as they are up!
Jennifer says
Wow! These turned out so great. Gives me a little confidence to try my hand at making my own : ]
Morgan says
Thanks! Can't wait to share them hung (as soon as I can hang them...) Please share if you make some similarly!
Nikki says
How far apart is each grommet? You have inspired me!!
Morgan says
They're about 4" apart. You just need to look at how much fabric you want in the fold. I'm glad! Please share when you do it!
Heather says
Neat! I've been putting off sewing bedroom curtains for a while now, and really need to now that the sun is up at full blast before I am...maybe some no-sew ones are the solution to my procrastination! Thanks for the tutorial!
CharlestonCrafted says
Yay! Please share if you do!
inga says
i love love the curtains and looks easy.but i am SO SCARED to even try.i think i am the least knows crafty person on this planet.
Morgan says
No, don't be scared! If you can iron, you can do this! I did the whole thing with a travel sized iron, you could 100% do it!
Carrie says
Maybe I'm a little dense, but I'm not understanding exactly how you affixed the white/blackout liner to the curtains... Where does the tape go for that part?
Anyway, you've inspired me-- I found this on Pinterest and I'm making curtains for my first baby's nursery. Fabric is ordered!
Morgan says
Not dense Carrie, I'm still new to tutorial-writing and might not be as clear as I could have been 🙂
First I "hemmed" the yellow fabric by folding over 1 inch and ironing with hem tape.
Then, I laid out the black out white sheet and hem-taped that to the edge of the yellow fabric.
Finally, I folded the whole thing over (yellow & white connected) and hem-taped it again to get a clean fold.
Does that make more sense? I should have taken a video but it would have been a long one, haha!
Alyssa says
Do you think its necessary for the blackout fabric? I'm making this more for decoration than function since the windows do have heavy blinds on them already
Morgan says
It totally depends on your fabric- hold it up to the window during the daylight & see how much light comes thru and how you feel about that. If you have heavy blinds and the window doesn't get direct light at an awkward time (ie 6am) then you should be totally fine. However, I would definitely line it so you don't have the "bad" side of the fabric showing. You could line it with fabric you already have. I've done a drape lined with a flat bedsheet- you can buy them by themselves at places like Walmart or Target.
Hope that helps!
Alyssa says
Thats great thanks!
colleen says
Did you only put the hem tape on the outer edge of the curtain when you attached he blackout liner, none in the middle? has the tape held up holding the blackout liner since you've put them up? They look great, I hope they last too!
Morgan says
Colleen- I only did it along the edge. They have held up just fine, but I very rarely handle them. I know that no-sew tape doesn't hold up great for things that are frequently handled. I'm just so afraid of my sewing machine 🙂 But yes, 0 problem at all with holding up so far, and it's been about 6 months!
Darby says
So you did 3 separate "hems?" One just the yellow, one black out liner to the yellow, and one more for a clean fold? Is that right?
Morgan says
Yes, I hemmed each fabric and then joined them with a 3rd hem.
Trisha D. says
I'm a huge fan of grommets, they bring the whole piece together to really make it look finished. Added bonus that they prevent the dreaded fray.
That print is so lovely! I wish we could pull off bright yellow in our home!
Jenn (Student Mom) says
Yikes... How is your carpet after the big stabbing?
CharlestonCrafted says
Haha-- no blood was shed in the making of these curtains 🙂