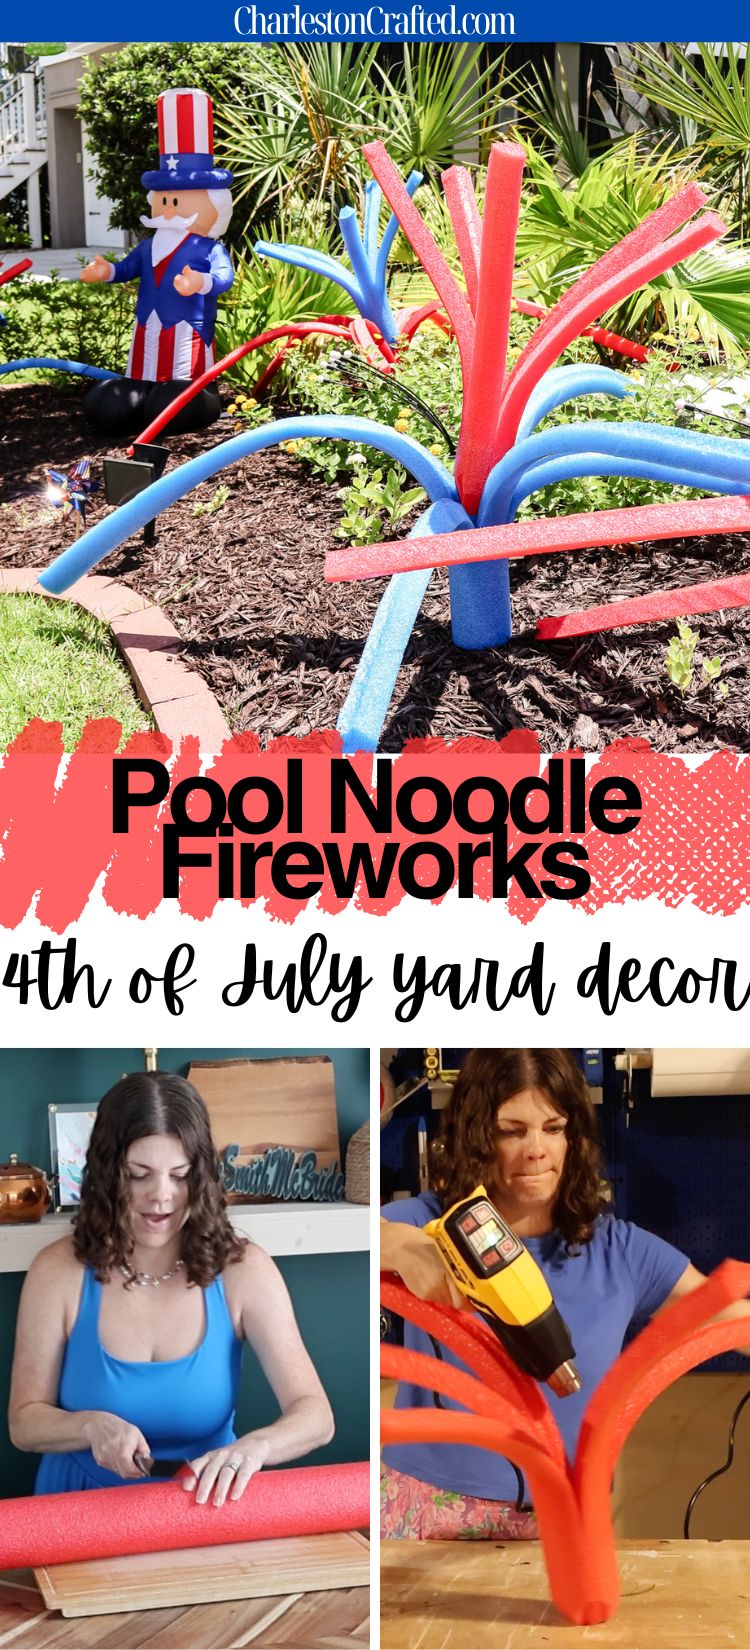
Want to make your yard extra festive and patriotic? Here's how to make Pool Noodle Fireworks for yard decor for the 4th of July!
It's official - I am officially the kind of person who decorates their yard for the 4th of July.
I know, I know. It's extra. It's over the top.
But, it brings joy to my kids and honestly? That's all I can ask for right now.

Y'all have been loving the pool noodle crafts, so I have been trying to create one for every holiday!
I saw a bin of noodles at walmart, and the way they bent out looked almost like a firework.
After a bit of experimentation, Sean and I figured out the best, easiest way to make them into a firework display for our yard!
How to make Pool Noodle Fireworks for yard decor
Here's how easy it was to make these oversized fireworks!
Supplies needed:
- Red + Blue Pool Noodles
- Knife (I prefer a serrated bread knife) + cutting board
- Heat gun (or hot hair dryer)
- Rebar (if putting in dirt outdoors)
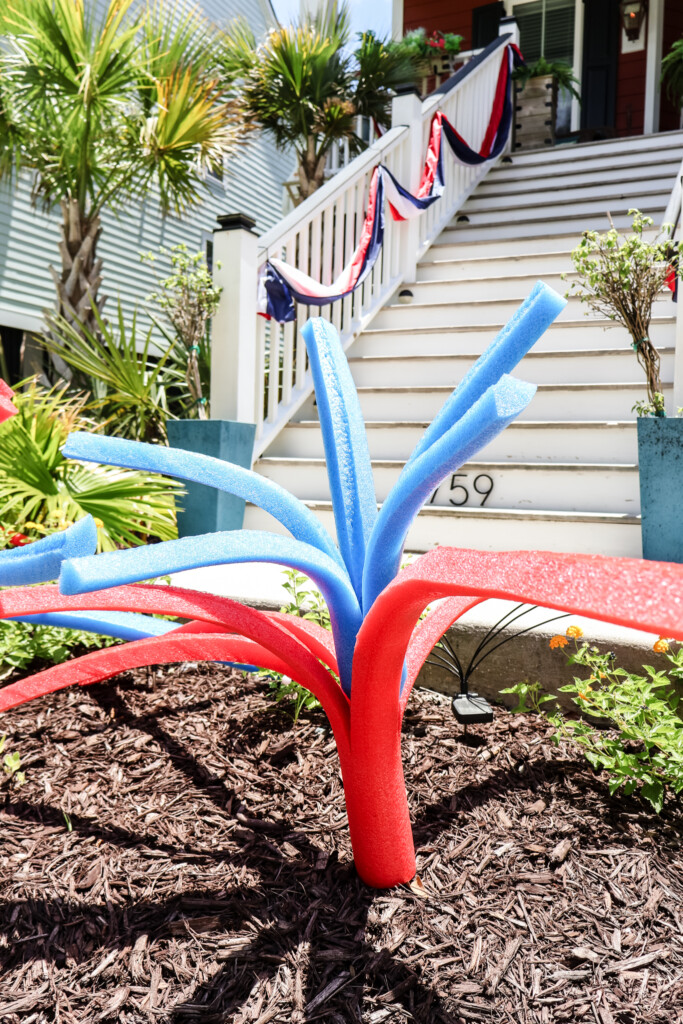
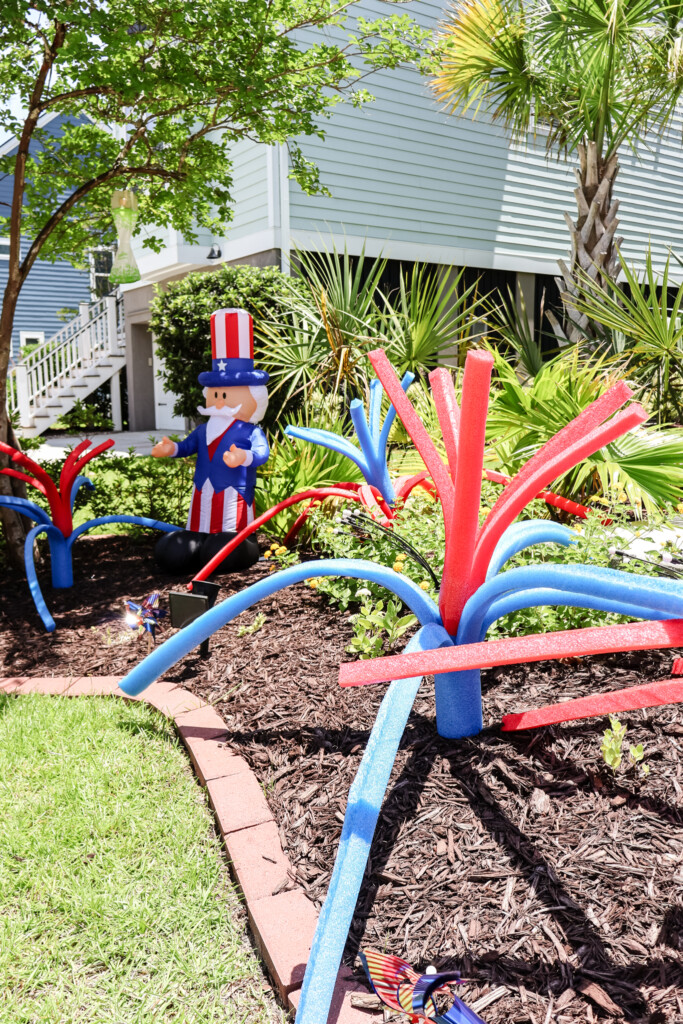
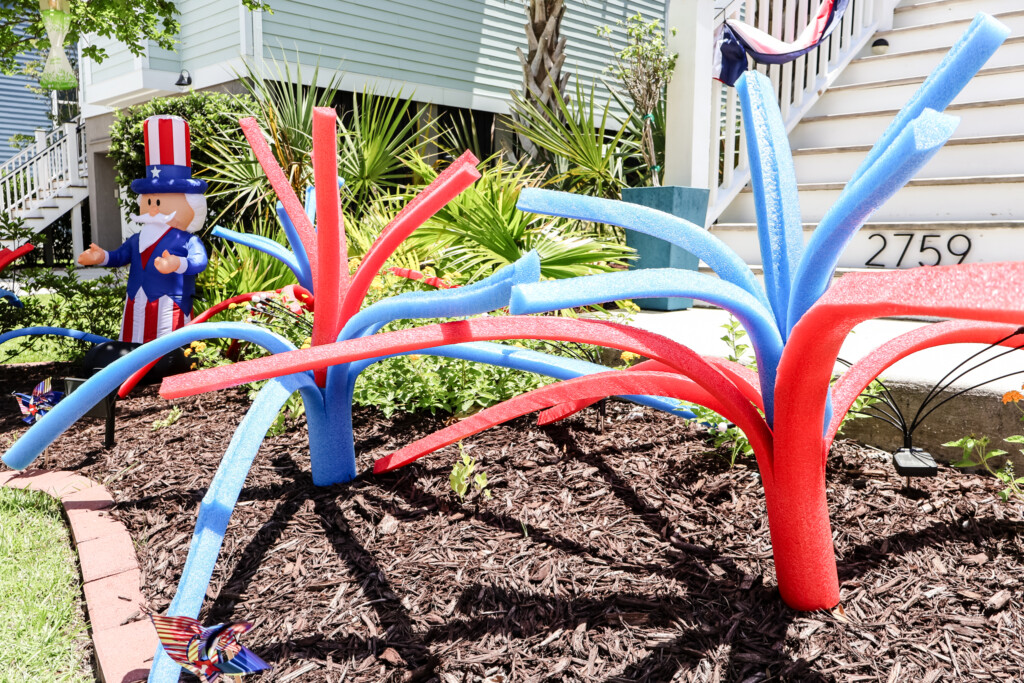
Note: I used 3 red and 3 blue noodles to create 4 2-tiered, 2-color fireworks.
Steps to make:
Here's how easy they are to make!
STEP 1: Design your display
Start by deciding how you want your fireworks display to look. How many do you want? How tall?
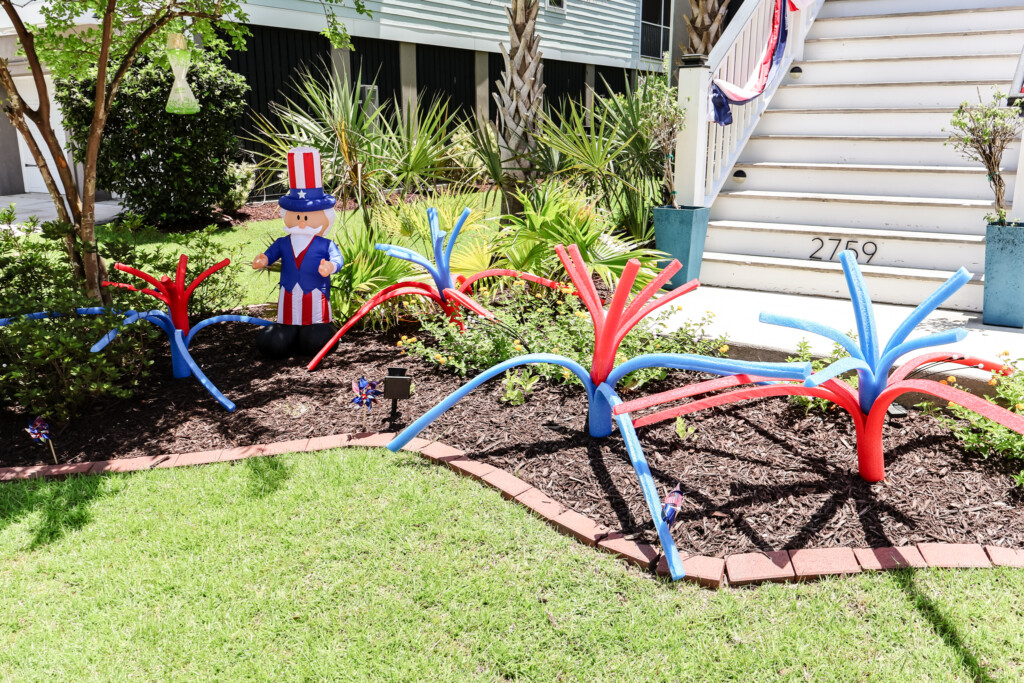
We decided to make our fireworks 2 tiers tall, and 4 fireworks total.
If you have a larger yard, you can do more. You could also make them smaller or taller. It's totally customizable!
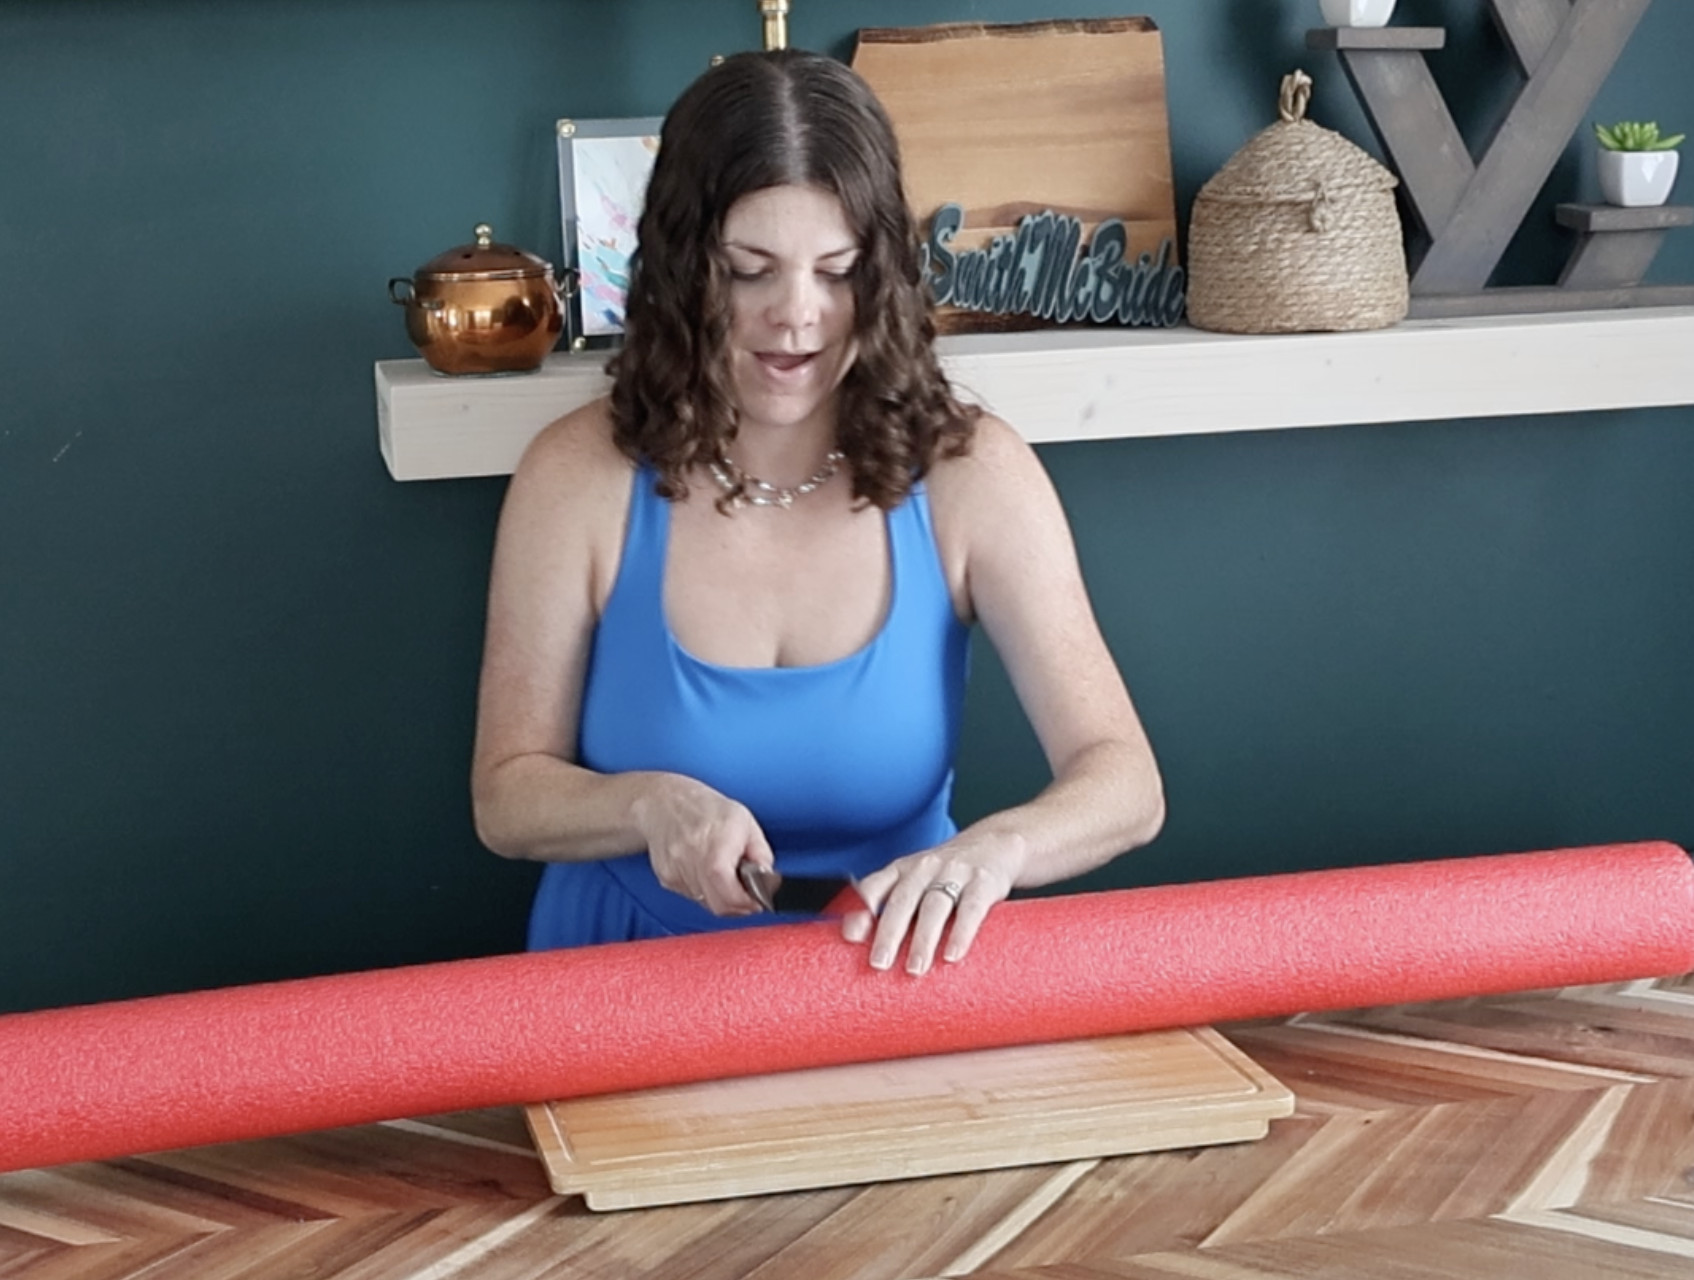
STEP 2: Prep your noodles
Our fireworks are 2 tiers: the bottom tier is a full noodle and the top tier is a half noodle.
This gives it a tiered look, with smaller on top.
You could do 2 the same, do them all ½ length, or add ⅓ or ¼ for smaller fireworks.
It's up to you!
To prep, go ahead and cut your half or third noodles, using a tape measure to measure and a bread knife + cutting board to cleanly cut in half.
STEP 3: Cut the noodles
Now, you are going to cut your noodles vertically, along the length.
Be careful, do not cut yourself!
I cut each noodle into 5 sections. Start with your knife and make 5 1" slits in the end to determine the spacing of your sections.
Then, carefully lay the noodle flat on your cutting surface and cut straight lines down the noodle. Leave 6-9 inches at the end un-cut to hold it together.
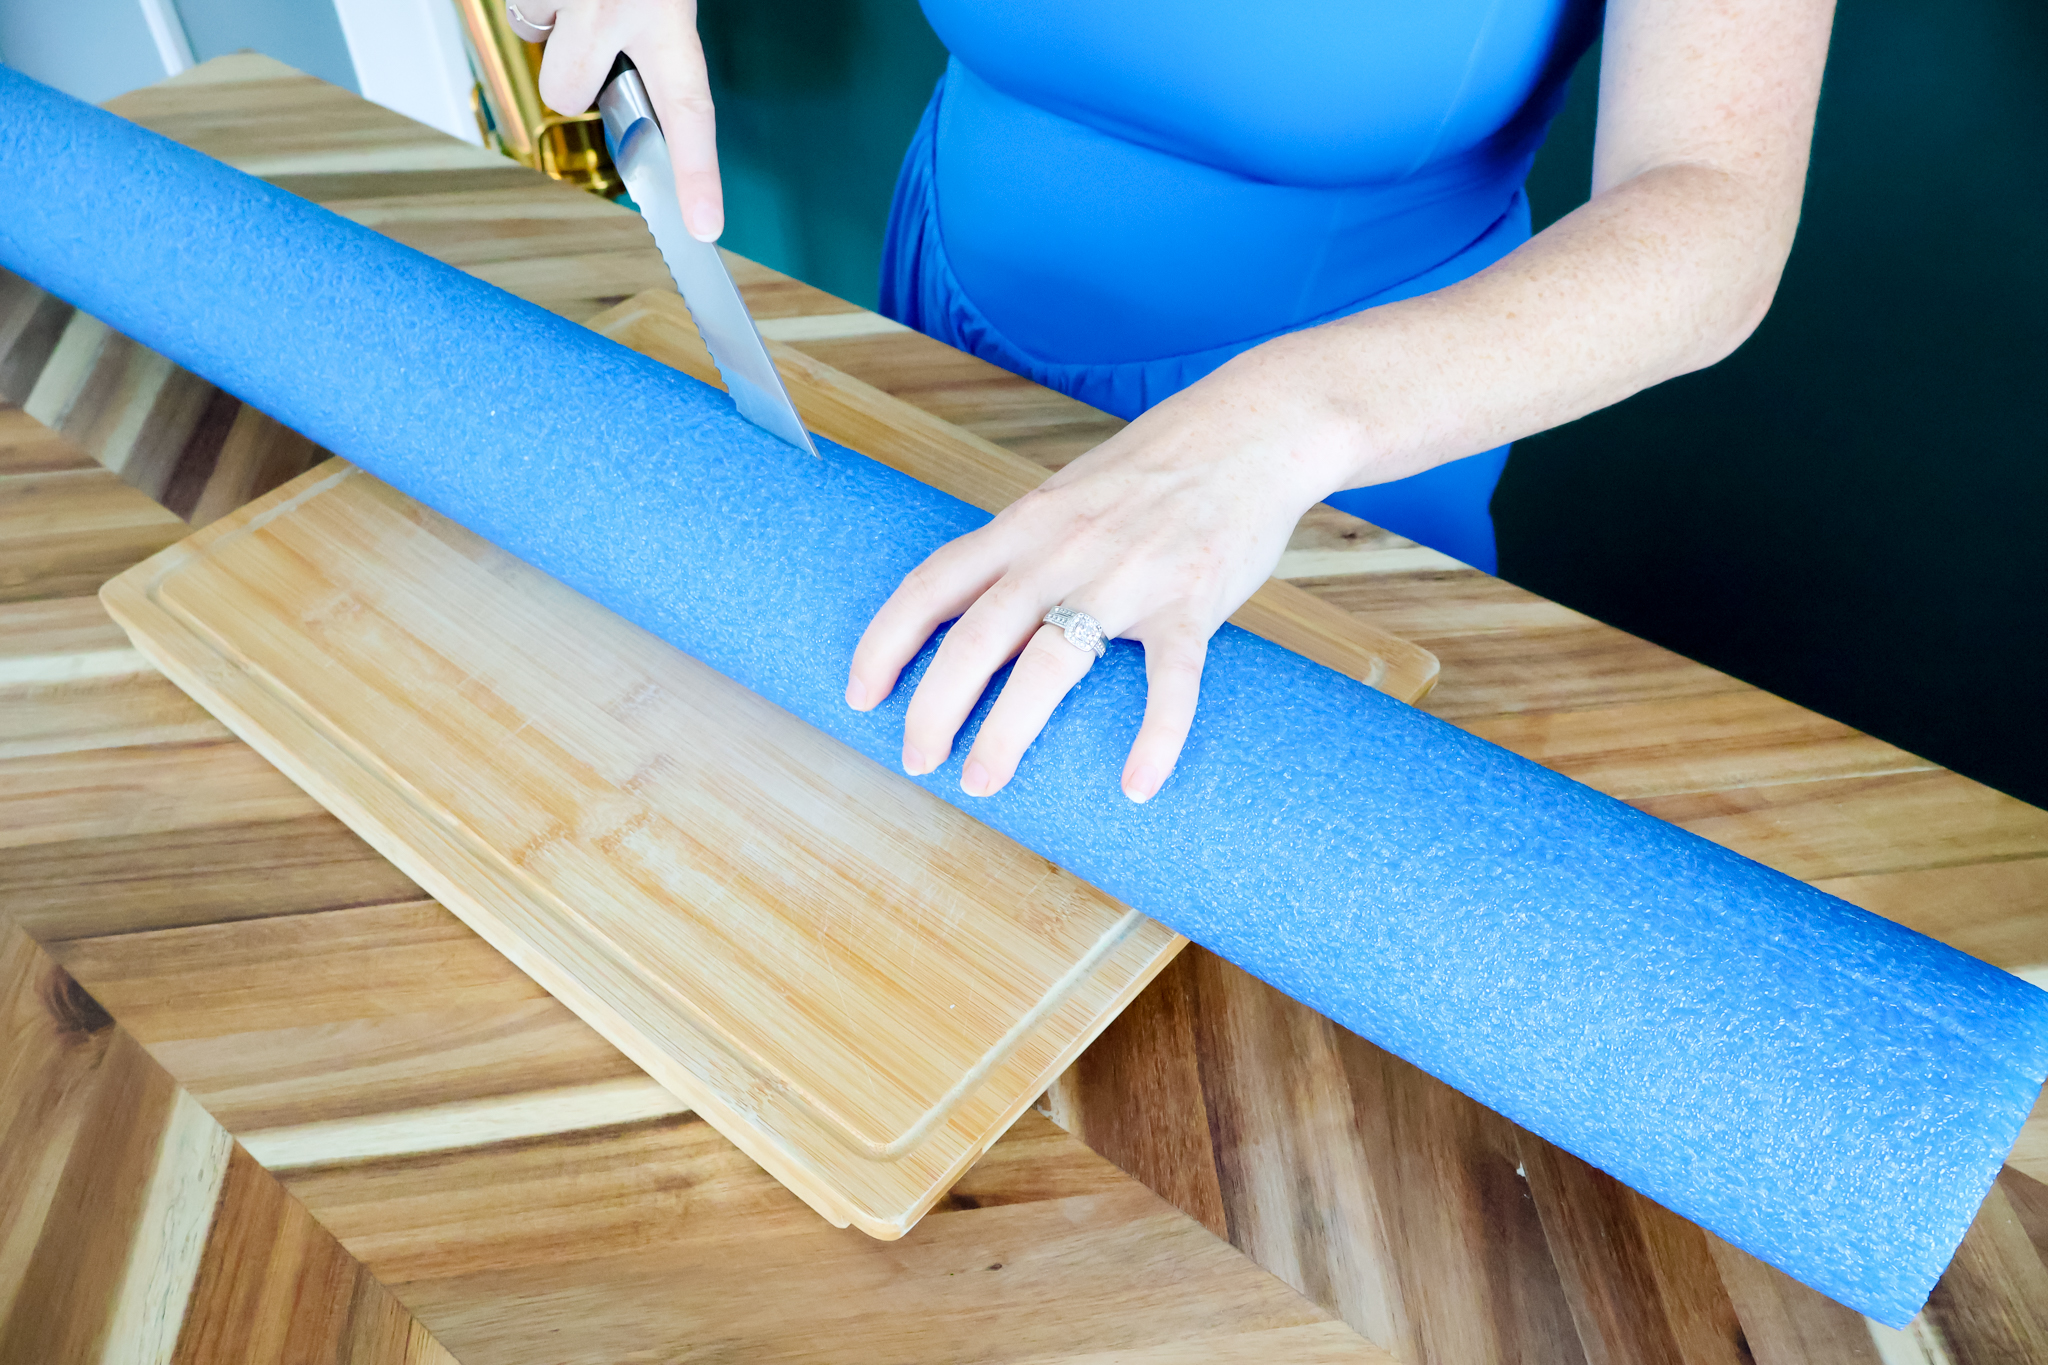
Repeat for all 5 sections, on all the noodles.
NOTE: I also shaved a bit off the bottom of the top tier of noodles, so they sit better in the display. You can see this clearly in my video on Youtube!

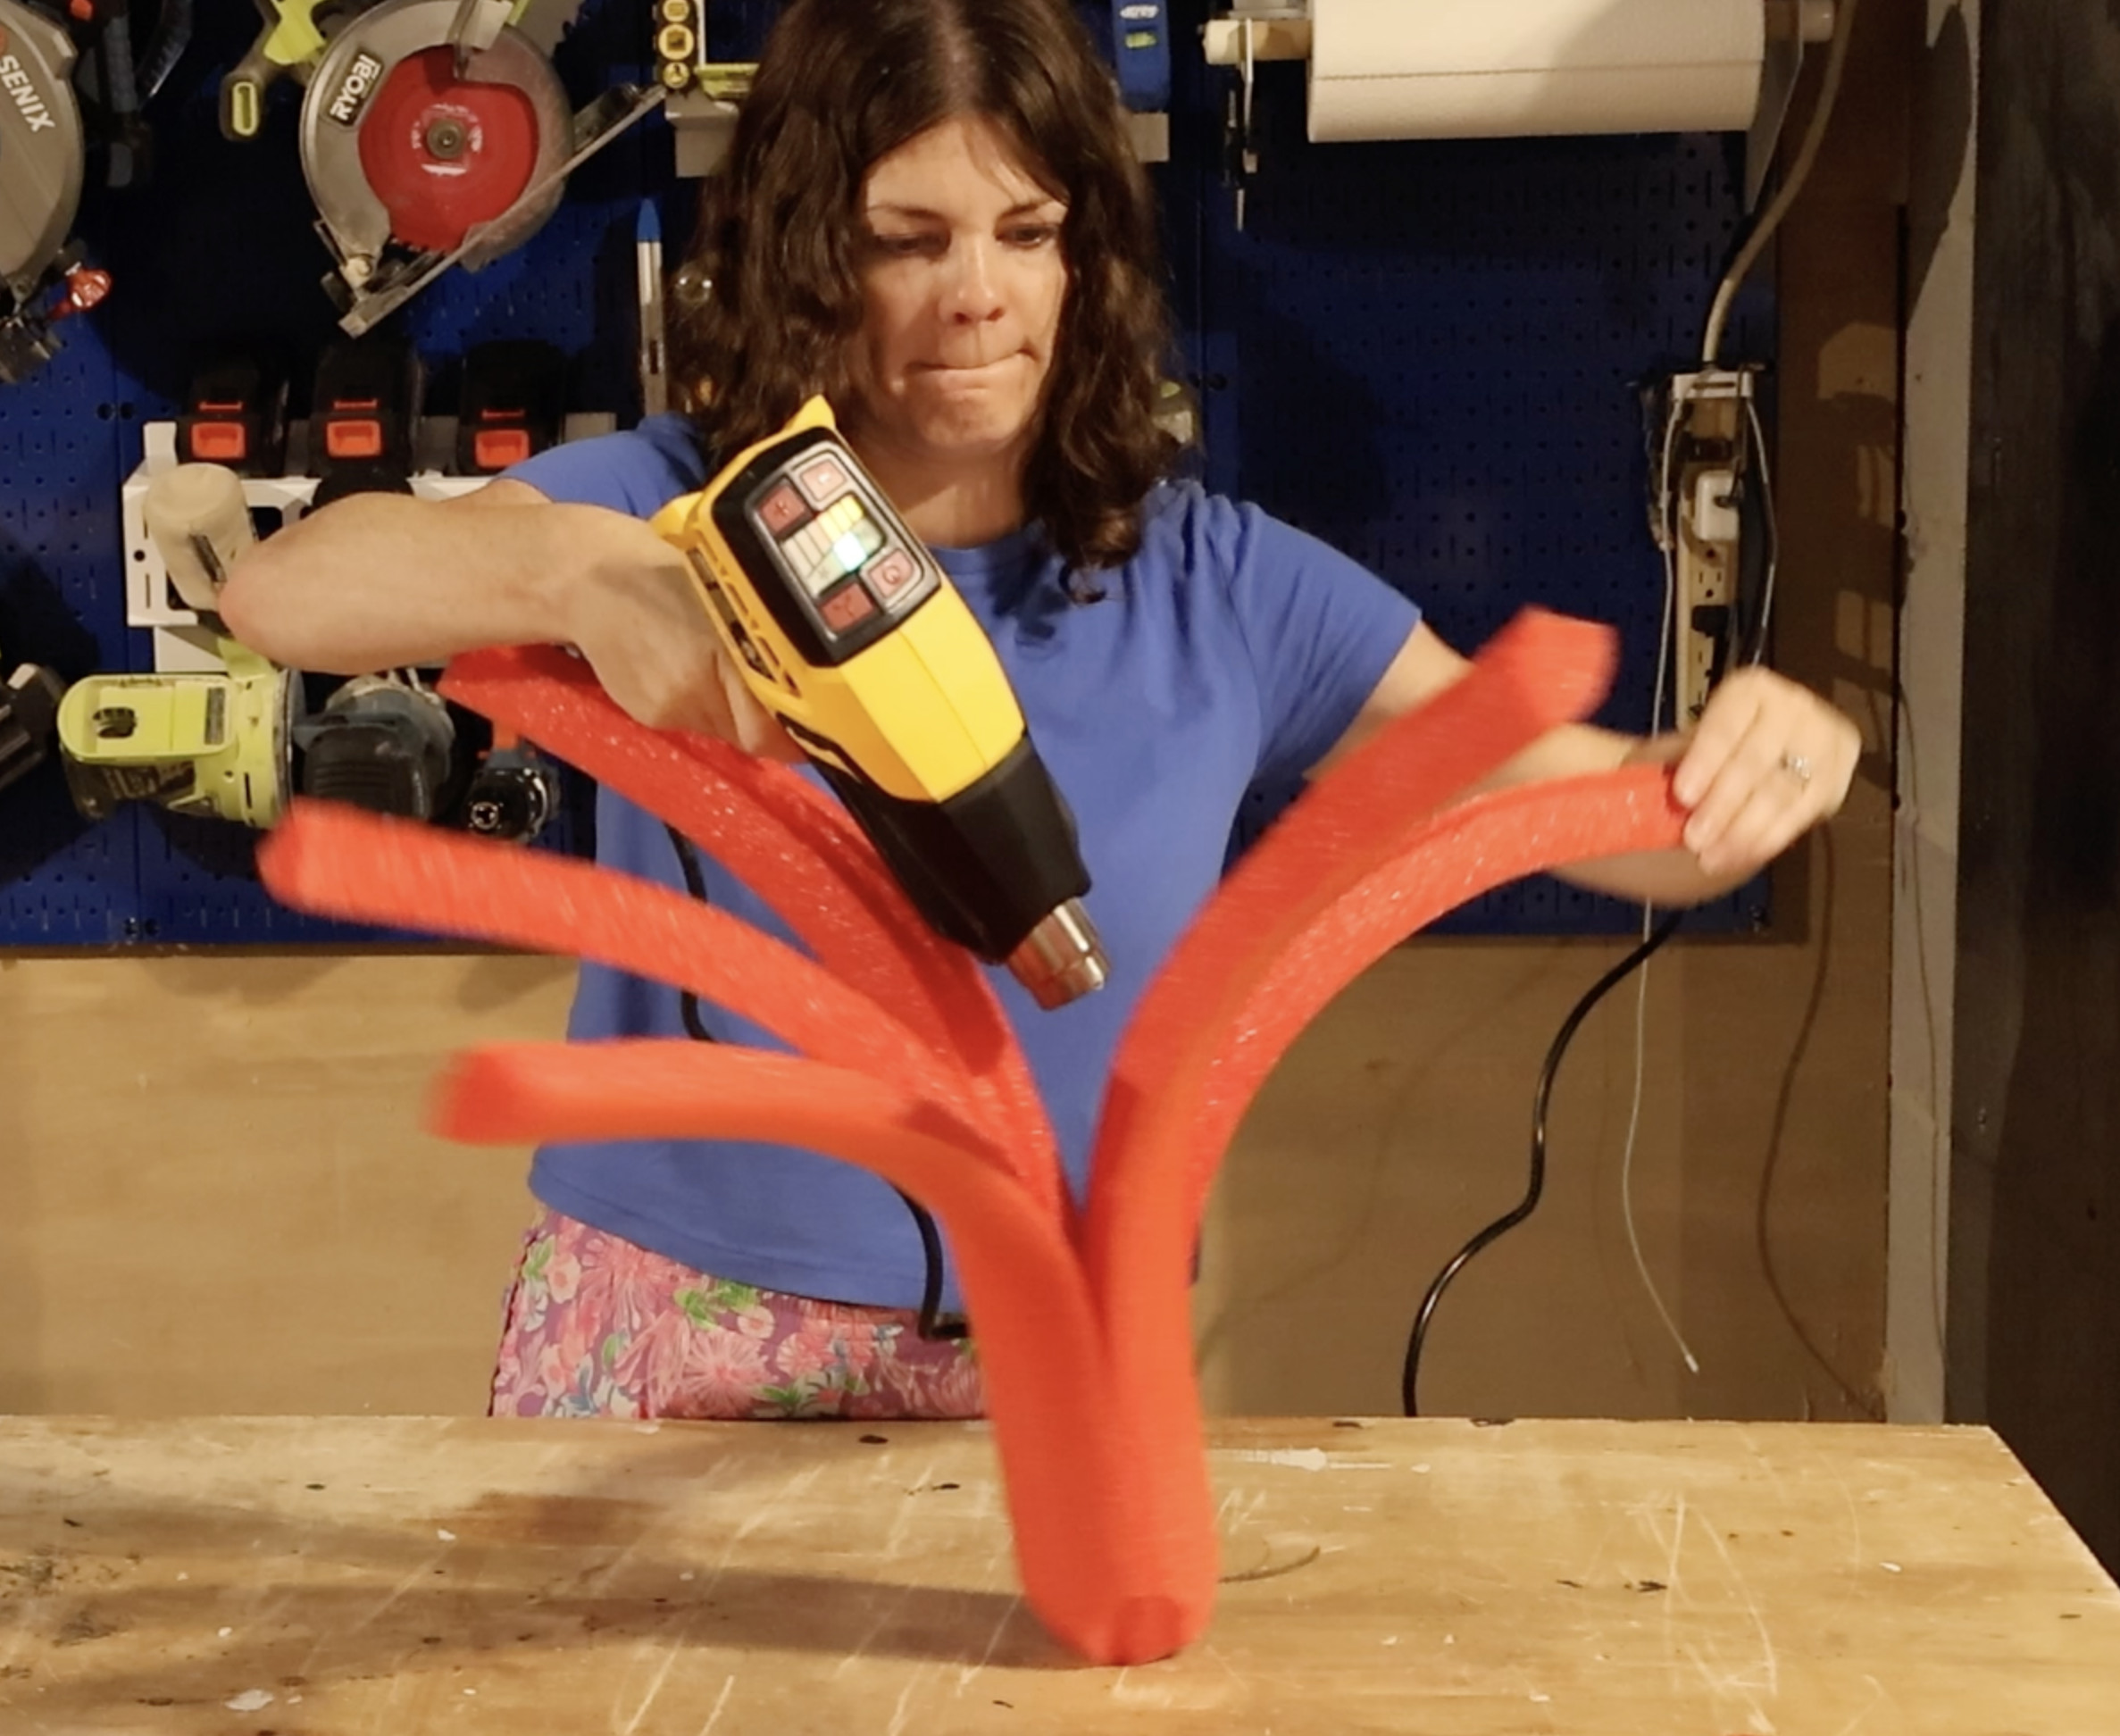
STEP 4: Heating + Bending noodles
Now, this step is optional but makes a huge difference.
As-is, the noodles tend to stick a bit straight. To me, they look like grass or sea weed! They need some encouragement to bend out like a firework.
To do this, I used a heat gun to gently melt the plastic as I bent it, then let it cool bent to hold the shape.
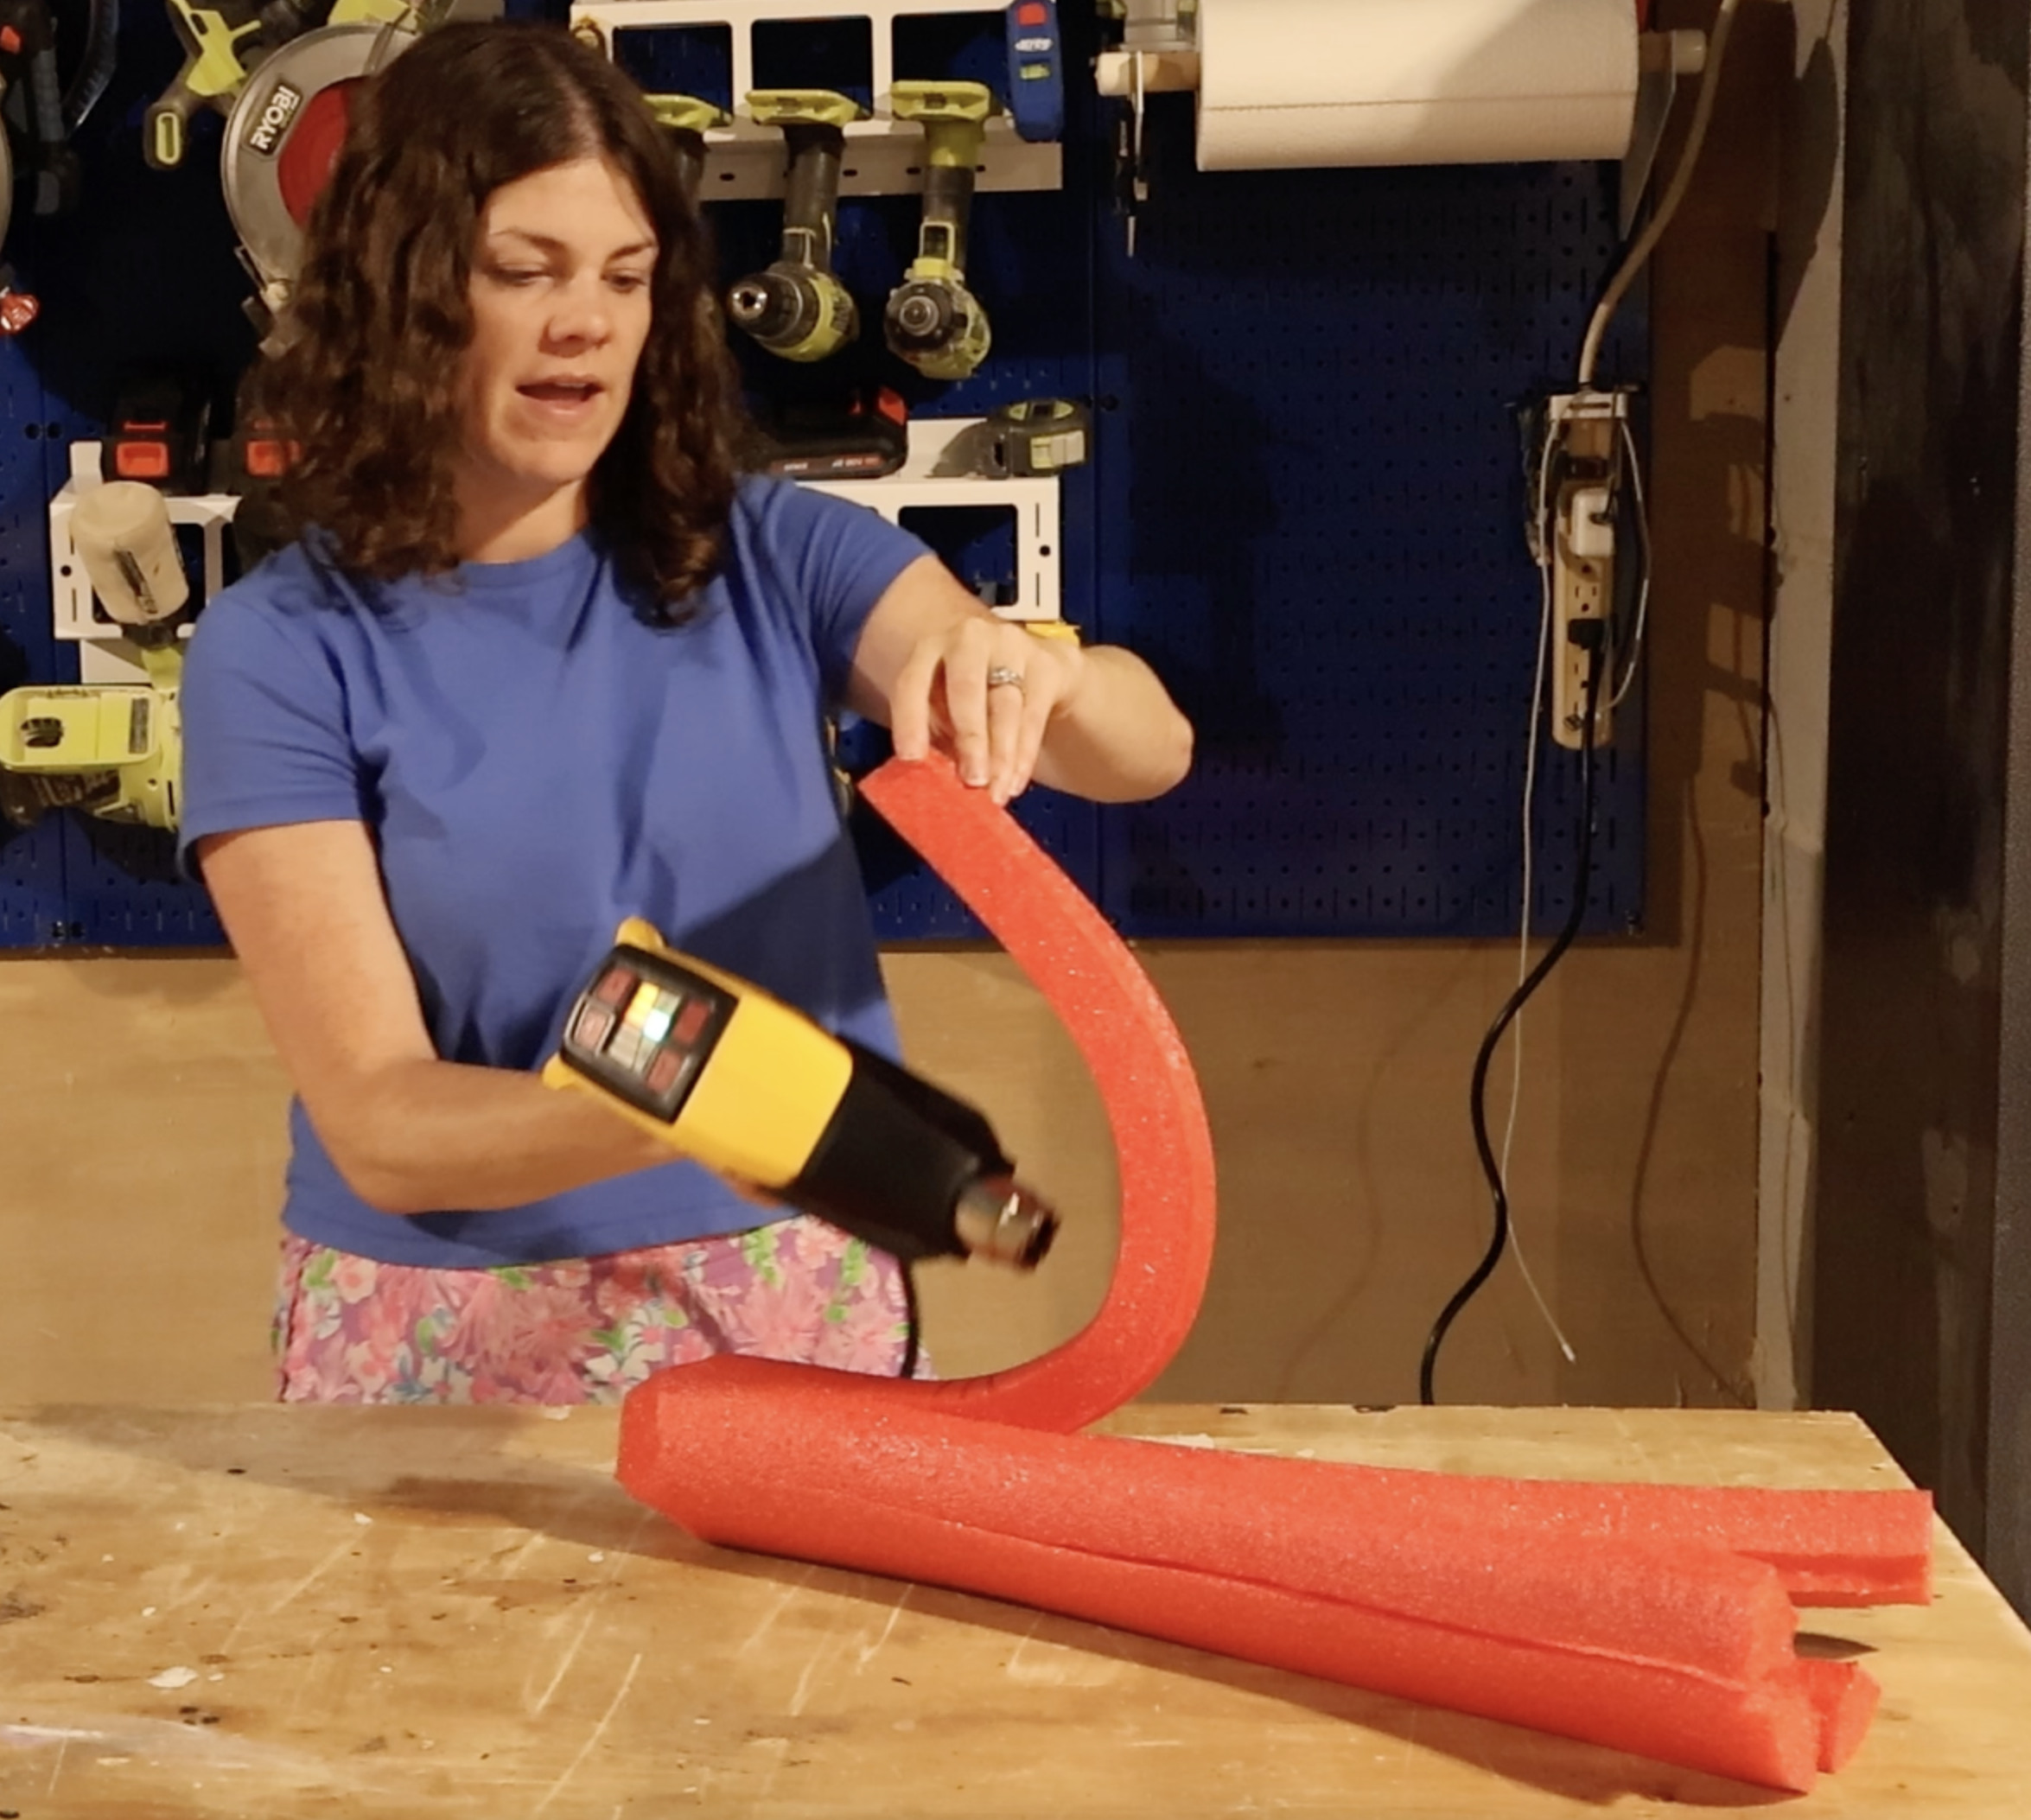
Work carefully and quickly and bend the noodle as you go.
Then, let cool upside down, with the legs being held out so they dry in the right position.
(Confused? Please watch my video tutorial for a very clear demonstration!)
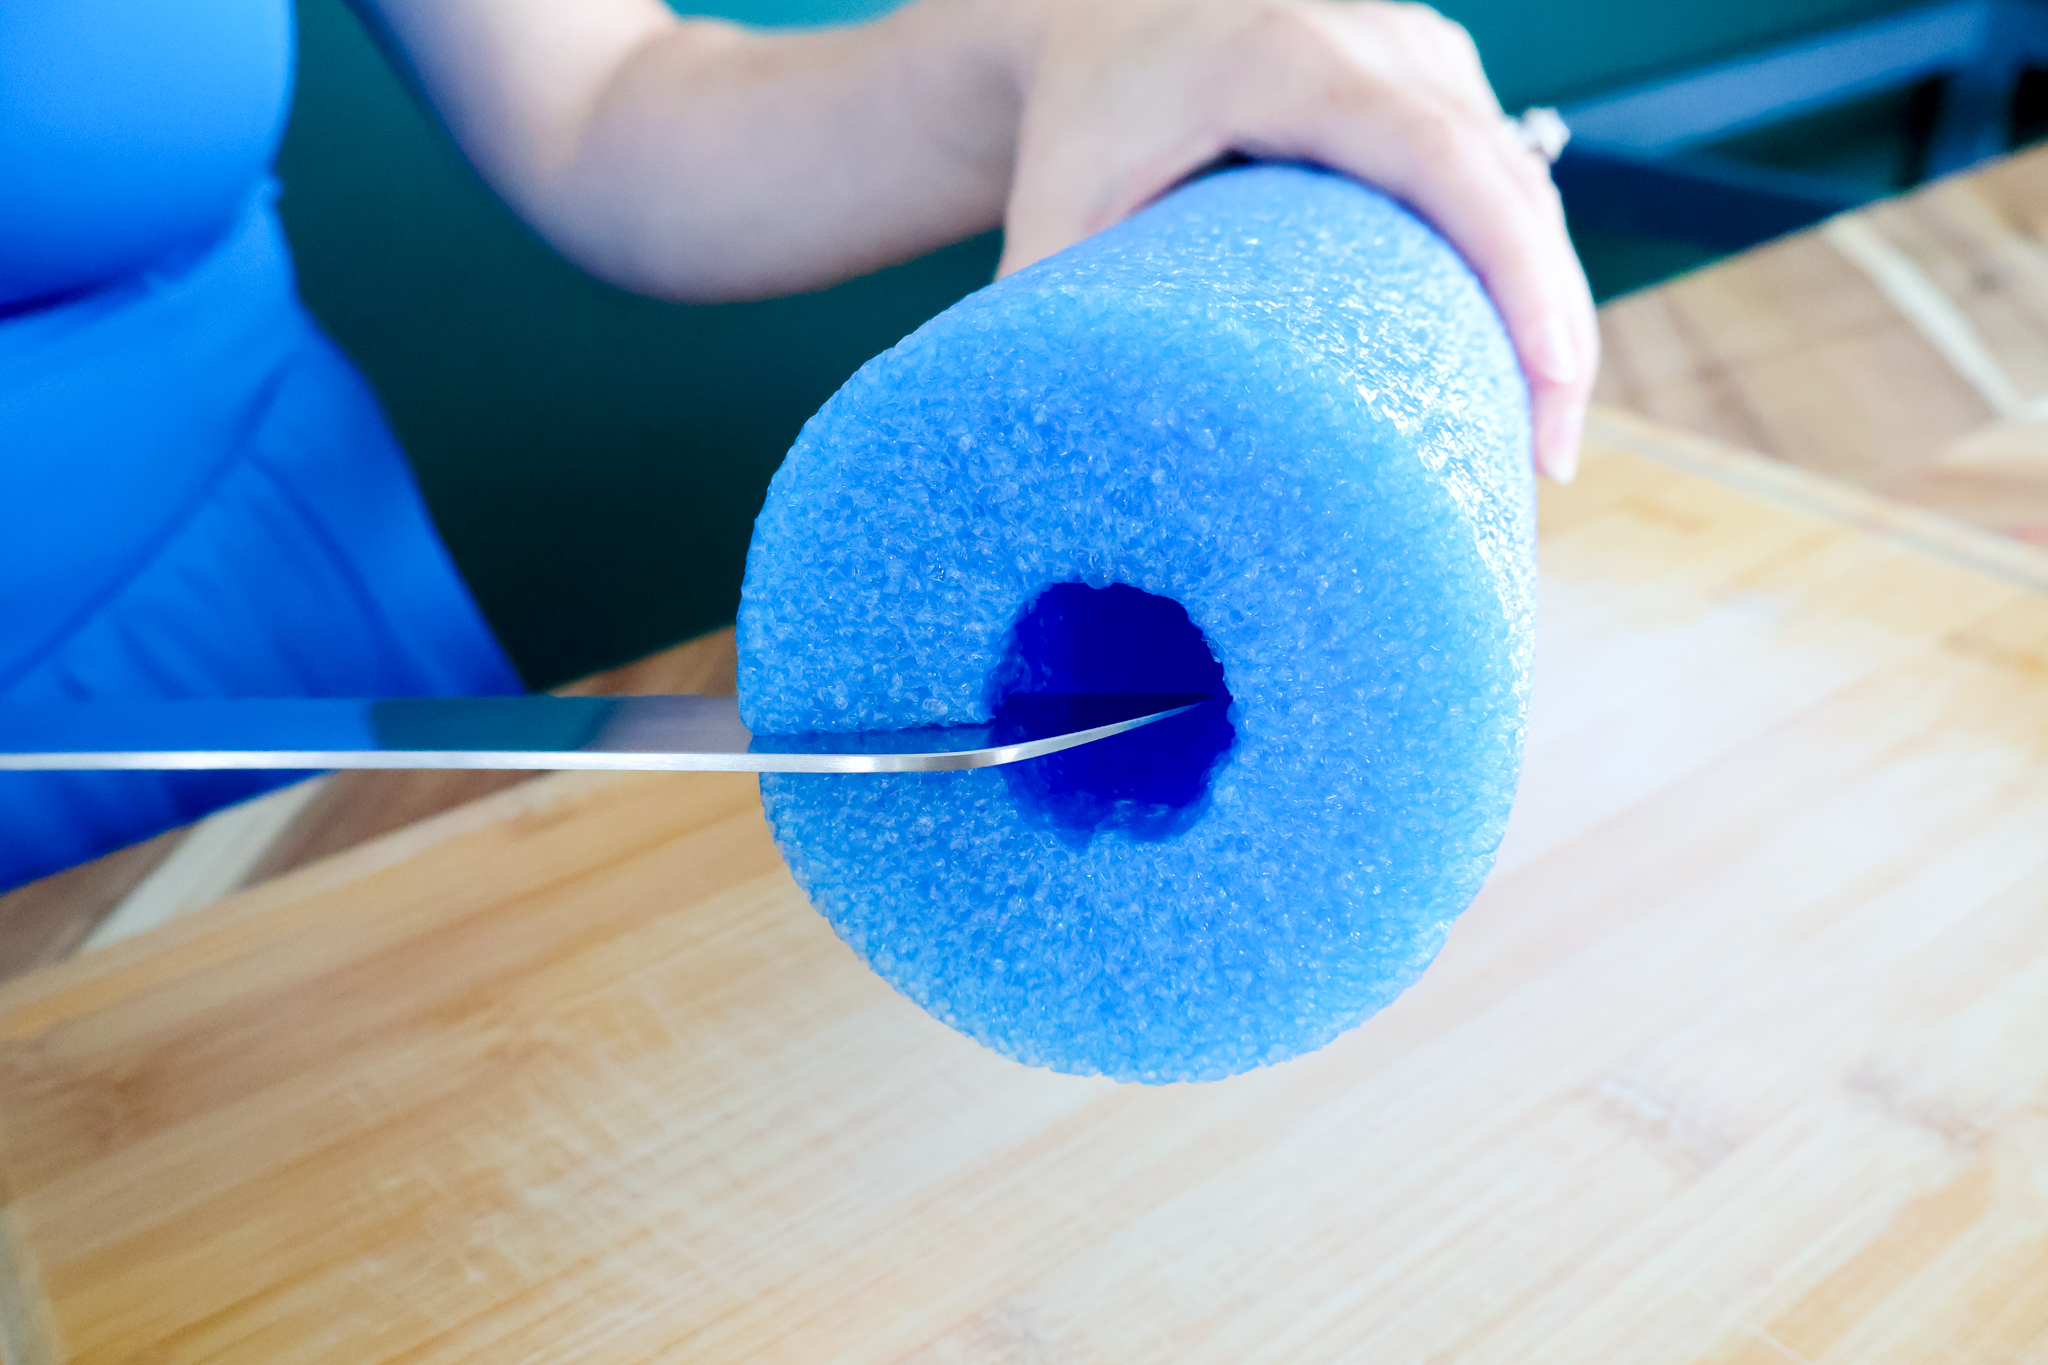
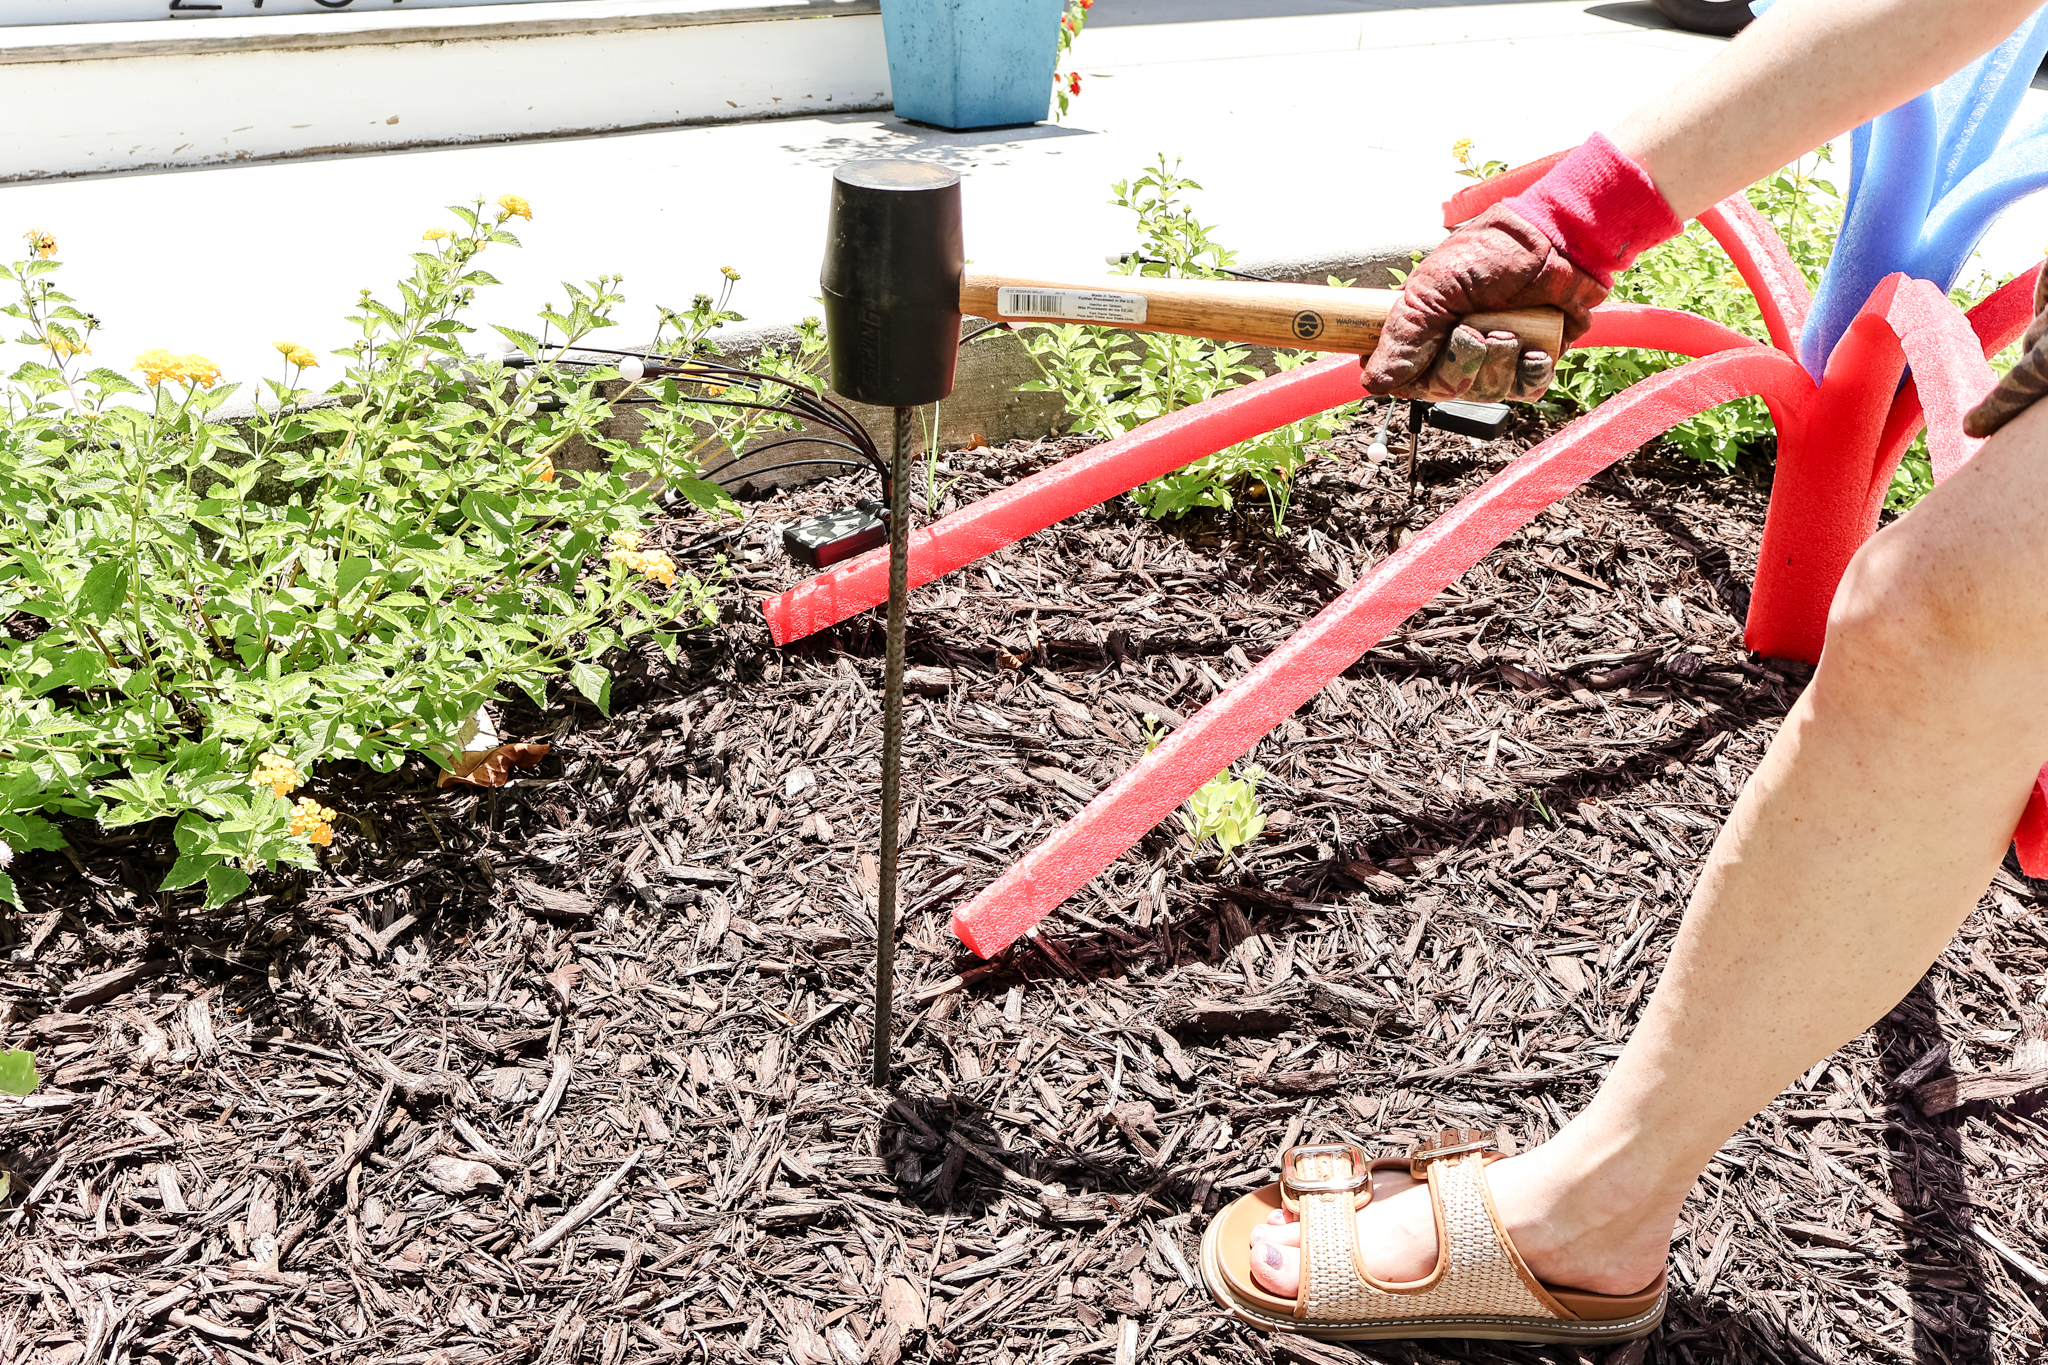
STEP 5: Hammer poles into dirt
Now, time to set up the display. I used rebar and used a mallet to hammer it straight into the earth.
I recommend you add a pole, then add fireworks, then do your next one. It's not as efficient as doing all the poles then adding all the noodles, but it's much easier to visualize the spacing when you can actually see it!
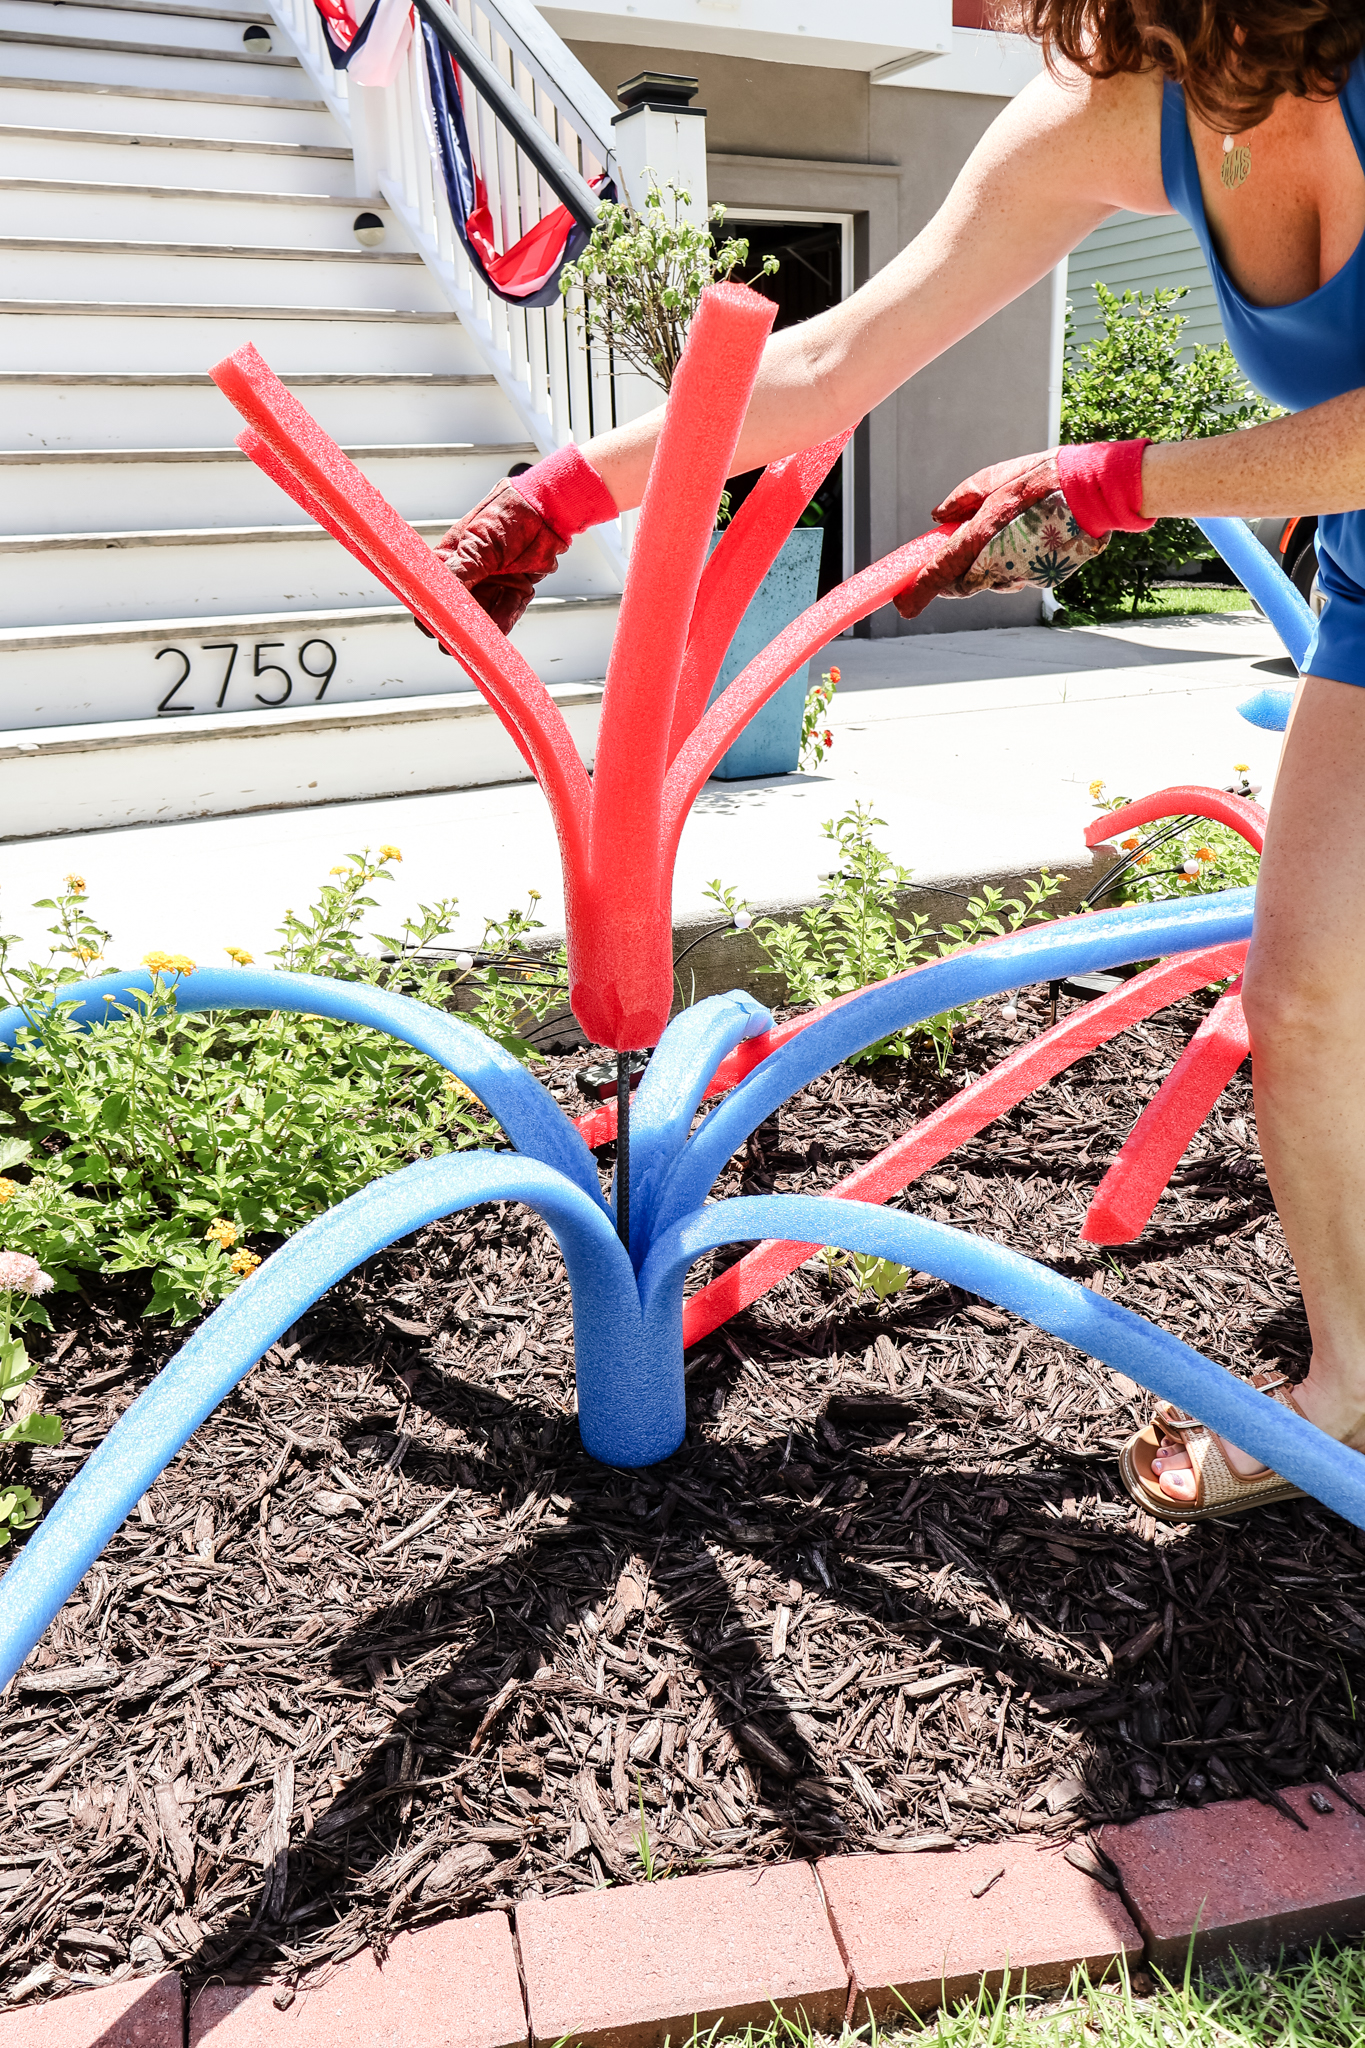
STEP 6: Add Noodles
Add your noodles to the poles, sliding them right on the pre-drilled hole in the noodle.
Tweak and position as needed!
STEP 7: Enjoy!
Enjoy your festive display for the 4th of July!

Would you ever decorate your yard for the 4th of July?!

Looking for something?
We've been doing this since 2012 so we have a LOT of blog posts!
Search stuff like: Ceiling Projects | DIY Plant Stands | Thrift Flips

Hello, I'm Morgan, half of the creative force behind CharlestonCrafted.com! With a passion for DIY that dates back to 2012, I've transformed three homes and now I'm dedicated to helping others craft their dream spaces. Let's turn your house into a home together!