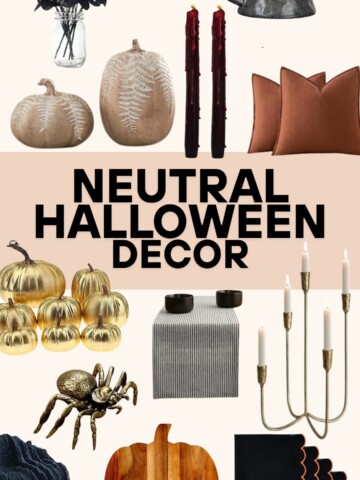
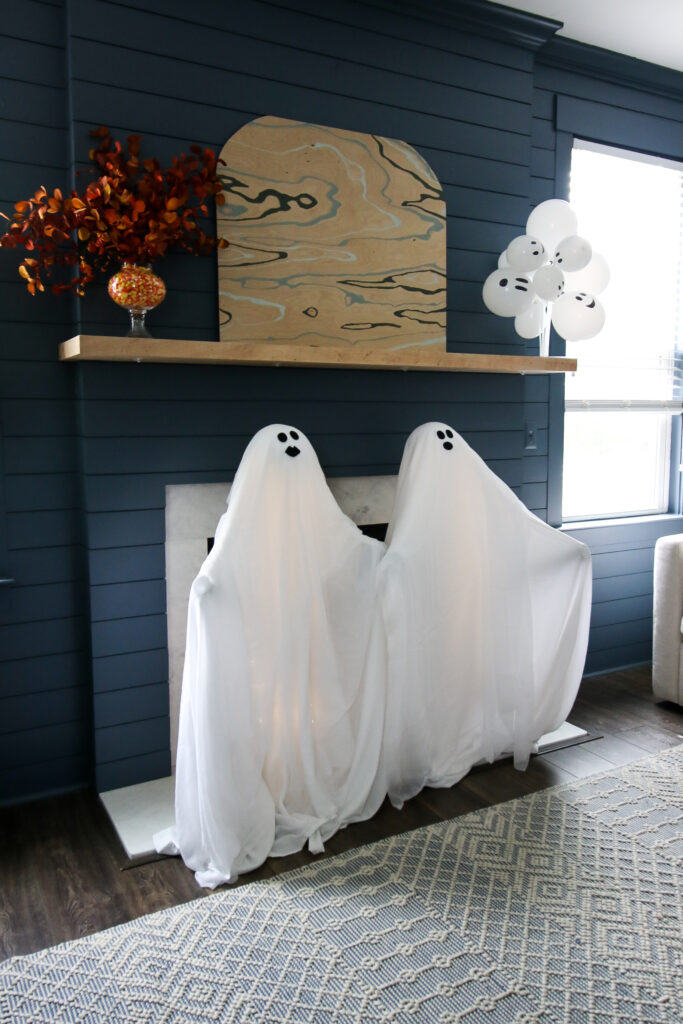
Want to add a silly spooky touch to your halloween decorations? Here's how to make tomato cage ghosts with arms - a fun and easy DIY!
I love decorating for Halloween and half the fun for me is making decorations myself. There's something so satisfying about creating something awesome from scratch!
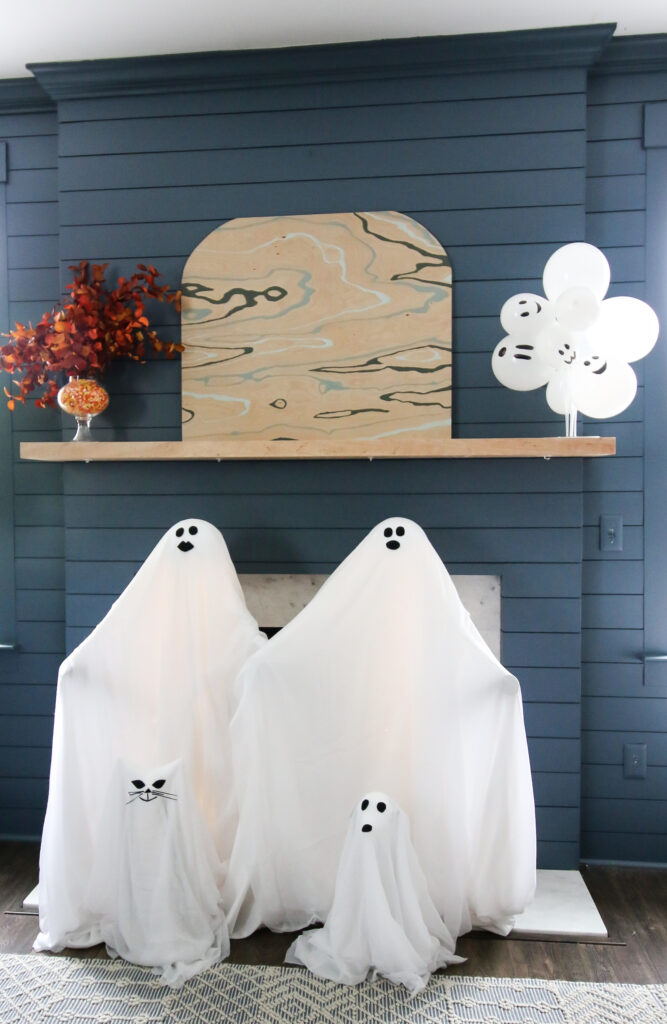
I have seen a lot of pictures lately of people making ghosts from upside down tomato cages.
Of course, I had to make my own! However, as I started making it, I was dissatisfied. He just looked a little... flat. So, I decided to give him arms.
It took a few tries to figure out how to position the arms correctly, but once we did, I was thrilled!
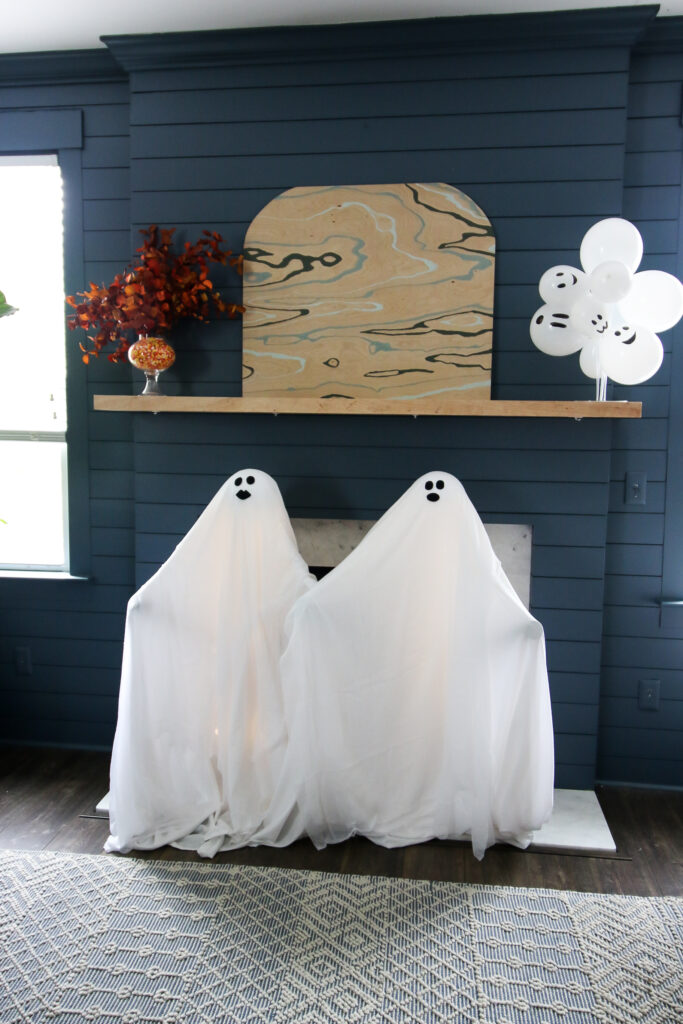
These ghosts are easy to make and have a HUGE impact. They'd be so cute on your porch next to the candy bowl on Halloween!
These pair GREAT with our DIY tomato cage cat and dog ghosts, too!
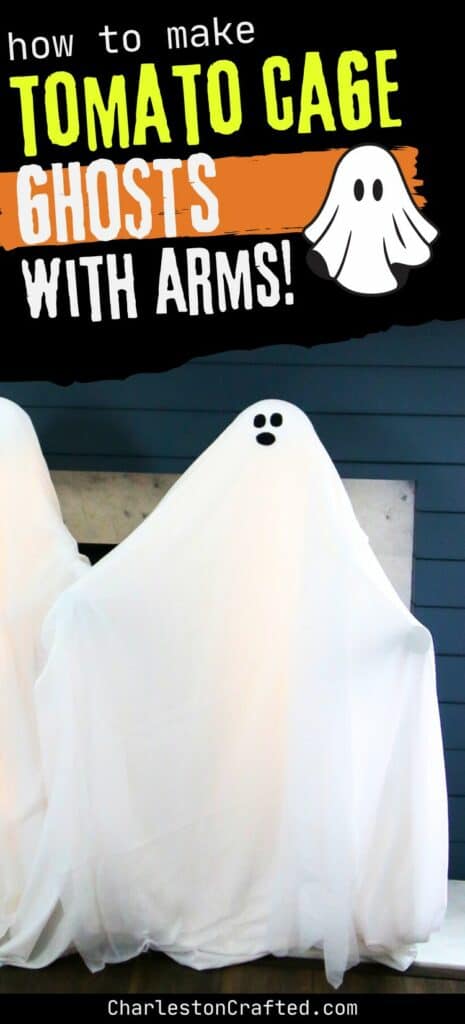
How to make tomato cage ghosts with arms
Here's how to make DIY tomato cage ghosts - with arms!
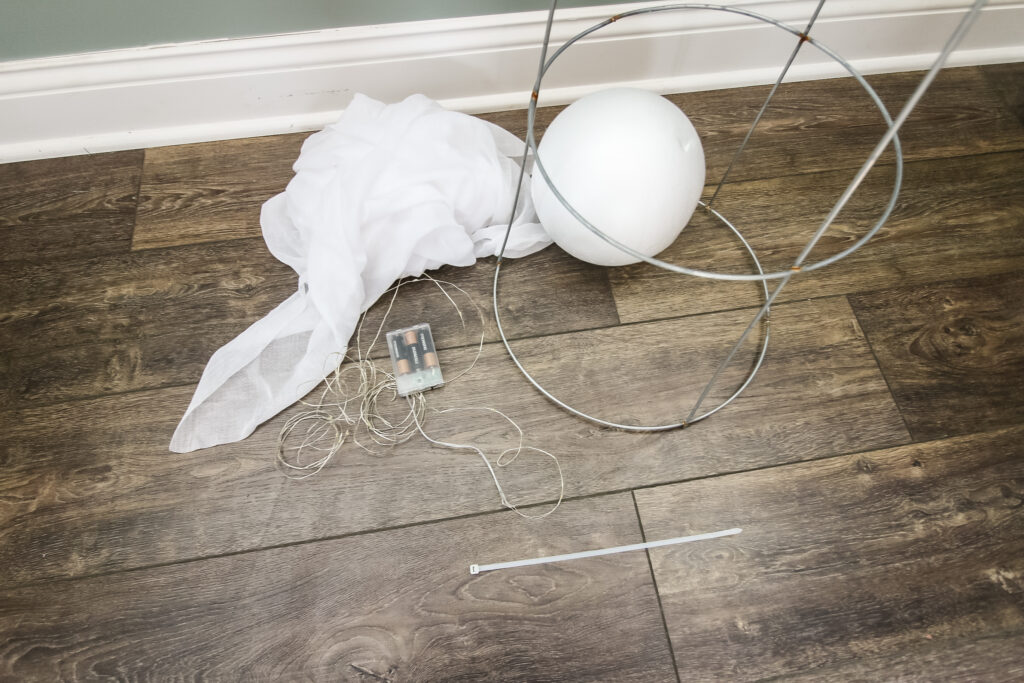
Supplies needed:
Supplies for 1 ghost
- 8" styrofoam ball
- Tomato cage
- Pipe insulation 6' OR pool noodle
- 4 zip ties
- Scissors
- Twin bed sheet (white)
- Optional: gauze fabric
- Black felt
- Hot glue
- Optional: battery or plug in string lights
Shop all of the supplies that I used here!
Steps to make:
Here's all the steps you need to take to make your tomato cage ghost and give him arms!
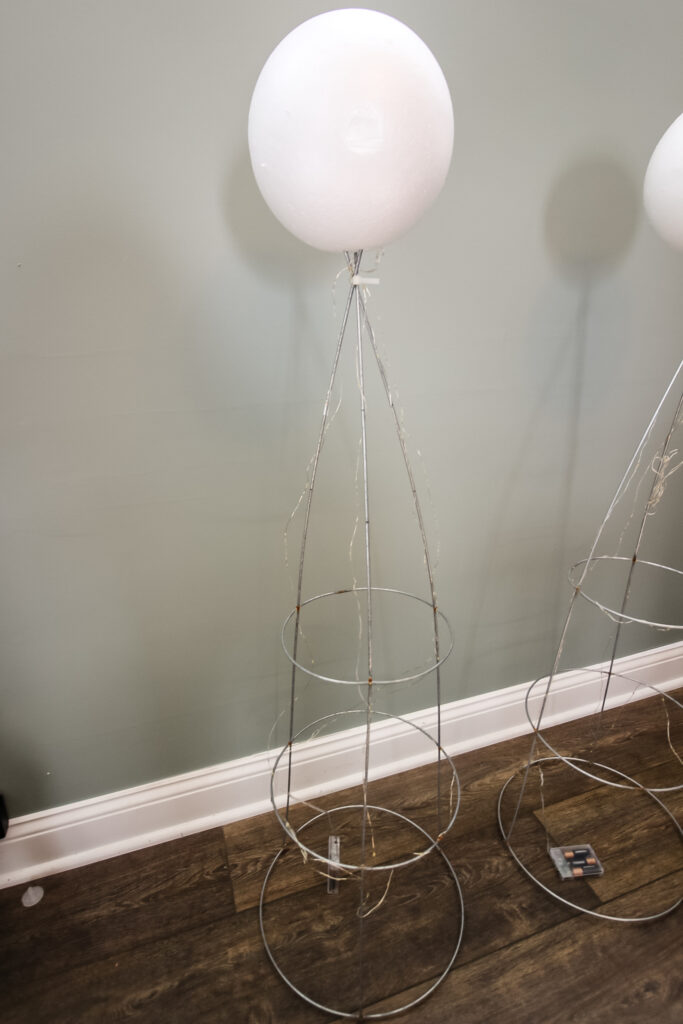
STEP 1: Prepare the tomato cage
Star by flipping your tomato cage upside down, so that the wide end is flat on the ground.
Gather the pokey ends together to create a point and use a zip tie to fasten together.
Use scissors to trim the excess of the zip tie.
STEP 2: Add the head
Now we are going to add the head! Get your Styrofoam ball. If it is wrapped in plastic use scissors to carefully remove the wrapping.
Then you are going to press the ball on to the pokey ends of the tomato cage that are sticking straight up in the air.
I found the best results doing this was to use one hand to hold the tomato cage right at the zip tie, and use the other hand to press down on the styrofoam ball firmly until it is securely fastened into the metal stakes.

STEP 3: Add lights
Lights are optional for this project, but they do add a really beautiful effect.
I used a battery pack of fairy lights and strung it up and down the tomato cages poles. If you do this, start at the bottom so that the battery pack will rest on the floor and not dangle.
The other option would be to use regular plug-in string lights. You will just have to position it near an outlet in your home. If you do this, just make sure you start with a plug at the bottom so it will be easy to plug-in when you're done.
STEP 4: Add the arms
Now comes the fun part – adding arms. You can use a pool noodle here. I went shopping for this project in September. I could not find pool noodles anywhere, so you might need to plan ahead and buy them during the summer season.
Otherwise, you can use these pipe insulation tubes. They are much like pool noodles except they have a split along the side and they are black. They also cost about four dollars each while pool noodles are one dollar each so keep that in mind.
To add arms to your ghost, fold the foam noodle in half to create a V-shaped and push it inside the tomato cage.
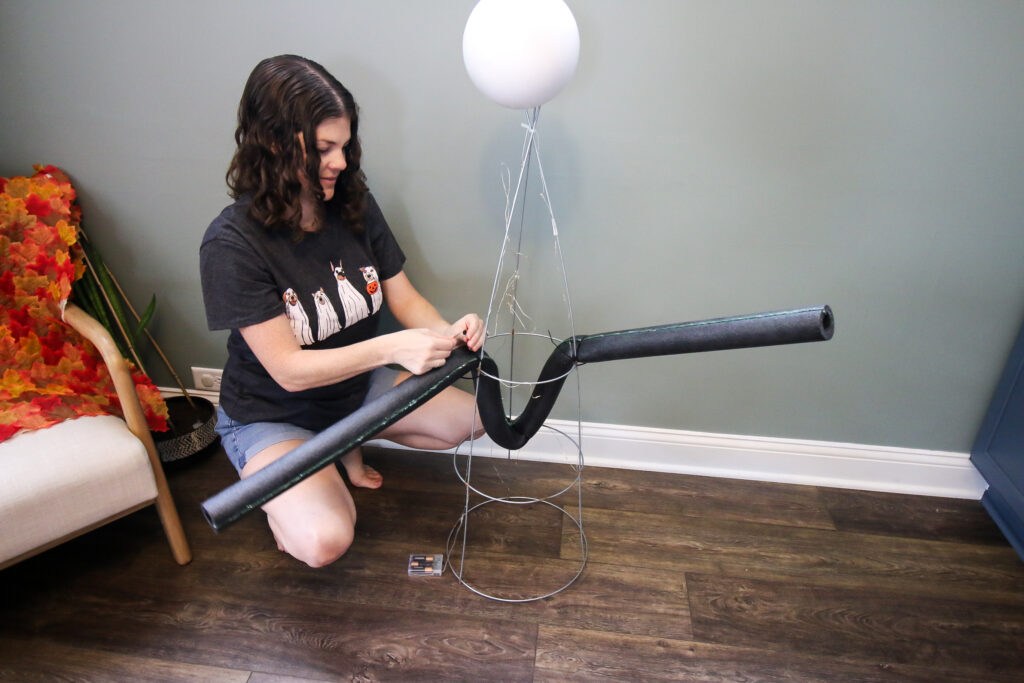
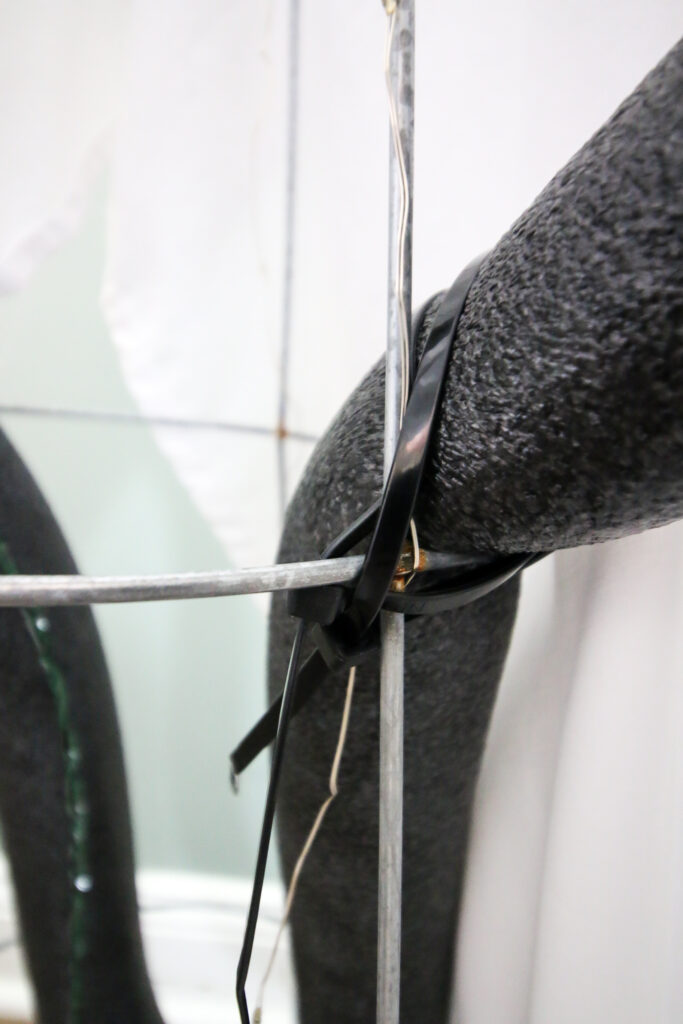
Align the point of your V with one of the lower, but not the very bottom, crossbars of the tomato cage. Use a zip tie to connect it there.
Then position the arms. They should go right over a crossbar and poke out of the tomato cage. Fold the arm down and crease it a bit and then use a zip tie to hold in place.
This was honestly the hardest part to figure out how to tie it so that the arms pointed out horizontally and not straight up.
Once you figure it out, it's no big deal, but you do have to kind of play around with a zip tie placement to get it just right.
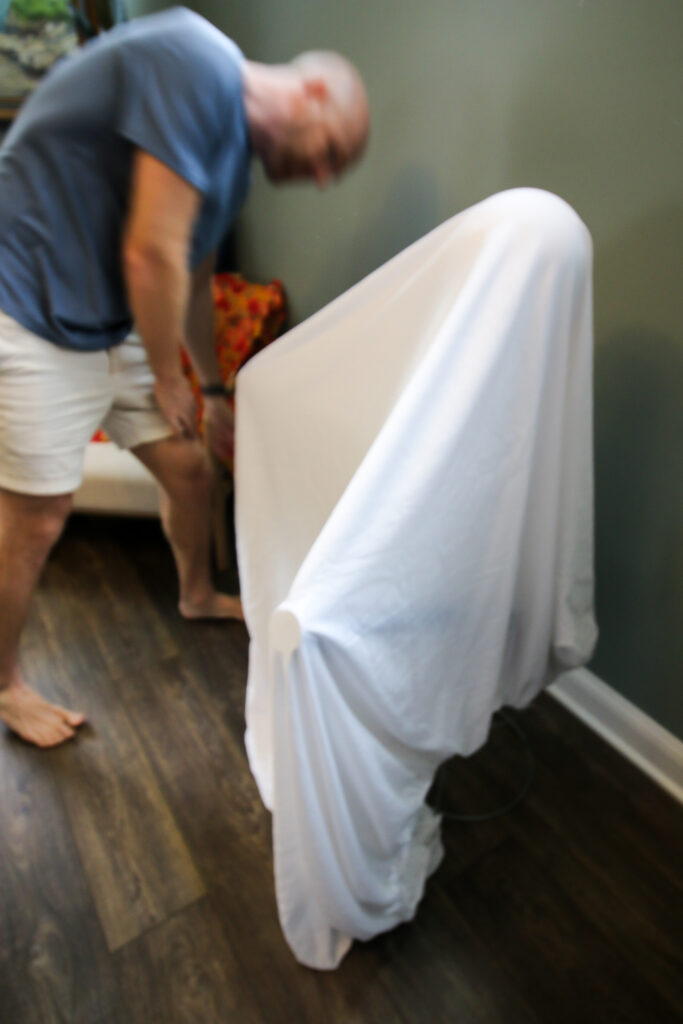
STEP 5: Add a sheet + fabric
Now top your tomato cage with fabric. I found a twin sized bed sheet to be the perfect fit. The flat sheet was slightly better than the fitted sheet, so if you have the option to buy just a flat sheet, I would do that.
I thought the sheet by itself was a little bit boring so I added white gauze fabric on top. This really gives it a spooky look, but it's totally optional.
Keep playing with the fabric and rearranging it until you like how it sits and know you can tuck it under the bottom of the cage on the floor if that helps to position it as well.
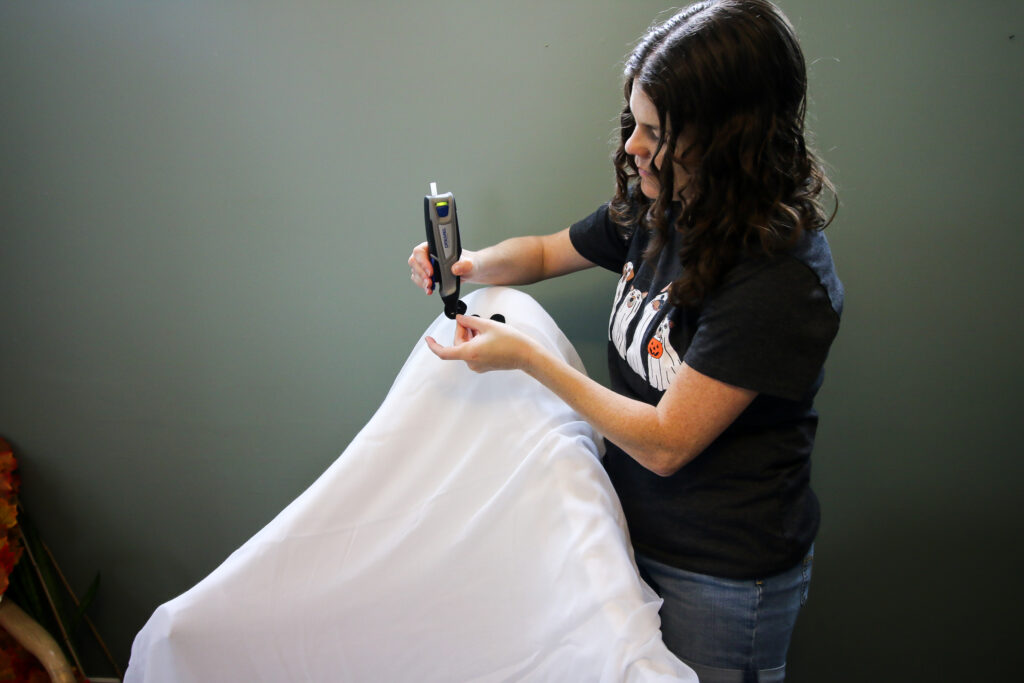
STEP 6: Add eyes
Cut eyes and a mouth out of black felt and use hot glue to attach them to your fabric.
I like to cut two squares of felt, sick them on top of each other, and cut the two eyes at the same time so they are exactly the same.
STEP 7: Enjoy!
Set this ghost up on your front porch, and your living room, or anywhere you need a little spooky fun.
These are definitely the kind of thing that it's just as easy to make two as it is to make one, so why not make a whole ghosty family!
Video tutorial
Prefer to watch? Click here or below to watch my video tutorial!


Looking for something?
We've been doing this since 2012 so we have a LOT of blog posts!
Search stuff like: Ceiling Projects | DIY Plant Stands | Thrift Flips

Hello, I'm Morgan, half of the creative force behind CharlestonCrafted.com! With a passion for DIY that dates back to 2012, I've transformed three homes and now I'm dedicated to helping others craft their dream spaces. Let's turn your house into a home together!