Want to make a super simple outdoor halloween decoration? Here is a tutorial on how to make solar pumpkin lights - perfect for your sidewalk or driveway!
We love decorating our yard for Halloween. One of our "signature decor" items is the staircase of light up pumpkins! People around our neighborhood always comment on it and call us the pumpkin house!
This year, we tried to include the small strip of yard on the other side of the driveway in with our decor. We have some great skeletons and a big inflatable over there, but I wanted some pumpkins to carry that theme over, as well.
So, I decided to make some simple pumpkin solar lights to line our driveway.
These are great because you don't need another extension cord, they are bright and cheerful and super easy to make!
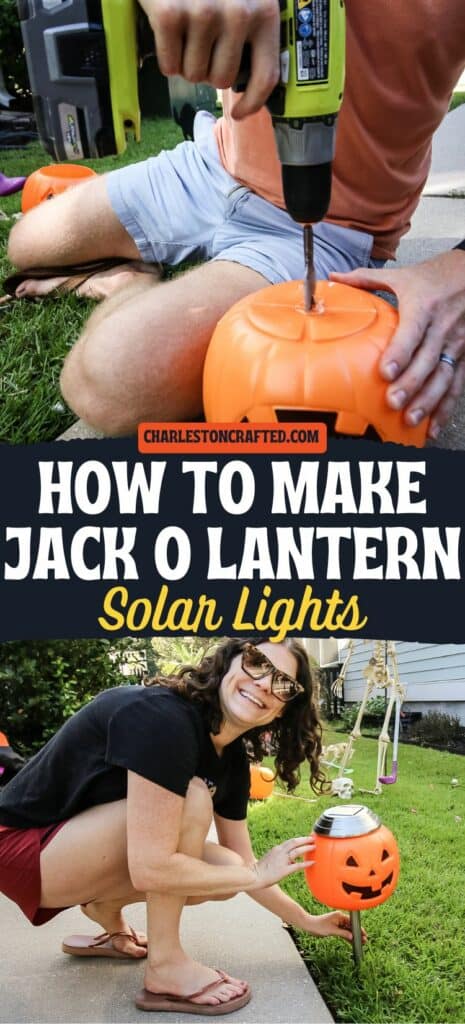
How to make solar pumpkin lights
Here's how easy it is to make these jack o lantern sidewalk lights!
Supplies needed:
- Jack o lantern bucket
- Solar light (if those are unavailable, these should work, too!)
- Drill with 1 inch spade drill bit
- Rubber band
- Scissors
You need 1 of each of the above items for each light. My lights came in a 5 pack so we did 5 of each item!
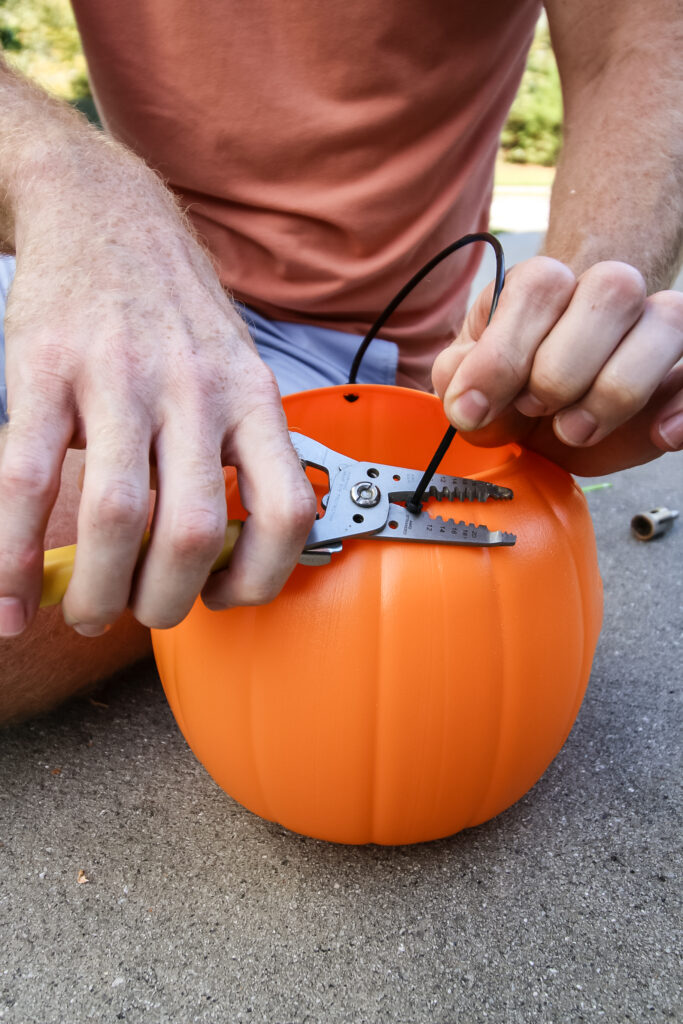
Steps to make:
STEP 1: Remove the handle
Use scissors to snip off the black handle. This is technically optional but I think it looks better without it.
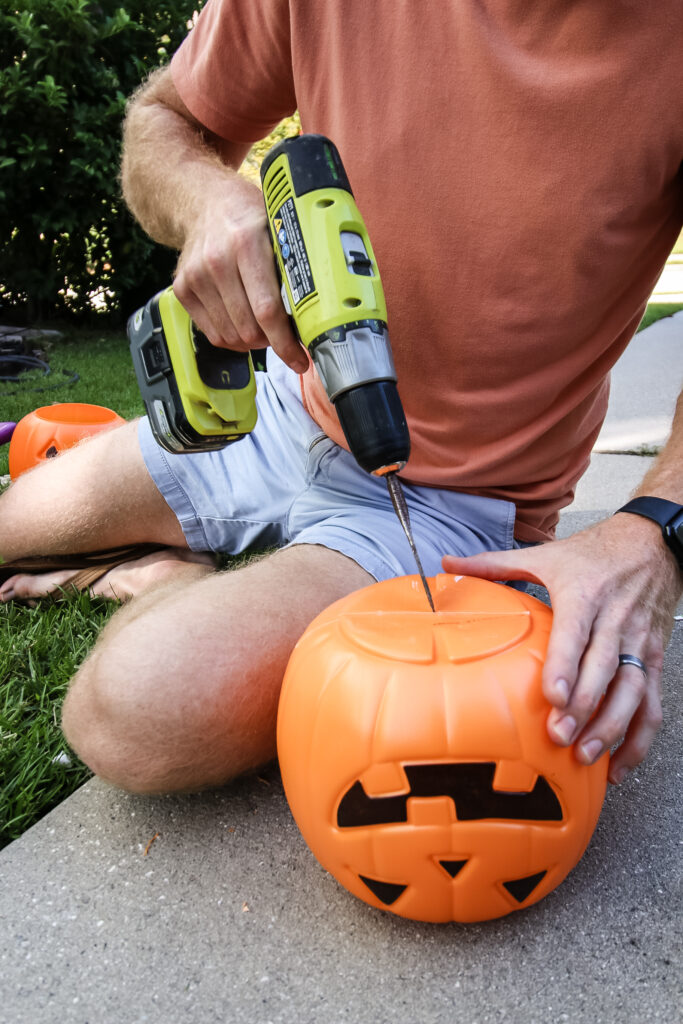
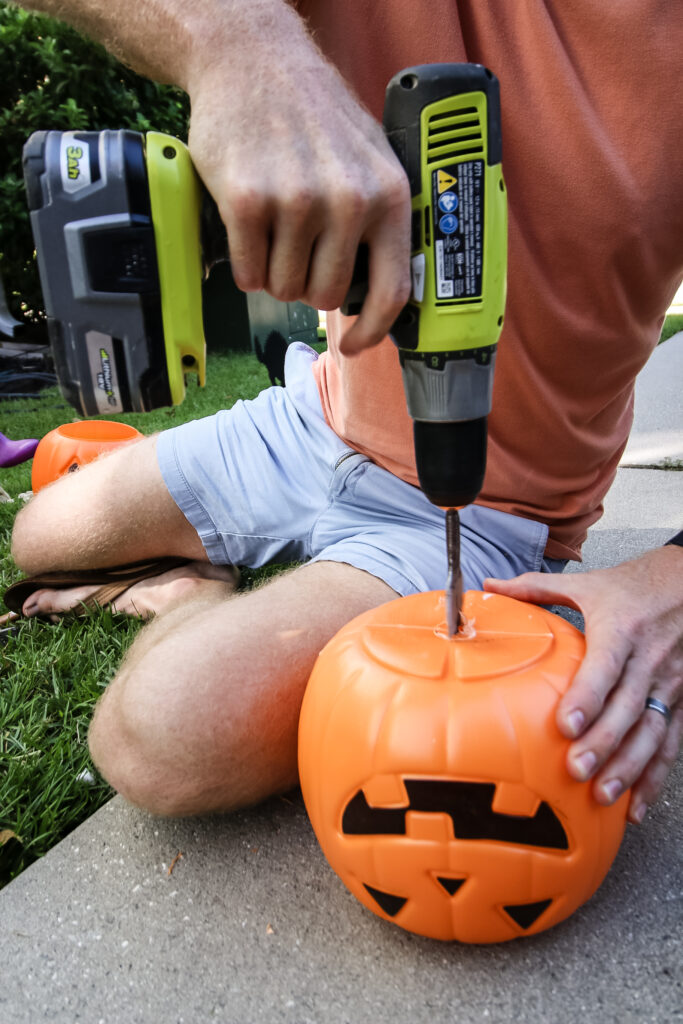
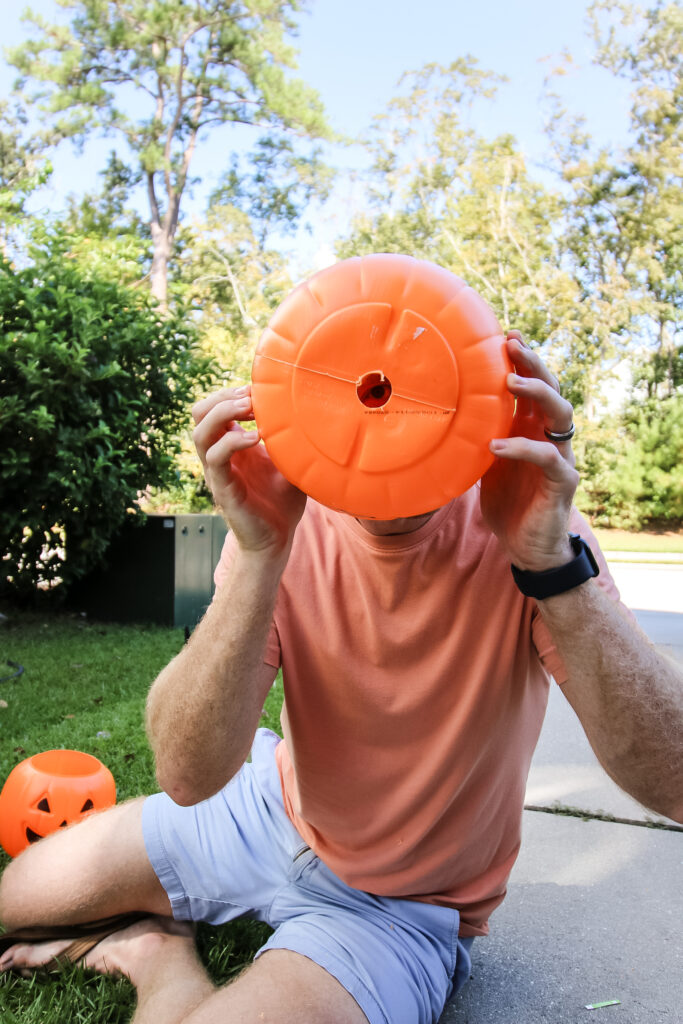
STEP 2: Drill a hole
Flip the bucket upside down and hold firmly while drilling a 1 inch hole using the spade drill bit into the center of the bottom of the bucket. A hole saw bit works cleaner and a little less rough, but it's less common. If you have one of those, that may be easier than the spade bit.
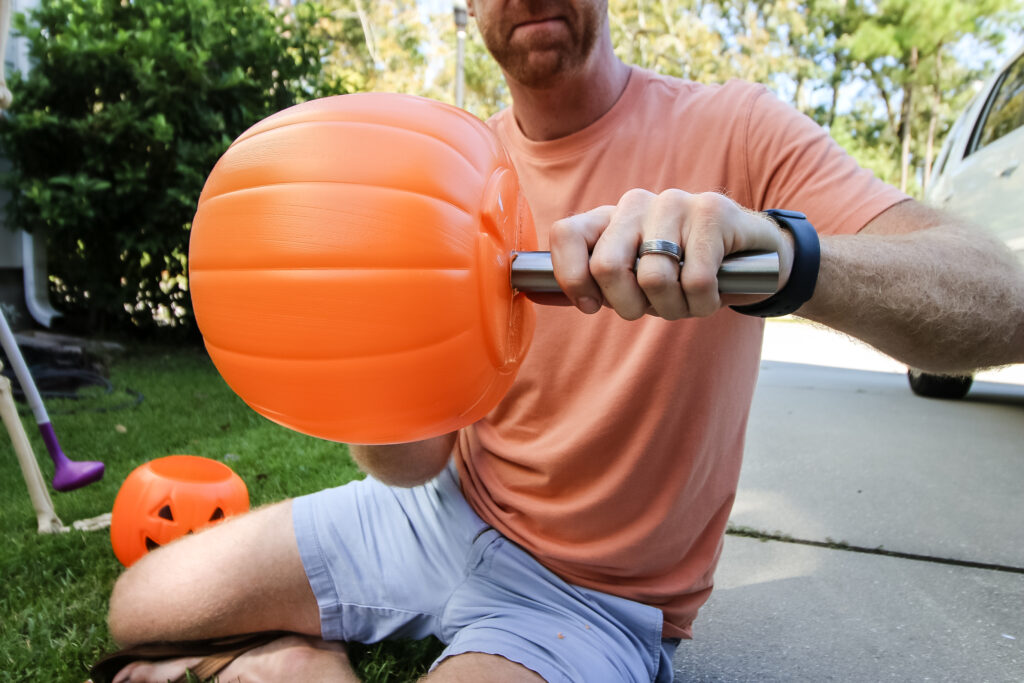
STEP 3: Insert the light
Insert the pole of the solar light up from the underside of the bucket, into the hole you just drilled.
Add the light portion of the light on top and connect to the pole of the light. If your light requires you remove a pull tab before operation, make sure you do that before you insert the light onto the pole.
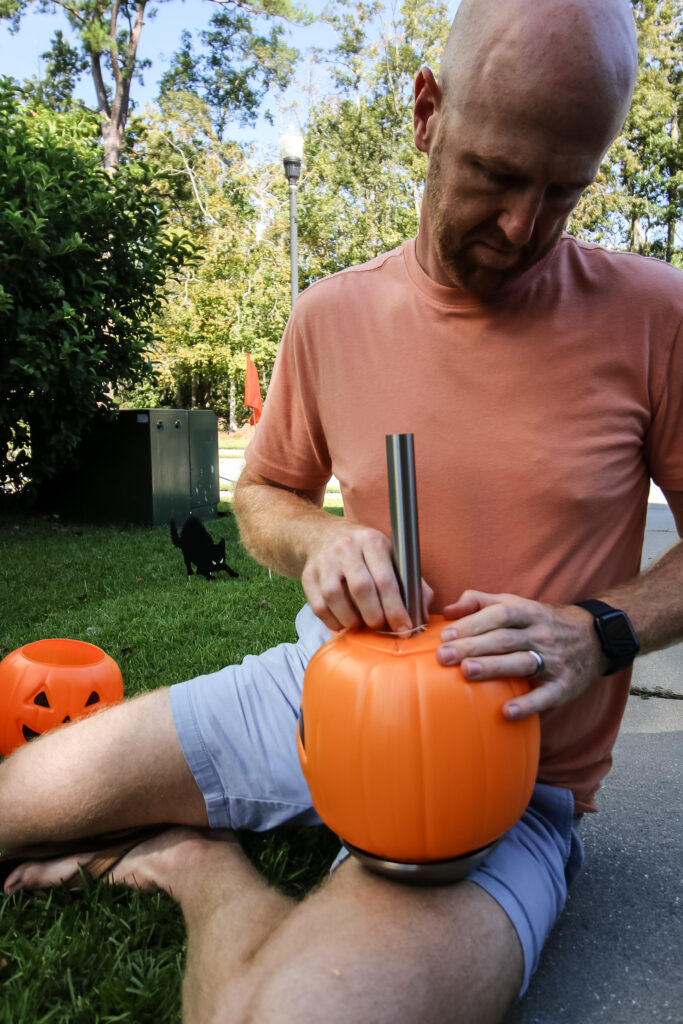
STEP 4: Add a rubber band
As-is, the pumpkin will likely slide down the pole. You could glue the top to the underside of the light.
We wanted to be able to re-use the lights after Halloween, so we added a rubber band to the pole, just below the pumpkin, to hold it in place.
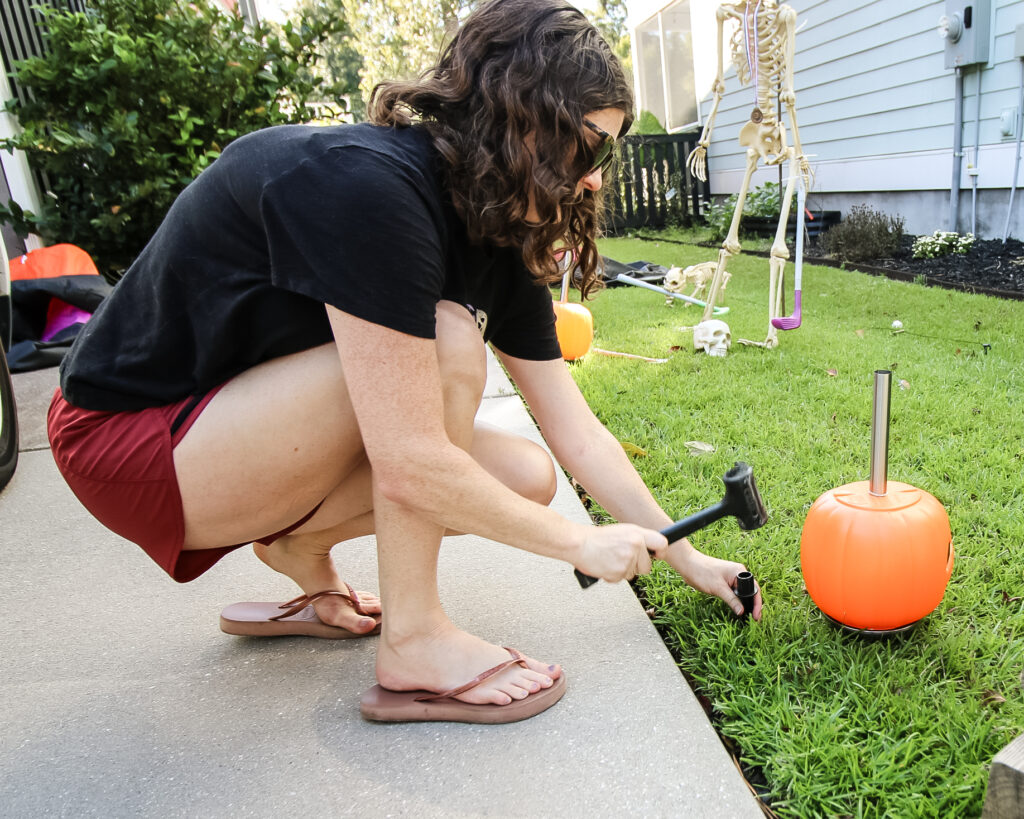
STEP 5: Push into ground
Hammer or press the stake of the light into the ground where you want it and slide the pumpkin pole on top.
These are quick and easy to make. Definitely make a few and light up your yard this Halloween!

Planning a big Halloween?
Be sure to grab our FREE Halloween Decor Planner to get all of your plans organized!


Looking for something?
We've been doing this since 2012 so we have a LOT of blog posts!
Search stuff like: Ceiling Projects | DIY Plant Stands | Thrift Flips

Hello, I'm Morgan, half of the creative force behind CharlestonCrafted.com! With a passion for DIY that dates back to 2012, I've transformed three homes and now I'm dedicated to helping others craft their dream spaces. Let's turn your house into a home together!