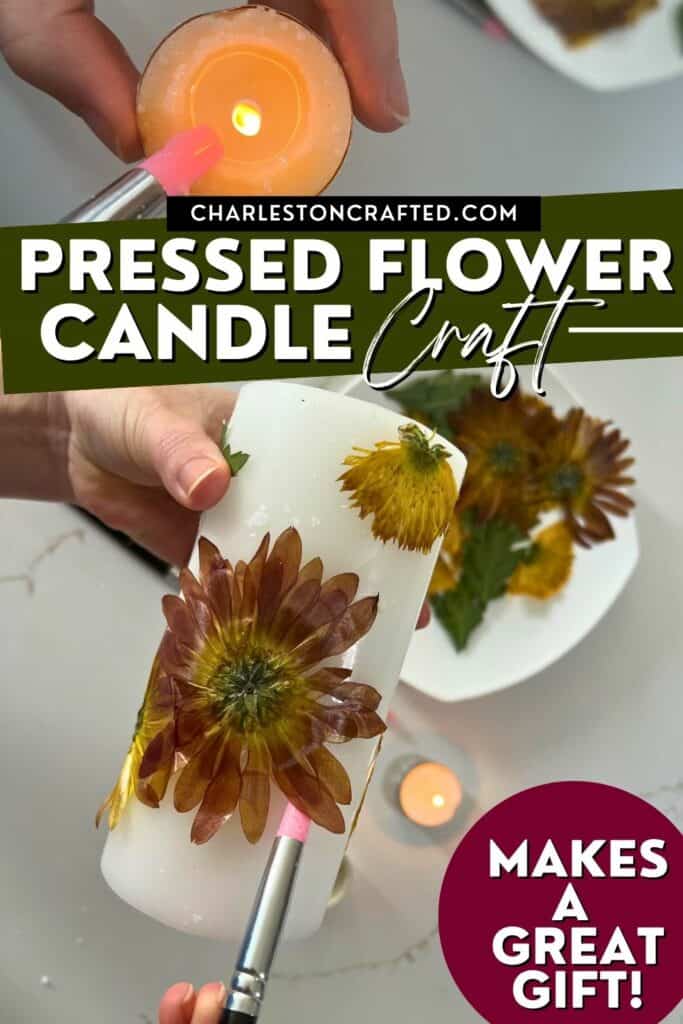
Want to make custom candles for a holiday, decor aesthetic, or as a gift? Here's a complete tutorial on how to make dried flower candles!
I just love candles and lately I have been enjoying doing candle crafts. I recently tattooed candles - which was so random and fun - and decided to step it up a notch with my next candle craft!
I have been seeing a ton of dried flower candles, and thought they were so elegant. I love that they can be customized with seasonal flowers or to match any color scheme.
These would make a great gift, and honestly once you start making them you are going to be hooked like I am!
How to make dried flower candles
Here's how to customize candles with dried flowers.
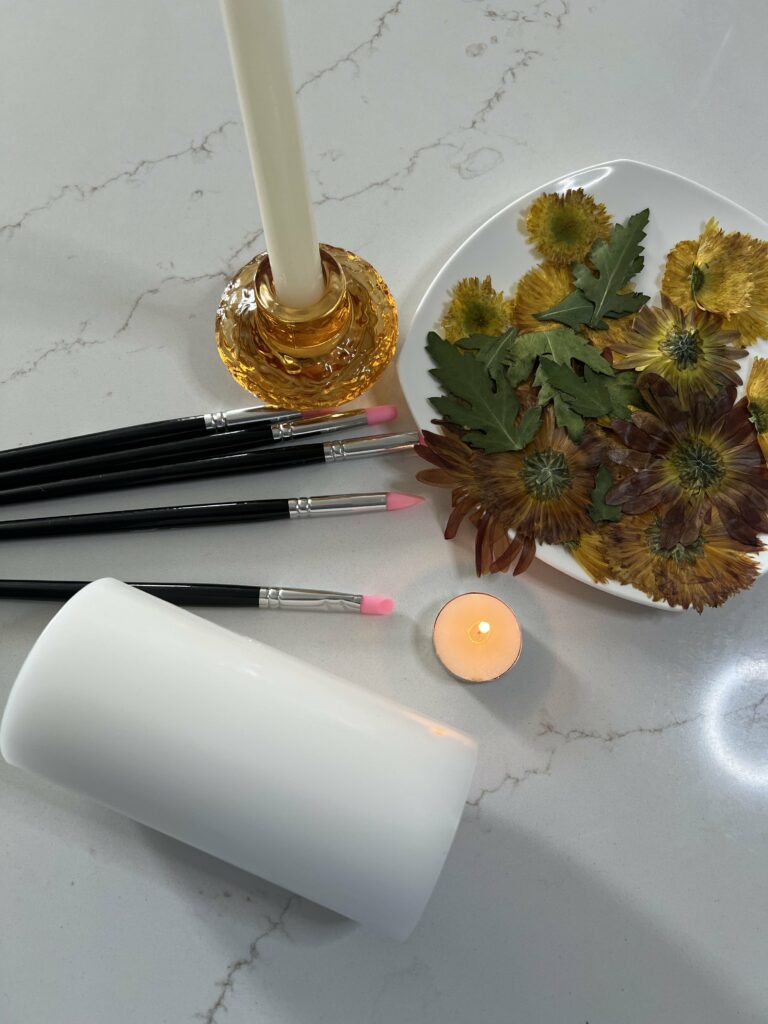
Supplies needed:
- Candles - taper or pillar style
- tea light candles in a clear or white wax color
- silicone paint brushes
- Candlestick holders (for tape candles)
- Dried flowers OR follow my steps below to dry your own with a Microwave Flower Art Press Kit!
Warning: this craft involves working with hot wax. Hot wax can burn you. Be careful, use common sense. Don't touch the flame with yourself. Don't touch melted wax with your skin. It's hot. Ouch!
How to dry flowers, quickly:
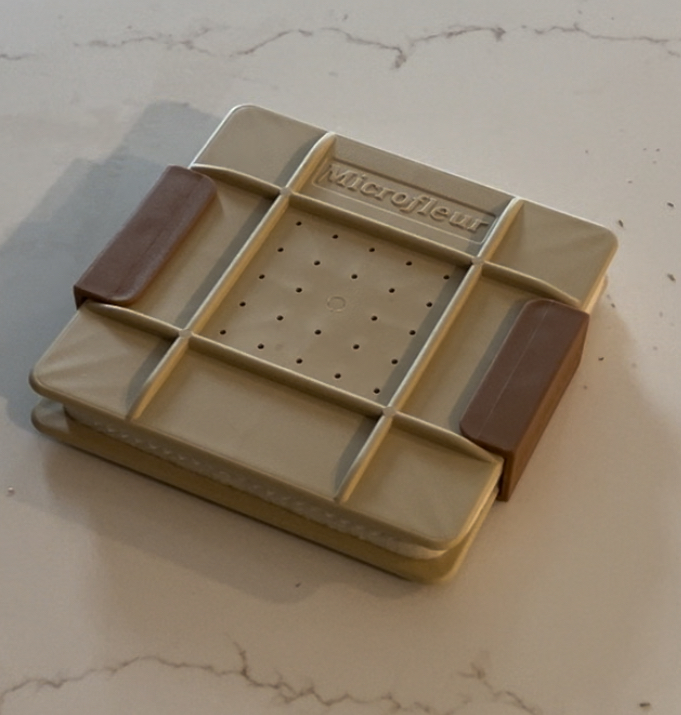
Here is how I pressed flowers for these candles in minutes using a Microwave Flower Art Press Kit!
STEP 1: Cut the flowers
Cut your flower heads/blooms off of the plant. You can also do leaves.
If you are doing a variety of types of flowers, it's suggested to stick to 1 variety per batch. This is because different flowers dry at different speeds.
For example, I found that leaves dried in less than half the time of blooms, and the larger and thicker the bloom, the longer it took to dry!
Mixing varieties could lead to burning them to a crisp.
STEP 2: Prep the press
I used a Microwave Flower Art Press Kit. To prep it, remove the clips, and open up all the pieces.
You will find: outer hard plastic shell, thick felt piece, white fabric, then repeat in reverse - fabric, felt, plastic.
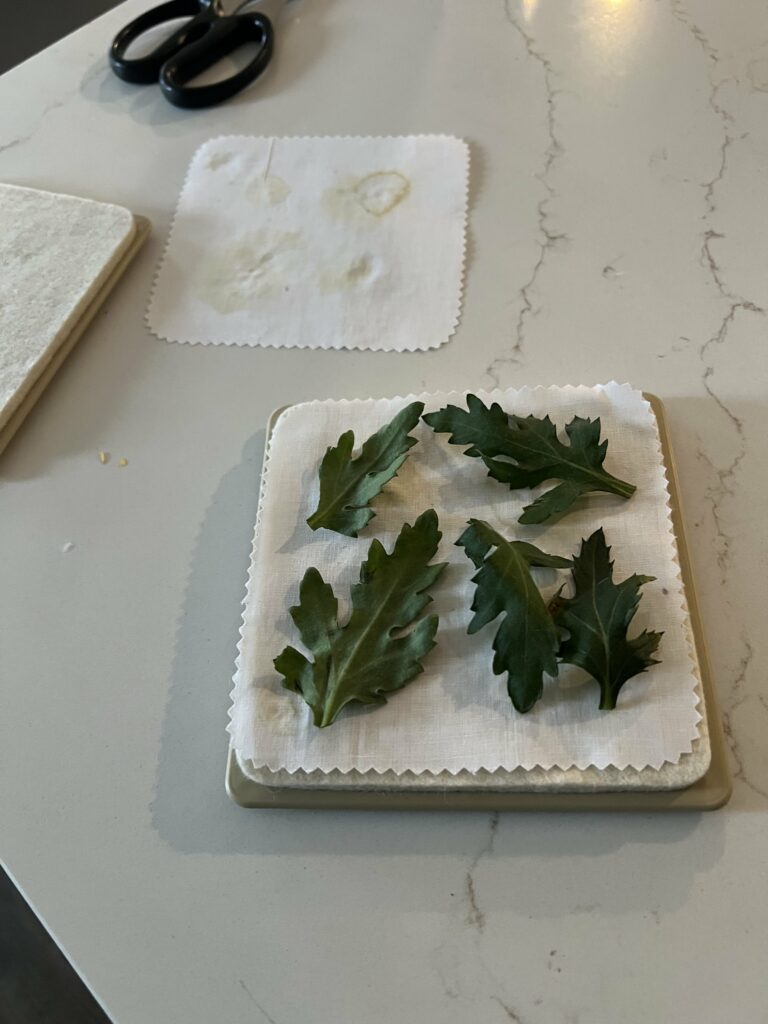
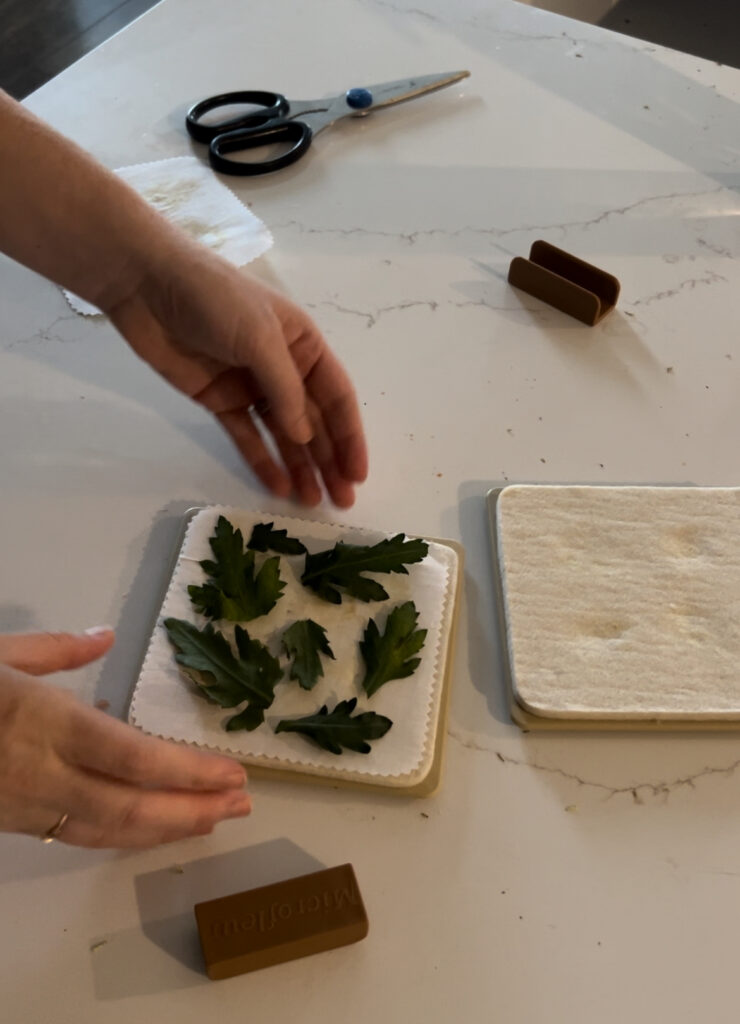
STEP 3: Lay out the flowers
Lay out your flowers on the fabric of the press. They should be 100% contained in the press - nothing hanging out the edges.
If your flowers touch or overlap, they will be fused together in this process. That could be beautiful - or annoying, depending on your design. Be thoughtful and take care!
STEP 4: Assemble the Press
Sandwich the flowers in the center of the press. Remember the order is: plastic casing (ridges out), thick felt, thin fabric, flowers, thin fabric, thick felt, plastic casing (ridges out).
Add the clips (it can be tight the first time, but it loosens up once the flowers start to wilt!
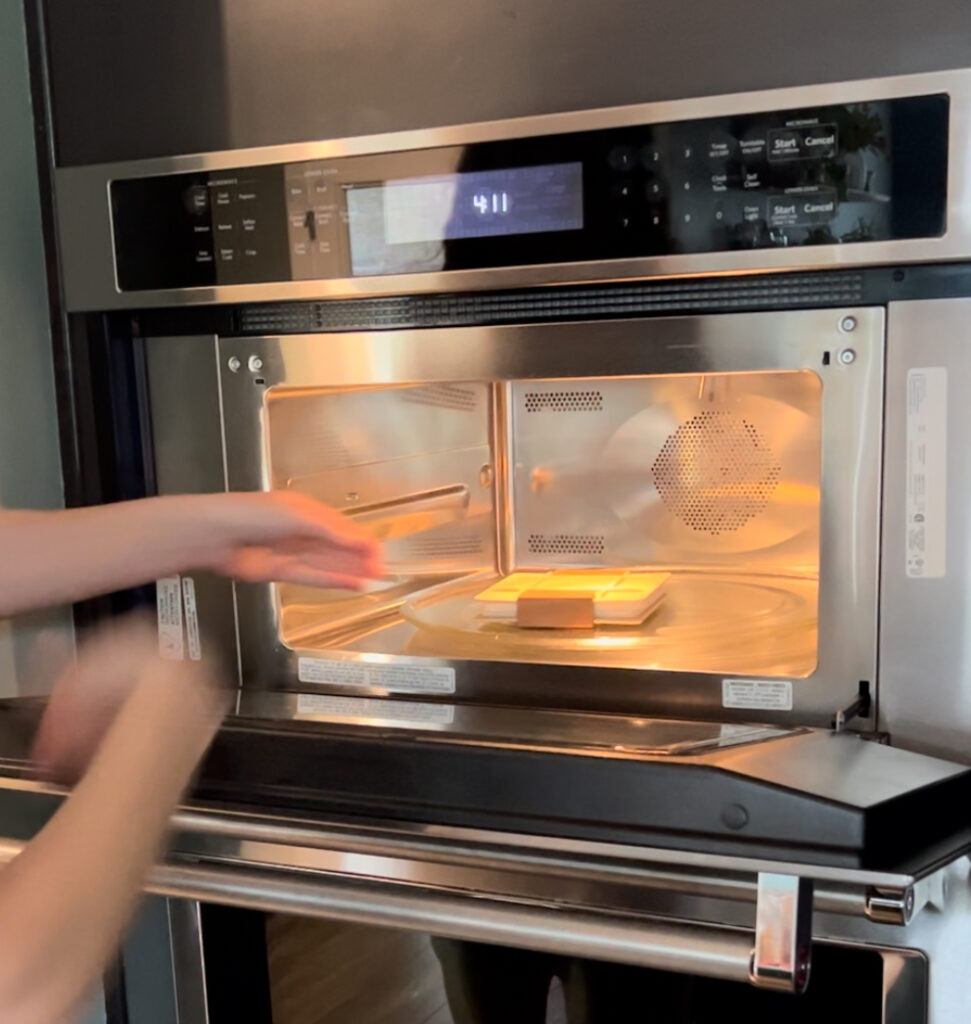
STEP 5: Get Cookin
Place your press in the microwave. Read the instruction booklet for suggested cook times based on your microwave's wattage. I could not determine my microwave's wattage even searching the model number, so I just did 30 seconds!
STEP 6: Check them out
Remove from the microwave and open the press. They are unlikely to be done, but they will have wilted significantly!
Warning: the press with be warm and very steamy. You are essentially dehydrating the flowers by steaming all the water out! Be careful and use common sense and caution!

STEP 7: Repeat
Pack back up the press sandwich and re-microwave. As I mentioned, my first blast was 30 seconds, and each subsequent blast I did for 20 seconds. Stick to ½-1/3 of your initial time!
It's important to do small bursts of drying and check the press between blasts so you don't overcook it.
Once you have done a few batches of a certain flower type, you will get comfortable with how long it takes.
As I mentioned, cook time varies greatly by flower type and even by the same type of flowers - smaller flowers cook faster than big ones!
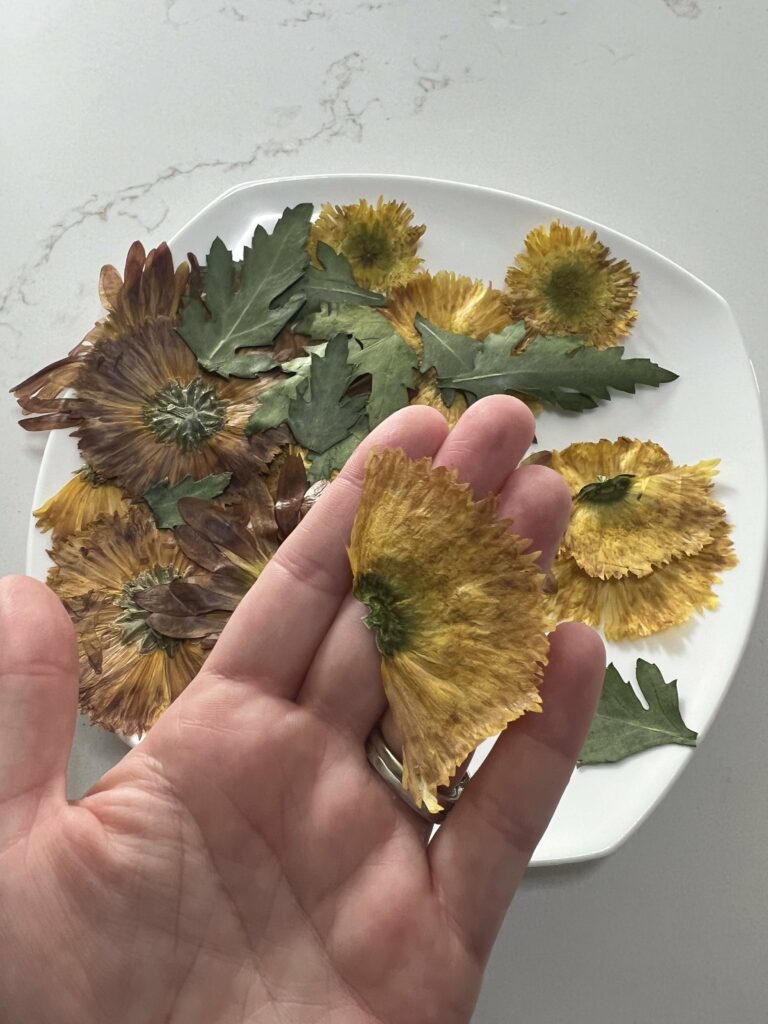
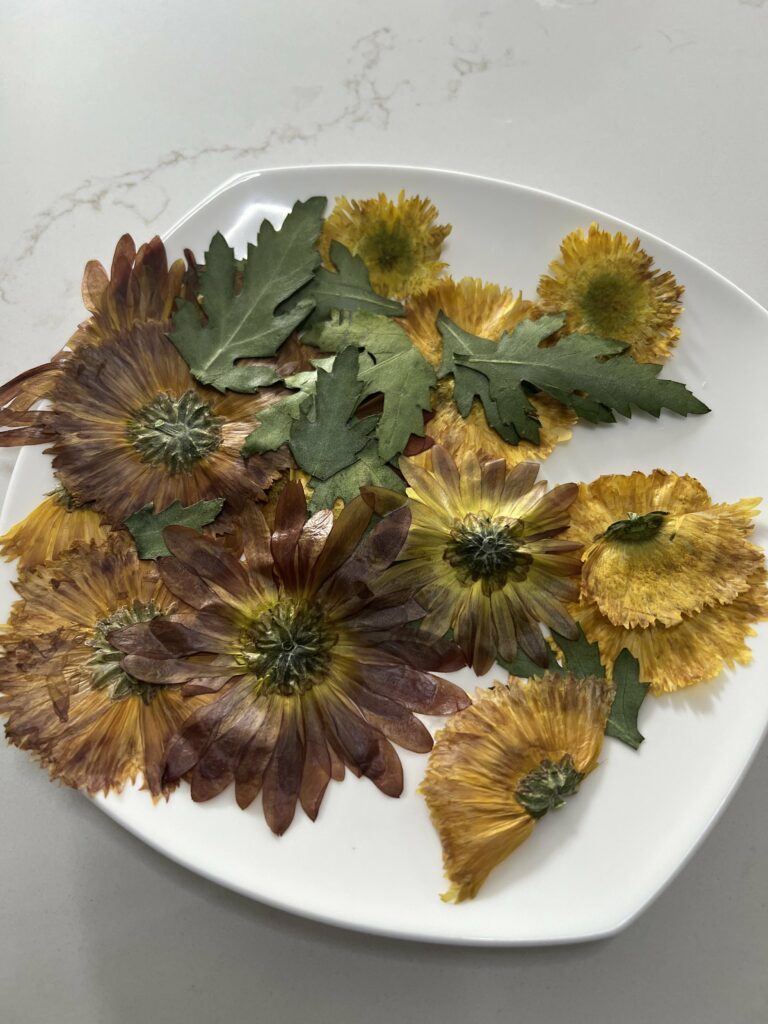
STEP 8: Let cool completely!
Your flowers are done when they are dry and papery. I found that mine started to naturally peel off of the fabric as they got done.
Check the centers of the flowers - that's what takes the longest to dry out!
Once they are fully dry, lay out on a clean surface and let cool completely.
Steps to make the candles:
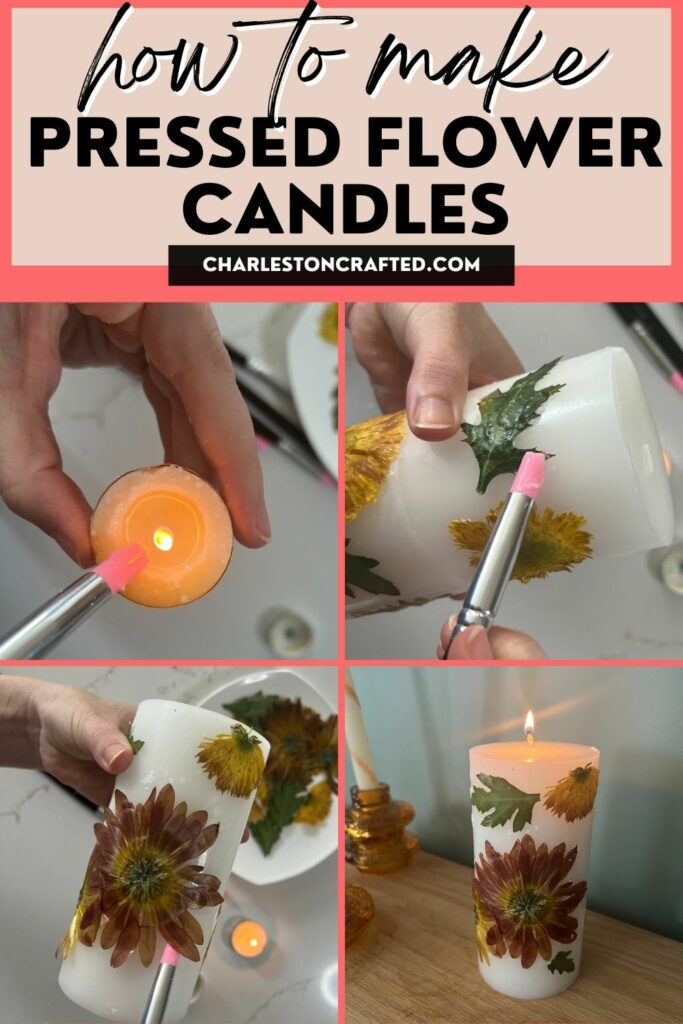
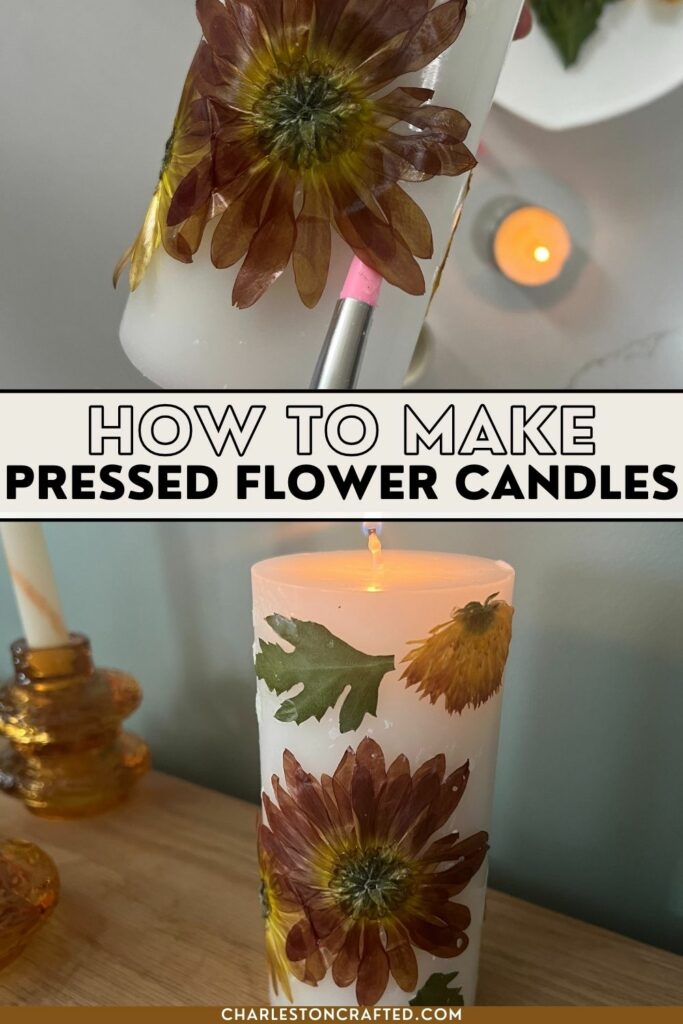
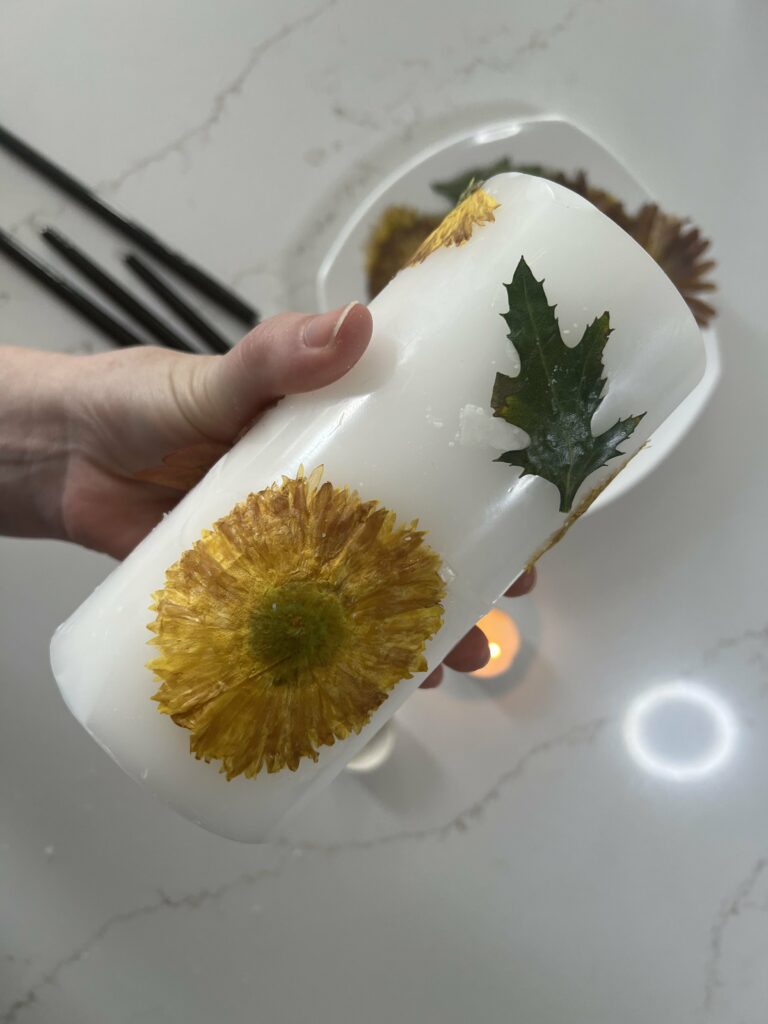
STEP 1: Light your candle
Light the votive candle and give it a few minutes to get juicy for ya.
STEP 2: Dip the brush
Once there is plenty of melted wax, dip your silicone brush into the melted wax. Do not let the silicone of the brush go in the flame, just the wax.
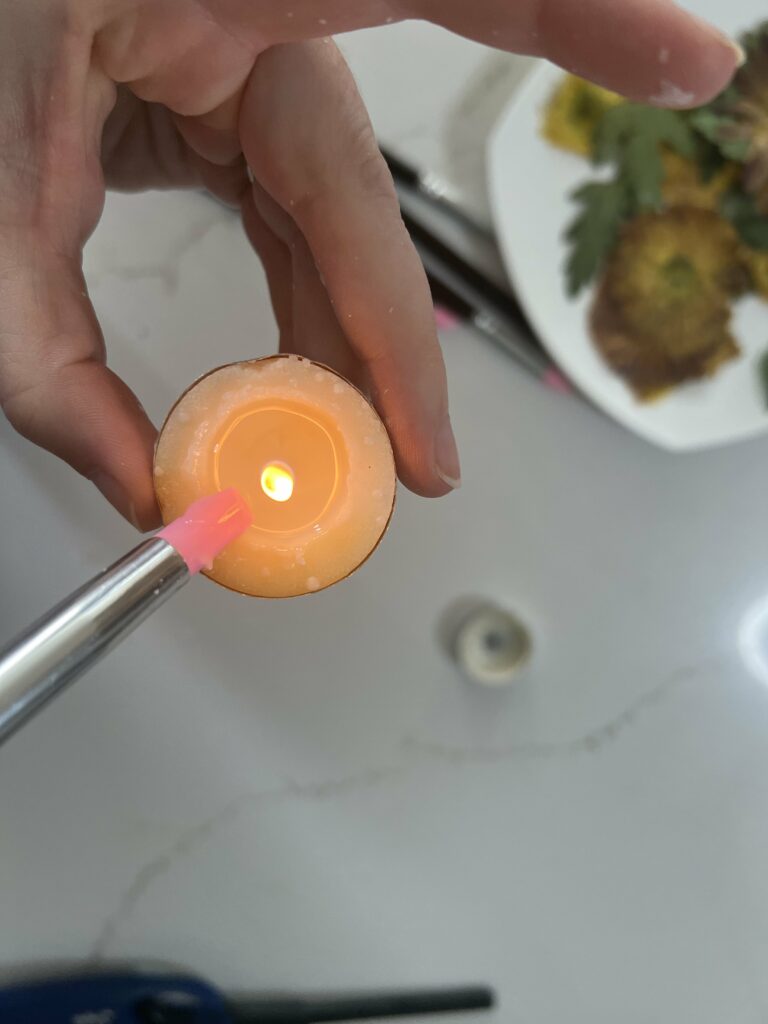
STEP 3: Paint the flowers
Work quickly to paint melted wax onto the back of your flower. The wax dries quickly, so just do your best in what you can do in about 2 seconds.

STEP 4: Press onto candle
Press the flower into the candle. Hold firmly to let the wax adhere.
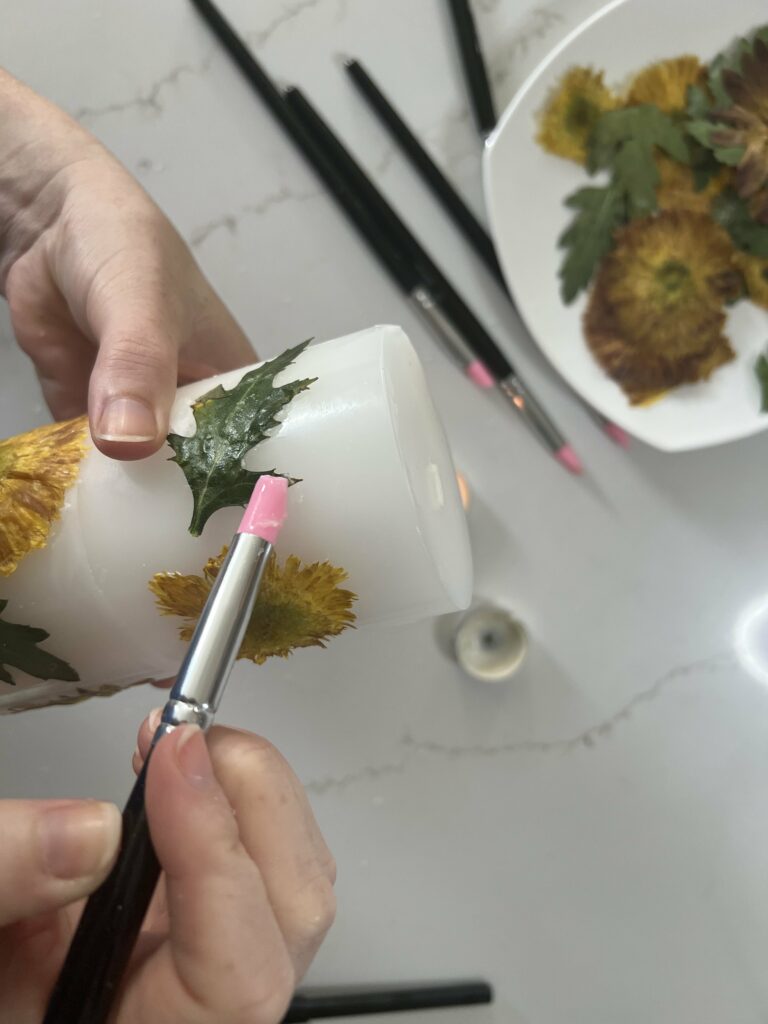
STEP 5: Touch up as needed
Since you have to work so quickly, you probably have petals or bits of the florals that did not get glued to the wax.
Dip your brush into the wax. Gently lift the loose parts of the flowers and apply a little wax, then press firmly to adhere.
Work your way around and around until the sides of the flowers are all secure!

STEP 6: Repeat for all flowers
Repeat for all of the flowers or leaves in your collection!
This was another slow and meticulous craft. But, it was almost meditative for me!
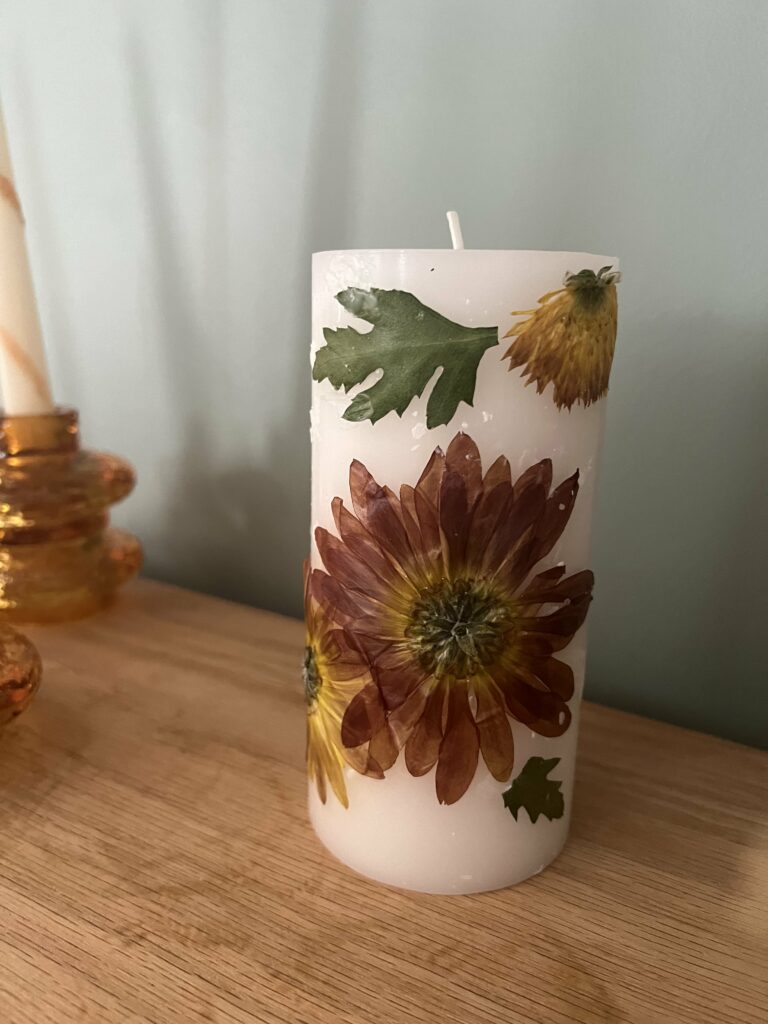
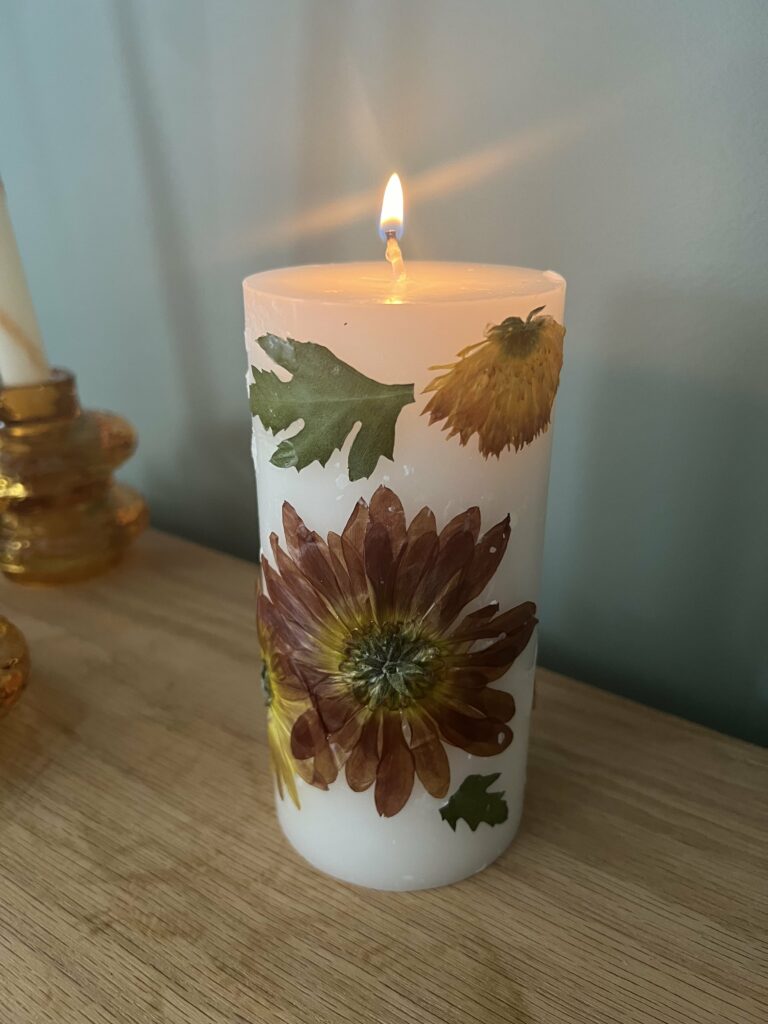
I think that these would be so fun to make in bulk for a wedding, holiday centerpiece, or as gifts!
If you decide to make them, please share!
Video Tutorial
Prefer to learn via video? Click here to watch my video tutorial on YouTube!

Looking for something?
We've been doing this since 2012 so we have a LOT of blog posts!
Search stuff like: Ceiling Projects | DIY Plant Stands | Thrift Flips

Hello, I'm Morgan, half of the creative force behind CharlestonCrafted.com! With a passion for DIY that dates back to 2012, I've transformed three homes and now I'm dedicated to helping others craft their dream spaces. Let's turn your house into a home together!