Want to turn a pumpkin into a DIY Halloween plant? Here's how to make a man eating plant for Halloween decor!
I absolutely adore decorating for Halloween and love mixing it up with a little bit of new decorations each year.
This year, we decided to do a spooky Halloween plant display on our mantle.
Of course, I had to start by making a couple of large man eating plants out of faux pumpkins to go on either end of the mantle.
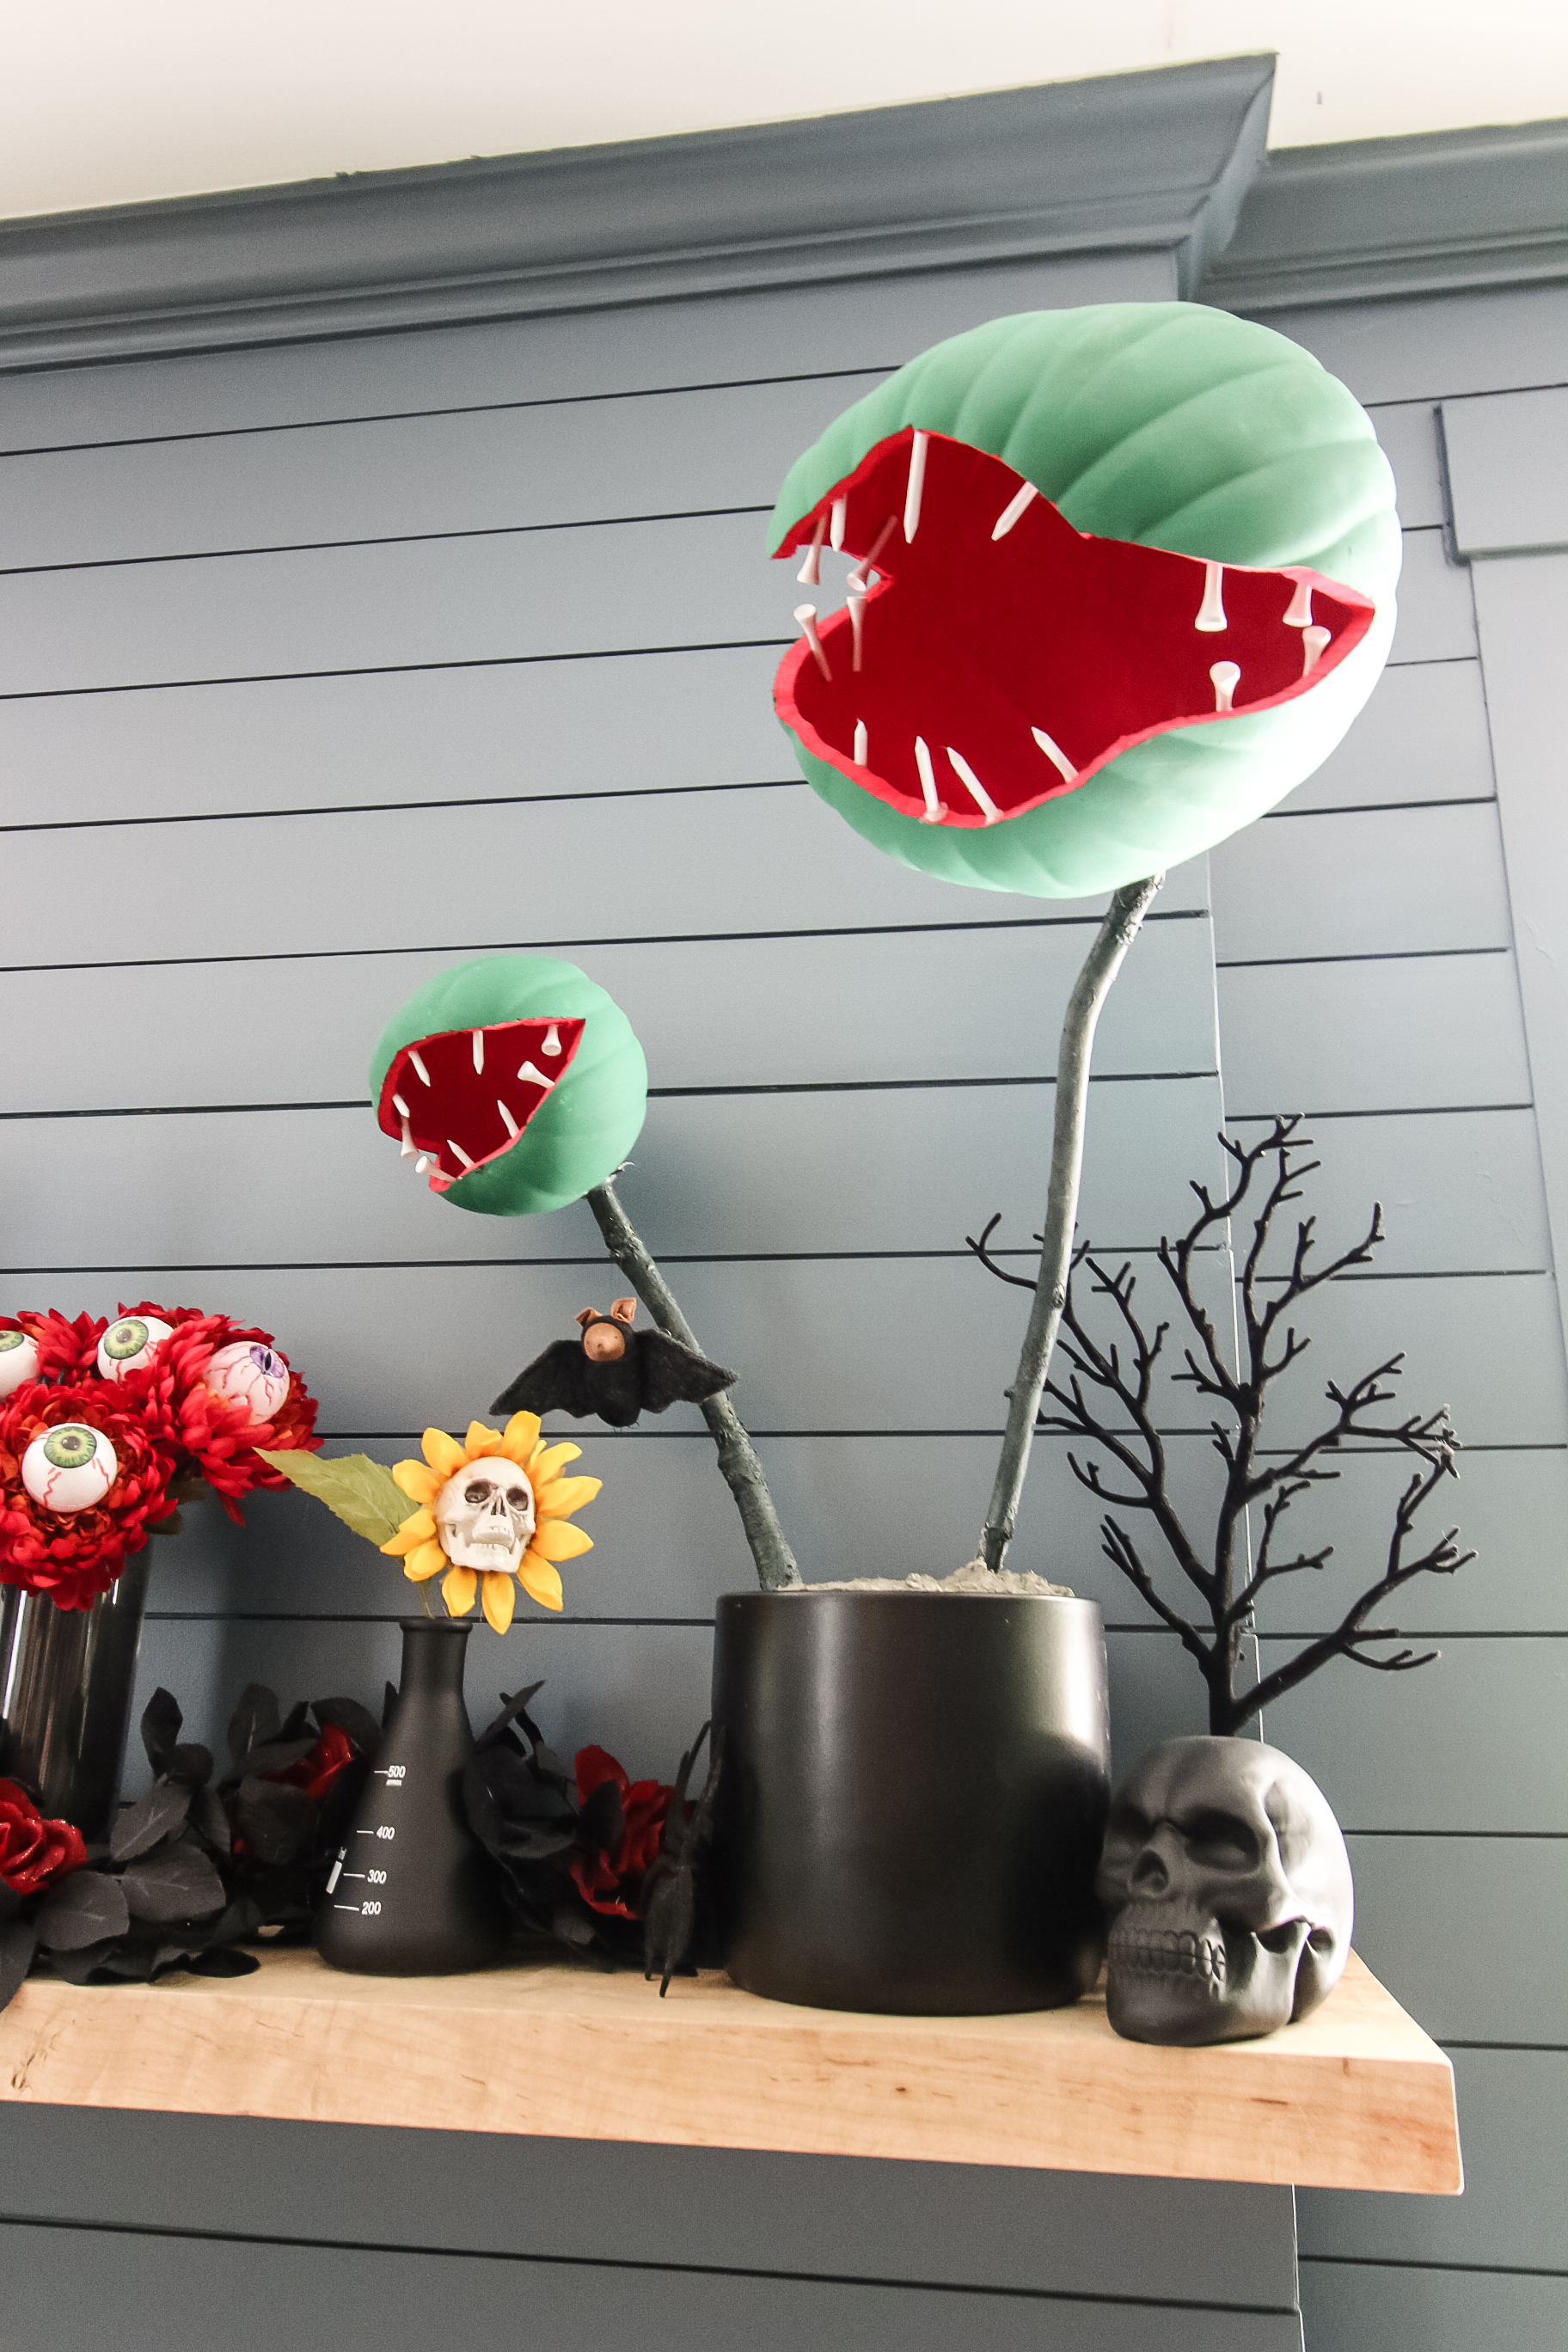
I'm not sure if these are meant to be giant venus flytraps or the plant from Little Shop of Horrors, but either way they are a fun play on Halloween for a houseplant lover like myself.
I did not invent this idea, you will see them all around during the month of October. At this point, they already sell them premade at Michael's.
However, I wanted to make them for a budget and honestly just because I really love crafting and making things from scratch.
I will say that there was nothing difficult at all about making these, and that it was very doable as a project to have a child help you with, too.
The most difficult part of this project were painting the pumpkins just because it was frustrating and then figuring out how to attach the pumpkin to the stick stem.
Lucky for you, we figured it out through trial and error so you can just do it the right way the first time.
Here's how we turned pumpkins into spooky Halloween man, eating plants!

How to turn a pumpkin into a Halloween man eating plant
Here's how easy it is to transform a foam faux pumpkin into a spooky man eating plant.
Supplies needed:
- hollow pumpkins
- sharpie or similar marker
- serrated knife or pumpkin carving knife
- green paint
- red paint
- suggested: primer for plastic
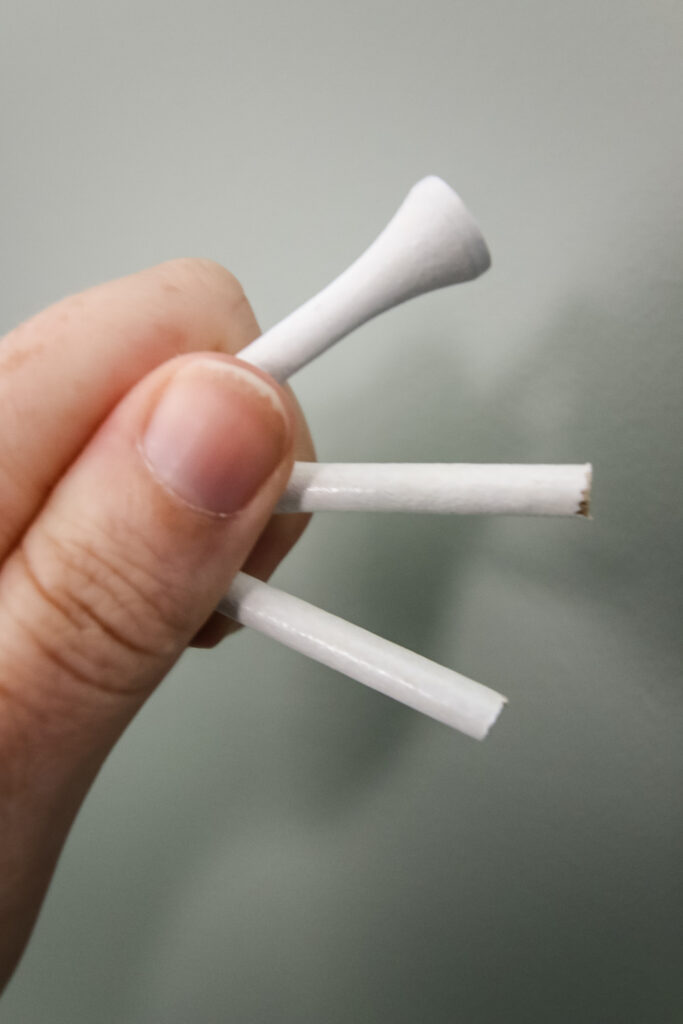
- golf tees
- hot glue
- sticks
- green spray paint
- black pots
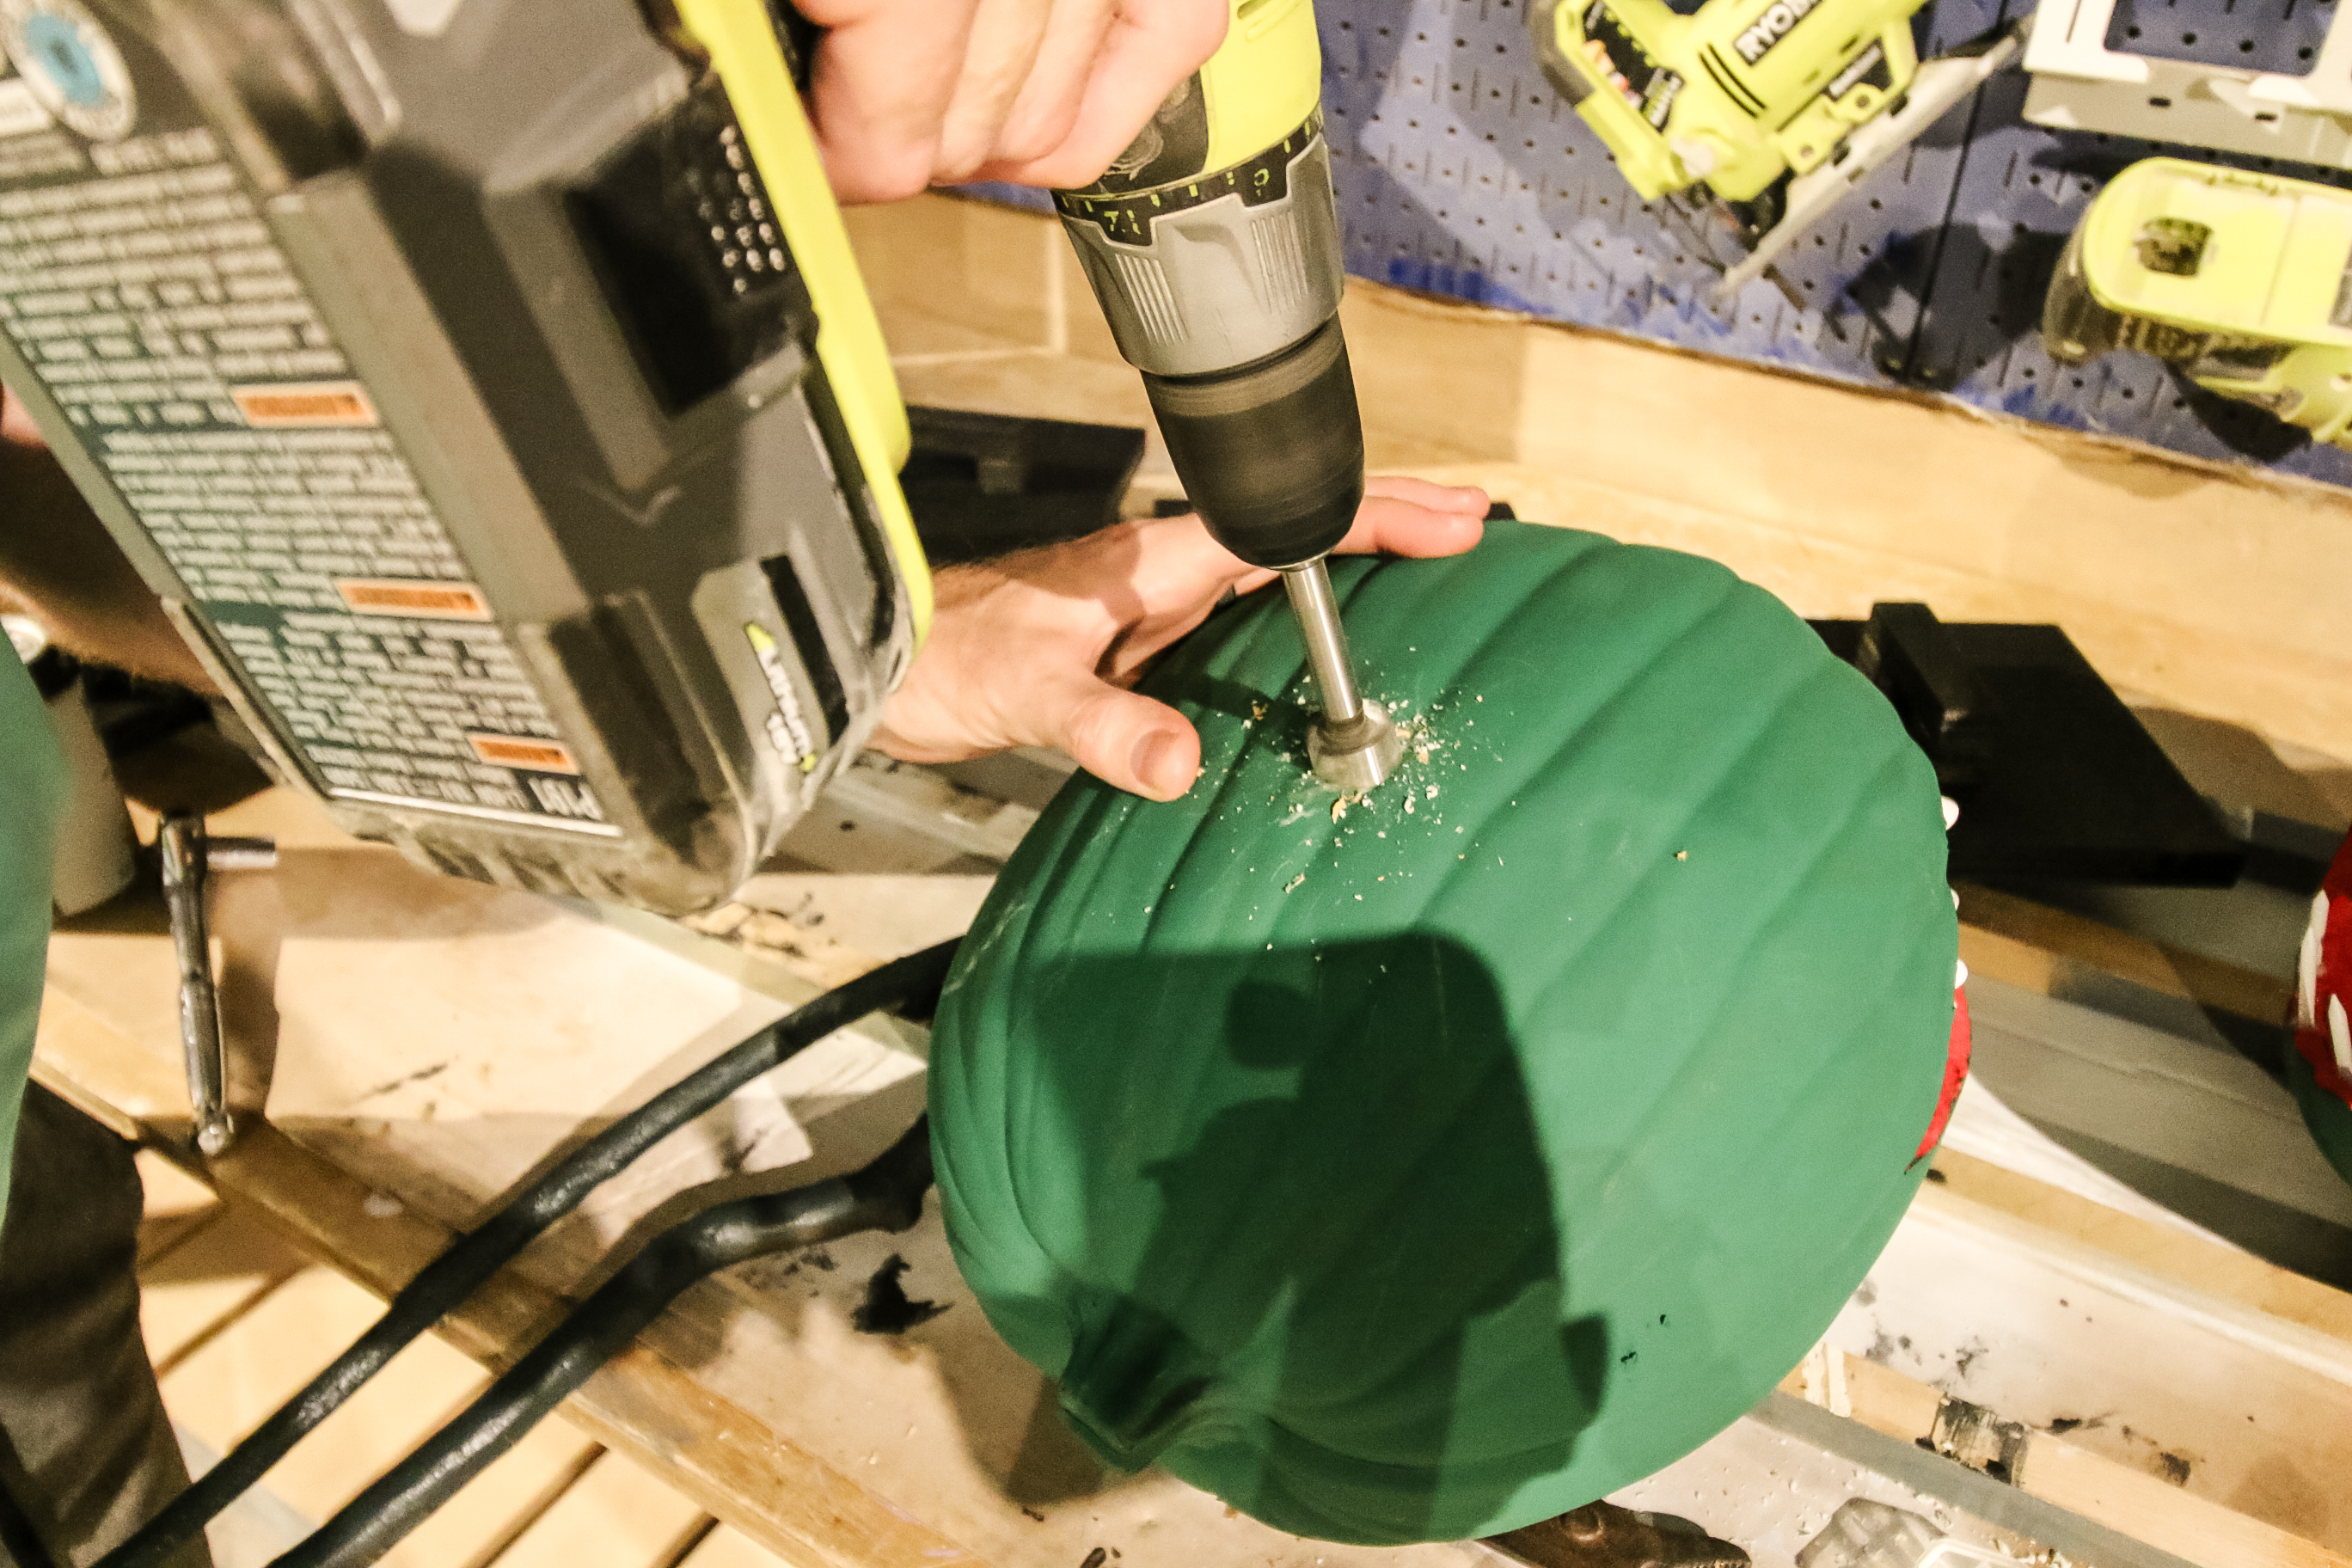
- Drill with forstner bit
- Nail
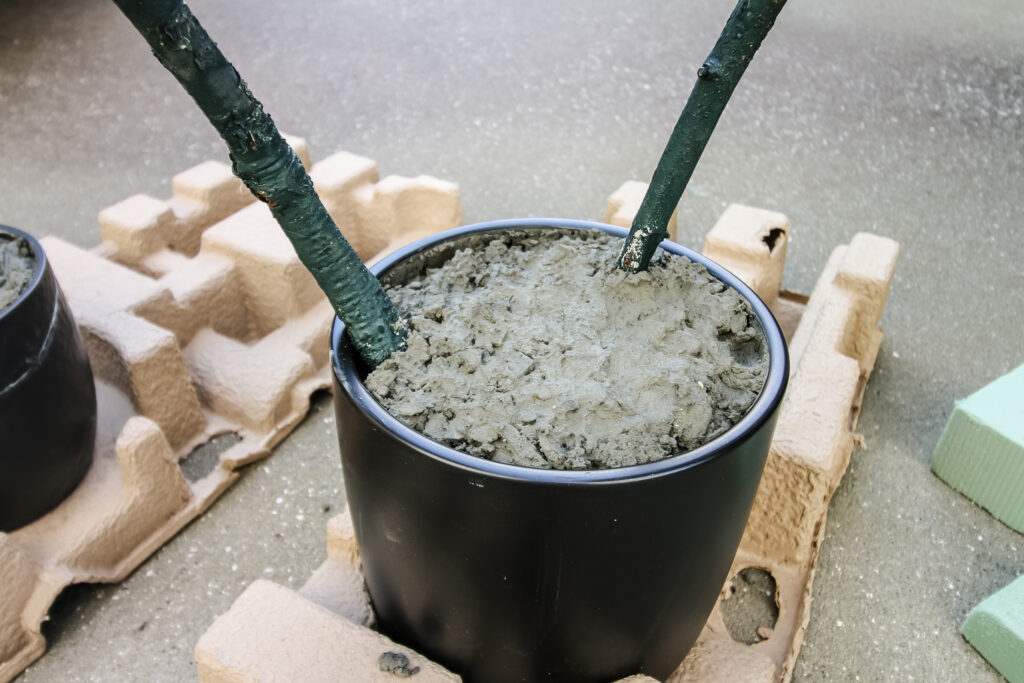
- Pot or vase
- Fast-setting concrete mix
Steps to make the Monster Plant for Halloween:
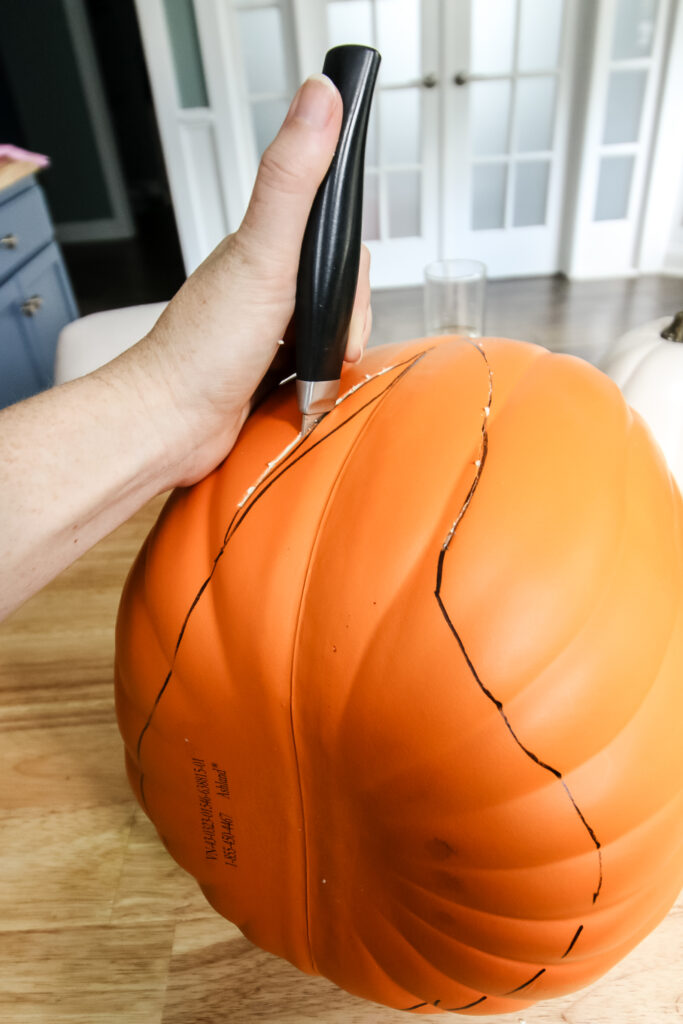
- Use a sharpie to design your mouth cut out on your pumpkin. Some people prefer to cut teeth out into the shape. I personally have a hard time carving anything intricate, so I went with a smooth mouth and added teeth later.
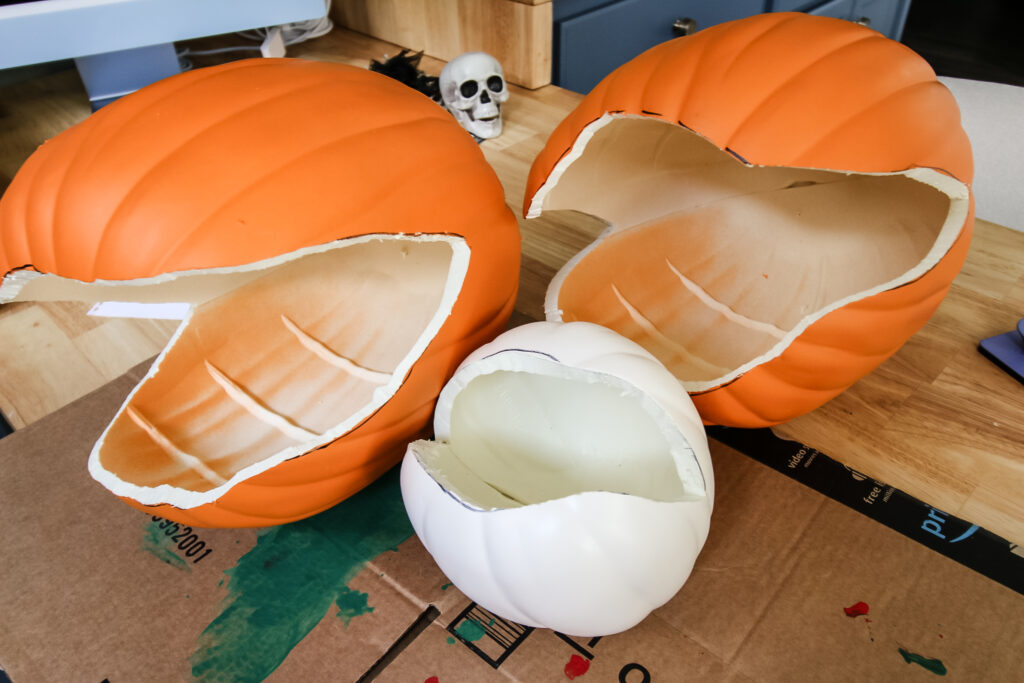
- Stab a serrated knife into the line and cut along the line to cut out the mouth.
- Repeat for each pumpkin you wish to use.
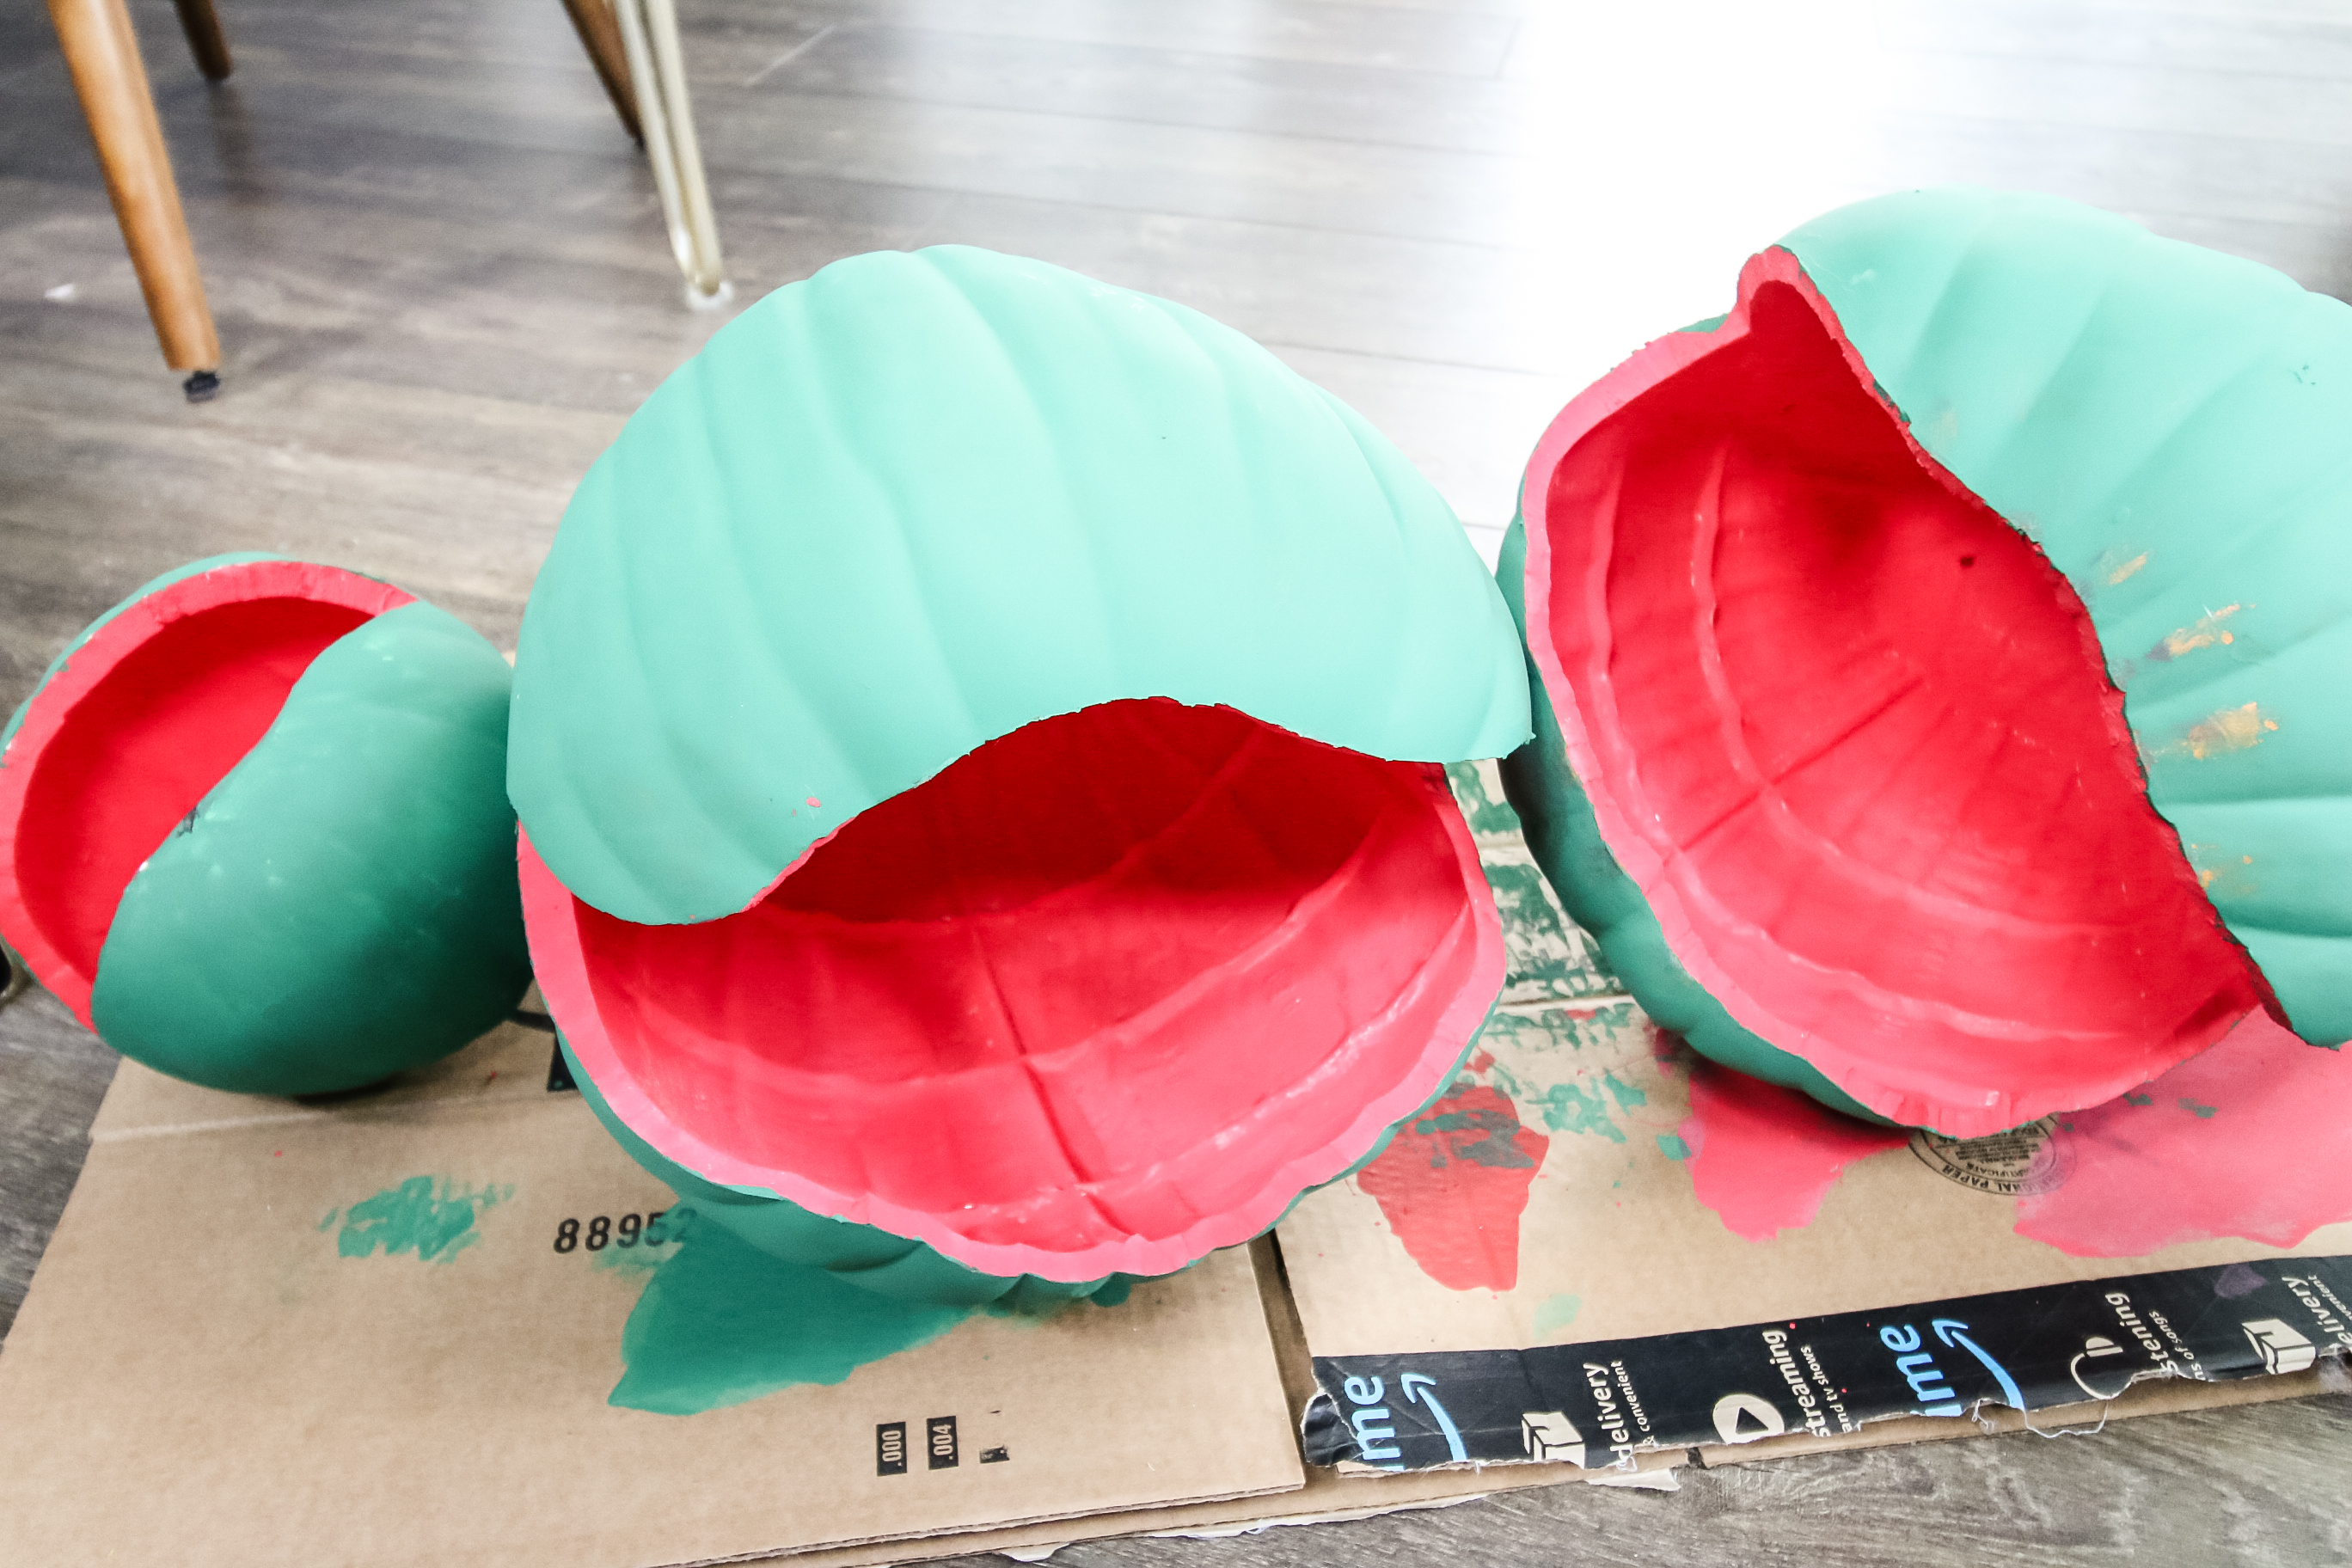
- Now it is time to paint. You want the inside of the pumpkin to be red and the outside to be green. I used plain acrylic craft paint for this and it was honestly a nightmare. The pumpkin has a plasticy coating that made it take literally EIGHT coats to get decent coverage. My suggestion would be to coat the entire thing inside and out with a spray primer designed for plastic. Then, I would spray paint the outside green and use a brush to paint the inside red! That seems like it would be easiest. Allow to dry.
- The golf tees will be your teeth. Depending on the size of your pumpkin, you may prefer to snap them in half lengthwise so they look like the right scale. We used garden shears to snap these neatly and easily.
- Use hot glue to attach the teeth to the mouth. Allow to dry.
- Gather sticks to serve as the stems. Make sure they are very strong! Remove any loose bark and spray paint green, rotating to get full coverage.
- Use a forstner bit the size of your stick to drill a hole in the pumpkin where you want the stick to go in. Then use a small drill bit the size of a nail and drill two holes through the stick near the tip and about ½" apart from each other.
- Push the stick in the hole so ½ inch is sticking up and the pre-drilled holes are split so one is inside the pumpkin and one is outside.
- Add a nail into each hole to hold in place. It's best if you can even push the nails through the stick and into the pumpkin so it holds a little better.
- Secure with hot glue around the hole on the inside and outside, gluing the pumpkin, nails and sticks together.
- Optional: you can glue faux leaves to the stems if you want leaves.
- Because these are so heavy, we had to concrete them into their pots to hold them upright. Everything else was too top heavy and flopped over. We mixed fast-setting concrete and poured it into the pots, then stuck the sticks into the concrete.
- Display and enjoy!
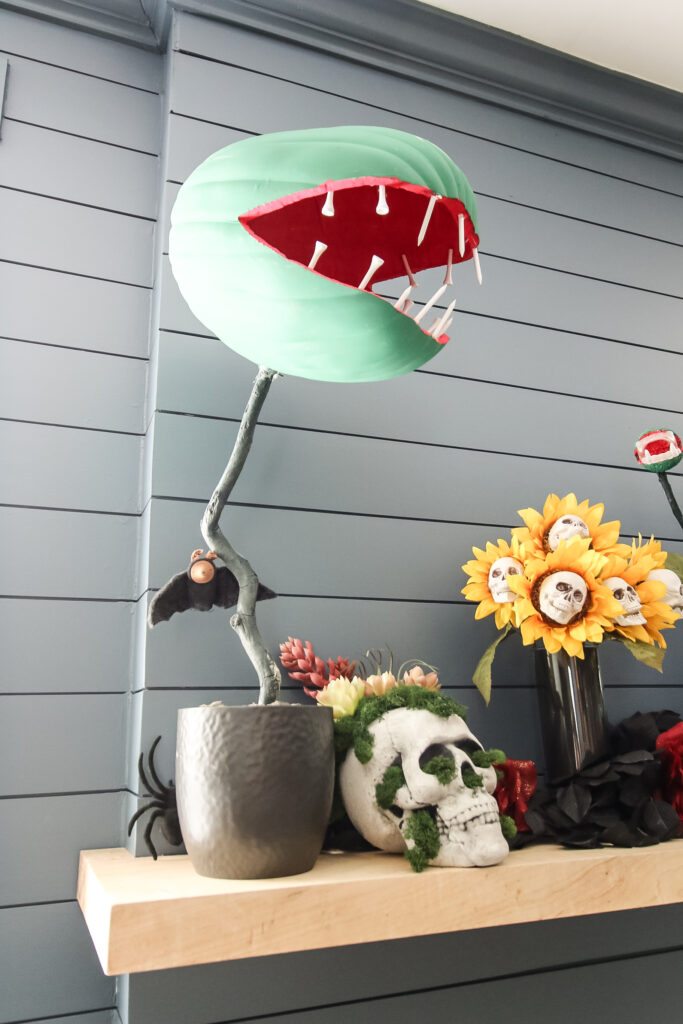
I absolutely love how these turned out and think they are the perfect showpiece for our mantel!
Any questions about this man eating plant DIY?

Looking for something?
We've been doing this since 2012 so we have a LOT of blog posts!
Search stuff like: Ceiling Projects | DIY Plant Stands | Thrift Flips

Hello, I'm Morgan, half of the creative force behind CharlestonCrafted.com! With a passion for DIY that dates back to 2012, I've transformed three homes and now I'm dedicated to helping others craft their dream spaces. Let's turn your house into a home together!