Want to make DIY Wall Acrylic Frames? Here's the inexpensive tutorial!
Happy Monday! Last week, one of my favorite blogs, Chris Loves Julia, shared a gallery wall that turned a bit scandalous in the comments.
They purchased wall mounted acrylic frames on Etsy and got blasted for not making them homemade from scratch from plastic that they melted from their own hopes and dreams. Well, practically.
I do want to say that I LOVE Chris Loves Julia, love reading their blog, love love love their podcast. I don't blame them for buying nice things - if they can afford it, they deserve it.
This is just a problem that happens with DIY bloggers. We often start DIYing in our early 20s because we are broke!
We buy a dirty old lamp at the thrift store and spray paint it because it's that or no lamp! Ten years later, if you can afford a new lamp, you would probably rather just buy a nice lamp that you love.
But, I can imagine how hard it is when you've built a huge audience to have that audience pivot and grow with you and not just want what you no longer want for yourself.
Regardless, I haven't "made it" yet. I definitely still tend towards buying the cheapest possible version of things or trying a DIY hack.
So, here is how I hacked these wall mounted acrylic frames that CLJ posted about last week. You can see my inspiration on Chris Loves Julia here or purchase it directly on Etsy here. Hands up for the readers who can afford it, here's my hack for those who can't.
DIY Wall Mounted Acrylic Frame Gallery Wall

What you need (for one frame):
- 2 sheets acrylic in desired size (more about this below!)
- four 1 ½" screws
- 4 self-tapping drywall anchors
- 4 pieces of standoff hardware for glass
- 1 photo (about 2" less in length and width than your acrylic)
- OPTIONAL: gold or other colored spray paint if you don't want silver hardware
What you do:
First, let's talk about the acrylic. Did you know that hardware stores sell sheets of it!? They have large sheets that you can pay to have cut in store (ask in your store for the rates for cutting! It varies).
But, they also have a lot of standard sizes ready to buy. Look Ma, no cuts! This is the option I went with - for each frame you will need 2 sheets. My sheets are 11"x14" and were just over $4 at Home Depot.
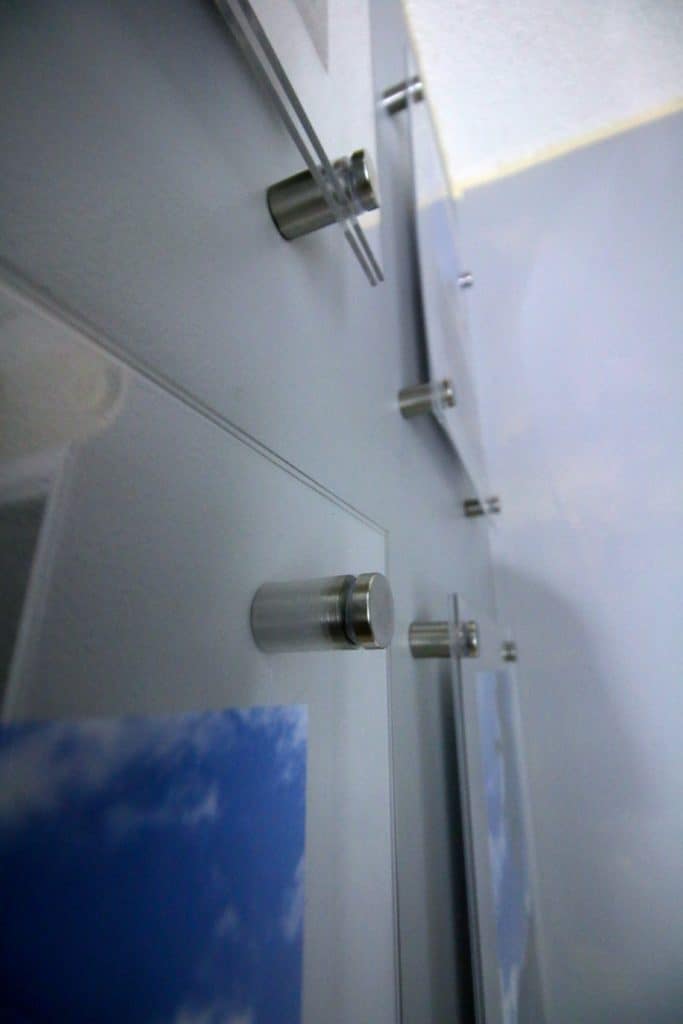
So the first step is to drill holes in your acrylic. I created a little cardboard guide so that they were all even, and marked a corner and ½" in, where I wanted my hole. You need a hole in each corner on each sheet - so 8 holes total.
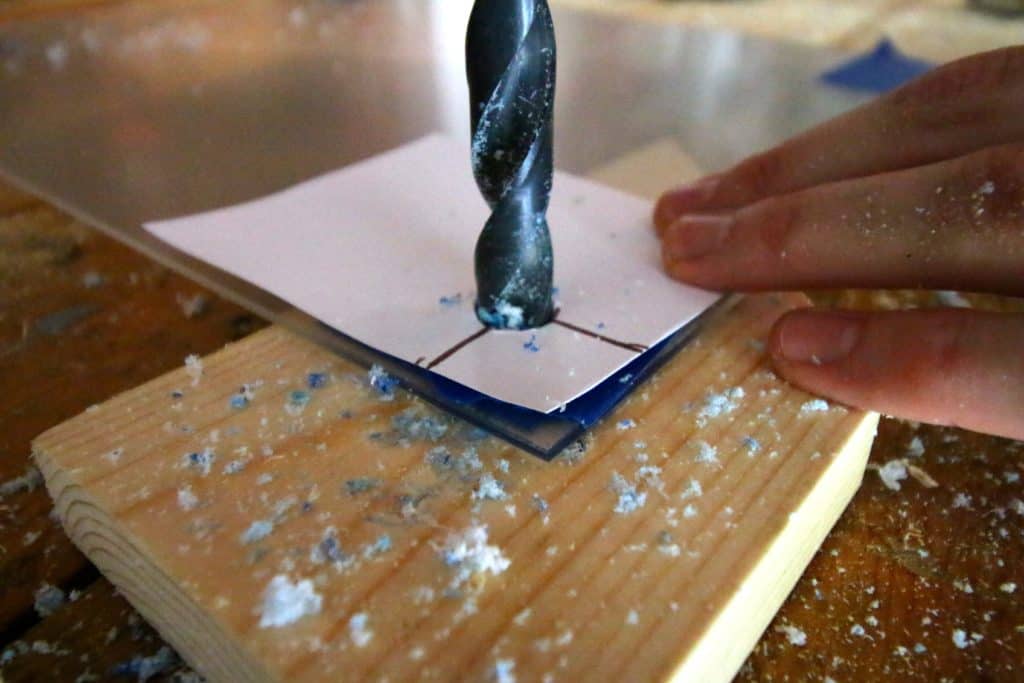
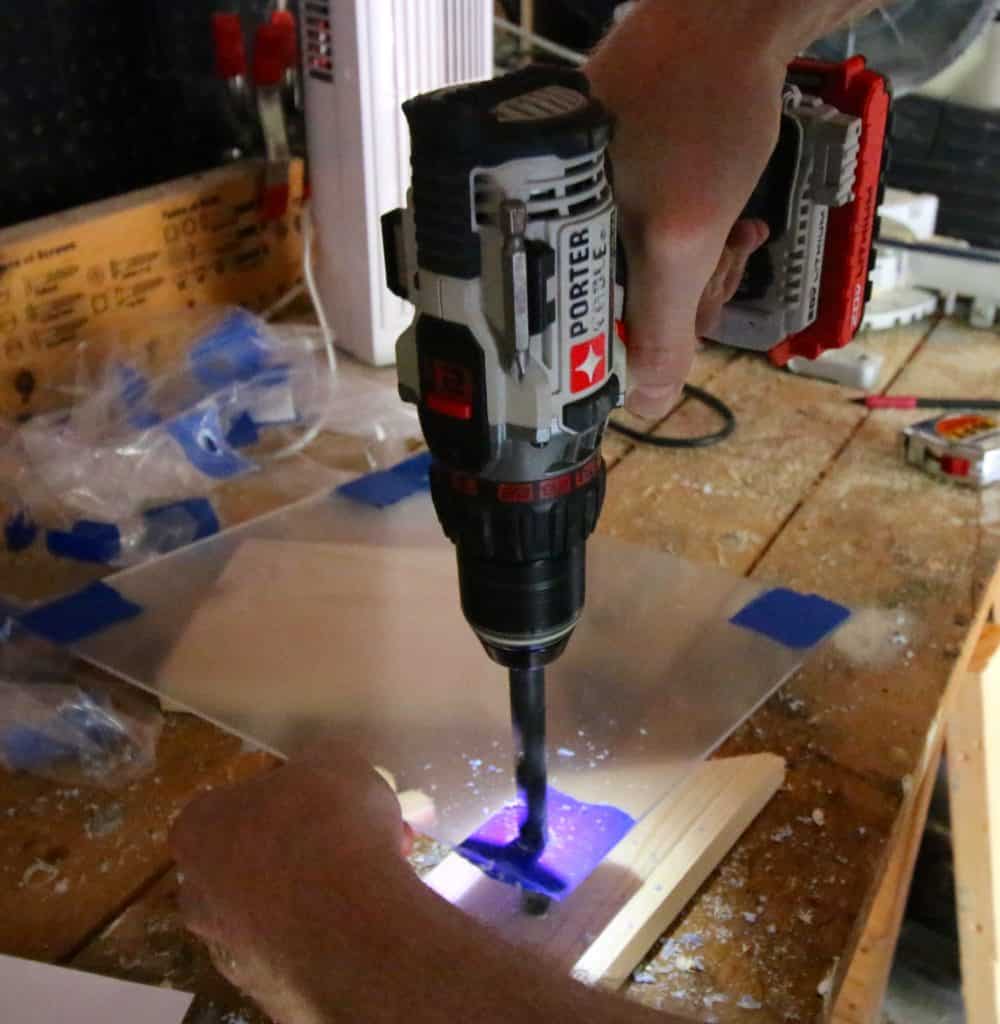
TIPS FOR DRILLING HOLES IN PLASTIC: start out by putting a piece of painter's tape on each side of each corner. Then, use a ½" drill bit to put a small divot mark in the plastic. Very small.
Then remove the paper guide and put your drill in reverse. Apply pressure and basically just melt the plastic with about 30 seconds of pushing the drill bit in reverse into the plastic.
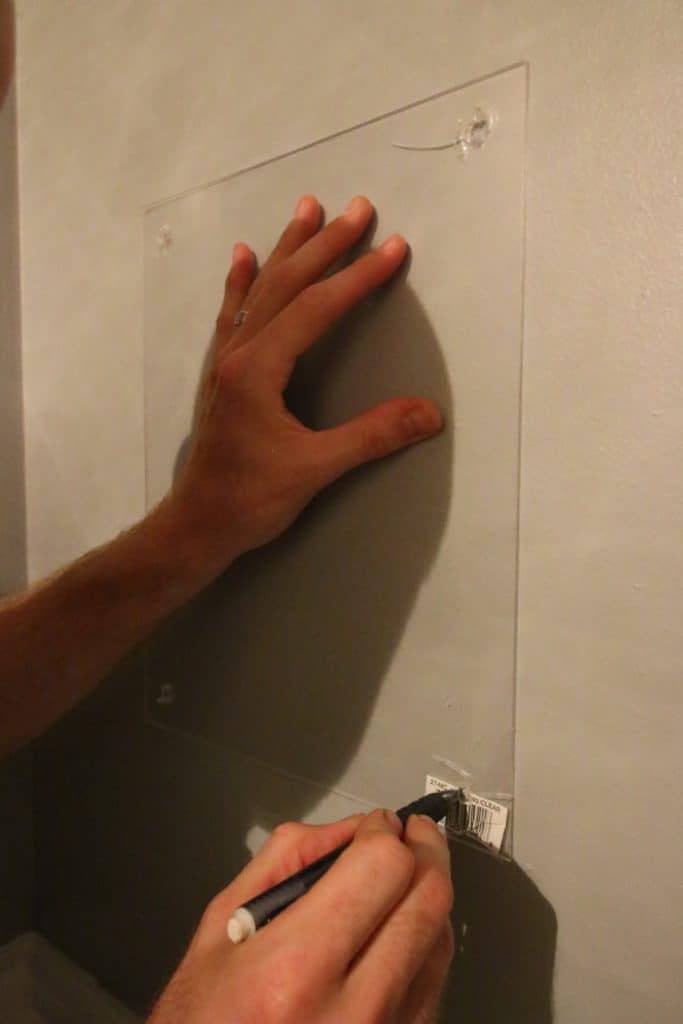
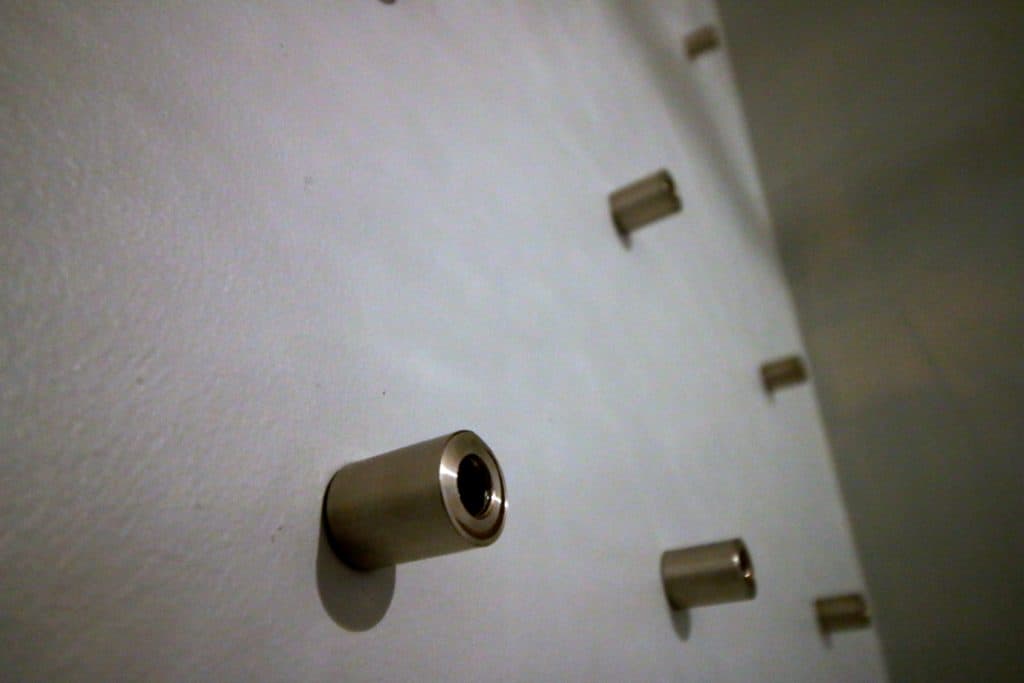
Next, you start setting up your wall for the screws. This takes a lot of measuring and using a level to be sure that it is lined up correctly. We used a cracked acrylic piece (that had the holes in the right spot) as our guide to mark the spots to drill.
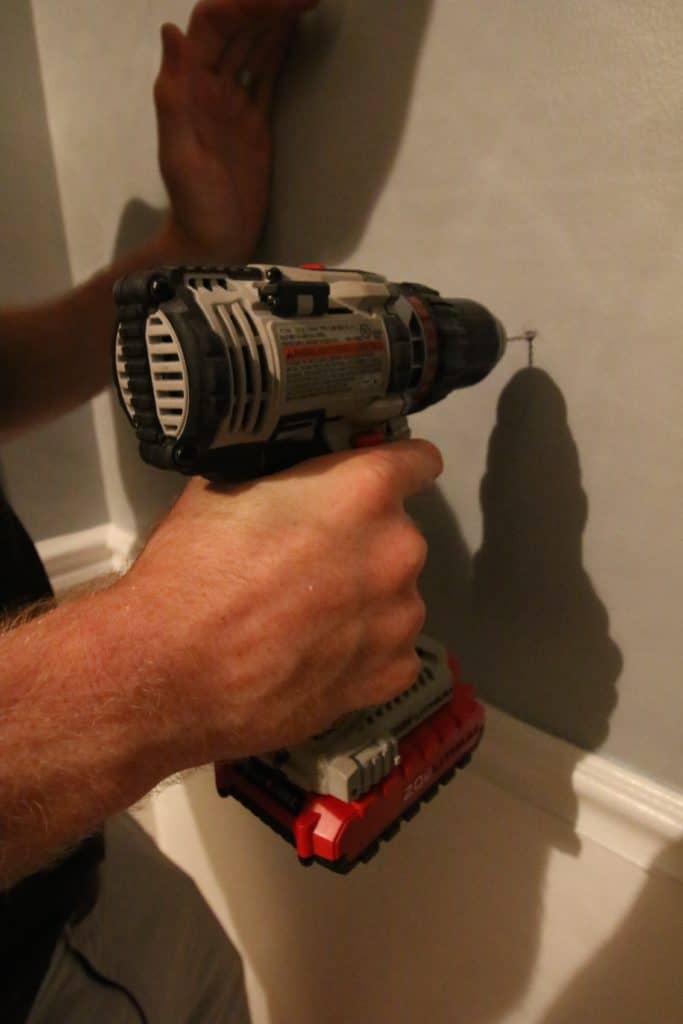
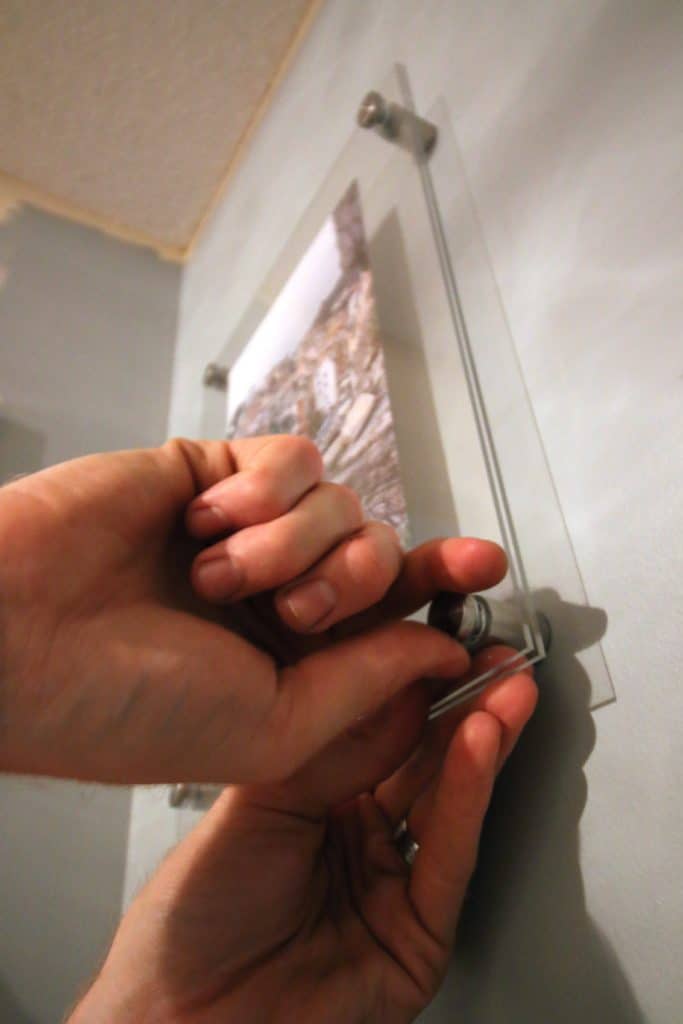
Drill a ⅜ inch hole into each spot (4 per frame) and then drill in a self tapping drywall anchor. This will hold the frame extra well into the wall.
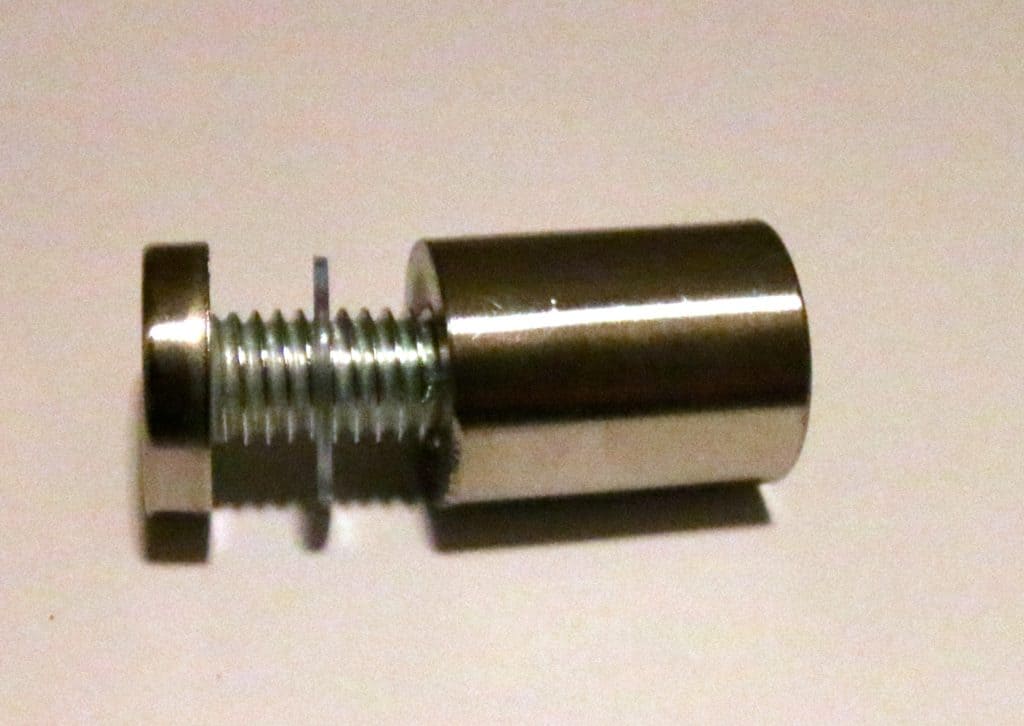
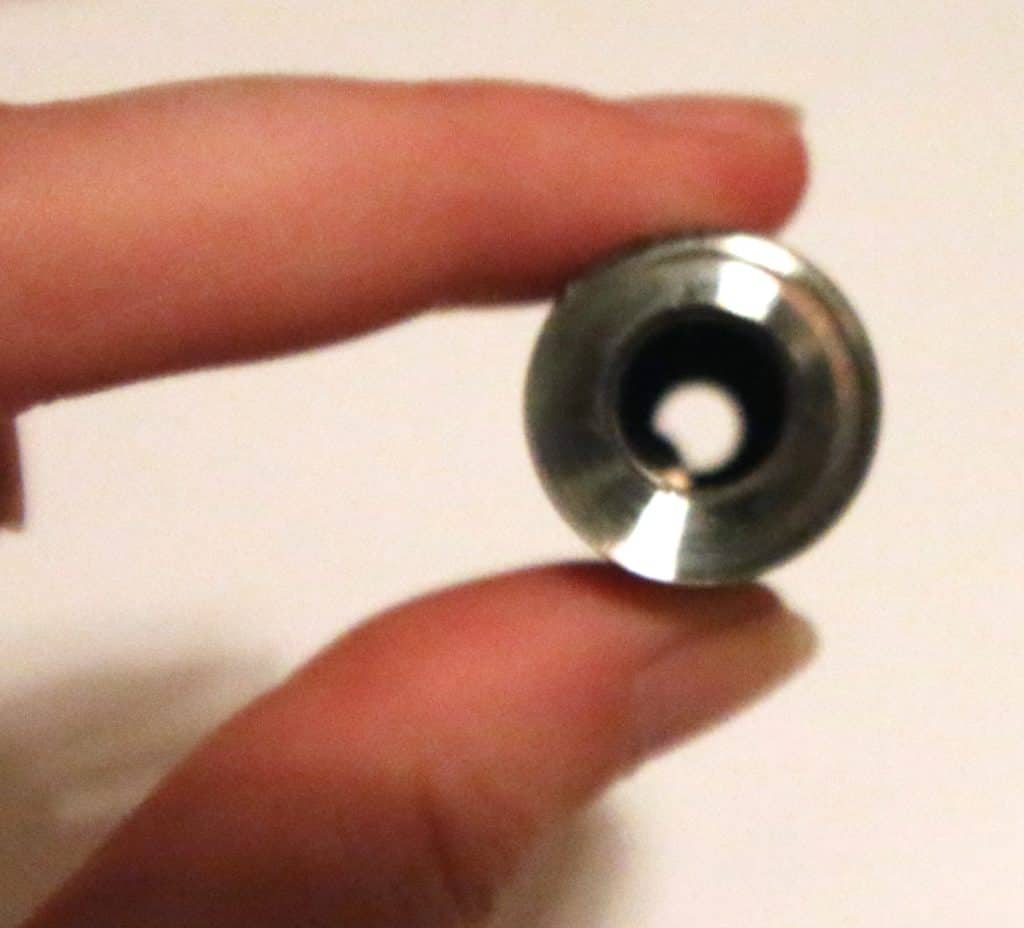
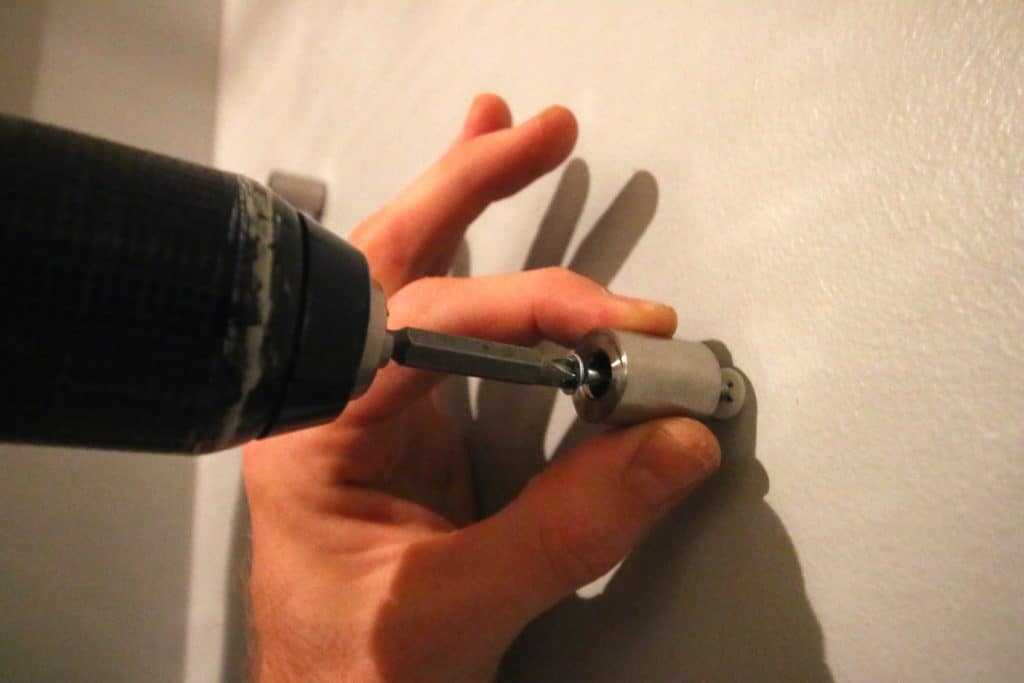
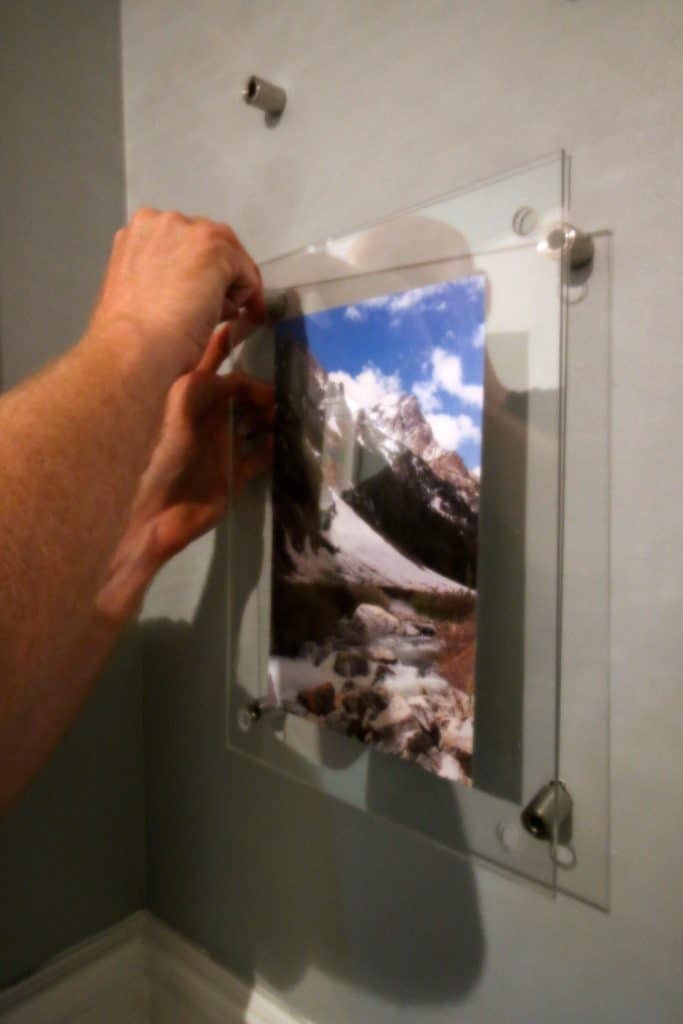
Now, drill in your hardware. It comes in two pieces - a tube and a bolt. You will use your screw (not included in the hardware kit) to attach the tube into the wall.
Next, add your photo in between the 2 sheets of acrylic. You might want to use double sided tape or glue dots to hold it straight and in place.
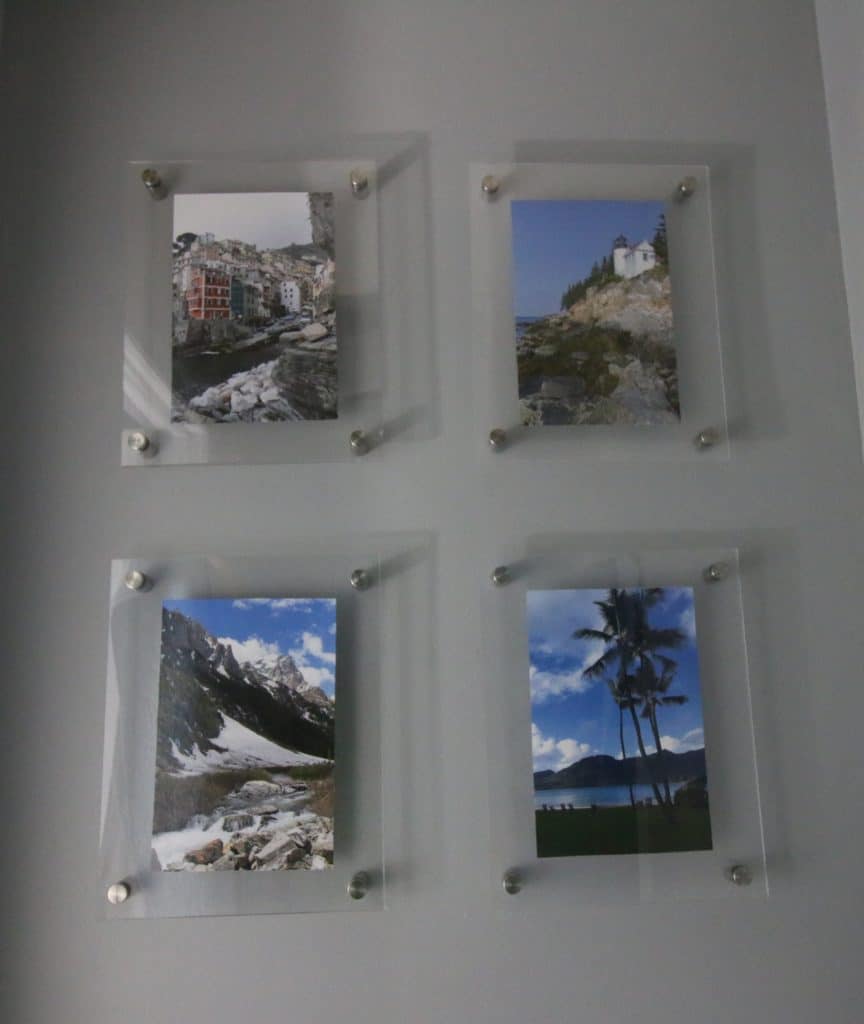
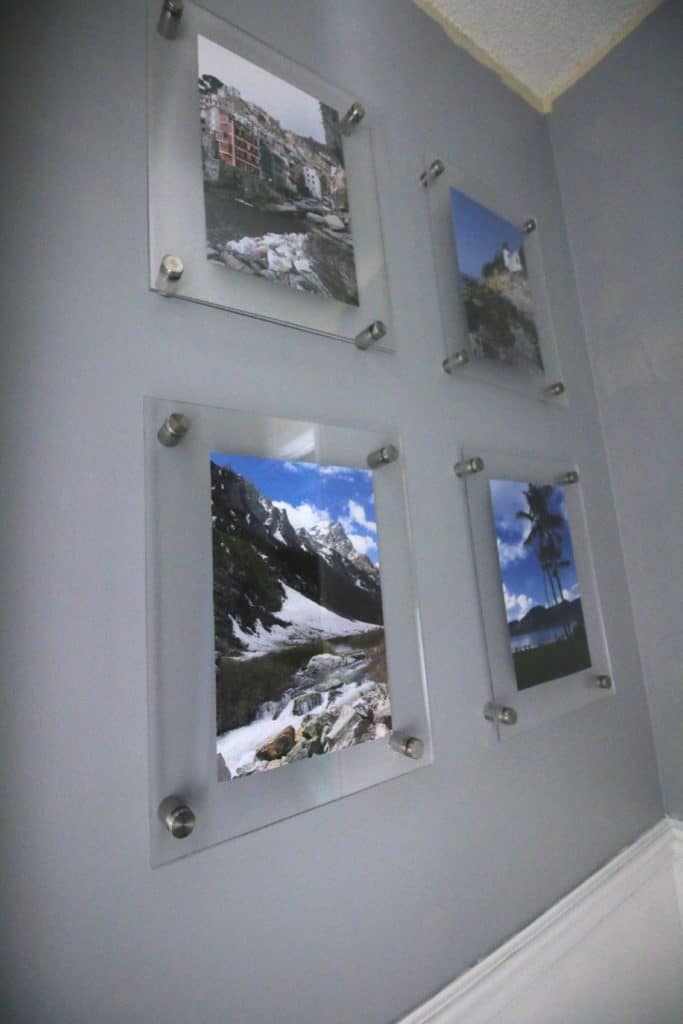
I just created a small 4 frame gallery wall in my upstairs hallway. This wall actually was still unpainted and unfinished, but I just whipped this together over the weekend since I was feeling so inspired by Julia's post!
I really do love the effect of these acrylic frames and think that they are totally unique and a great way to have easily swap-able art.
Anyways, here's a cost breakdown:
- Sheets acrylic size 11" x1 4" - $4.38 each x2 = $8.76
- Screws - had on hand
- Drywall anchors - had on hand
- Pieces of standoff hardware for glass - $6.19 for 10 (I bought 2 10 packs & have 4 left over)
- Photo 8" x 10" - printed at home so free
Total for 4 frames = $47.42
Cost per frame = $11.85
To be fair, the $88 frames that Julia used were larger than mine, but would have been way too big for my space. But, the magic in these acrylic sheets is that you can have them cut to any size!
The most annoying part of this project was definitely drilling the holes in the plastic - there was a definite learning curve to it.
If you don't want to mess with that, then I definitely see the benefit in paying for finished frames. However, if you aren't afraid of a bit of a challenge, definitely give this DIY knock off hack a try!
Side note - if you love the look of this project, check out our DIY wood grain painting that we mounted in a similar way, just with basic nuts and bolts from the hardware store instead of specialty hardware!
So tell me, what have you been DIY hacking lately?!
This post contains affiliate links. That means, if you click through and make a purchase, we receive a very small percentage of the sale. Thanks for supporting the brands that make Charleston Crafted possible!

Hello, I'm Morgan, half of the creative force behind CharlestonCrafted.com! With a passion for DIY that dates back to 2012, I've transformed three homes and now I'm dedicated to helping others craft their dream spaces. Let's turn your house into a home together!


Meg Taylor says
Ummm sooo seriously, the comments on that other blog post you linked to are a bit rough! I have to admit, I do like that you fully DIYed her project, though. This came out so well, and I'd love something like this that you can change whenever you feel like it!
Meg, Borrowed Heaven
Robin Gibson says
Cool and modern frames for less than $12 each. Can't beat it!
Amanda says
Your frames look amazing! And I have to say that sometimes I just rather buy than DIY! My sanity is sometimes worth the extra cost!
All Things Big and Small says
This looks so great! I have wanted to do this with a big print we have and now I have the courage to do it! Love it!
Carleen says
Thank you! I have been wanting to do this forever but now you have the perfect diy for me! My only question is where you bought your standoffs and what size are they? I went looking at amazon and there are so many sizes available- thank you again!
Sean says
Hi I am glad this tutorial helped you! we used these: https://amzn.to/2Dv26mX 30mm size