• Skip to primary navigation
  • Skip to main content
  • Skip to primary sidebar
Charleston Crafted
  • DIY
  • Woodworking
  • Popular Posts
  • Blog
  • About
  • Shop
menu icon
go to homepage
  • DIY
  • Woodworking
  • Popular Posts
  • Blog
  • About
  • Shop
search icon
Homepage link
  • DIY
  • Woodworking
  • Popular Posts
  • Blog
  • About
  • Shop
×
Home » Crafts

How to make a DIY Bow Garland

Published: Dec 3, 2024 by Morgan · As an Amazon Associate, we earn from qualifying purchases. This site contains affiliate links. ·

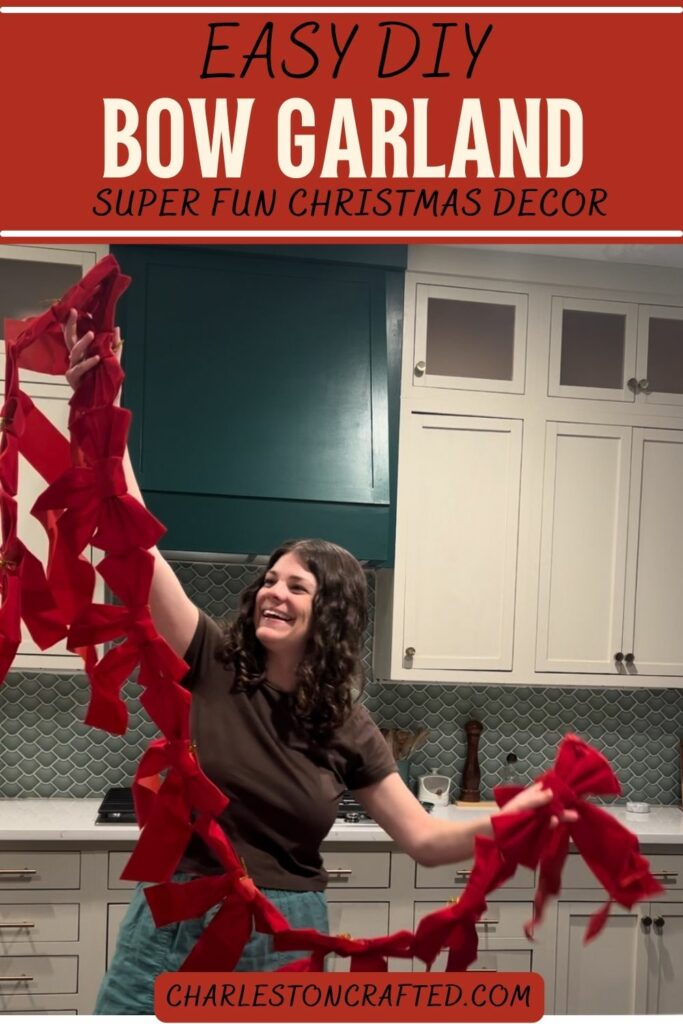
Love bows but want them to make more of a visual impact on your home? Here's how to make a DIY bow garland for easy holiday decor!

There's just something about a big red bow that makes everything feel special.

This Christmas season, bows are really trending, and I've been enjoying decorating with them!

But, what's better than one bow? A whole string of them!

red bow garland DIY christmas decor

Inspired by bow garlands at Michaels Craft Store and Anthropologie, I decided to make my very own bow garland.

These are so easy to make - I made them in a couple of sizes for different spots around the house. So fun!

how to make an easy diy bow garland

How to make a DIY Bow Garland

Here's how easy it is to make this beautiful bow garland - in any size - for Christmas or for a party!

Supplies needed:

  • Hot glue
  • Pre-made bows - or tie your own

Here are the bows that I used for my garlands:

  • 13" long red bows
  • Medium sized 6" red hair bows
  • Mini red ribbon bows
pile of bows

Steps to make:

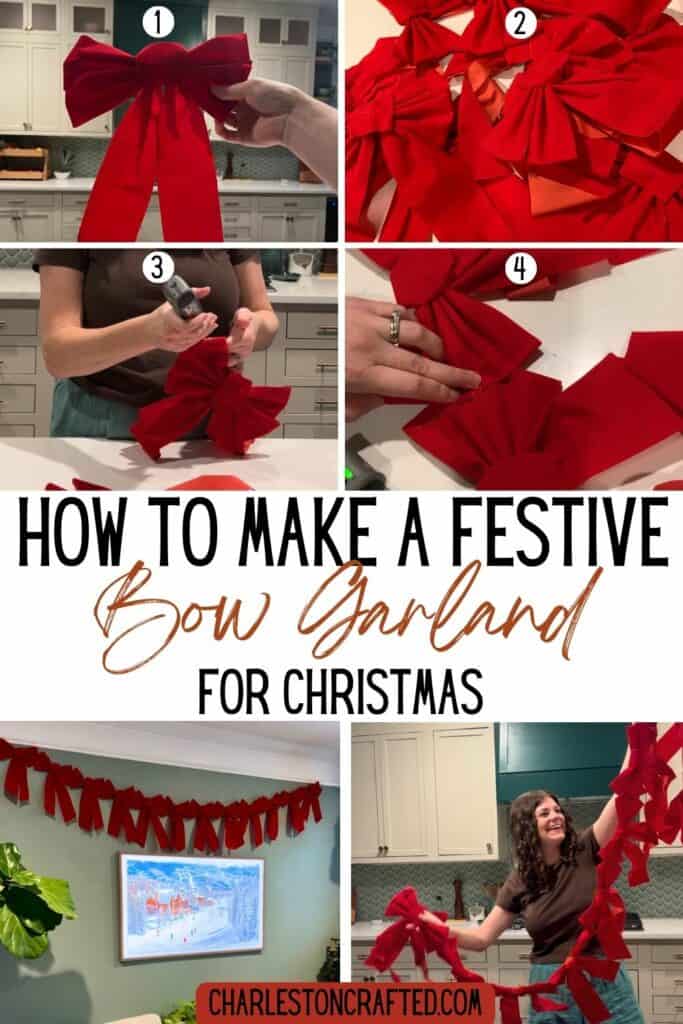
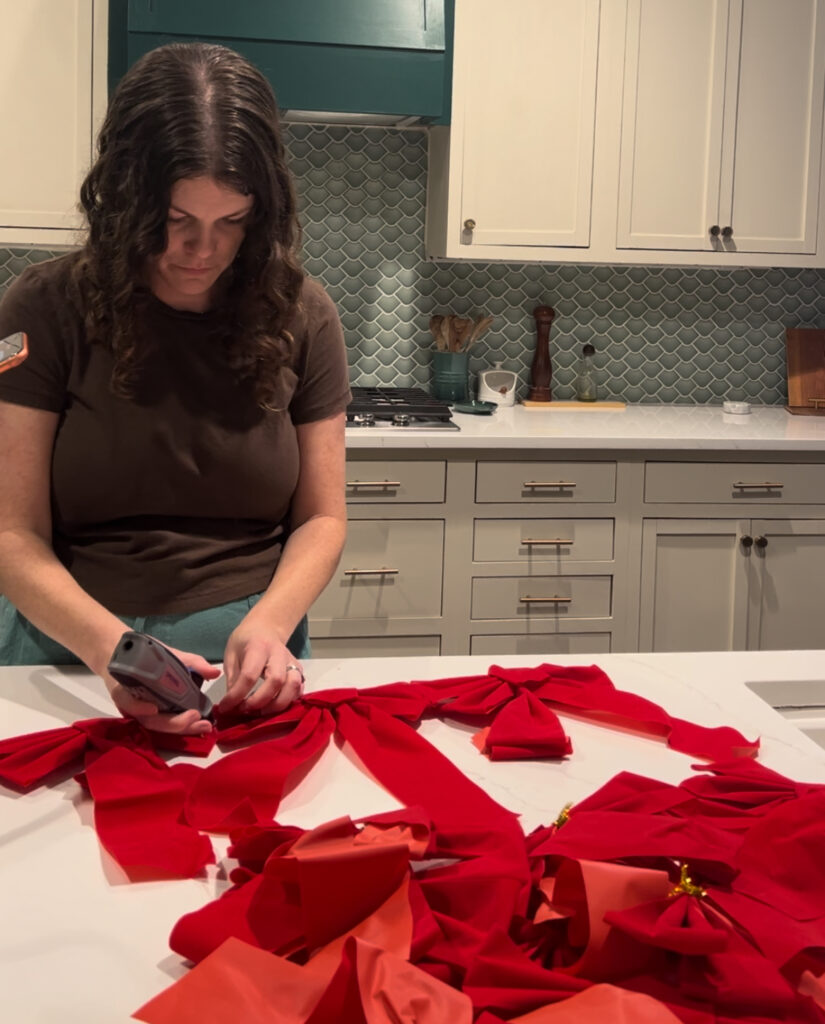
STEP 1: Line up your bows

Lay your bows out in a row, side by side, to determine how many you need to create the length that you want your total garland to be.

STEP 2: Glue edges

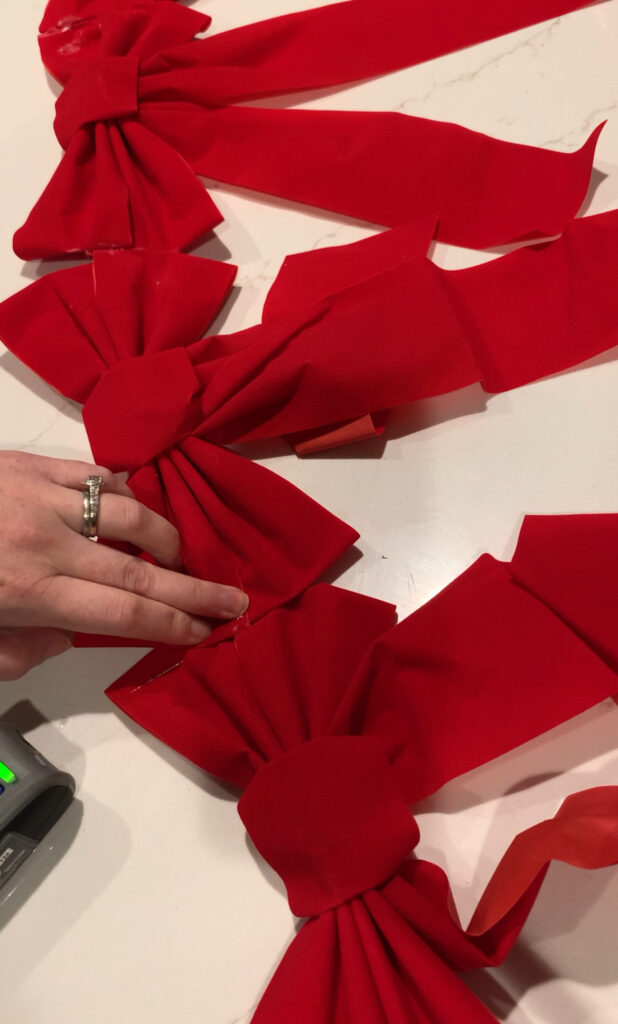
Apply hot glue to the edge of the left side of one bow loop. Connect it to the right side of the next bow loop in the row.

NOTE: I first tried to do this on the actual seam of the fold on the loop. This was very, very hard to get to line up correctly.

It was much easier to just lay one bows loop so that it overlapped over the front face of the second bow by about ¼ of an inch. This may vary by bow type, but know that it's an option.

hot gluing bows together to create garland

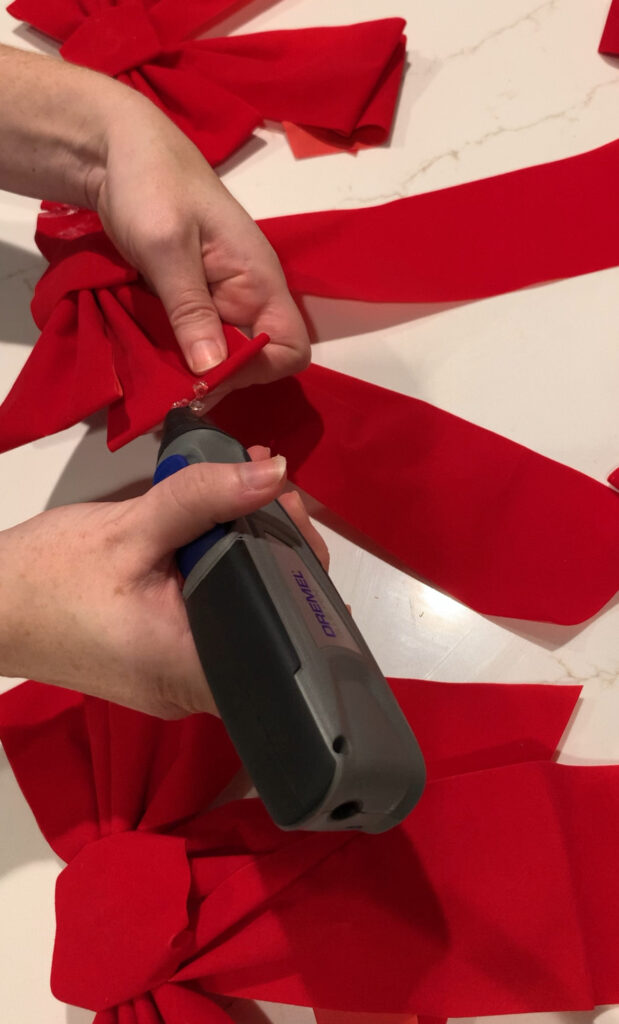
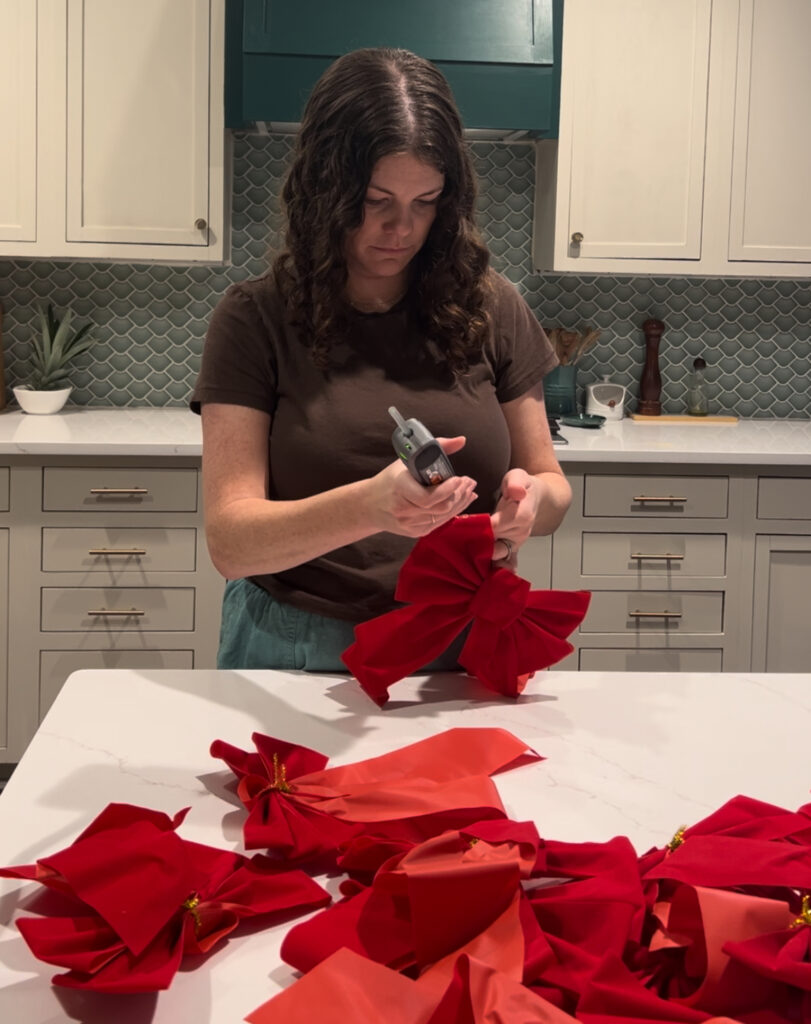
STEP 3: Press and hold

Work carefully because hot glue is - well, hot - but I suggest carefully holding the 2 bows together for about 60 seconds until the glue has begun to cool.

If you skip this step, the bows might not be very securely connected once the glue dries. Just take your time and make sure everything is well adhered!

pressing bows together

STEP 4: Repeat

Repeat bow-by-bow until you are happy with the total length.

Let dry completely - honestly, waiting 1 hour+ while it lays flat is best - before hanging.

hot glueing bows together

STEP 5: Hang

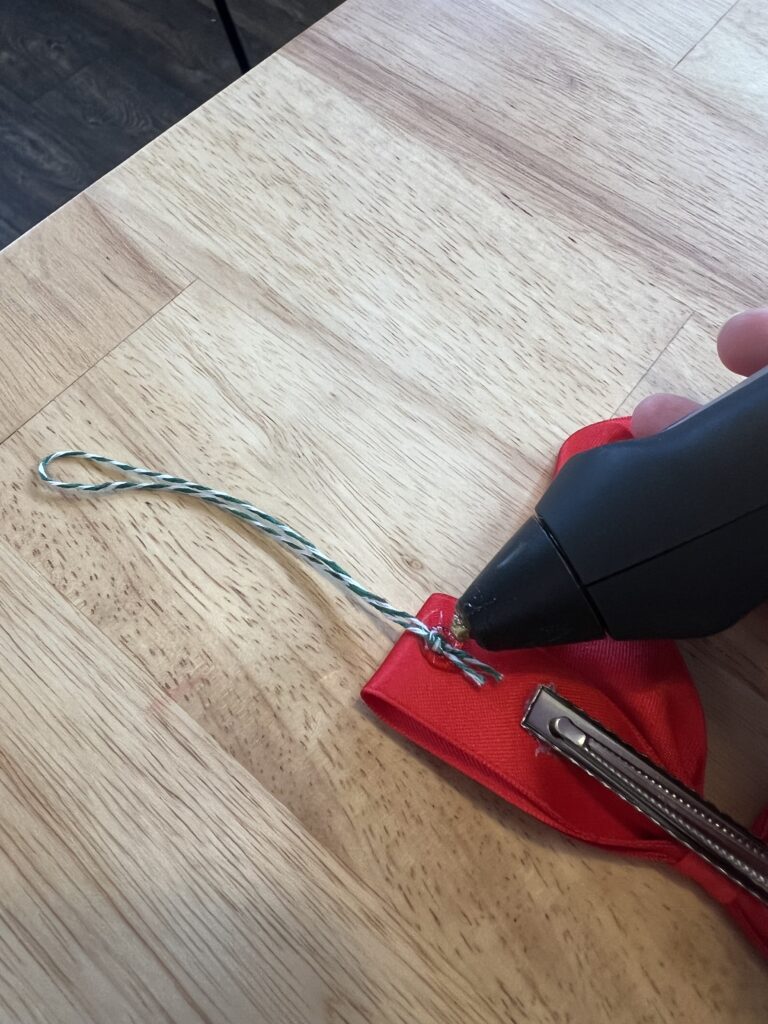
Determine how you will hang your bows. My large bows had a twist tie loop on the back of each, so I hung those from nails or hooks.

You could also hot glue on a knotted loop of twine or ribbon if needed to hold it in place.

glueing loop of twine onto red bow garland

Or, hang on your tree and you don't need hooks at all!

red bow garland DIY christmas decor

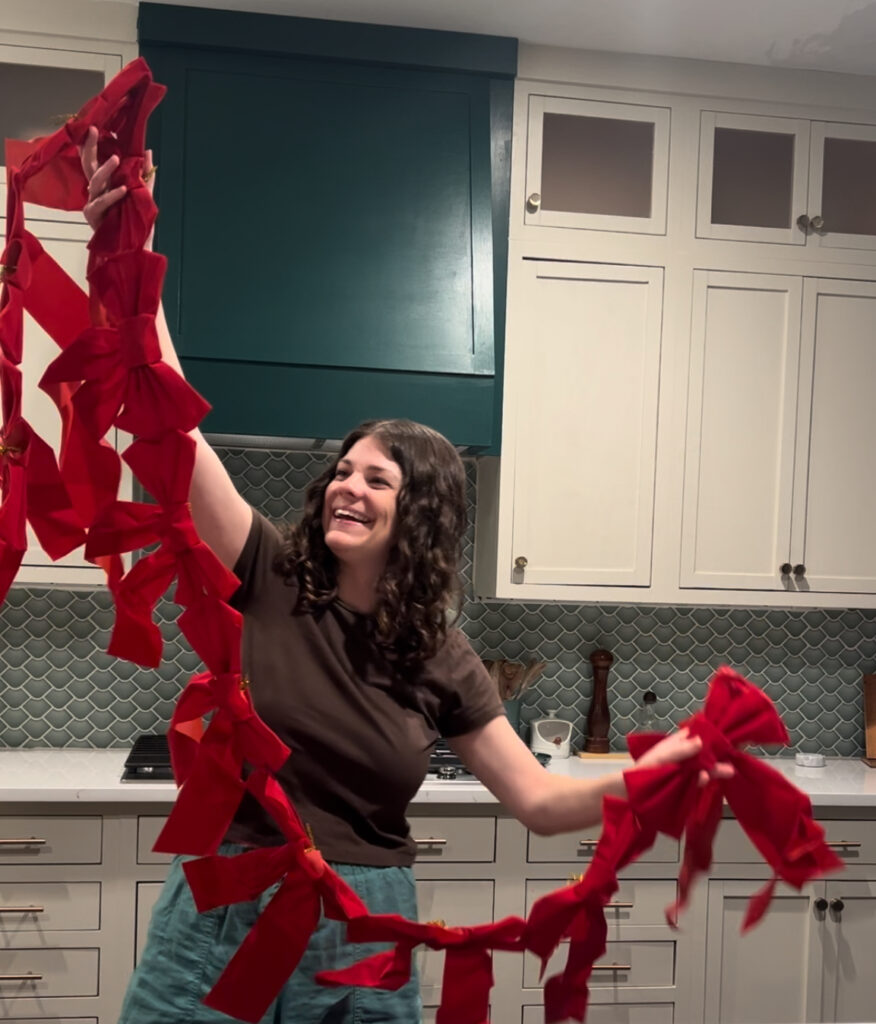
I love how these garlands turned out - so fun for the holiday season!

how to make an easy diy bow garland

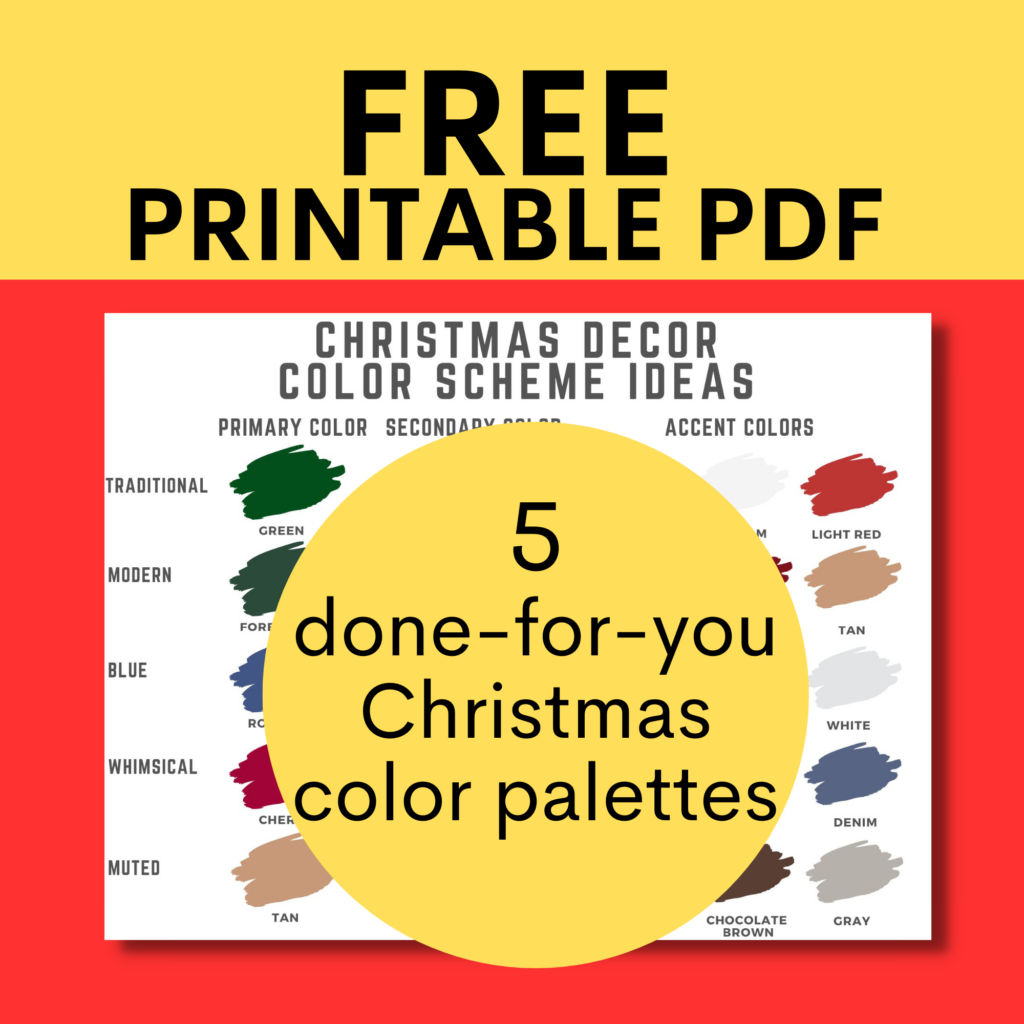
Get my Christmas Color Scheme Cheat Sheet!

With our free printable cheat sheet, you can easily bring your vision to life and create a festive atmosphere that will be remembered for years to come.

christmas color palette mock up (8 x 8 in)
Charleston Crafted Signature

Follow us on:
Pinterest | Instagram | TikTok | YouTube | Facebook | Amazon Storefront | LTK Shop

Looking for something?

We've been doing this since 2012 so we have a LOT of blog posts!
Search stuff like: Ceiling Projects | DIY Plant Stands | Thrift Flips

Charleston Crafted logo banner
Morgan headshot cropped
Morgan

Hello, I'm Morgan, half of the creative force behind CharlestonCrafted.com! With a passion for DIY that dates back to 2012, I've transformed three homes and now I'm dedicated to helping others craft their dream spaces. Let's turn your house into a home together!

More Crafts

  • DIY flocked easter bunny wreath
    DIY Flocked Bunny Easter Wreath
  • how to make an oversized easter egg wreath
    DIY Oversized Easter Egg Wreath
  • how to make an easter peeps centerpiece
    The EASIEST Easter Peeps Flower Centerpiece!
  • How to make a giant pool noodle Easter basket
    How to make a giant pool noodle Easter basket

Primary Sidebar

Charleston Crafted about us image

Hey y'all!

We are Morgan & Sean McBride and we are crafting our home together in Charleston, South Carolina.

More about us

Popular Posts

  • DIY Coffered Ceiling
    DIY Coffered Ceiling

  • How to Make DIY Concrete Pumpkins via Charleston Crafted
    How to Make DIY Concrete Pumpkins

  • How to Make a Cupid's Arrow Valentine's Day Wall Hanging with felt on the Cricut
    How to make a Cupid's Arrow Valentine's Day Wall Hanging

  • Our Tropical Oasis - A backyard Hammock area - Charleston Crafted
    Our Tropical Oasis

Recent Posts

  • How to create a whole house color scheme
    How to create a whole house color scheme

  • DIY modern rolling storage table - Charleston Crafted
    DIY modern rolling storage table

  • how to organize a pantry with zones
    How to Organize Your Pantry in Zones (And Why It’s a Game Changer)

  • Keep outdoor rug from blowing up - Charleston Crafted
    How to keep your outdoor rug in place

Privacy Policy

Footer

↑ back to top

Navigation

  • Home
  • Blog
  • Contact Us
  • Terms of Use
  • Disclaimer

Newsletter

  • Sign up for emails and updates
  • Follow us on Instagram
  • Work with Us

Browse by Category

  • Woodworking
  • Home Projects
  • Paint Colors
  • Room Reveals

© 2025 The Charleston Crafted Blog LLC DBA “Charleston Crafted” and “CharlestonCrafted” (also known as N/A) / All Rights Reserved.
Official Website: (Charleston Crafted)
Registered in USA (Co. Reg. No.: 565586)
Address: Charleston, USA 29414, South Carolina
Contact Phone: Not applicable — contact is via email: sean@charlestoncrafted.com

DISCLAIMER: The content on this website is provided for general informational purposes only and is not intended as professional advice. The Charleston Crafted Blog LLC and The Charleston Crafted Blog LLC make no representations or warranties—express or implied—regarding the accuracy, completeness, or suitability of the information contained herein. Any reliance you place on this information is strictly at your own risk. In no event shall The Charleston Crafted Blog LLC or The Charleston Crafted Blog LLC be liable for any loss or damage, including without limitation, indirect or consequential loss or damage, arising from the use or inability to use this website. This website is the official website of The Charleston Crafted Blog LLC.

AFFILIATE DISCLOSURE: This website contains affiliate links. If you click through and make a purchase, we may earn a commission at no extra cost to you.

As an Amazon Associate, I earn from qualifying purchases.

Site Editor: Morgan Smith McBride

Copyright © 2025 Charleston Crafted