• Skip to primary navigation
  • Skip to main content
  • Skip to primary sidebar
Charleston Crafted
  • DIY
  • Woodworking
  • Popular Posts
  • Blog
  • About
  • Shop
menu icon
go to homepage
  • DIY
  • Woodworking
  • Popular Posts
  • Blog
  • About
  • Shop
search icon
Homepage link
  • DIY
  • Woodworking
  • Popular Posts
  • Blog
  • About
  • Shop
×
Home » Decor

A Renter-Friendly Front Door Update

Published: Oct 3, 2013 · Modified: Apr 23, 2023 by Morgan · As an Amazon Associate, we earn from qualifying purchases. This site contains affiliate links. ·


I love quick little updates that add a blast of color to a room. However, I really don't consider my condo a long-time home, and am always cautious of every project's effect on the resale value.

I've seen several people online who've painted the inside of their front doors. I was so inspired by Meredith's pink door! However, I had a feeling that the hot pink would not fly with Sean or future buyers/renters. So, I considered painting just the rectangular detail. However, I ended up chickening out, for the sake of "resale value."

A Renter-Friendly Front Door Update with scotch tape - charleston crafted

Click here to pin this project to your pinterest boards!

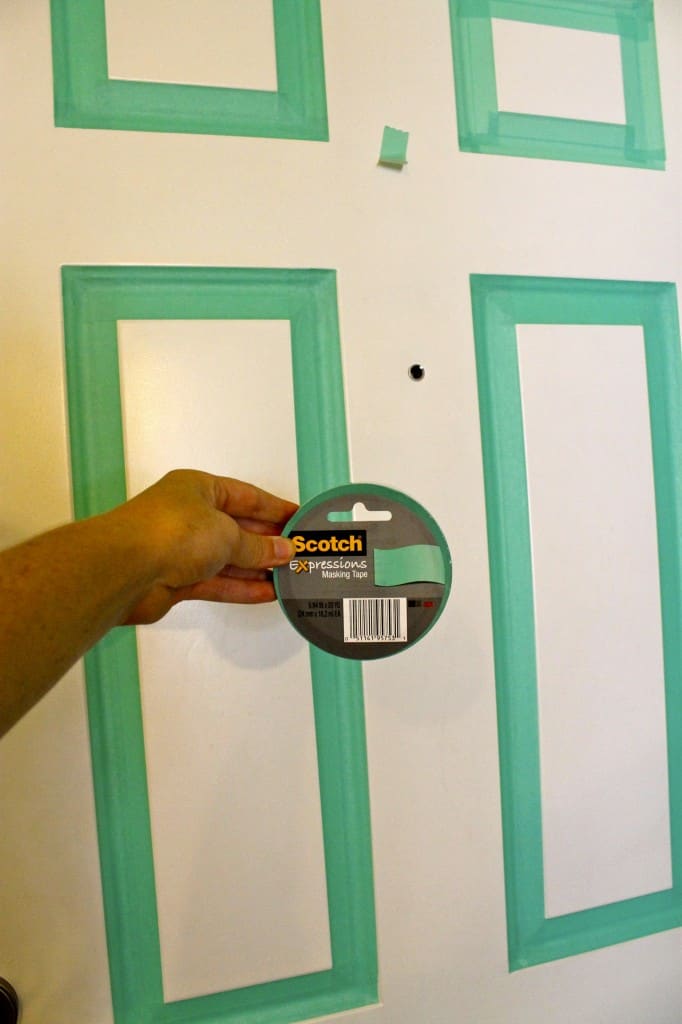
Recently, I was wandering up & down the aisles of Target (one of my favorite past times), actually looking for patterned contact paper for another project, when I spotted Scotch Expressions masking tape. It's basically teal masking tape. I grabbed 2 rolls & skipped home with a smile on my face and a DIY idea in my head (I'm sure Sean got shivers up his spine, subconsciously sensing my newest "great idea")!

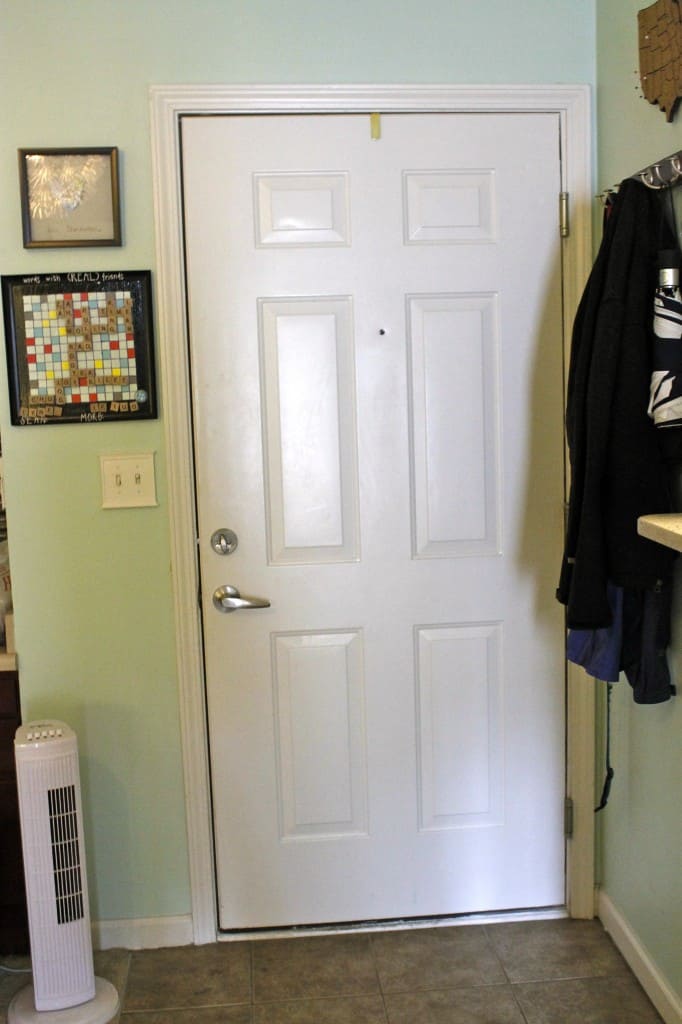
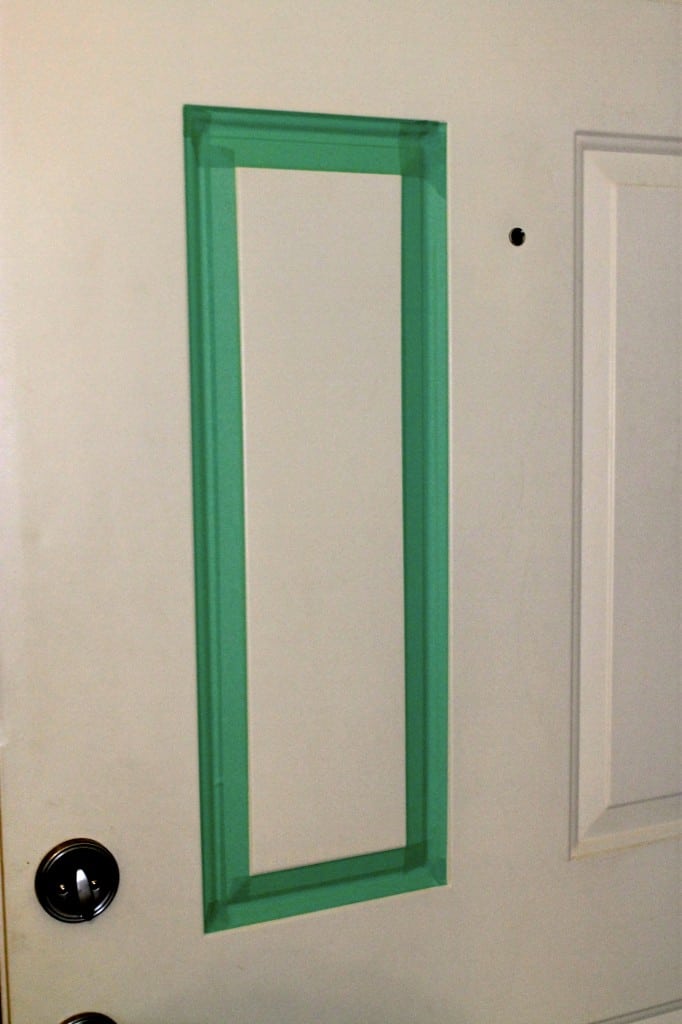
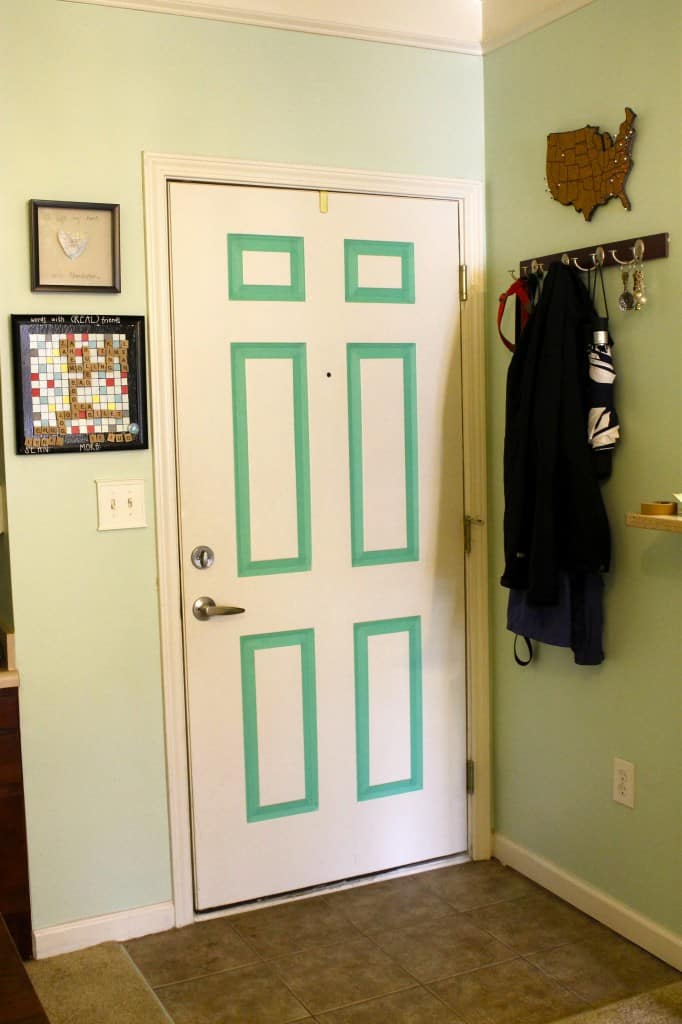
So, here's what our front door looked like (from the inside) before:

Update Your Front Door... With Masking Tape!

So, all I did was slap the tape up there in the rectangular grooves.

Update Your Front Door... With Masking Tape!

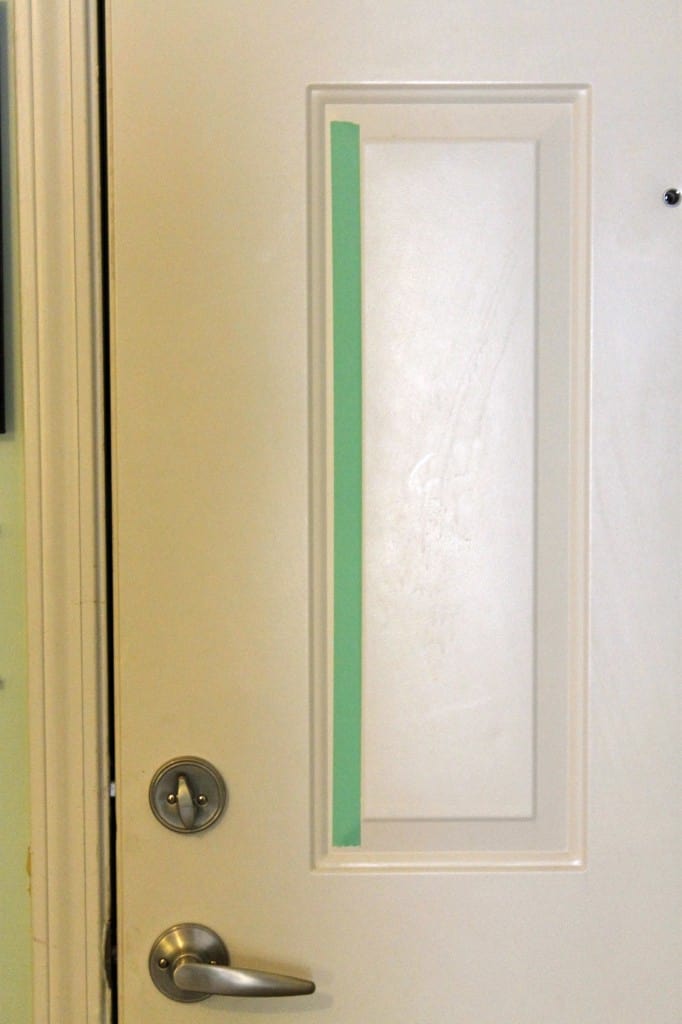
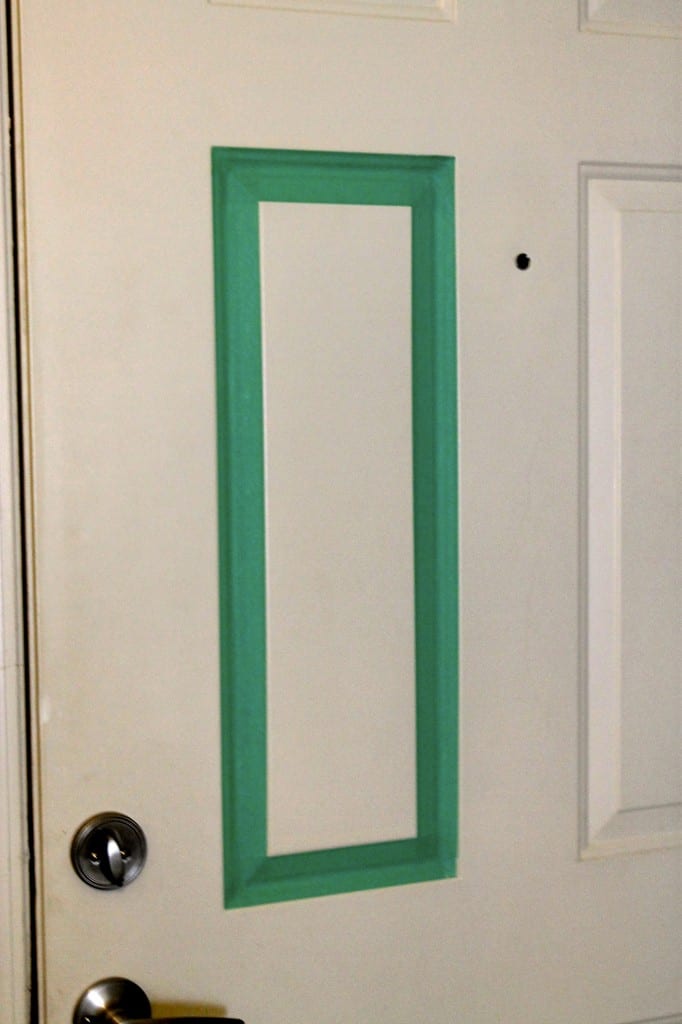
Ok, maybe it was a bit more than that. I added the tape so it was closely lined up with either the inner or outer edge of the grooves. The grooves were almost exactly 2 pieces of tape wide, so I overlapped them ever so slightly next to each other.

Update Your Front Door... With Masking Tape!

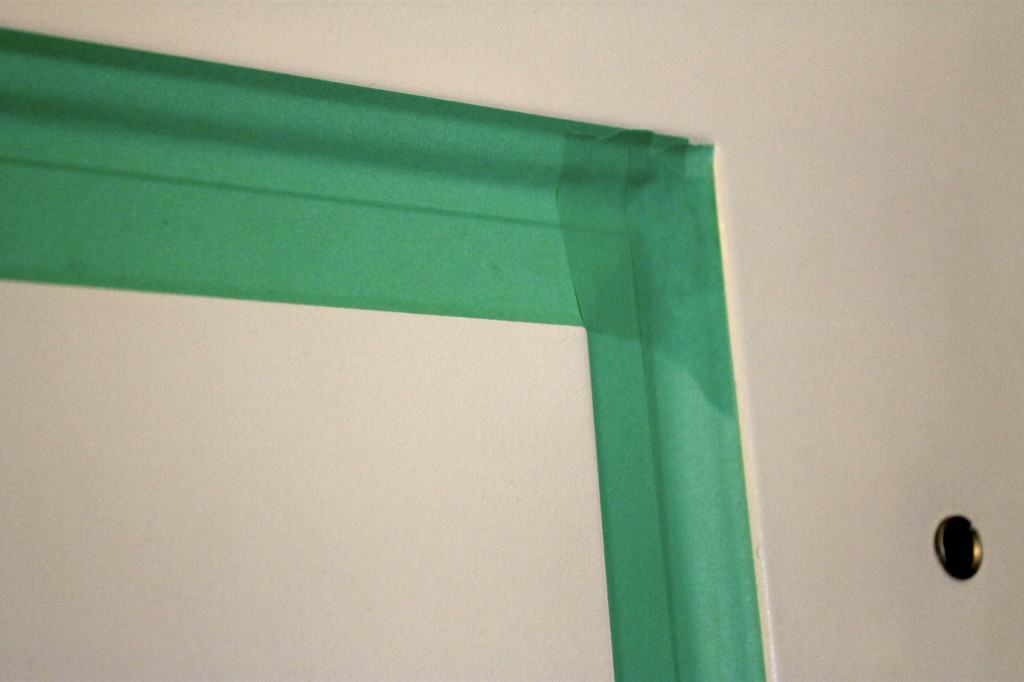
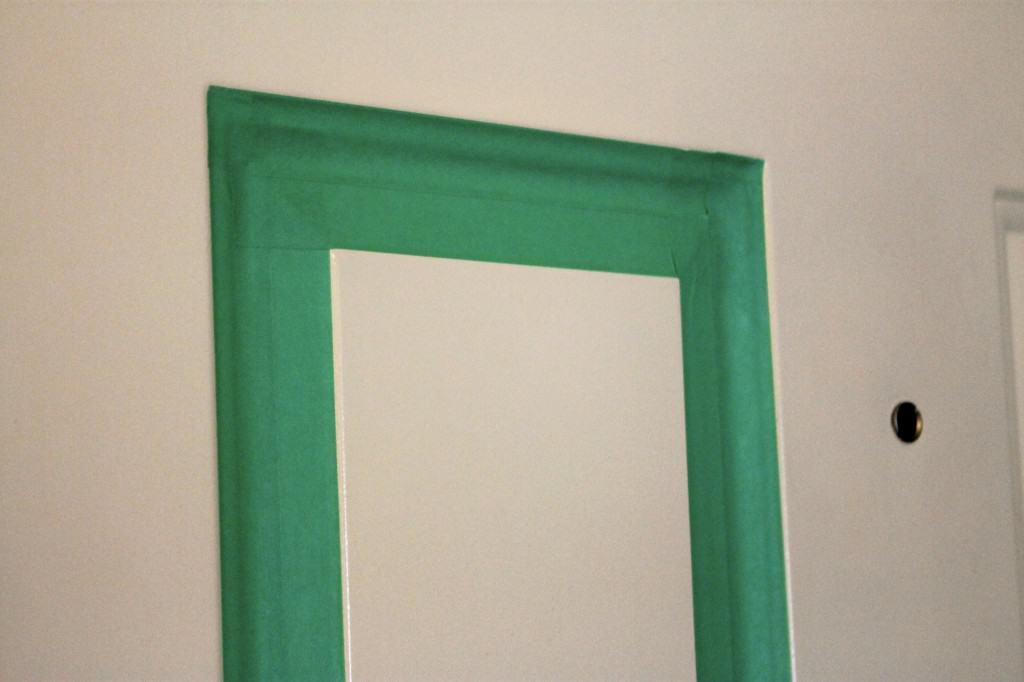
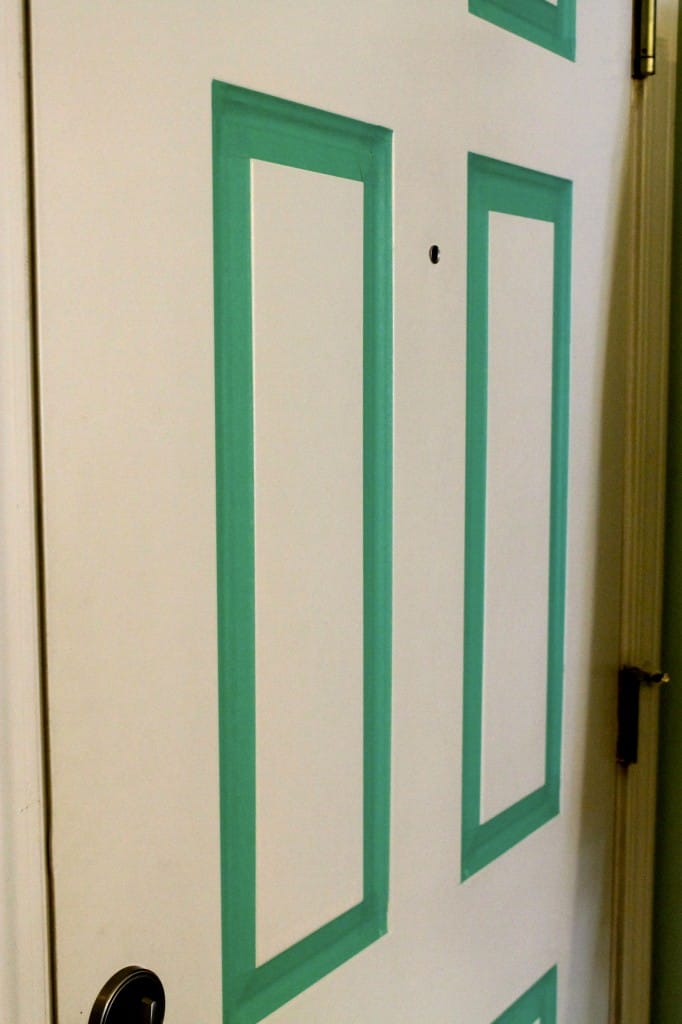
As you can see, you could really see where the tape overlapped (it's where it looks darker). So, I repeated myself and did a second layer of tape directly over the first layer. That made it totally opaque and you couldn't see overlaps at all! Whew!

Update Your Front Door... With Masking Tape! (one layer)

Update Your Front Door... With Masking Tape! (two layers)

So, I left this one square j chillin for a weekend to see what we thought.

Update Your Front Door... With Masking Tape!

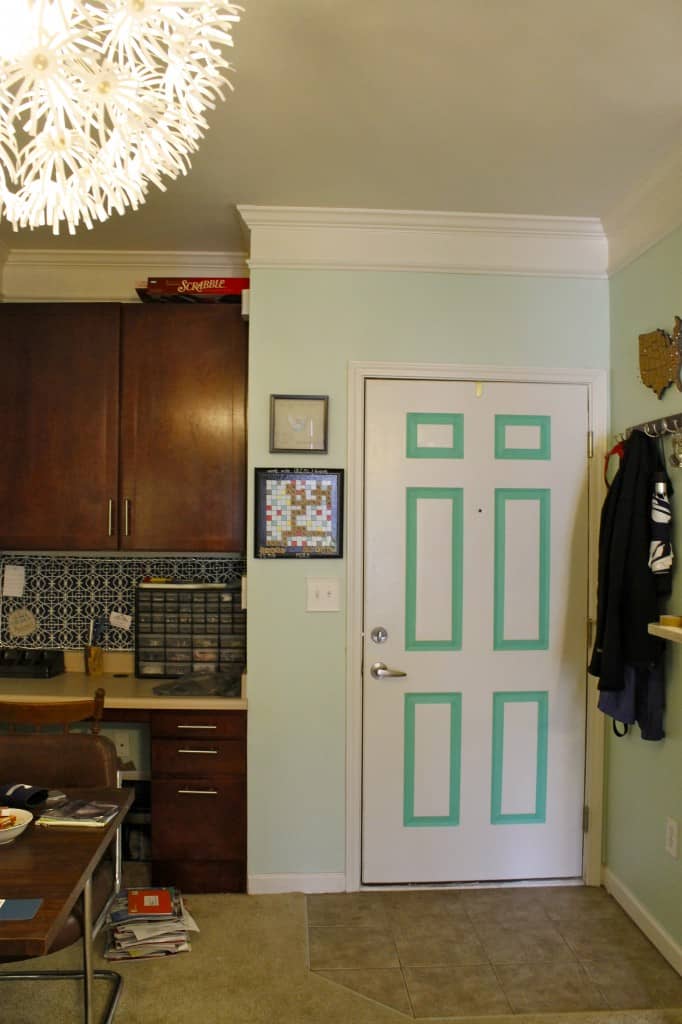
We considered just grabbing a sample tub of paint and painting them (we fell hard for this tape color + the wall color combo and Pantone's Emerald is an almost exact match, and there are towers of pre-mixed sample tubs for sale at Lowes.) However... I decided to stick with the tape. If your head is at least 12 inches away, you can't tell at all that it's tape. And this way, if I change my mind, or have to move in a hurry, or anything, I can just whip it off without having to repaint.

So, I finished all the squares. I whipped them out in less than 30 minutes and ended up using a roll and a half of tape. I think it looks so cool and love how changeable it is!

Here are some other washi tape door ideas!

Update Your Front Door... With Masking Tape!

As I progressed doing these, I decided it looked a lot cleaner to cut the tape instead of tearing it (#lazy), but didn't look rough enough to go back and redo the first few pieces I did.

Update Your Front Door... With Masking Tape!

Hey, maybe I'll end up doing a new color for each season! hahaha, Sean would LOVE that!

Update Your Front Door... With Masking Tape!

Update Your Front Door... With Masking Tape!

Want to paint a door? Here are our best tips on how to paint a door! We also compared painting a door with a roller vs with a paint sprayer!

I love it! Do you ever do any "temporary" updates in your home??!

  signature 2
 logo facebook  logo instagram  logo pinterest  logo twitter


Morgan headshot cropped
Morgan

Hello, I'm Morgan, half of the creative force behind CharlestonCrafted.com! With a passion for DIY that dates back to 2012, I've transformed three homes and now I'm dedicated to helping others craft their dream spaces. Let's turn your house into a home together!

More Decor

  • DIY easter egg topiary
    How to make an oversized Easter egg topiary
  • design shop review
    DesignShop Box Review
  • lighting trends for 2025
    Top Lighting Trends to Brighten Your Home in 2025
  • Our Valentine's Day Mantel Decor
    Valentines Day Mantel Decor

Reader Interactions

Comments

  1. Meredith & Gwyneth, The New Yorkie says

    October 06, 2013 at 10:26 pm

    SO Smart! Love this!!

    xoxo,
    mk & Gwynnie

    • Morgan says

      October 09, 2013 at 5:57 pm

      ahhh! so excited to see you saw this! def makes my week 😀

Primary Sidebar

Charleston Crafted about us image

Hey y'all!

We are Morgan & Sean McBride and we are crafting our home together in Charleston, South Carolina.

More about us

Popular Posts

  • DIY Coffered Ceiling
    DIY Coffered Ceiling
  • How to Make DIY Concrete Pumpkins via Charleston Crafted
    How to Make DIY Concrete Pumpkins
  • How to Make a Cupid's Arrow Valentine's Day Wall Hanging with felt on the Cricut
    How to make a Cupid's Arrow Valentine's Day Wall Hanging
  • Our Tropical Oasis - A backyard Hammock area - Charleston Crafted
    Our Tropical Oasis

Recent Posts

  • fisherman aesthetic home inspiration
    Fisherman Aesthetic Decor for Your Home
  • Senix Tools Review- Charleston Crafted
    Are Senix power tools any good?
  • Your Weekend To-Do List: 15 Things to Do for Summer Home Upkeep
    Your Weekend To-Do List: 15 Things to Do for Summer Home Upkeep
  • How to build a DIY gate pergola- Charleston Crafted
    How to build a DIY gate pergola

Privacy Policy

Footer

↑ back to top

Navigation

  • Home
  • Blog
  • Contact Us
  • Terms of Use
  • Disclaimer

Newsletter

  • Sign up for emails and updates
  • Follow us on Instagram
  • Work with Us

Browse by Category

  • Woodworking
  • Home Projects
  • Paint Colors
  • Room Reveals

© 2025 The Charleston Crafted Blog LLC DBA “Charleston Crafted” and “CharlestonCrafted” (also known as N/A) / All Rights Reserved.
Official Website: (Charleston Crafted)
Registered in USA (Co. Reg. No.: 565586)
Address: Charleston, USA 29414, South Carolina
Contact Phone: Not applicable — contact is via email: sean@charlestoncrafted.com

DISCLAIMER: The content on this website is provided for general informational purposes only and is not intended as professional advice. The Charleston Crafted Blog LLC and The Charleston Crafted Blog LLC make no representations or warranties—express or implied—regarding the accuracy, completeness, or suitability of the information contained herein. Any reliance you place on this information is strictly at your own risk. In no event shall The Charleston Crafted Blog LLC or The Charleston Crafted Blog LLC be liable for any loss or damage, including without limitation, indirect or consequential loss or damage, arising from the use or inability to use this website. This website is the official website of The Charleston Crafted Blog LLC.

AFFILIATE DISCLOSURE: This website contains affiliate links. If you click through and make a purchase, we may earn a commission at no extra cost to you.

As an Amazon Associate, I earn from qualifying purchases.

Site Editor: Morgan Smith McBride

Copyright © 2025 Charleston Crafted