Board and batten is an easy DIY accent wall to add to any room and looks really great in a bathroom! Here's how to do it!
The biggest project that I wanted to undertake for Bathroom Week was updating the walls by adding Board & Batten. This look is huge right now & Sean and I agreed that it would look fabulous in the guest bathroom.
Also, this room doesn't have much wall space, so we knew it would be a great way to make a big impact in this small space.
*NOTE: I'm going to say "We" a lot in this post. Probably, that means that Sean did it while I watched. Though this was my "vision," the nature of the sawing, hammering, and measuring meant this project fell into the "blue jobs" category, aka Sean did most of the work while I watched. And motivated *
Adding Board & Batten to a Bathroom
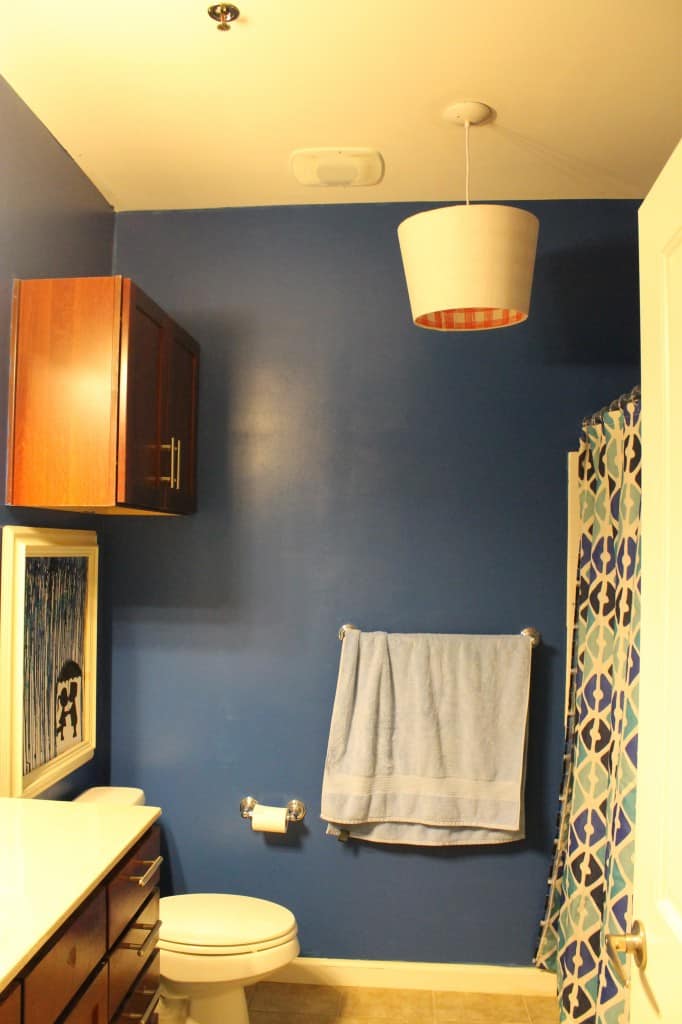
Here's how the room looked before we started:
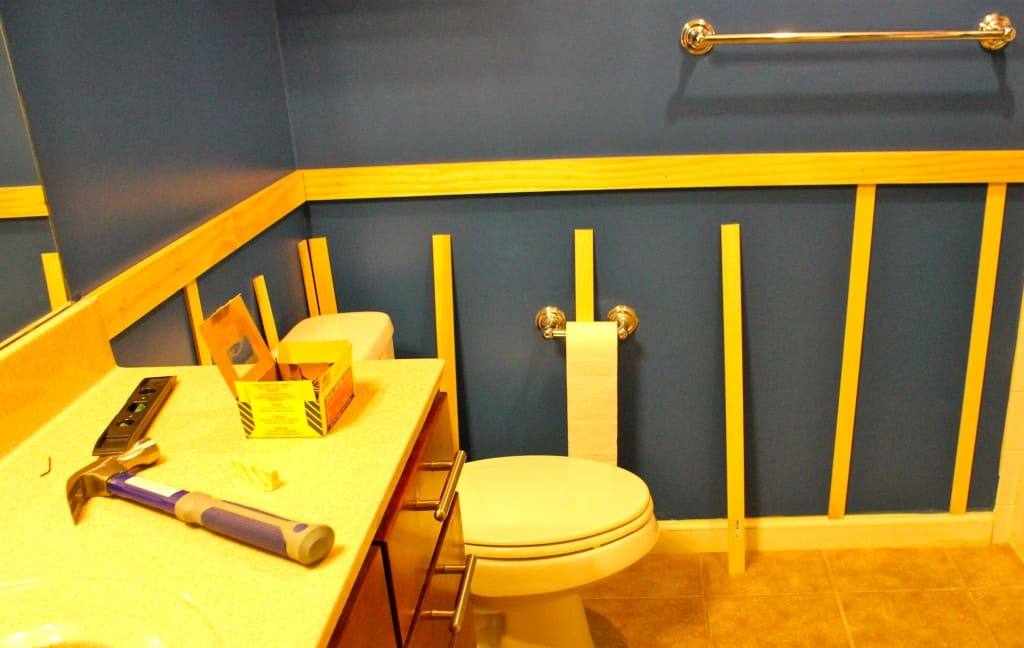
Sean started by taking everything off the walls and measuring. We moved the framed art and hanging towels into another room to have better access to the main wall in the room.
We decided to have the horizontal line of the top of the boarding line up with the counter top. This would give us a nice clean line around the room.
So, Sean measured the width of each of these 2 visible walls, as well as the height of the counter. Then we headed to Lowes. We picked up:
- 8' long x 2" wide x ½" thin boards
- 48" long x 2" wide thin slats
- White semi-gloss paint (paint & primer in one)
- clear paintable caulk
- box of 200 nails (with small heads)
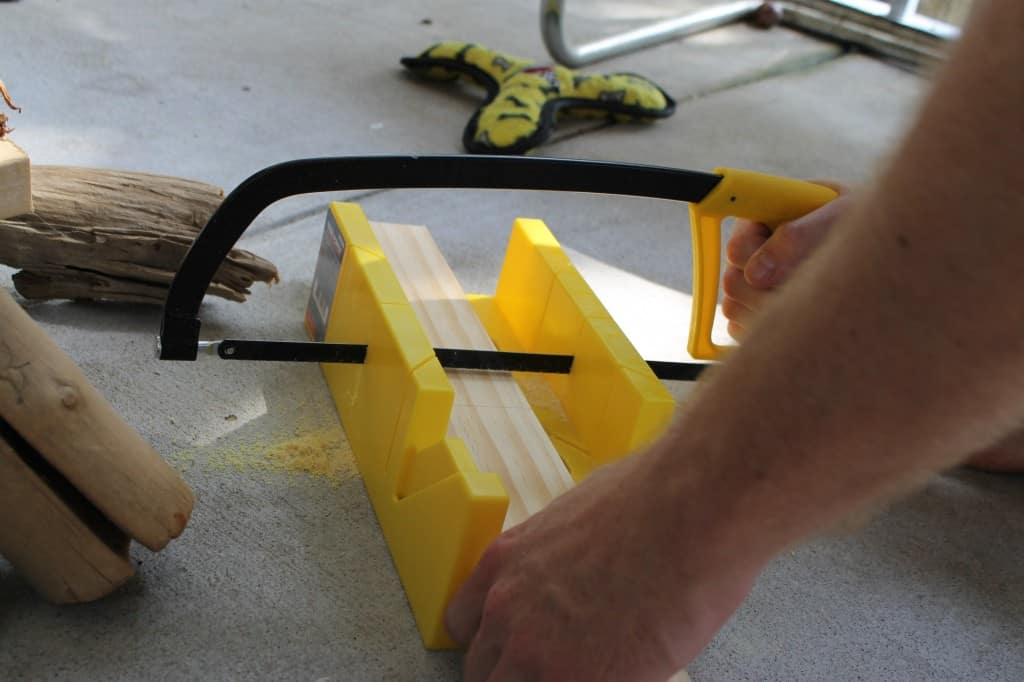
Step one: cut boards
We got home and started cutting. First, make sure to measure again. Then measure AGAIN. You don't want to cut a board too small and then have to buy another one.
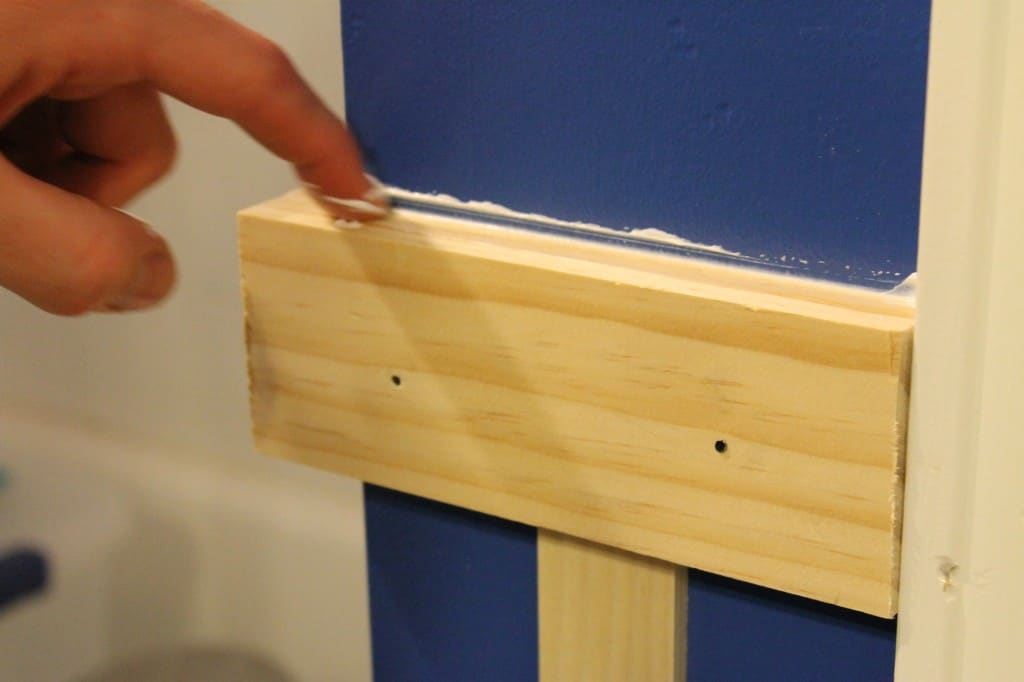
Step two: attach railing
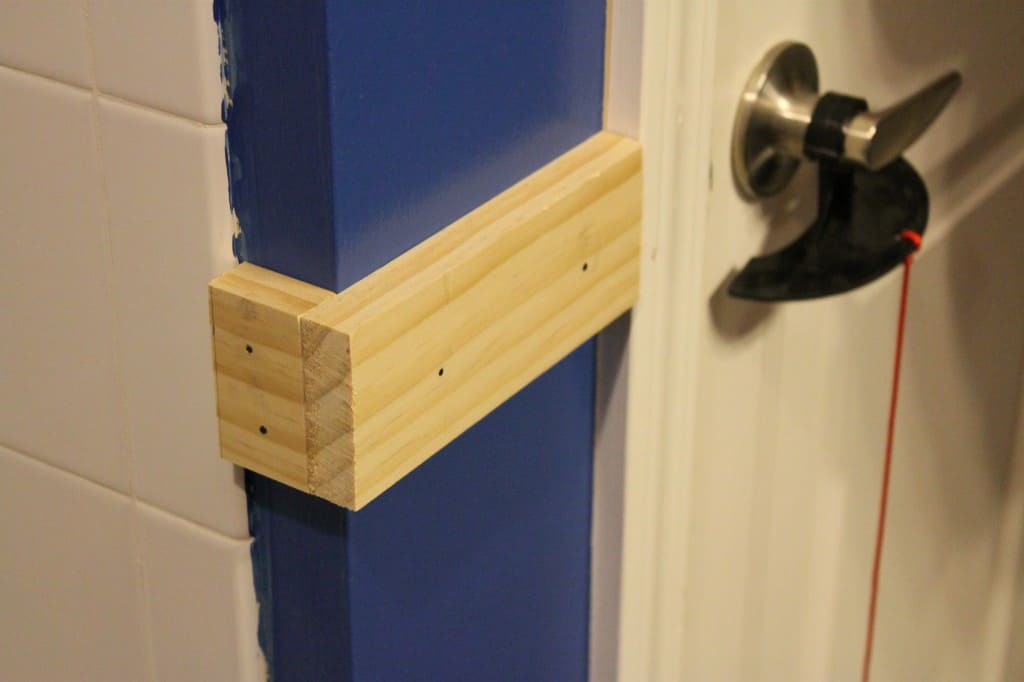
Sean got cutting and held things up to the wall along the way. For the corners, if it's an "inside" corner (like behind the toilet) you have to subtract the thickness of your board from one of the sides.
If it's an "outside" corner, you add the thickness. We had both, yay math!
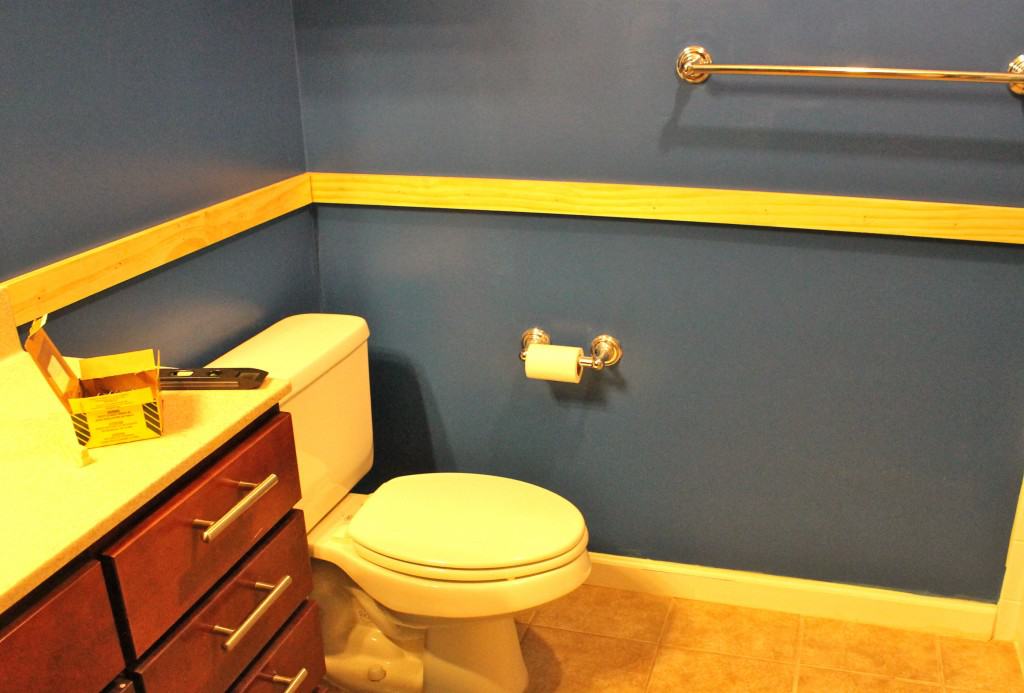
Once we had the horizontal pieces cut, we went ahead and nailed them to the wall. This way, we could measure the vertical pieces and hang them without it moving and changing.
This hanging process involved hammering in the long nails about every six inches. We also did a LOT of leveling- its better to check twice now than regret later!
Step three: add vertical rails
Next Sean got cutting the vertical pieces. He measured that they should be 32 inches high. However, after a lot of cutting and placing and leveling and measuring, he concluded that the floor boards are slightly uneven!
He ended up having to progressively shave a little bit off each board to get them to fit, while I made bagel bites and proclaimed "that really stinks babe." Always the supportive girlfriend!
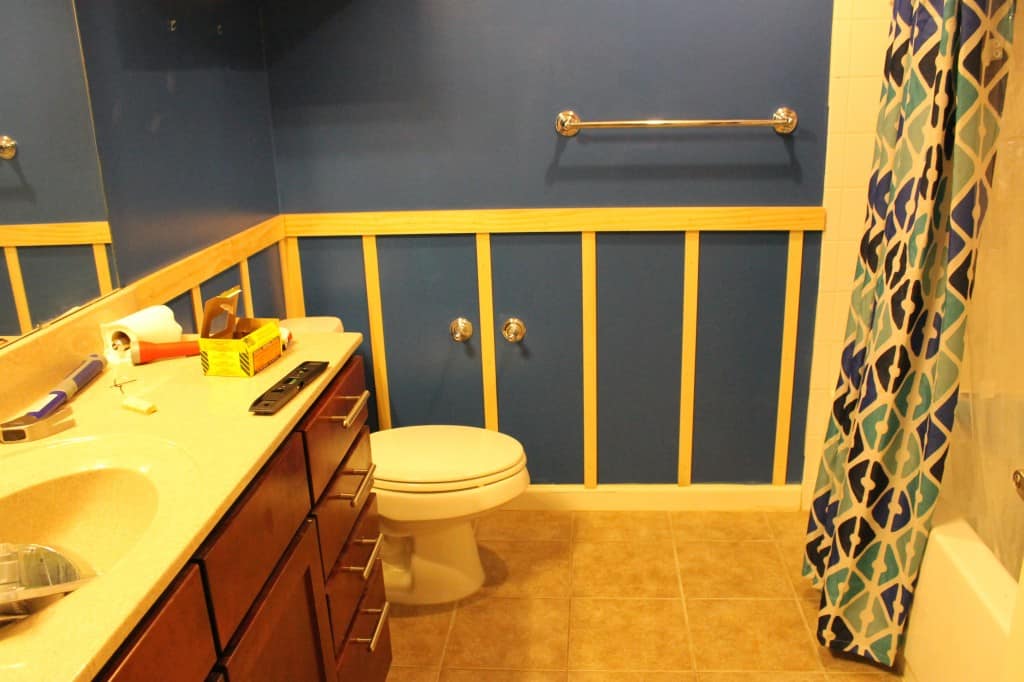
We ended up placing the boards 12 inches apart from each other, for a total of ten in our small room. We liked this spacing, but you could make them closer together or farther apart.
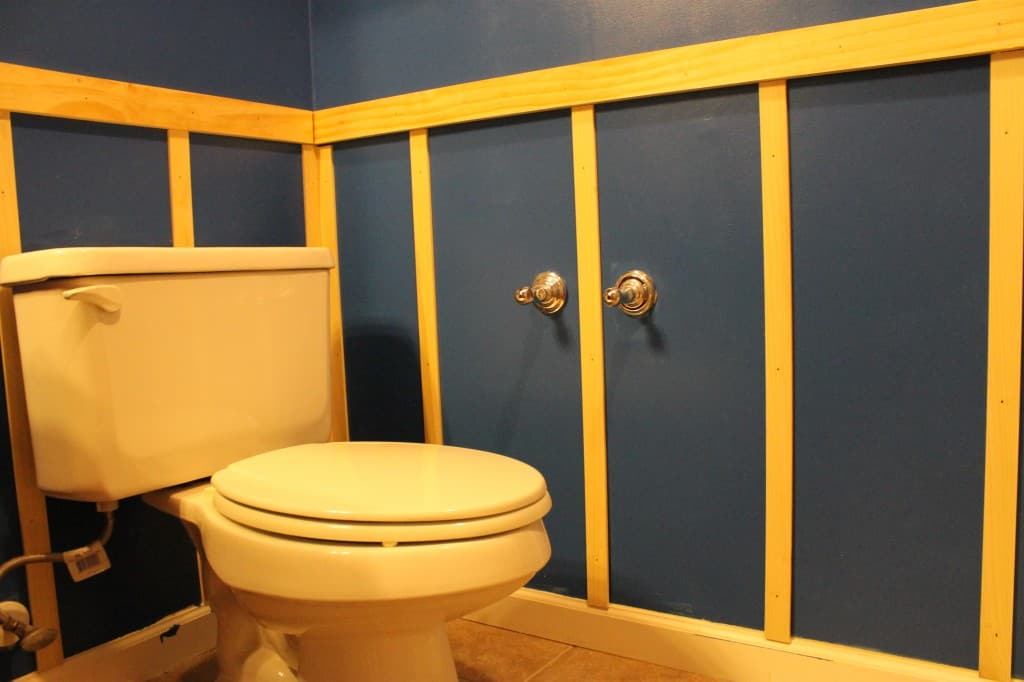
Then we nailed those boards into place. They each got at least 3 nails- the ones behind the toilet were a little bit hard to get to. We did a lot of leveling (again!)
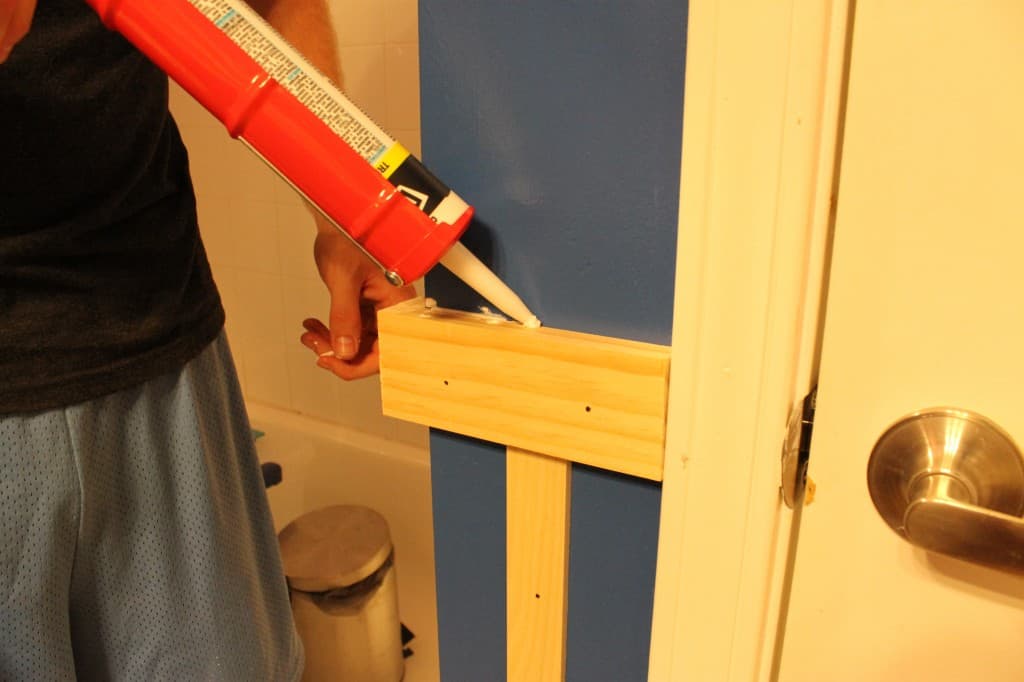
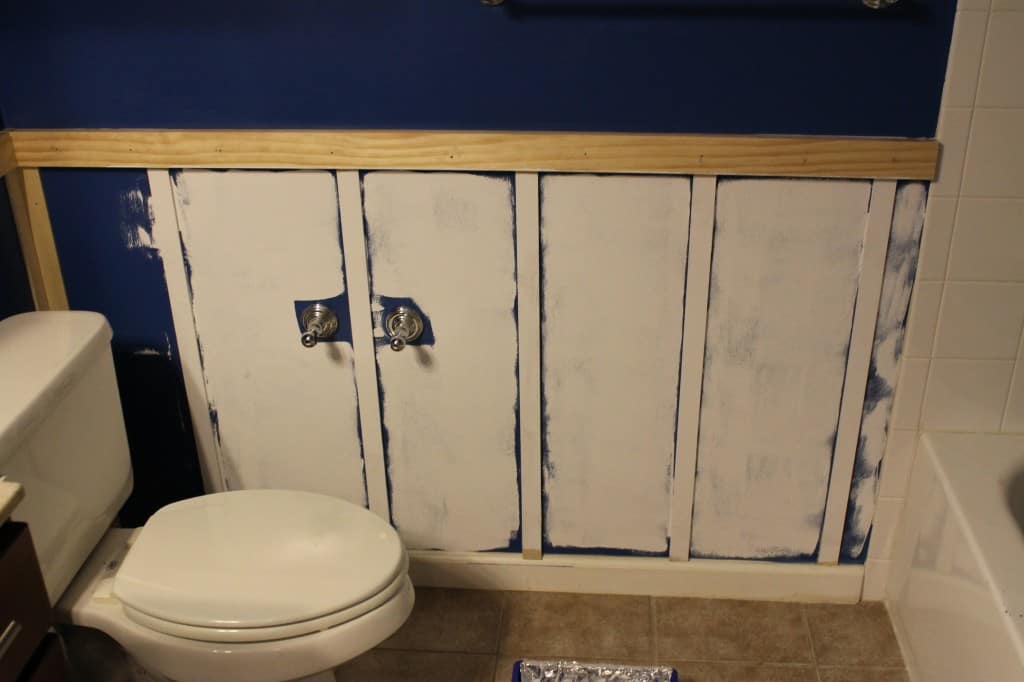
Step four: caulk seams
Next, we caulked all of the seams. Caulk all the seams between all the boards and the wall, including on the horizontal and vertical beams because you don't want any gaps.
Step five: paint
Once that was dry, we painted the whole thing glossy white. It took four coats and a lot of brush work, but it made all of the difference in the world!
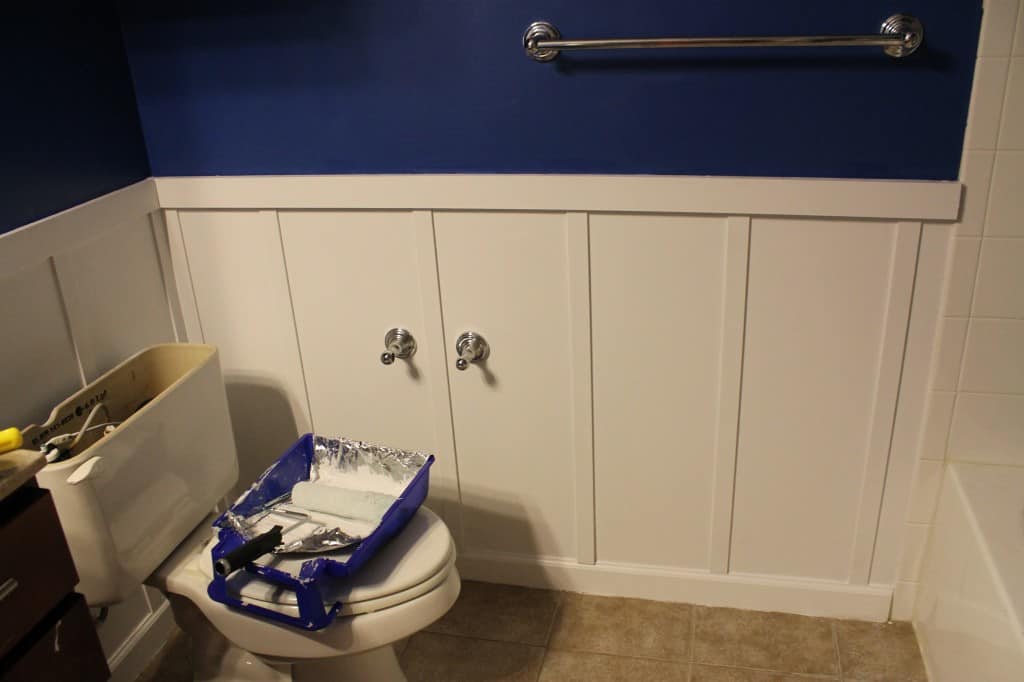
Step six: enjoy!
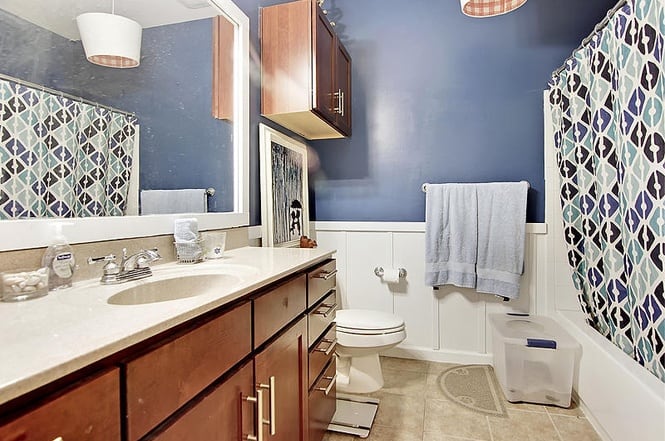
Oh my gosh, I am beyond in love with it. It looks clean and fresh and makes me feel like I'm in a spa! and even though this was a big project, it really wasn't that hard. It took a while, but it really was a fairly simple project. At least for me, Sean did most of the work!!
Check out our other favorite bathroom makeovers here!
I'm so excited that this room is almost complete... check back in tomorrow to see how we finished it off!

Looking for something?
We've been doing this since 2012 so we have a LOT of blog posts!
Search stuff like: Ceiling Projects | DIY Plant Stands | Thrift Flips

Hello, I'm Morgan, half of the creative force behind CharlestonCrafted.com! With a passion for DIY that dates back to 2012, I've transformed three homes and now I'm dedicated to helping others craft their dream spaces. Let's turn your house into a home together!


Alyssa says
I am loving you blog and I just joined the other day!
I have a bedroom that is completely painted the same color as this bathroom, I am adding white horizontal stripes on one wall and white/yellow curtains(following your curtain blog a couple days ago) and throwing in yellow punches else where. I'm excited to see your success
Morgan says
Yay! I would love to see how the stripes turn out, I have been wanting to paint a patterned/focal wall but am a little nervous about it. Please share!
Runt says
You two definitely made that look easy! We have a baby on the way and I am debating if I want to do this in what will be the nursery. I can't decide! Your bathroom looks great though. I love that wall color!
Morgan says
I think it would look great in the nursery! Its a crisp look that could really grow up with your baby!
Amanda says
YESSS!!! this is the only tutorial I've seen that has simple instructions with simple tools, thank you so much, I can't wait to start this project!!!!
Sean says
Yay! I am so glad that you enjoyed it! please tag me if you do it!!
Stefanie Godfrey says
Good job! Hey Sean I have a 45in wall with a square wall heater directly in the way. I'm having a hard time figuring out how far to space my boards apart? My measurements are 45in wide with 33in down and 1.5in panels.
Morgan says
If the heater is directly in the path and there wouldn't be any slats there, I would ignore that measurement entirely. Just base your spacing off the two open sections on the sides. If it is in the middle but you can still see wall around it, then I would just make equal measurements off the entire wall and space out accordingly, like the heater wasn't even there.