• Skip to primary navigation
  • Skip to main content
  • Skip to primary sidebar
Charleston Crafted
  • DIY
  • Woodworking
  • Popular Posts
  • Blog
  • About
  • Shop
menu icon
go to homepage
  • DIY
  • Woodworking
  • Popular Posts
  • Blog
  • About
  • Shop
search icon
Homepage link
  • DIY
  • Woodworking
  • Popular Posts
  • Blog
  • About
  • Shop
×
Home » Furniture Projects

Turn a Wrought Iron Headboard into an Upholstered Headboard

Published: Sep 18, 2013 · Modified: Apr 23, 2023 by Morgan · As an Amazon Associate, we earn from qualifying purchases. This site contains affiliate links. ·

Wondering how to upholster a metal headboard? You are going to love this easy & inexpensive DIY tutorial!

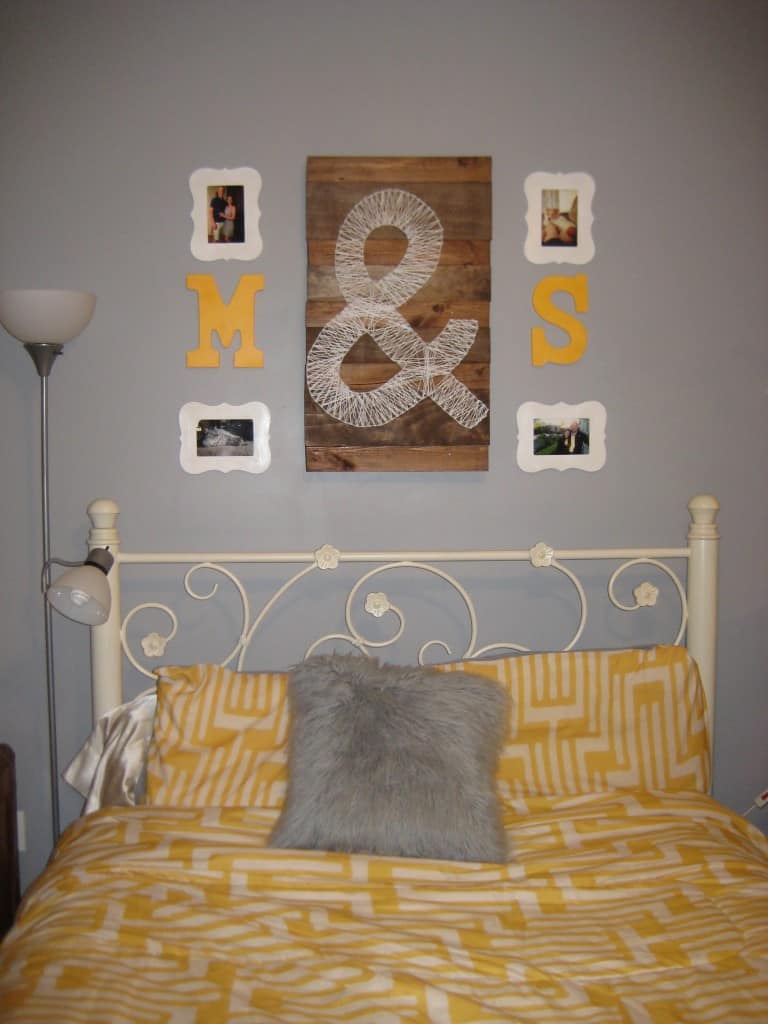
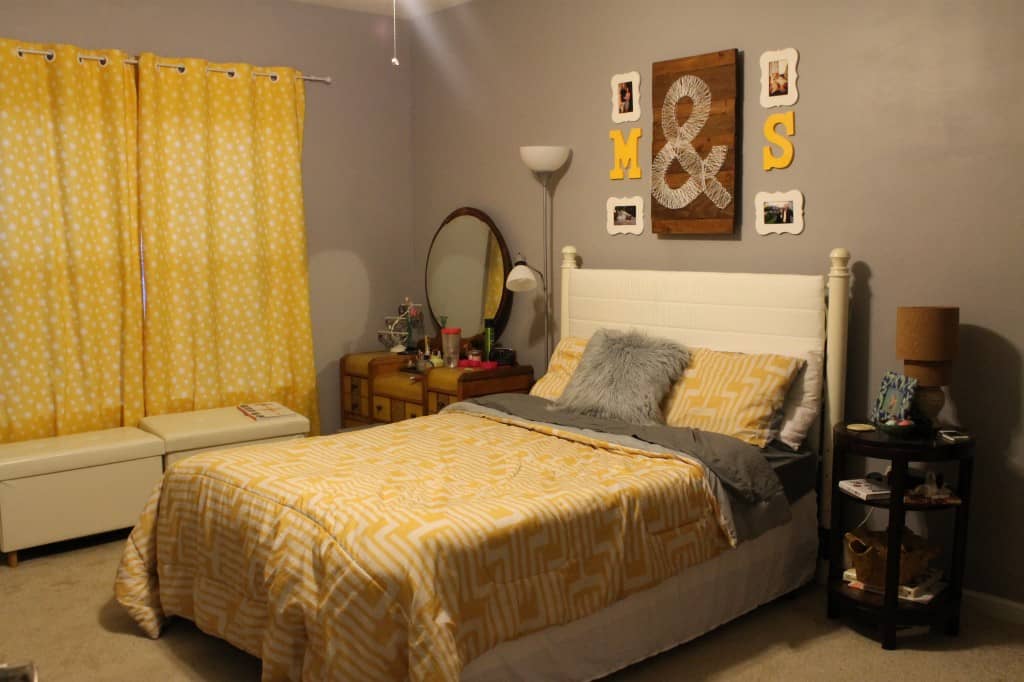
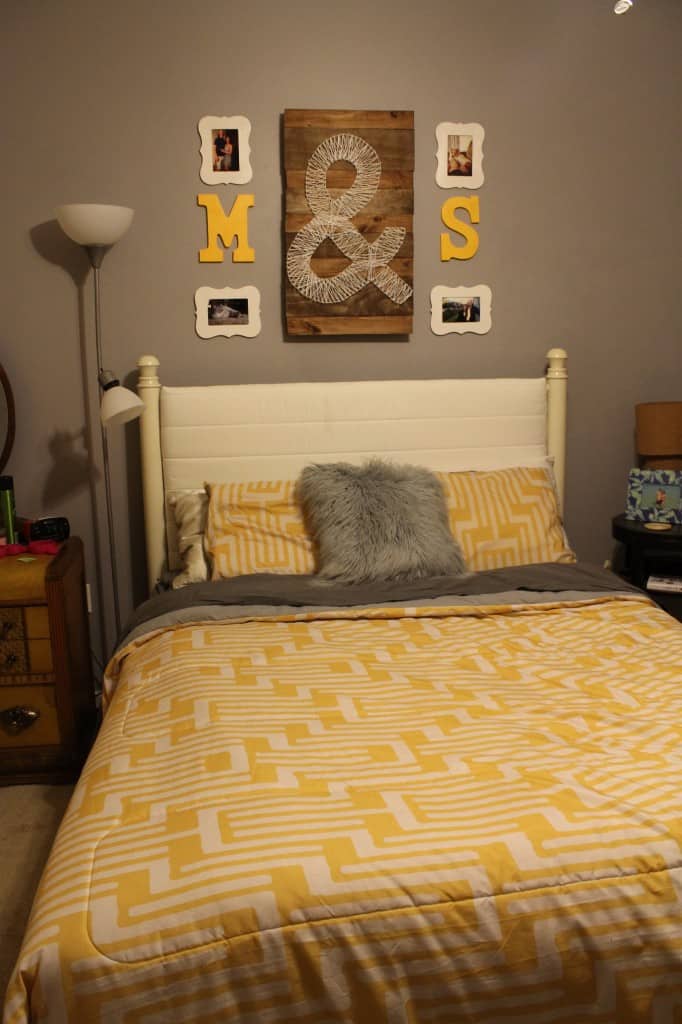
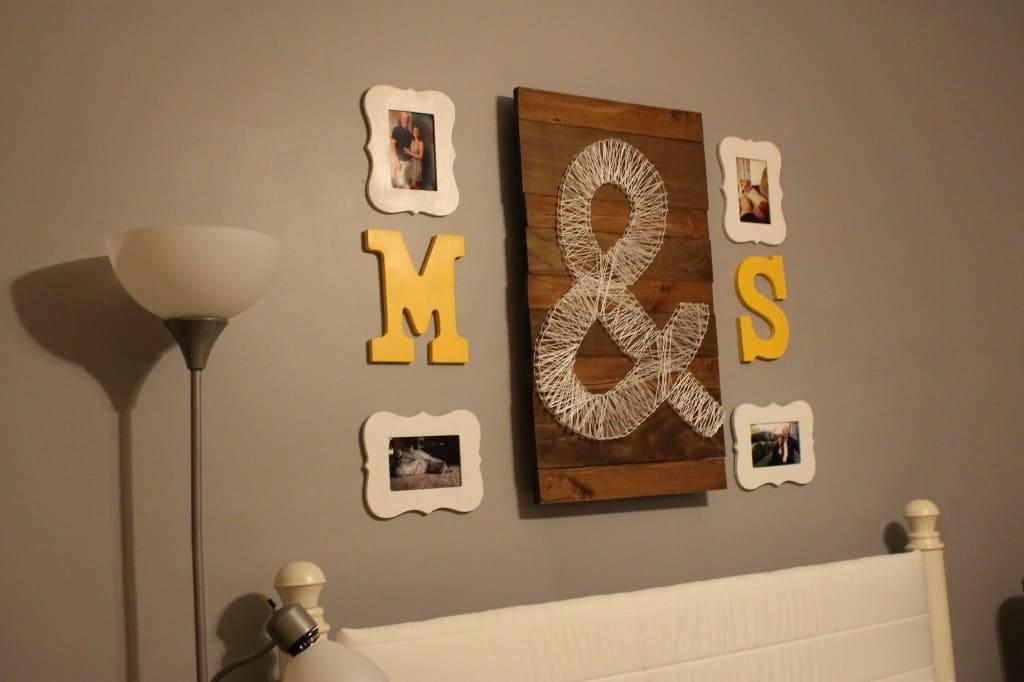
I am so pleased with the upgrades going on in the master bedroom. From the ampersand string art to the no sew curtains, to the grid gallery wall and curtains on the closets, this room is really taking shape.
One of the last big things that I wanted to update was the headboard. This bed is in great shape & has nothing wrong with it, but the headboard is really out of style. It has curvy metal and, while really pretty, is less my style than it was when I originally bought it (in 2008.)
DIY String Art - Charleston Crafted
Of course, everyone with a pinterest account is upholstering their headboards. So, I figured that I could easily modify this one for an upholstered look.
Now, let me just say, almost every "cheap and easy" project that I attempt ends up WAY more expensive, time consuming, and troublesome than I anticipated. Not this one. It was easy, peasy, chicken squeezey. So, if you're considering it - go for it!
Here's what you need:
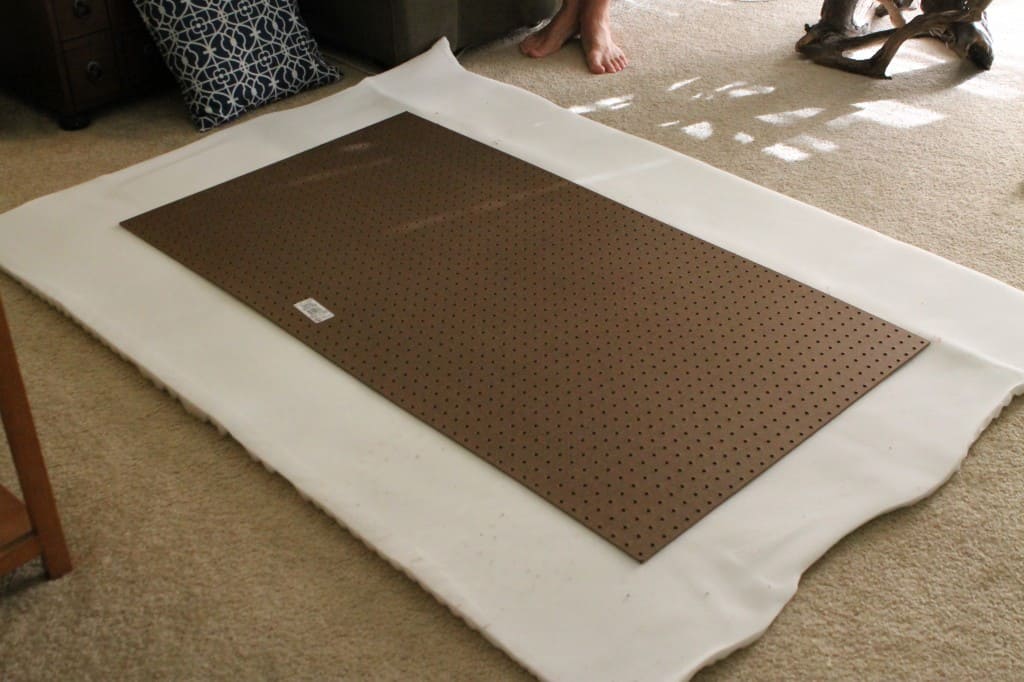
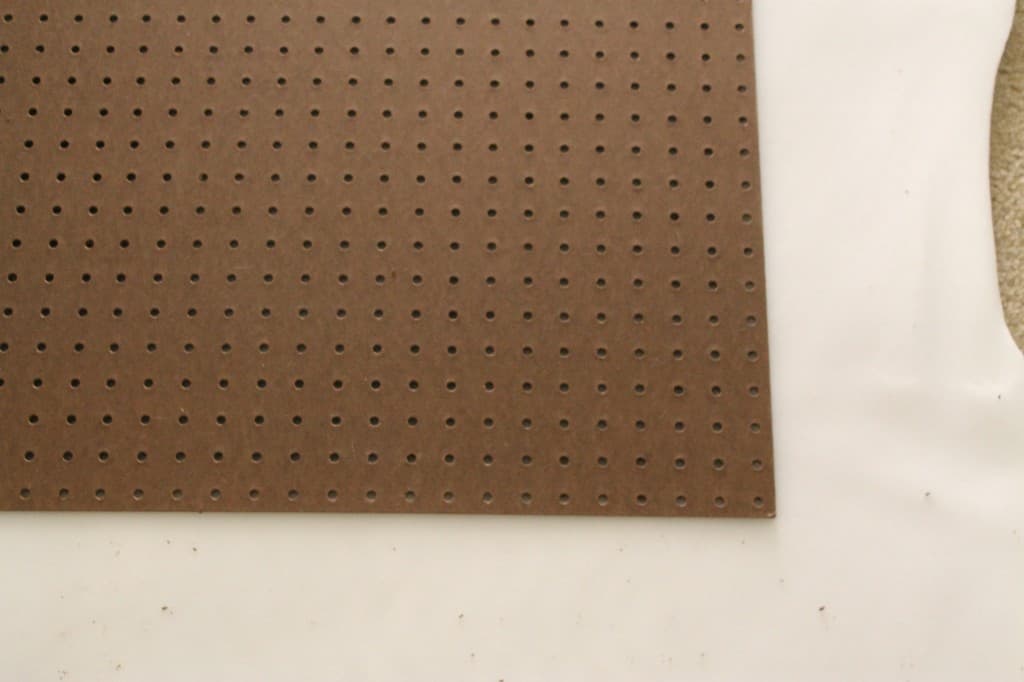
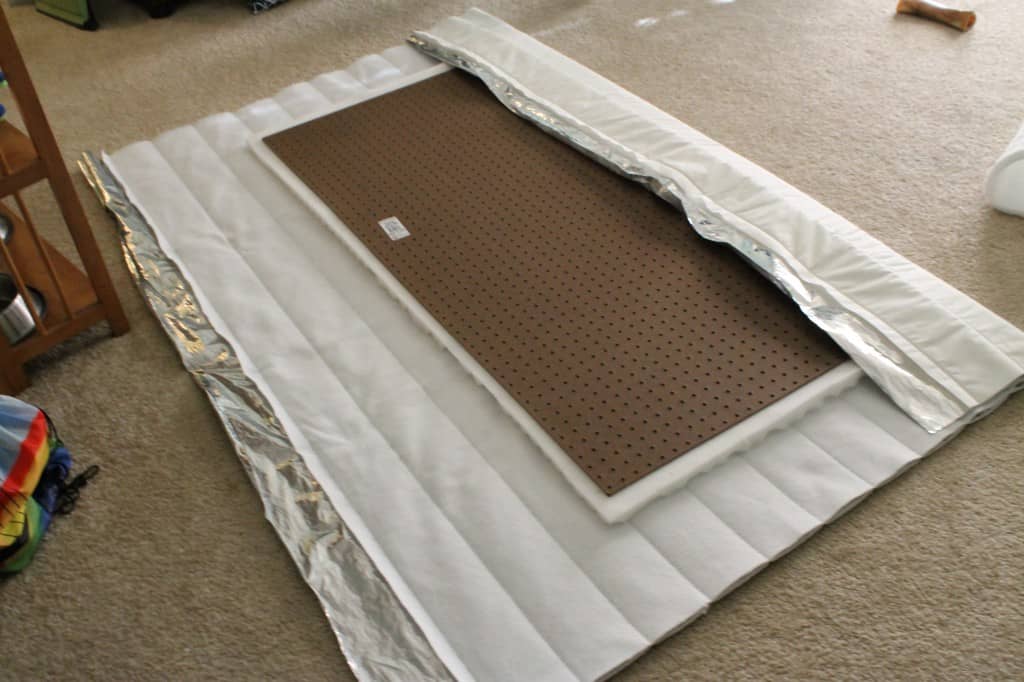
  • Pegboard cut to the size of your headboard
  • Foam mattress topper (for a queen headboard we used a full topper & had room to spare)
  • 2 yards of fabric
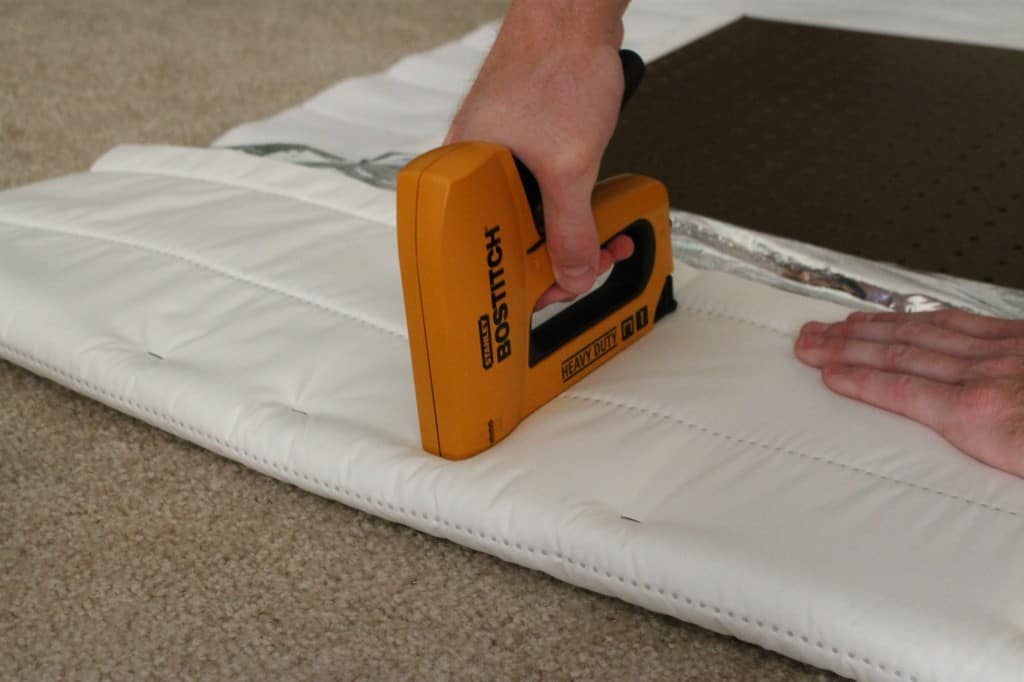
  • Staple gun & staples
  • Zip ties
Here's what we did:
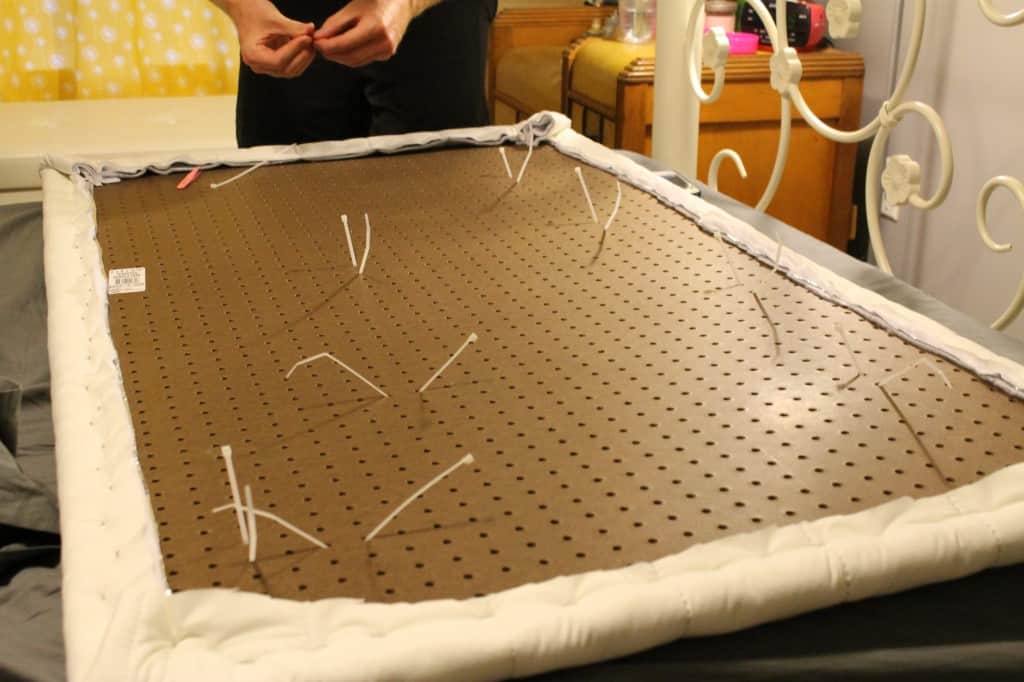
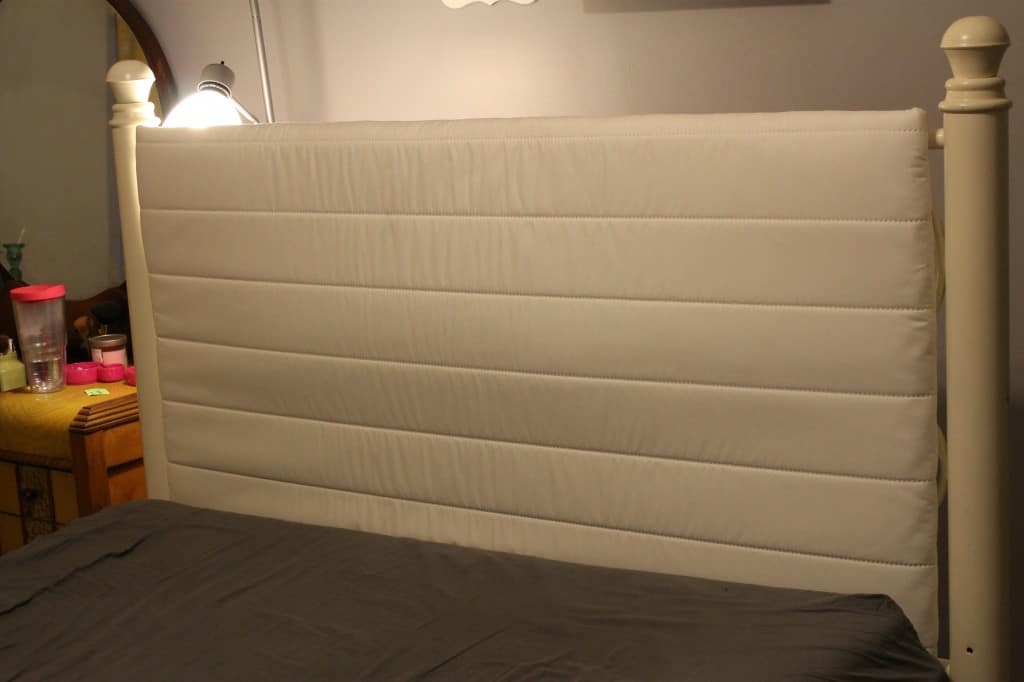
Lay the peg board down on the foam. Cut the foam to the size of your board plus a 1 inch border around the edge.
Upholster a Wrought Iron Headboard - Charleston Crafted
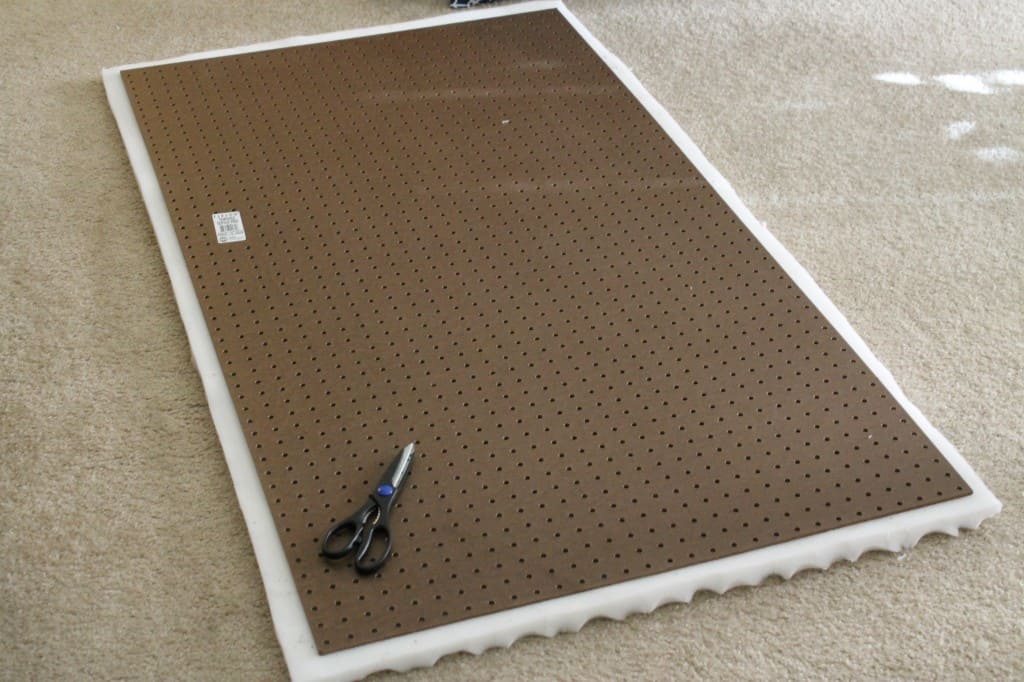
Lay it on top of your fabric, bad side up. Pull it TIGHT over the edge and staple. We do a center staple & one on each side, then fill in.
Upholster a Wrought Iron Headboard - Charleston Crafted
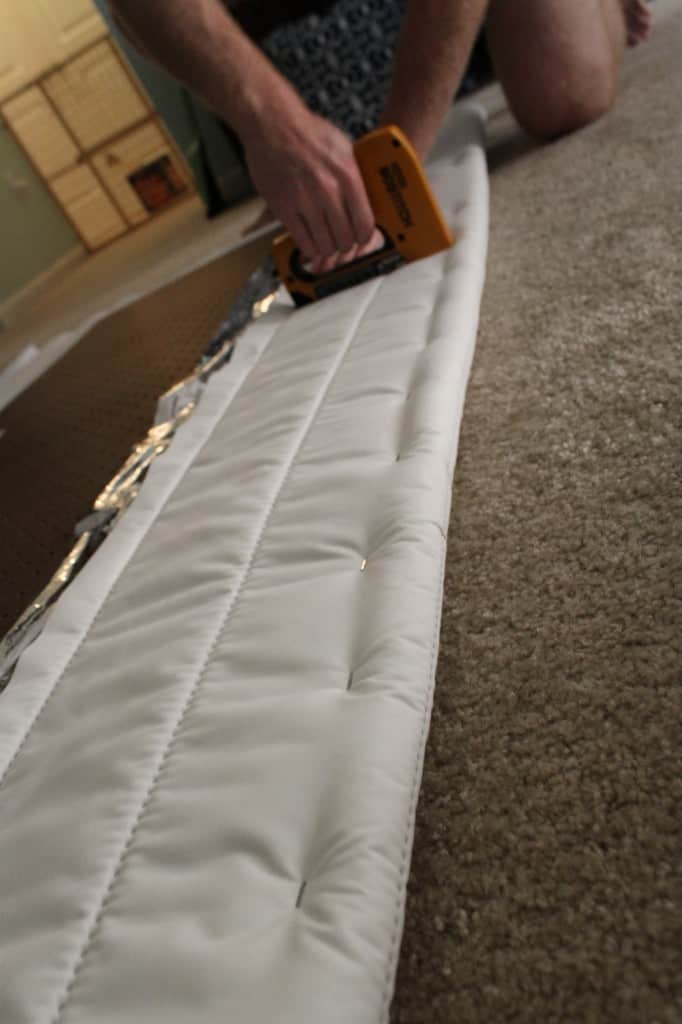
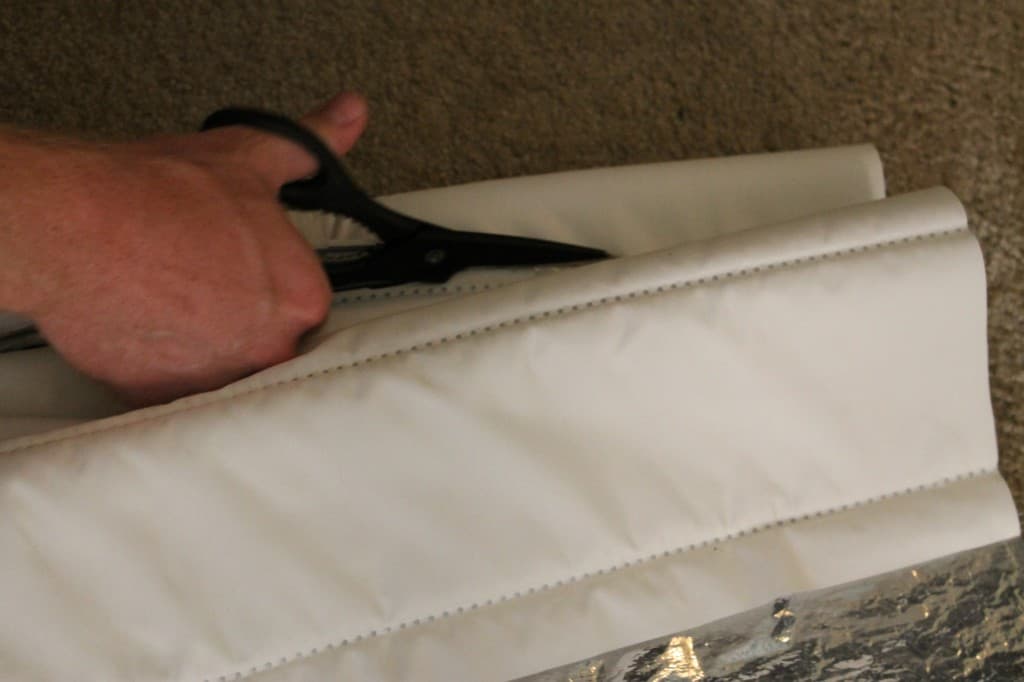
Repeat on the opposite side. Trim excess fabric.
Upholster a Wrought Iron Headboard - Charleston Crafted
Repeat on the two remaining sides.
Upholster a Wrought Iron Headboard - Charleston Crafted
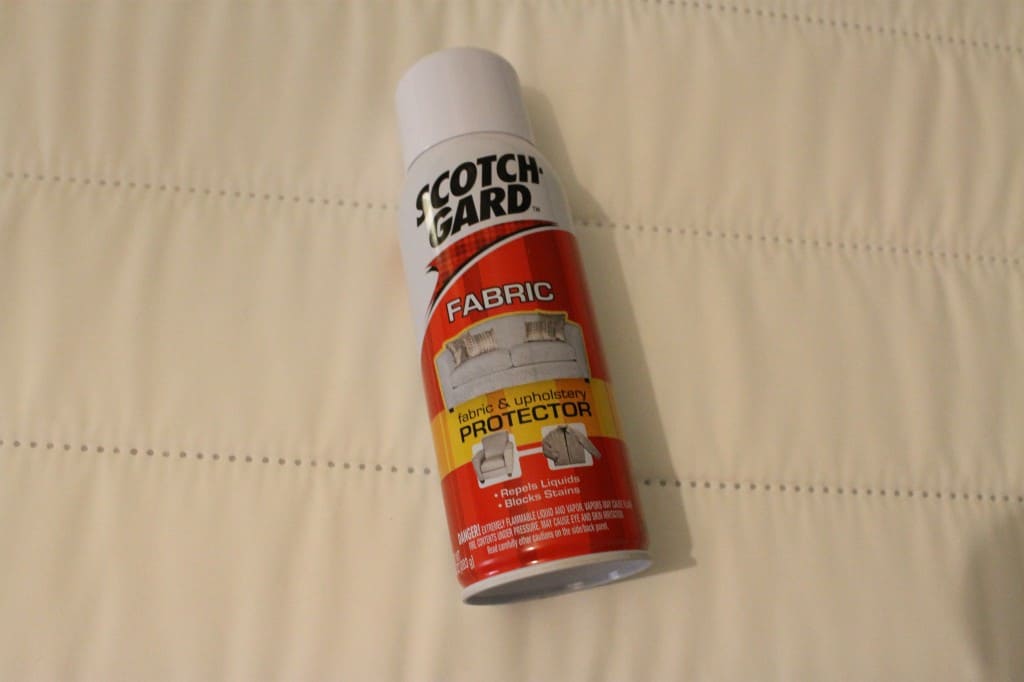
I scotch guarded the entire thing after a lady at Joann's fabric approached me, asked me what I was planning to use the fabric for, and told me what a terrible idea it was to use white. I replied "YOLO!" but really wasn't too worried. We don't have too much trouble with dirtiness and I like white and sometimes what you like takes precedence over practicality. But I already owned scotch guard and decided to give it a coat just to help a little.
Upholster a Wrought Iron Headboard - Charleston Crafted
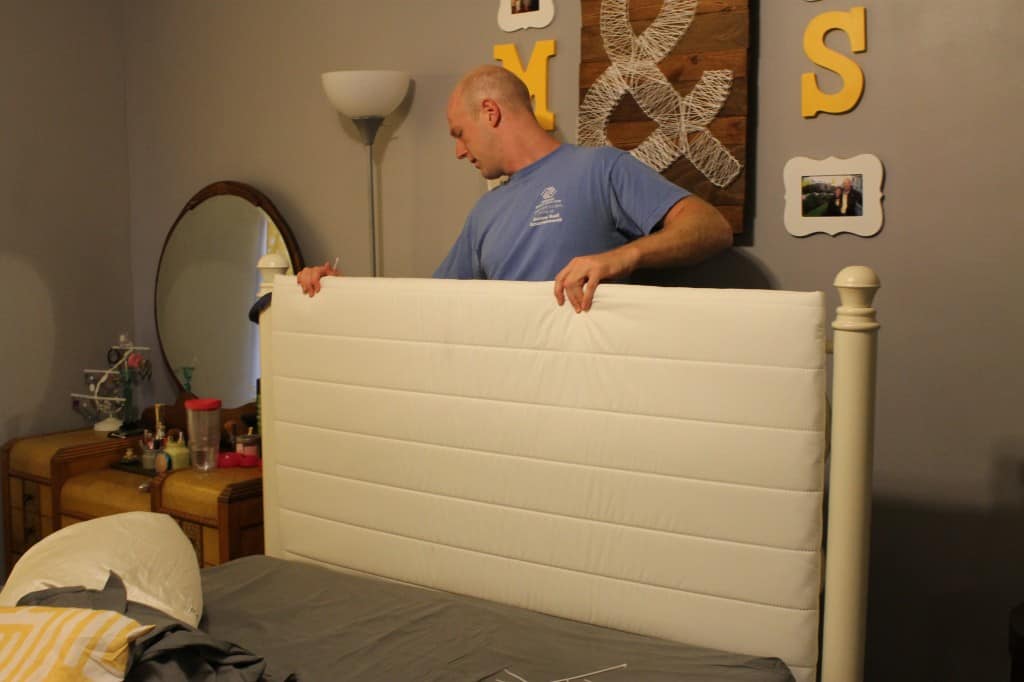
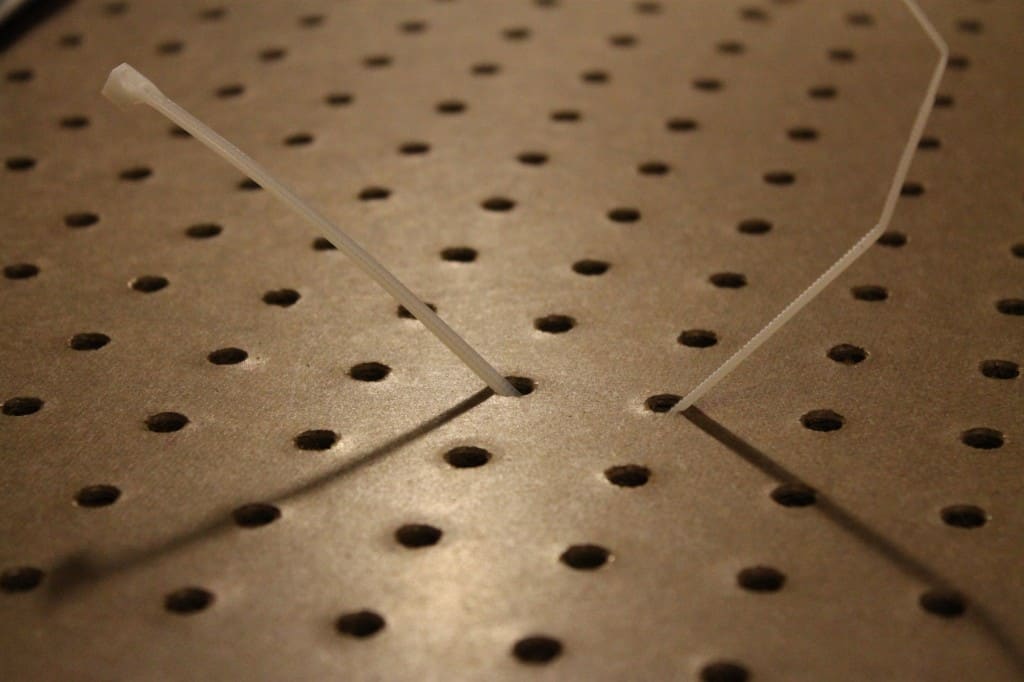
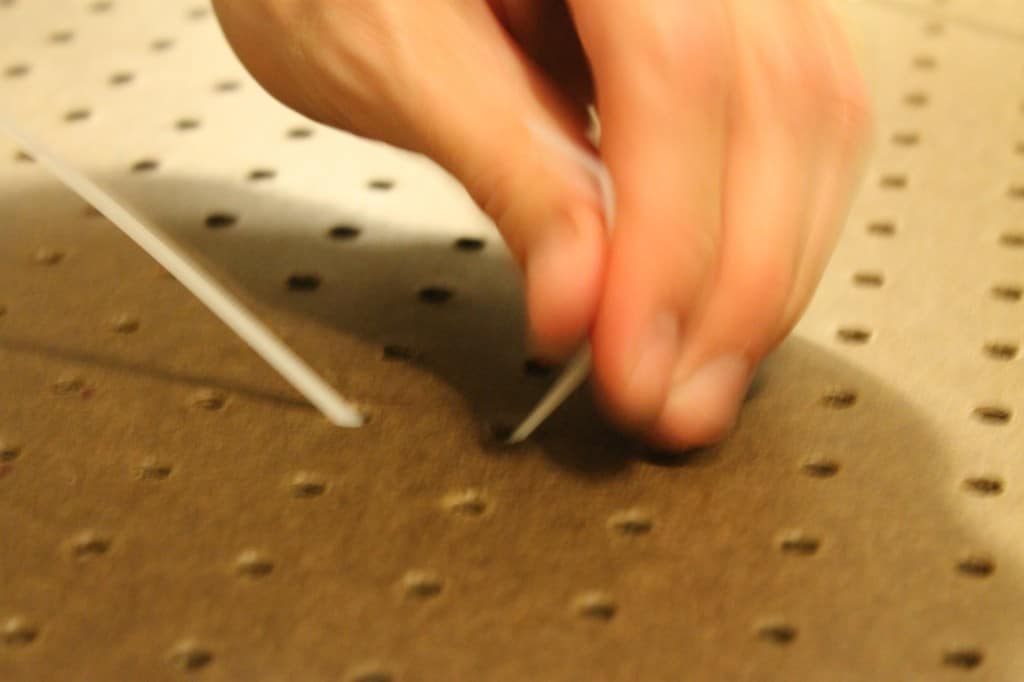
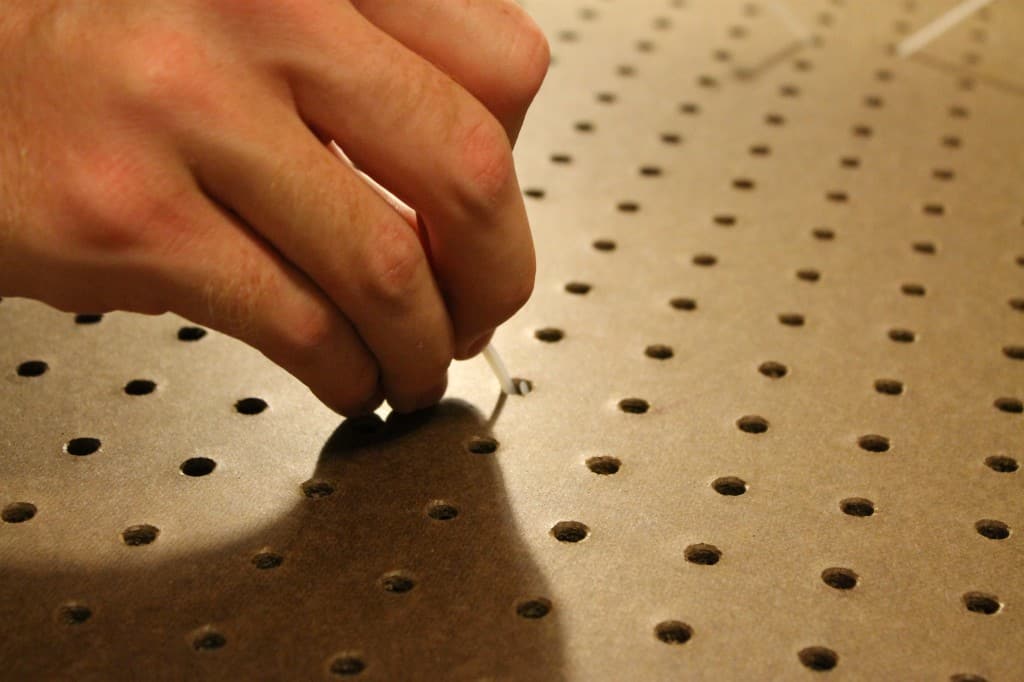
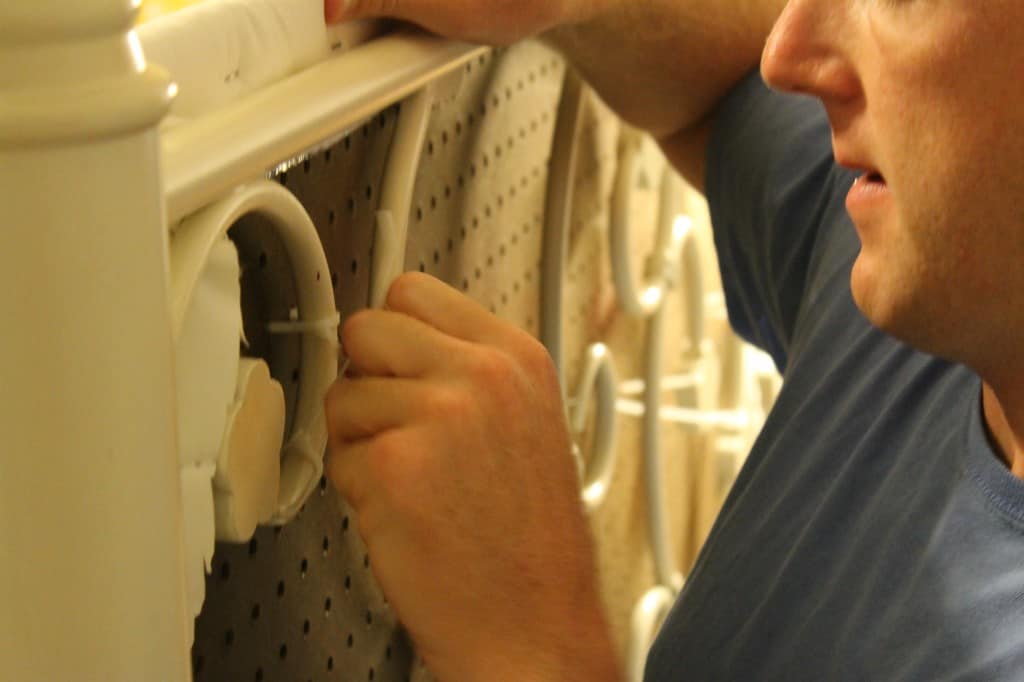
To hang it- we stuck zip ties through the holes in the pegboard & tied it to the existing headboard. We should have inserted the ties before stapling, but didn't think it through. Sean was able to bend the plastic ties and stick them through the holes without too much trouble.
Upholster a Wrought Iron Headboard - Charleston Crafted
IMG_3066
Upholster a Wrought Iron Headboard - Charleston Crafted
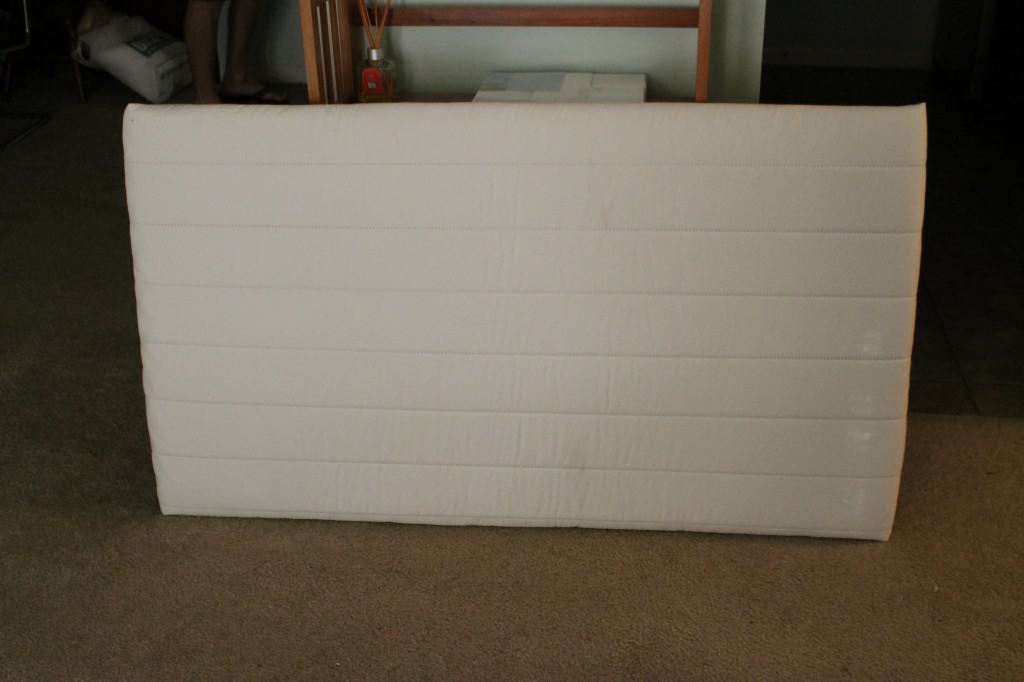
Ta-da! A totally updated headboard!
Upholster a Wrought Iron Headboard - Charleston Crafted
As for why we used pegboard and not particle board:
1. It was cheaper at Lowes
2. So we could attach it to the existing headboard without any hardware
3. I originally planned on tufting it. However, I thought this fabric looked better untufted! The peg holes make it easy to line up & attach your tufts!
We love this project and it was SO EASY! I can't get over it!
Have you had any projects turn out super easy lately??
  signature 2
 logo facebook  logo instagram  logo pinterest  logo twitter

[wp_ad_camp_2]

Morgan headshot cropped
Morgan

Hello, I'm Morgan, half of the creative force behind CharlestonCrafted.com! With a passion for DIY that dates back to 2012, I've transformed three homes and now I'm dedicated to helping others craft their dream spaces. Let's turn your house into a home together!

More Furniture Projects

  • DIY modern rolling storage table - Charleston Crafted
    DIY modern rolling storage table
  • DIY cube storage console table - Charleston Crafted
    DIY cube storage console table
  • DIY ottoman coffee table - Charleston Crafted
    DIY ottoman coffee table
  • Henredon Murphy Fabric Modular Sectional Review
    Henredon Murphy Fabric Modular Sectional Review

Reader Interactions

Comments

  1. Runt says

    September 19, 2013 at 9:29 am

    What a great idea! I love how you didn't really have to alter your actual headboard at all. Clever and it came out great!

    • CharlestonCrafted says

      September 19, 2013 at 9:32 am

      Thanks! It was a good way to use what we had already, which really made it inexpensive and easy!

  2. Claire says

    March 15, 2014 at 4:53 pm

    Hi there,

    Wanting to transform my iron bedframe using this method, do the cable ties secure the board properly or would it be slightly loose?

    Many thanks,

    C, UK

    • CharlestonCrafted says

      March 15, 2014 at 6:27 pm

      Hi Claire! The great thing about these ties is you pull them as tight as you want. We used a lot of ties and pulled them as tight as we could (pull as tight as you can then when you're done a all go back and give each one an extra tug before trimming!) and it is very tight and does not wiggle. Good luck!

  3. Dida says

    April 01, 2015 at 11:48 am

    OMG!!! Absolutely Genius!!! I am going to try this.

    • Sean says

      April 05, 2015 at 9:26 pm

      I'm so glad! Hope it turns out well for you! Let us know if you have any questions.

  4. Judee says

    June 09, 2015 at 9:02 pm

    Love it! I want to try it. My daughter wants me to cover the posts as well. Any ideas how I can do this??? Thanks.

    • Morgan says

      June 10, 2015 at 3:23 pm

      What posts do you mean? On the side? You could use a wider board, but just make sure that it is very secure.

  5. Ray Palagy says

    June 16, 2015 at 11:08 am

    built mine this past weekend...came out great! I used an old Latex mattress topper that I chopped into the shape of the pegboard and covered with batting and then fabric. We did a King size bed so we had to use 2 pegboards which I held together overlapping with tie wraps as well to get the perfect length.

    • Morgan says

      June 16, 2015 at 3:03 pm

      Yay I am so glad that it turned out!

  6. Kimberly Jones says

    June 28, 2015 at 2:03 pm

    What a well done up grade and fantastic tutorial. Mr Cheapskate sees no reason to get a new bed," We've only had this one 10 years. We only sleep in there, no one sees it. What's it matter?" Will very soon schedule a day off work, send him fishing and do some magic, thanks to you!

    • Sean says

      June 28, 2015 at 3:50 pm

      Thanks! I hope it turns out well for you 🙂

    • Evelyn Thomas says

      October 29, 2017 at 4:47 pm

      So Kimberly Jones, it's been over 2 years1 how did your headboard upholstery go?

  7. Maryssa says

    November 09, 2015 at 12:49 pm

    I love this idea I have been looking for something like this for my daughters bed. One question any ideas on the foot board?

    • Morgan says

      November 09, 2015 at 12:57 pm

      Our bed did not have a headboard, but I can imagine that you could use the same technique. Good luck!

      • Evelyn Thomas says

        October 29, 2017 at 4:49 pm

        Maybe you could use one piece of pegboard each to front and back of footboard, then cover, for the aesthetics.

Primary Sidebar

Charleston Crafted about us image

Hey y'all!

We are Morgan & Sean McBride and we are crafting our home together in Charleston, South Carolina.

More about us

Popular Posts

  • DIY Coffered Ceiling
    DIY Coffered Ceiling
  • How to Make DIY Concrete Pumpkins via Charleston Crafted
    How to Make DIY Concrete Pumpkins
  • How to Make a Cupid's Arrow Valentine's Day Wall Hanging with felt on the Cricut
    How to make a Cupid's Arrow Valentine's Day Wall Hanging
  • Our Tropical Oasis - A backyard Hammock area - Charleston Crafted
    Our Tropical Oasis

Recent Posts

  • fisherman aesthetic home inspiration
    Fisherman Aesthetic Decor for Your Home
  • Senix Tools Review- Charleston Crafted
    Are Senix power tools any good?
  • Your Weekend To-Do List: 15 Things to Do for Summer Home Upkeep
    Your Weekend To-Do List: 15 Things to Do for Summer Home Upkeep
  • How to build a DIY gate pergola- Charleston Crafted
    How to build a DIY gate pergola

Privacy Policy

Footer

↑ back to top

Navigation

  • Home
  • Blog
  • Contact Us
  • Terms of Use
  • Disclaimer

Newsletter

  • Sign up for emails and updates
  • Follow us on Instagram
  • Work with Us

Browse by Category

  • Woodworking
  • Home Projects
  • Paint Colors
  • Room Reveals

© 2025 The Charleston Crafted Blog LLC DBA “Charleston Crafted” and “CharlestonCrafted” (also known as N/A) / All Rights Reserved.
Official Website: (Charleston Crafted)
Registered in USA (Co. Reg. No.: 565586)
Address: Charleston, USA 29414, South Carolina
Contact Phone: Not applicable — contact is via email: sean@charlestoncrafted.com

DISCLAIMER: The content on this website is provided for general informational purposes only and is not intended as professional advice. The Charleston Crafted Blog LLC and The Charleston Crafted Blog LLC make no representations or warranties—express or implied—regarding the accuracy, completeness, or suitability of the information contained herein. Any reliance you place on this information is strictly at your own risk. In no event shall The Charleston Crafted Blog LLC or The Charleston Crafted Blog LLC be liable for any loss or damage, including without limitation, indirect or consequential loss or damage, arising from the use or inability to use this website. This website is the official website of The Charleston Crafted Blog LLC.

AFFILIATE DISCLOSURE: This website contains affiliate links. If you click through and make a purchase, we may earn a commission at no extra cost to you.

As an Amazon Associate, I earn from qualifying purchases.

Site Editor: Morgan Smith McBride

Copyright © 2025 Charleston Crafted