• Skip to primary navigation
  • Skip to main content
  • Skip to primary sidebar
Charleston Crafted
  • DIY
  • Woodworking
  • Popular Posts
  • Blog
  • About
  • Shop
menu icon
go to homepage
  • DIY
  • Woodworking
  • Popular Posts
  • Blog
  • About
  • Shop
search icon
Homepage link
  • DIY
  • Woodworking
  • Popular Posts
  • Blog
  • About
  • Shop
×
Home » Decor

Easy Heart Photo Wall

Published: Feb 1, 2013 · Modified: Sep 25, 2018 by CharlestonCrafted · As an Amazon Associate, we earn from qualifying purchases. This site contains affiliate links. ·

You might remember that in my old apartment I had a heart shaped gallery wall in my dining room. It was really a focal point of the room & people always commented on & admired it. So, I've been looking for a way to incorporate a heart photo wall into my new condo- I thought about over a bed's headboard but in the end decided to recreate the look in my new dining area.

My condo is all open so you can see it from the kitchen & the living room, too!

Easy Heart Photo Wall

In order to prep the gallery wall, I first laid out the photo design on the floor. I used pictures of my previous design as a template.

You can see that it is essentially arranged in 7 columns of photos. The center column is 6 photos high.

In total to make this arrangement, I used 15 landscape/horizontal photos and 21 portrait/vertical photos. 36 photos total.
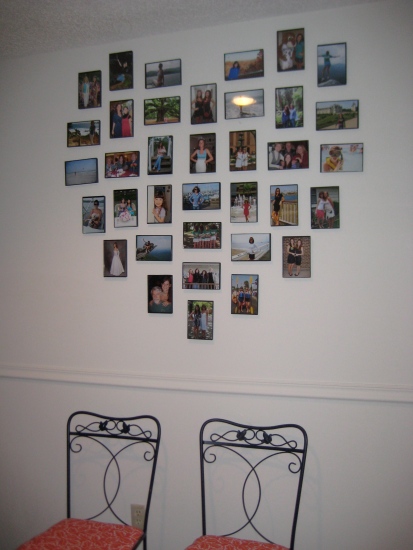
Heart Frame Gallery Wall - Charleston Crafted
Heart photo frame gallery wall

IMG_3072

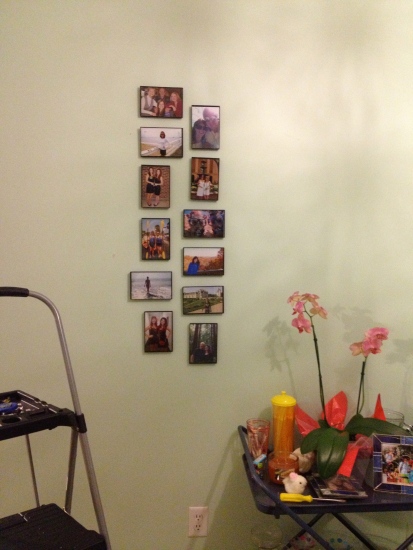
Then, I started hanging. I started with the top center of the heart.

First, I placed the top frame center in the wall & about level with the top of the doorway next to it. Then I worked my way down. I used a tape measure to measure 2 inches between all frames.

IMG_3073

IMG_3074

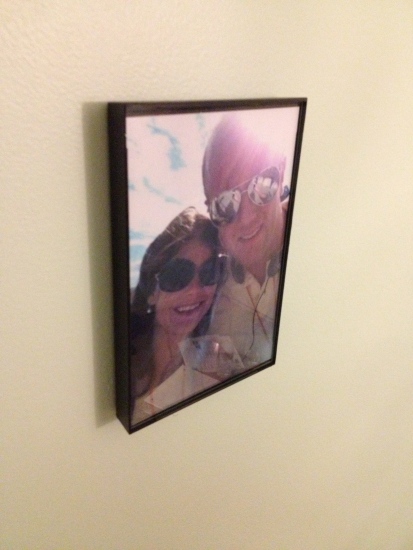
You could use nails but I actually decided to hang these frames with small command hooks so that I didn't have to put holes in the wall.

IMG_3075

IMG_3076

The command hooks fit perfectly in the frame holes, so I stuck the hook in the hole & then pressed the whole thing against the wall where I wanted it. Press and hold the command strip hook in place long enough for it to stick. If you have heavier frames, you might need to remove them from the hooks to give the hooks time to dry.

IMG_3078

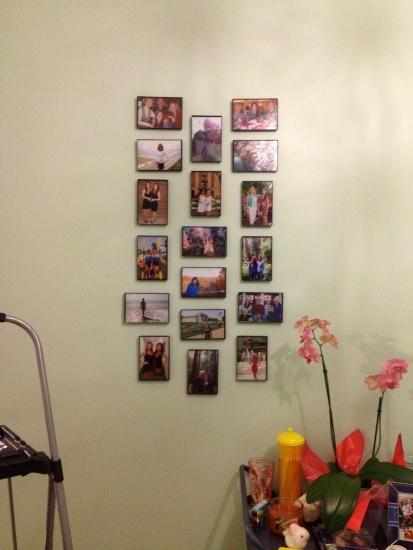
I worked my way down columns & went back & forth from side to side, so I did the 1st column on the left & then the column on the right.

IMG_3079

It's not hard, it just takes a while because you have to step back and make sure that things are even frequently. I encourage you to be patient. You do not want it to turn out crooked or lopsided.

In the end, it turned out awesome! I love the look of this heart photo wall and love how easy it was to make a big impact without having to get any large frames or photos printed. I also love how easy it is to swap out photos if I get a new picture that I love!

IMG_3092_2

Do you have a gallery wall in your home?

CharlestonCrafted

More Decor

  • DIY easter egg topiary
    How to make an oversized Easter egg topiary
  • design shop review
    DesignShop Box Review
  • lighting trends for 2025
    Top Lighting Trends to Brighten Your Home in 2025
  • Our Valentine's Day Mantel Decor
    Valentines Day Mantel Decor

Reader Interactions

Comments

  1. Rathna says

    September 15, 2020 at 1:41 pm

    Hi i am trying to make a heart shaped photo wall like you did but with canvases and smaller than yours maybe with 15 to 20 pictures with varying sizes big to small. Please let me know how i can arrange the template and with different sizes of 10x10,8x8,5x7,8x10,4x6, 12x16,12x12. I need ideas how to form a heart. Since you already did it would have more ideas and templates. Please share your thoughts.

    • Morgan says

      September 16, 2020 at 11:22 am

      Hey Rathna - the best thing to do is lay them out on the floor until you get the look you like. I think it looks best to have it be symmetrical from left to right. Good luck!

Primary Sidebar

Charleston Crafted about us image

Hey y'all!

We are Morgan & Sean McBride and we are crafting our home together in Charleston, South Carolina.

More about us

Popular Posts

  • DIY Coffered Ceiling
    DIY Coffered Ceiling
  • How to Make DIY Concrete Pumpkins via Charleston Crafted
    How to Make DIY Concrete Pumpkins
  • How to Make a Cupid's Arrow Valentine's Day Wall Hanging with felt on the Cricut
    How to make a Cupid's Arrow Valentine's Day Wall Hanging
  • Our Tropical Oasis - A backyard Hammock area - Charleston Crafted
    Our Tropical Oasis

Recent Posts

  • fisherman aesthetic home inspiration
    Fisherman Aesthetic Decor for Your Home
  • Senix Tools Review- Charleston Crafted
    Are Senix power tools any good?
  • Your Weekend To-Do List: 15 Things to Do for Summer Home Upkeep
    Your Weekend To-Do List: 15 Things to Do for Summer Home Upkeep
  • How to build a DIY gate pergola- Charleston Crafted
    How to build a DIY gate pergola

Privacy Policy

Footer

↑ back to top

Navigation

  • Home
  • Blog
  • Contact Us
  • Terms of Use
  • Disclaimer

Newsletter

  • Sign up for emails and updates
  • Follow us on Instagram
  • Work with Us

Browse by Category

  • Woodworking
  • Home Projects
  • Paint Colors
  • Room Reveals

© 2025 The Charleston Crafted Blog LLC DBA “Charleston Crafted” and “CharlestonCrafted” (also known as N/A) / All Rights Reserved.
Official Website: (Charleston Crafted)
Registered in USA (Co. Reg. No.: 565586)
Address: Charleston, USA 29414, South Carolina
Contact Phone: Not applicable — contact is via email: sean@charlestoncrafted.com

DISCLAIMER: The content on this website is provided for general informational purposes only and is not intended as professional advice. The Charleston Crafted Blog LLC and The Charleston Crafted Blog LLC make no representations or warranties—express or implied—regarding the accuracy, completeness, or suitability of the information contained herein. Any reliance you place on this information is strictly at your own risk. In no event shall The Charleston Crafted Blog LLC or The Charleston Crafted Blog LLC be liable for any loss or damage, including without limitation, indirect or consequential loss or damage, arising from the use or inability to use this website. This website is the official website of The Charleston Crafted Blog LLC.

AFFILIATE DISCLOSURE: This website contains affiliate links. If you click through and make a purchase, we may earn a commission at no extra cost to you.

As an Amazon Associate, I earn from qualifying purchases.

Site Editor: Morgan Smith McBride

Copyright © 2025 Charleston Crafted