
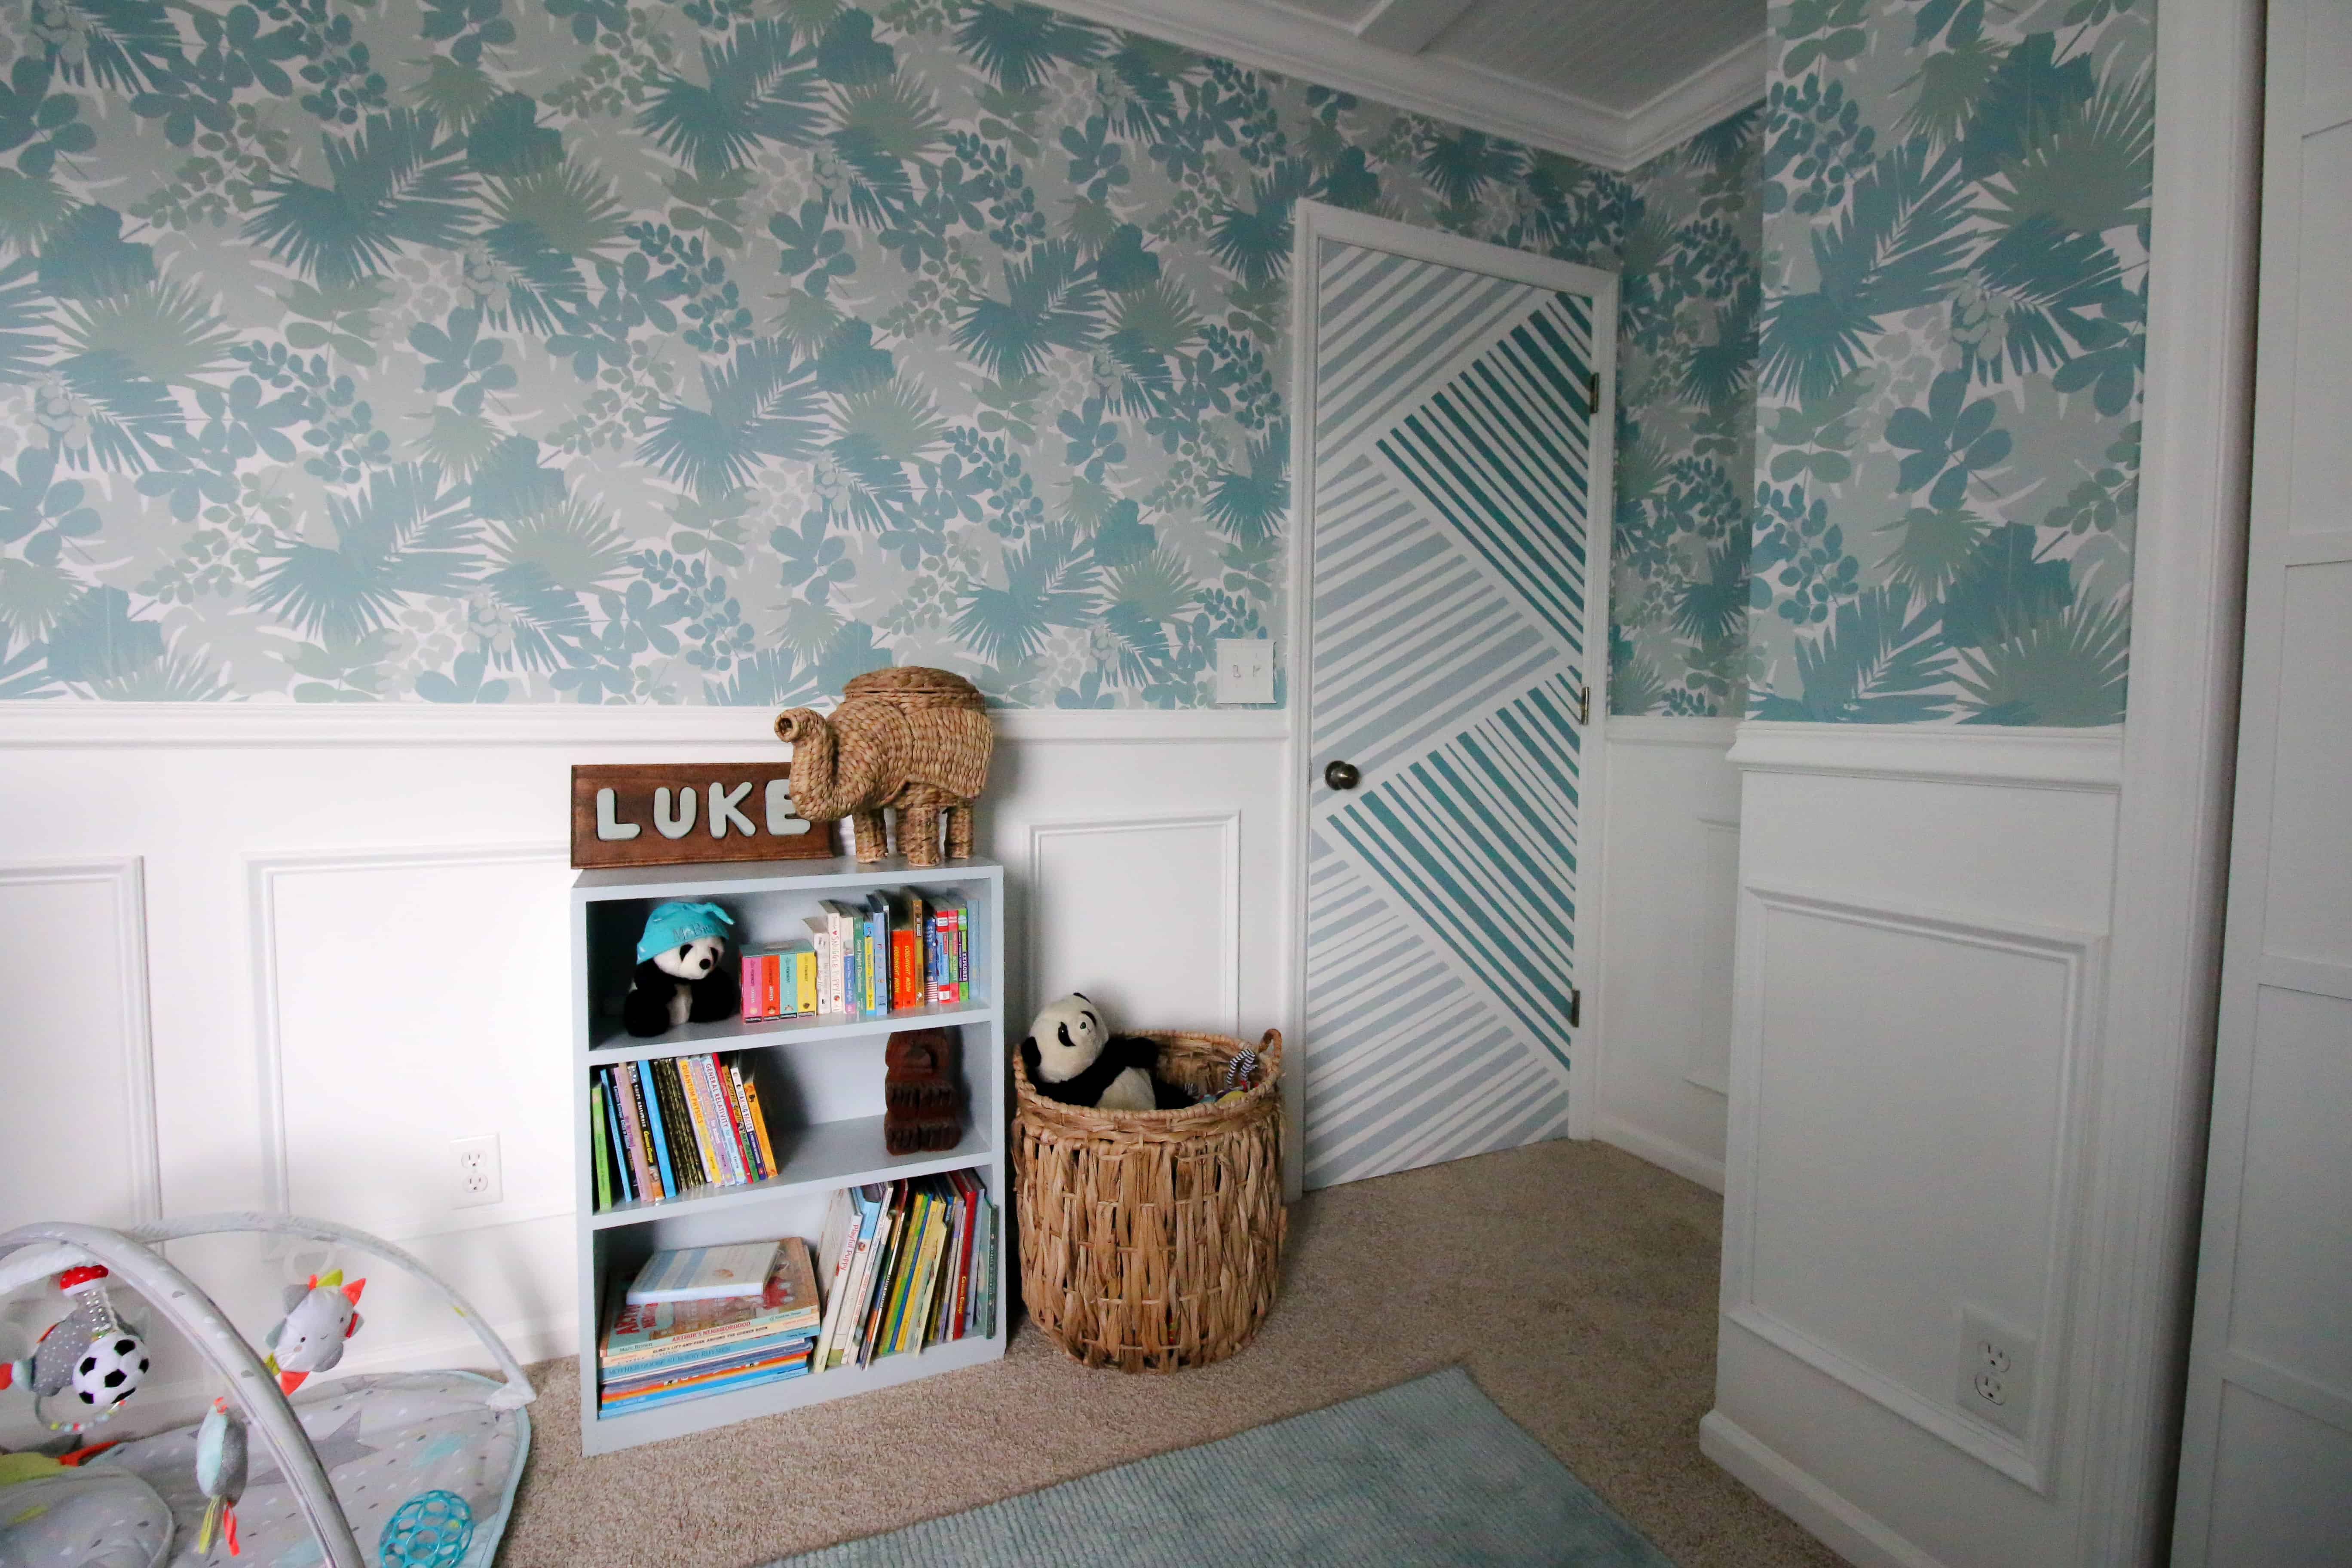
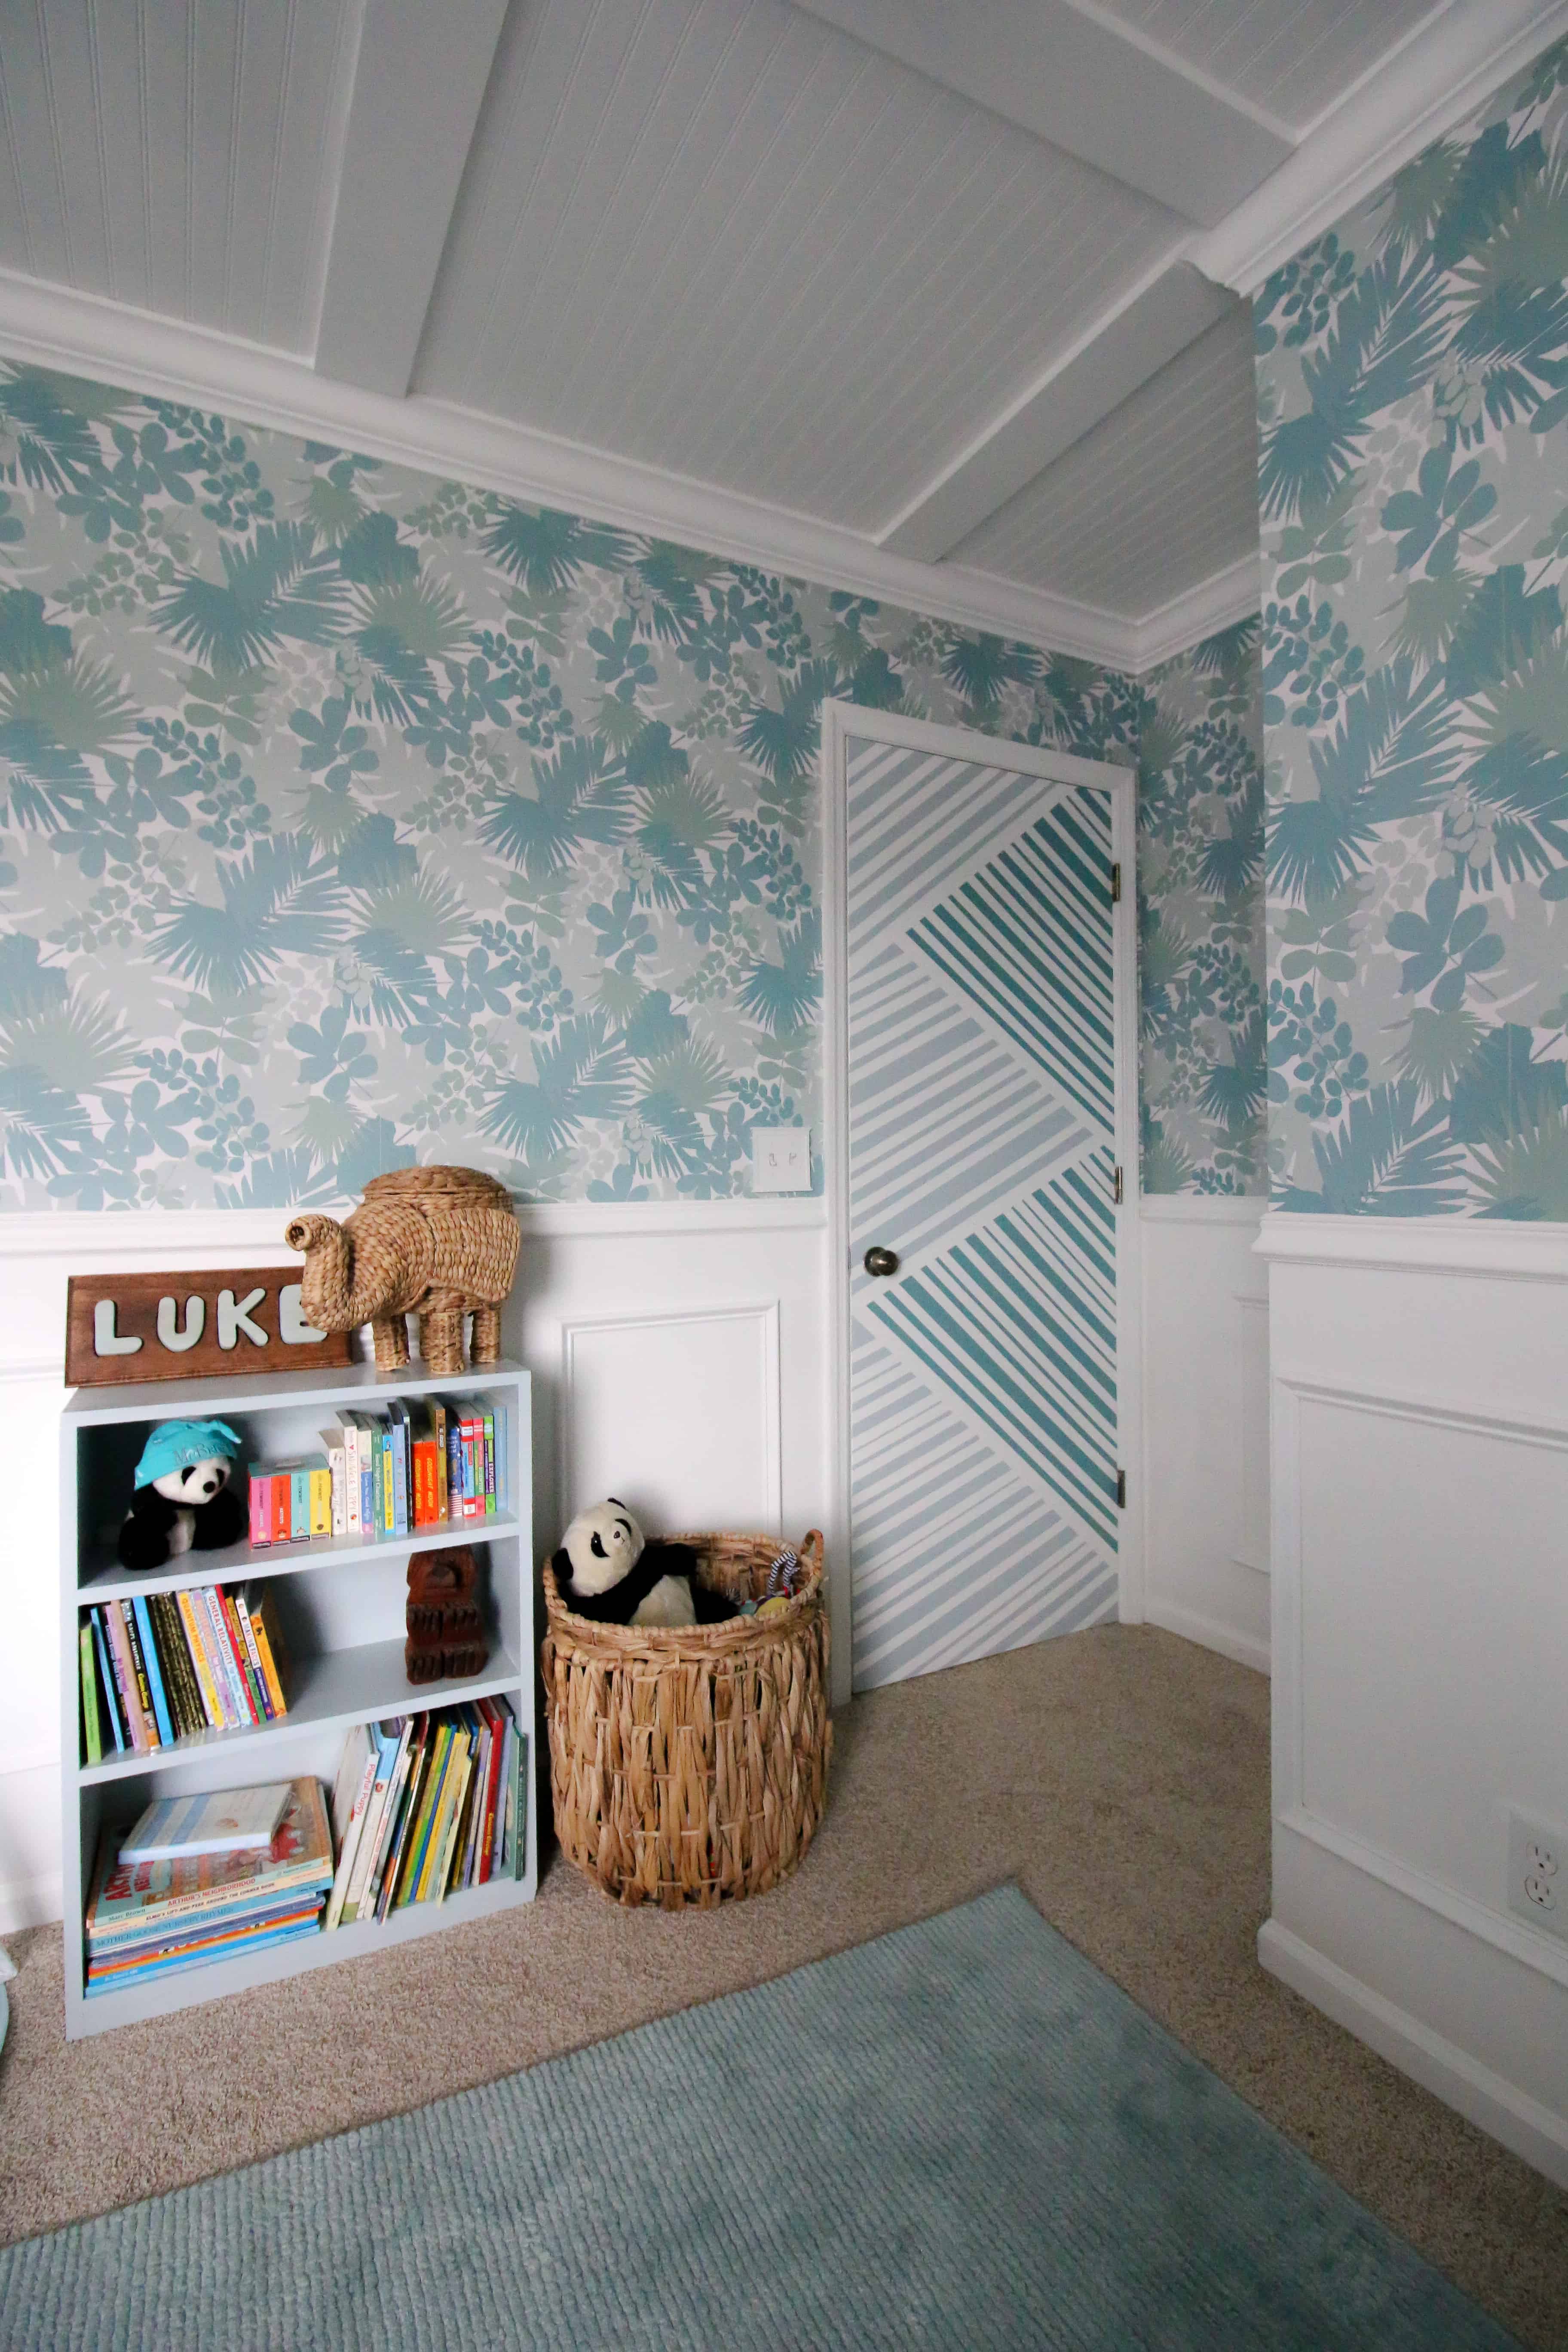
We already revealed our jungle themed nursery, but there were a few areas that I thought still needed some more love. The primary area that I am talking about is the wall with the door to the room on it. After a while, we added some floating shelves because it felt so blank. But, I also saw the big blank door as an opportunity for a pop of color.
The interior doors in our home are flat, hollow core doors. They are as basic as can be – 1990’s builder grade. We recently upgraded the hall side of the doors with molding and also swapped out the knobs for some coordinating levers.
But, today I am focusing on the inside of the door – the door that you see while in the nursery. I stare at this door a lot since it is across the room from my nursing chair. Sometimes the door is open, but we often close it to keep noise in (hello, screaming baby) or to keep the pets out.
I debated painting the inside of the door a solid color, but decided to have more fun with it! This is a kid’s room, in a very tucked away spot in our home. If there is anywhere to take a design risk, this is it!
I love the transformative power of paint – it’s the most budget-friendly tool available to DIYers!
Love doable DIY? Be sure to sign up for our FREE weekly newsletter!
We had paint left over from our furniture makeovers in this room, and already had FrogTape on hand, so this was a completely free makeover for us. In addition to being free, using the paint colors that are already occurring in this room helped to keep this busy pattern from looking too crazy.
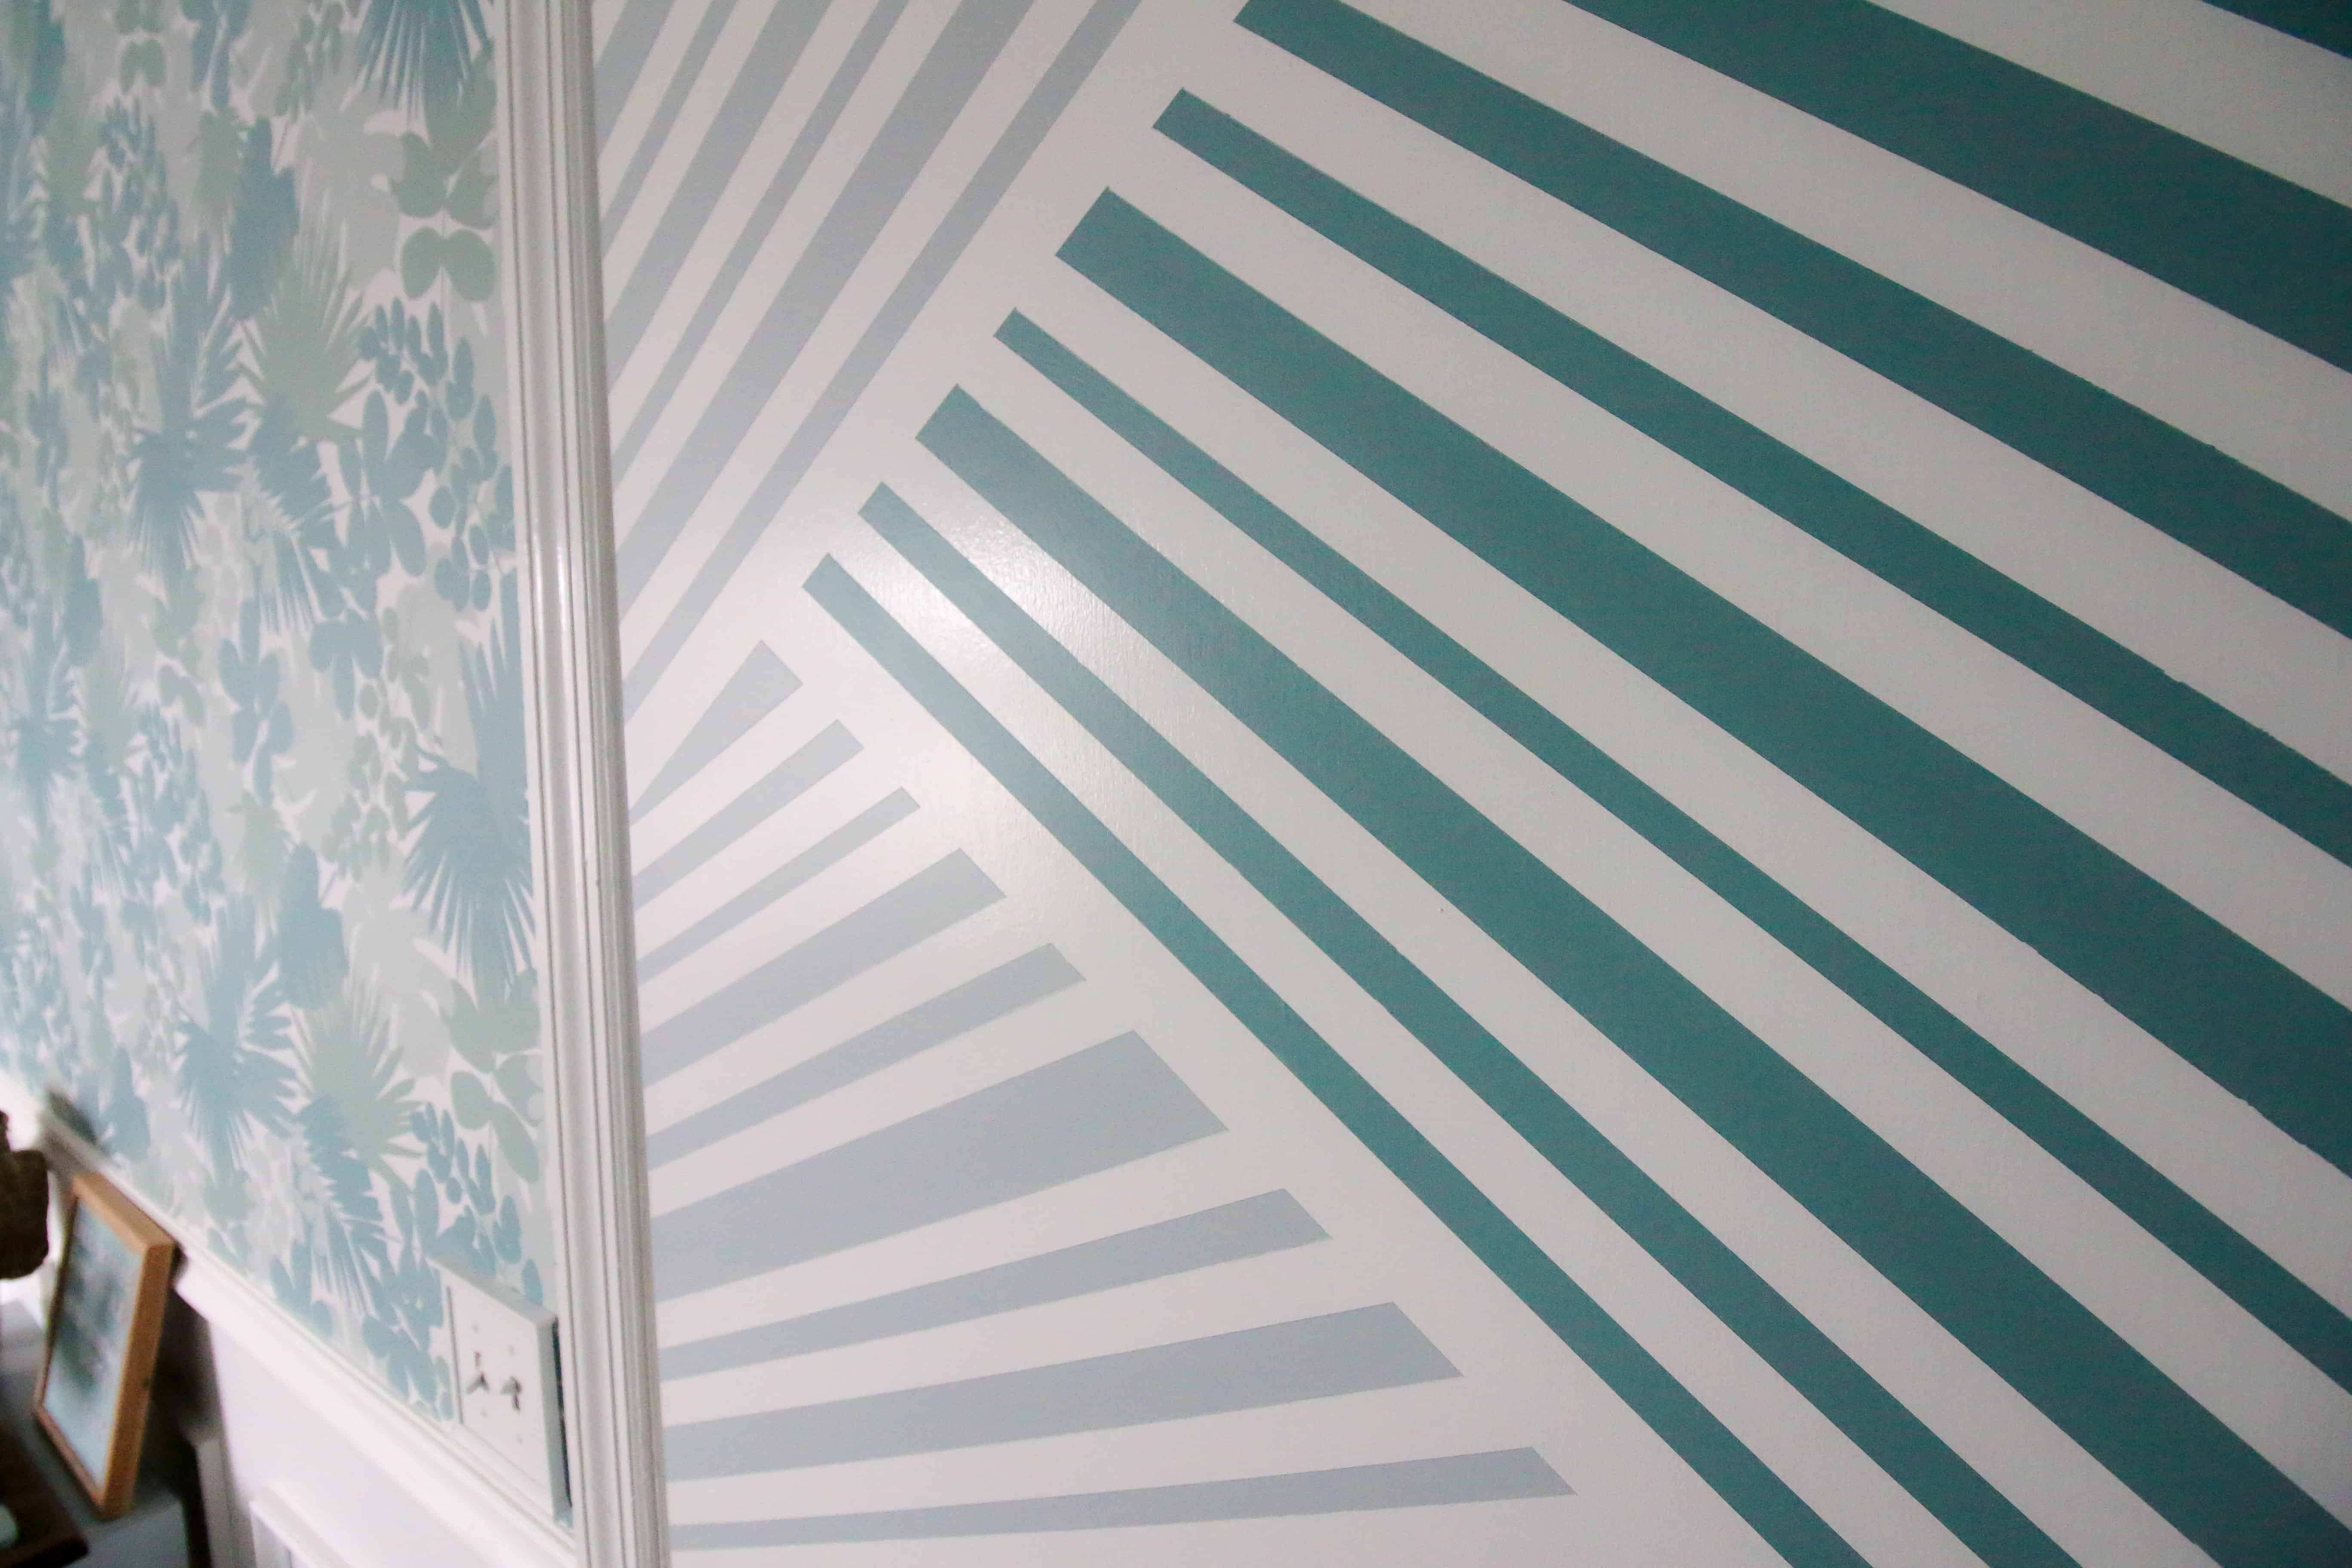
I cannot overstate the importance of cohesiveness – if you are going to have two bold patterns next to each other, making them the same color family is key!
All right, on to the good stuff. Here’s how we did this awesome door makeover!
Click here to pin this project to your Pinterest board!
Geometric Painted Door
What you need:
- Paint of choice – I used 2 colors – Behr Urban Raincoat (lighter) and Tower Bridge (darker)
- Foam roller or brush for each paint color
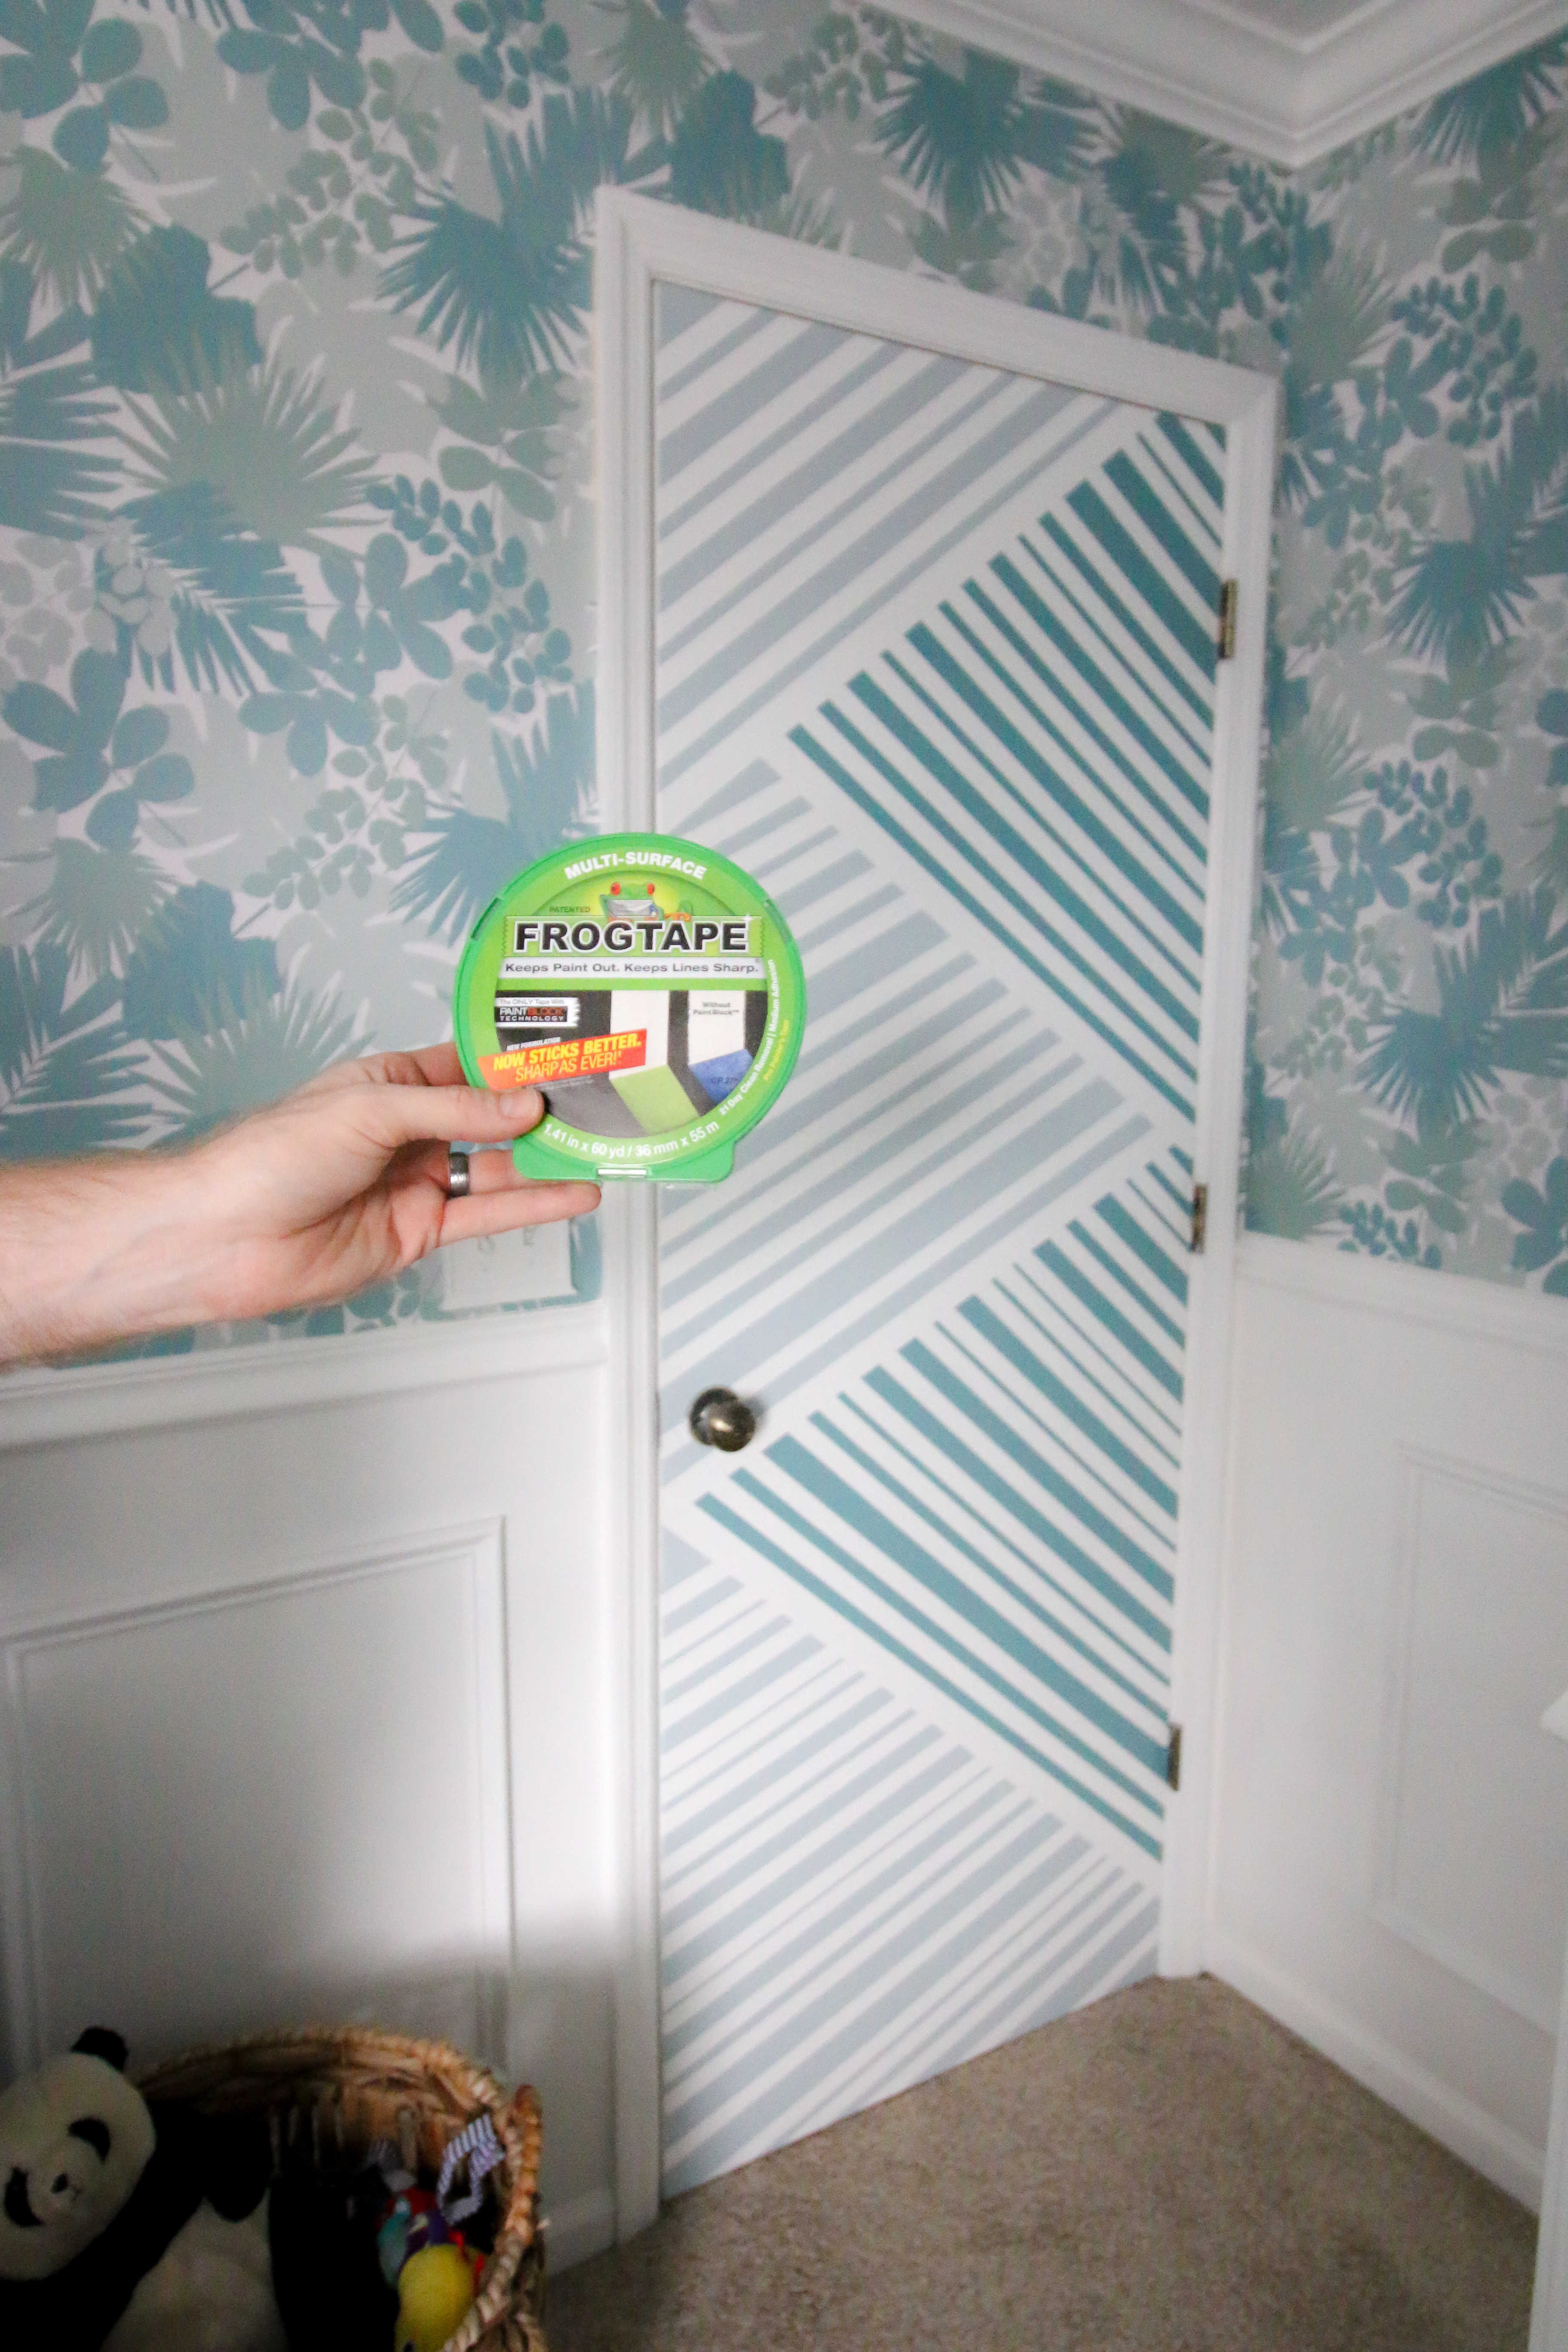
- FrogTape in 2 sizes – .94″ width and 1.41″ width
- Damp rag
- Scissors – optional but often easier than tearing the tape
- Trash bag
What you do:
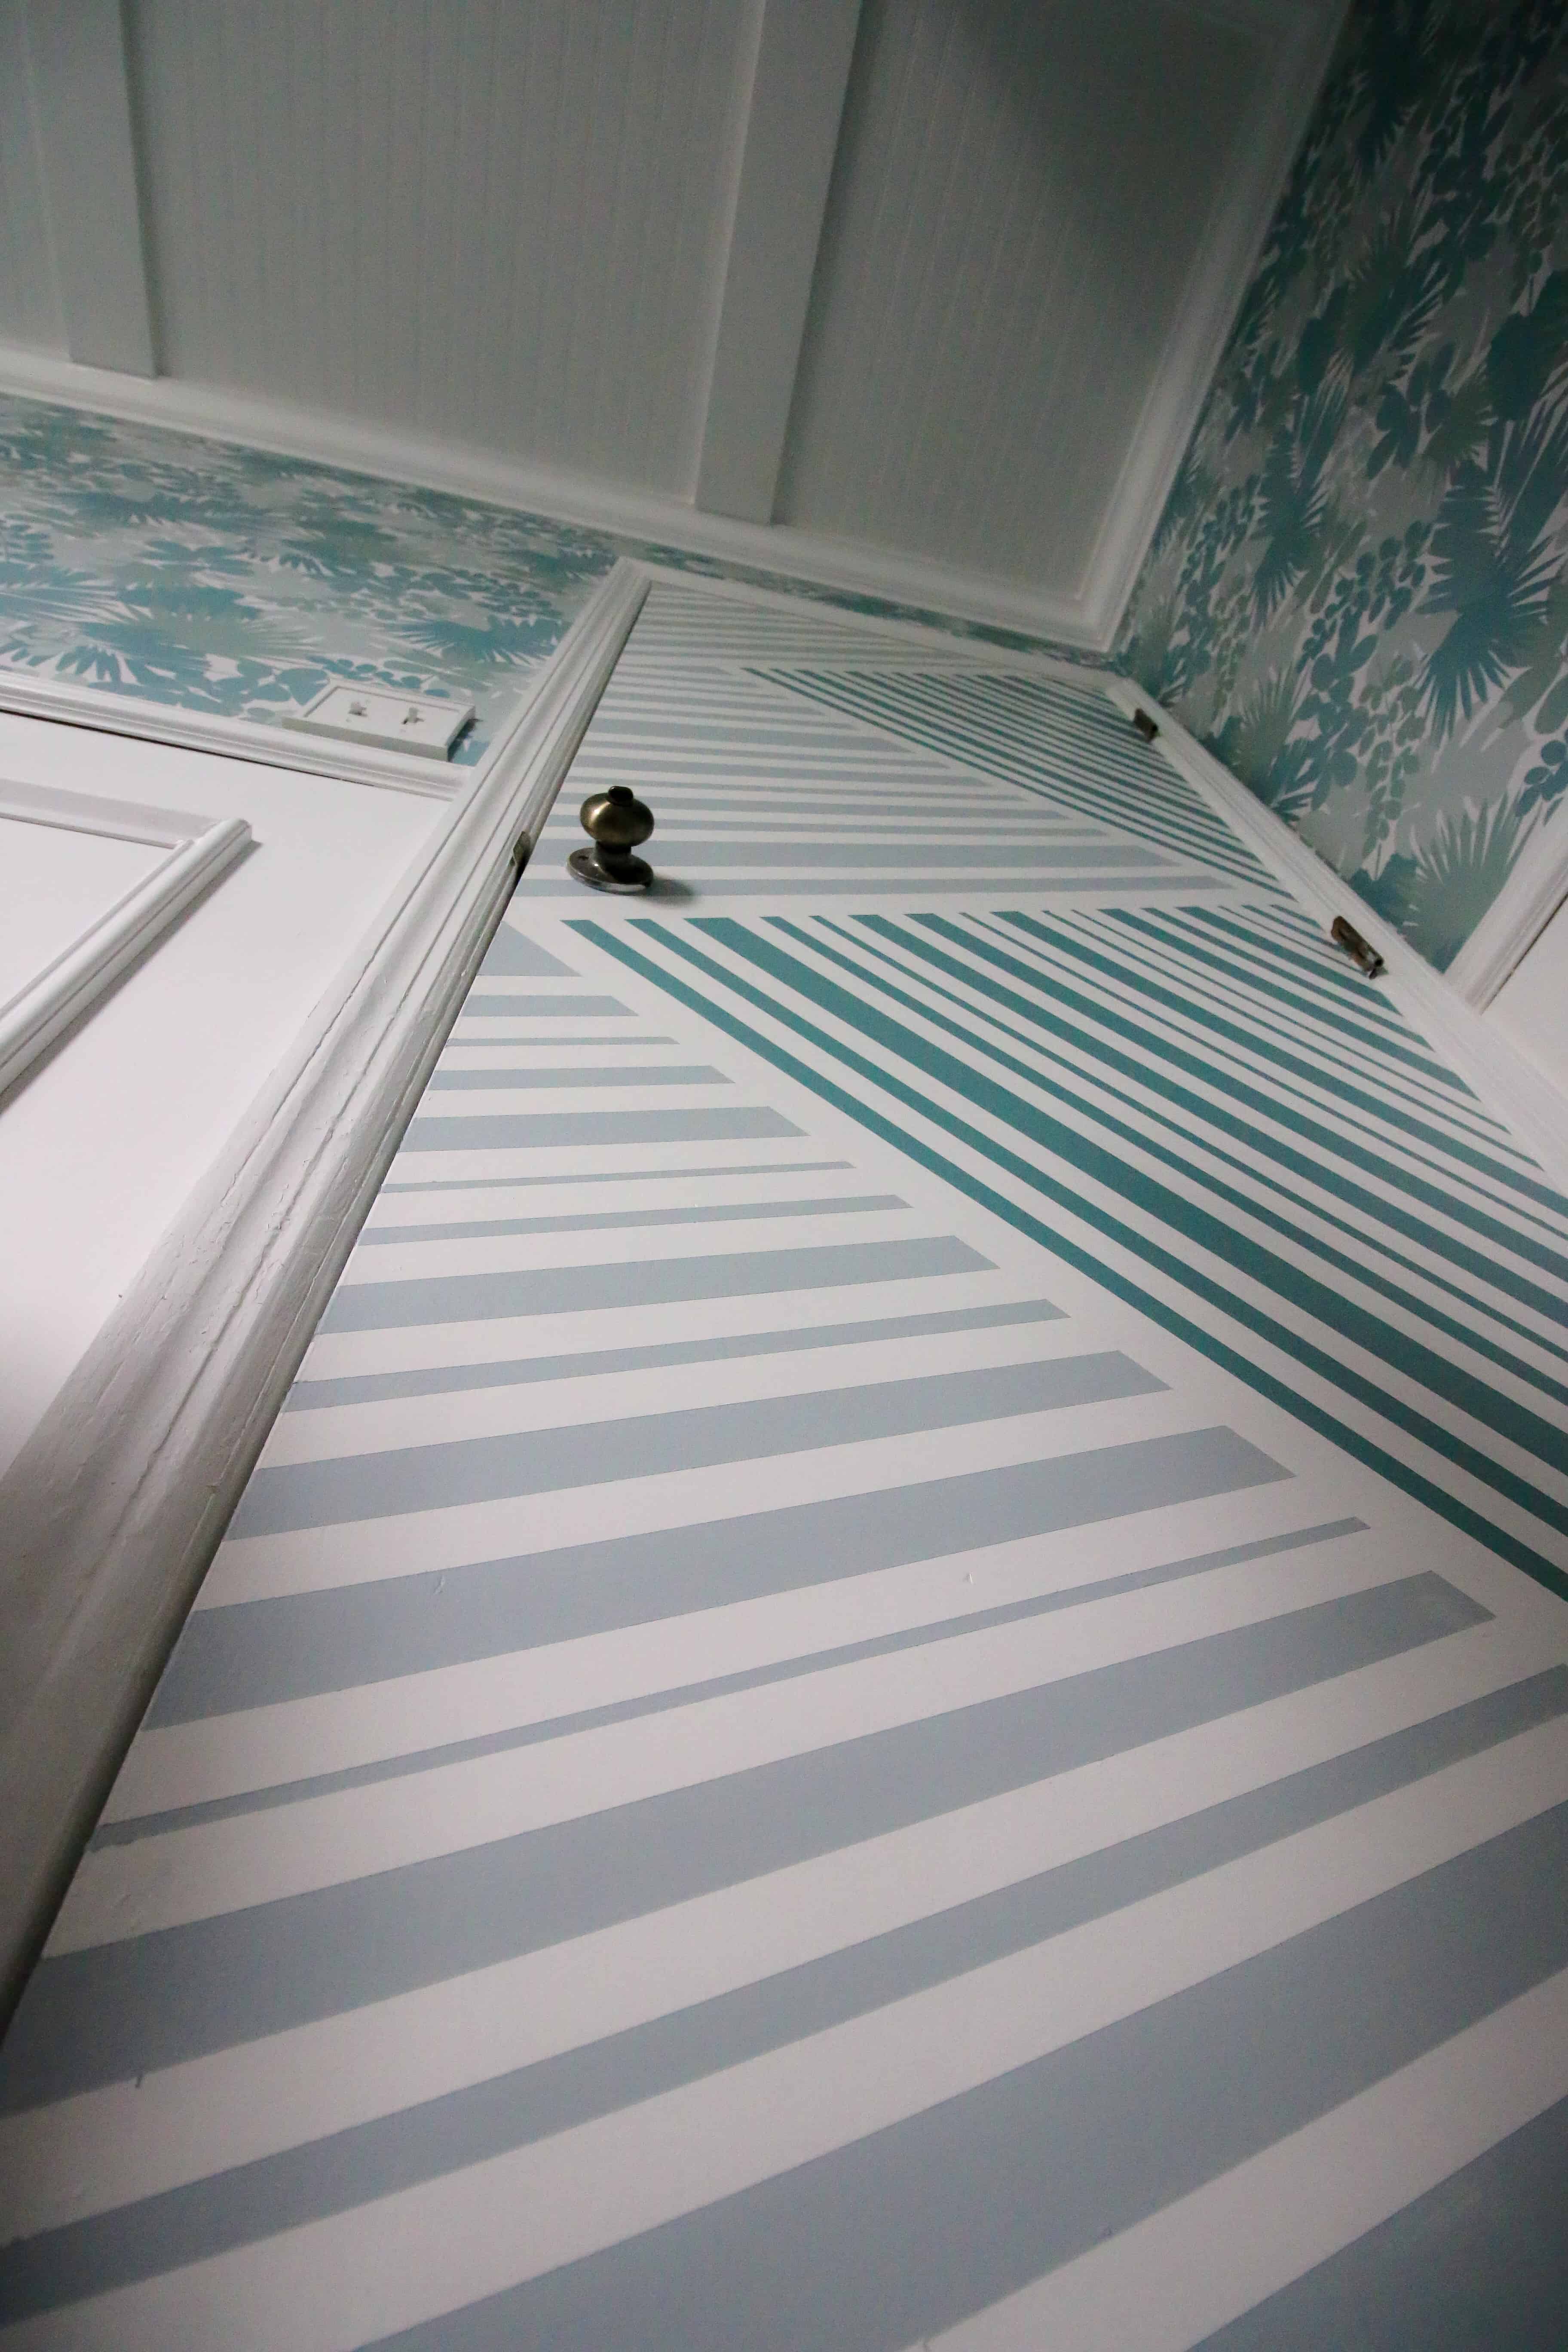
- Plan your design. I wanted a zig-zag look. It’s really a series of parallel lines. Before picking this design, I sketched out six different options. Put your ideas on paper to see what you really love!
- Prepare your surface. Be sure that the door is clean and dry. Wipe off any dust or dirt for best results!
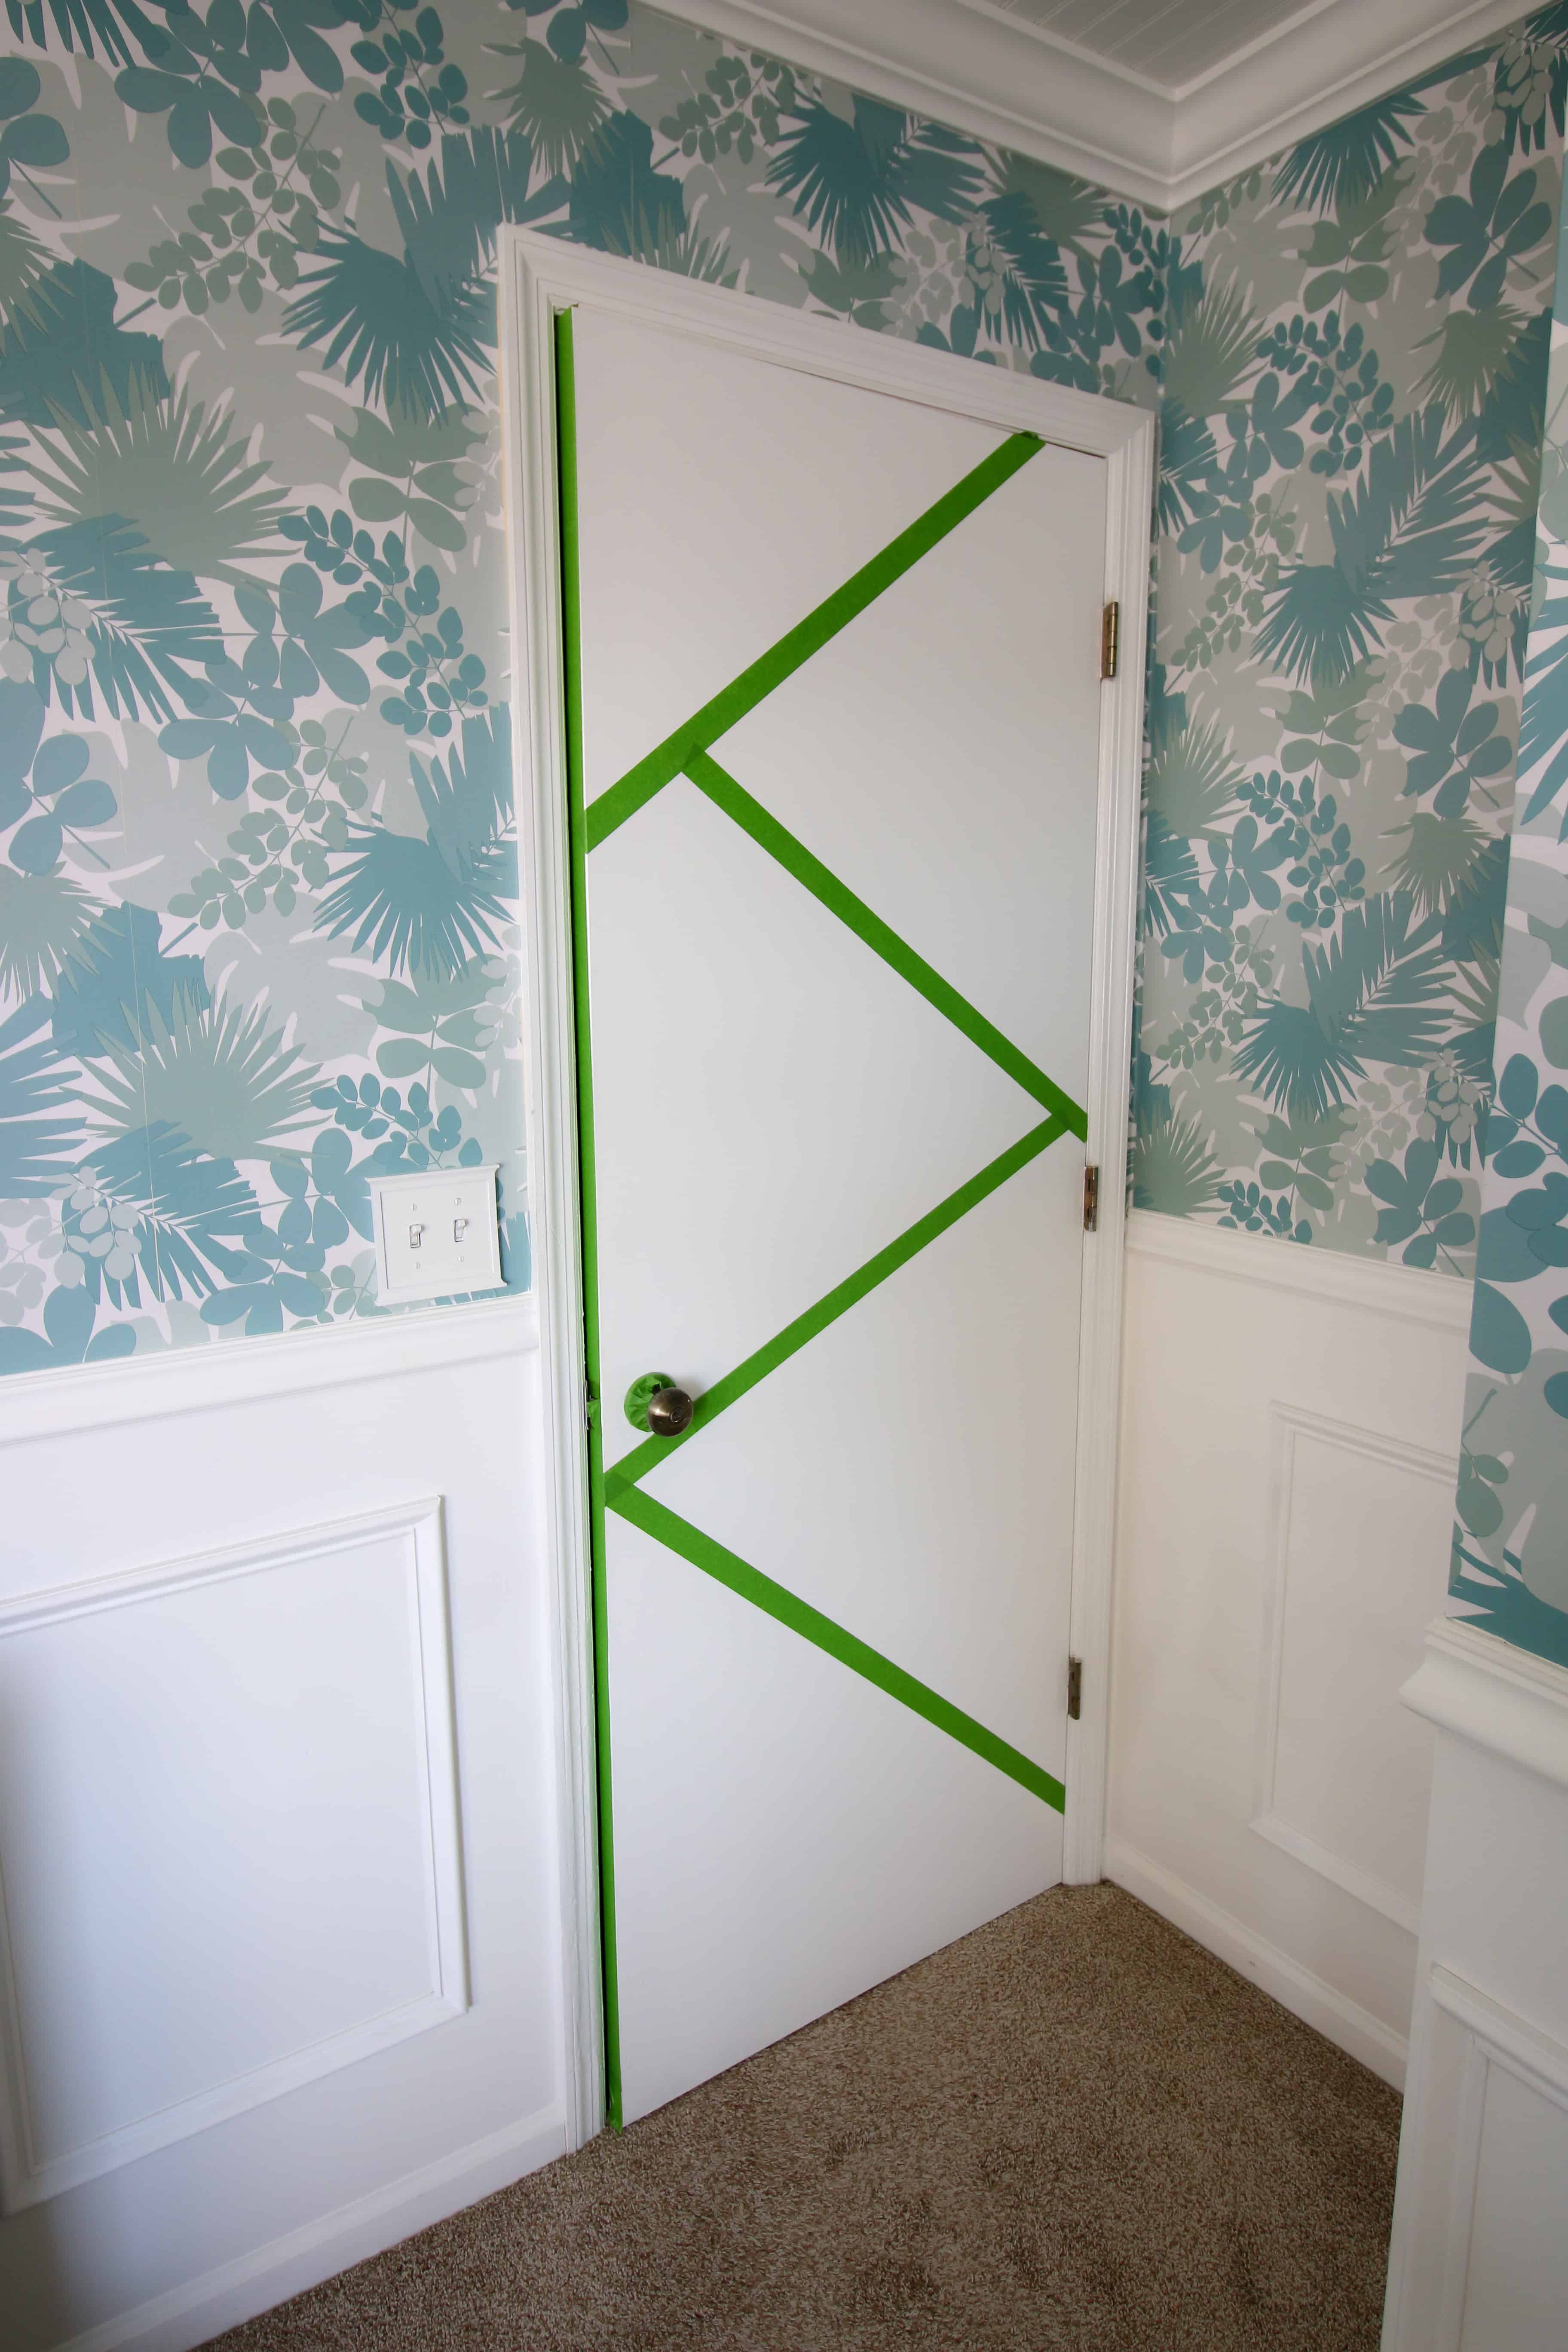
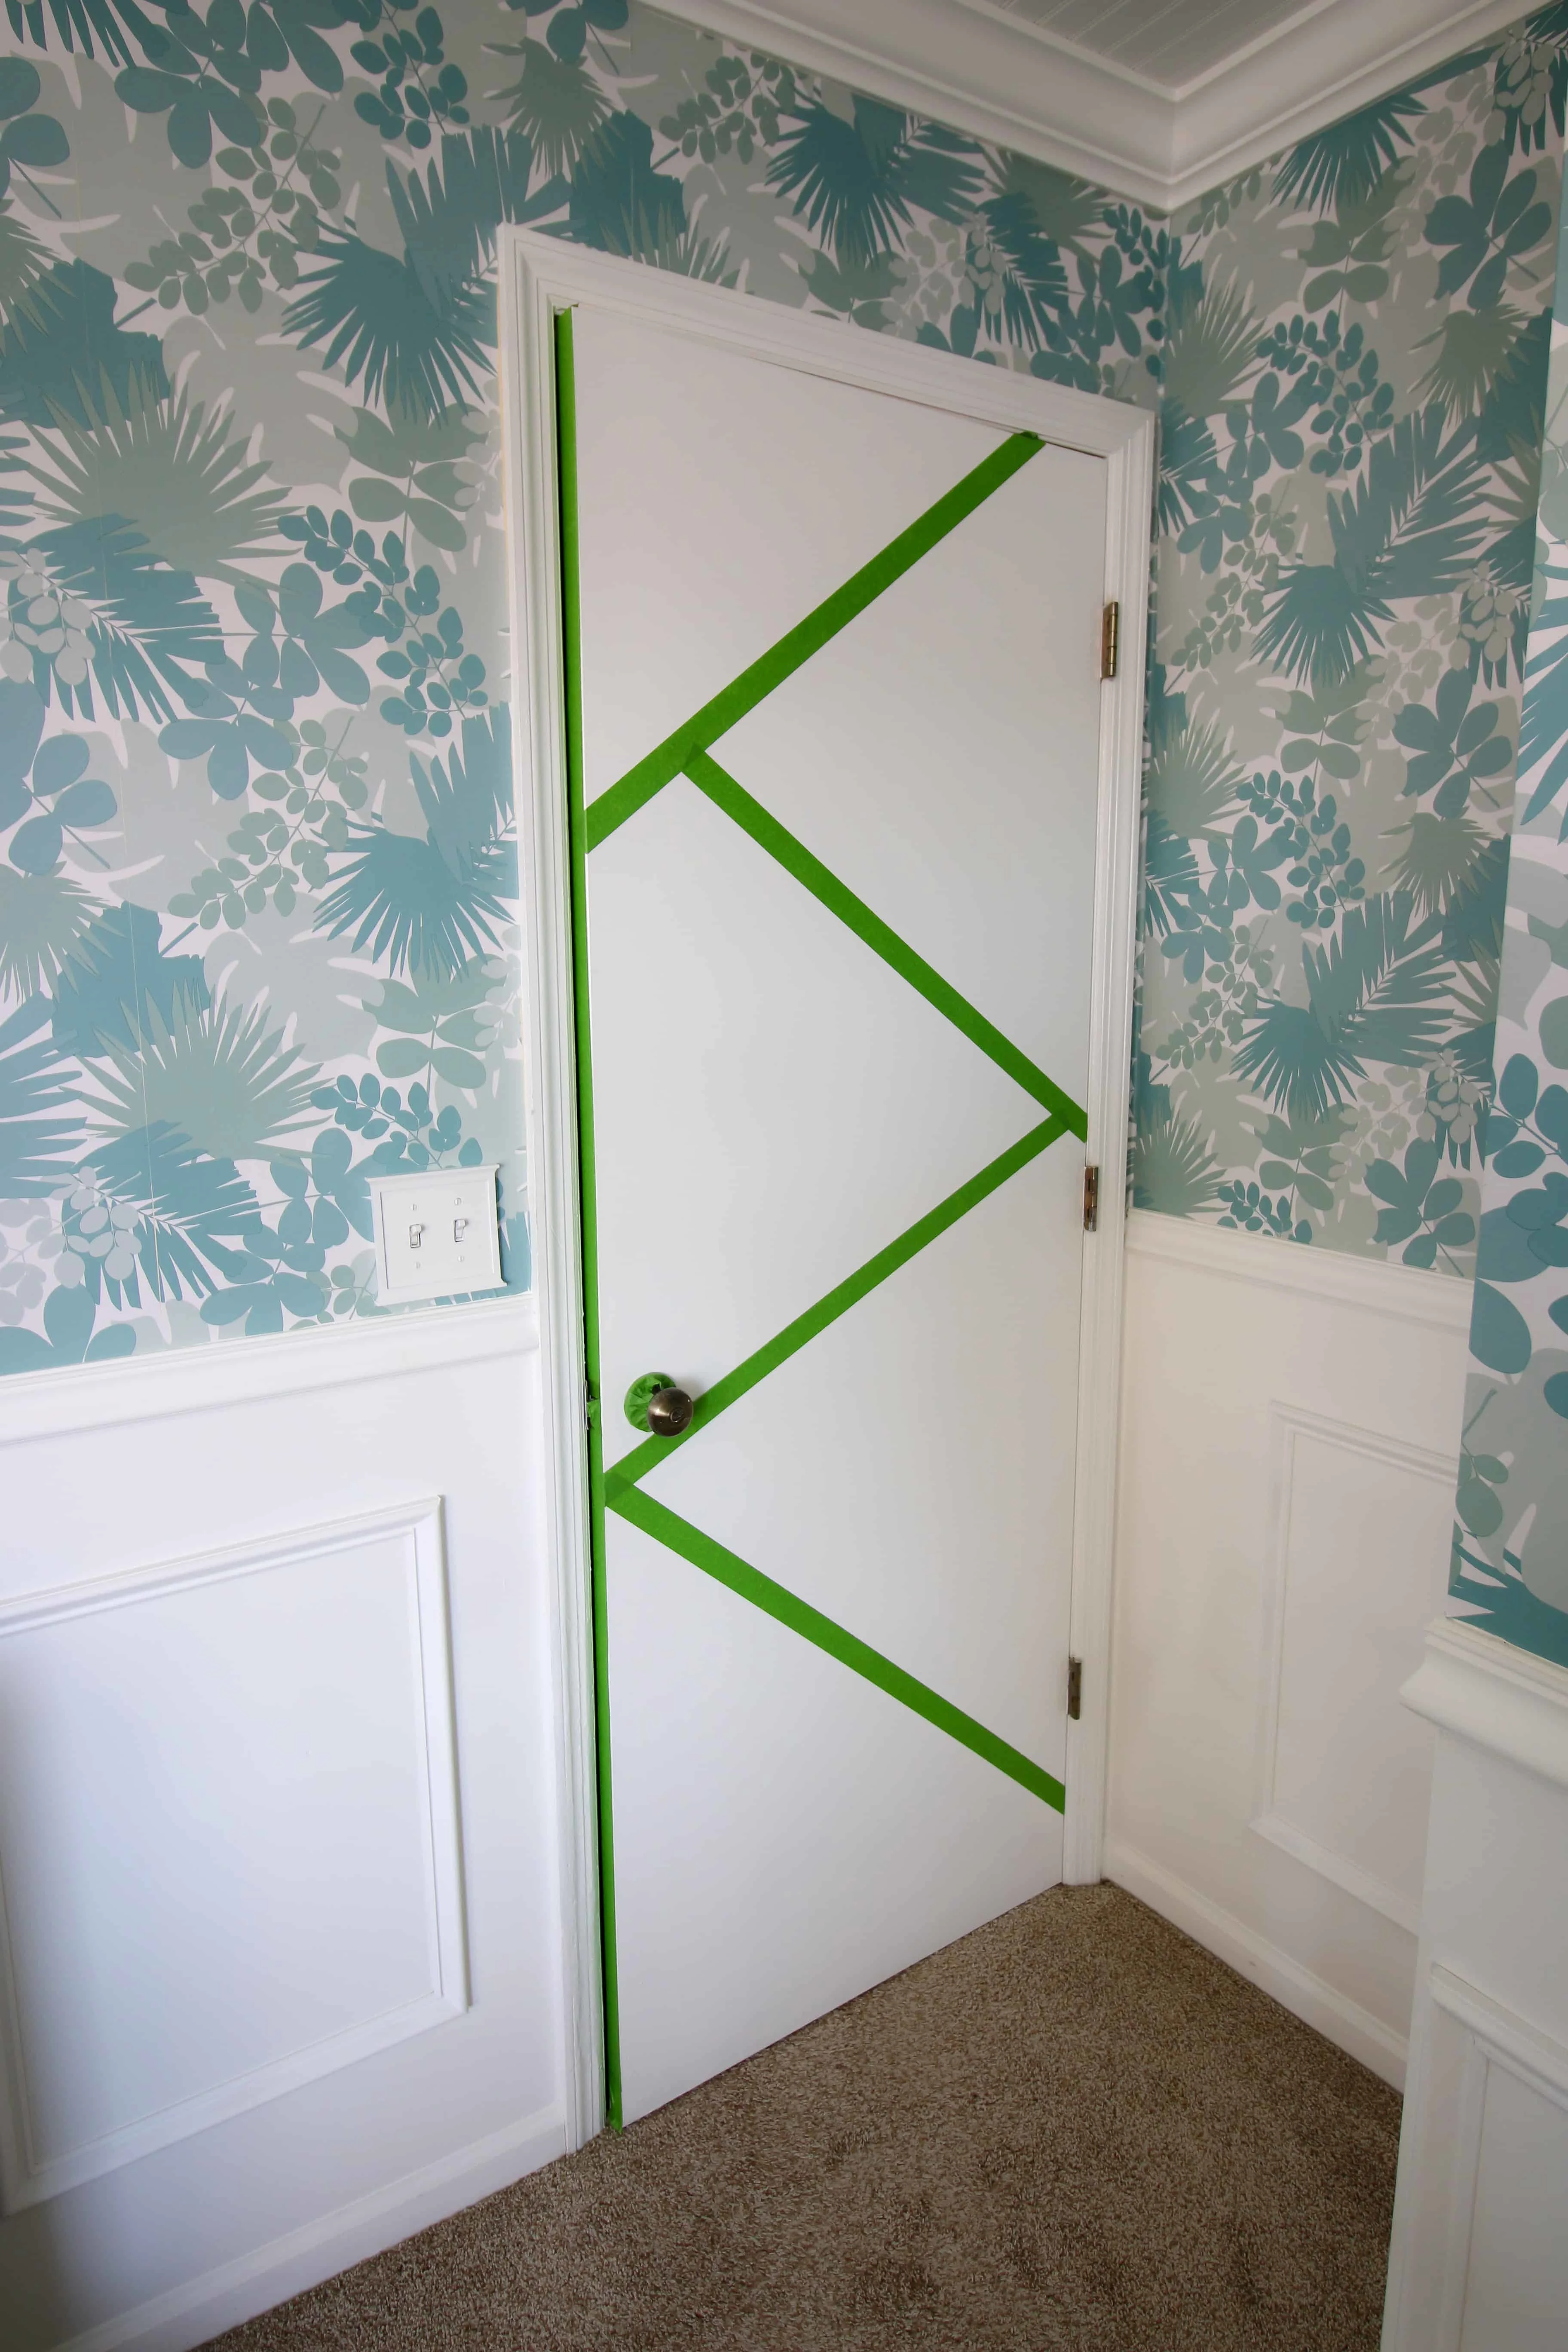
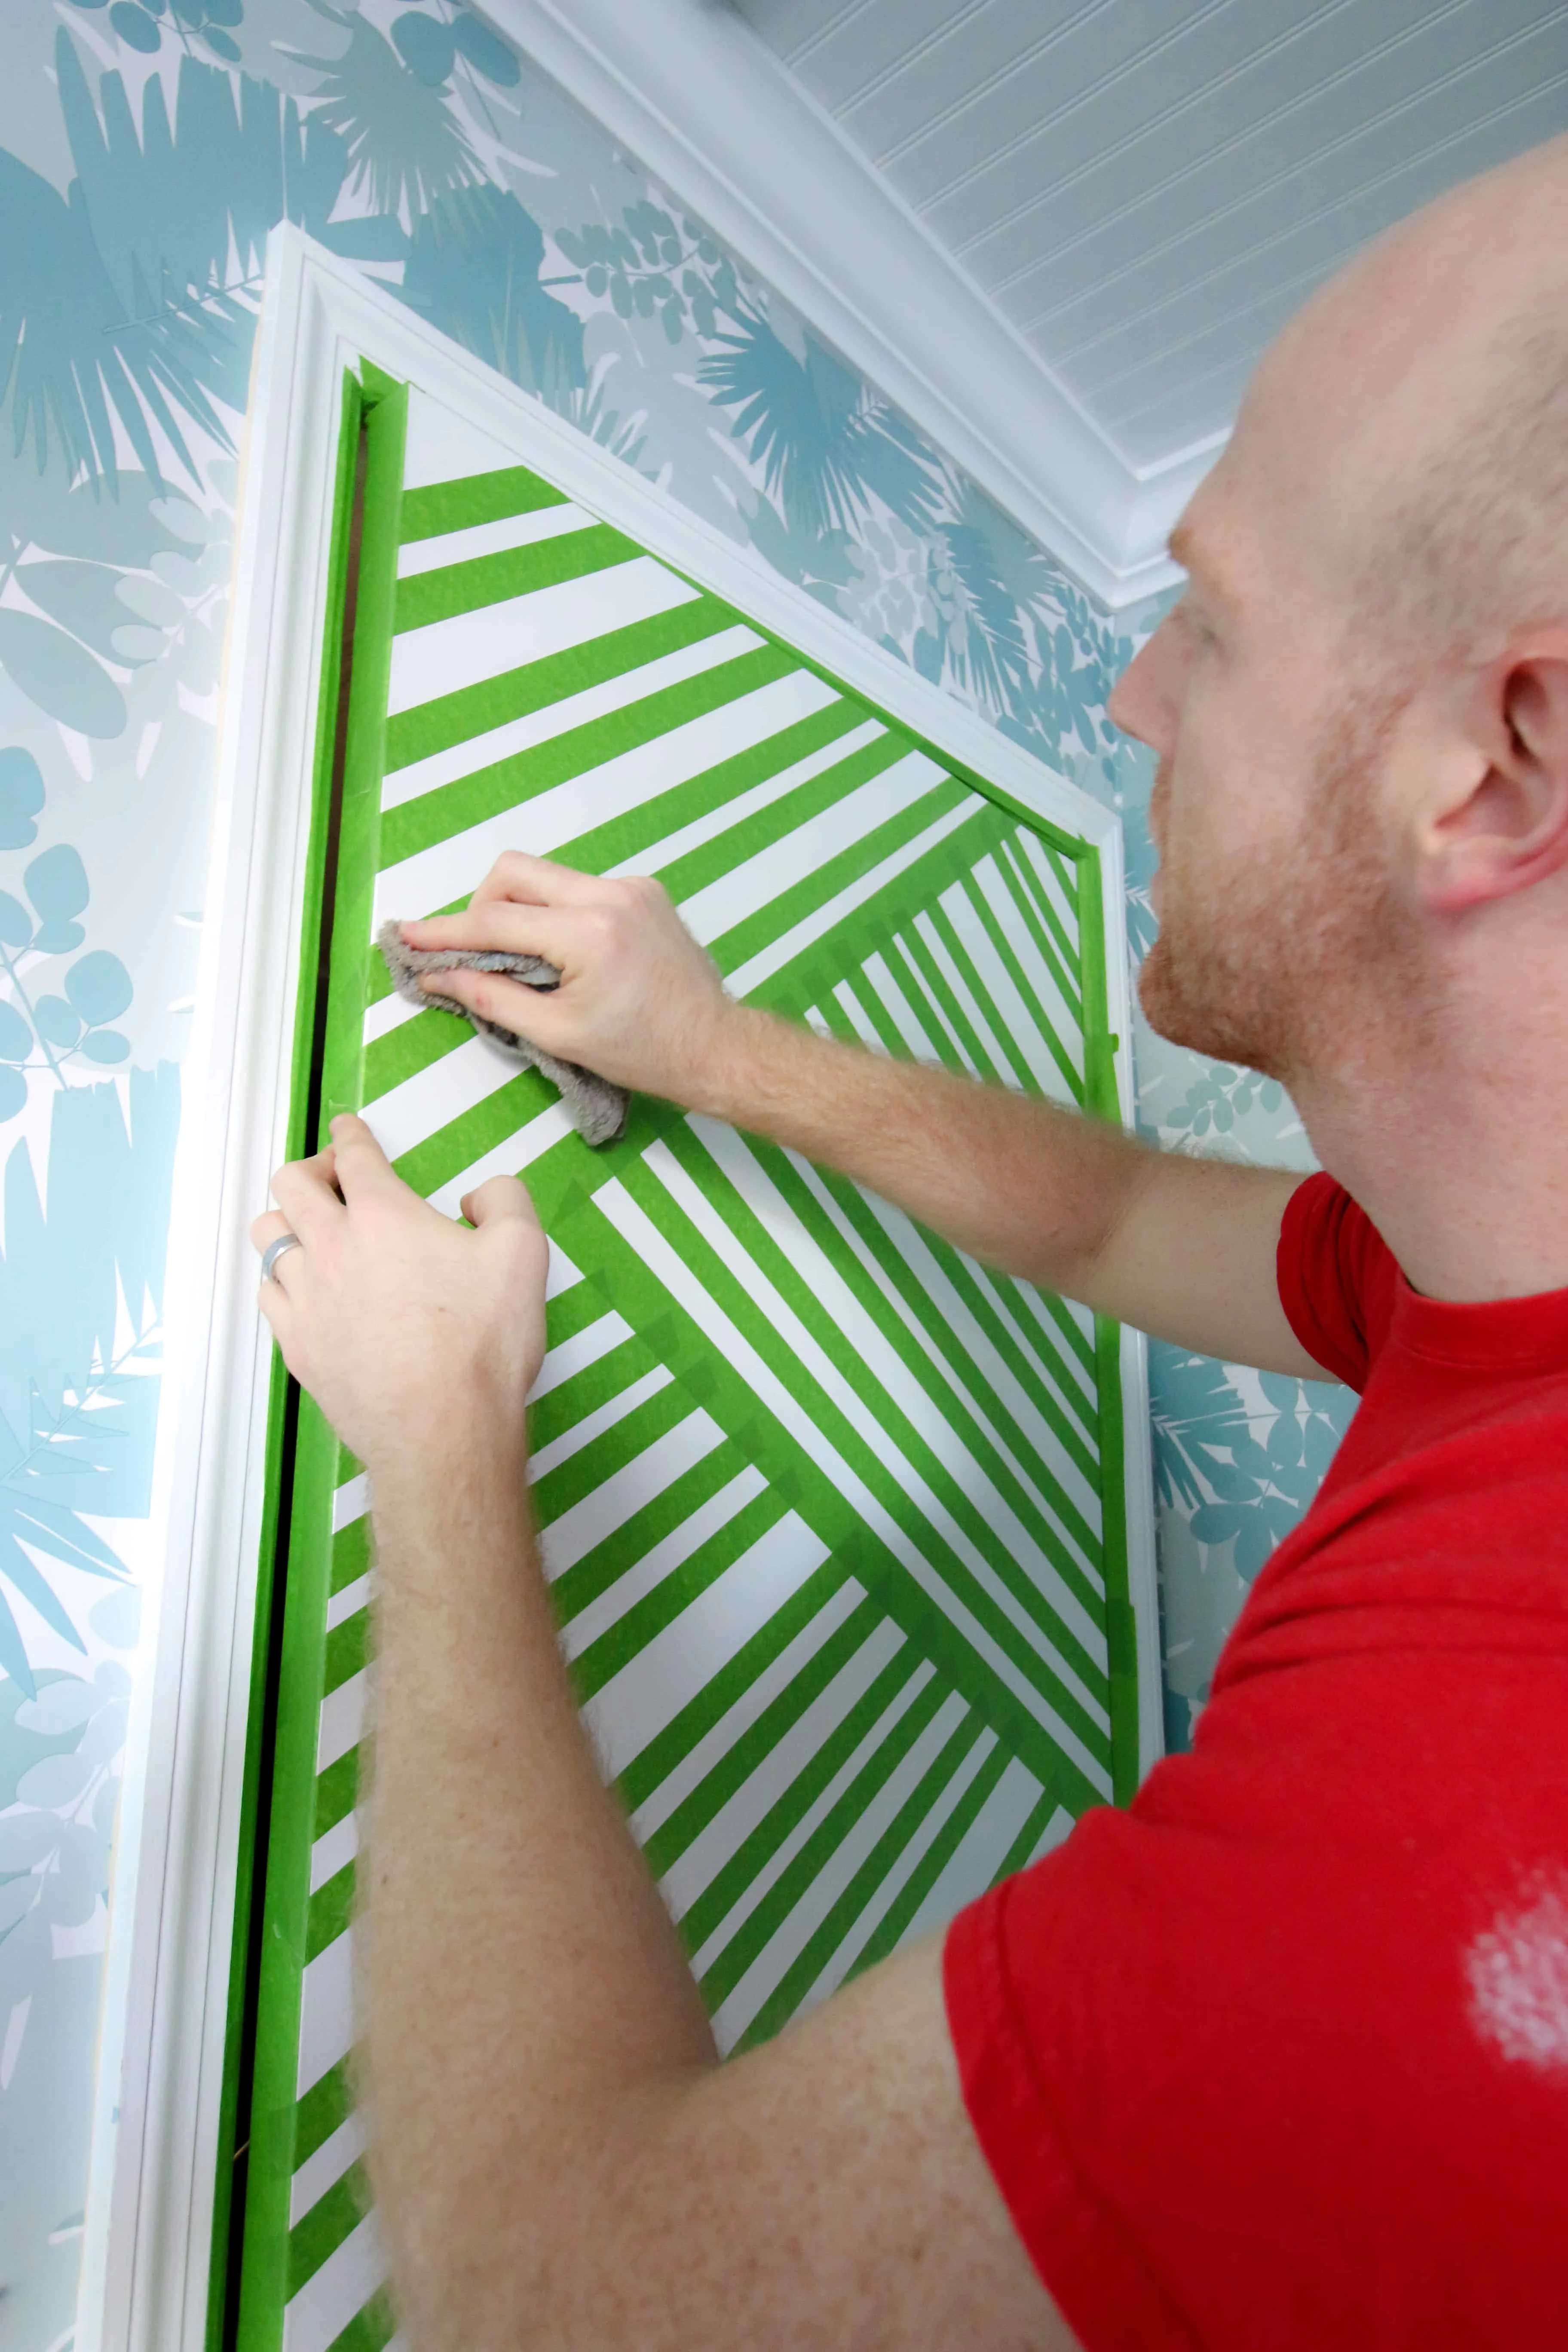
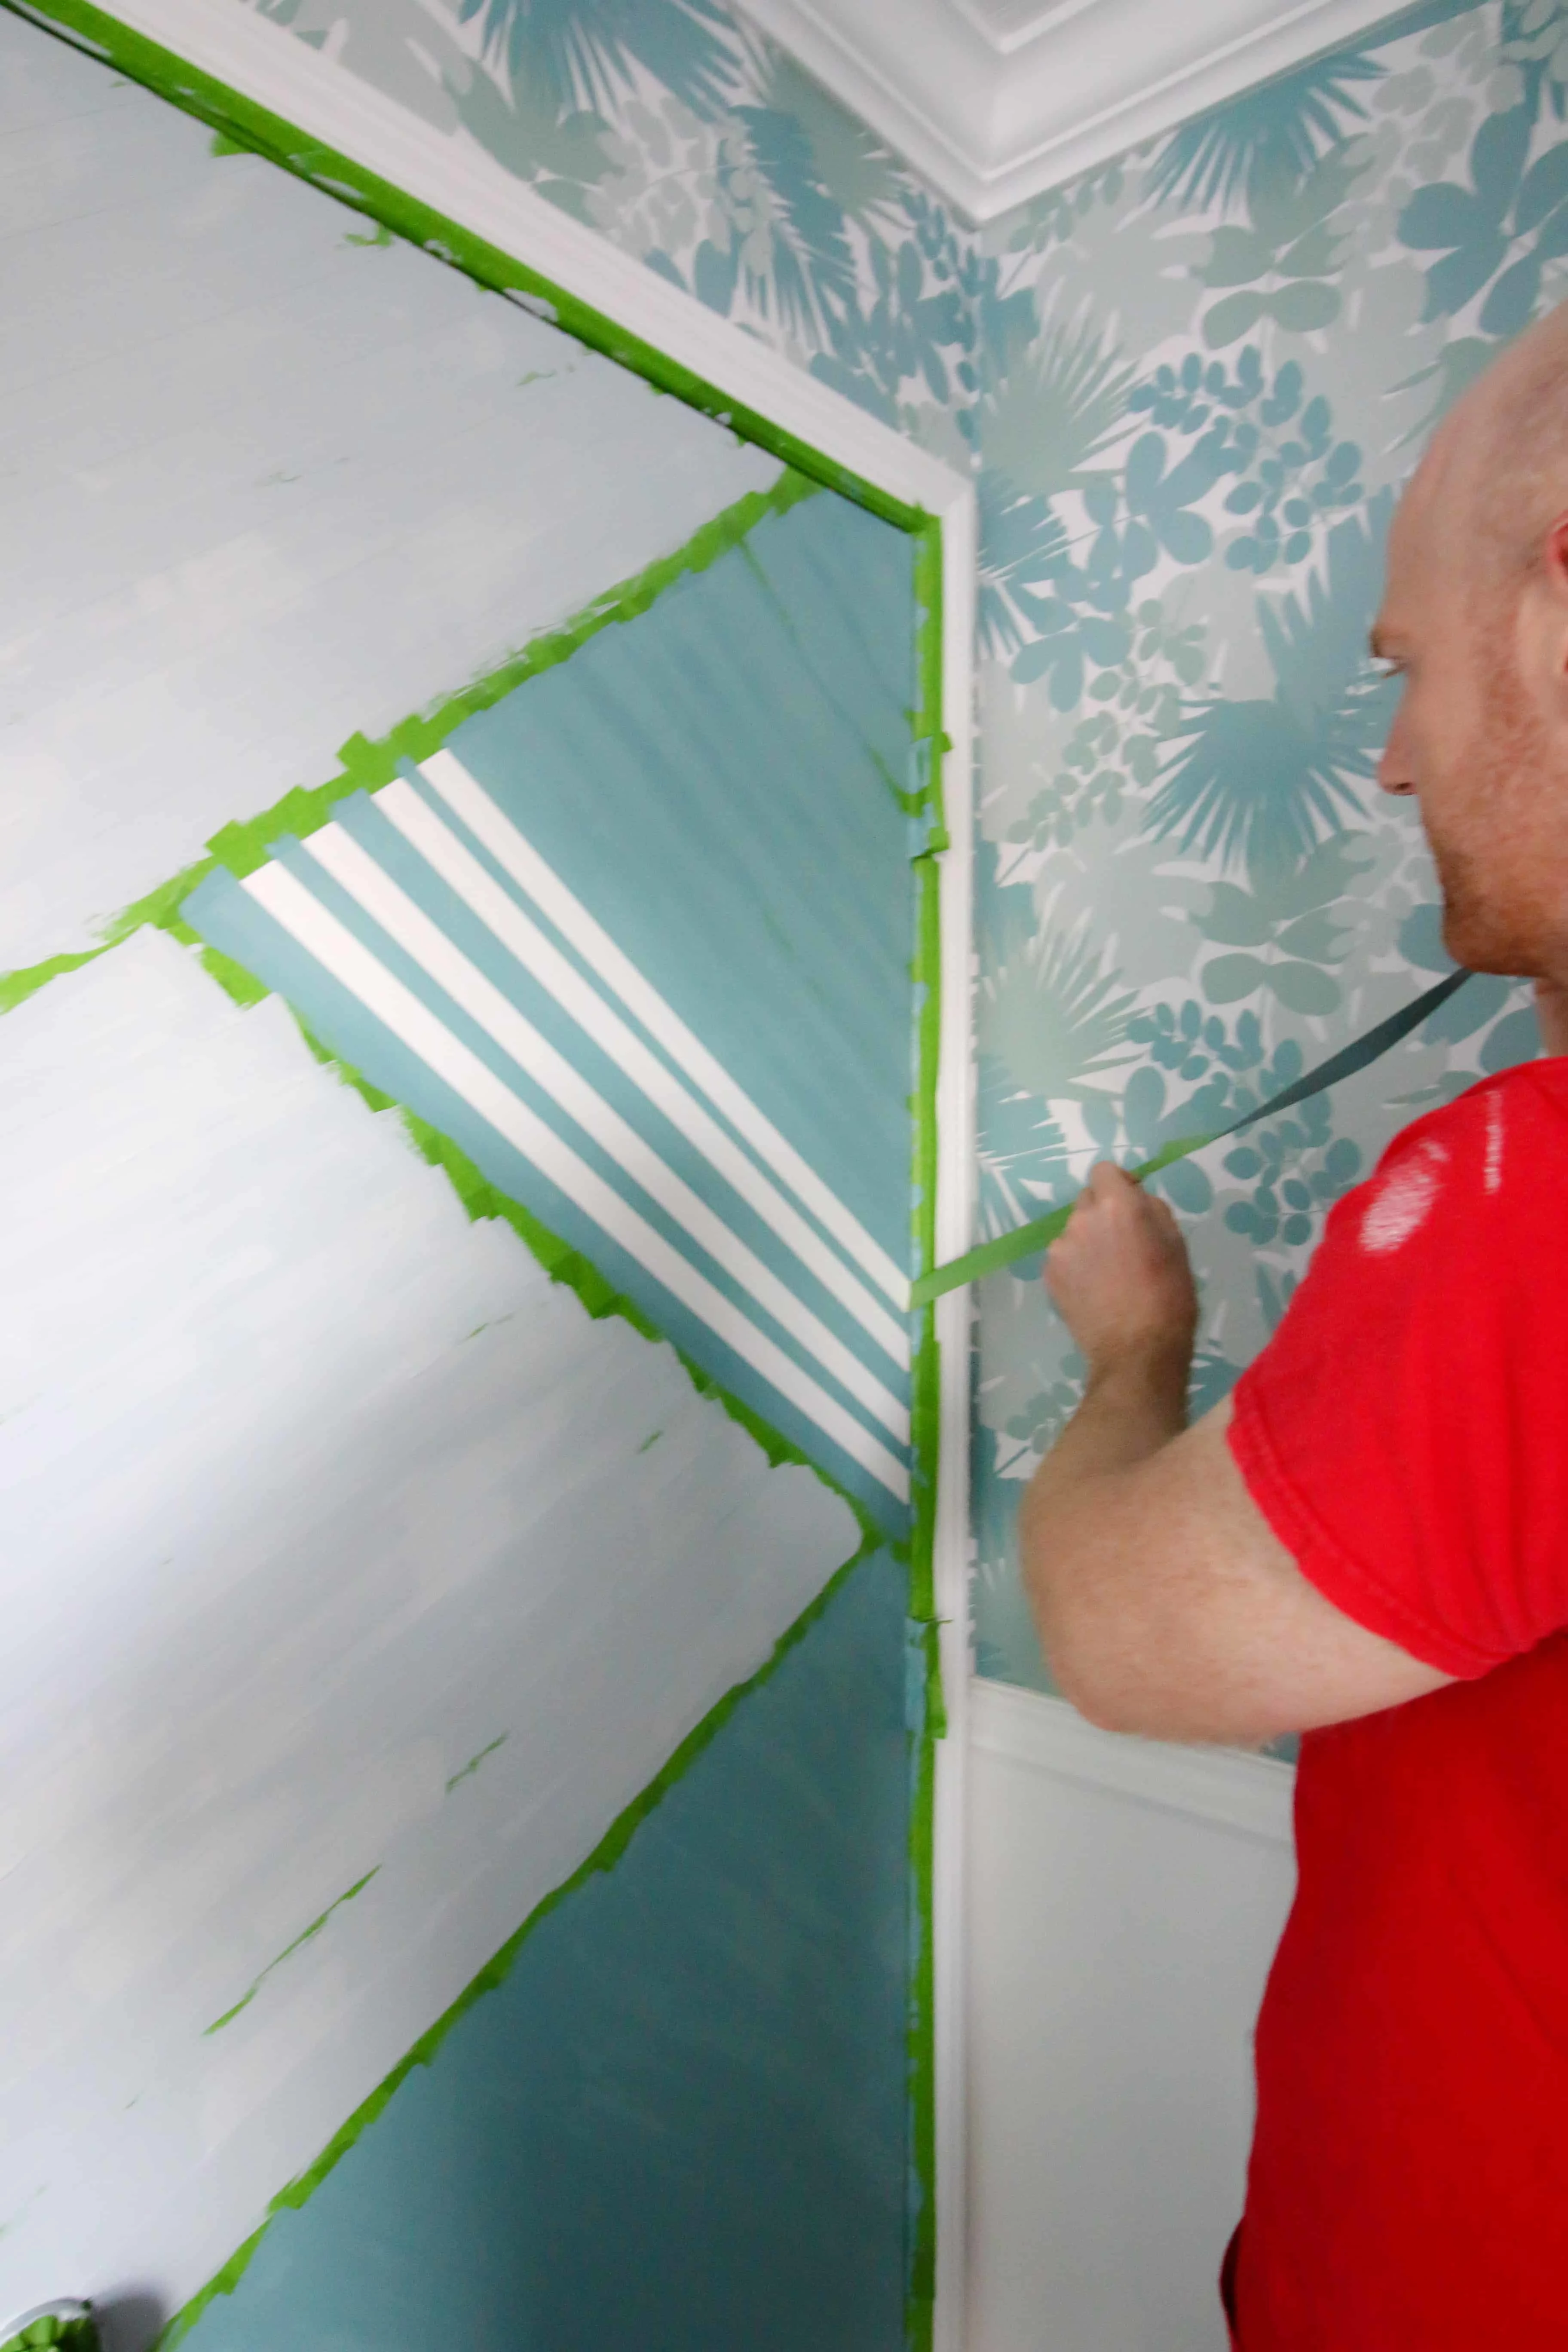
- Apply the tape. I started with the wider 1.41″ tape. I used this to create my primary zigzag/triangles on the door. Then, I took the more narrow .94″ FrogTape and applied it in stripes parallel to the wider tape. I did not measure the distance between stripes. I eyeballed it and tried to alternate between narrow and wide spaces. The gaps range between 1/2 an inch and 2 inches.

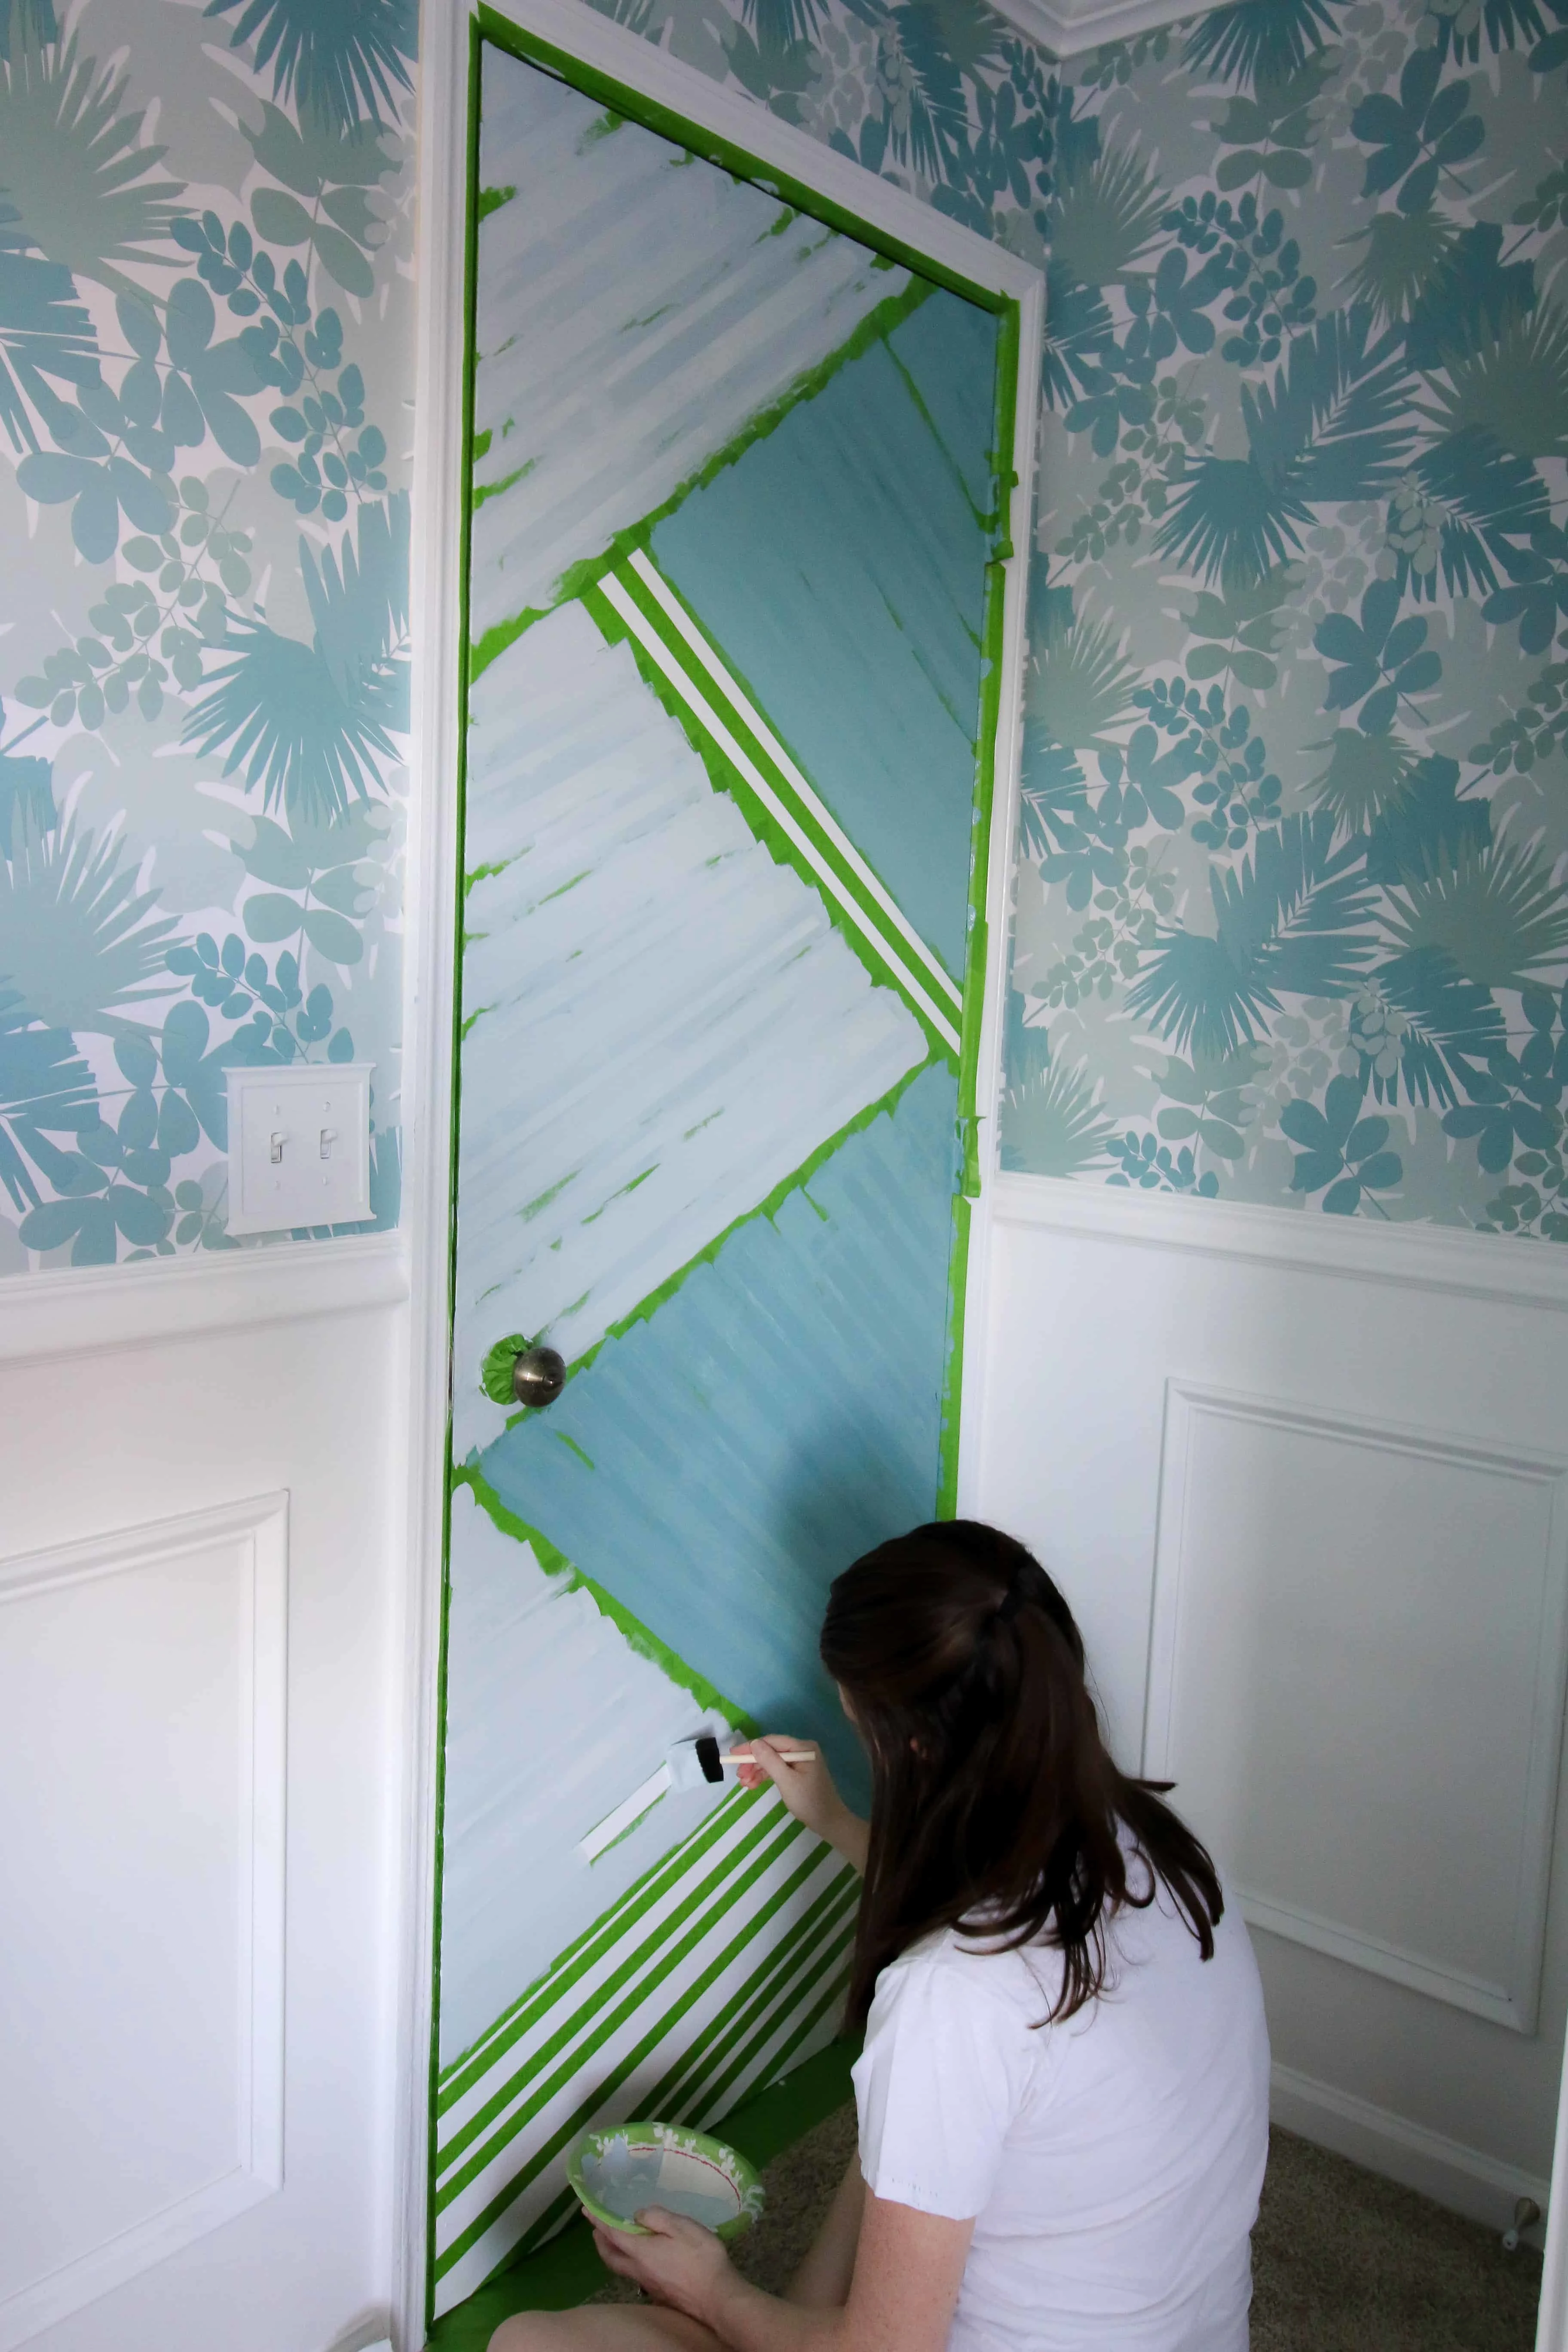
Then, I taped off the edges of the door, the door frame, and put down a floor covering to catch paint drips.
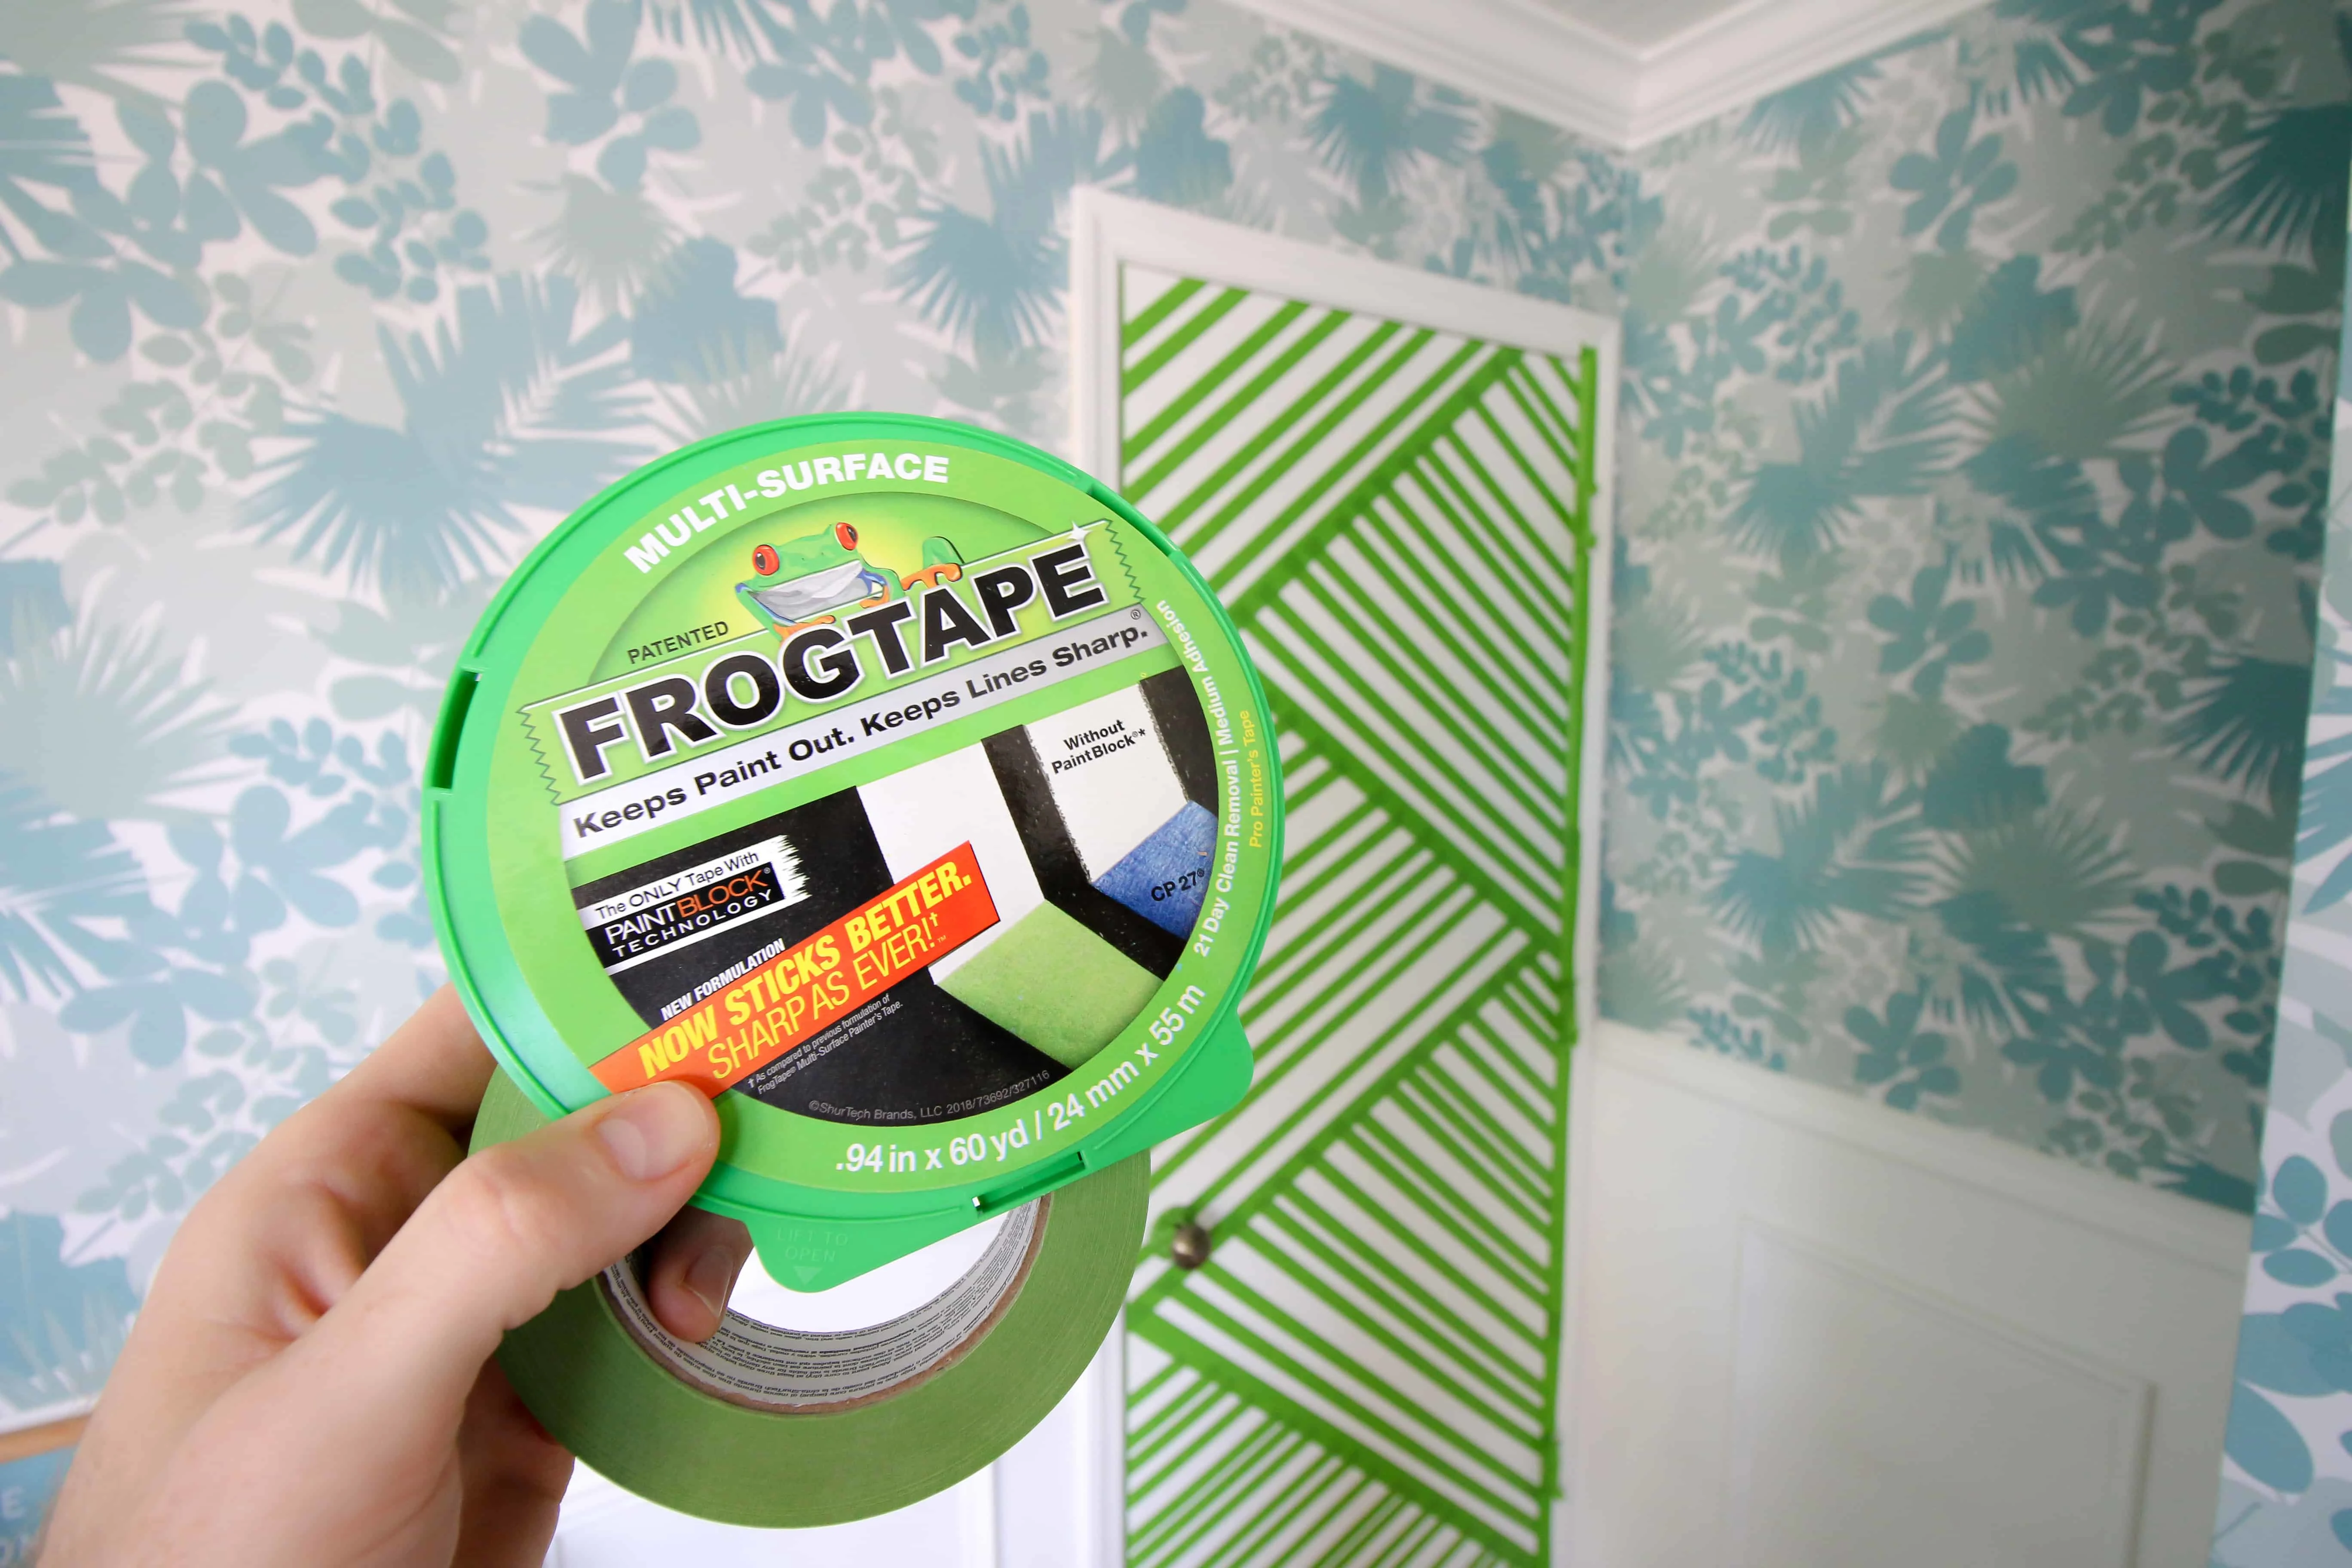
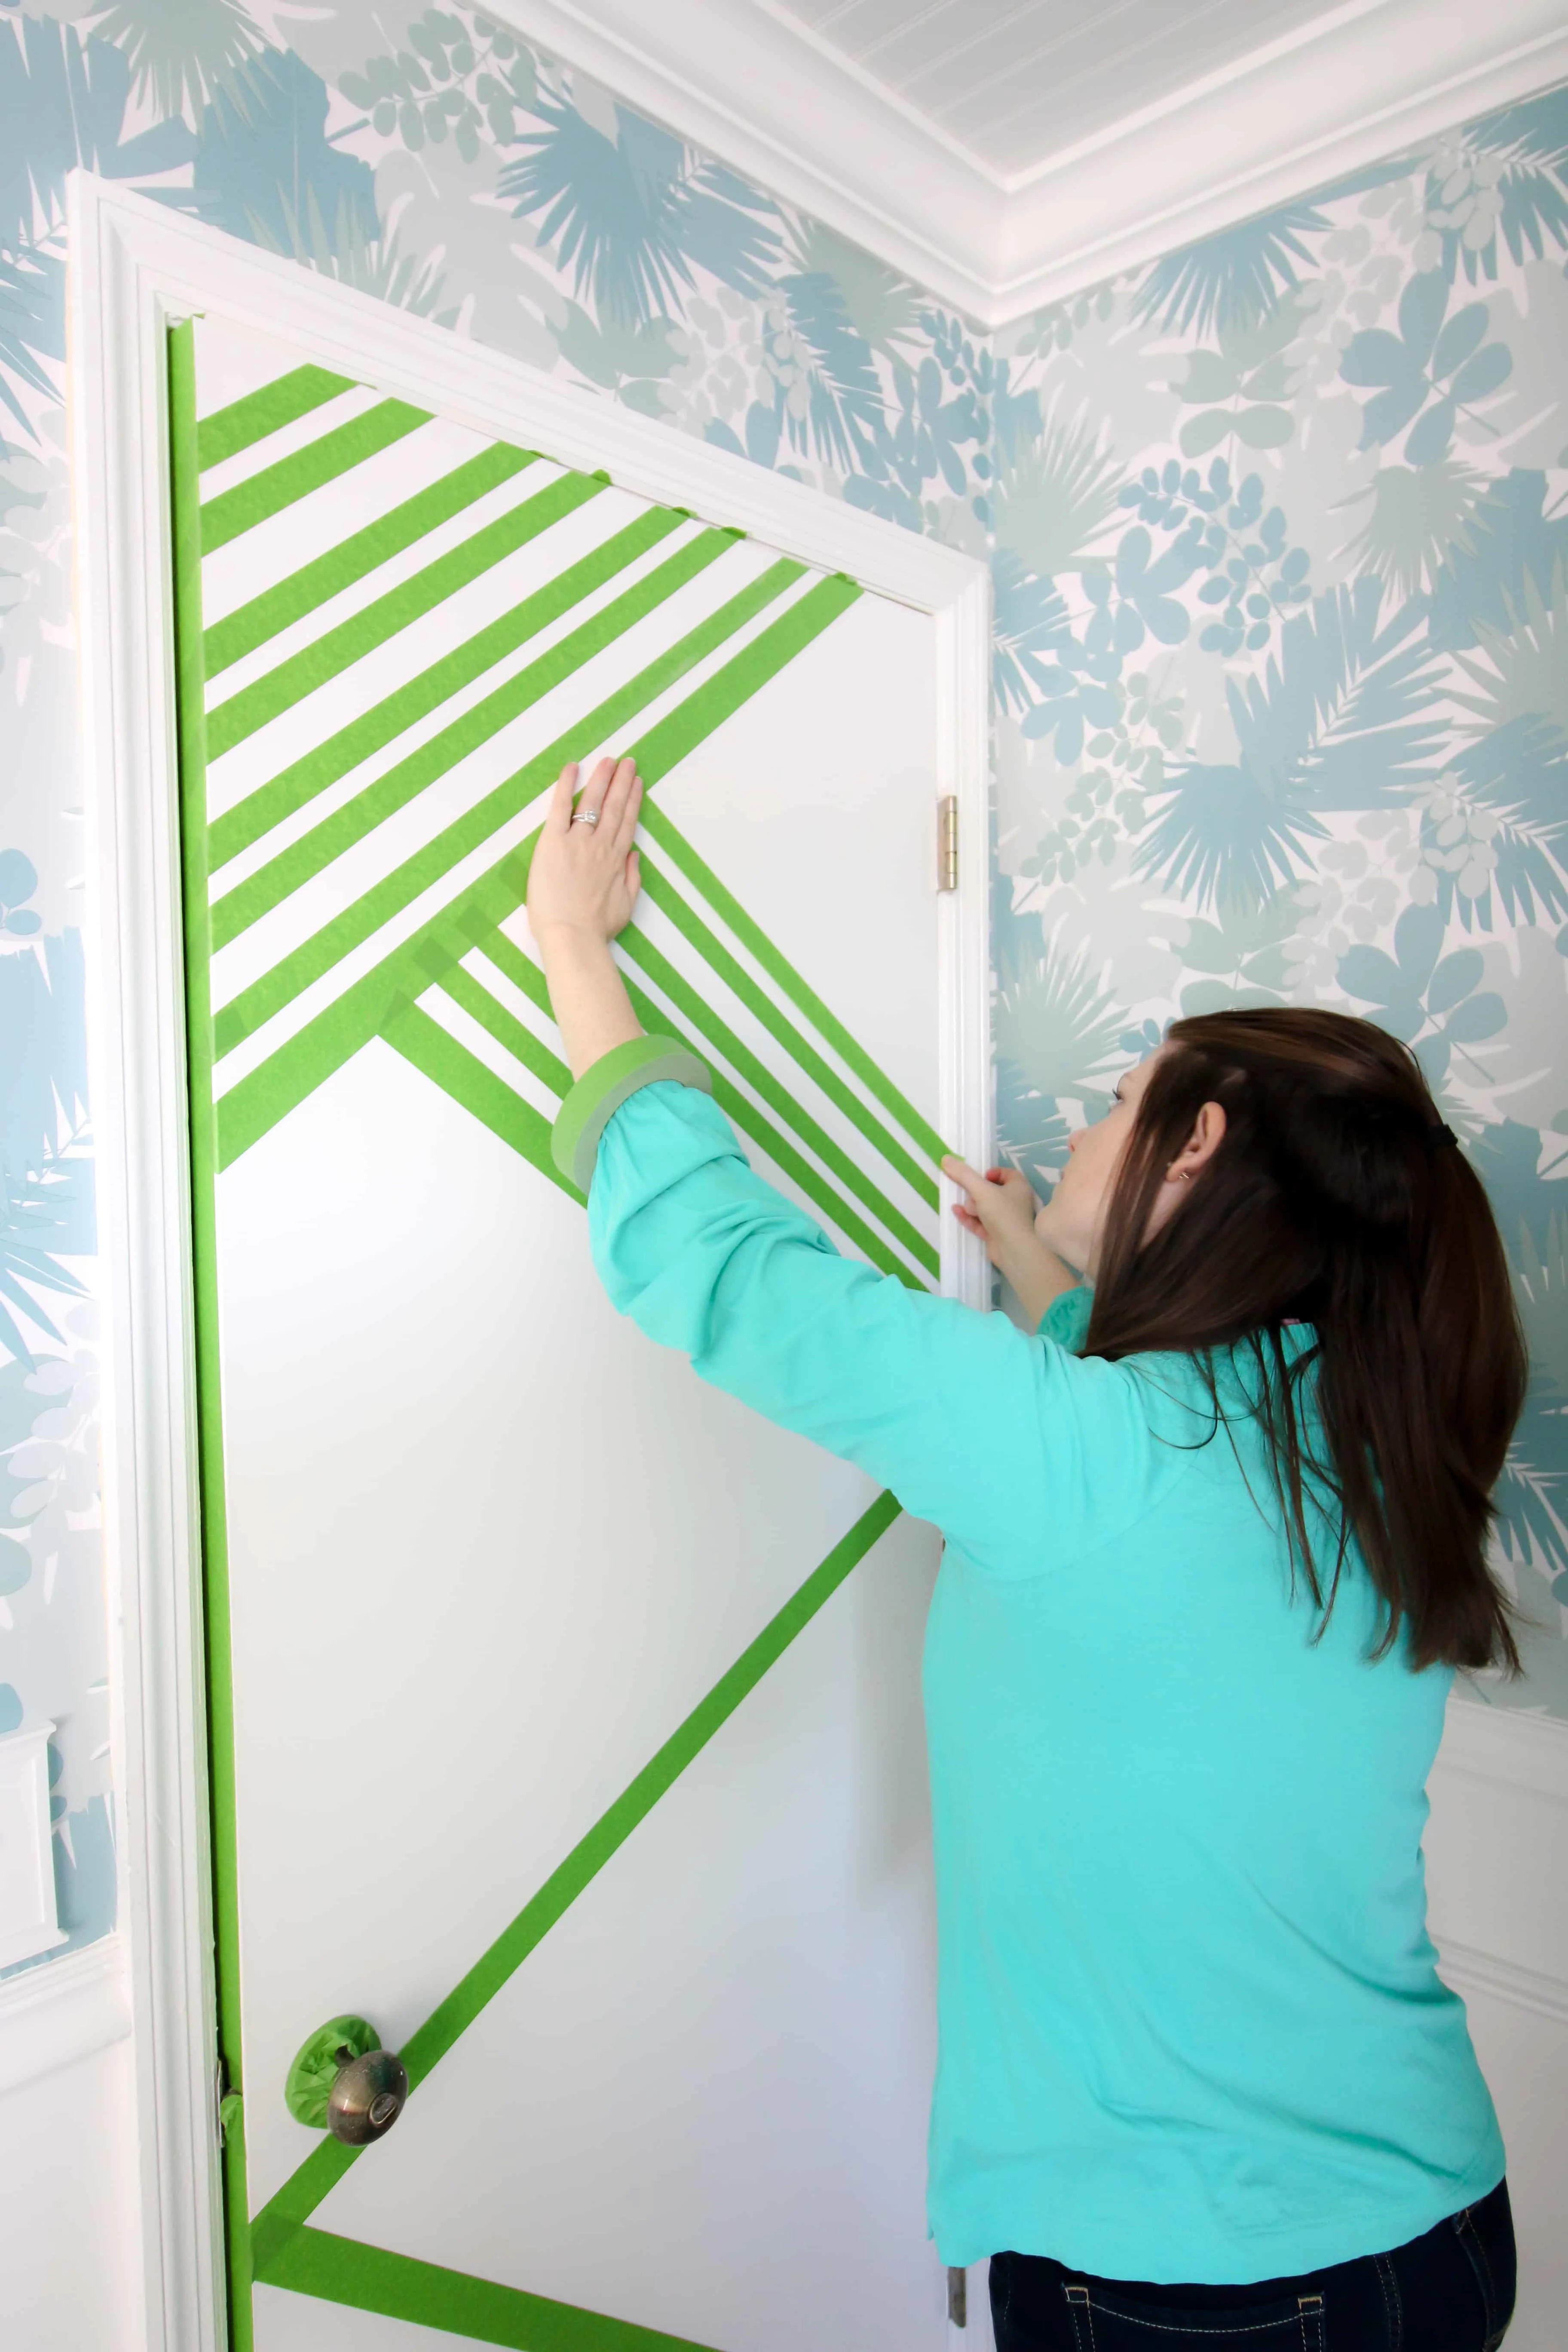
Use the palm of your hand to run over all of the tape and press it into the door firmly. - Activate the PaintBlock technology. FrogTape can seem kind of powdery when you open it. That powder is actually a polymer. This super absorbent polymer reacts to moisture by forming a gel that creates a micro-barrier. This micro-barrier seals the edge of the tape and prevents bleeds. This polymer is what makes FrogTape the best tape for crisp paint lines!
While the moisture from your paint should activate all of the polymer, I like to take one extra step to be sure that it’s 100% good to go, especially on a project like this. Grab a damp rag and wipe down all of the tape. This helps to turn that powder into a gel and be sure that you don’t miss a single spot.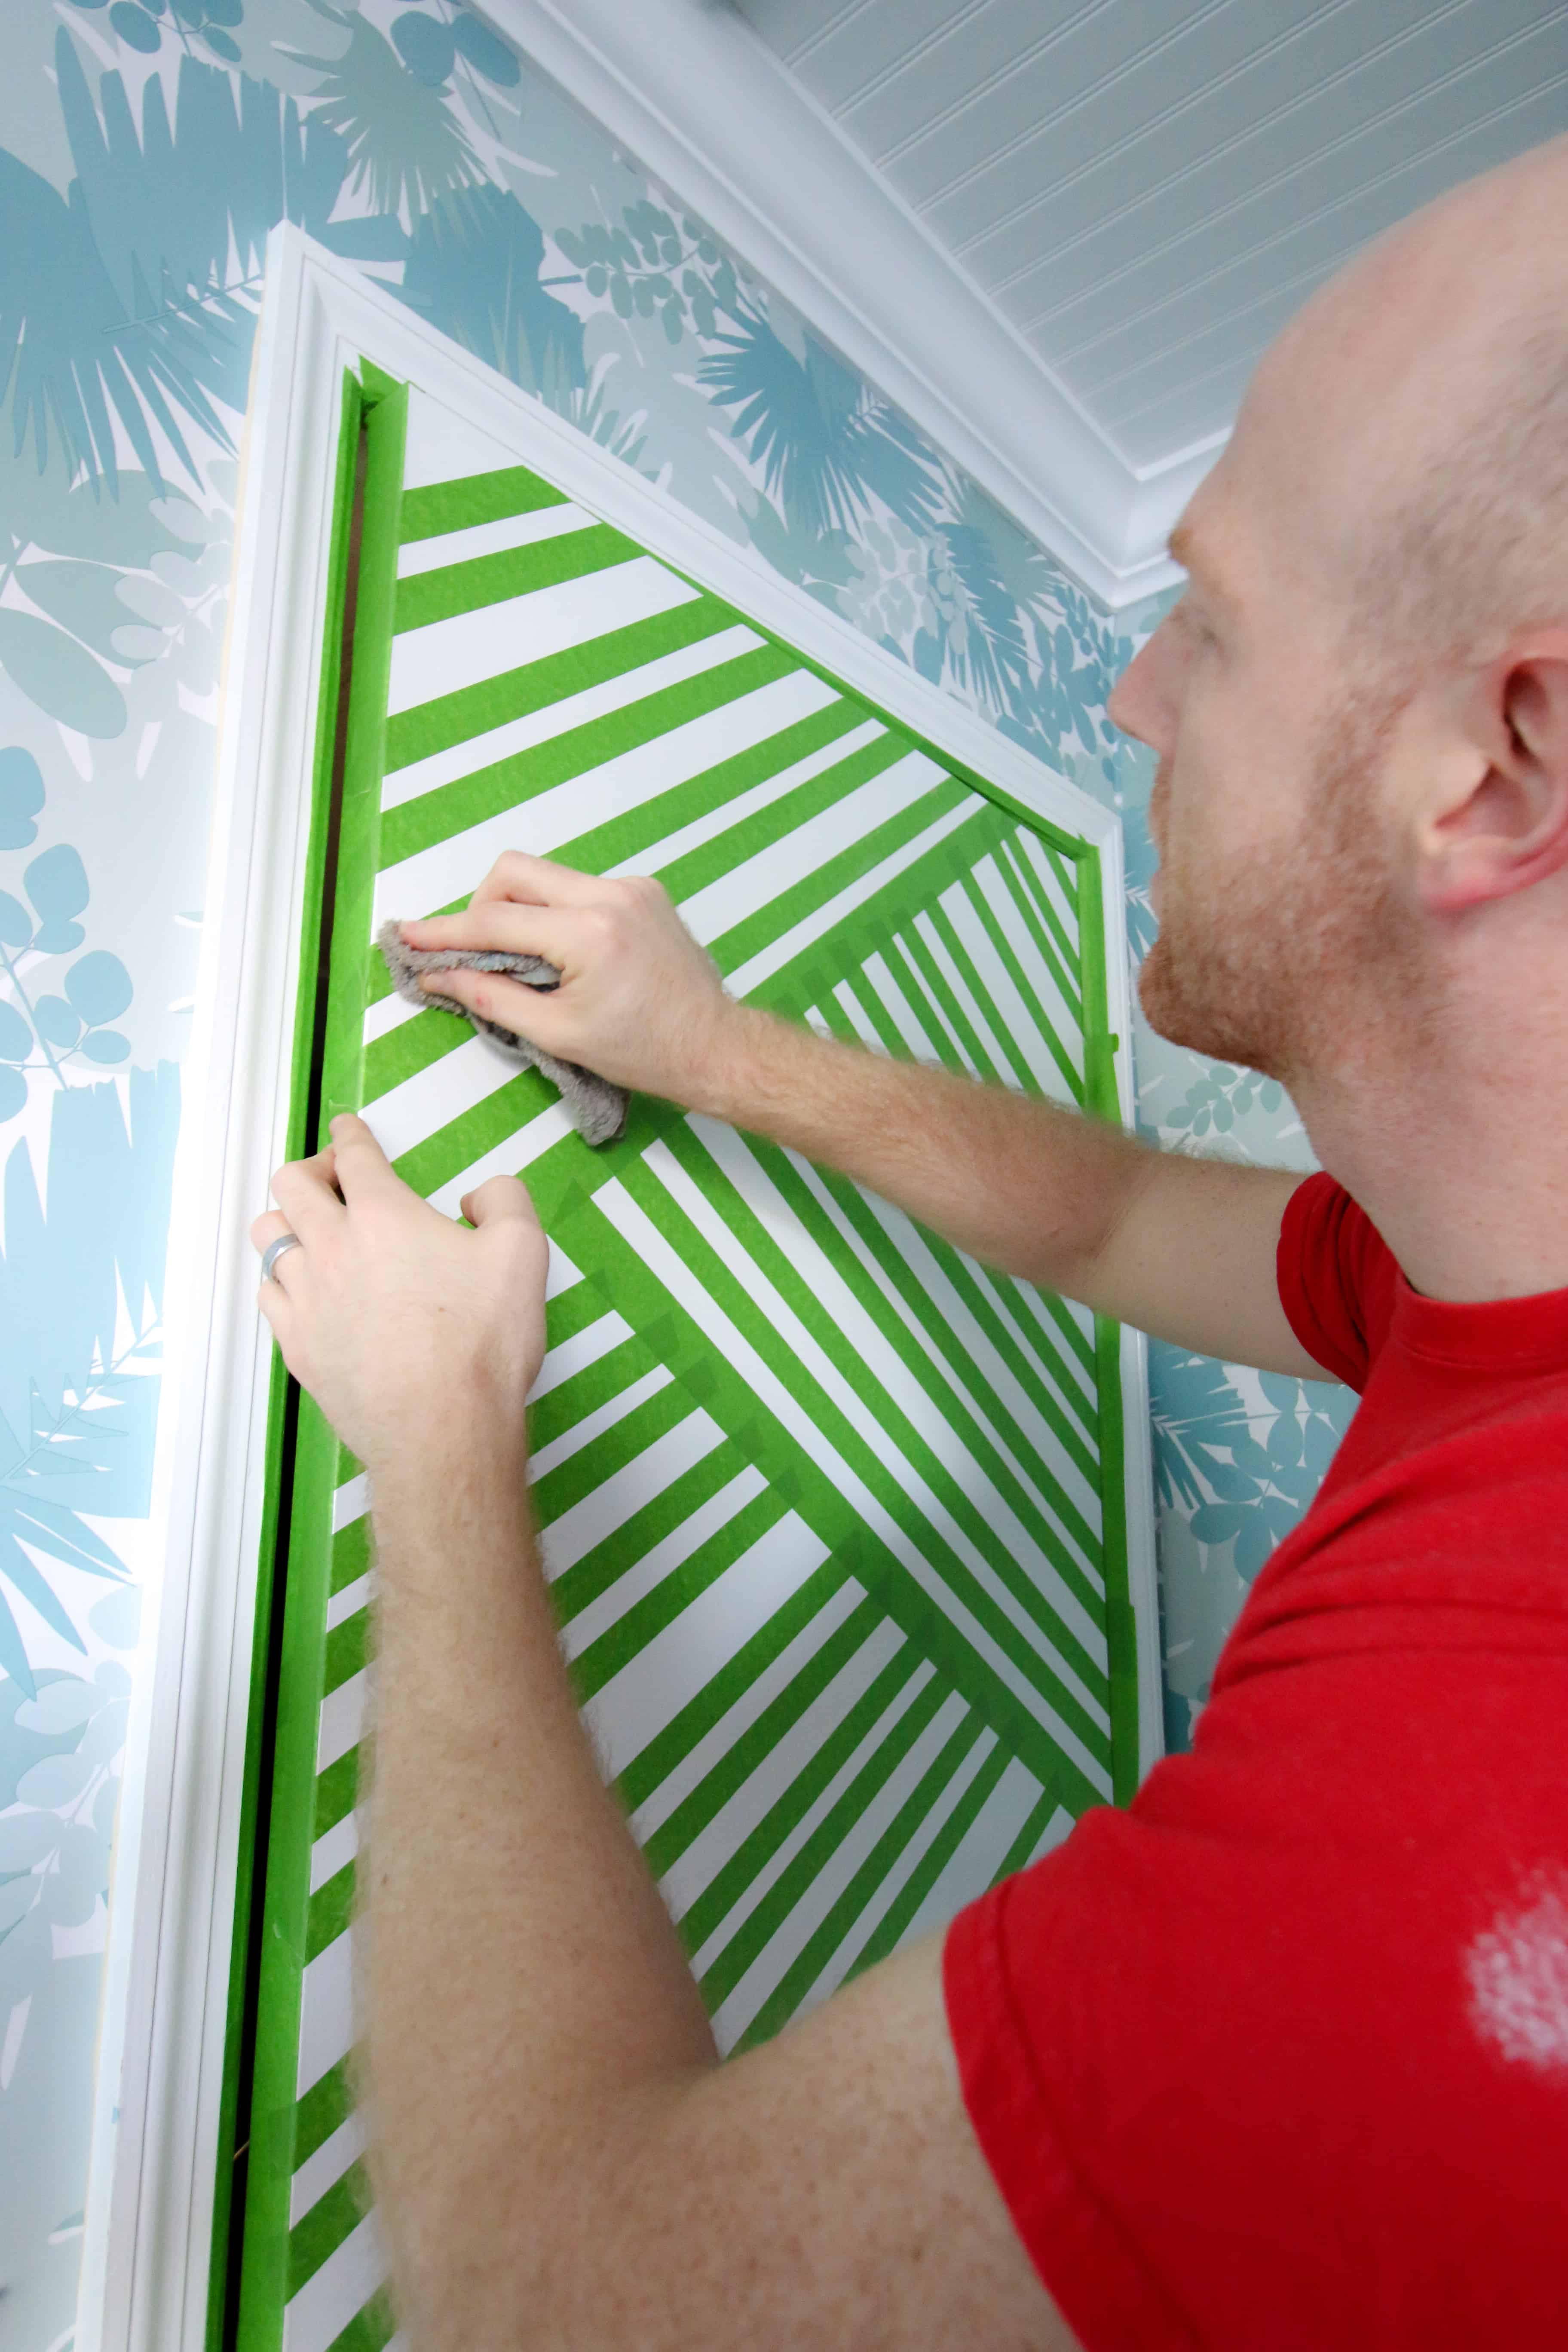
- Paint! I used a foam brush to apply my paint (regular eggshell wall paint) to the door. We completely covered the tape and the paint with no regard to being careful. I knew the FrogTape would do its job. It took two coats to get the coverage that I was looking for.
Here are our best tips for how to open a paint can.
- Remove your FrogTape. It is important to remove your FrogTape while the paint is still wet! I didn’t used to do this and was always frustrated when some of the paint peeled off with the tape. This is why you read the instructions on the packaging! Peeling off the tape while the paint is wet will get you the cleanest, crispest paint lines. Have a trash bag handy to drop your tape into because it will have wet paint on it!

- Let the paint dry normally. Don’t smudge it!
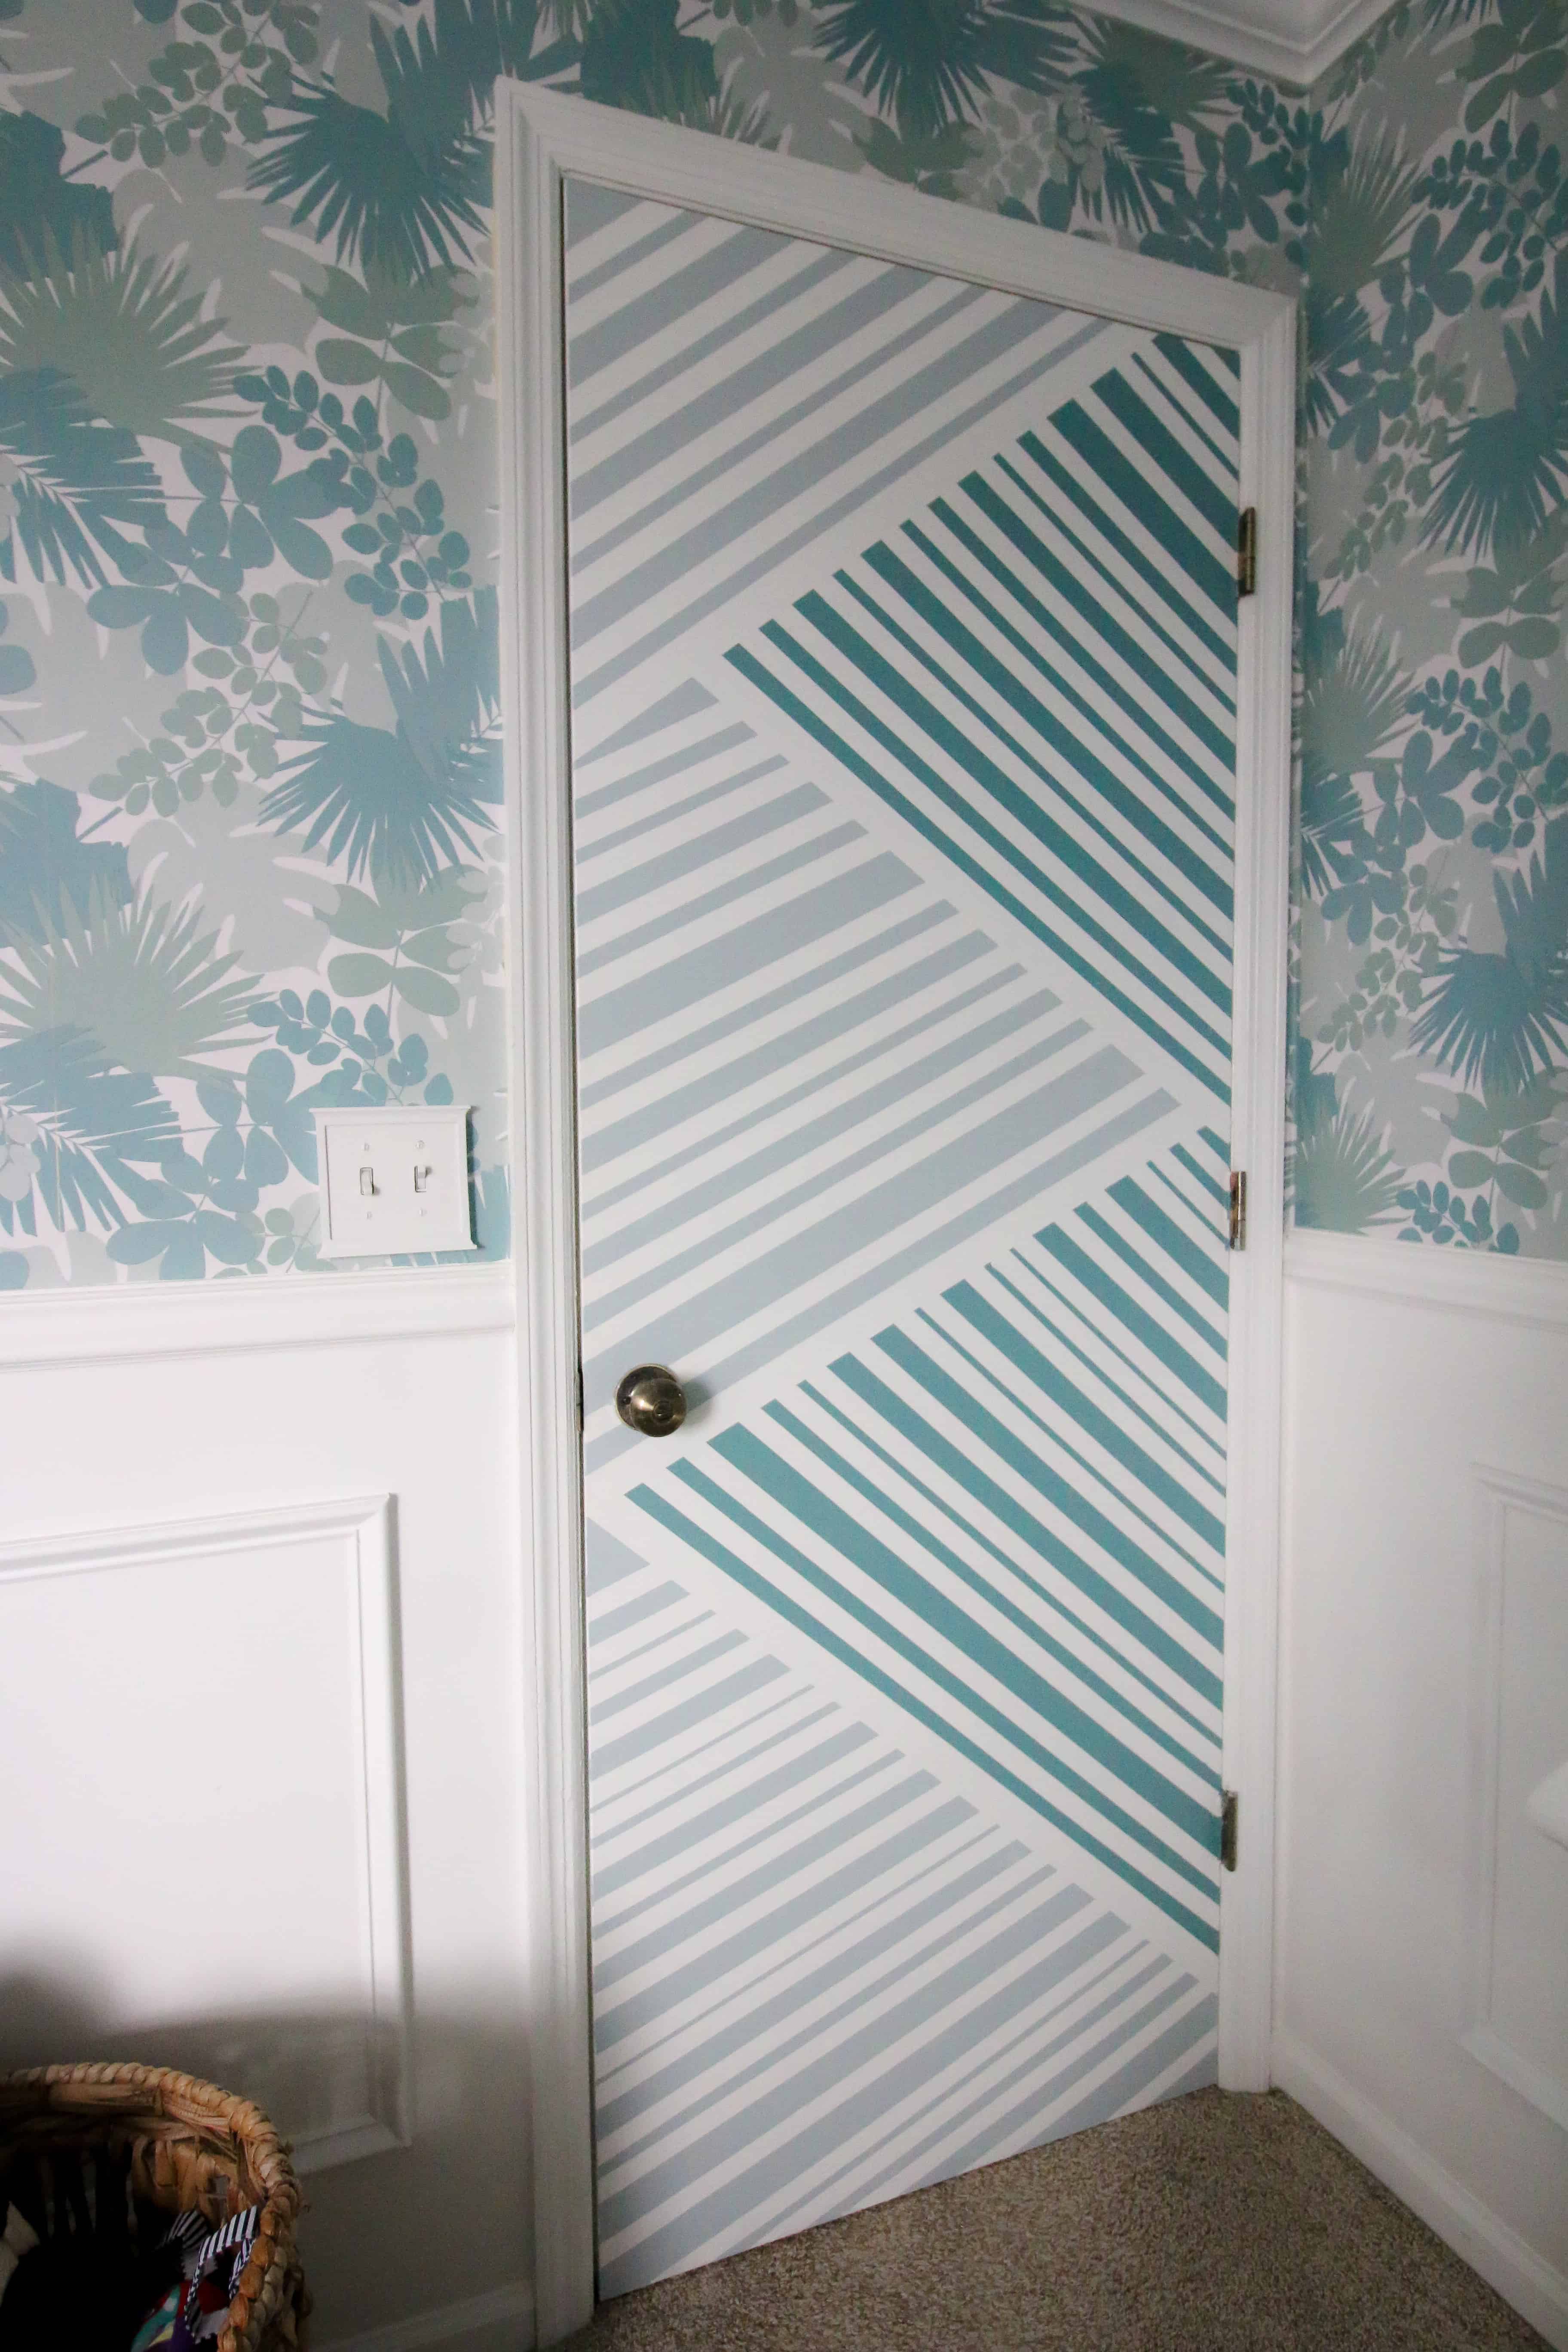
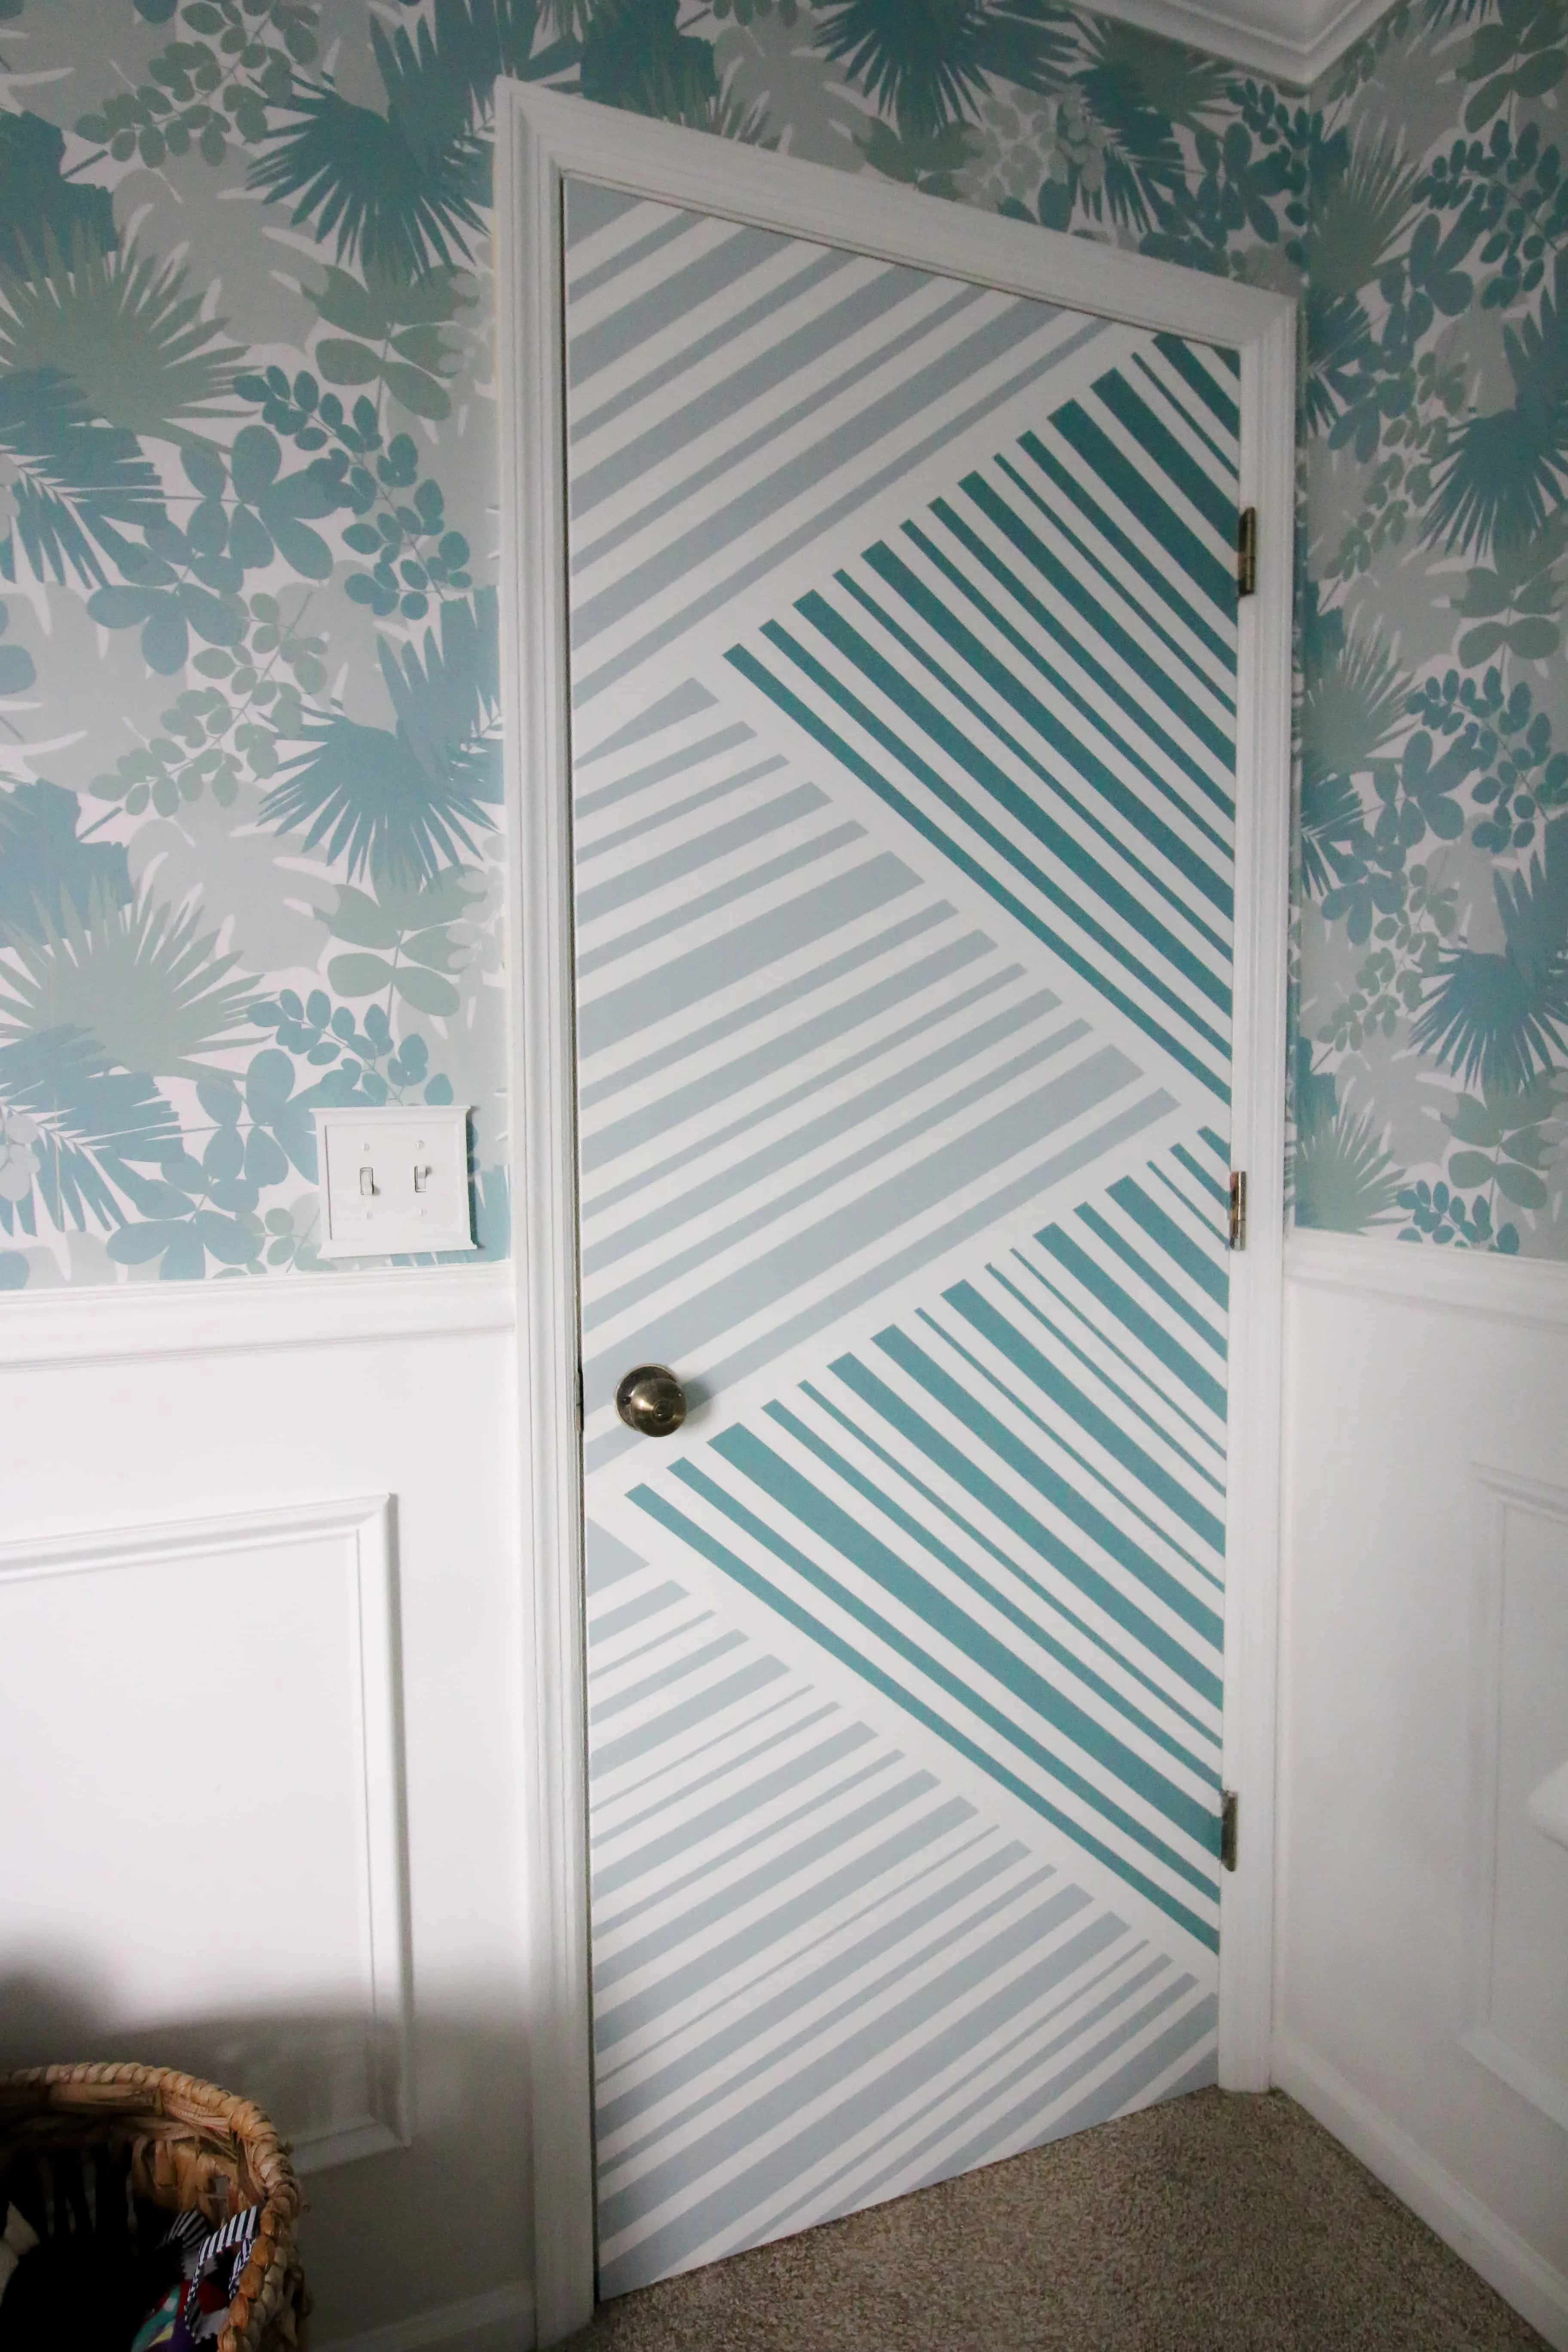
- Enjoy your newly fun geometric painted door!
Click here to get the best tips for using painters tape in a printable checklist PDF!
I am beyond obsessed with how this door turned out – it really exceeded my expectations. This whole nursery, I have gone out of my comfort zone and really embraced color and pattern. Now I want to add more fun designs around my home!
I shared the whole process in real-time on my Instagram stories (and it’s now a highlight – Geometric Painted Door – go watch it) and I got a lot of questions about using FrogTape so I wanted to address them here!
FrogTape Tips
- Do I need to paint the base color over the tape before I paint the stripe color? I heard that’s how to prevent bleeds?
- No! That’s not preventing bleeds – it just covers it up by letting the base color do the bleeding. Press the tape down well and activate the PaintBlock technology with a damp cloth. You will get very crisp paint lines!
- How long can you leave FrogTape on before painting?
- FrogTape can stay on your surface for up to 21 days – 7 days in the direct sun – before it will be hard to get off without leaving behind residue.
- How long should paint dry before removing tape?
- Always remove the tape while the paint is wet for best results!
- Why does FrogTape come in a big plastic container?
- I love the FrogTape canisters! They protect the tape from damage such as nicks or dents and also keep out moisture to protect those polymers! The containers stack really nicely and are perfect for using to store small items like screws or nails once the tape is all gone.
- How long after painting can I apply FrogTape?
- FrogTape should be applied to fully cured surfaces. If you were painting the base color of your door before adding the stripes, you would want to wait before applying the tape onto the newly painted surface. I would wait at least 3 days. You can always test a piece in an inconspicuous spot first!
- Where can I buy FrogTape?
- FrogTape is available so many places – Amazon, Walmart, Target, Lowes, Home Depot! Basically anywhere you buy paint or DIY supplies.
More Door Makeovers
We have shared a ton of content about painting doors – it’s one of my favorite budget-friendly ways to update a room! Be sure to check out:
Using a paint sprayer on an exterior door
A renter-friendly front door makeover
Which is better for painting a door – a roller or a paint sprayer?
Have you ever made over a door in your home? Would you try a bold geometric pattern?
Interested in a geometric painted door for your home? FrogTape makes it super easy! I received compensation to complete this project for using FrogTape painter’s tape products. All opinions, projects and ideas are based on my own experience. Thanks for supporting the brands that make Charleston Crafted possible!
| | |||
| | | | |


Hello, I’m Morgan, half of the creative force behind CharlestonCrafted.com! With a passion for DIY that dates back to 2012, I’ve transformed three homes and now I’m dedicated to helping others craft their dream spaces. Let’s turn your house into a home together!
Barb
Thursday 21st of March 2019
I love this, and the tips on using Frog Tape. I'm going to do this over the weekend to one of my doors!
Sean
Saturday 23rd of March 2019
Yay! Please share pictures!
Sandy Piper
Wednesday 20th of March 2019
That is such a nice job and it goes beautifully with your entire room. I might "borrow" your idea for the inside of the door coming in from my garage.
The wallpaper and wainscotting is georgeous too. Thanks for sharing.
Sean
Saturday 23rd of March 2019
Thank you so much! Please share pictures if you do!