
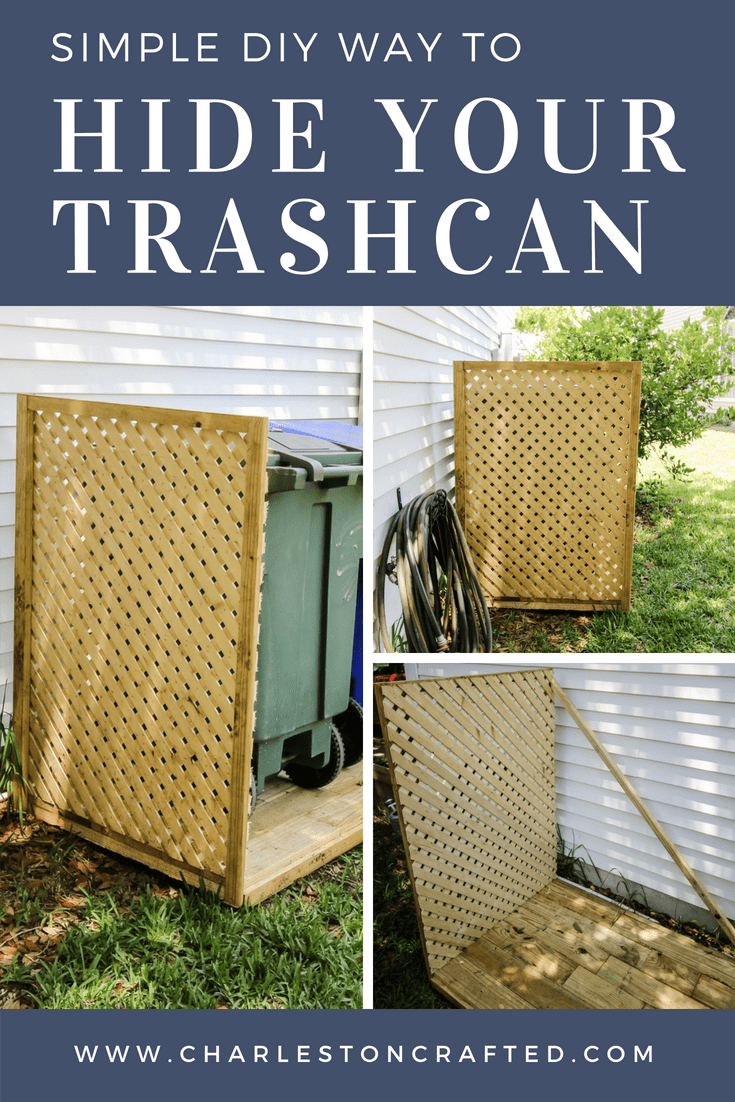
Having trash cans stored in your front yard can really hurt your curb appeal, and many HOAs will fine you for it. Here’s the easy way to hide your trash bins behind a DIY lattice wall – with printable PDF woodworking plans!
Our trash and recycling cans have always been along the side of our house since before we moved in. One day I was talking to my neighbor about random HOA rules and he mentioned that you weren’t supposed to have your garbage bins in view of the street.
But, how do you hide your garbage cans outside?! If you don’t have a bush or you can’t roll them around the back, you’re in a tight spot.
At the time, I figured oh well, since they had always been there, but I also decided that eventually I would fix it. I couldn’t move them, because our garage was always an active project zone and we had our shed in the small space behind the garage.
But, when I saw some roadside wood scraps one day, I knew I could make a free simple way to hide our trash cans.
Using a small trellis to hide garbage and recycling cans is both functional and attractive. This is also a great solution if you are looking for outdoor garbage can storage!
Check out all of our favorite ways to upgrade your backyard on a budget!
How to build a garbage can enclosure
Here’s how I built this outdoor garbage can enclosure.
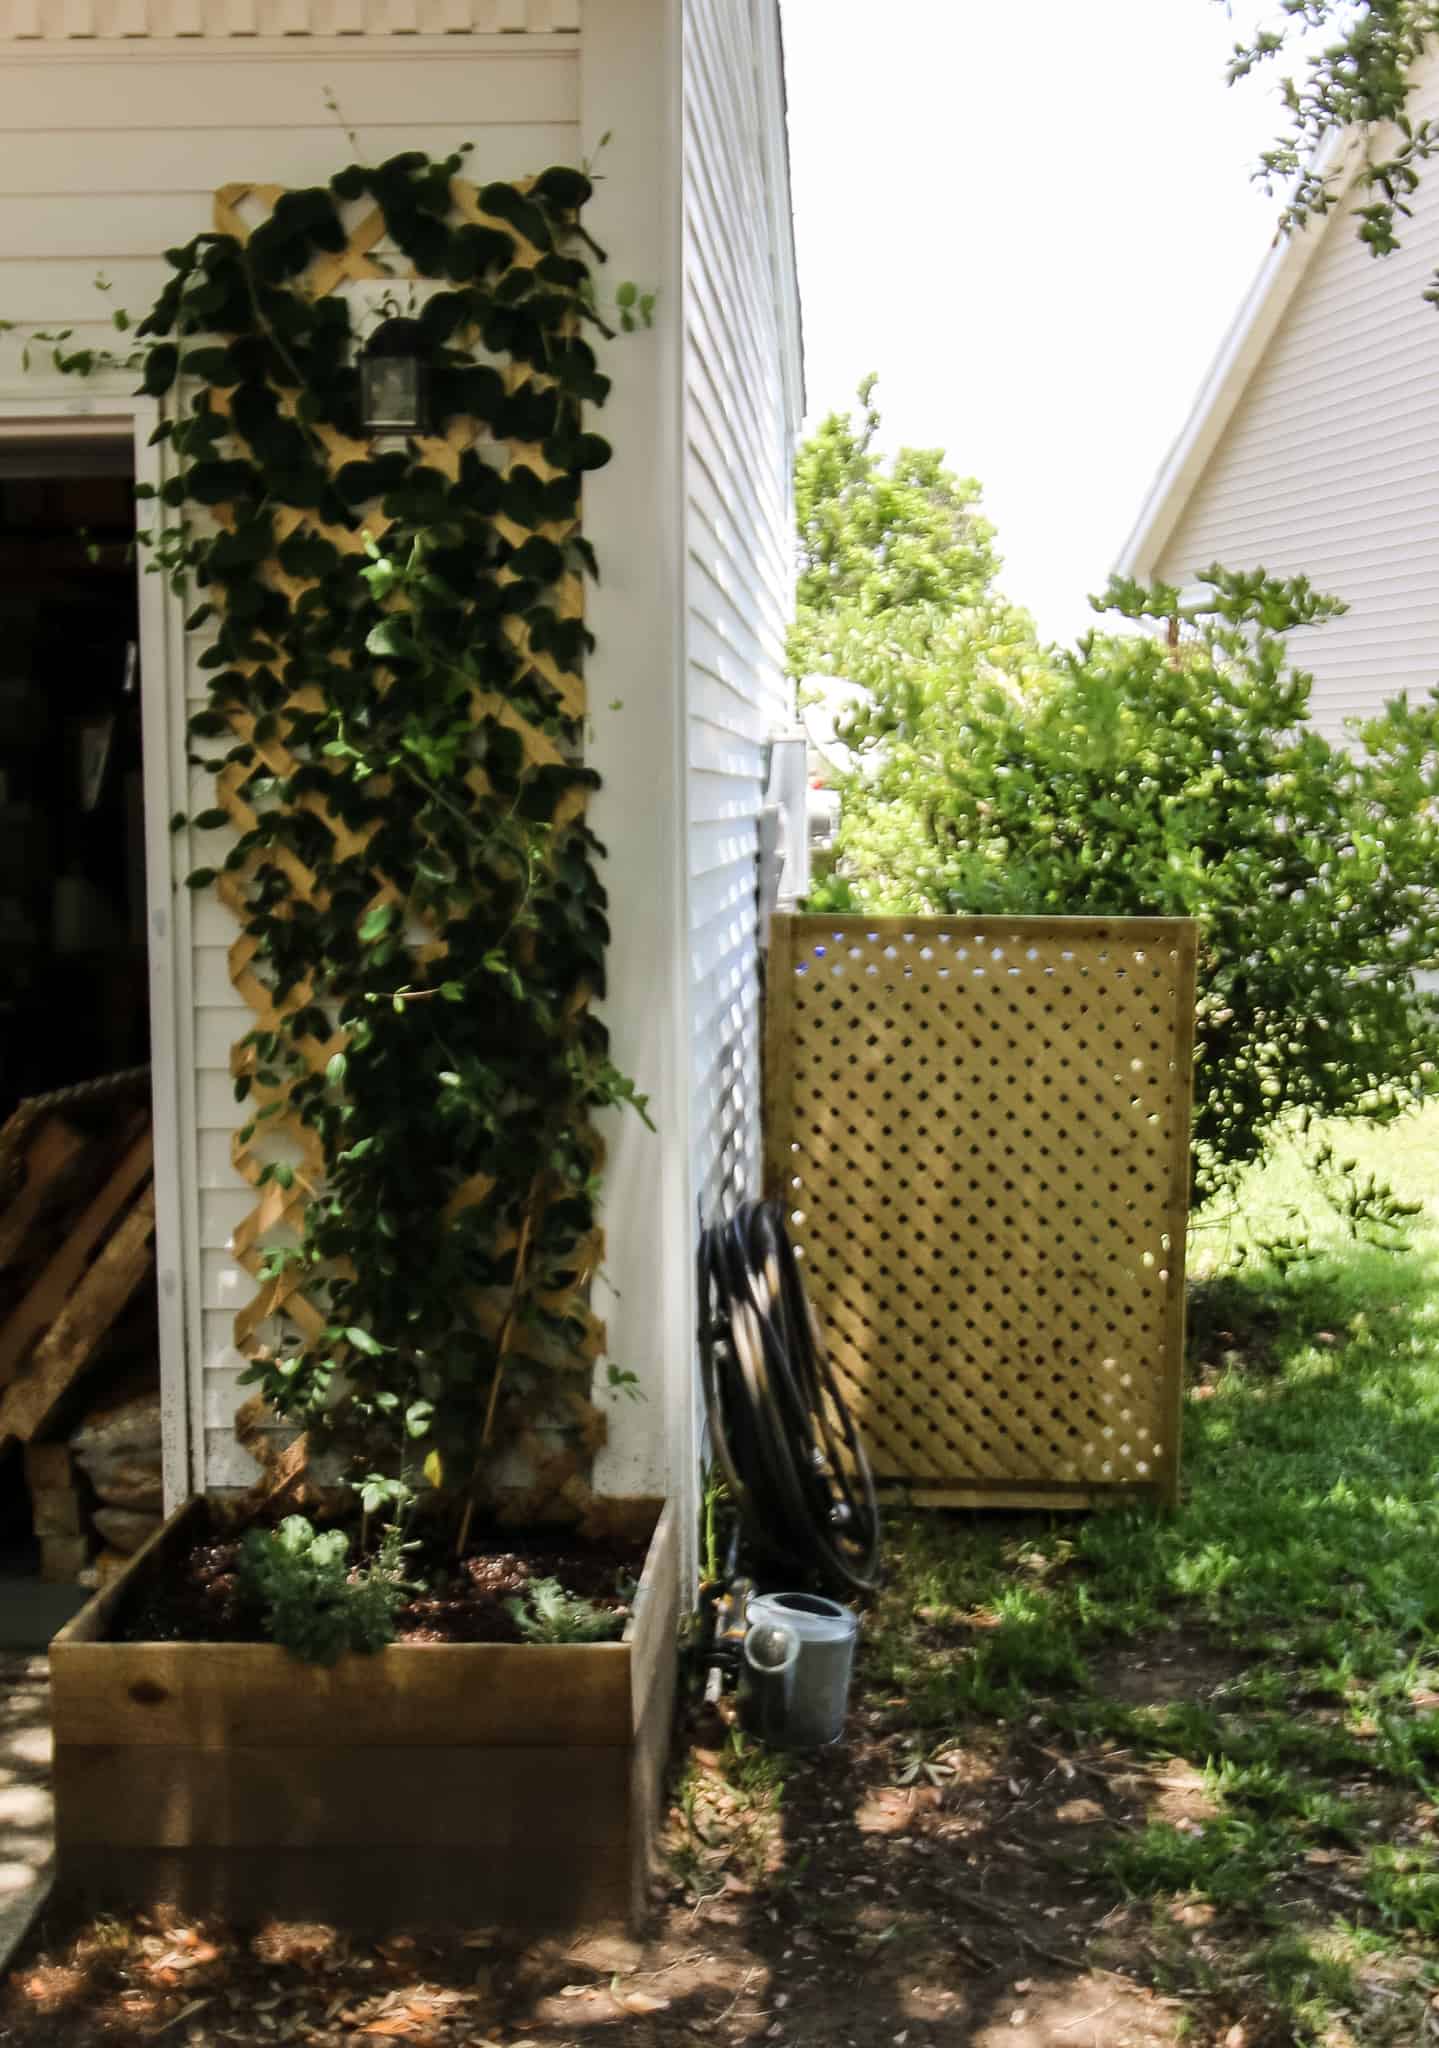
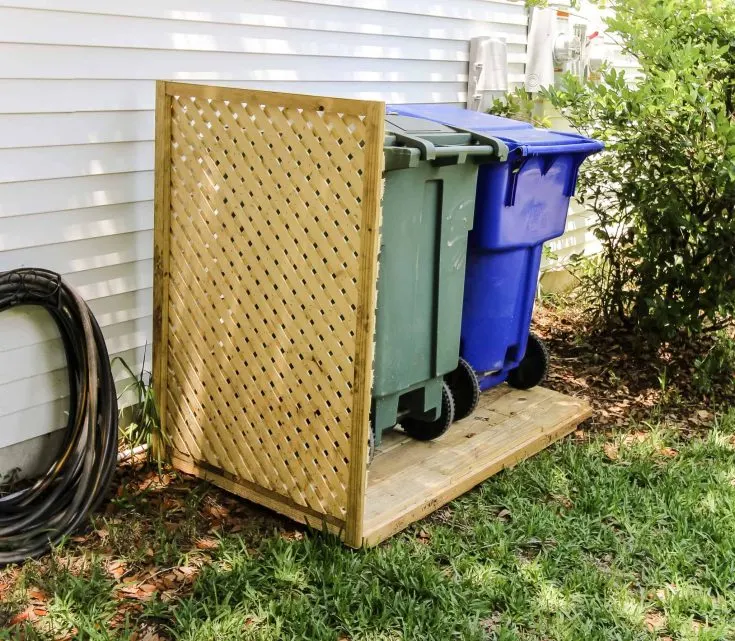
I basically wanted to make a platform enclosure for the two cans to rest on and attach a lattice wall to it. The lattice wall would actually serve as the way to shield the cans from view while the platform was an easy way for use to get the cans back and forth to the street and have a place for them to live.
I couldn’t just dig down into the ground and build the wall because I know a bunch of wires and our main water line run right through that area.
Make sure you check out our DIY garden arbor arch that also uses lattice!
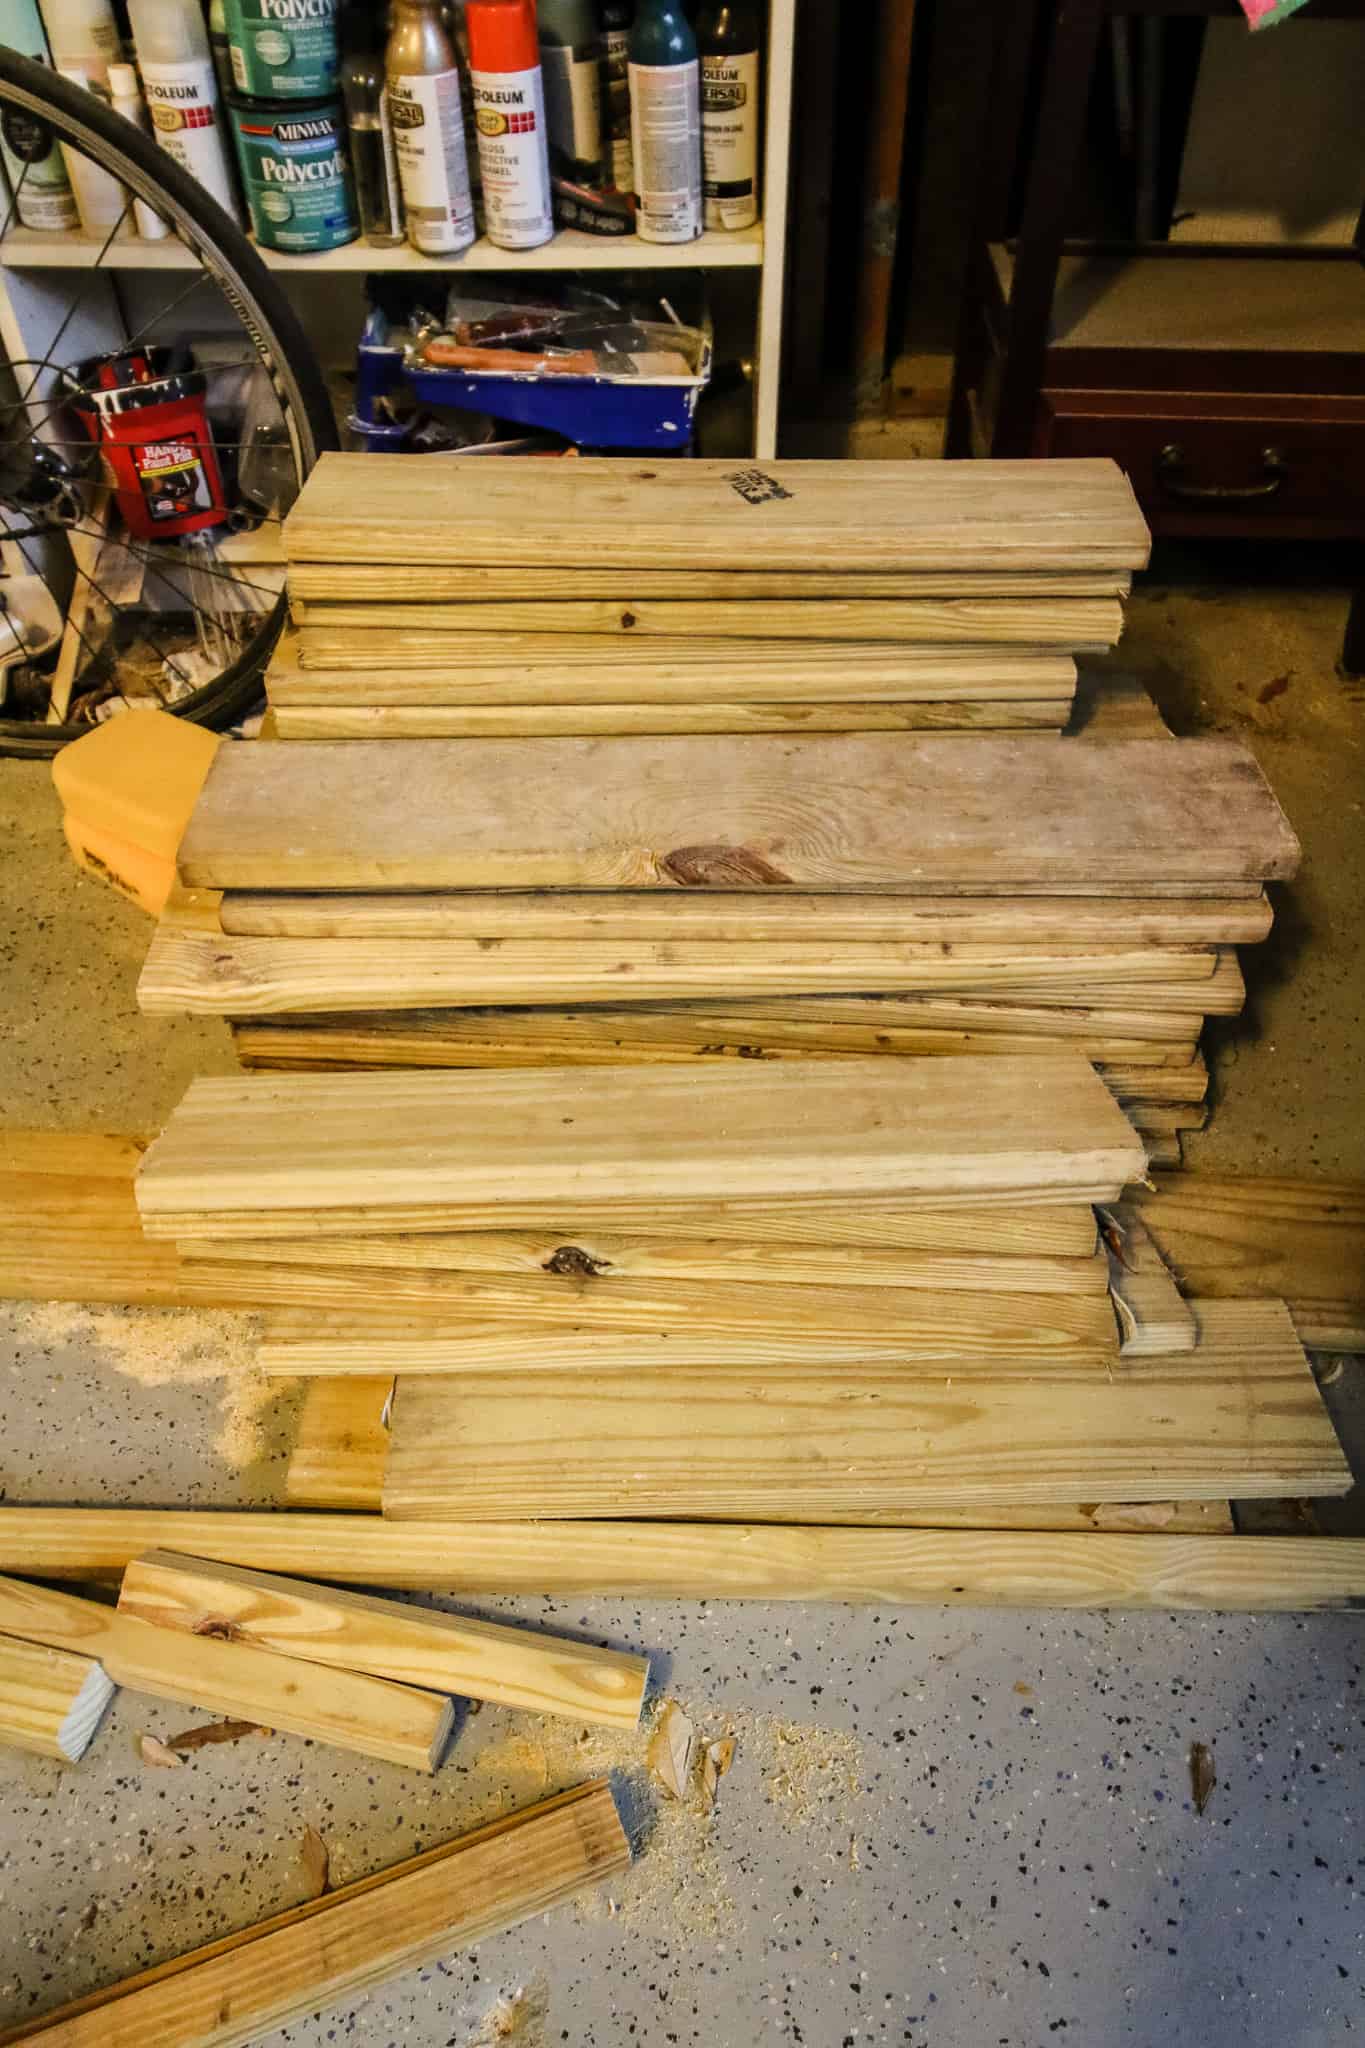
So my scraps were free, but they were 2-3 foot long scraps of fence posts that someone tossed in a pile when they finished their new fence.
I’ve designed printable PDF plans for this project that use full-length boards so you can replicate this project even easier than it was for me!
The most important thing to remember if you do this for yourself is to make sure the base is wide enough for the TOPS of both of your trash cans and is tall enough to go a few inches above the lid.
Obviously, if you just size the base to the base of your cans or the wall to just the top, the cans will still stick out and be pretty visible.

How can I hide my outdoor garbage bins?
You can hide your outdoor garbage bins behind your house or a bush or in your garage. However, if that’s not an option, the best thing to do is to build a simple DIY enclosure or cover to hide your garbage bins.
Here’s the steps for how we built our DIY trash can enclosure!
Materials needed to build a trash can privacy enclosure
Here’s what you’ll need to hide your trash cans:
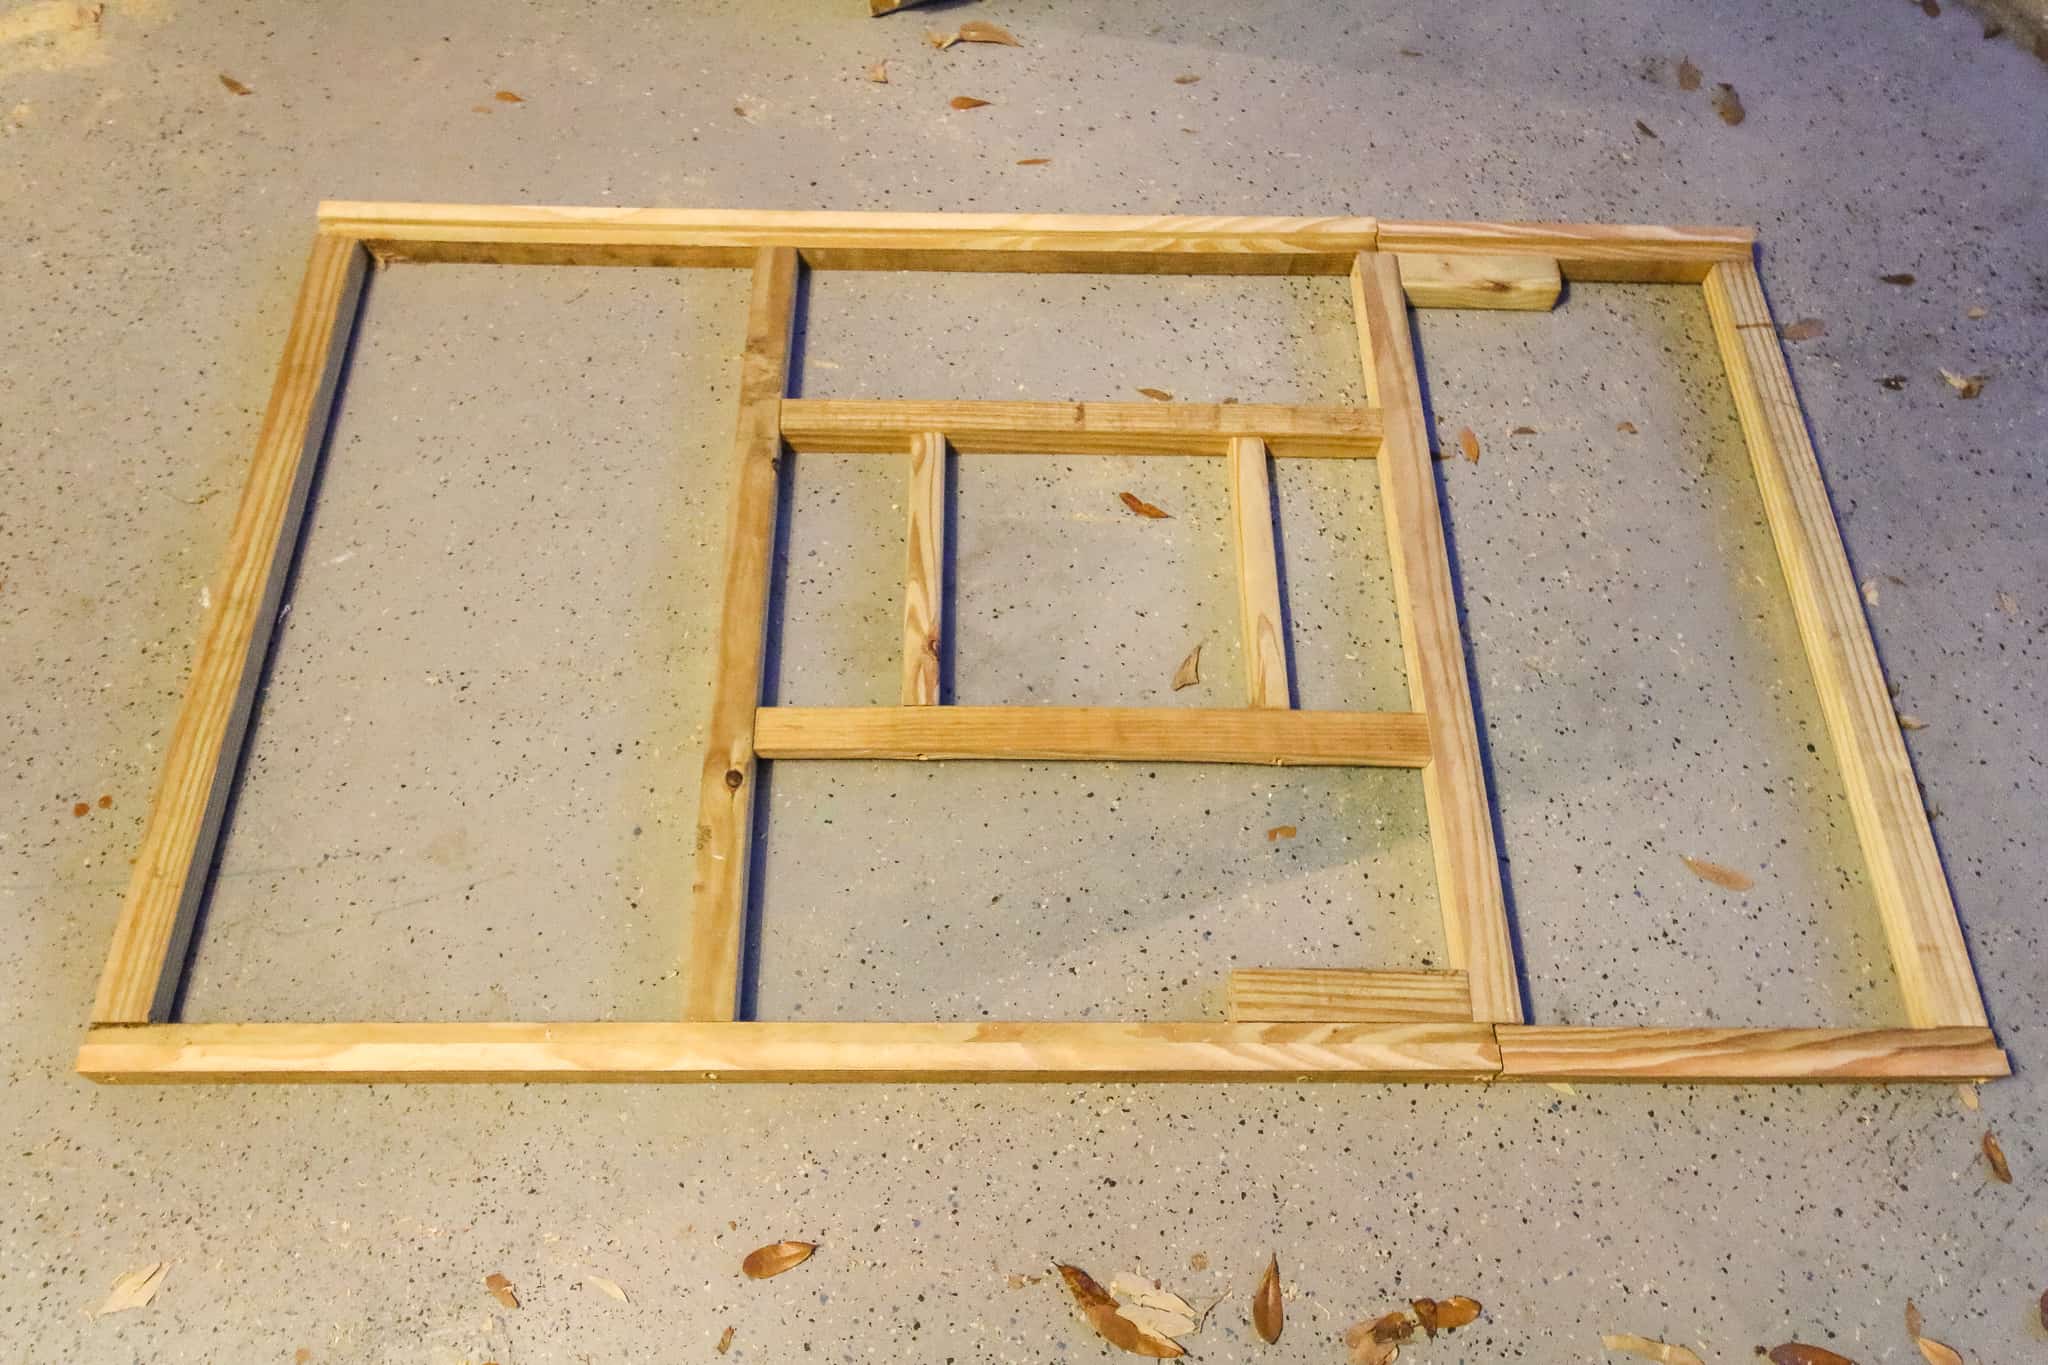
Step one: Build base
So I started by building the base. I created a frame with support beams first.
This frame went around the entire outside dimensions of the size I mapped out and then used a couple of support boards going each direction to hold it together.
You’ll see in the picture that it looks a little crazy what I did, but remember, I was using cut off scraps and I needed to make sure there were enough points to secure the scraps to. In my downloadable plans, it’s much cleaner looking!
Step two: Attach base boards
Then I cut fence boards to fit on the beams. Each board rested on at least two beams.
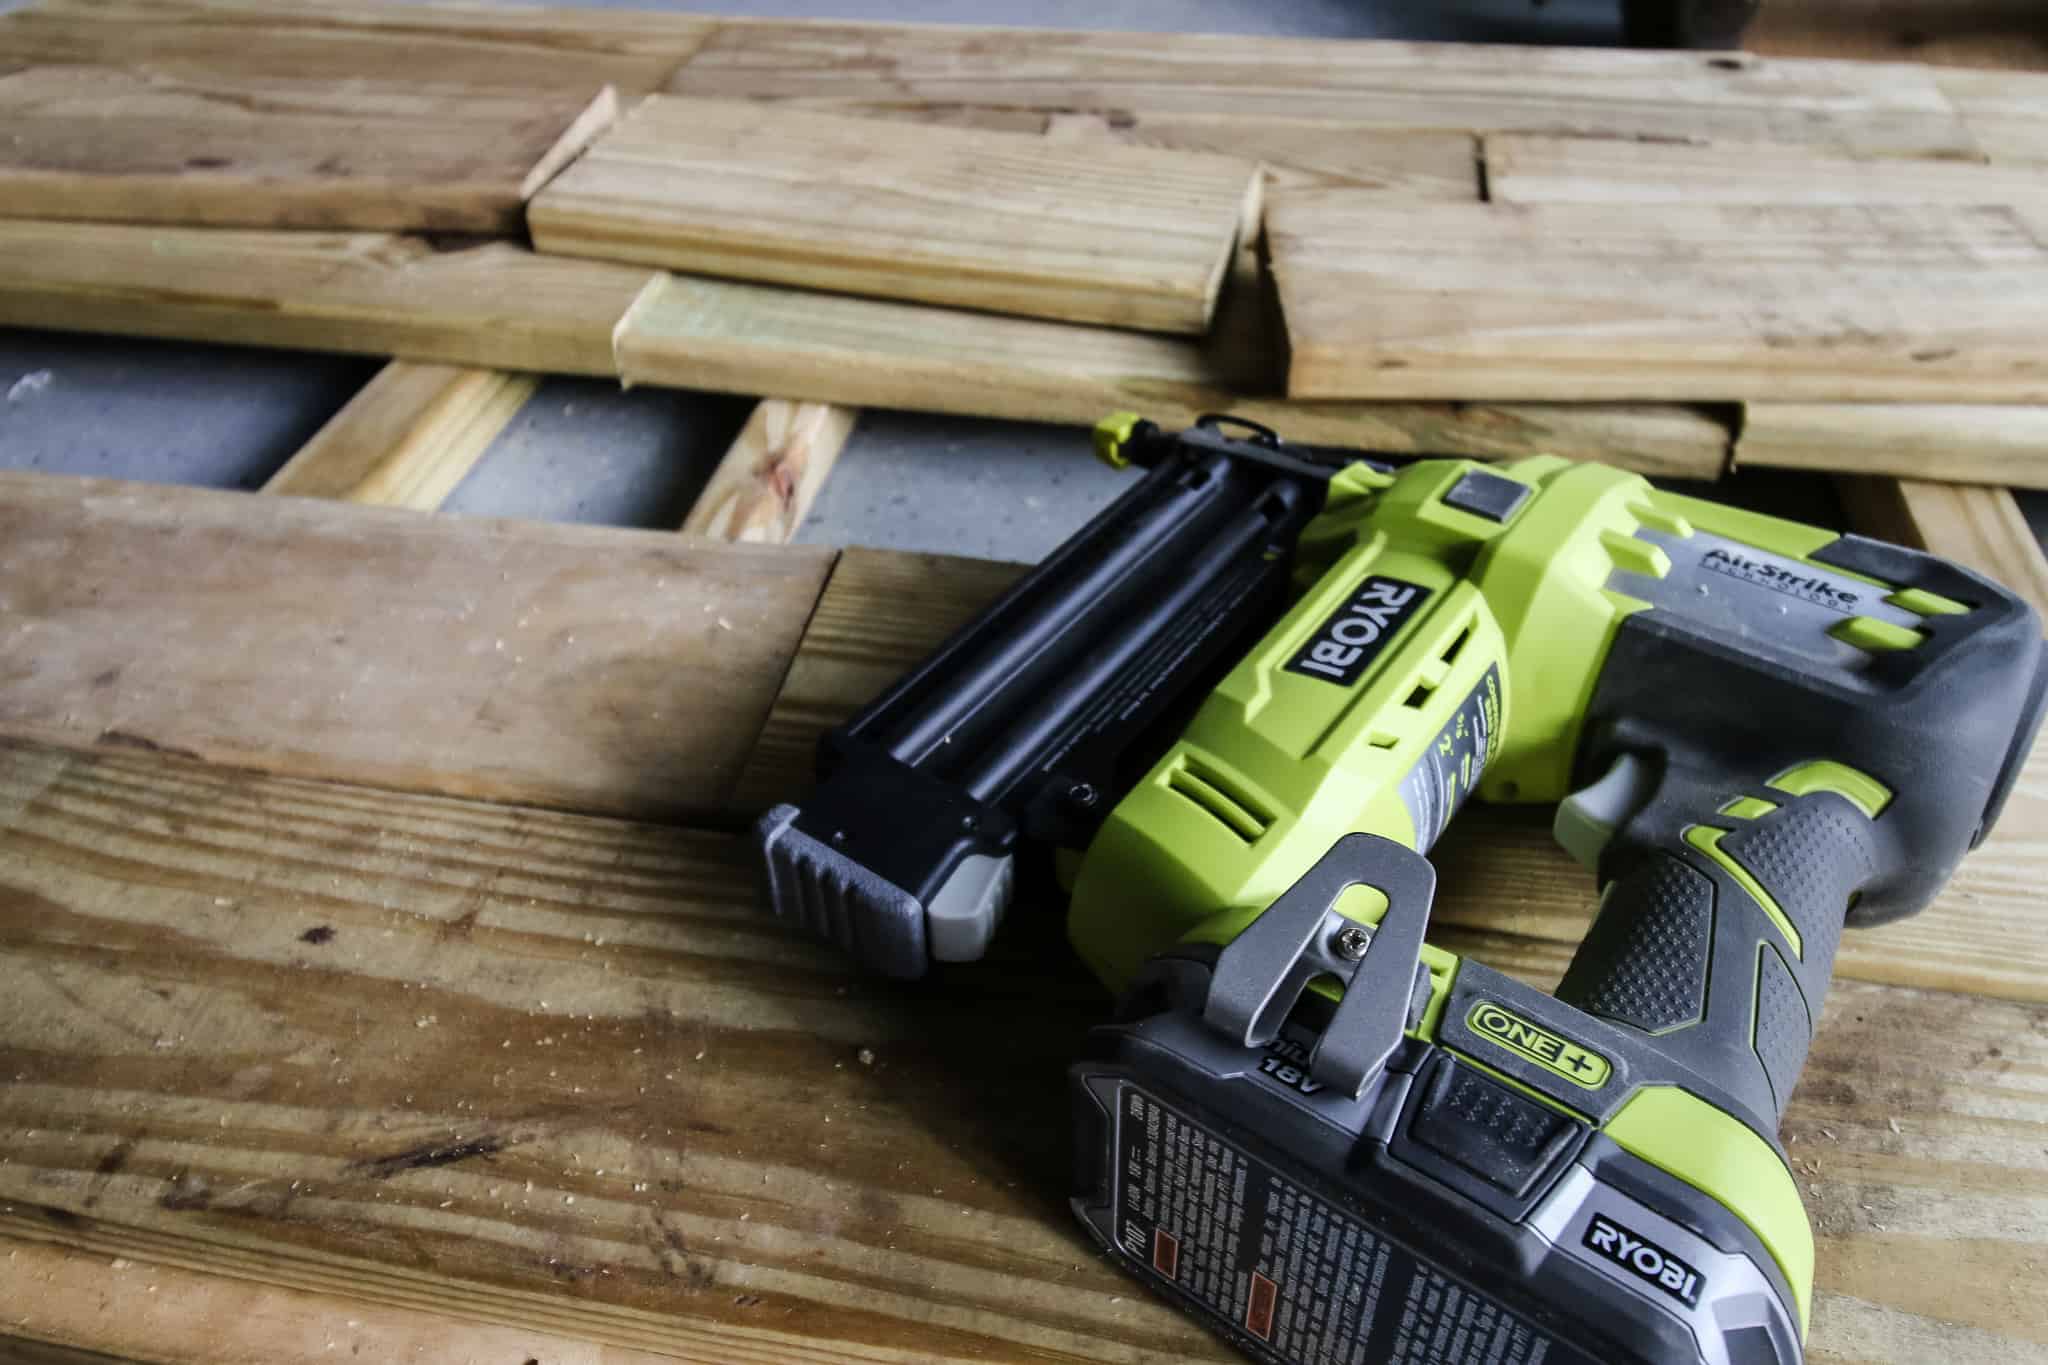
I used my RYOBI AirStrike nail gun to nail them in place.
You can use any nail gun, hammer and nails, or a drill and screws to secure the boards.
The nail gun was secure enough for this because it wouldn’t get a ton of movement, but use what you have!
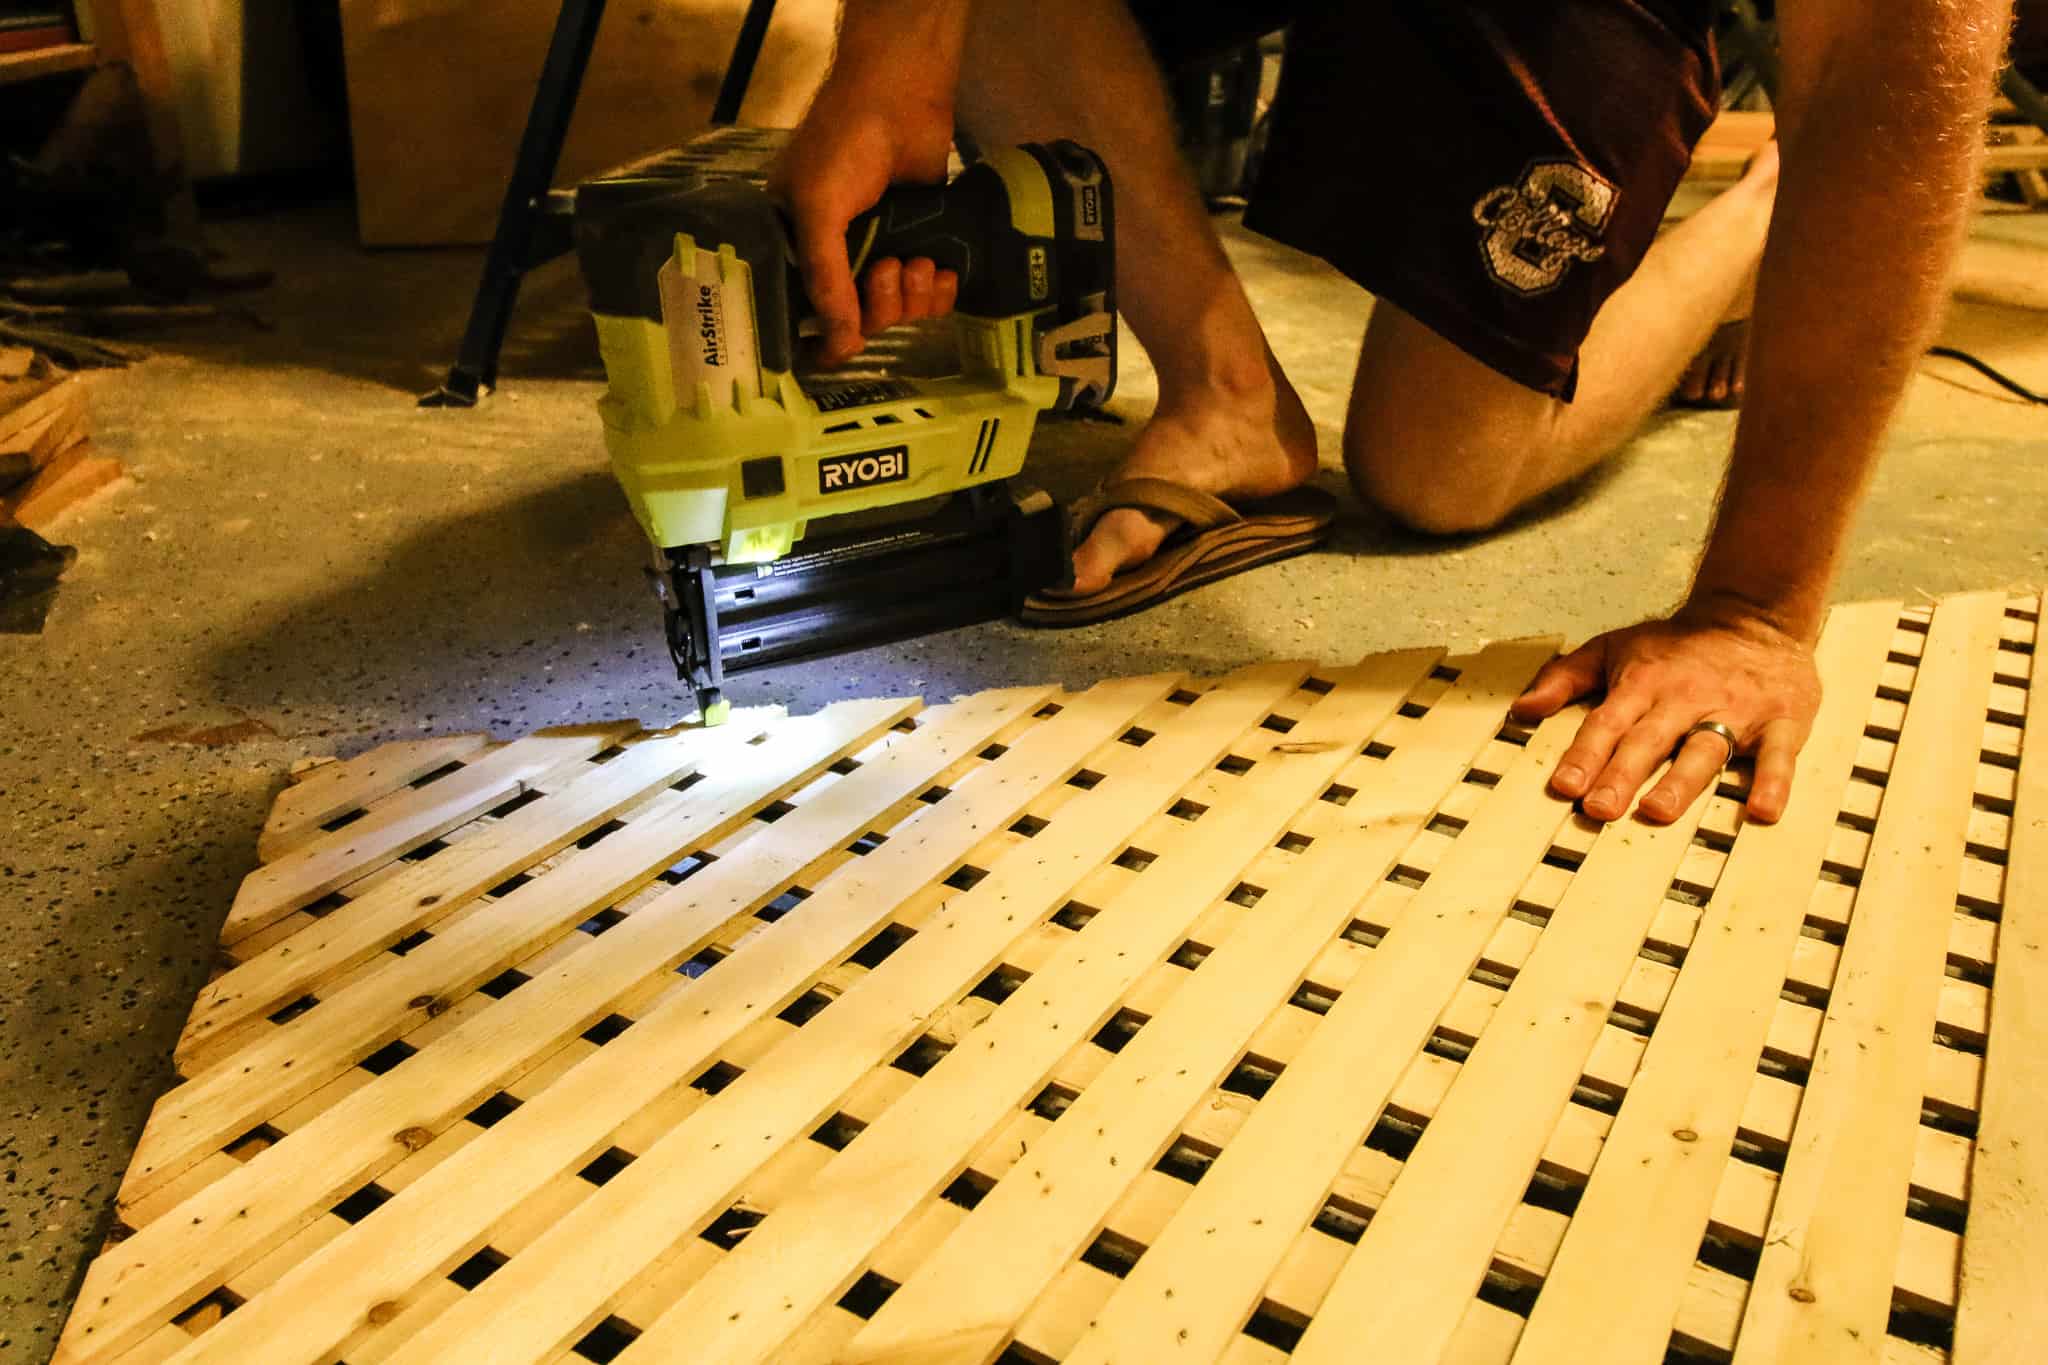
Step three: Build lattice wall
Then I built the wall. I cut the longest board I had taken from the side of the road and into three strips about two inches wide.
Then I cut a piece of lattice (this was the only thing I bought for this project) to be the size I needed. For me, it was 3 feet wide by 4 feet tall.
Then I nailed this to the boards I’d just cut. You could add wood glue here to make sure it holds, but putting nails every couple of inches will also hold just fine.
Step four: Attach lattice wall to base
Finally, I attached this to the outside of the base with screws along the bottom and one stabilizing cross-beam using a 2″x2″ I’ve had laying around.
The wall needed to be stabilized from the top or it would eventually snap off if only connected by the screws at the bottom.
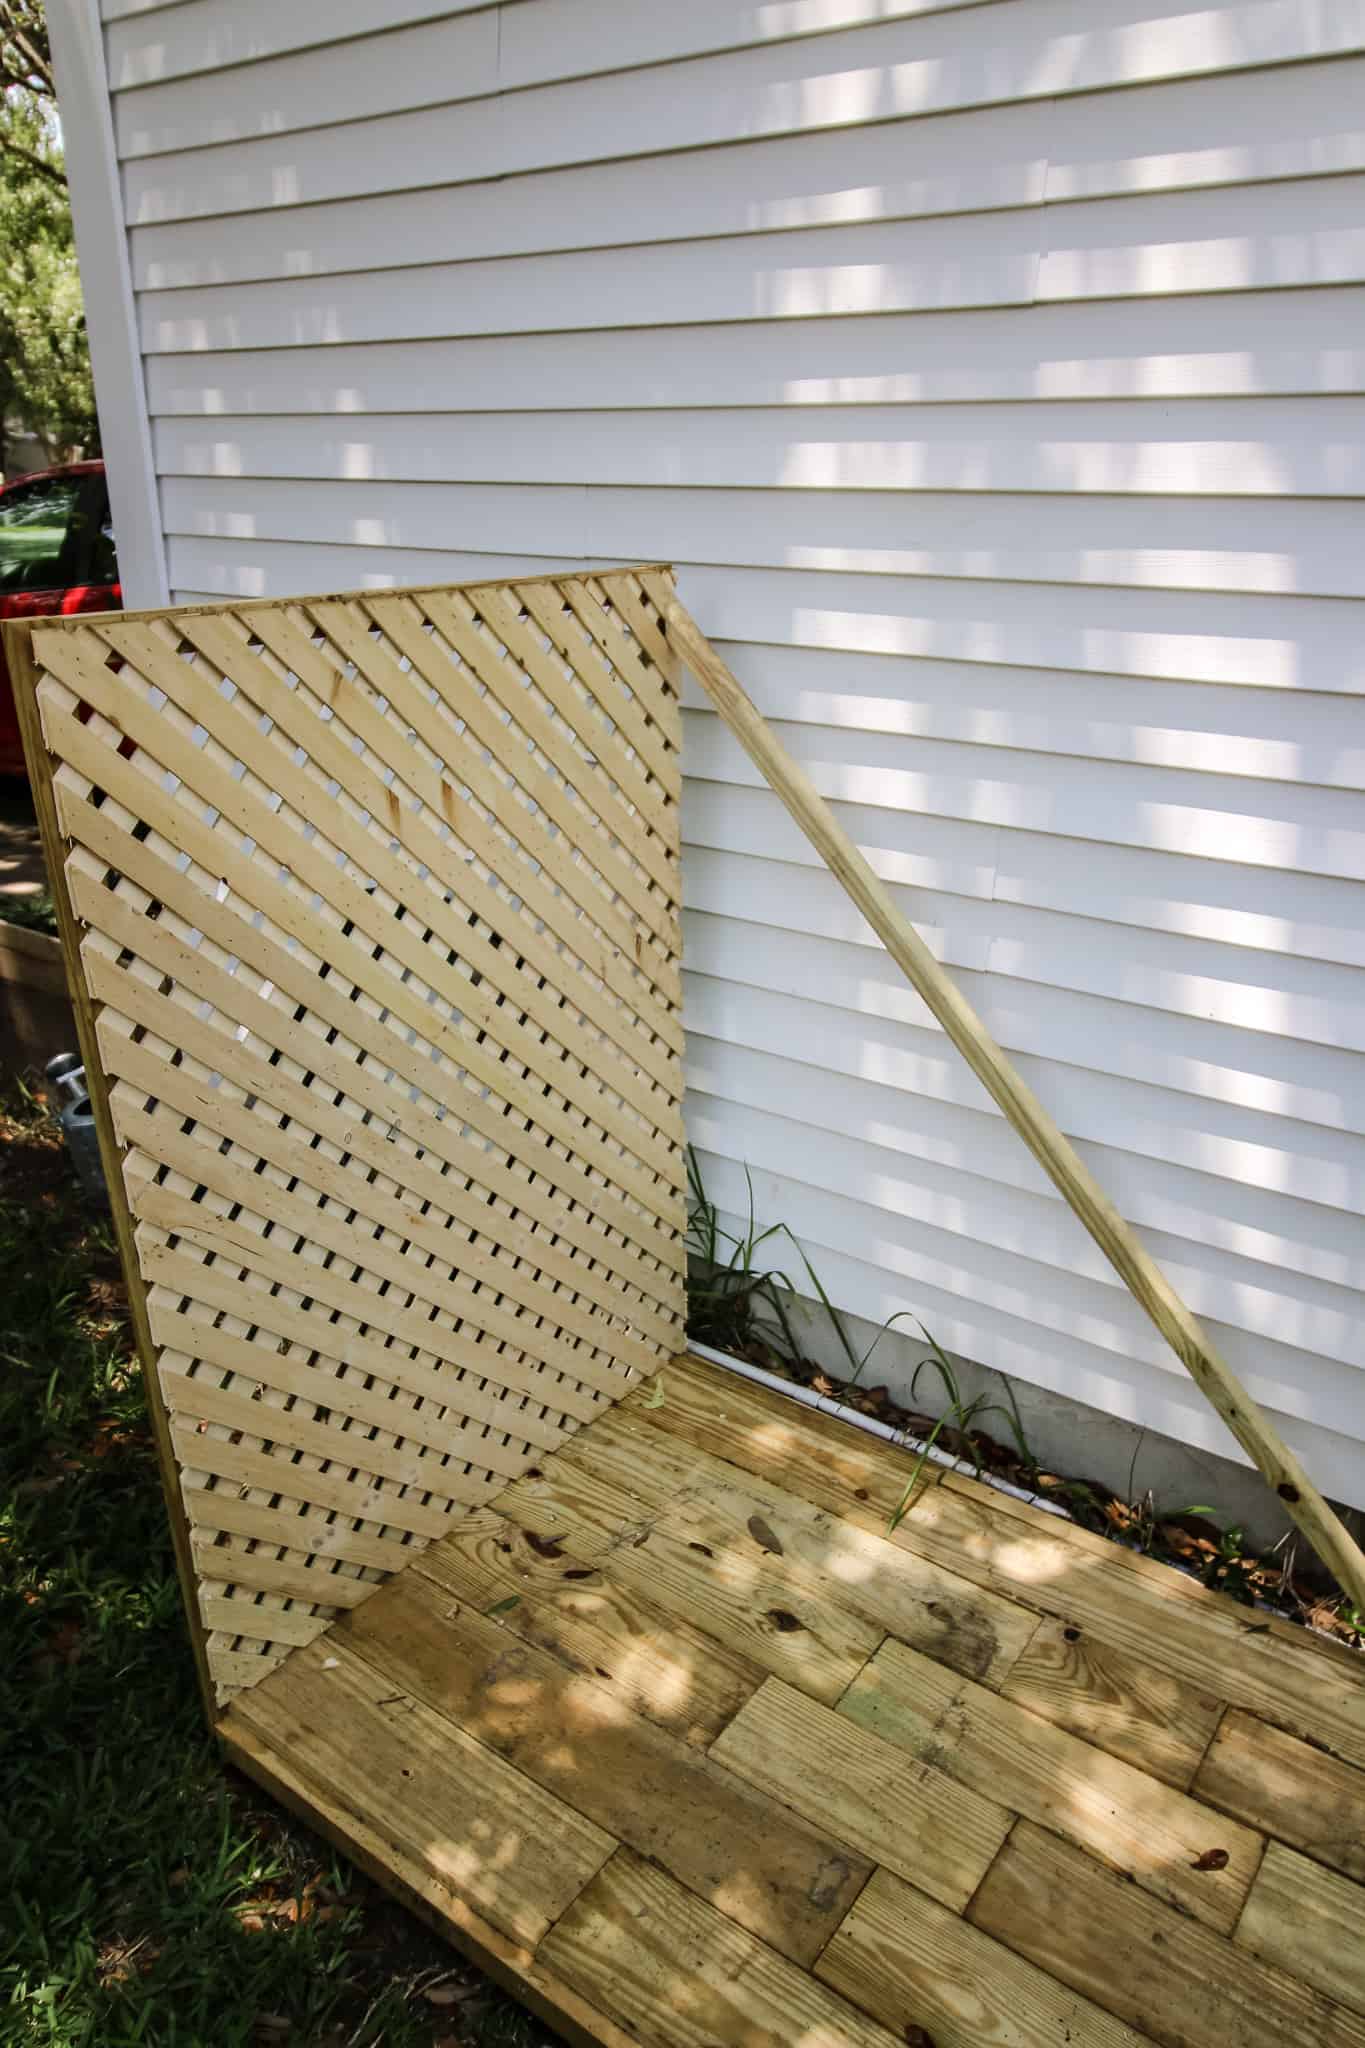
I cut a 45 degree angle on each end of the beam and nailed it into place.
Ideally you would have the wall connected in a second location, but you can’t really do this with the trash cans needing to roll in from the front.
However, we used this for about three years before we moved and the current owners are still using it, so I’d say it held up fine.

How do you build a privacy fence for trash cans
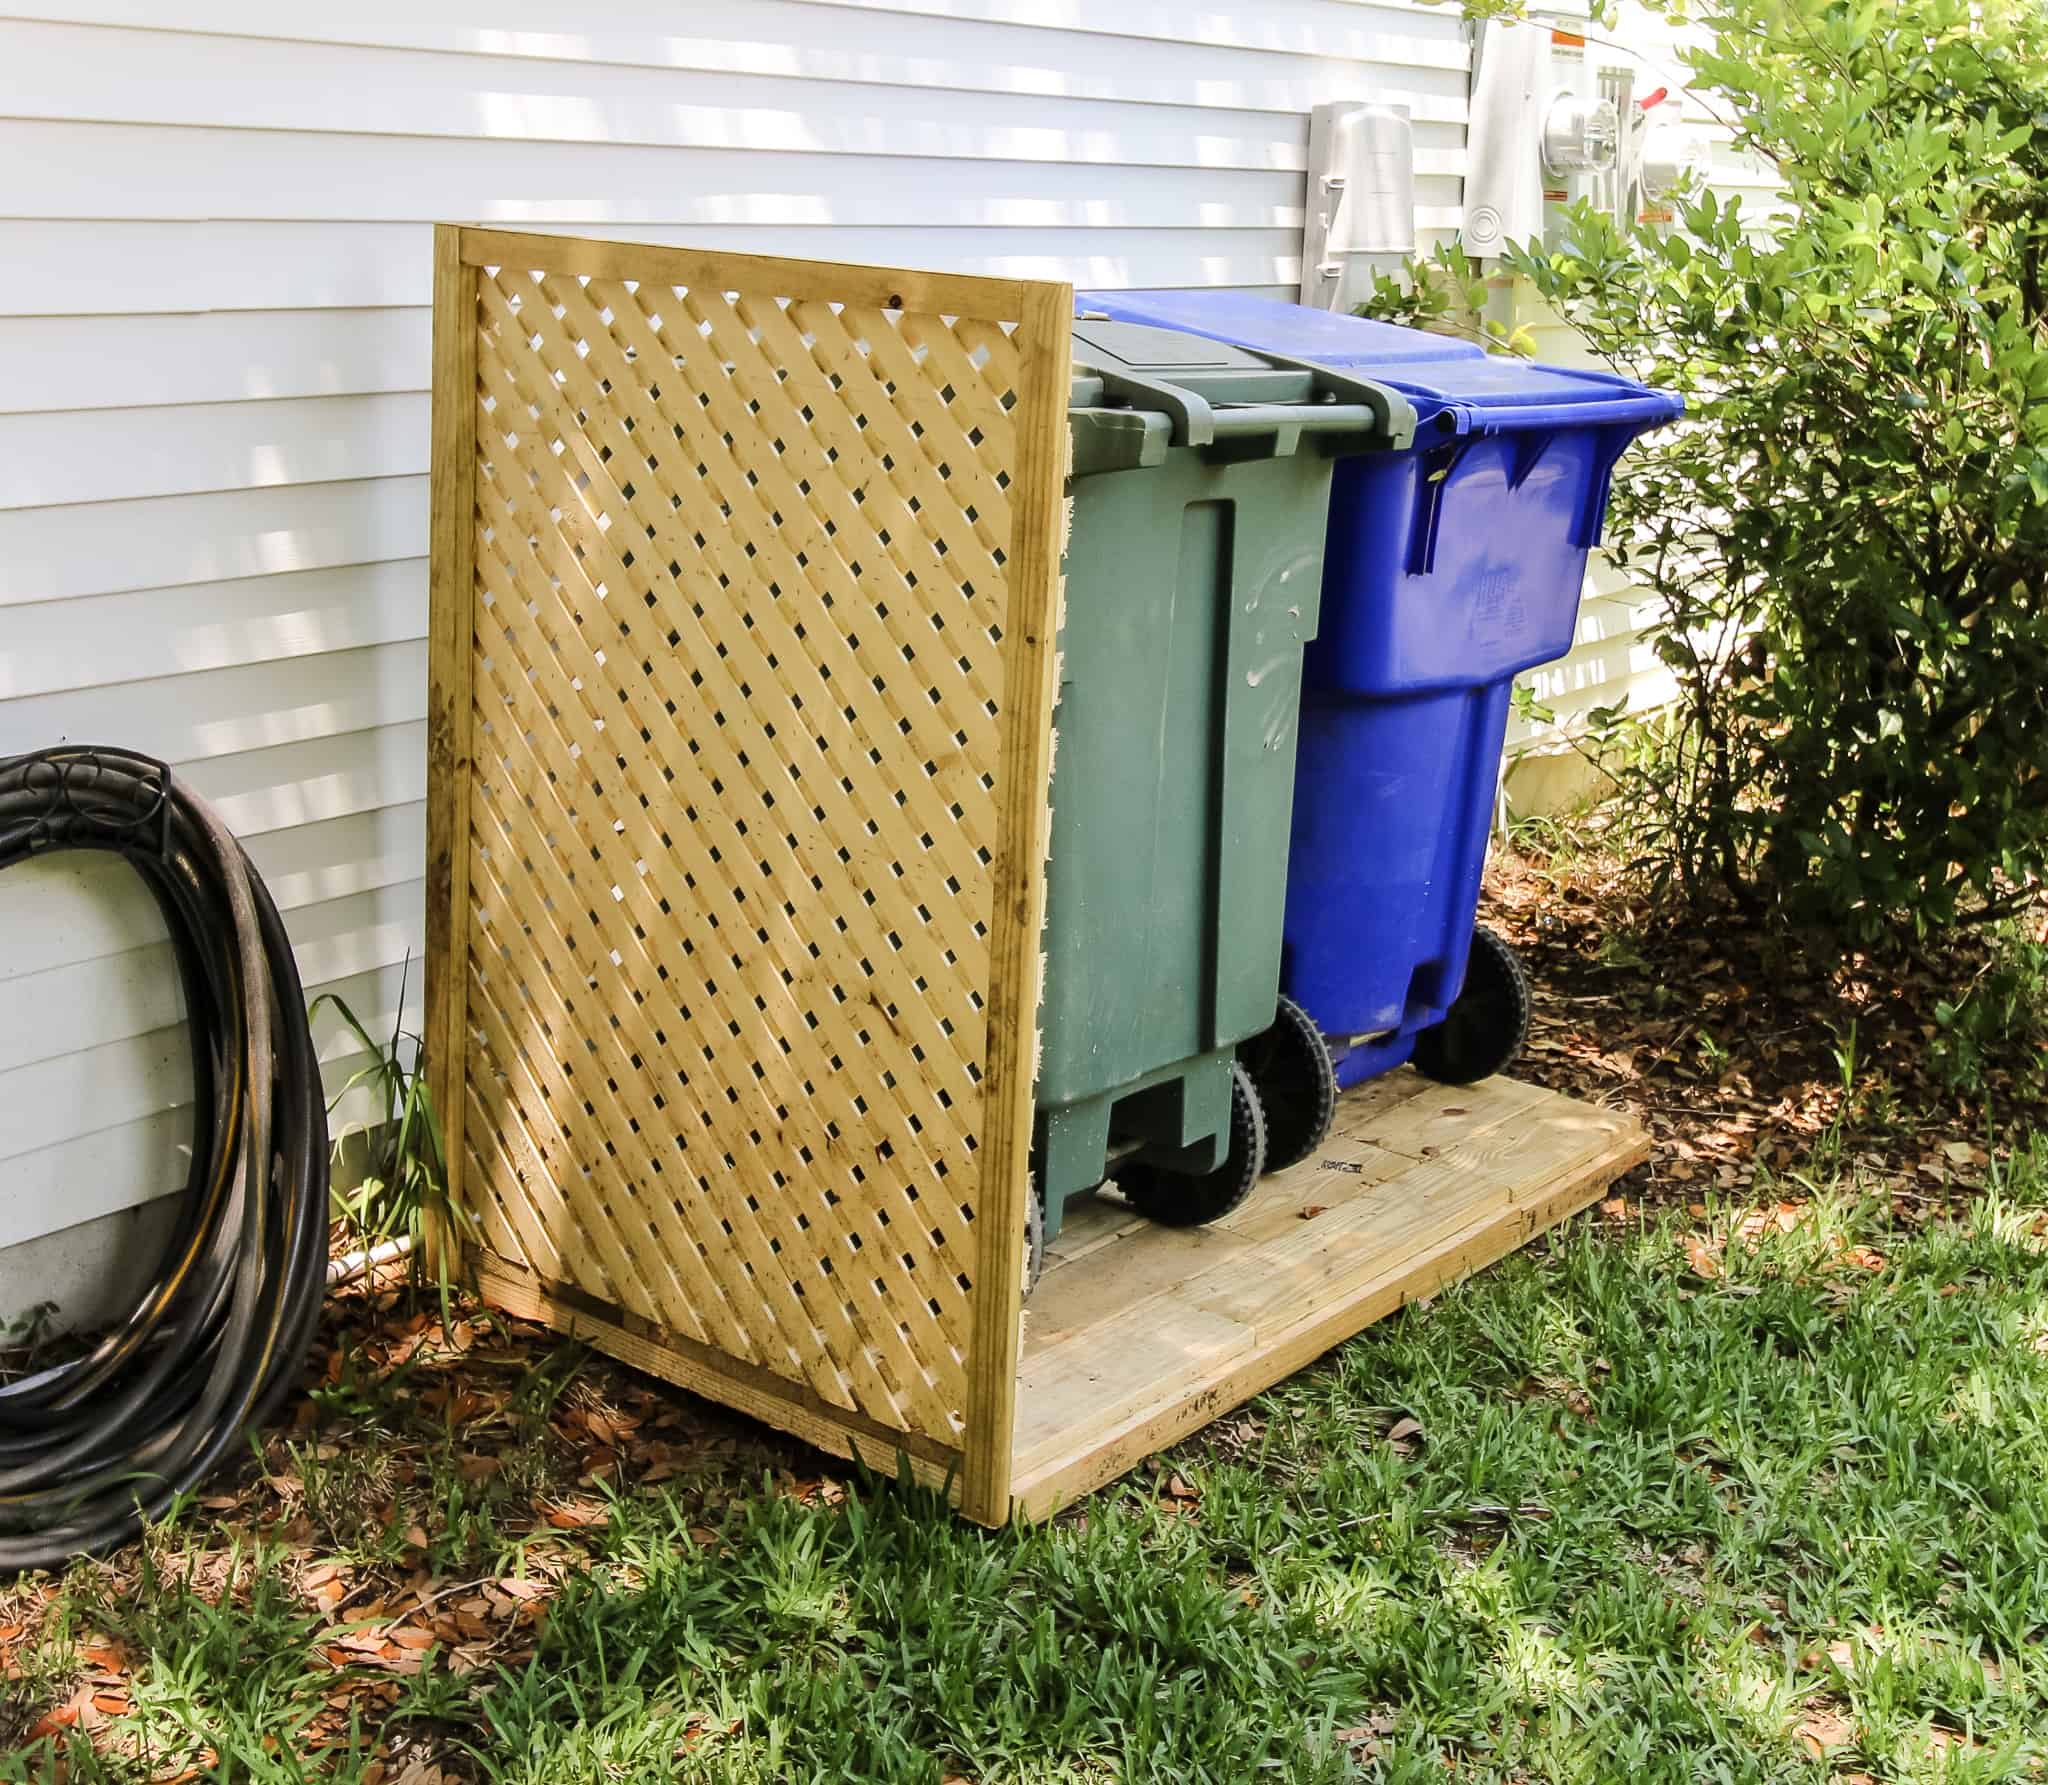
In the end, this privacy trash can fence enclosure was exactly what I wanted! Out outdoor trash cans look so much more hidden.
If you look directly at the house, the lattice keeps the trash and recycling bins nearly completely hidden from view.
The small holes don’t show much of anything, plus the trash can is green and it blends in through the lattice.
This project was great because it was almost entirely free. Aside from the lattice, everything was on hand.
However, building this from scratch using our plans will still only cost you a little bit of money. For under $100, you’ll have a beautiful setup!
I was able to build the entire thing in about 3 hours.
I was glad to get this project done this way even though it had been on my list for almost two years, but was never a priority.
This is a simple DIY way to hide your trash cans and can be customized easily for your space!
If you want to hide your indoor trash, check out our DIY tilt out kitchen trash can and our laundry room trash can hack!
DIY trash can enclosure woodworking plans
If you liked this project and want to replicate it for your home, you’re in luck!
We’ve designed printable PDF woodworking plans for this DIY trash can cover!
As mentioned above, the plans use full pieces of boards, so you don’t have to piece anything together, making it even easier than what we had to do!
The plans come with a full material list, cut list and step-by-step instructions with computer model imagery to help you build this project quickly and easily!
Get your HOA, spouse or neighbor off your back by building this great project!
Should you keep your garbage can in the garage?
Keeping your garbage can in the garage will keep it from getting any unwanted visitors, such as raccoons or rodents, digging through your trash. It will also keep your unsightly trash cans out of view of neighbors.
However, keeping your trash can in the garage can be difficult if you park your cars in the garage or use it as a workshop or gym. In that case, it’s best to build a simple DIY trash can privacy fence or enclosure.
Any questions about this garbage can fence DIY project?

How to Hide Your Outdoor Trash Cans
This DIY project is prefect for hiding your outdoor trash and recycling cans. If you need to keep your cans out of view, build a quick platform with a lattice wall and keep them concealed. Plans may vary minimally based on your trash can size, but can be easily adjusted. Measure the TOPS of your trash cans and make sure that the base and wall are wide enough to cover the tops.
Materials
- 50'- 2"x2" boards
- 3'x4' lattice
- (6) 1"x6" outdoor grade boards
Tools
- Miter Saw
- Nail gun
Instructions
- Build a base frame with 2"x2"s that is 6'x3'
- Add supporting beams within that frame.
- Attach 1"x6" boards to the frame with a nail gun.
- Build a wall frame that is 3'x4'
- Attach lattice to the inside of the wall frame.
- Screw wall into the base.
- Attach a 5 foot long 2"x2" board with a 45 degree angle on each end to the wall and the base to stabilize.


Looking for something?
We’ve been doing this since 2012 so we have a LOT of blog posts!
Search stuff like: Ceiling Projects | DIY Plant Stands | Thrift Flips


Hey there, I’m Sean, the woodworking enthusiast and builder behind CharlestonCrafted.com! Since 2012, I’ve been sharing the magic of turning raw materials into beautiful creations. I love teaching others the art and satisfaction of woodworking and DIY. I try to inspire fellow crafters to make something extraordinary out of nothing at all.
35 DIY Privacy Screen Ideas 2021: Indoor And Outdoor Projects
Tuesday 11th of May 2021
[…] Click for more details […]