
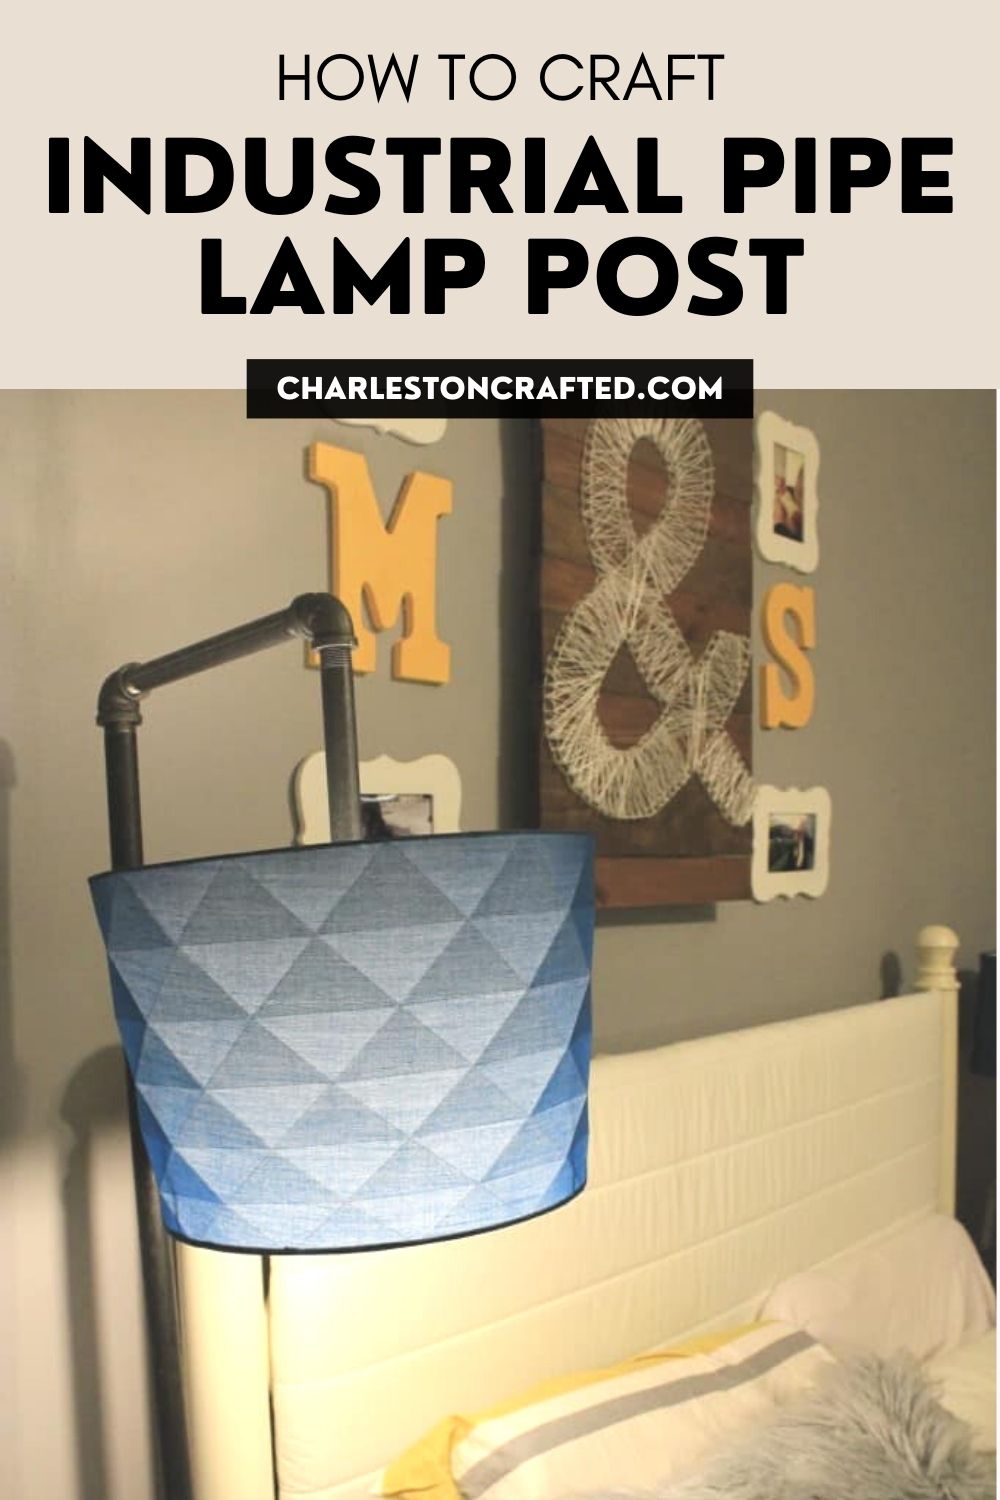
Learn how to create a stylish industrial pipe lamp with our easy-to-follow guide. Transform your space with this chic, functional DIY project.
Morgan wanted a cool new lamp, something that would add a dash of sophistication to her nighttime reading sessions.
The current lamp, a dinky white lamp, just didn’t cut it anymore.
That’s when the idea struck her – why not embrace the bold and trendy aesthetic of “industrial chic”?
It was time to roll up our sleeves and dive into an exciting DIY project: crafting a lamp using an industrial plumbing pipe.
So we bought the black pipe and a lamp kit for the electrical parts. Stay tuned as we guide you through each step of creating your very own vintage industrial pipe lamp.
How to Create an Industrial Pipe Lamp Post
Supplies Needed:
Before you begin, here’s what you need:
- Industrial pipe pieces
- Lamp kit
- Plumbing pliers (optional)
- Edison bulbs (optional)
- Cleaning supplies (optional)
Steps to Making an Industrial Pipe Lamp
STEP 1: Initial Design
Begin by thinking about how you want the lamp to look. It’s a good idea to make a sketch of your lamp’s appearance.
Your sketch will give you a good idea of the parts you’ll need – so draw up a list.
Now you’re ready to head to the hardware store!
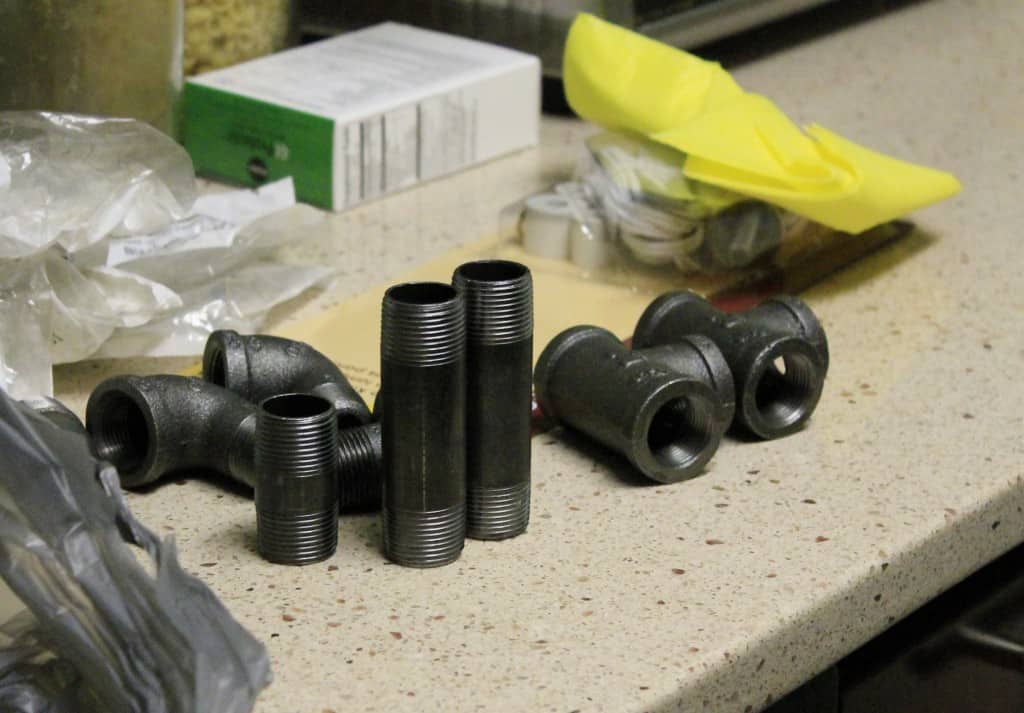
STEP 2: Collecting the Materials
At the hardware store, you’ll need to select a galvanized pipe of suitable diameter for the main structure.
Be prepared for a challenge in finding the right connectors and elbows, as these parts are often mixed up in their boxes.
To us, this was the hardest part of the whole project. We just couldn’t find the right connectors at Lowe’s!
All of the cartons that had each type of elbow and connector and everything else in every possible size were completely mixed up. Nothing was in the correct box!
So give enough time for this process. You could even purchase the industrial pipe online – this might save time.
Remember to purchase a lamp kit as well – opt for a longer cord (around 12 feet) because it’ll need to thread through the entire lamp post.

STEP 3: Preparing the Parts
Once home, start by thoroughly cleaning the pipes.
We found ours were all very greasy and oily, so we wiped them down the best we could.
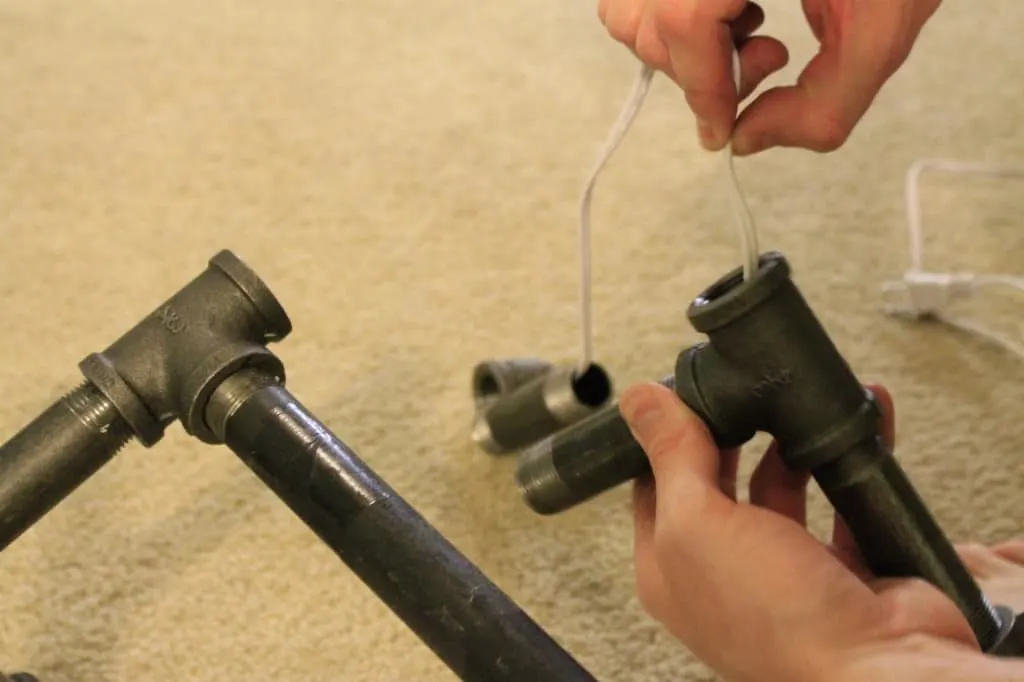
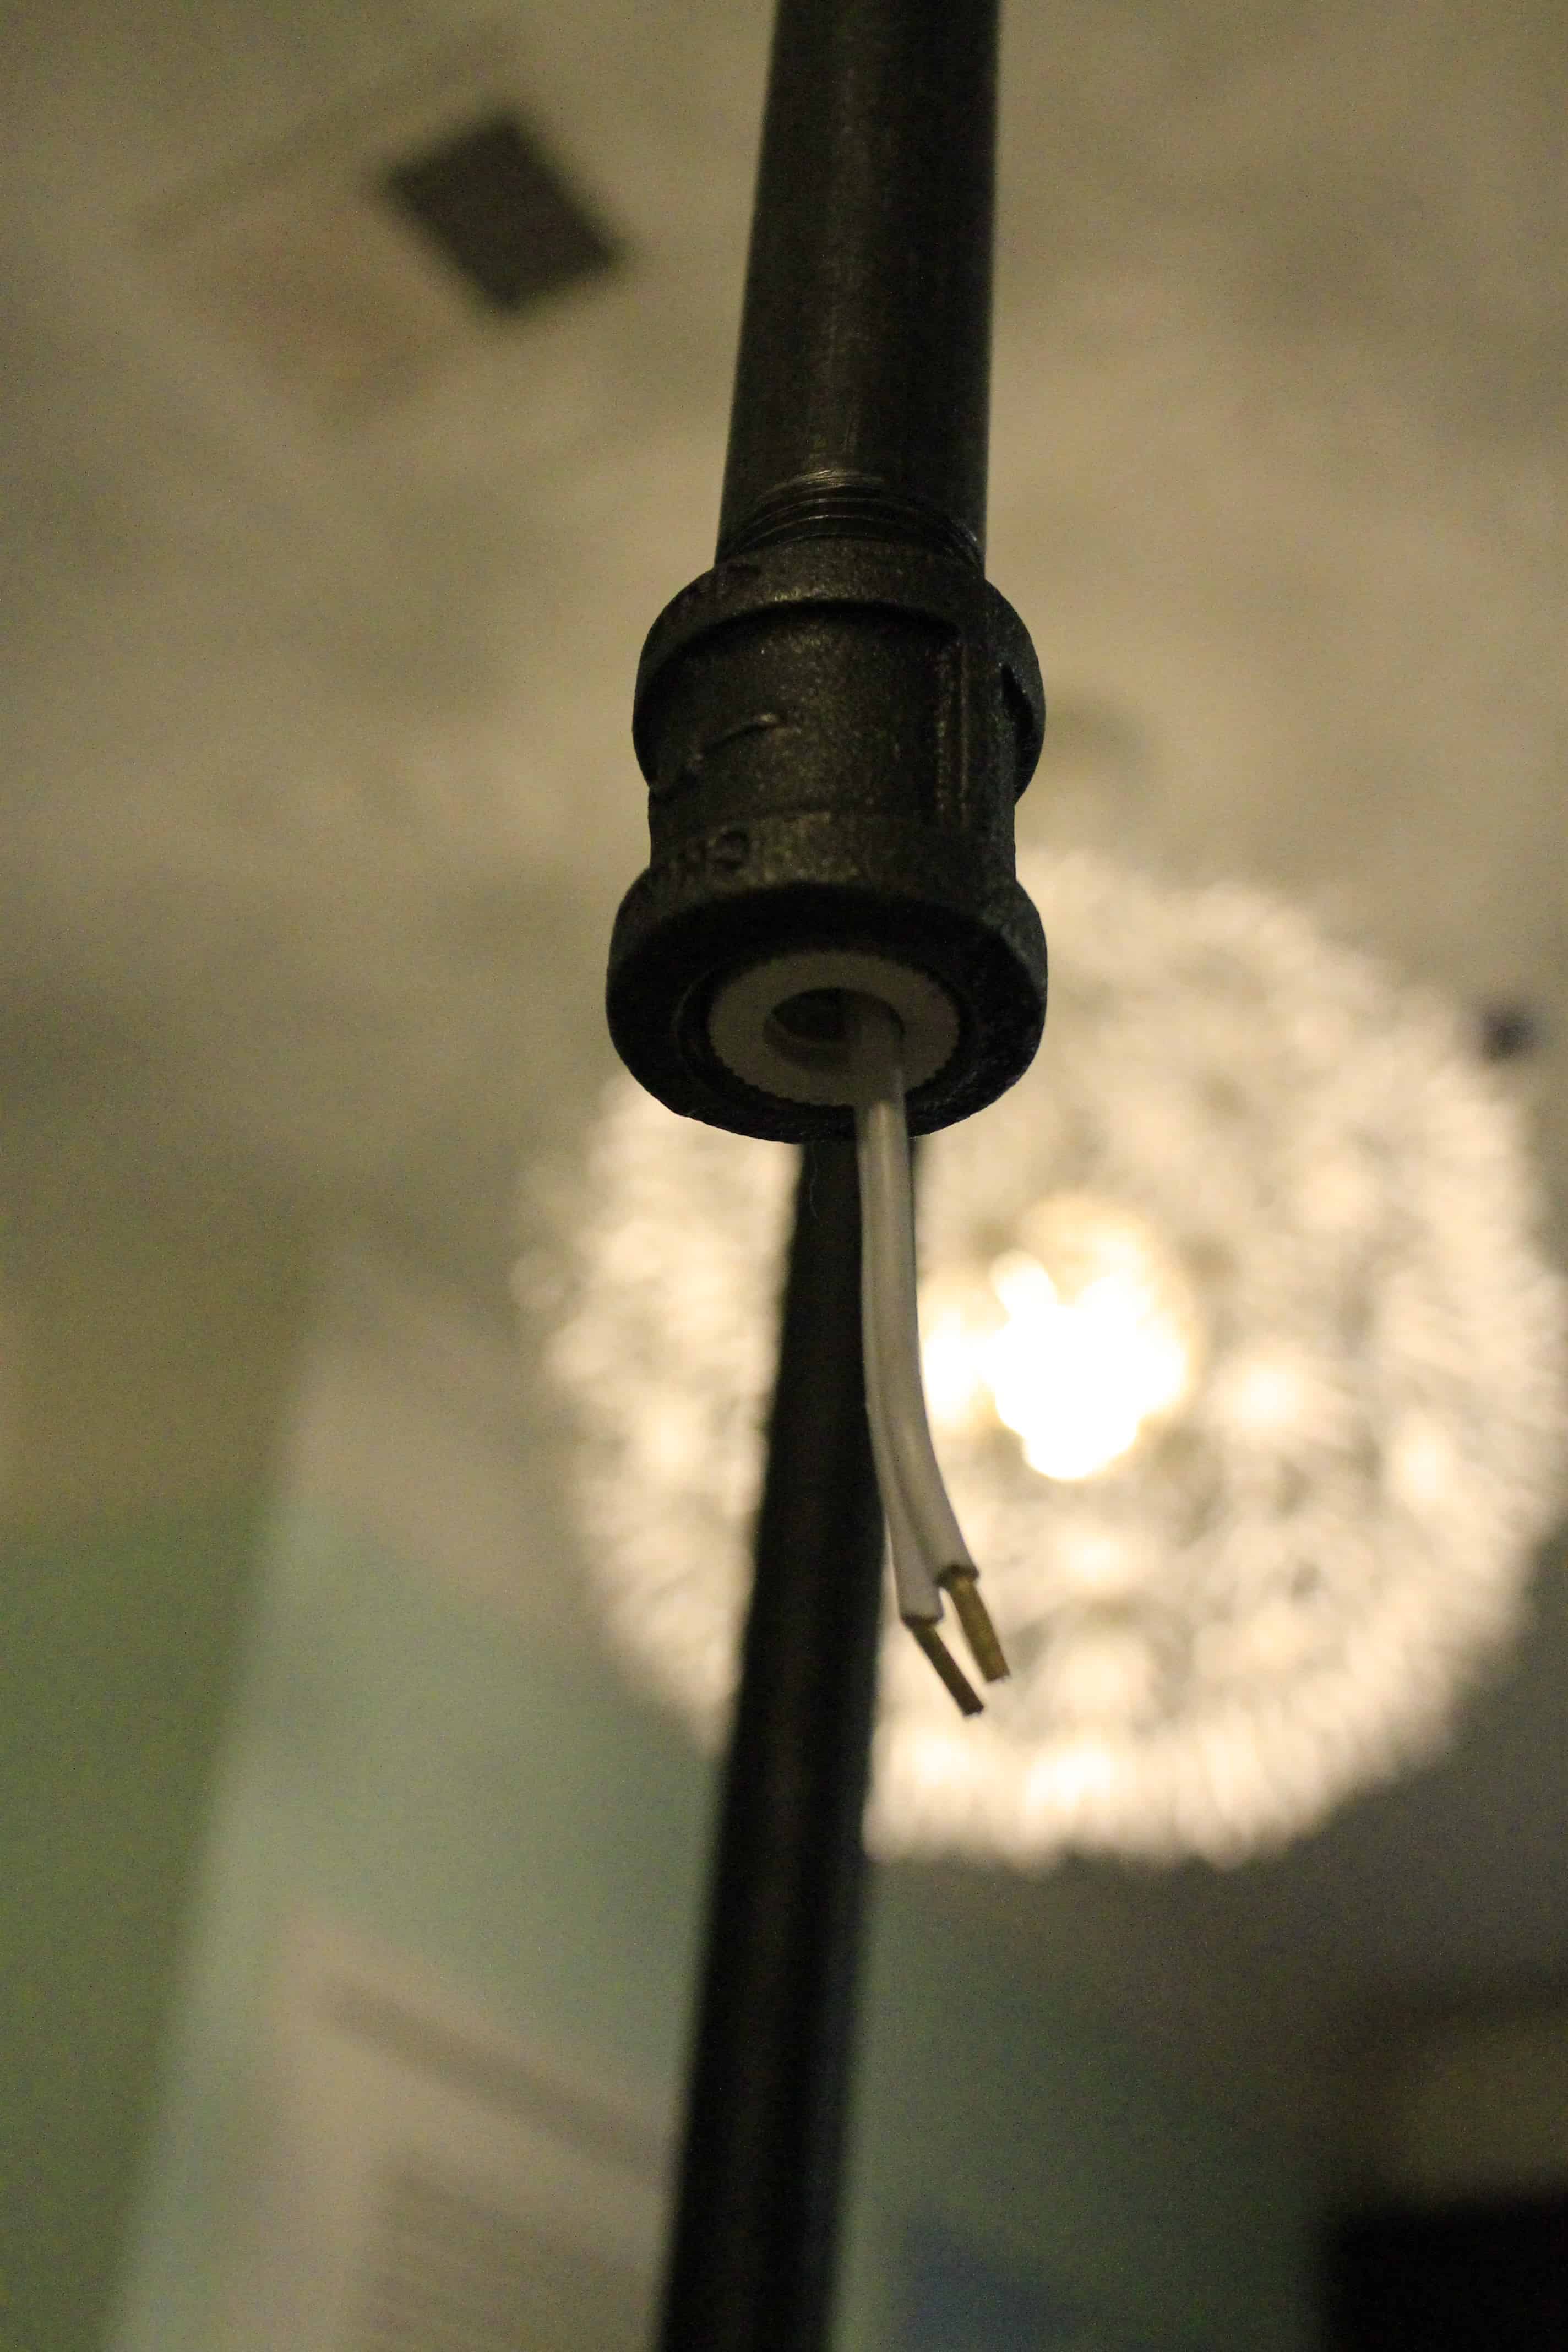
STEP 4: Feed the Wire
Learn from our experience: do not put everything together before threading the electrical wire!


We tried this, and found that the twists and turns just wouldn’t allow us to push the cable through.
So assemble the pipe pieces one at a time, feeding the cord through each piece before adding the next.
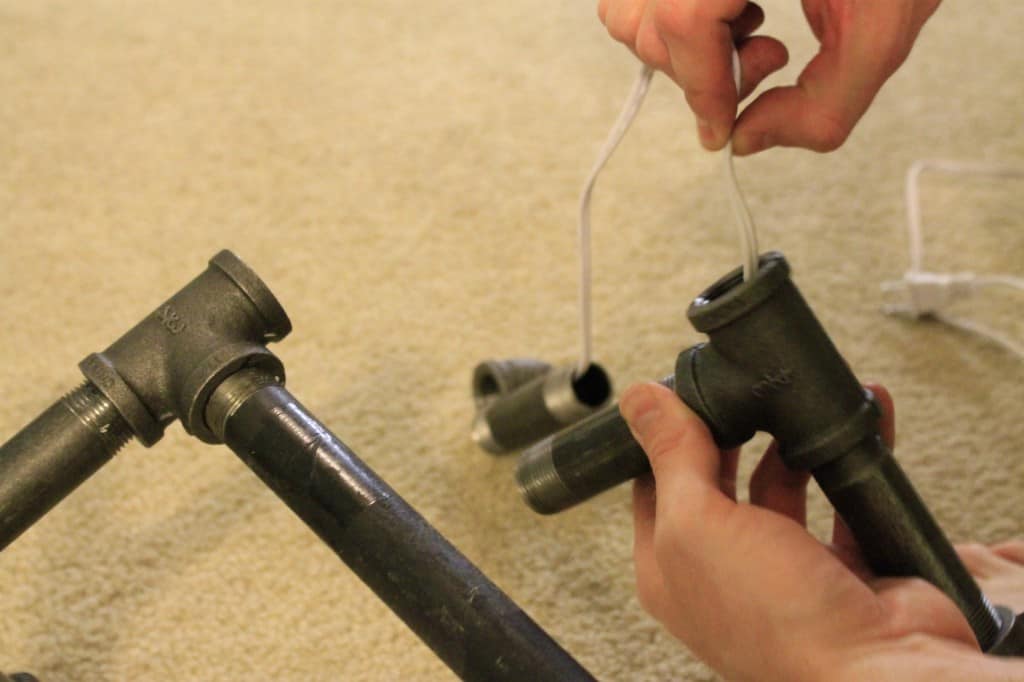
You don’t need to screw the pieces together yet – just lay them out on the floor in the correct places.
For longer sections, a helpful trick is to tie a string to the cord and a pen, drop the pen through the pipe, and pull the string to guide the cord through.
STEP 5: Tightening the Joints
After threading the electrical cord through, now you can begin tightening all the connections on your iron pipe lamp.
Start from the bottom and work your way up so you have a nice and sturdy structure.
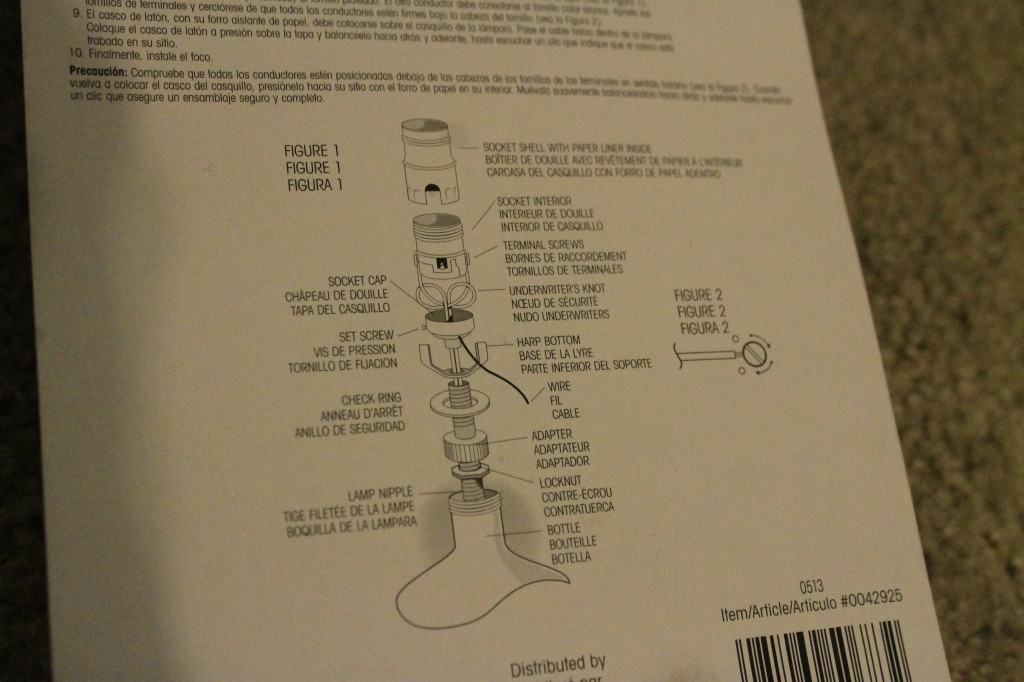
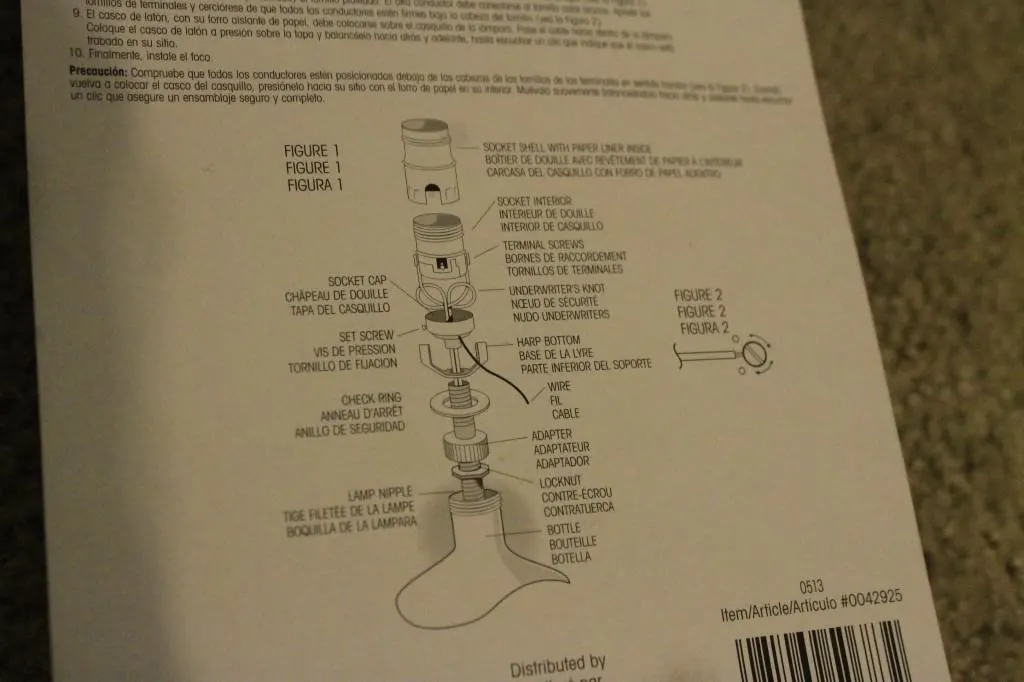
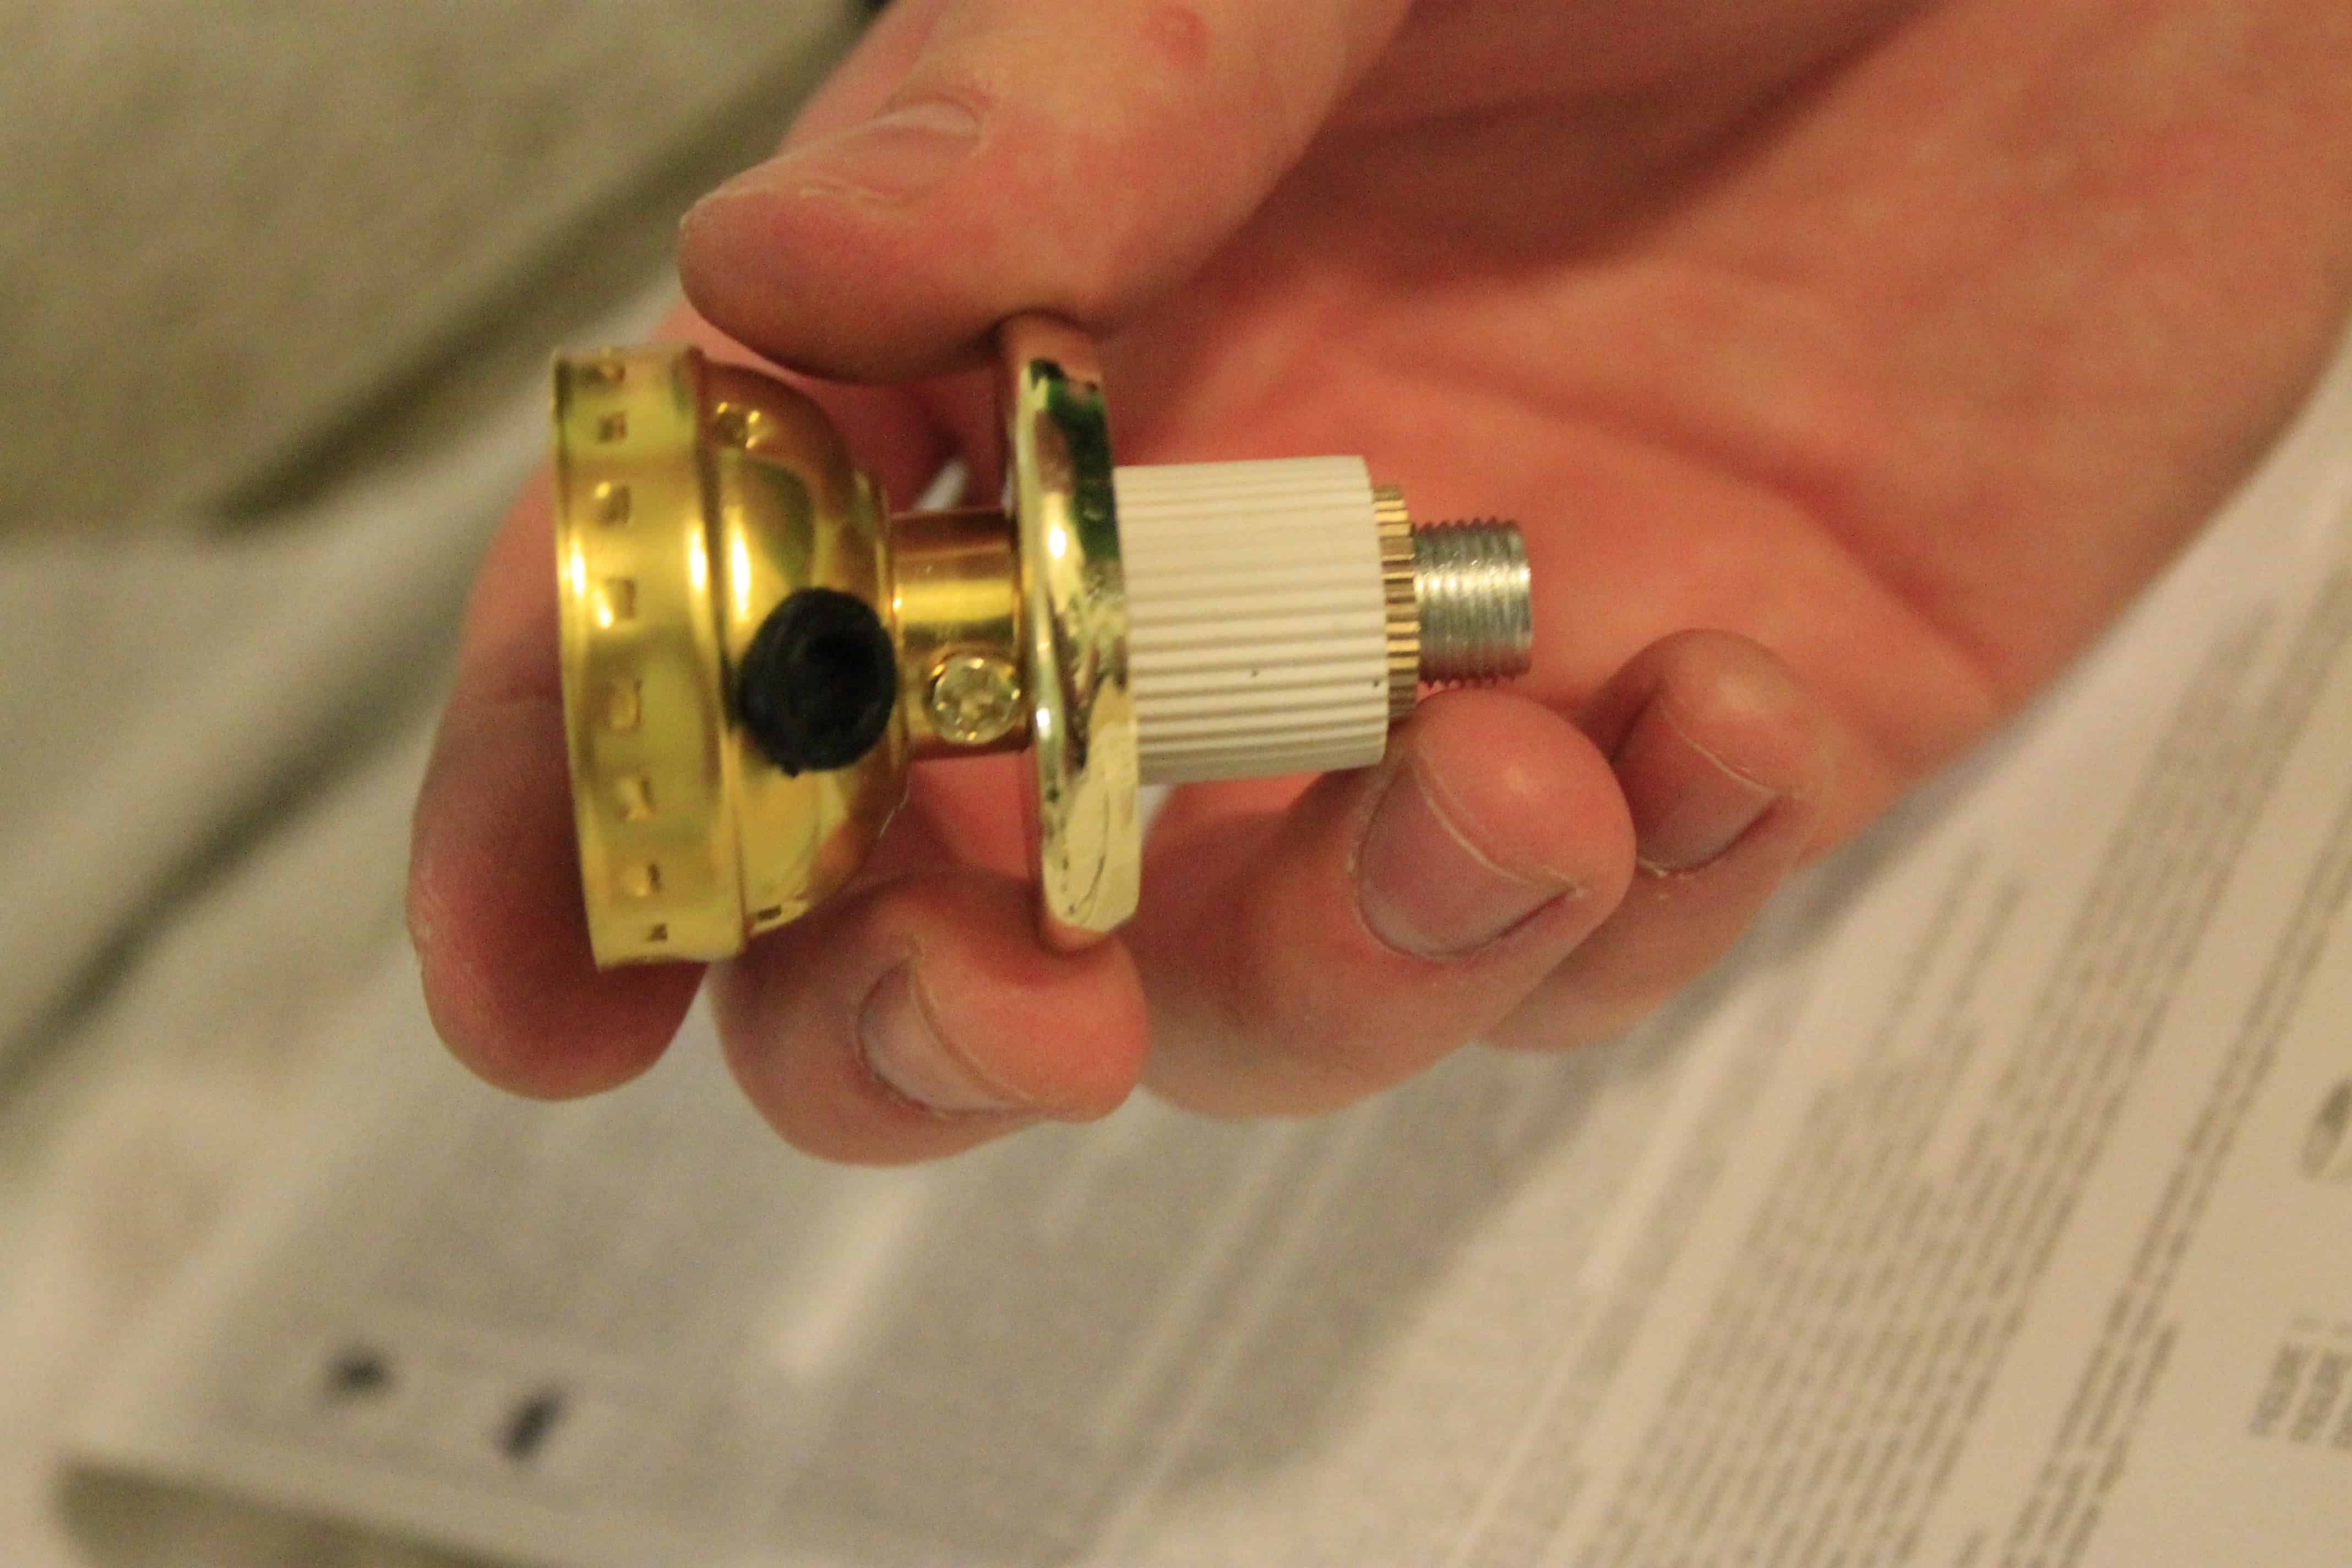
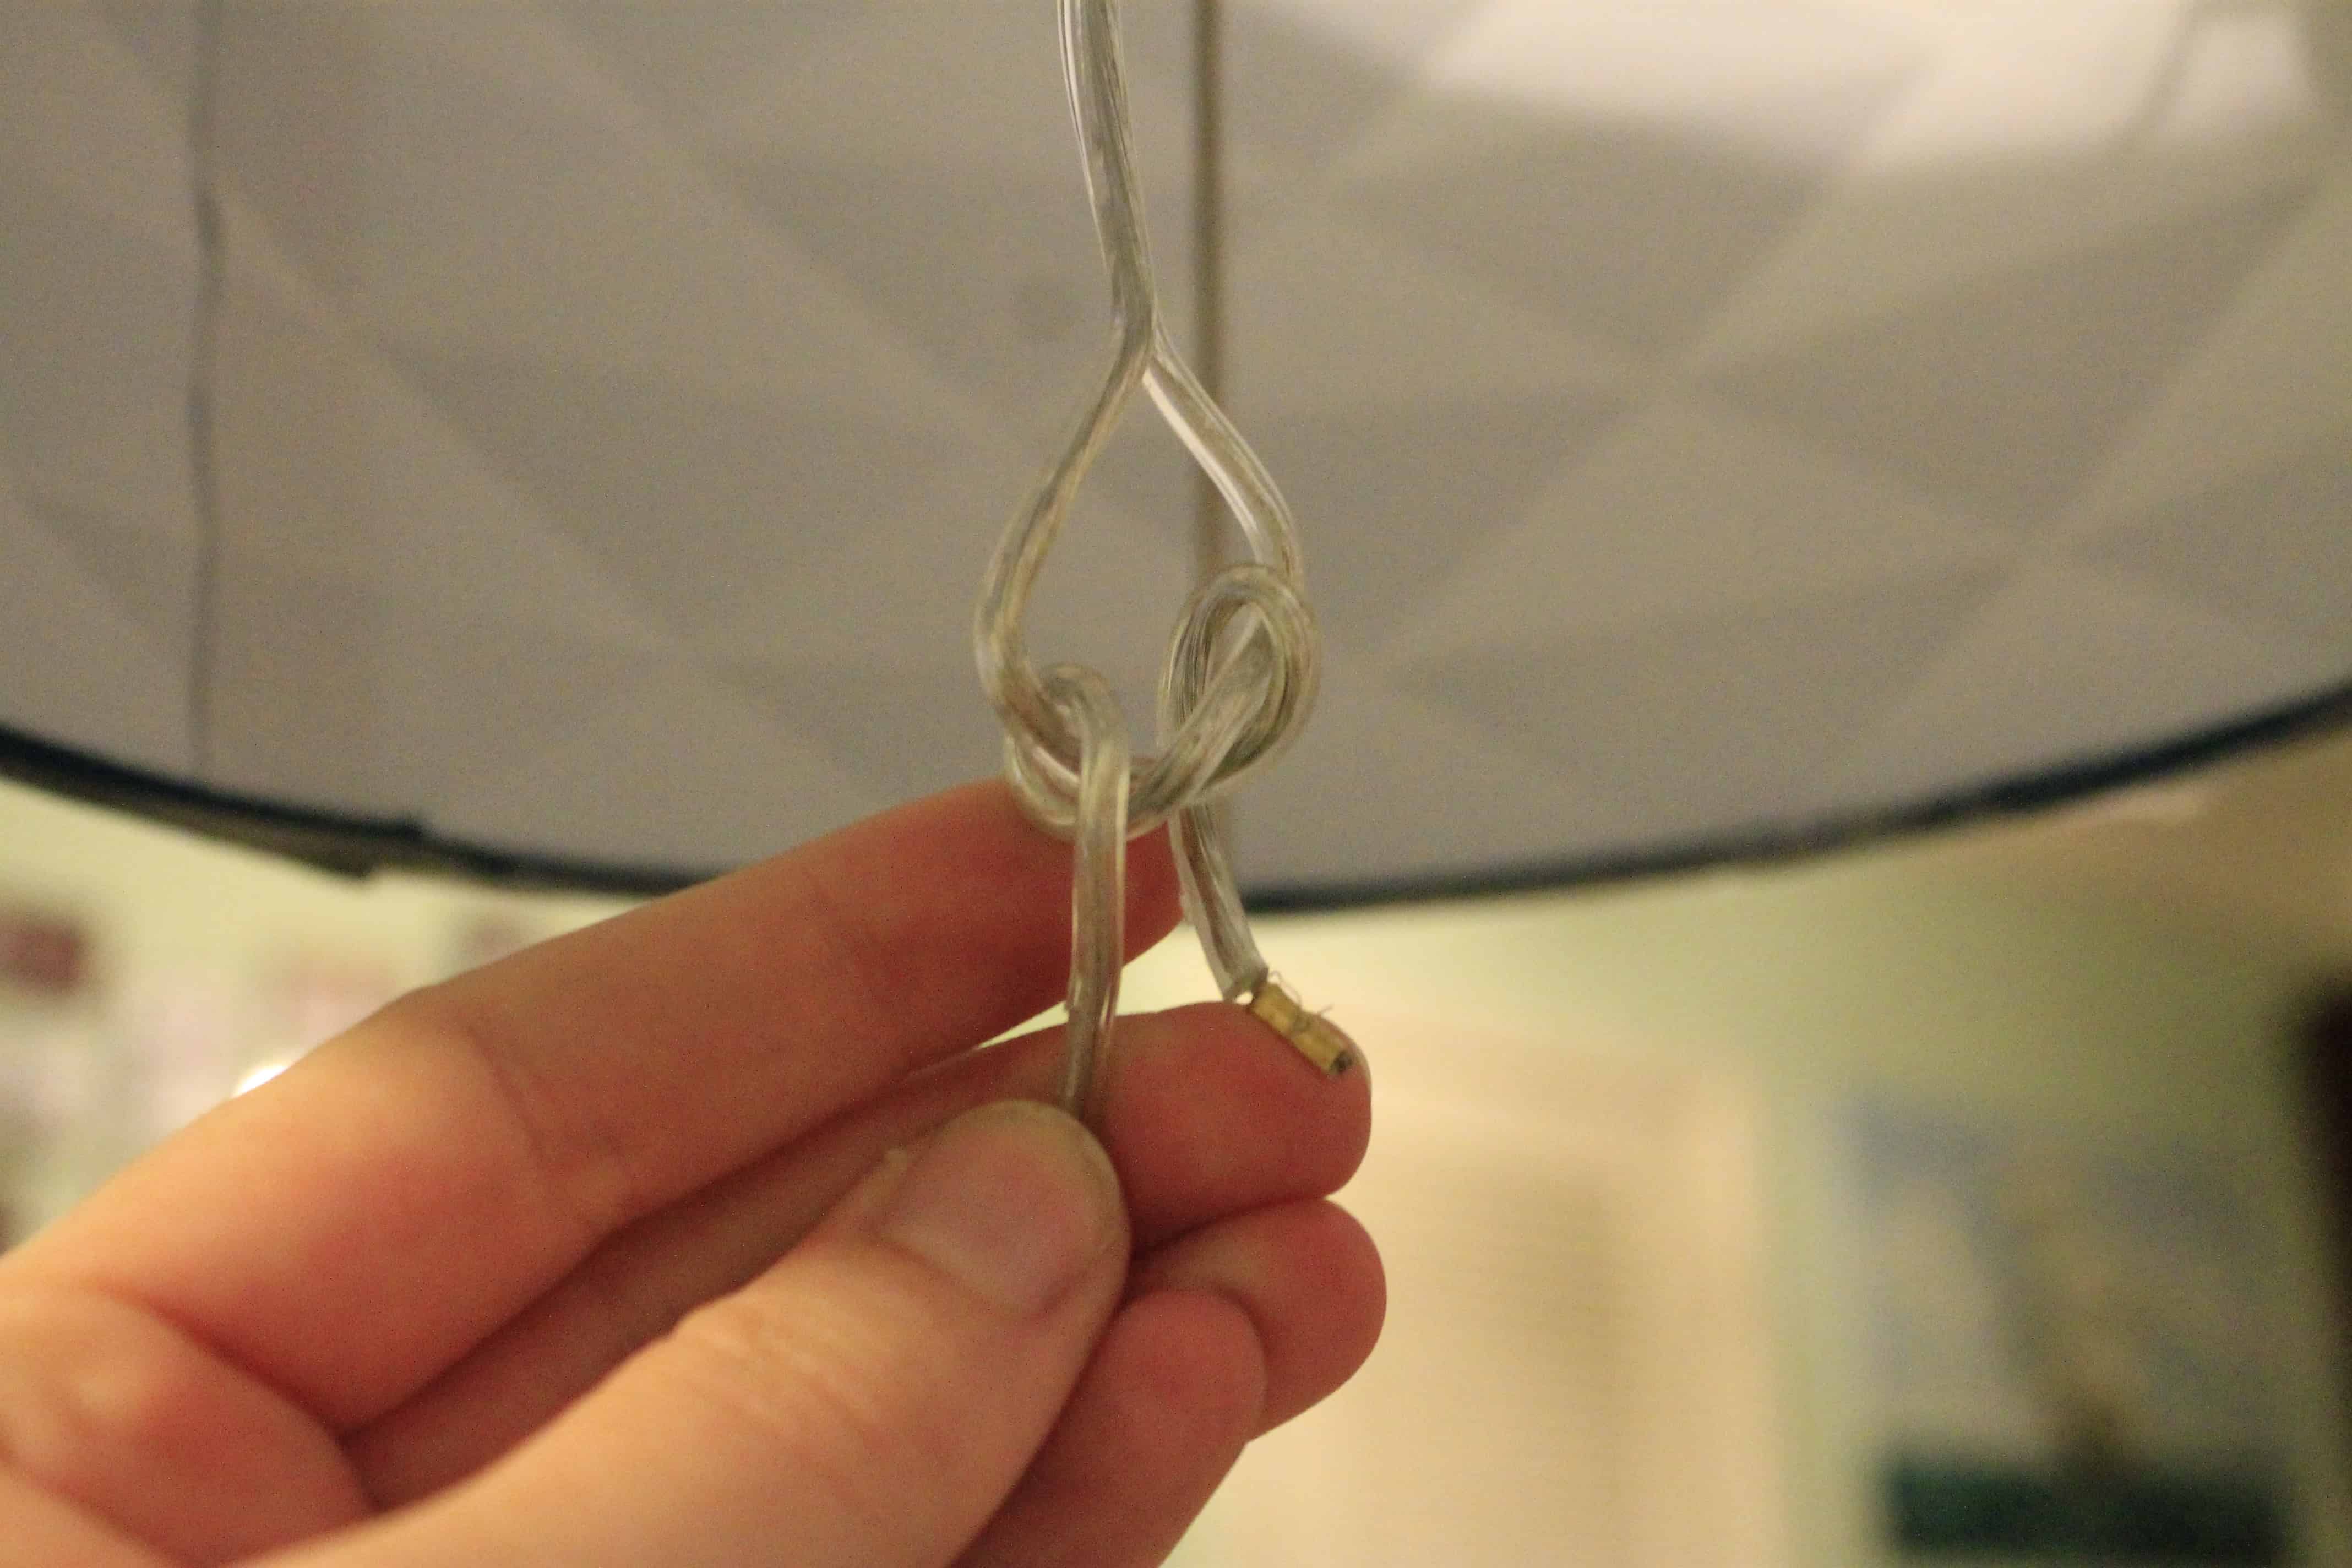
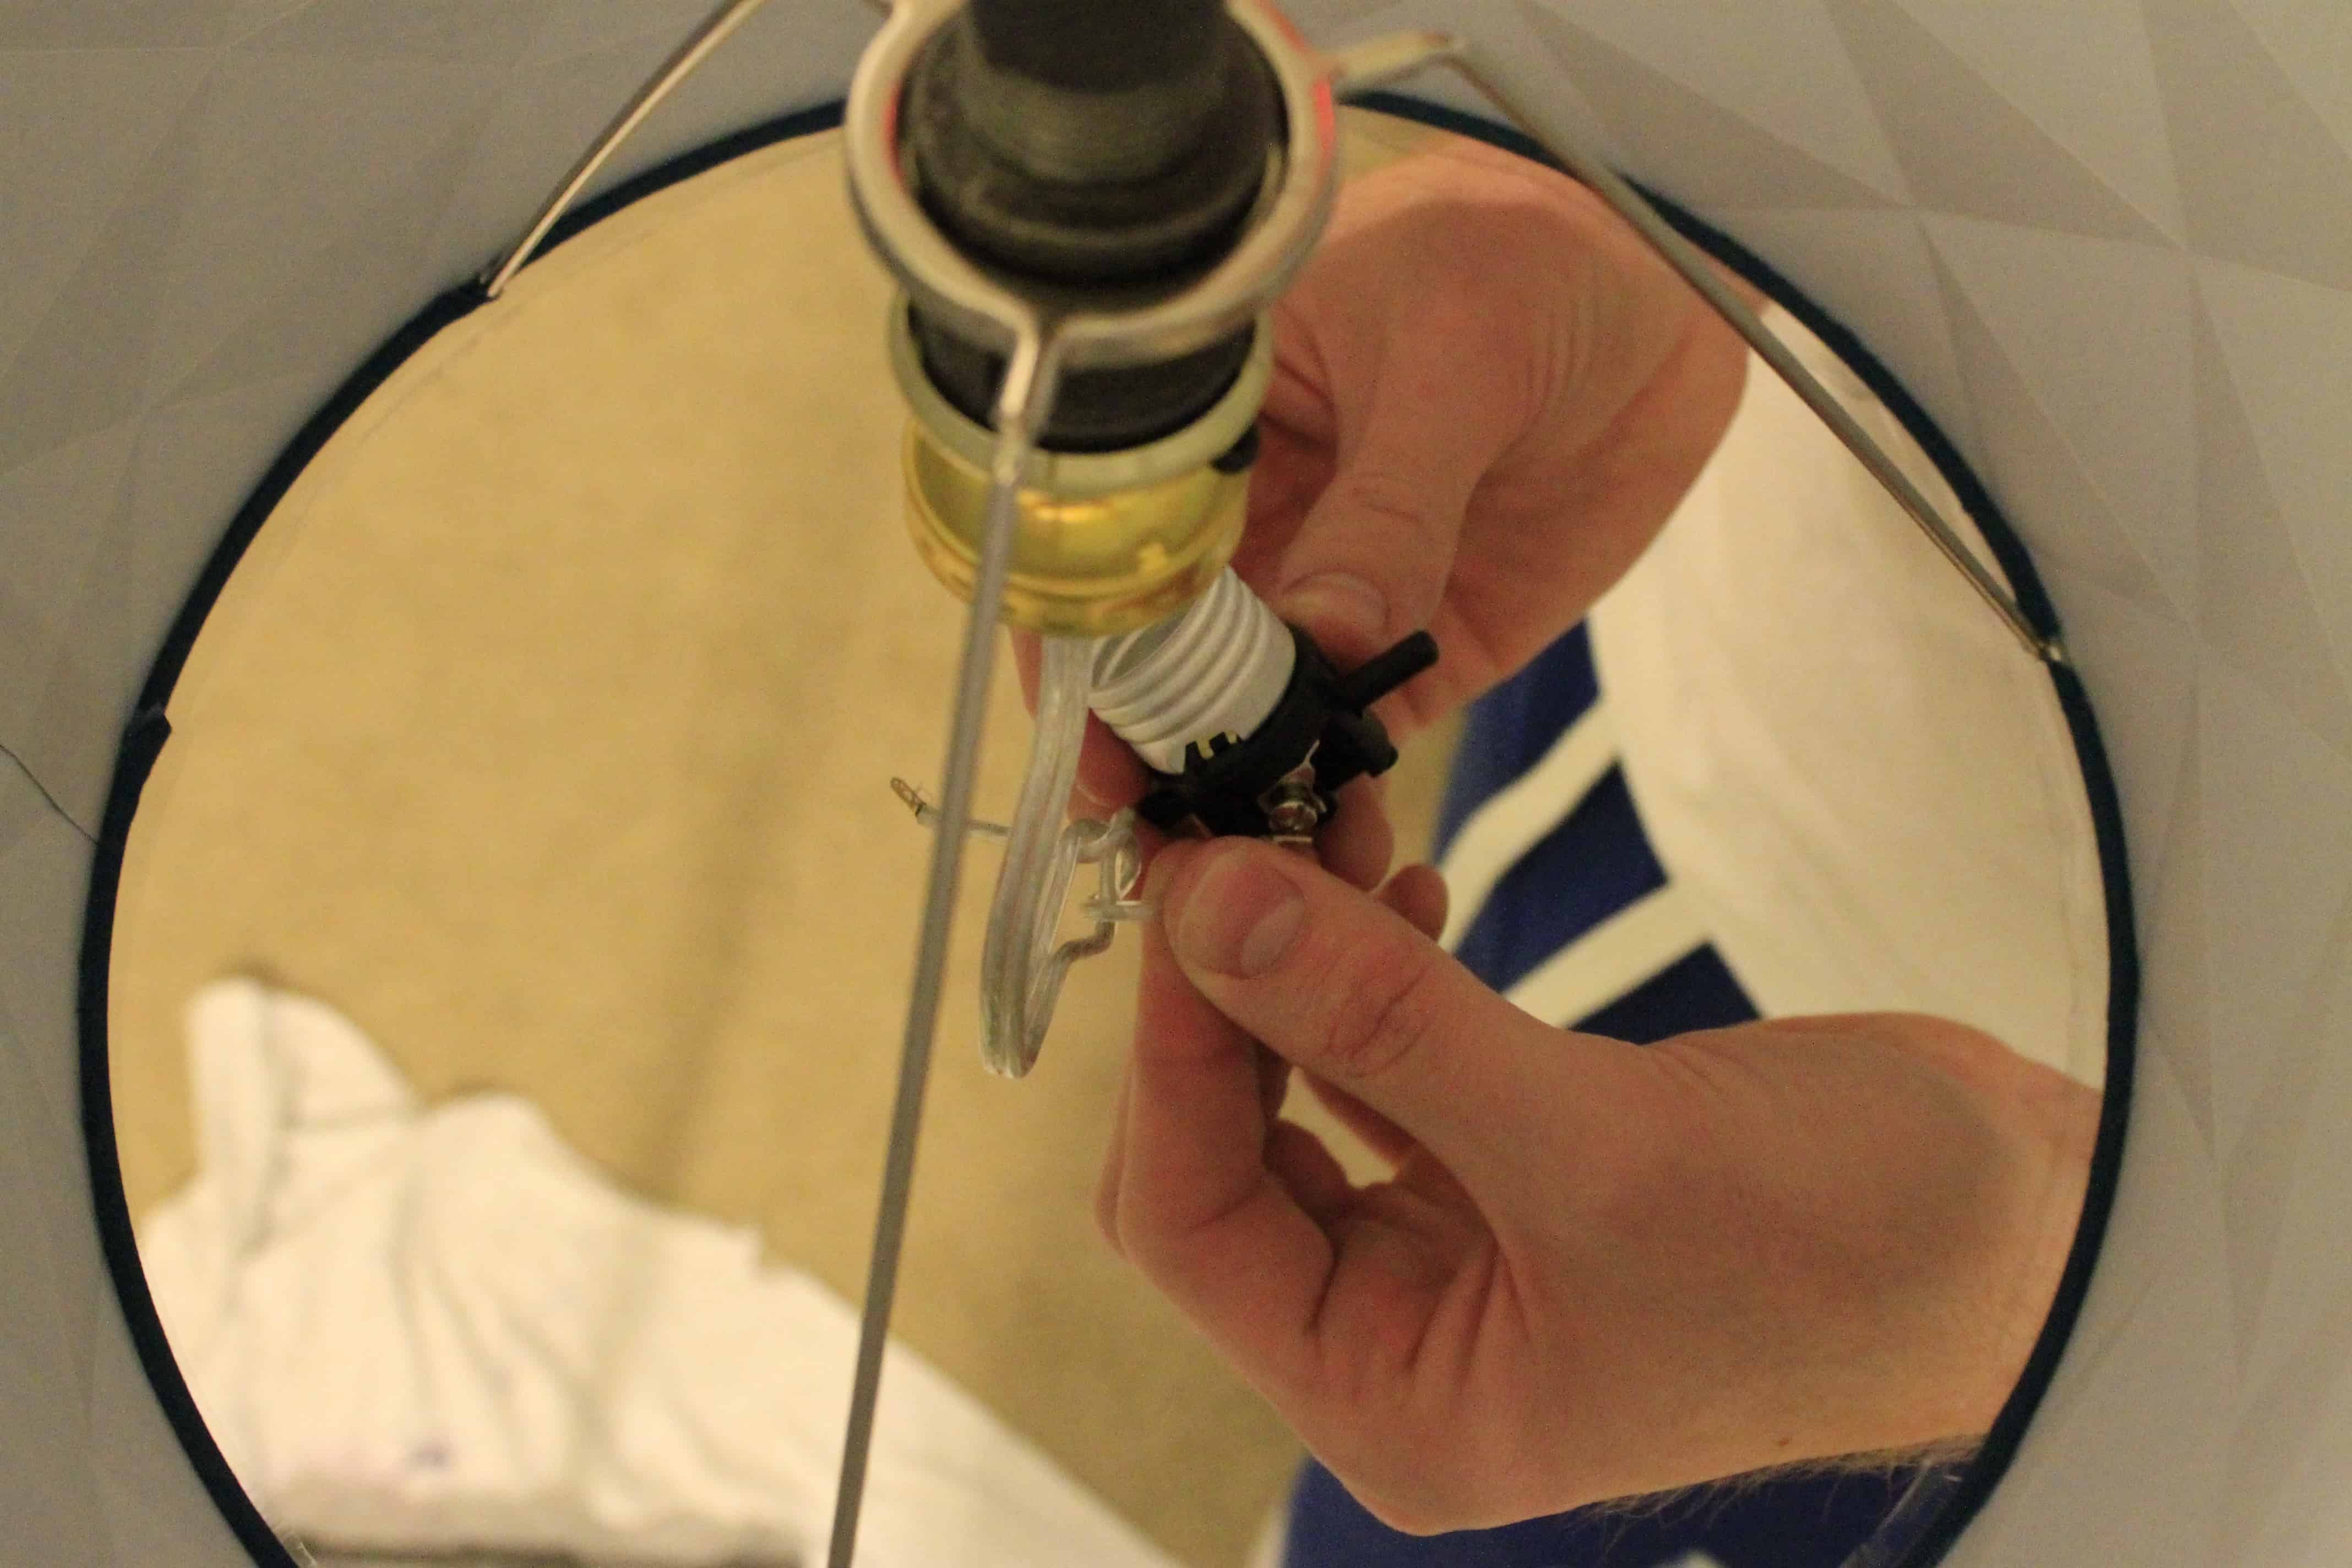
STEP 6: Wiring the Socket
Now, focus on the electrical aspect. Follow the lamp kit’s instructions for connecting the wires and constructing the socket.
If you’re adding a lampshade, you might need to add the lampshade holder before fixing the lamp socket in place and wiring it.

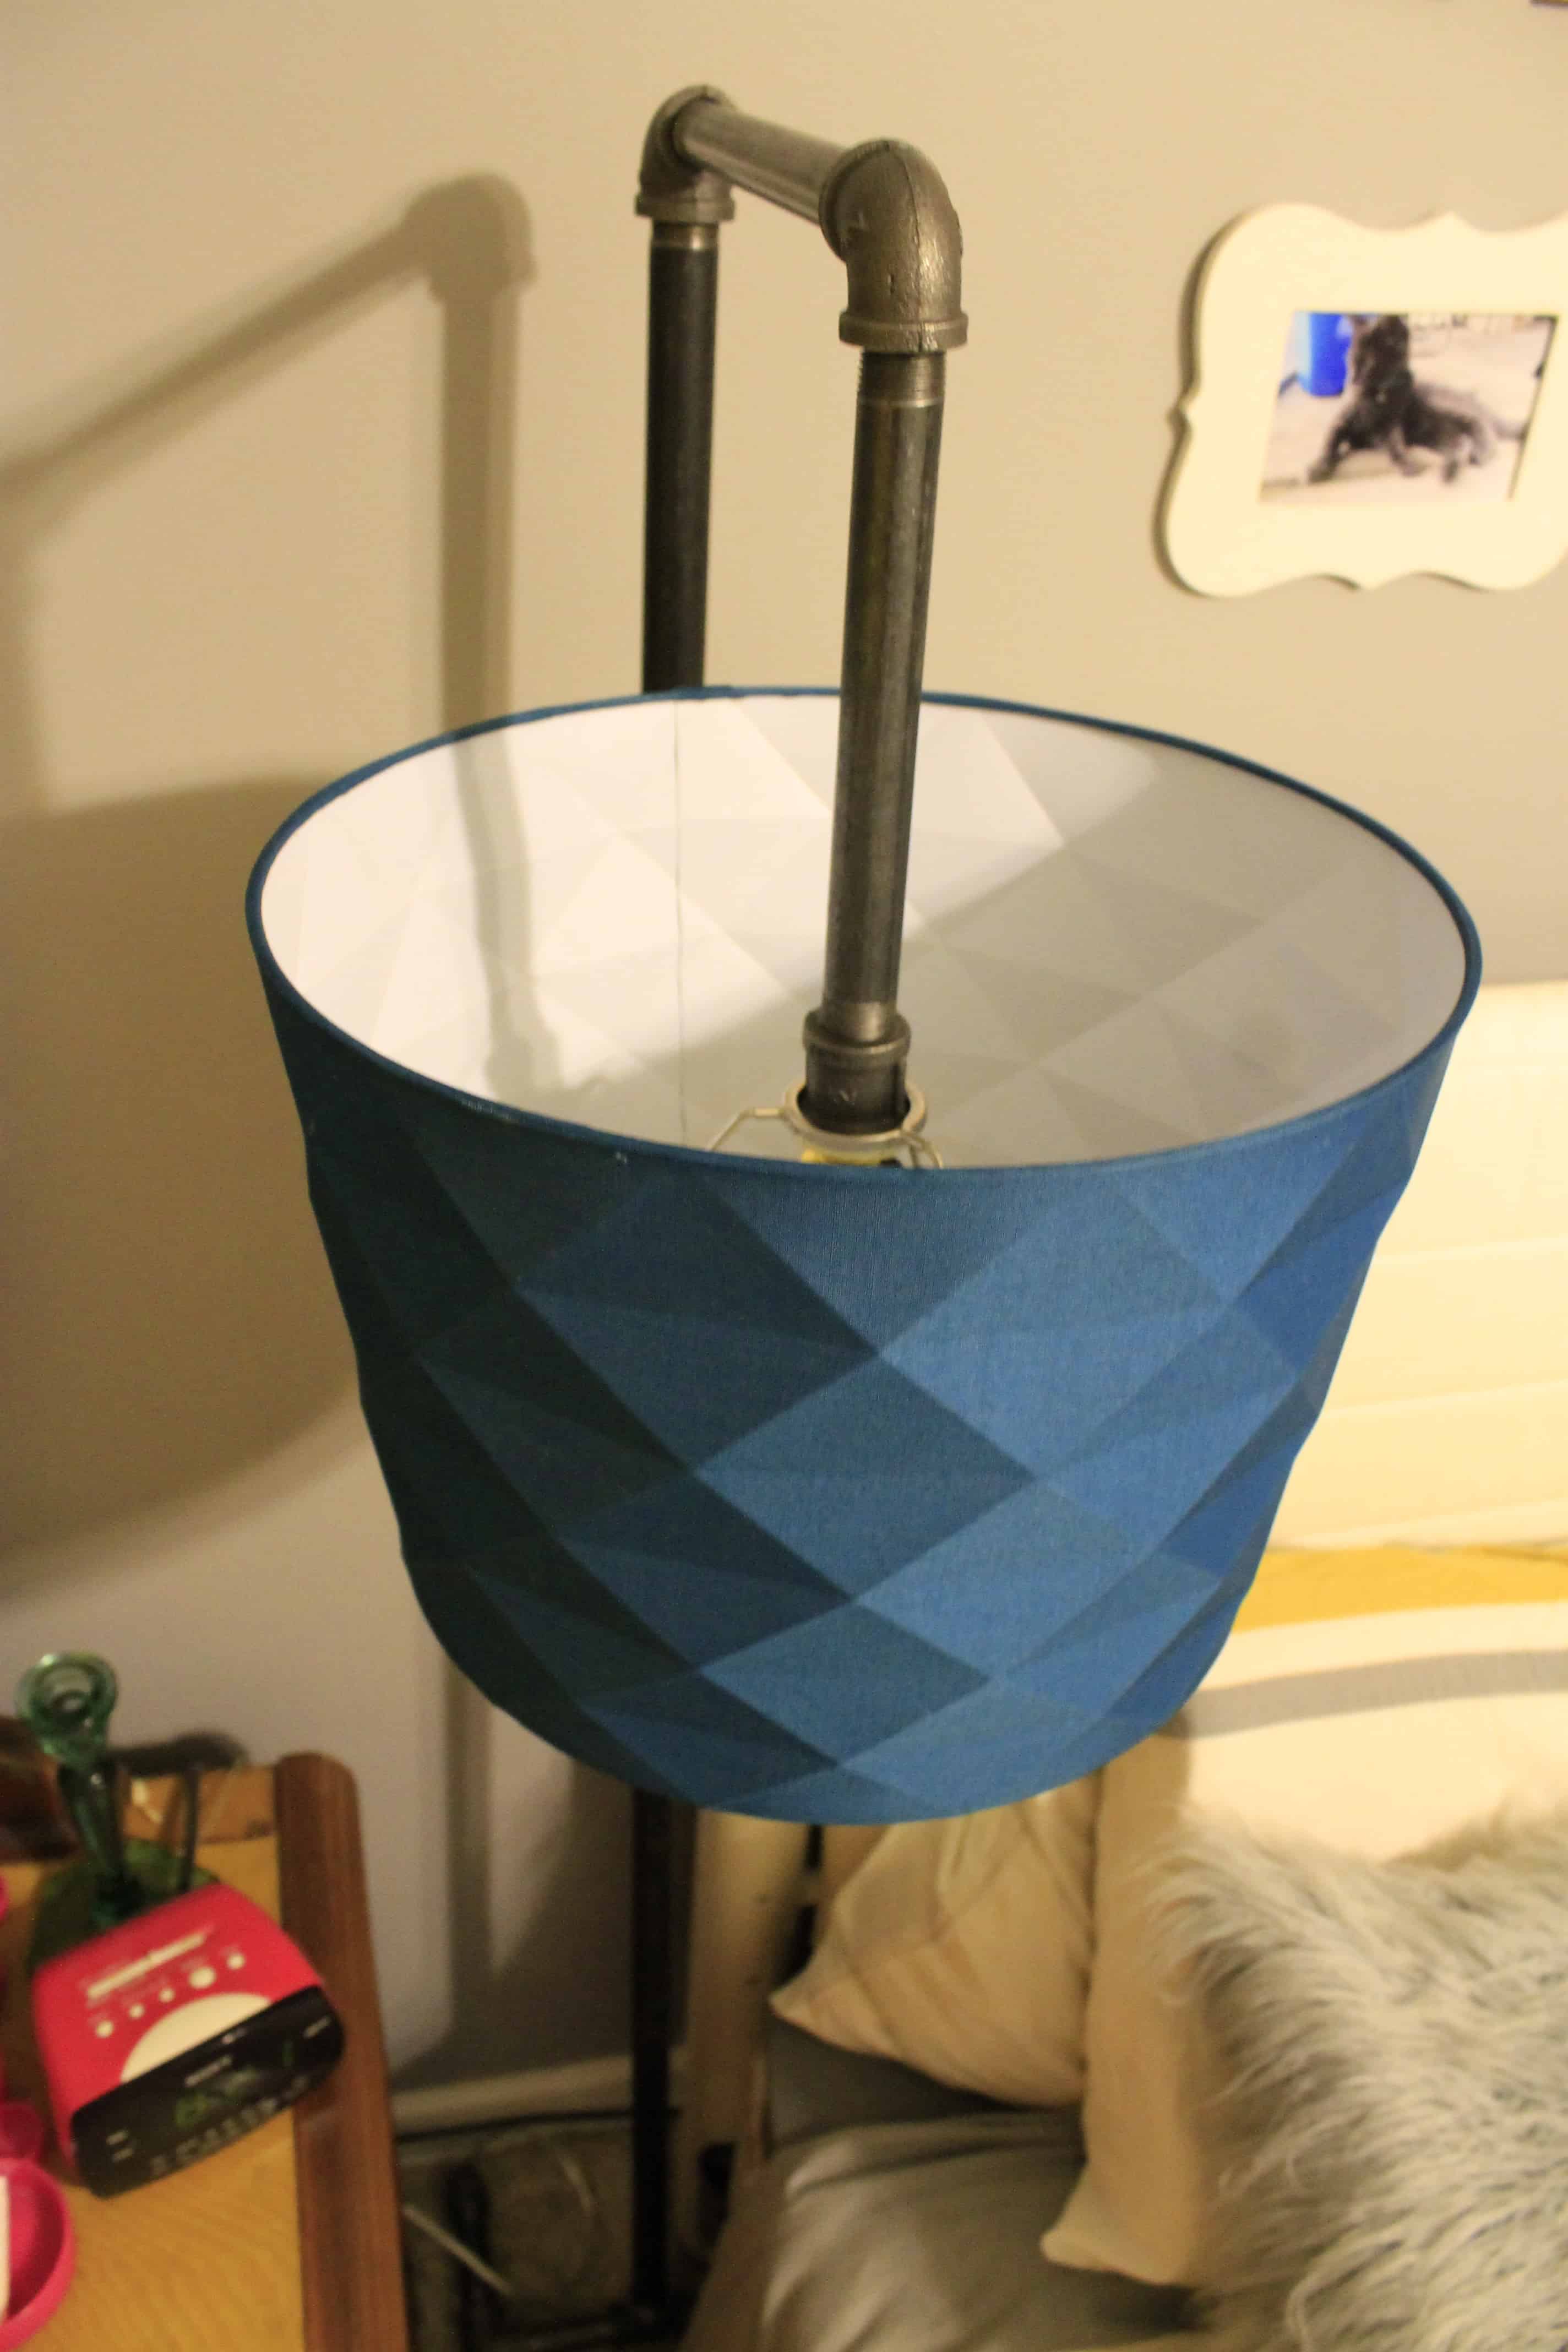
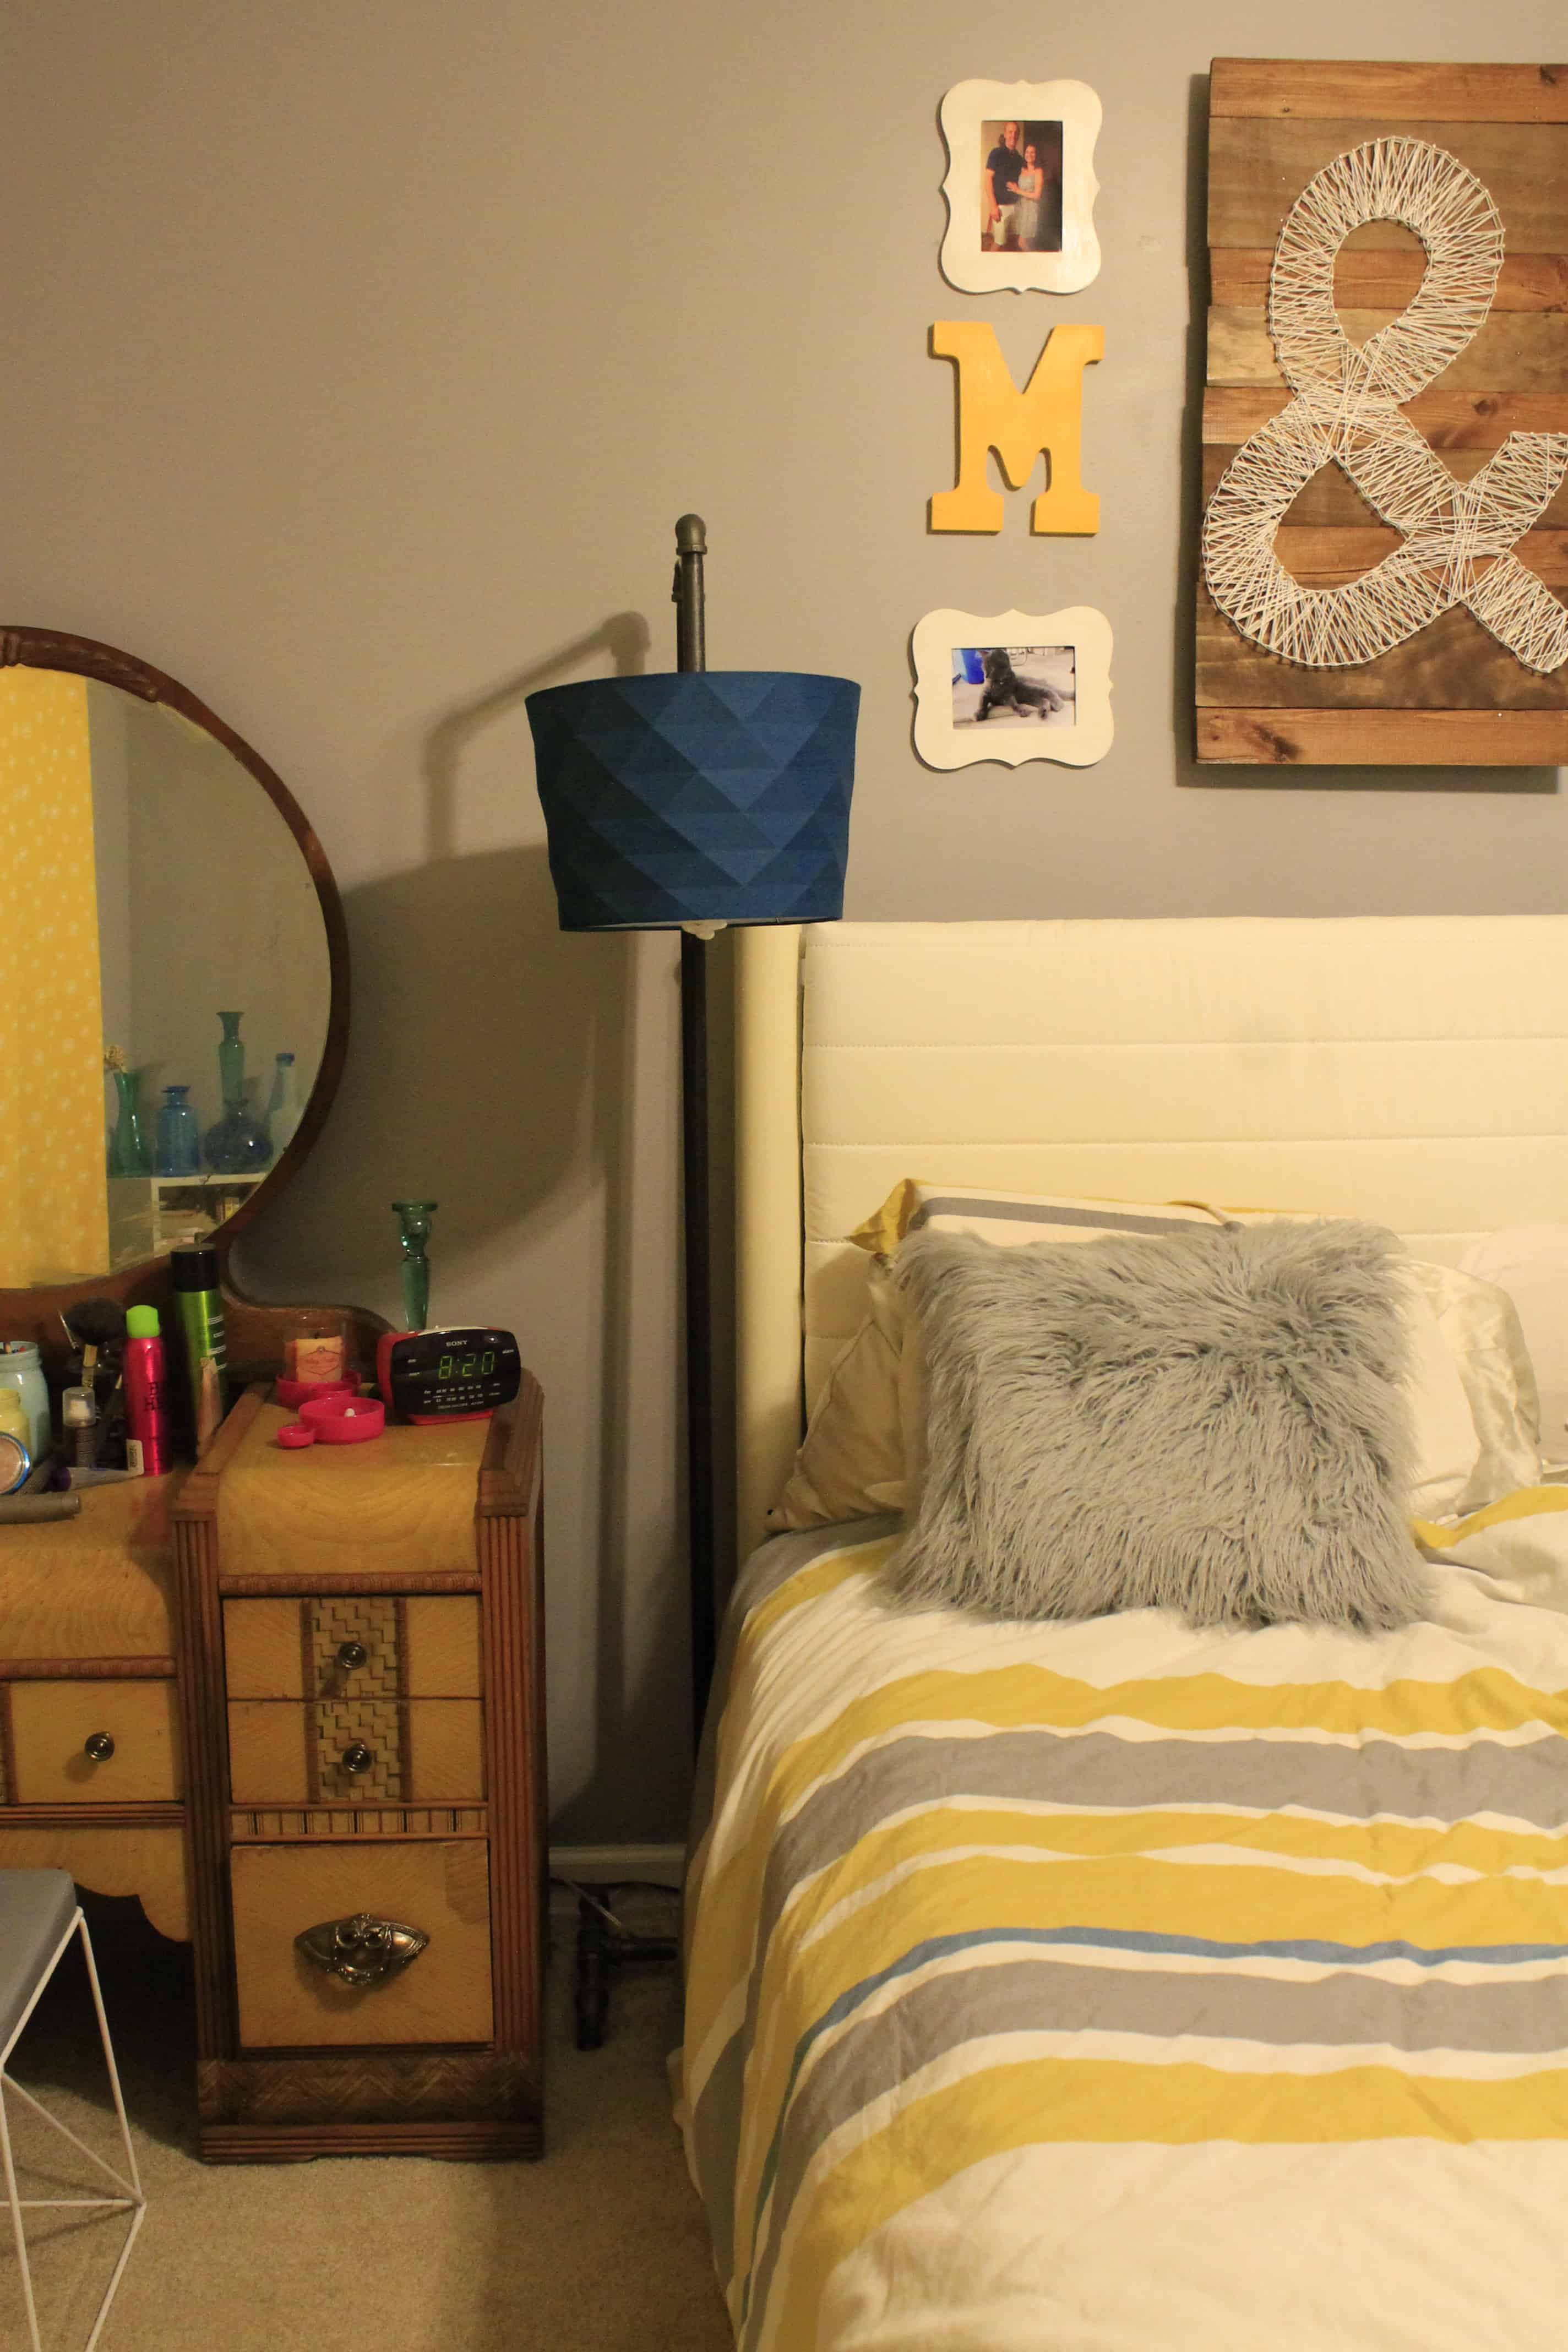
STEP 7: The Finished Result
Once you have that hooked up, plug it in and see how you did!
If your electrical work is good, make sure you go back and double-check your connection and make sure they’re extra tight. You could even use a set of plumbing pliers.
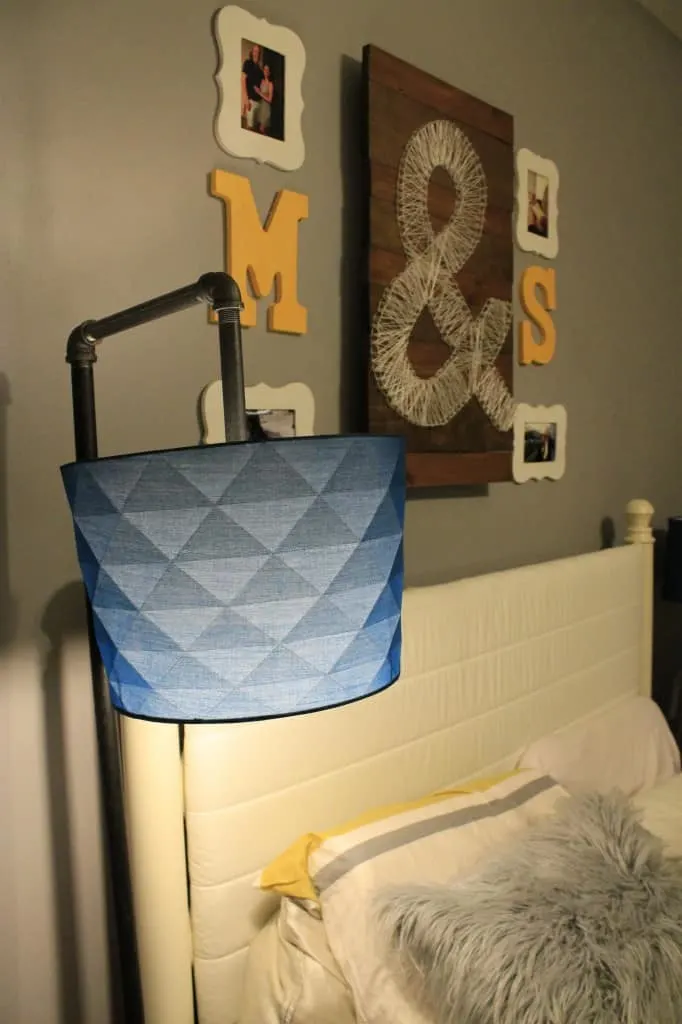
As you can see, your black pipe lamp is a great piece that adds a lot of character to the bedroom.
Expert Pipe Lamp Tips
Follow these expert tips to make sure your industrial pipe lighting comes together perfectly:
- Safety First: When working with electrical components, always prioritize safety. Unplug the lamp while assembling and follow electrical guidelines to prevent any hazards.
- Thread Carefully: When threading the wire through the pipes, be patient and gentle to avoid damaging the wire, which could lead to electrical issues later on.
- Sturdy Assembly: Make sure all joints and connections are tight and secure so your lamp doesn’t wobble.

Want More How-to Guides?
Check out these easy how-to tutorials:
- Speedy Seat Makeover: Reupholstering Simplified
- Build a Charming Basil Planter with Ease
- Elegantly Frame a Silk Scarf in a Few Simple Steps
- Replace a Broken Kitchen Faucet the Easy Way


Looking for something?
We’ve been doing this since 2012 so we have a LOT of blog posts!
Search stuff like: Ceiling Projects | DIY Plant Stands | Thrift Flips


Hey there, I’m Sean, the woodworking enthusiast and builder behind CharlestonCrafted.com! Since 2012, I’ve been sharing the magic of turning raw materials into beautiful creations. I love teaching others the art and satisfaction of woodworking and DIY. I try to inspire fellow crafters to make something extraordinary out of nothing at all.