
Want to add a backsplash on a serious budget? Here is a step by step guide to painting a faux tile backsplash!
Oh man, y’all. I am so excited to share this project! We haven’t done a big DIY project in a while, and this was a rude reminder of the ups-and-downs of a multi-day project.
But, I will say, we’ve been wanting a new backsplash and I’m happy with how it turned out.

Click here to pin this project to your pinterest boards!
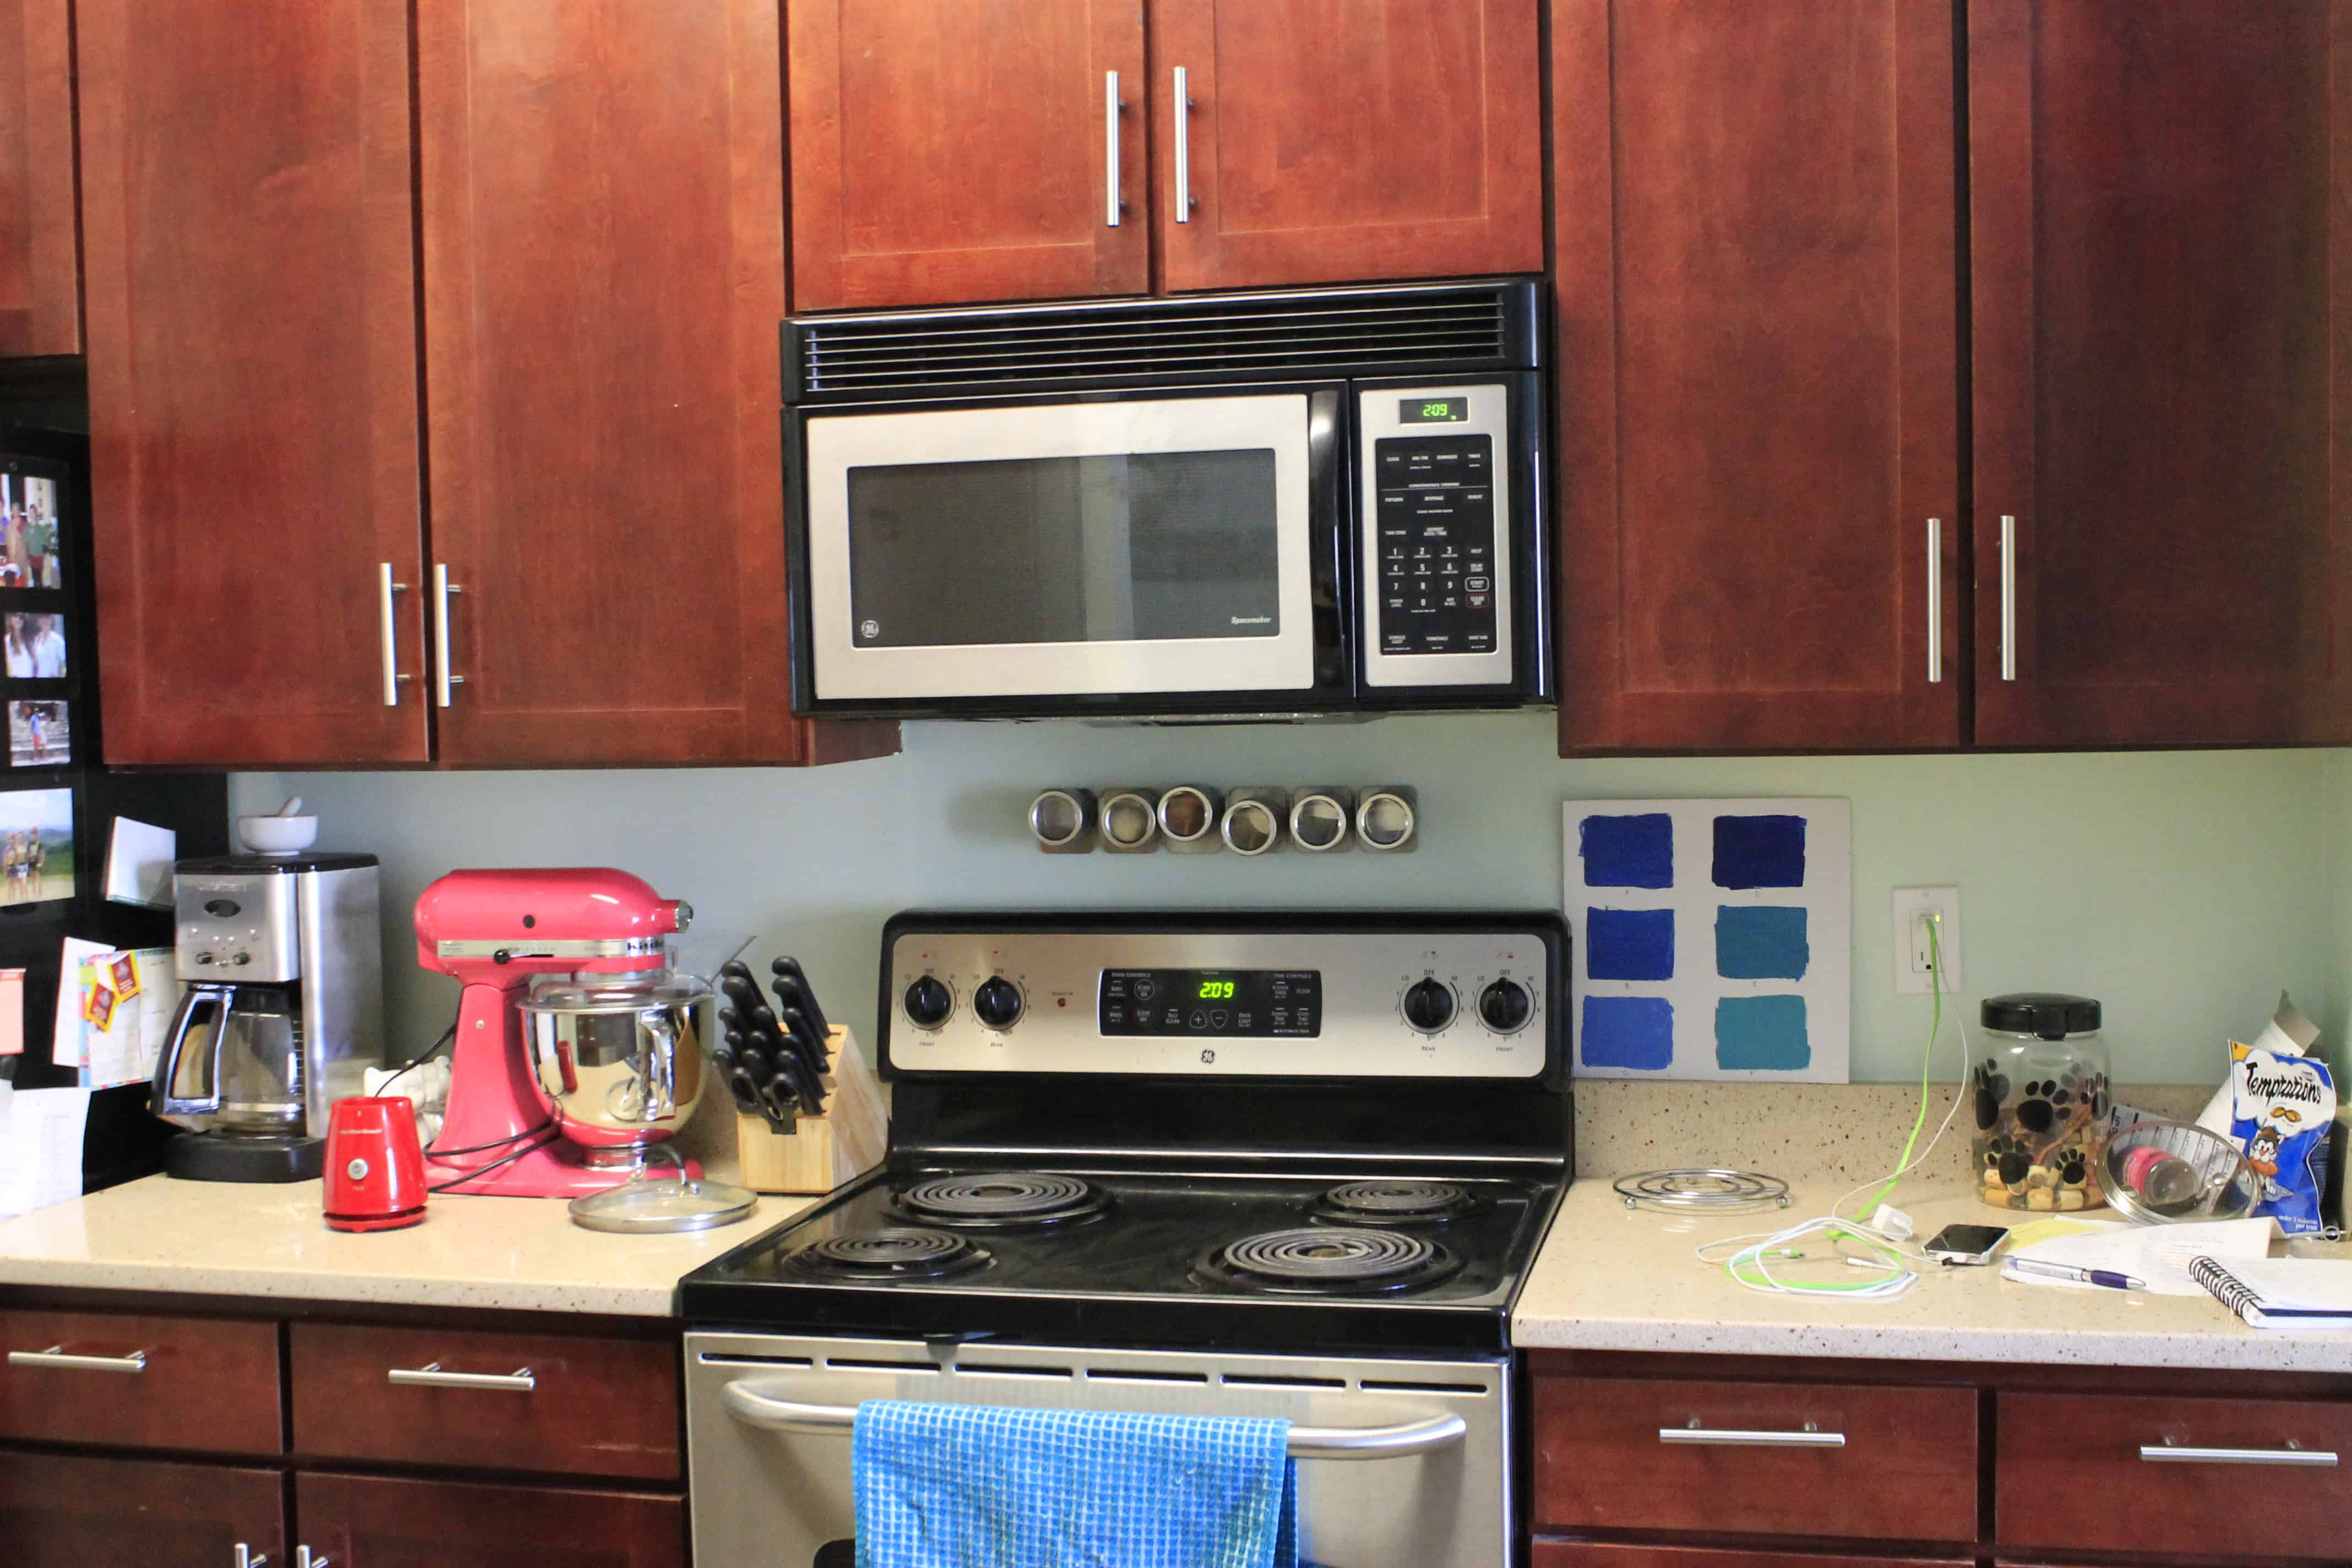
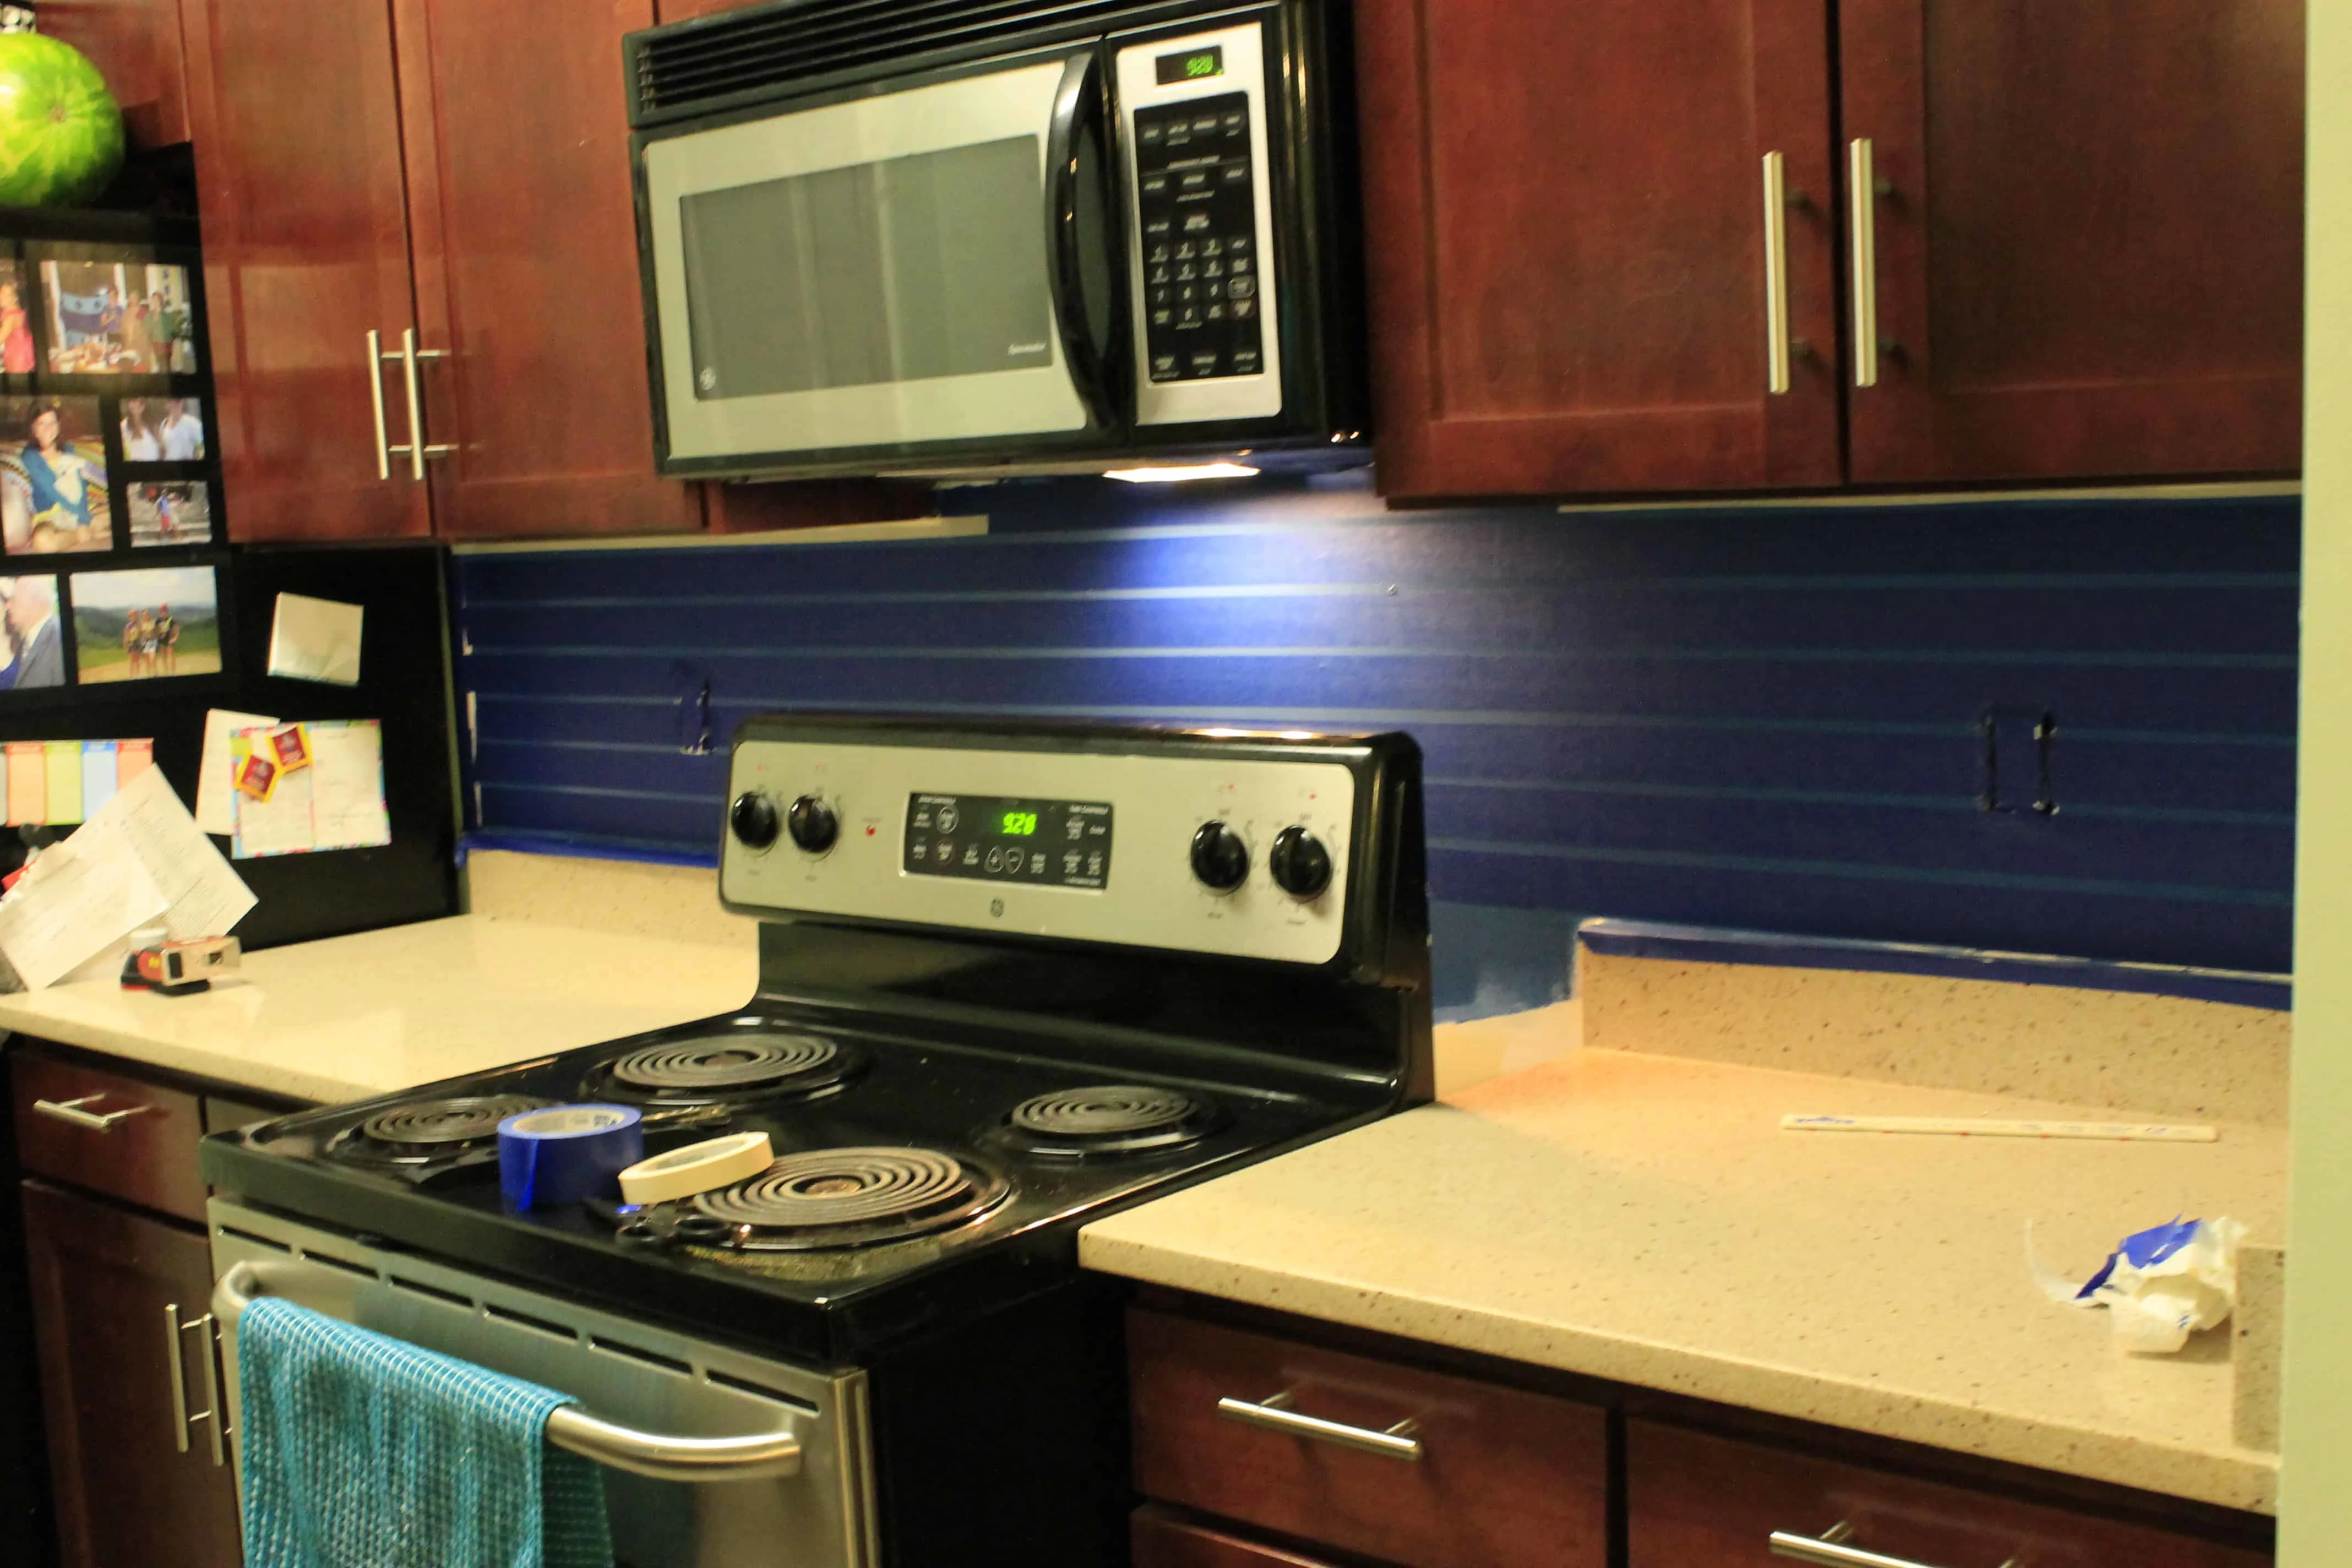
I have been wanting to update the backsplash in our kitchen for a while. However, I didn’t want to invest too much cash into the update.
As we’ve said before, the condo is not our forever home. Not even close. I foresee us being out of here in the next 24 months.
We sold our condo in 2015. Tour it here!
And, the condos in this complex tend to sell for a flat rate (i.e. at any given time all the two bedroom units are selling for about the same price).
They’re fairly new and all came with upgrades as a standard (like the quartz counter tops) so there’s not a lot to differentiate them. So, we are trying to keep most of our major updates low cost.
So, while I’ve had my eye on some sea glass subway tile, we decided that it would be better to not spend the money. So, I thought about alternatives.
We thought about bead board, or sheet metal, but I finally settled on paint. A DIY hand painted backsplash is a great way to get the Pinterest look on a budget!
How to paint a backsplash to look like tile
I dug out a bunch of our leftover paint samples and painted sample squares on a piece of cardboard.
We decided that we liked Starry Night best. It was an “almost” color for our guest bathroom, so I was excited to finally get to use it.
Though it’s nowhere else in our house, I think that it is similar enough to blend with the overall color pallet.
How to paint a faux tile backsplash
This project took a lot of turns throughout as we tried to figure out the best way to do it. Instead of explaining the ways we did it wrong at different points, I’ll just explain the ways that were correct.
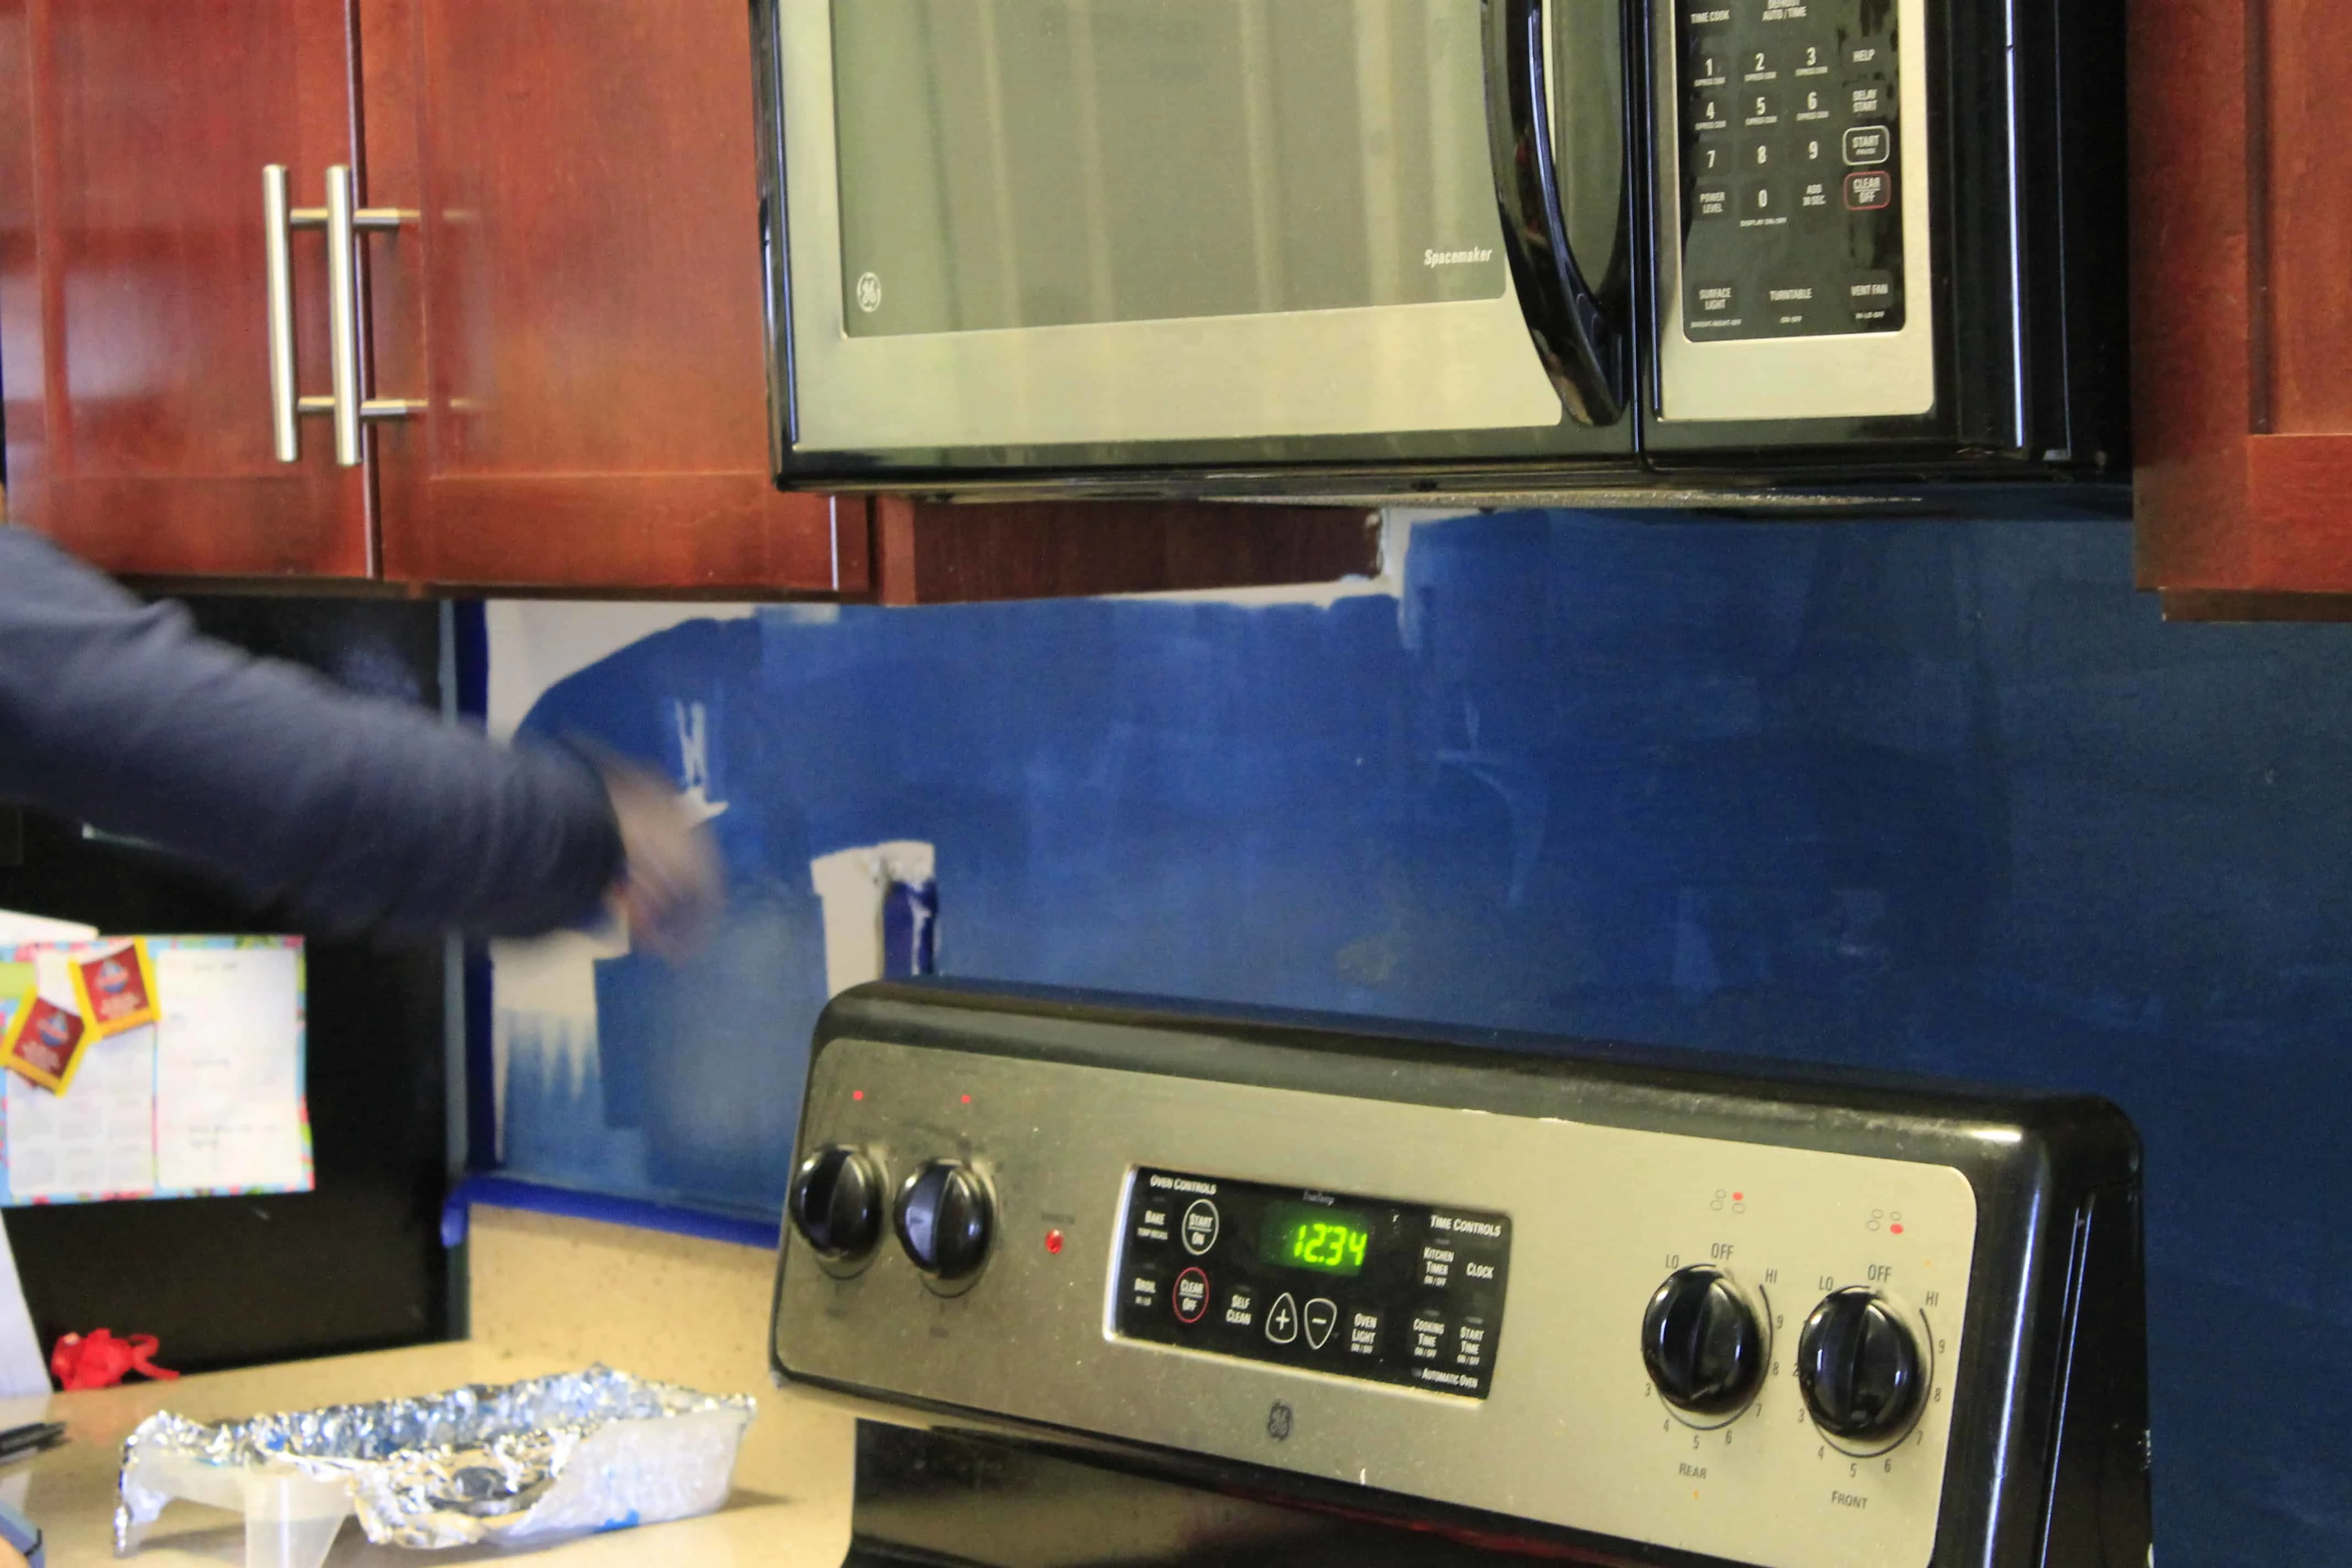
STEP 1: Paint the tile color
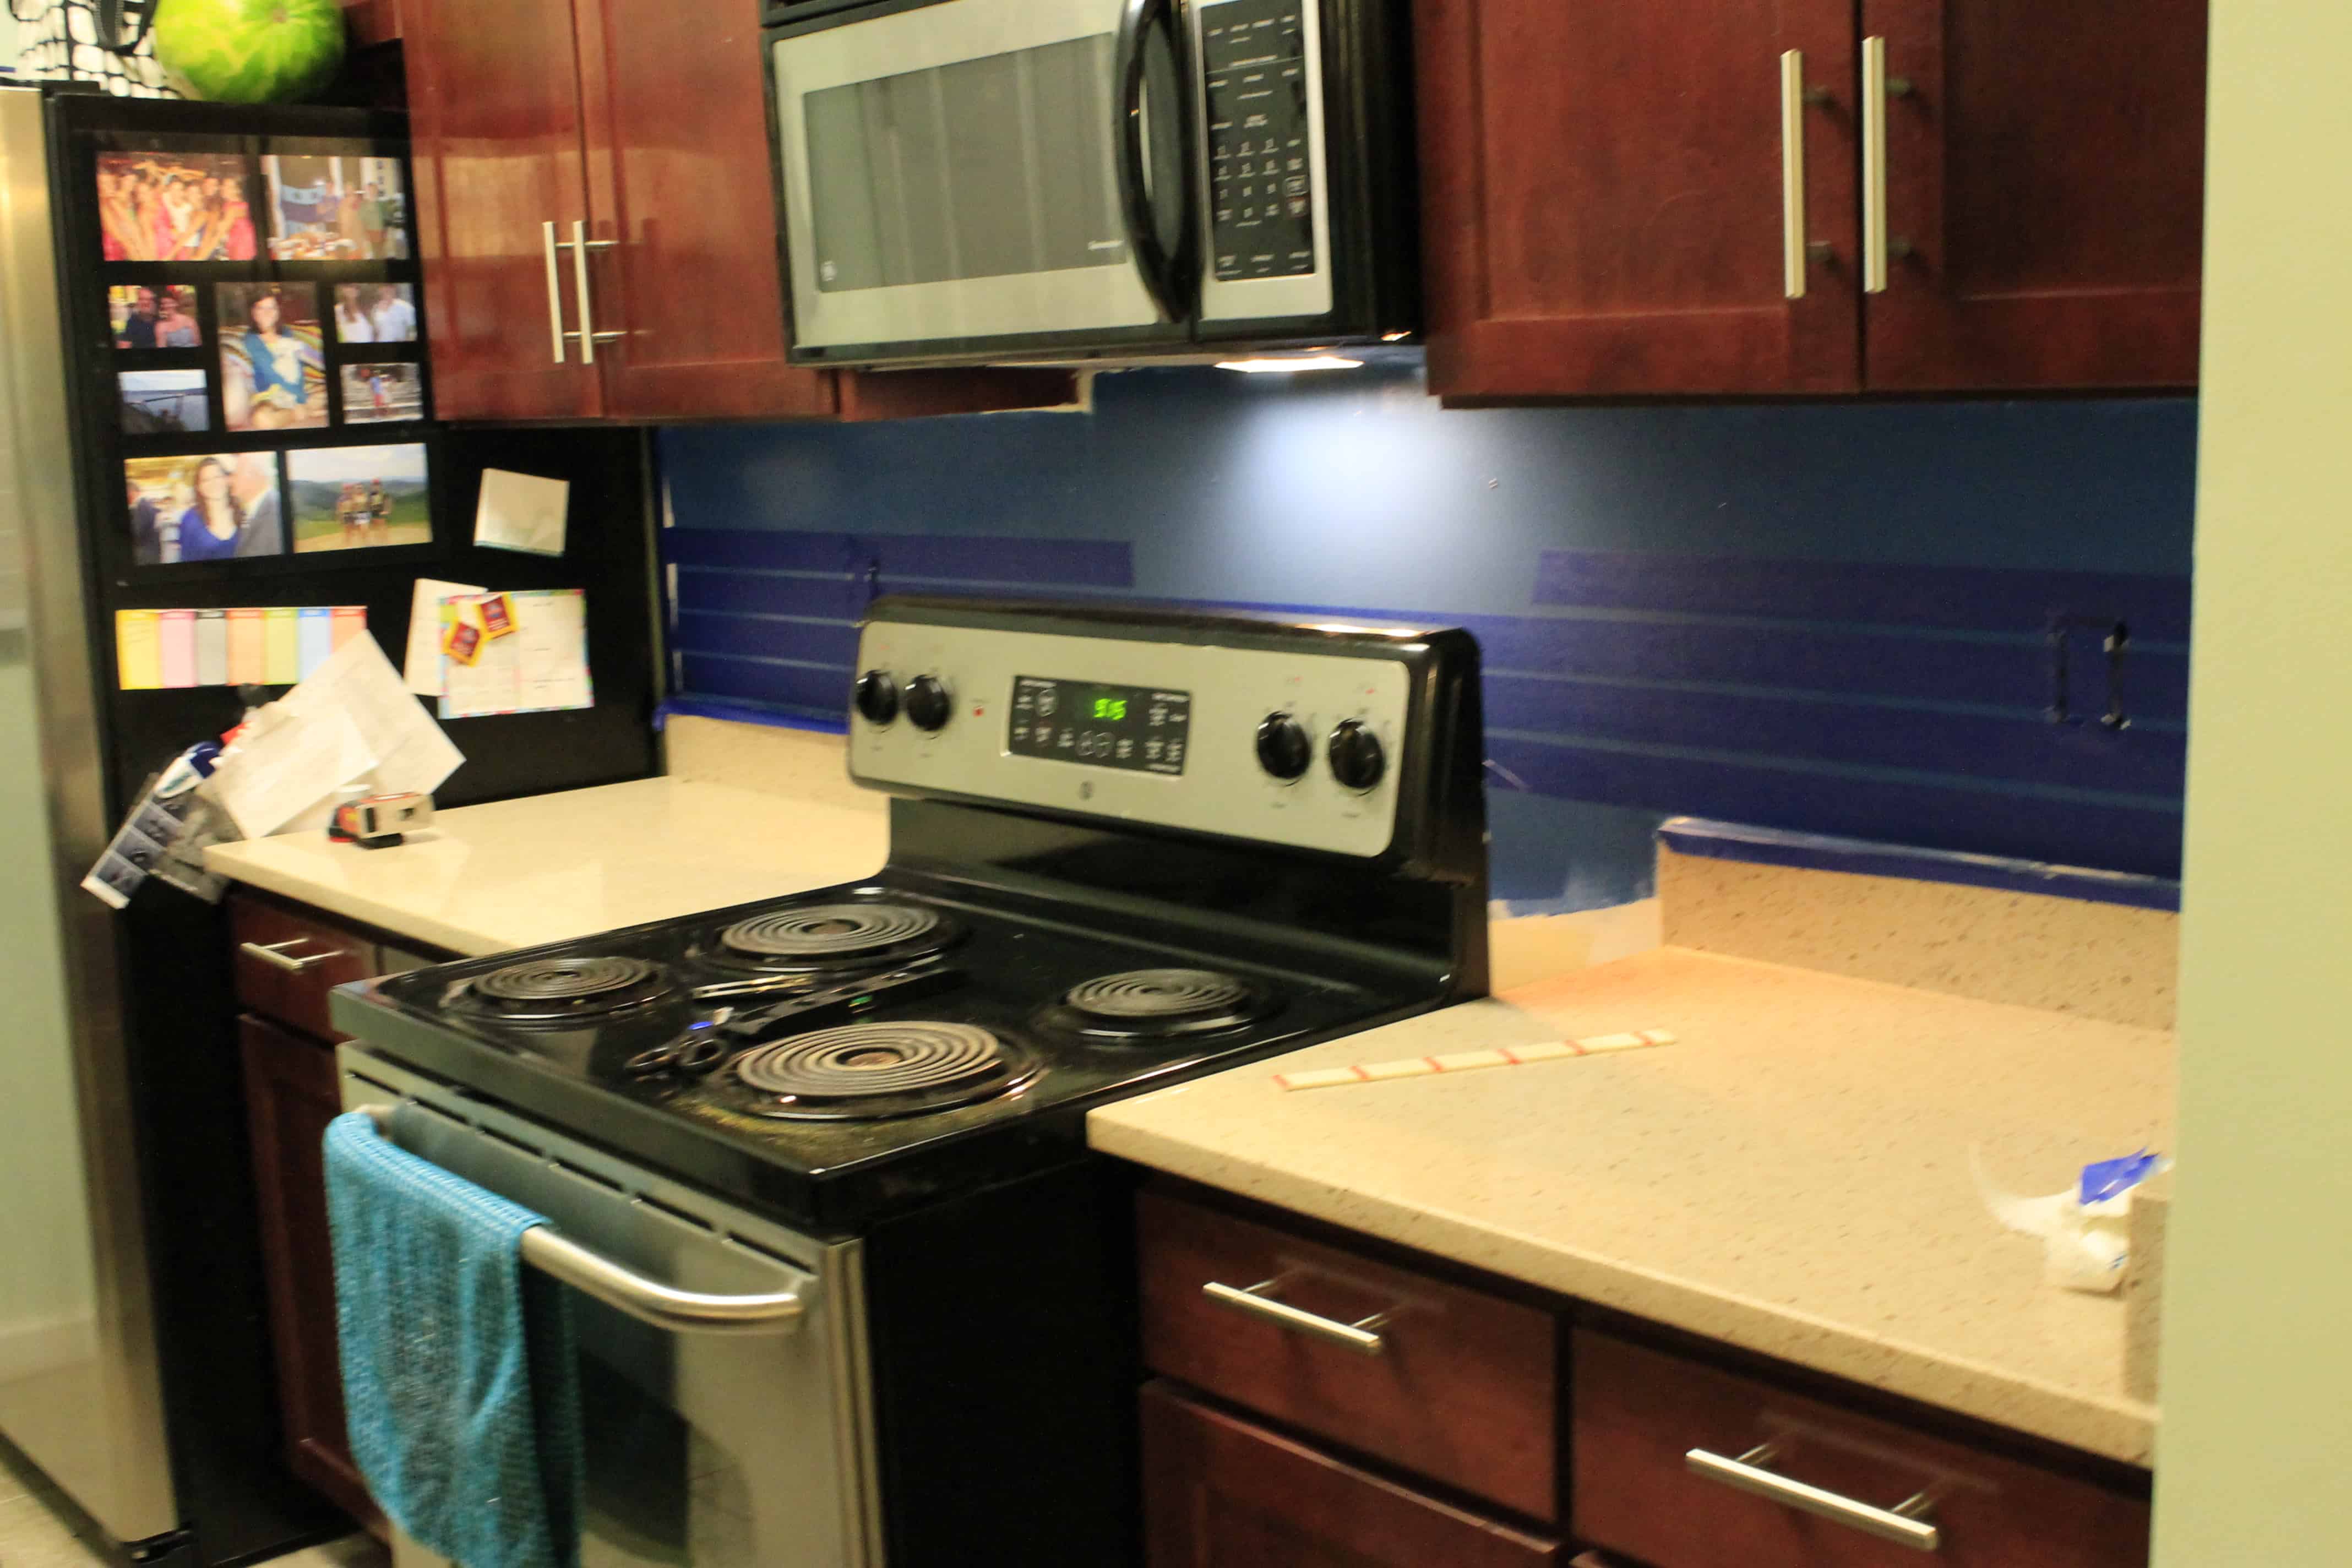
First, we painted the wall behind the stove and counter with several coats of the Starry Night blue.

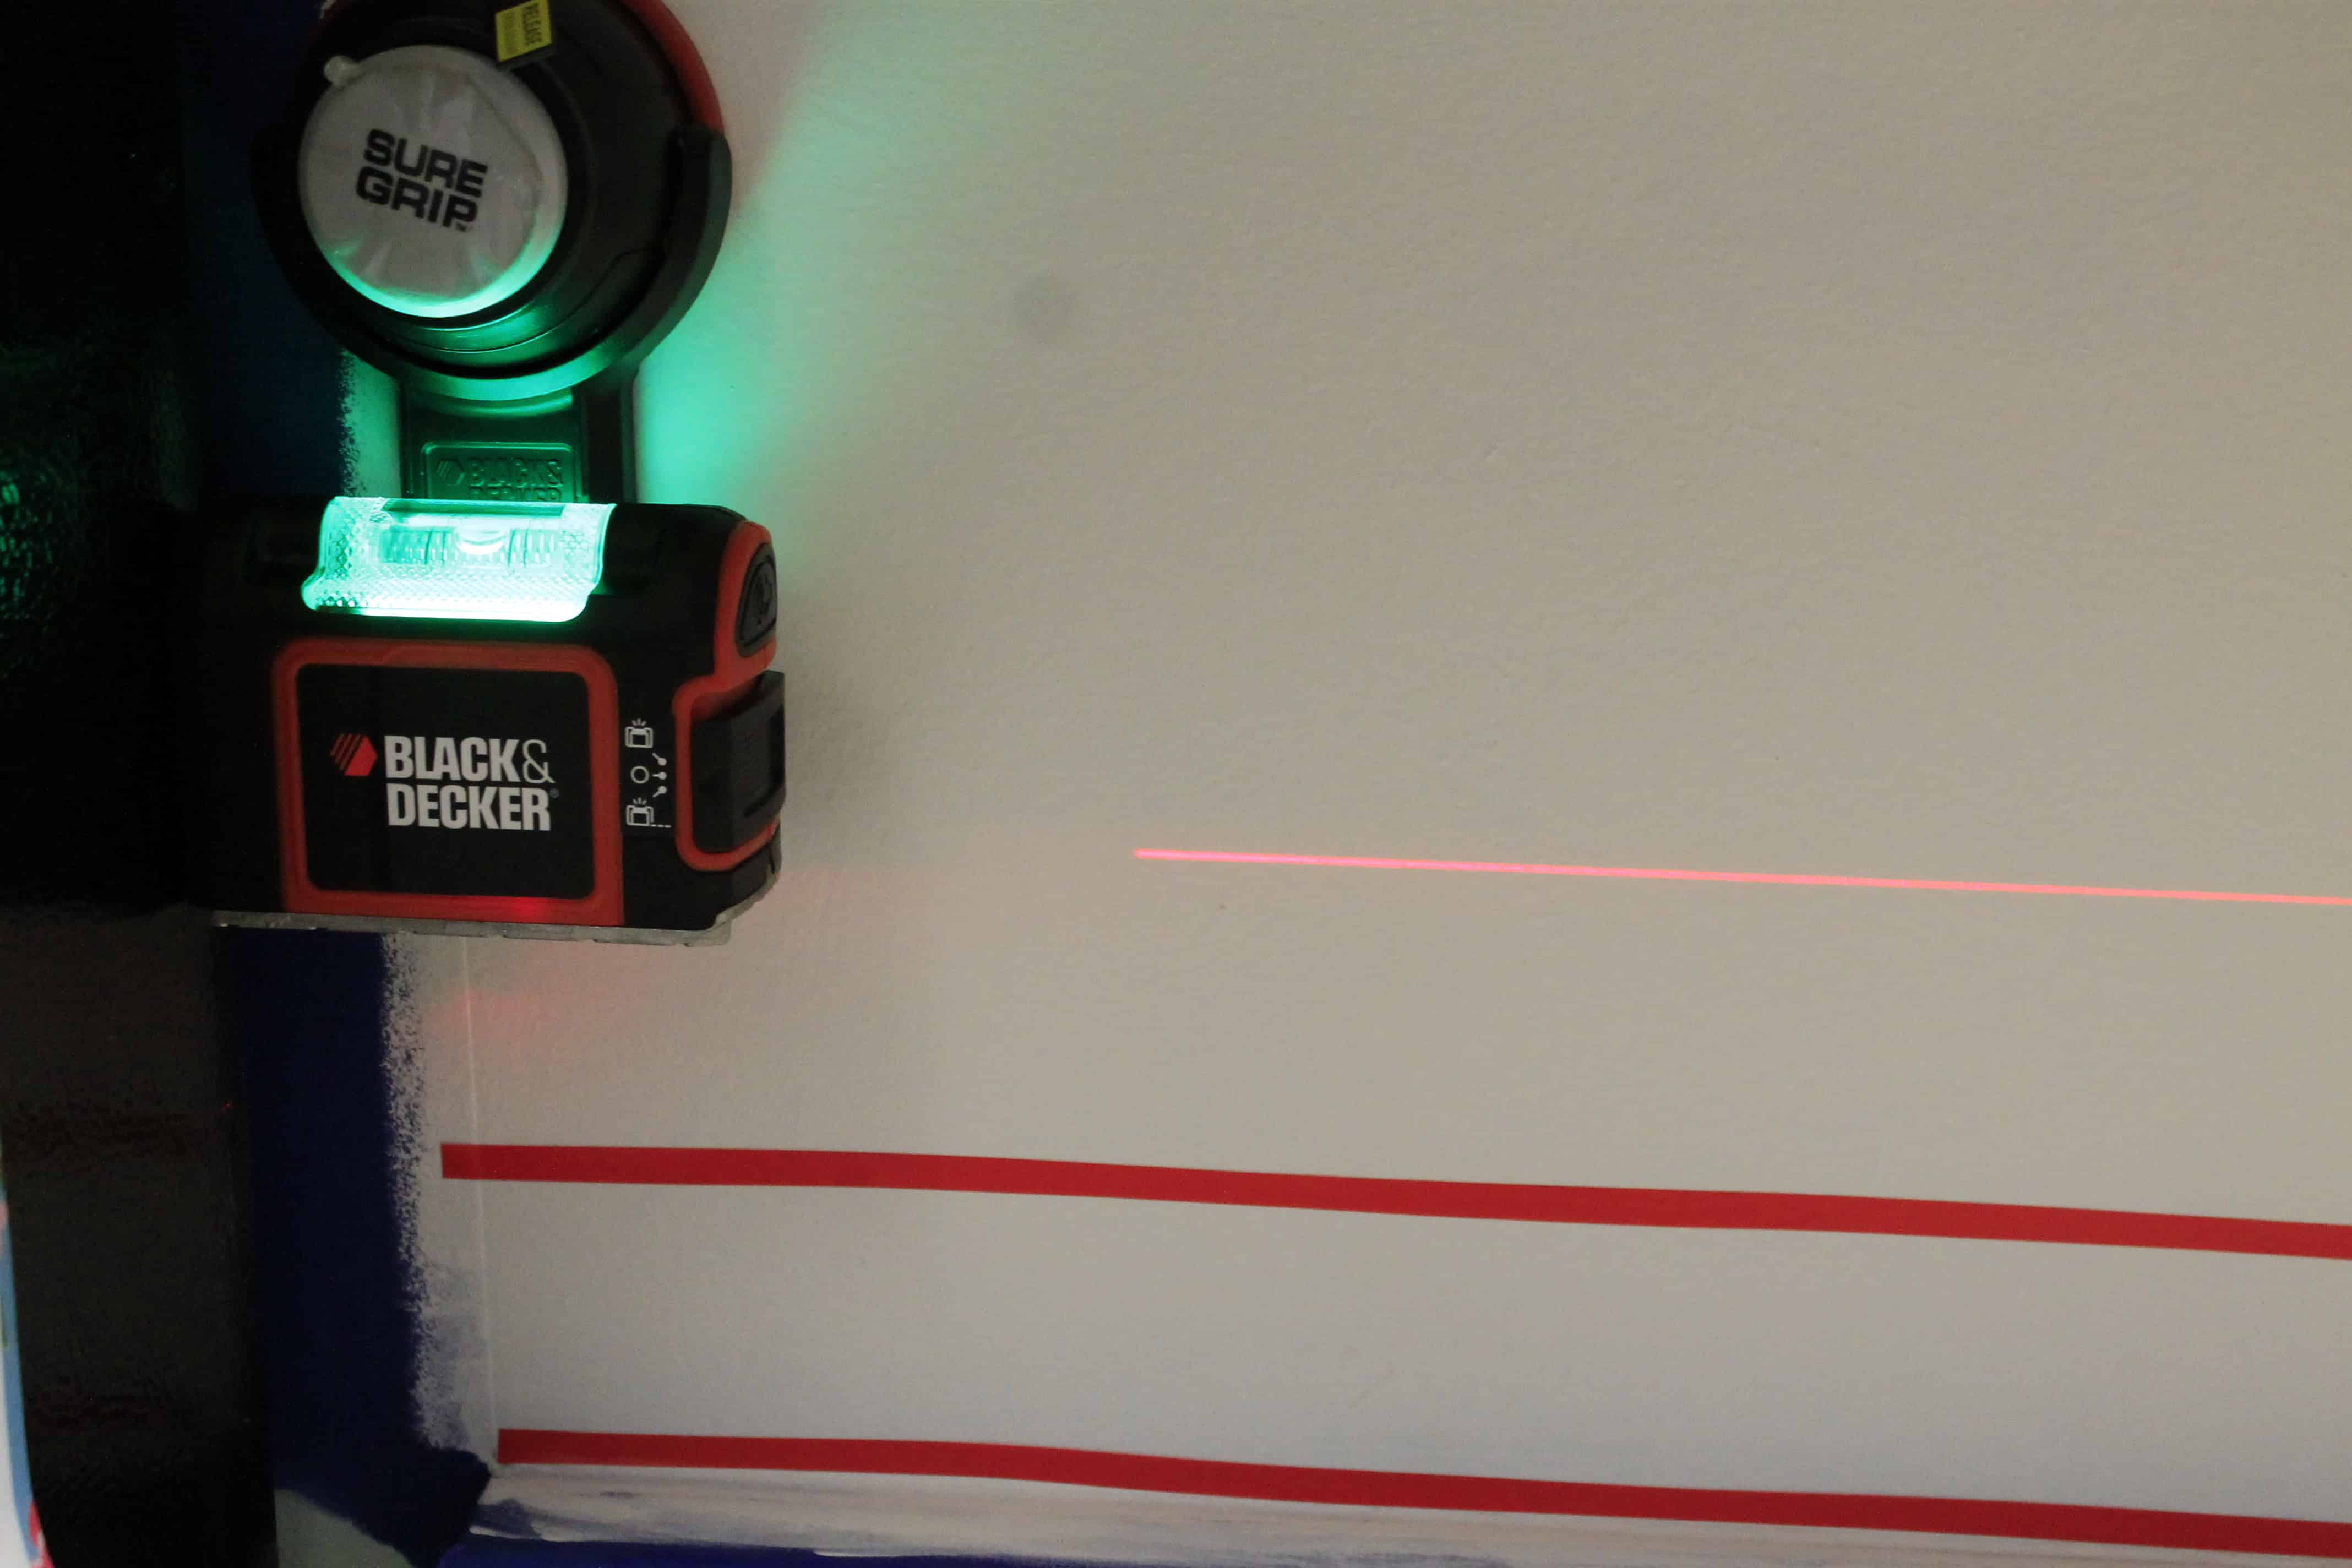
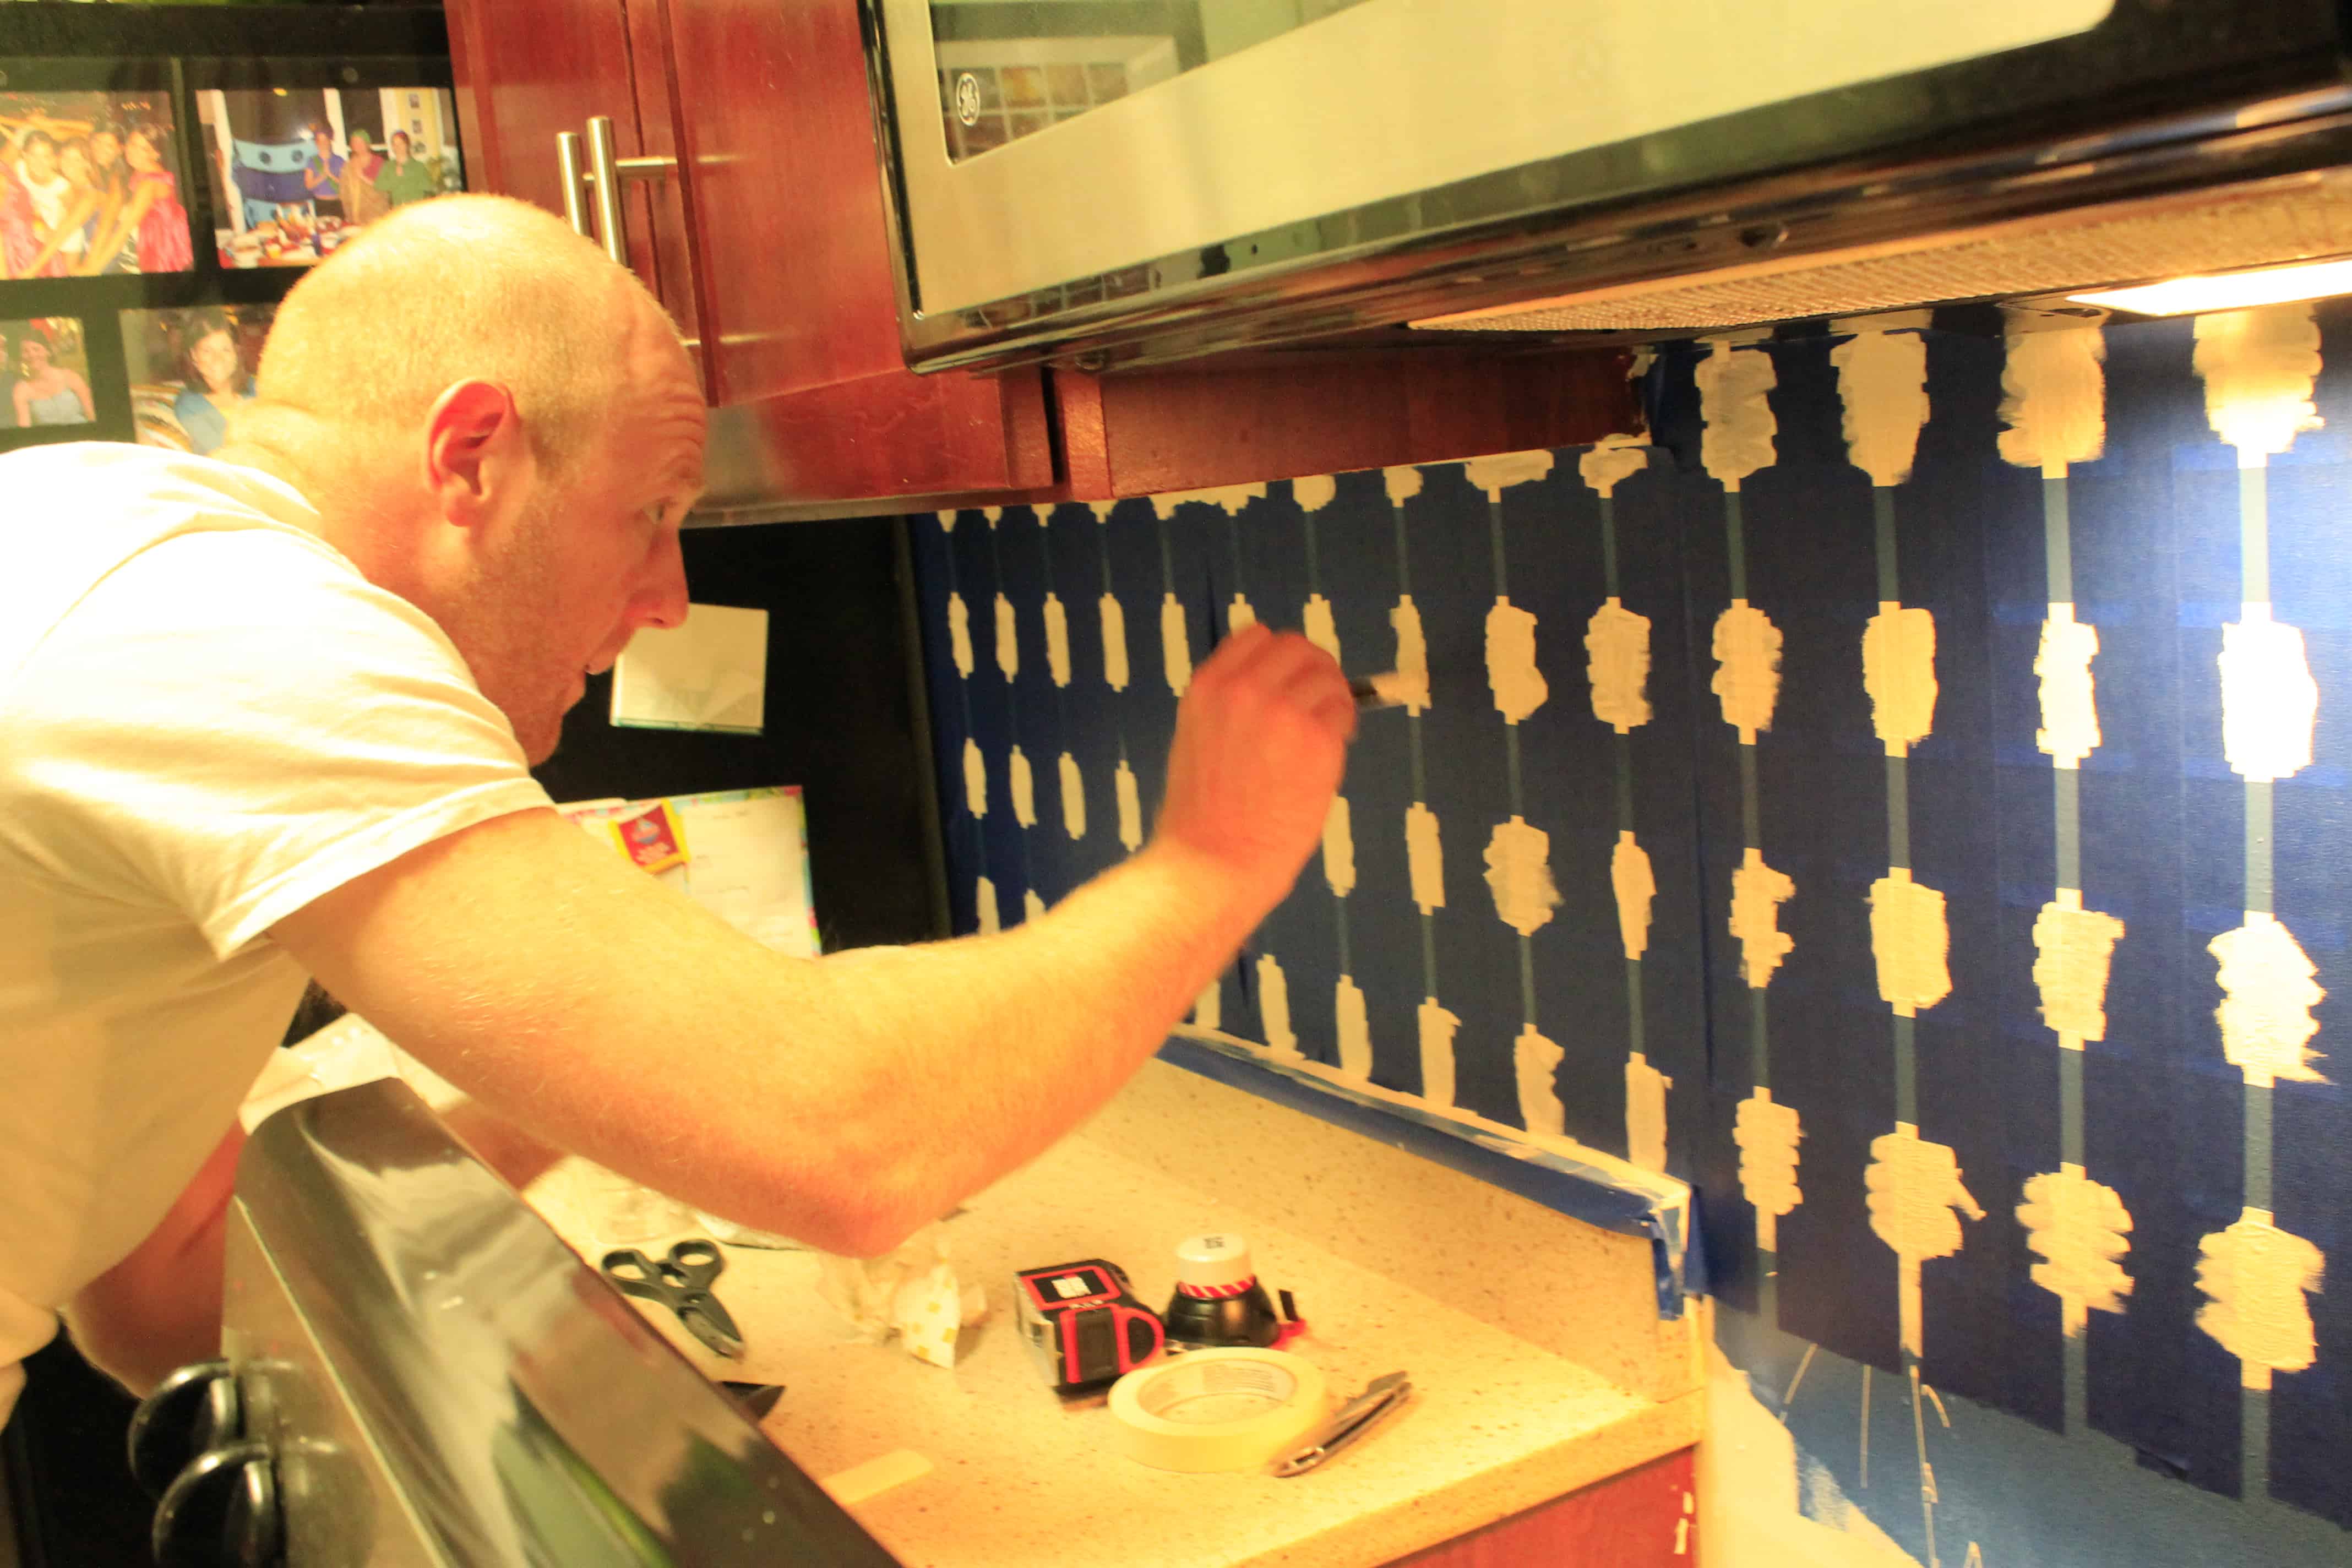
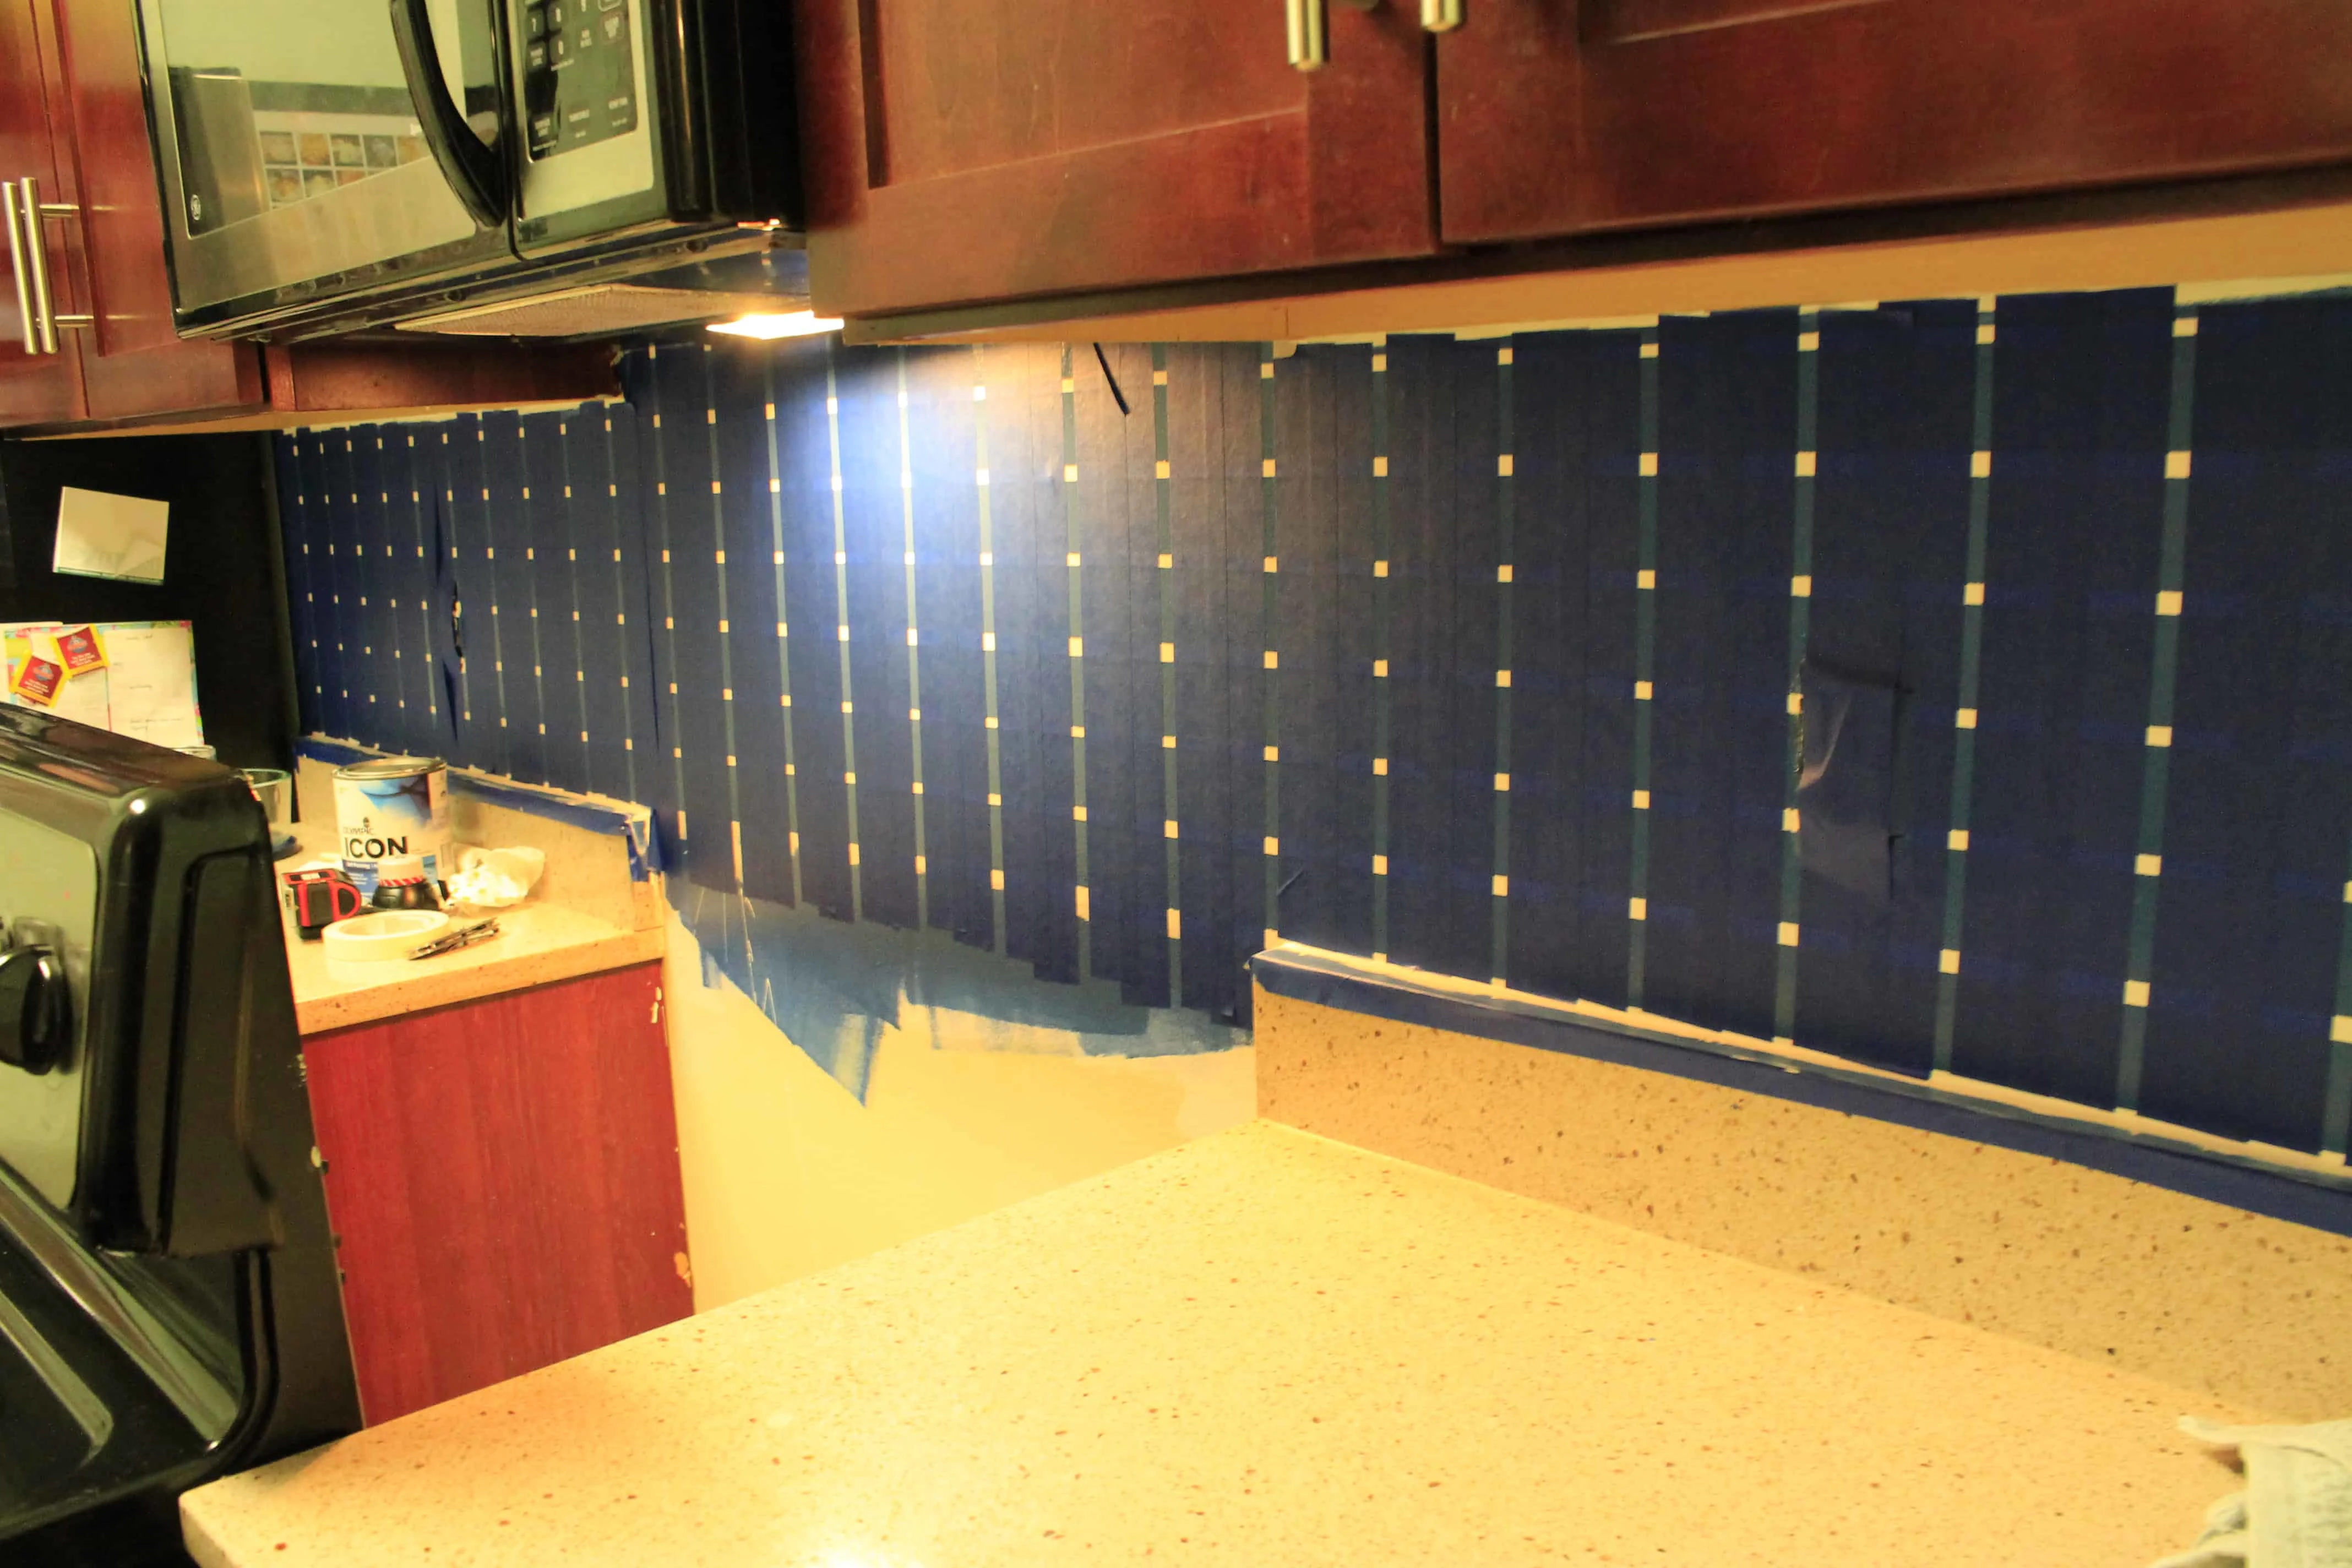
STEP 2: Tape off your “grout lines”
Then, we used our new laser level to mark where we needed our horizontal “grout” lines.
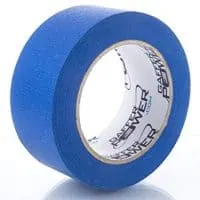
We used two-inch thick painters tape to create the height of our tiles, so we put strips down with about a quarter inch space between where we would paint our “grout” white.
Note: we originally painted white, taped off with 1/4 inch tape, and planned to paint blue over it. The 1/4 inch tape was terrible (Art Tape from Staples) and didn’t stick at all. We re-painted blue and decided to reverse our taping strategy.

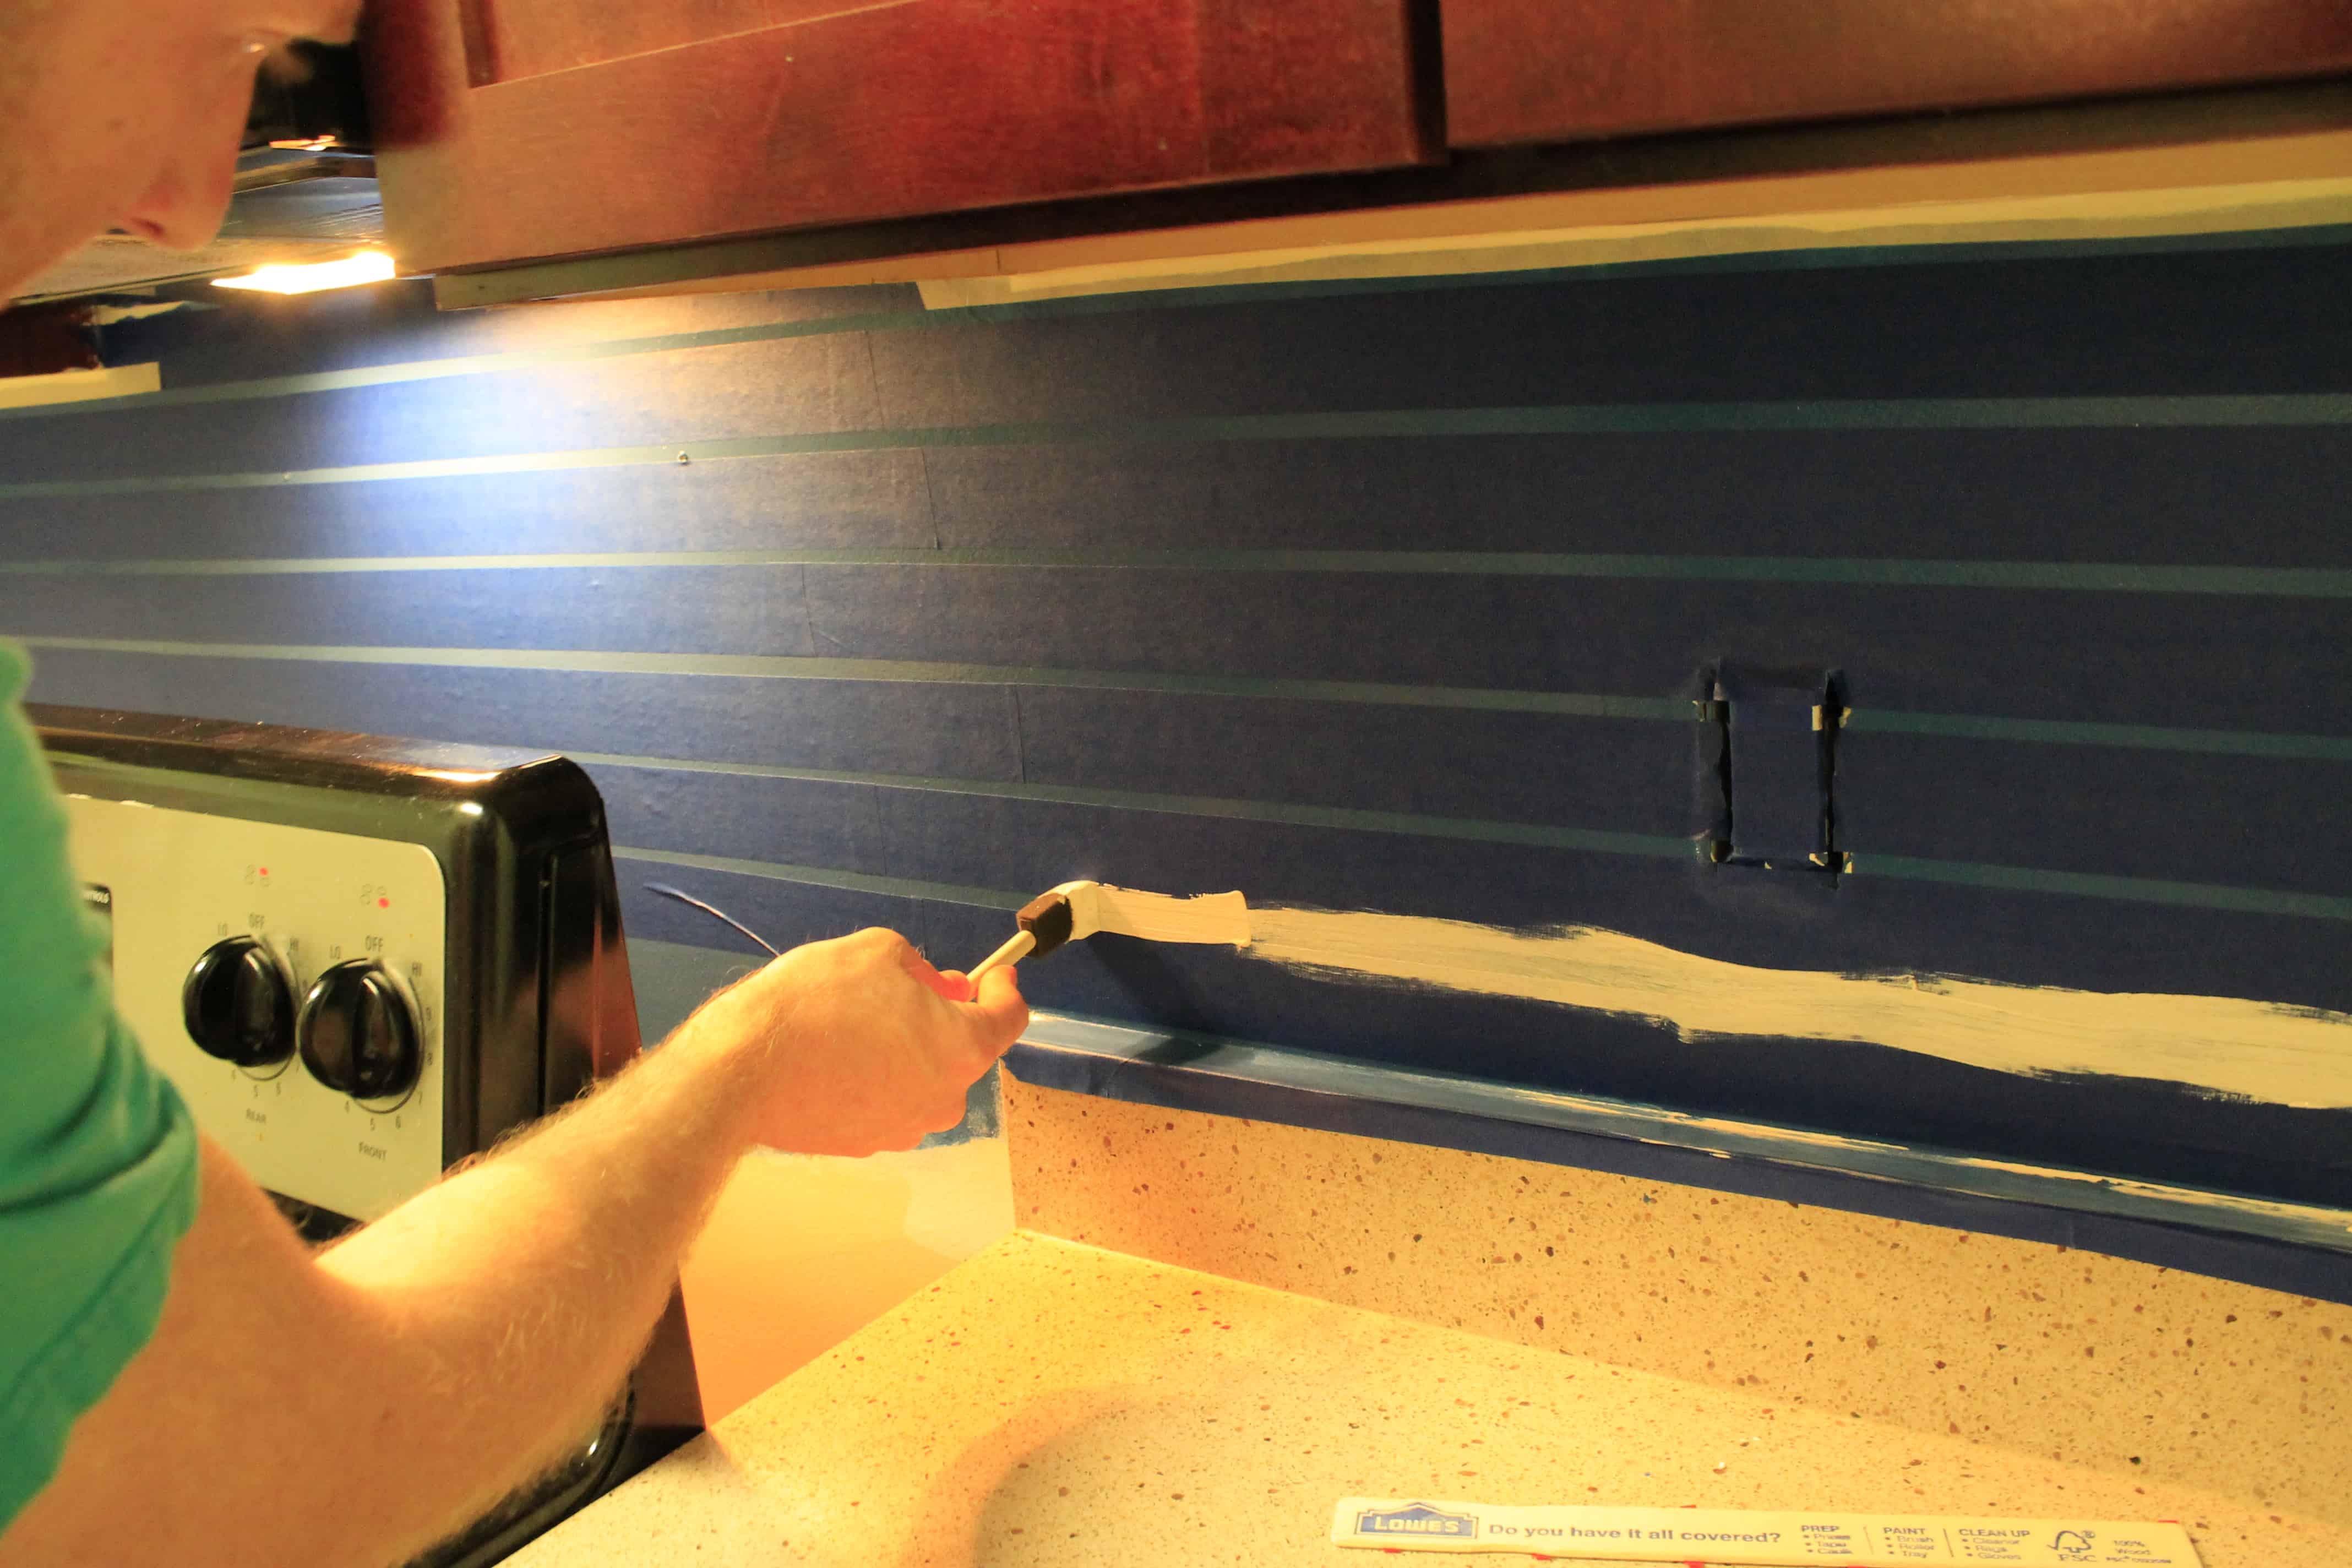
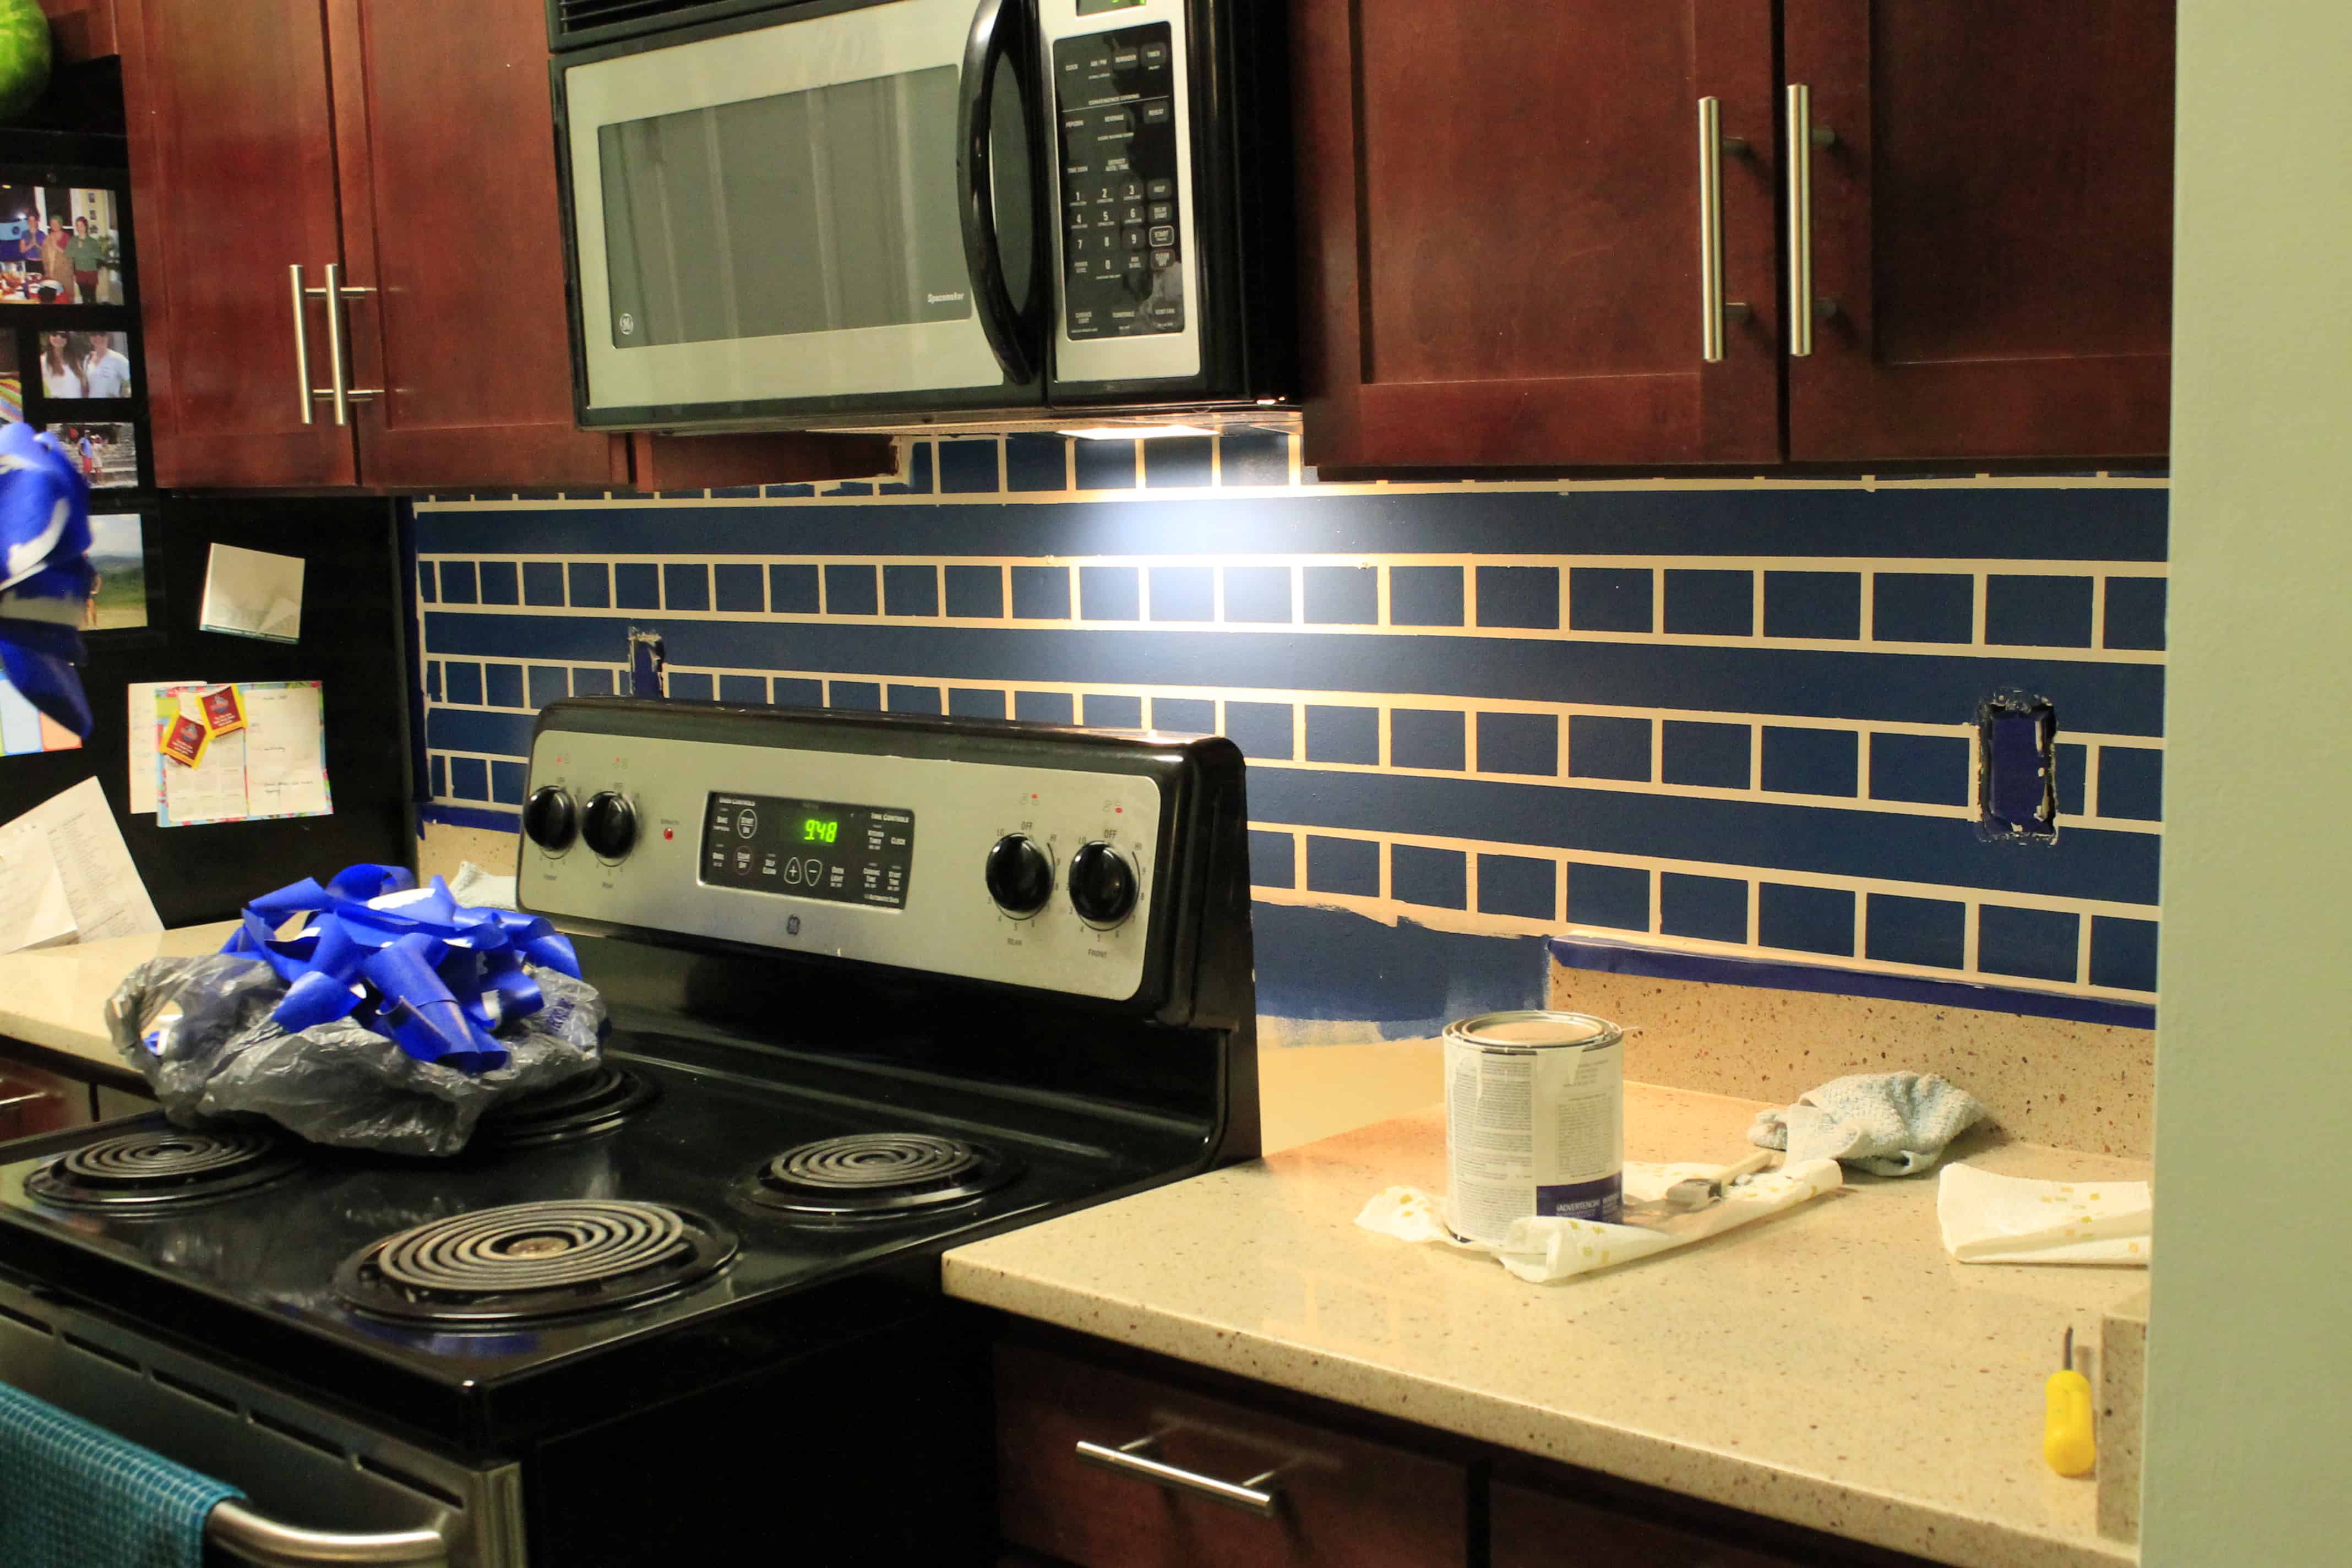
STEP 3: Paint the “grout”
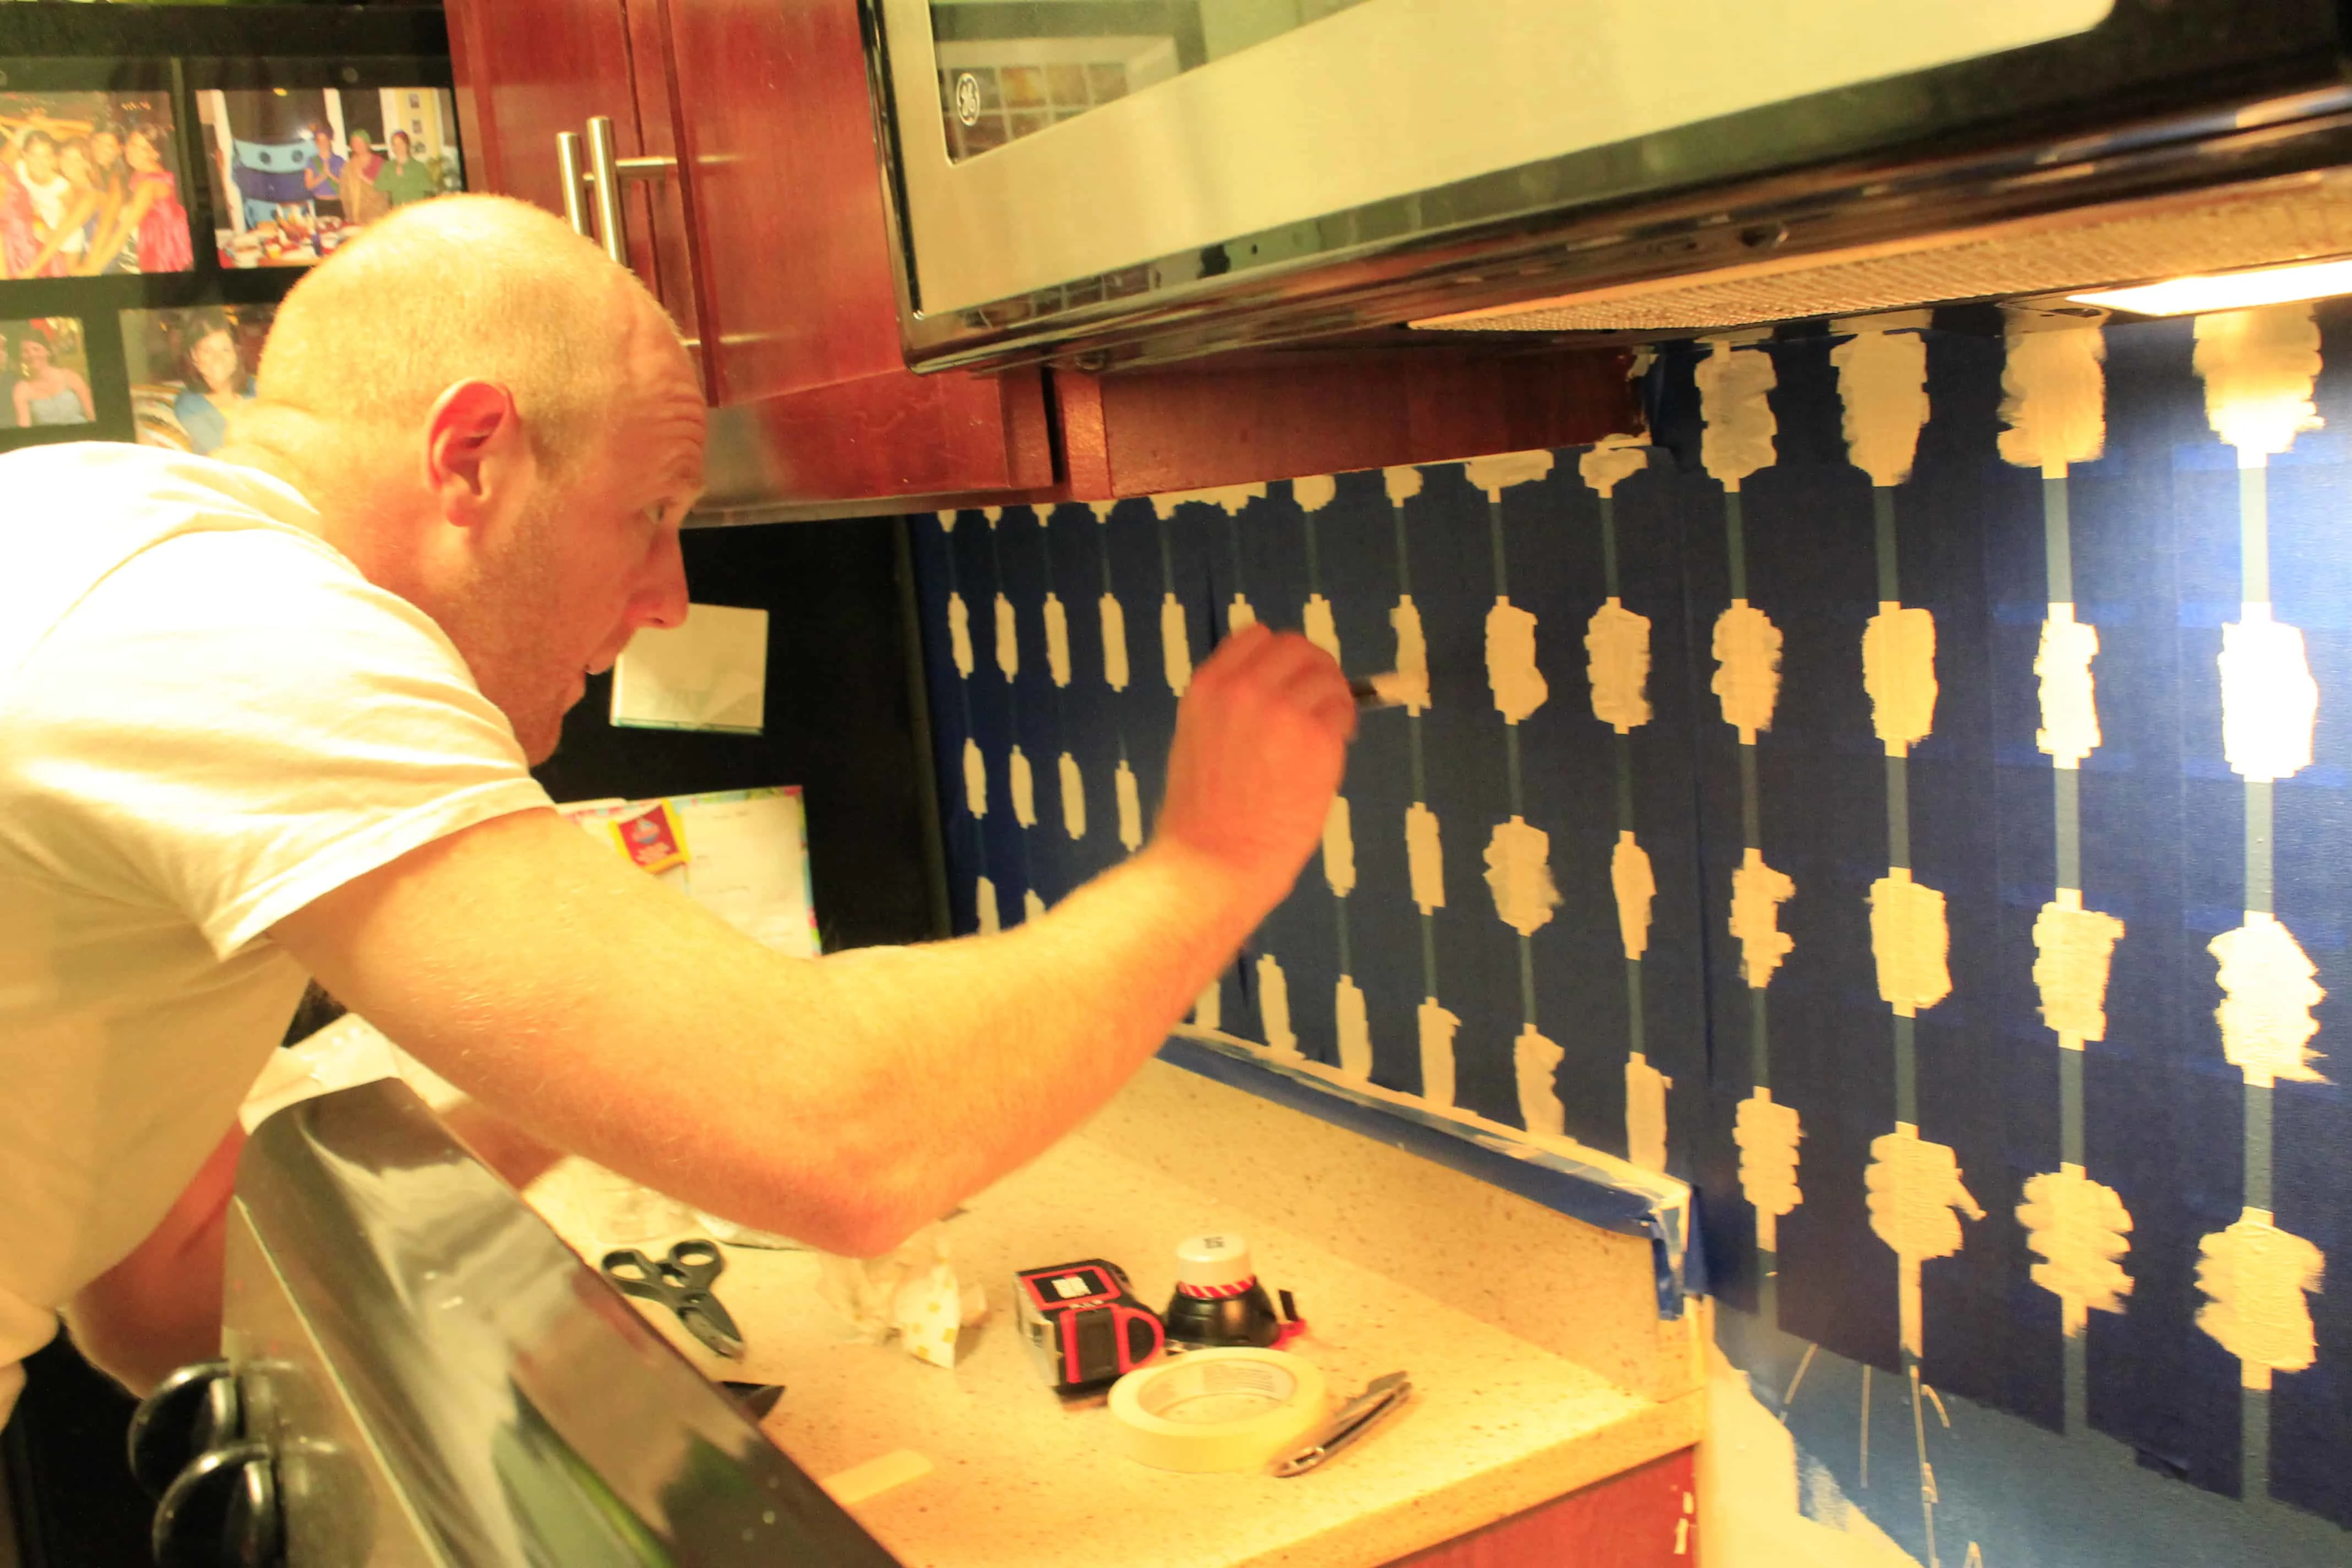
Once we had put all these lines up, we needed to start making “tiles.”
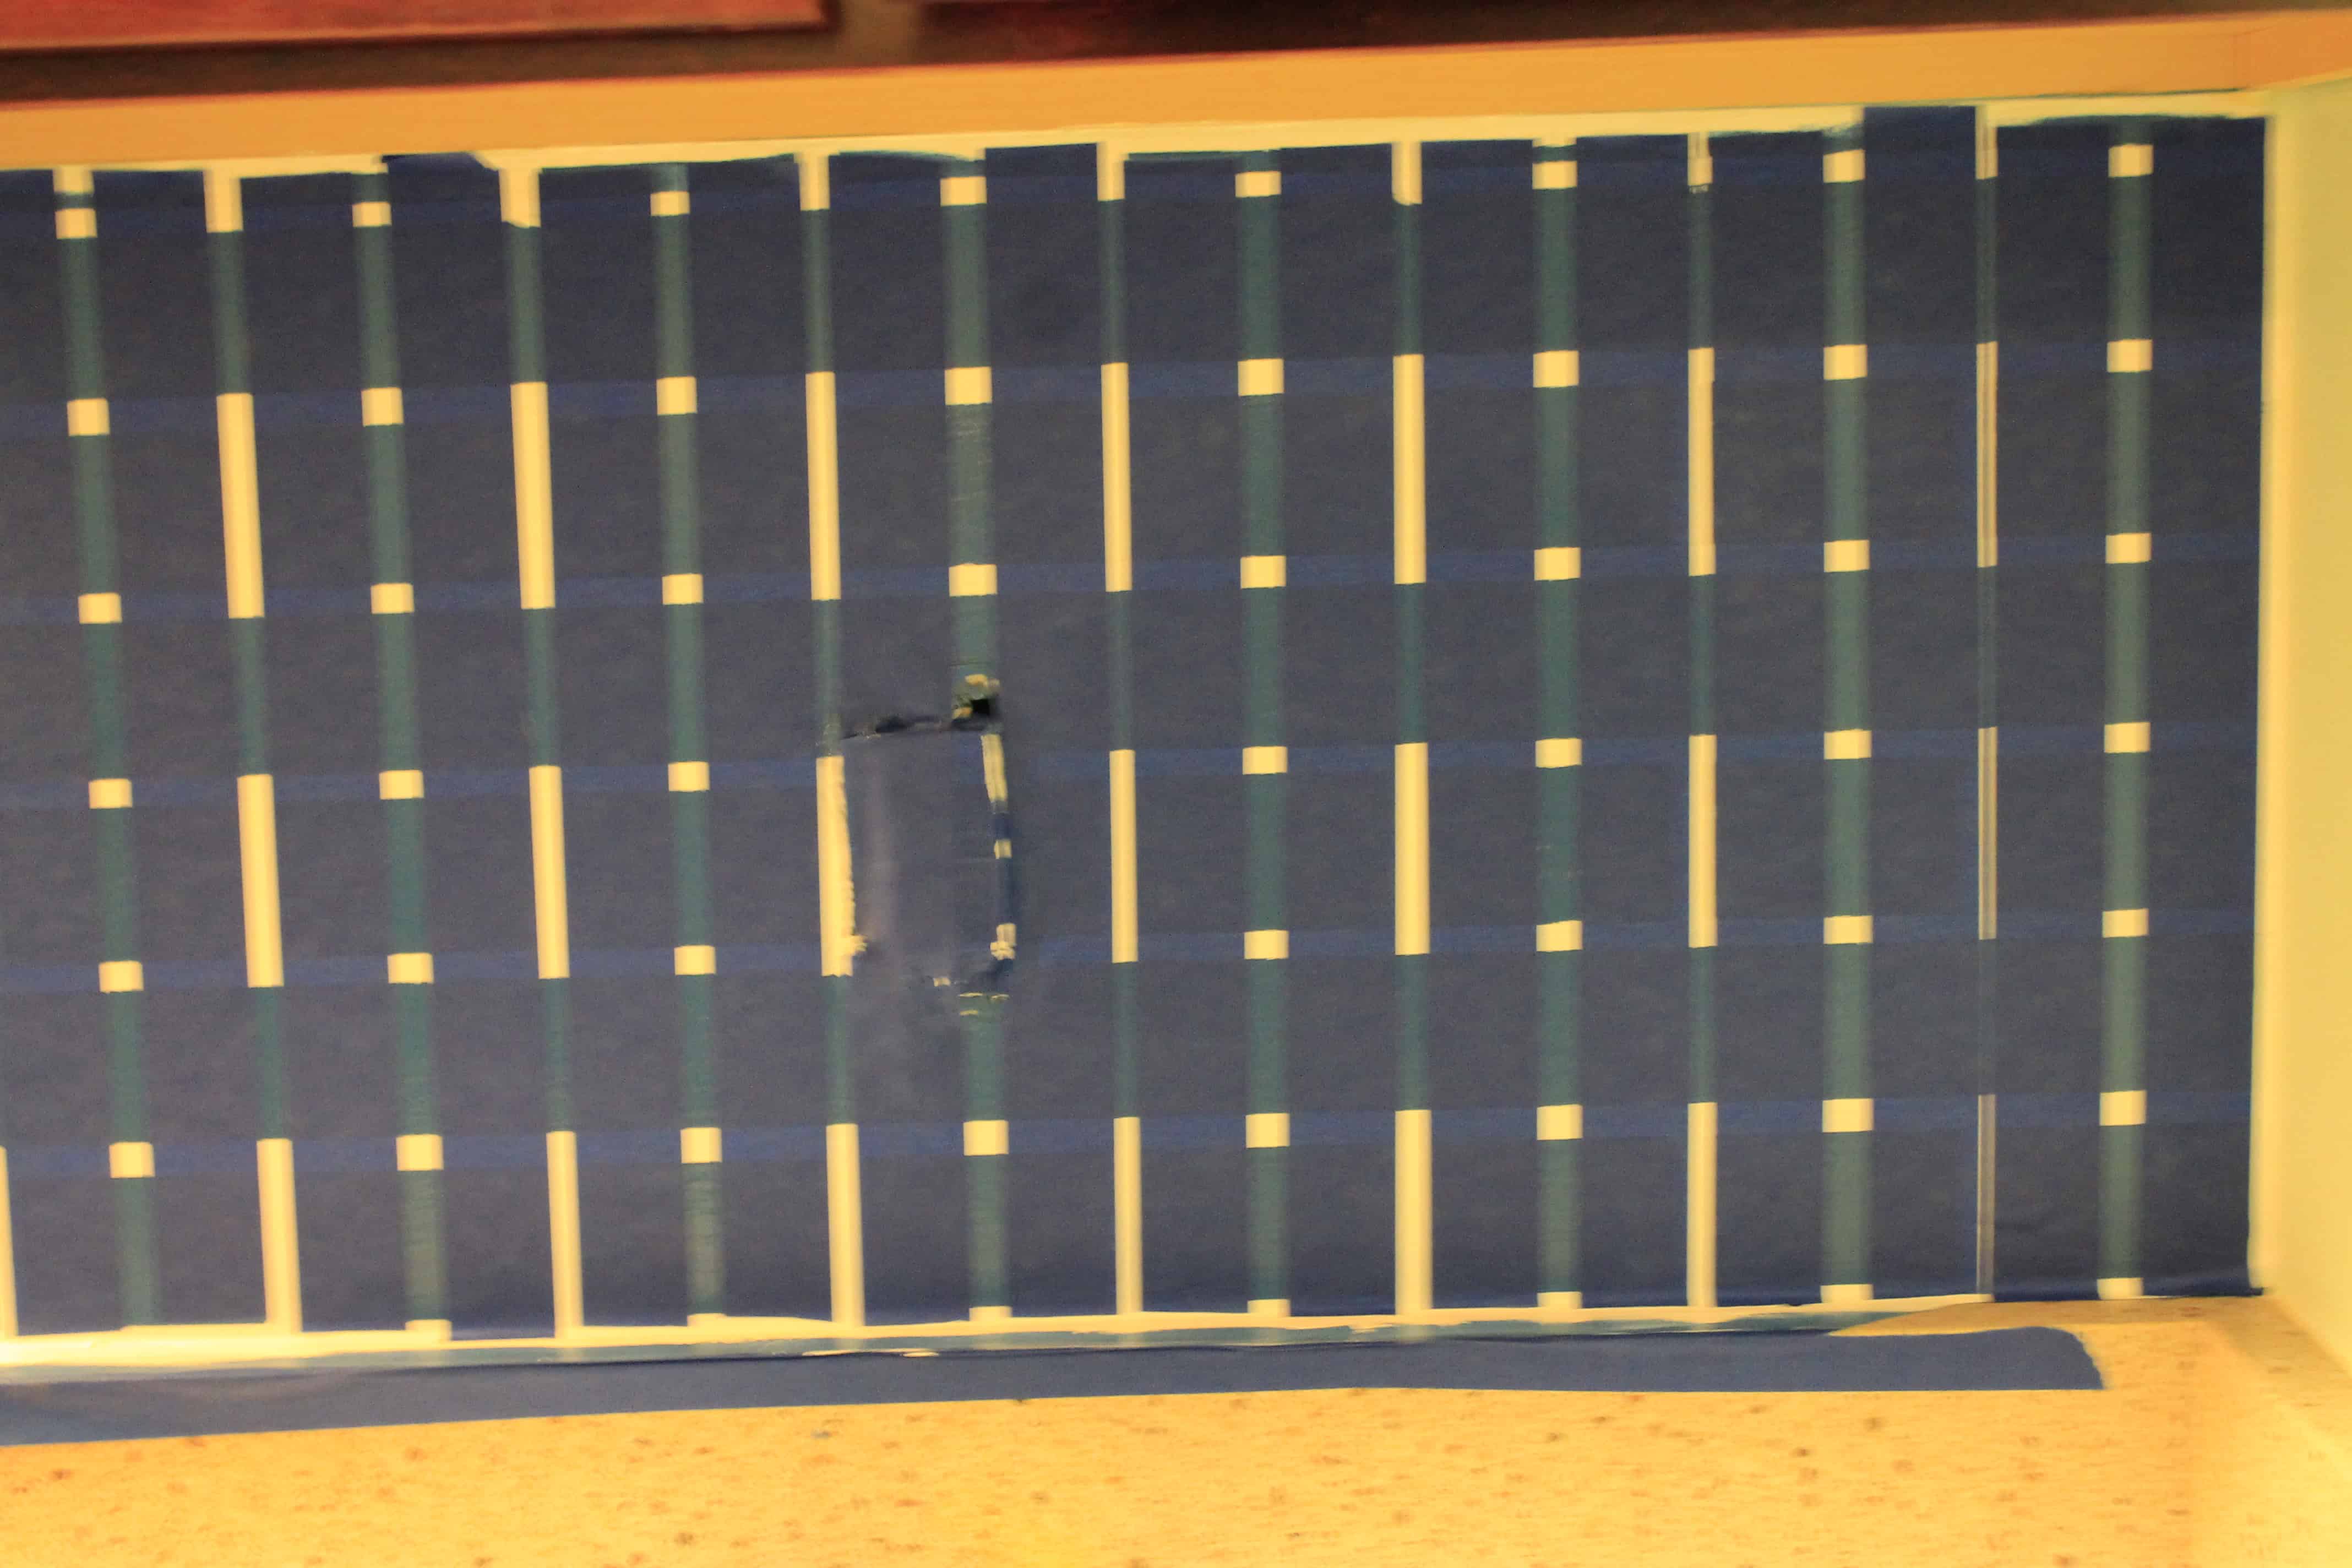
We wanted them to be three inches wide, so we put vertical strips of the two-inch thick painters tape up and overlapped one inch of them so that we would have three-inch wide tiles.
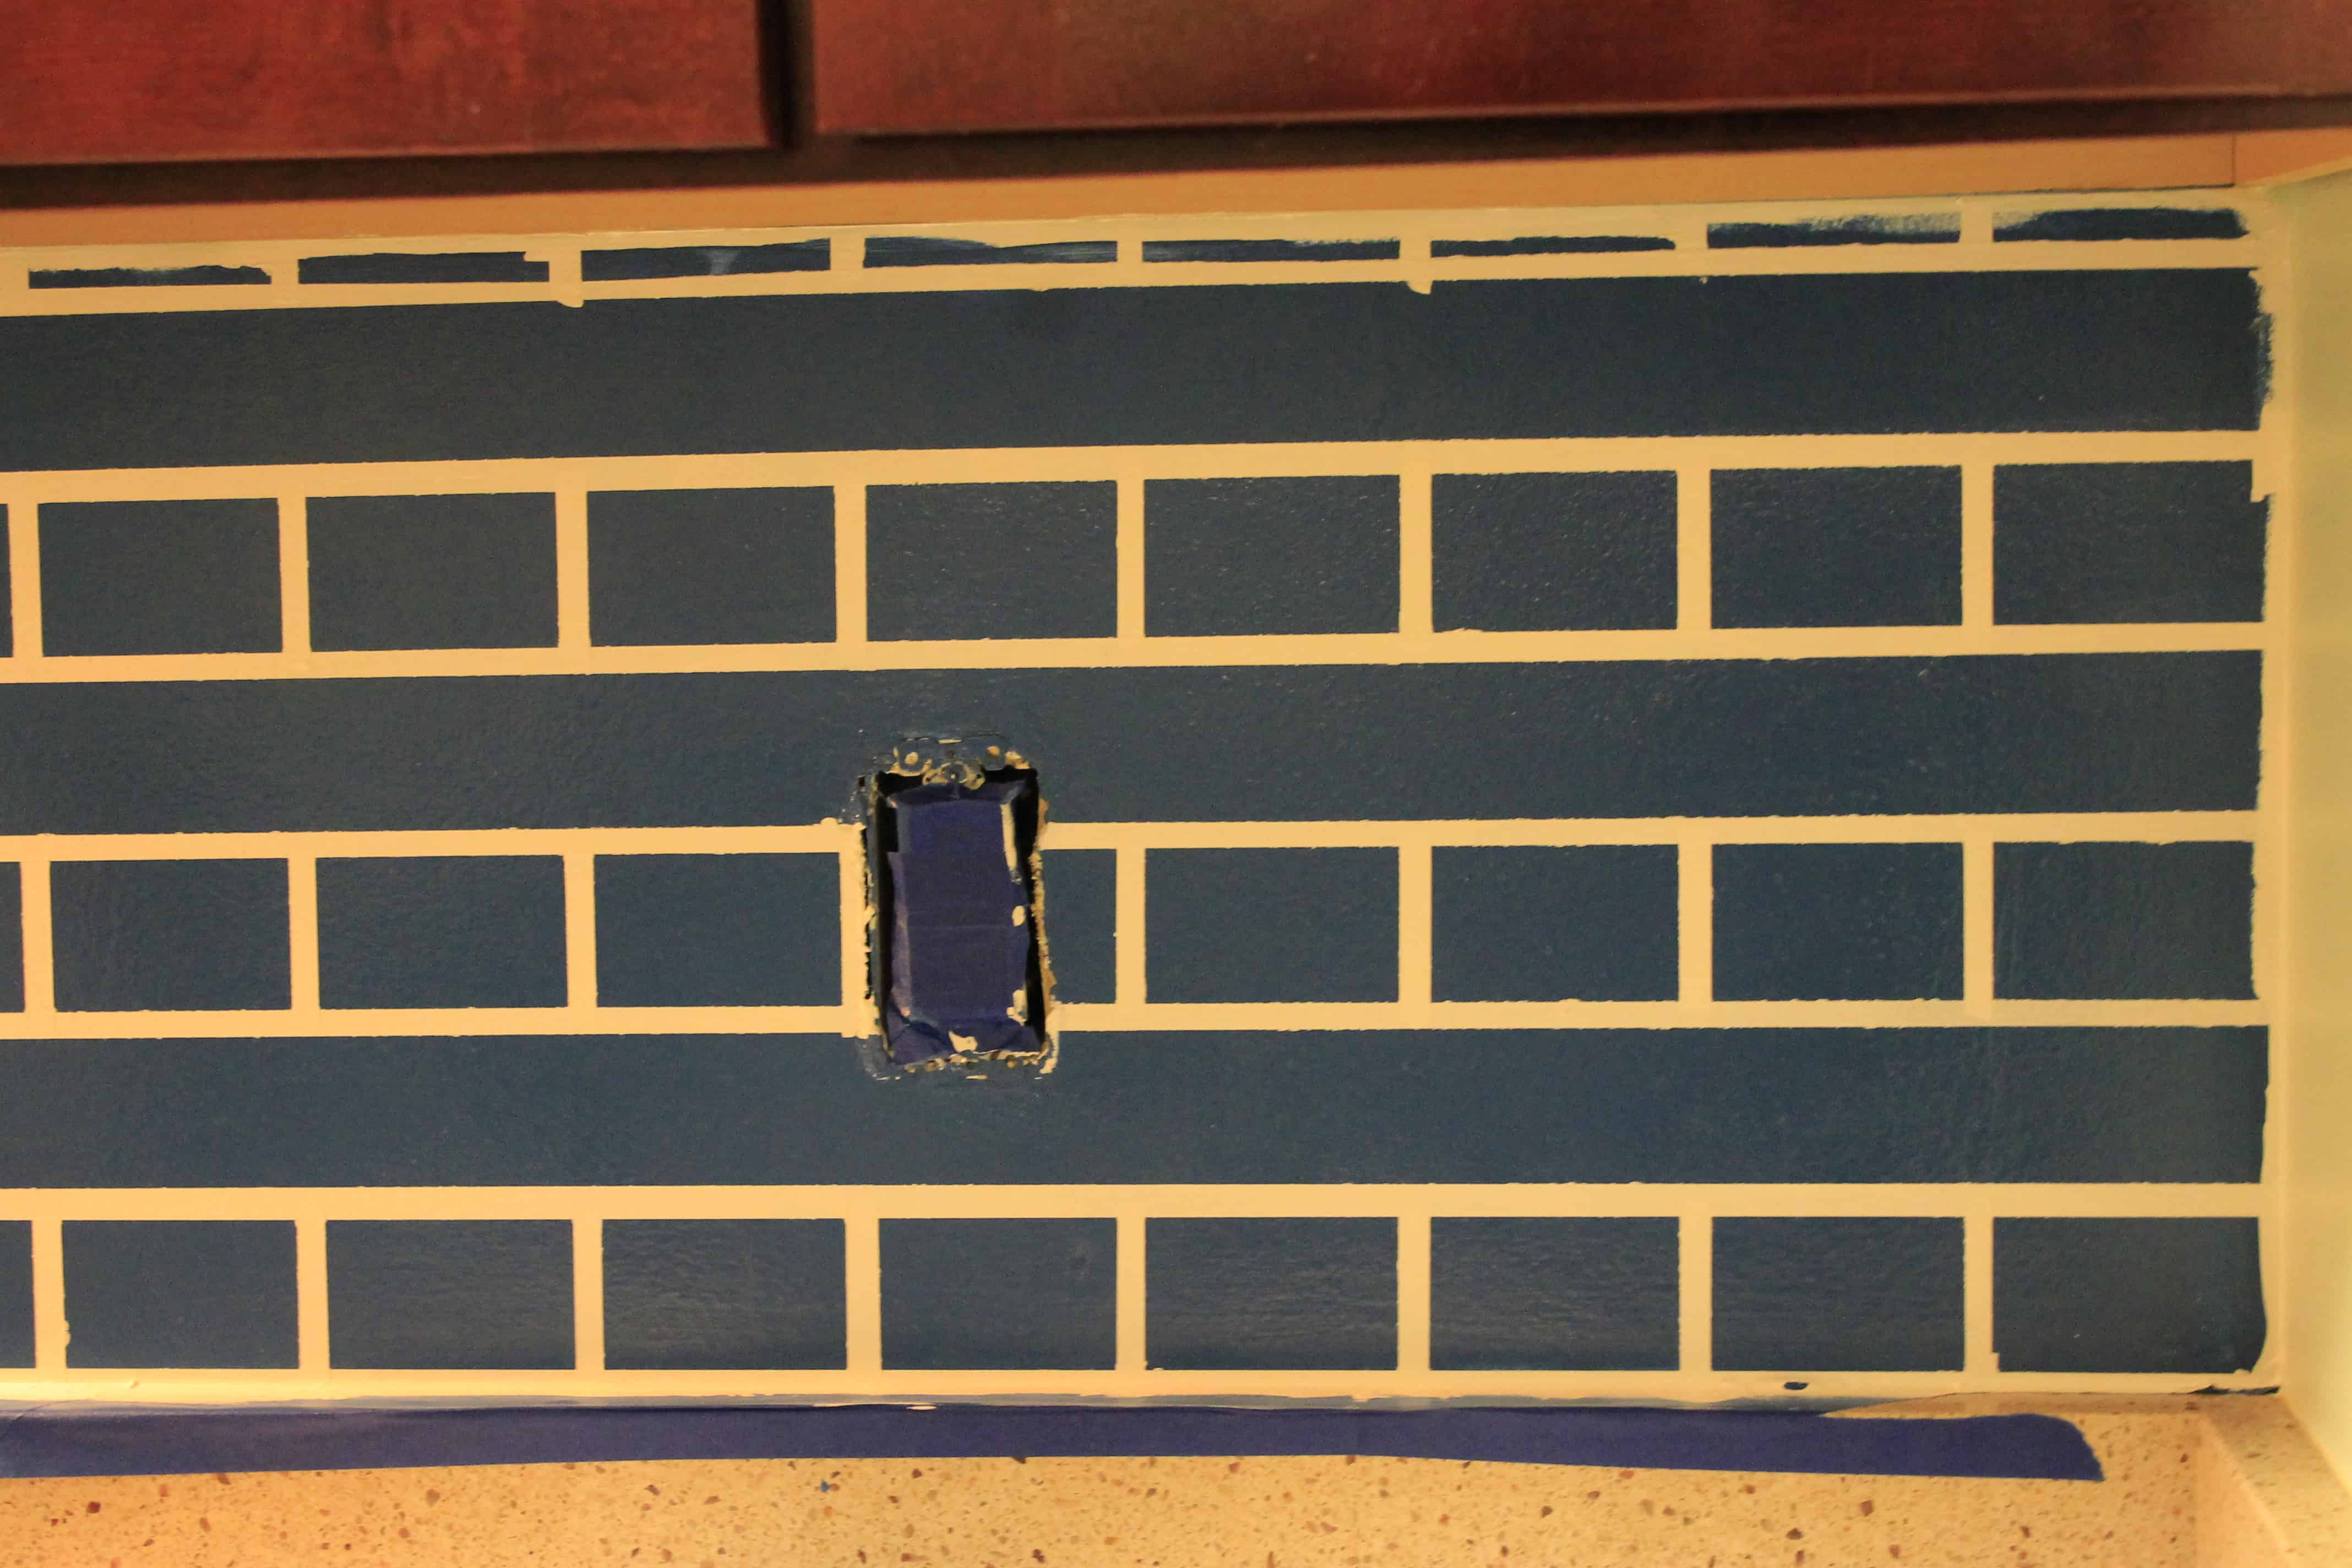
Then, we would do this again with quarter inch “grout” spaces between them all the way down. After they were all created, we painted alternating rows white.

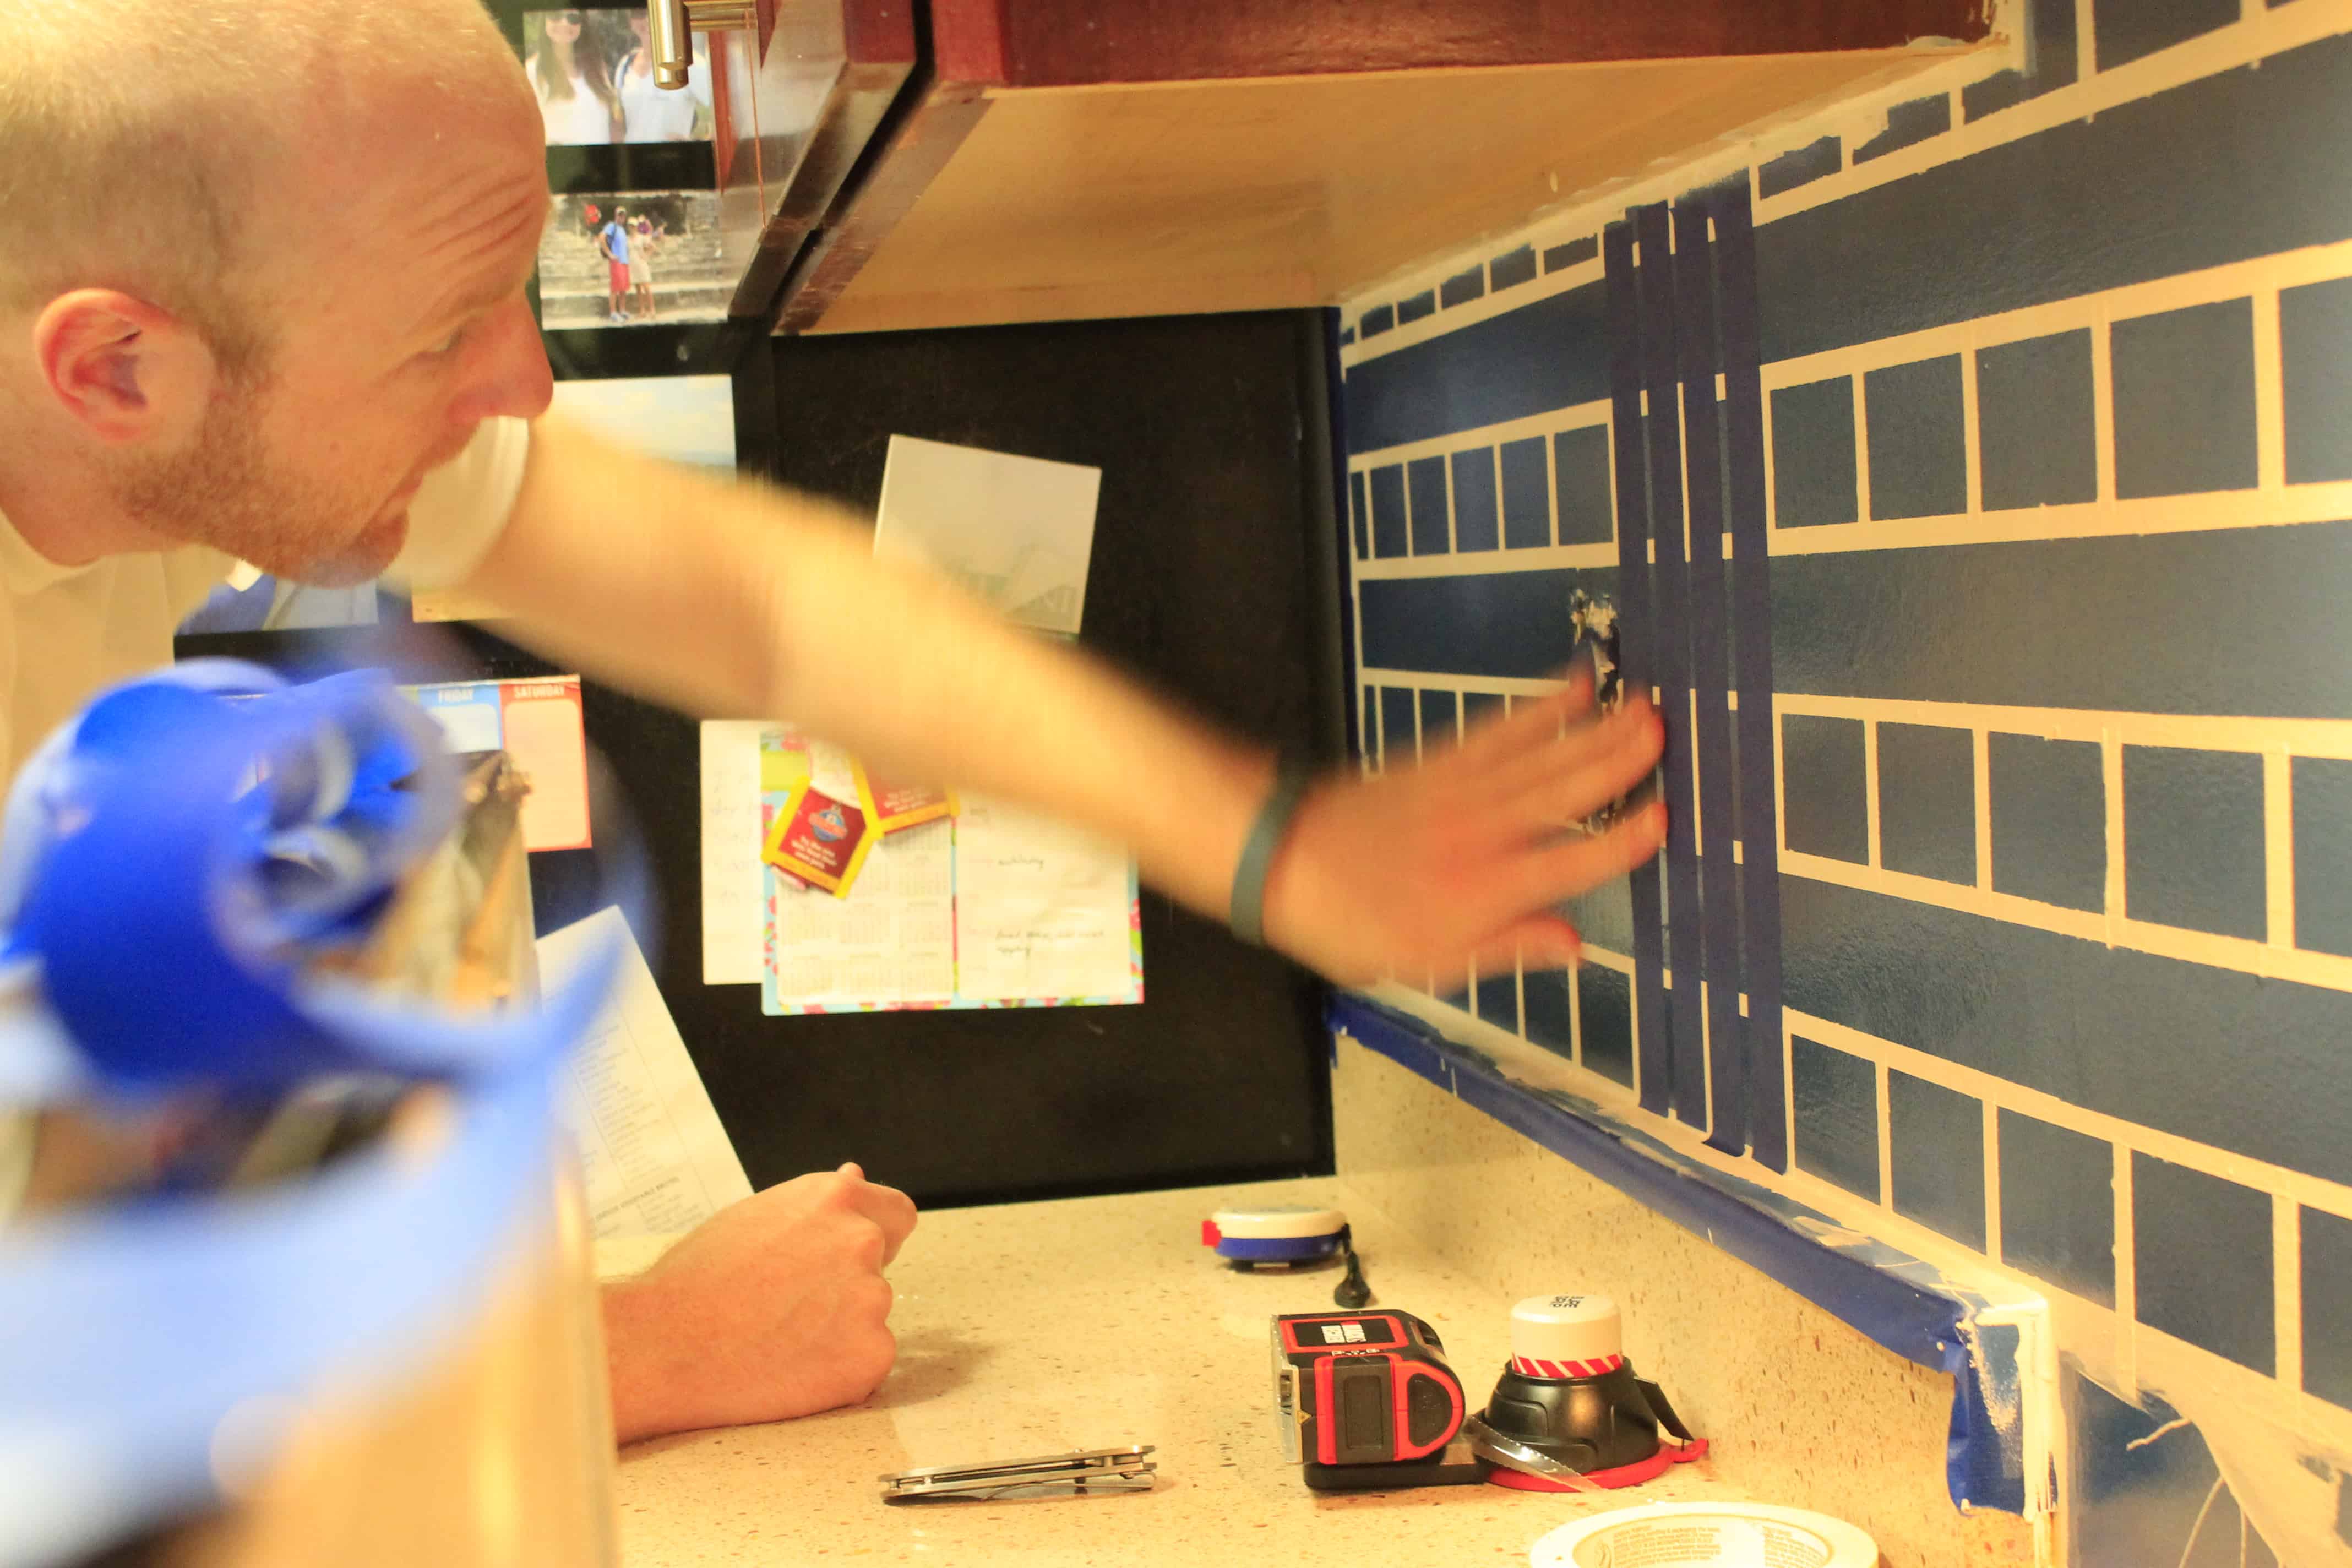
We didn’t want a plain grid – I wanted the tiles to appear staggered on every other row.
So, we needed to do alternating rows, but we needed to do them evenly spaced in the middle of the first sets of tiles.
We went and bought 1.41″ painters tape and taped vertical lines along where we had already painted lines.
We taped them up just slightly overlapping the lines we had already painted so that we had roughly a quarter of an inch.
I had to eyeball this, and it turned out alright.
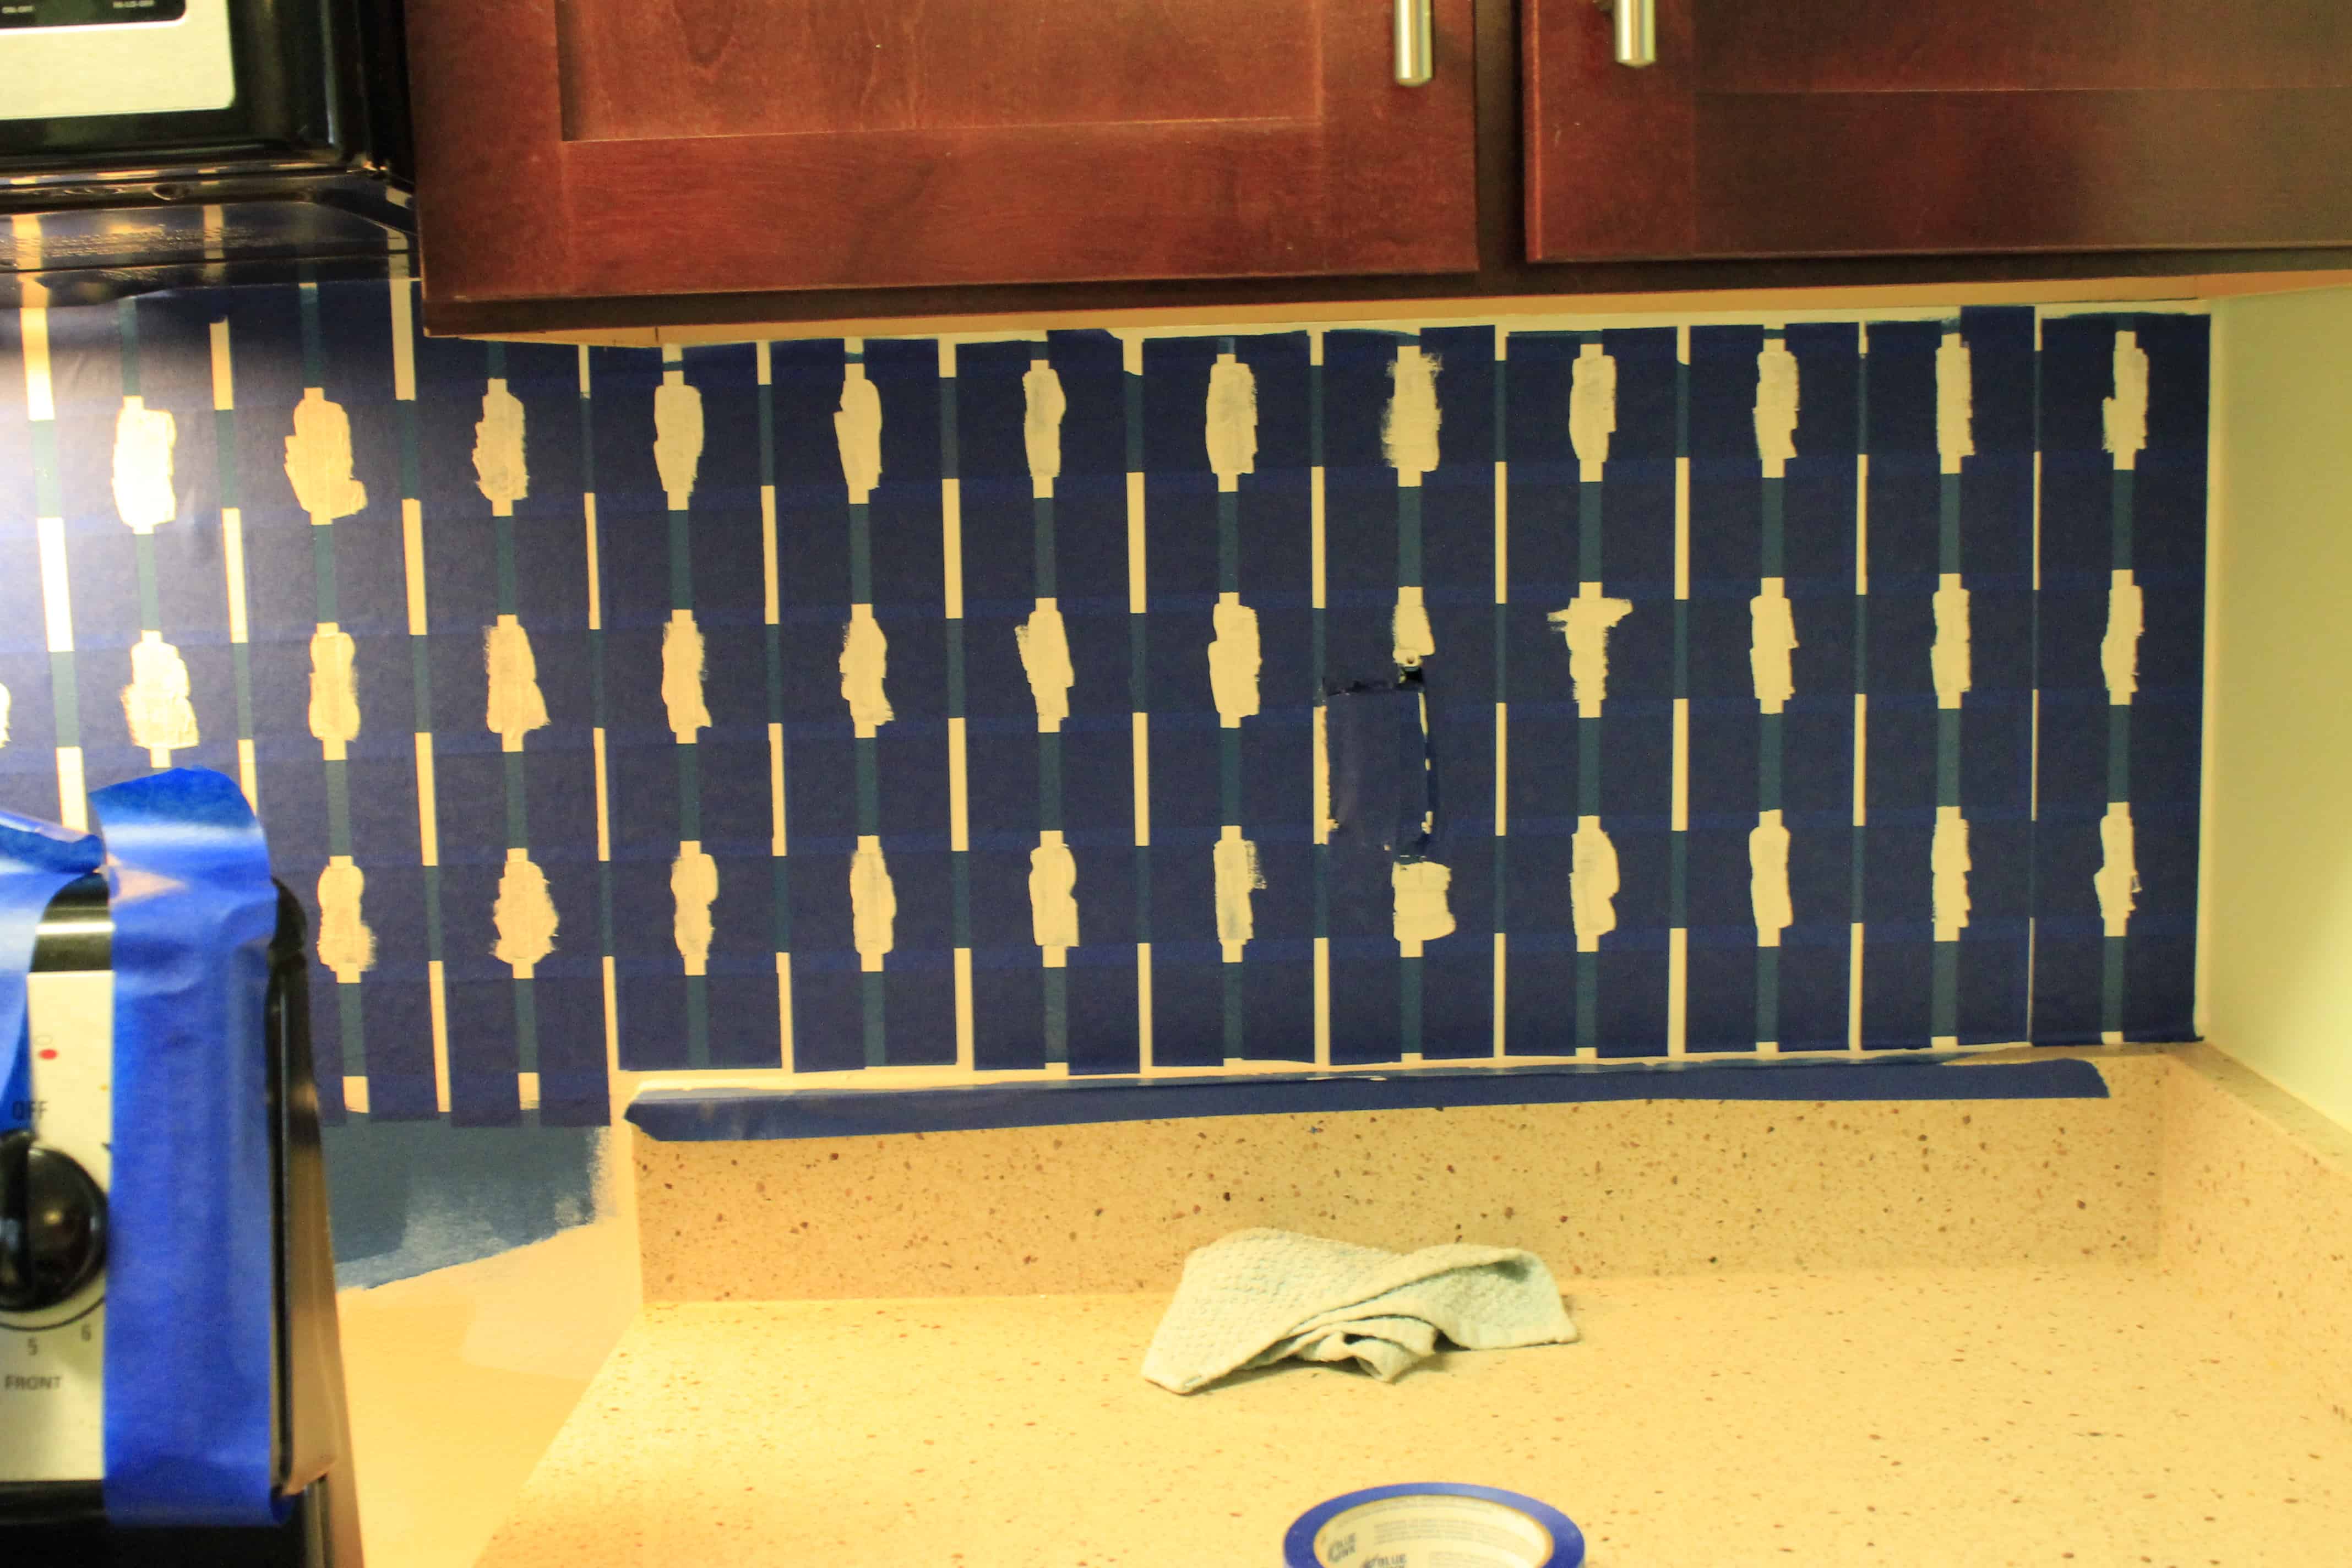
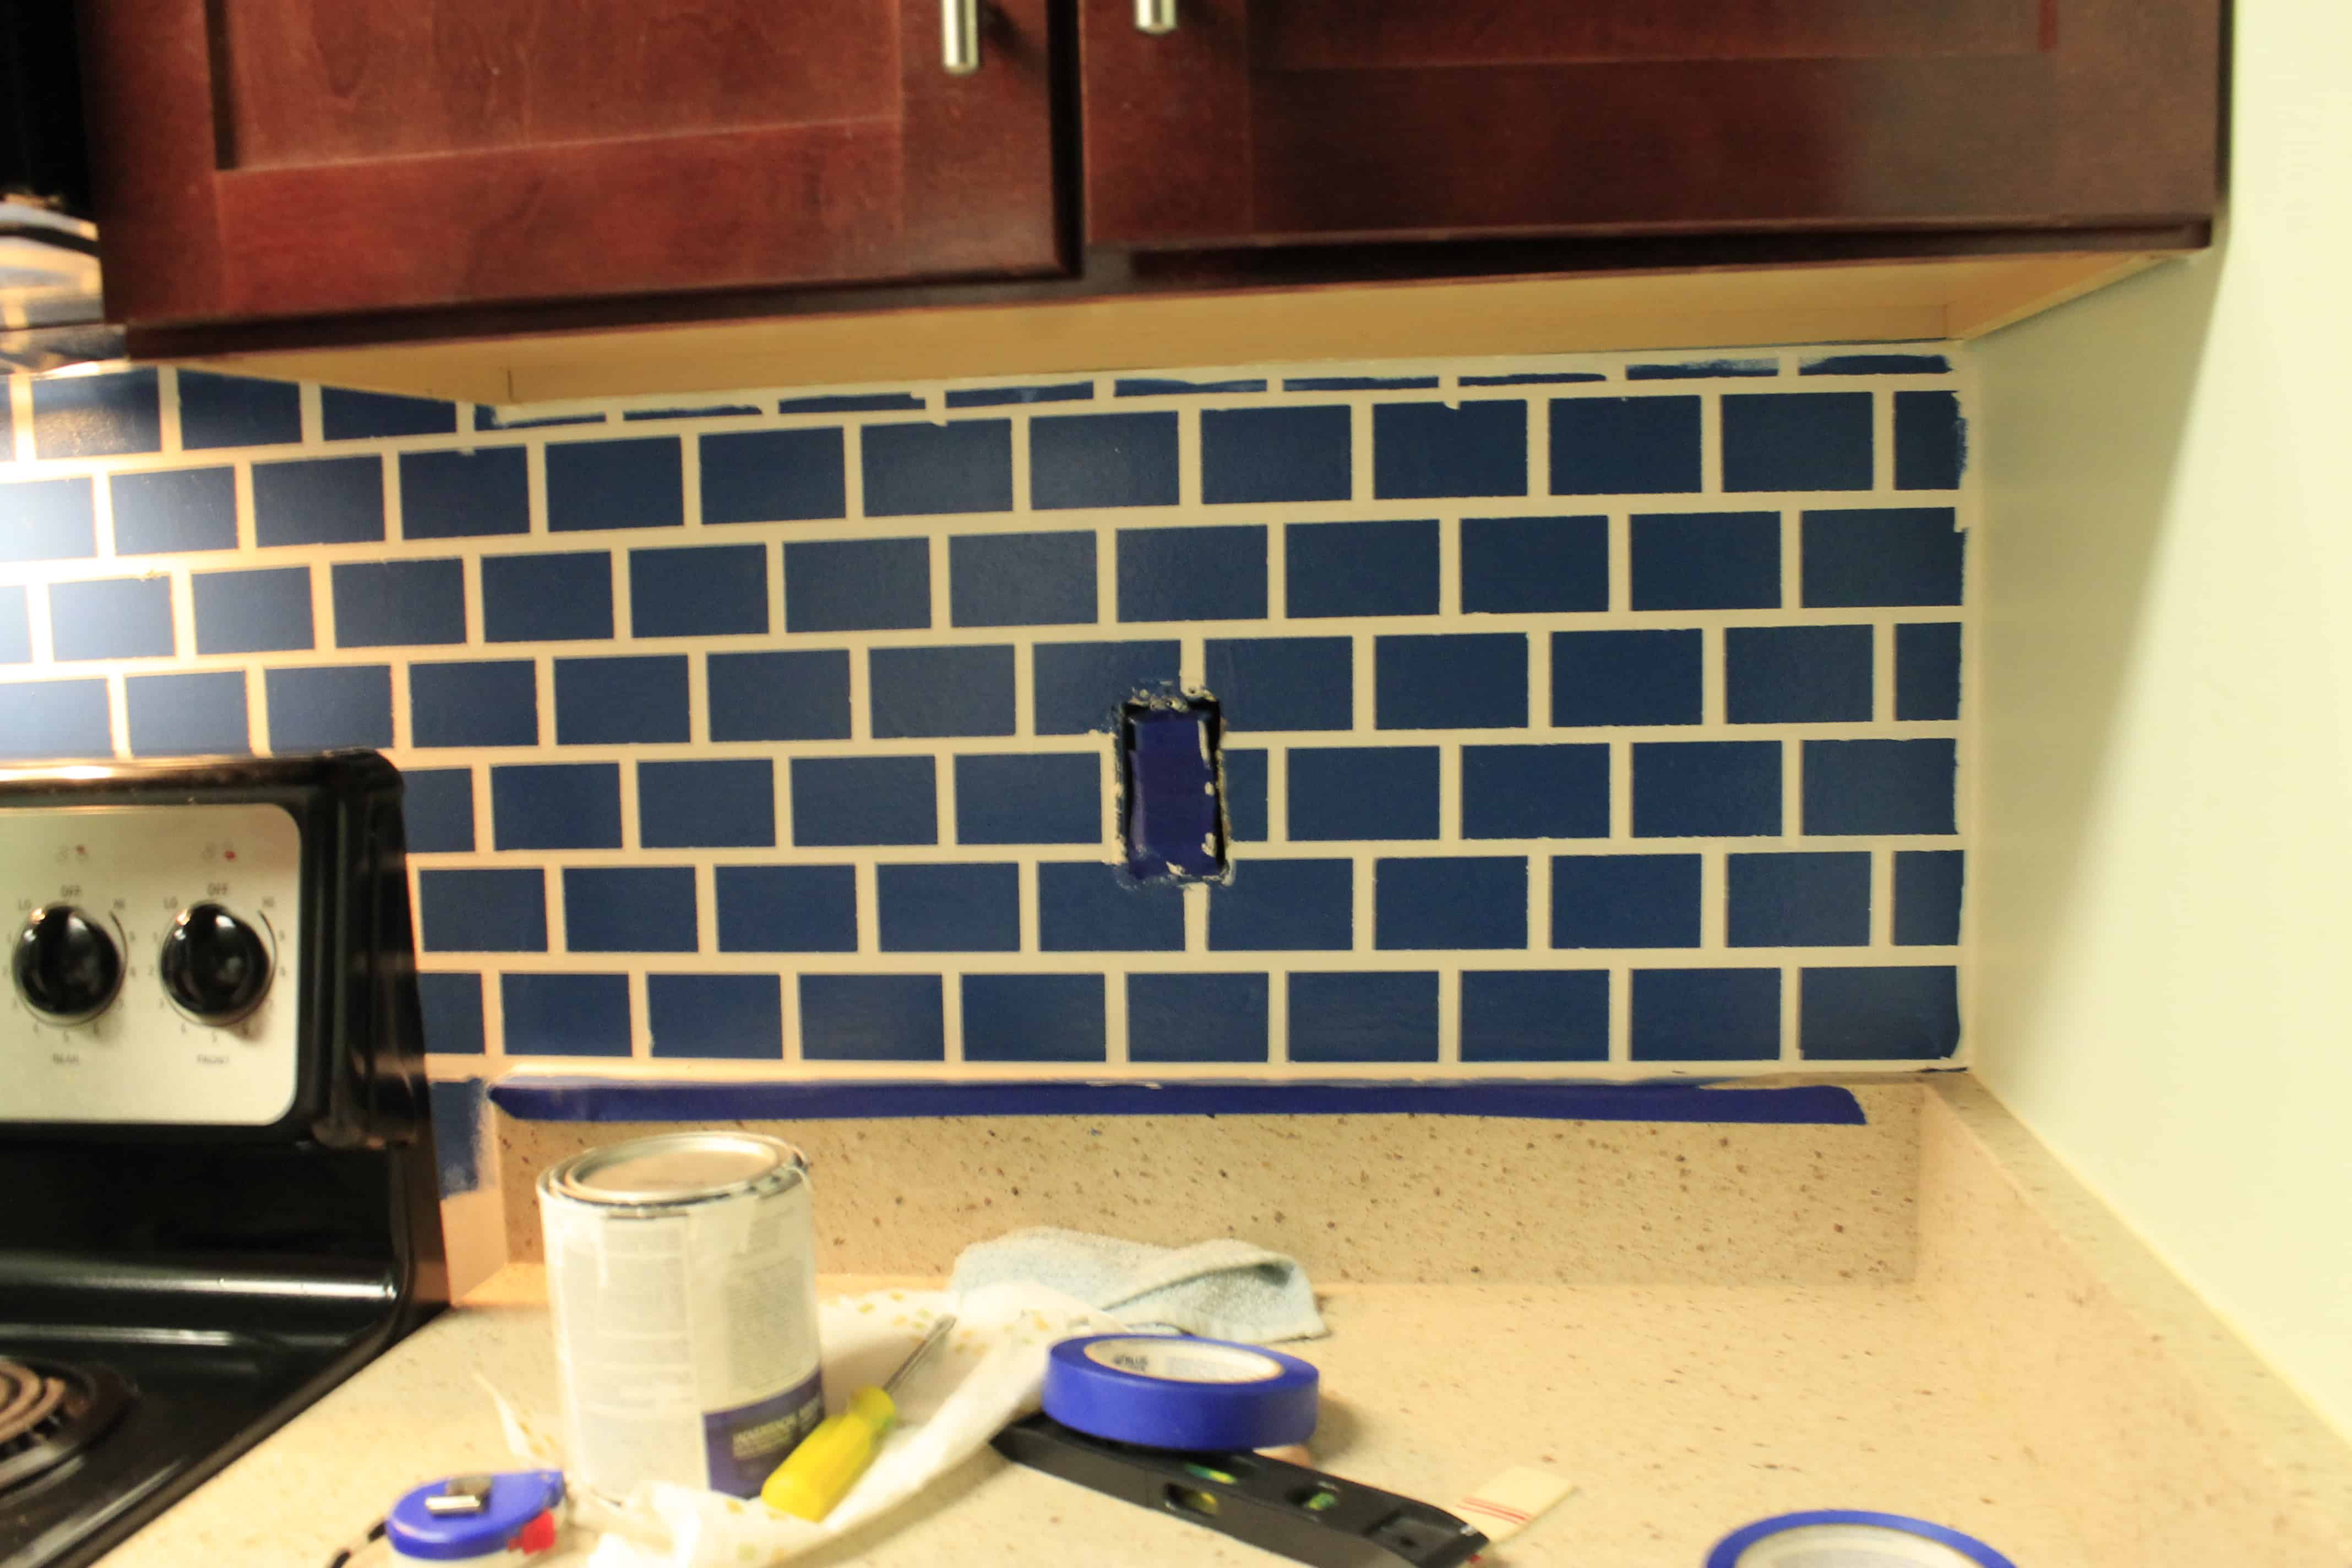
STEP 4: Clean up
After this, we took all the tape down and did small touch-ups.
I was so nervous multiple times throughout this project.
We kept having problems figuring out how to do certain parts and each step of the way, I kept thinking it looked terrible.
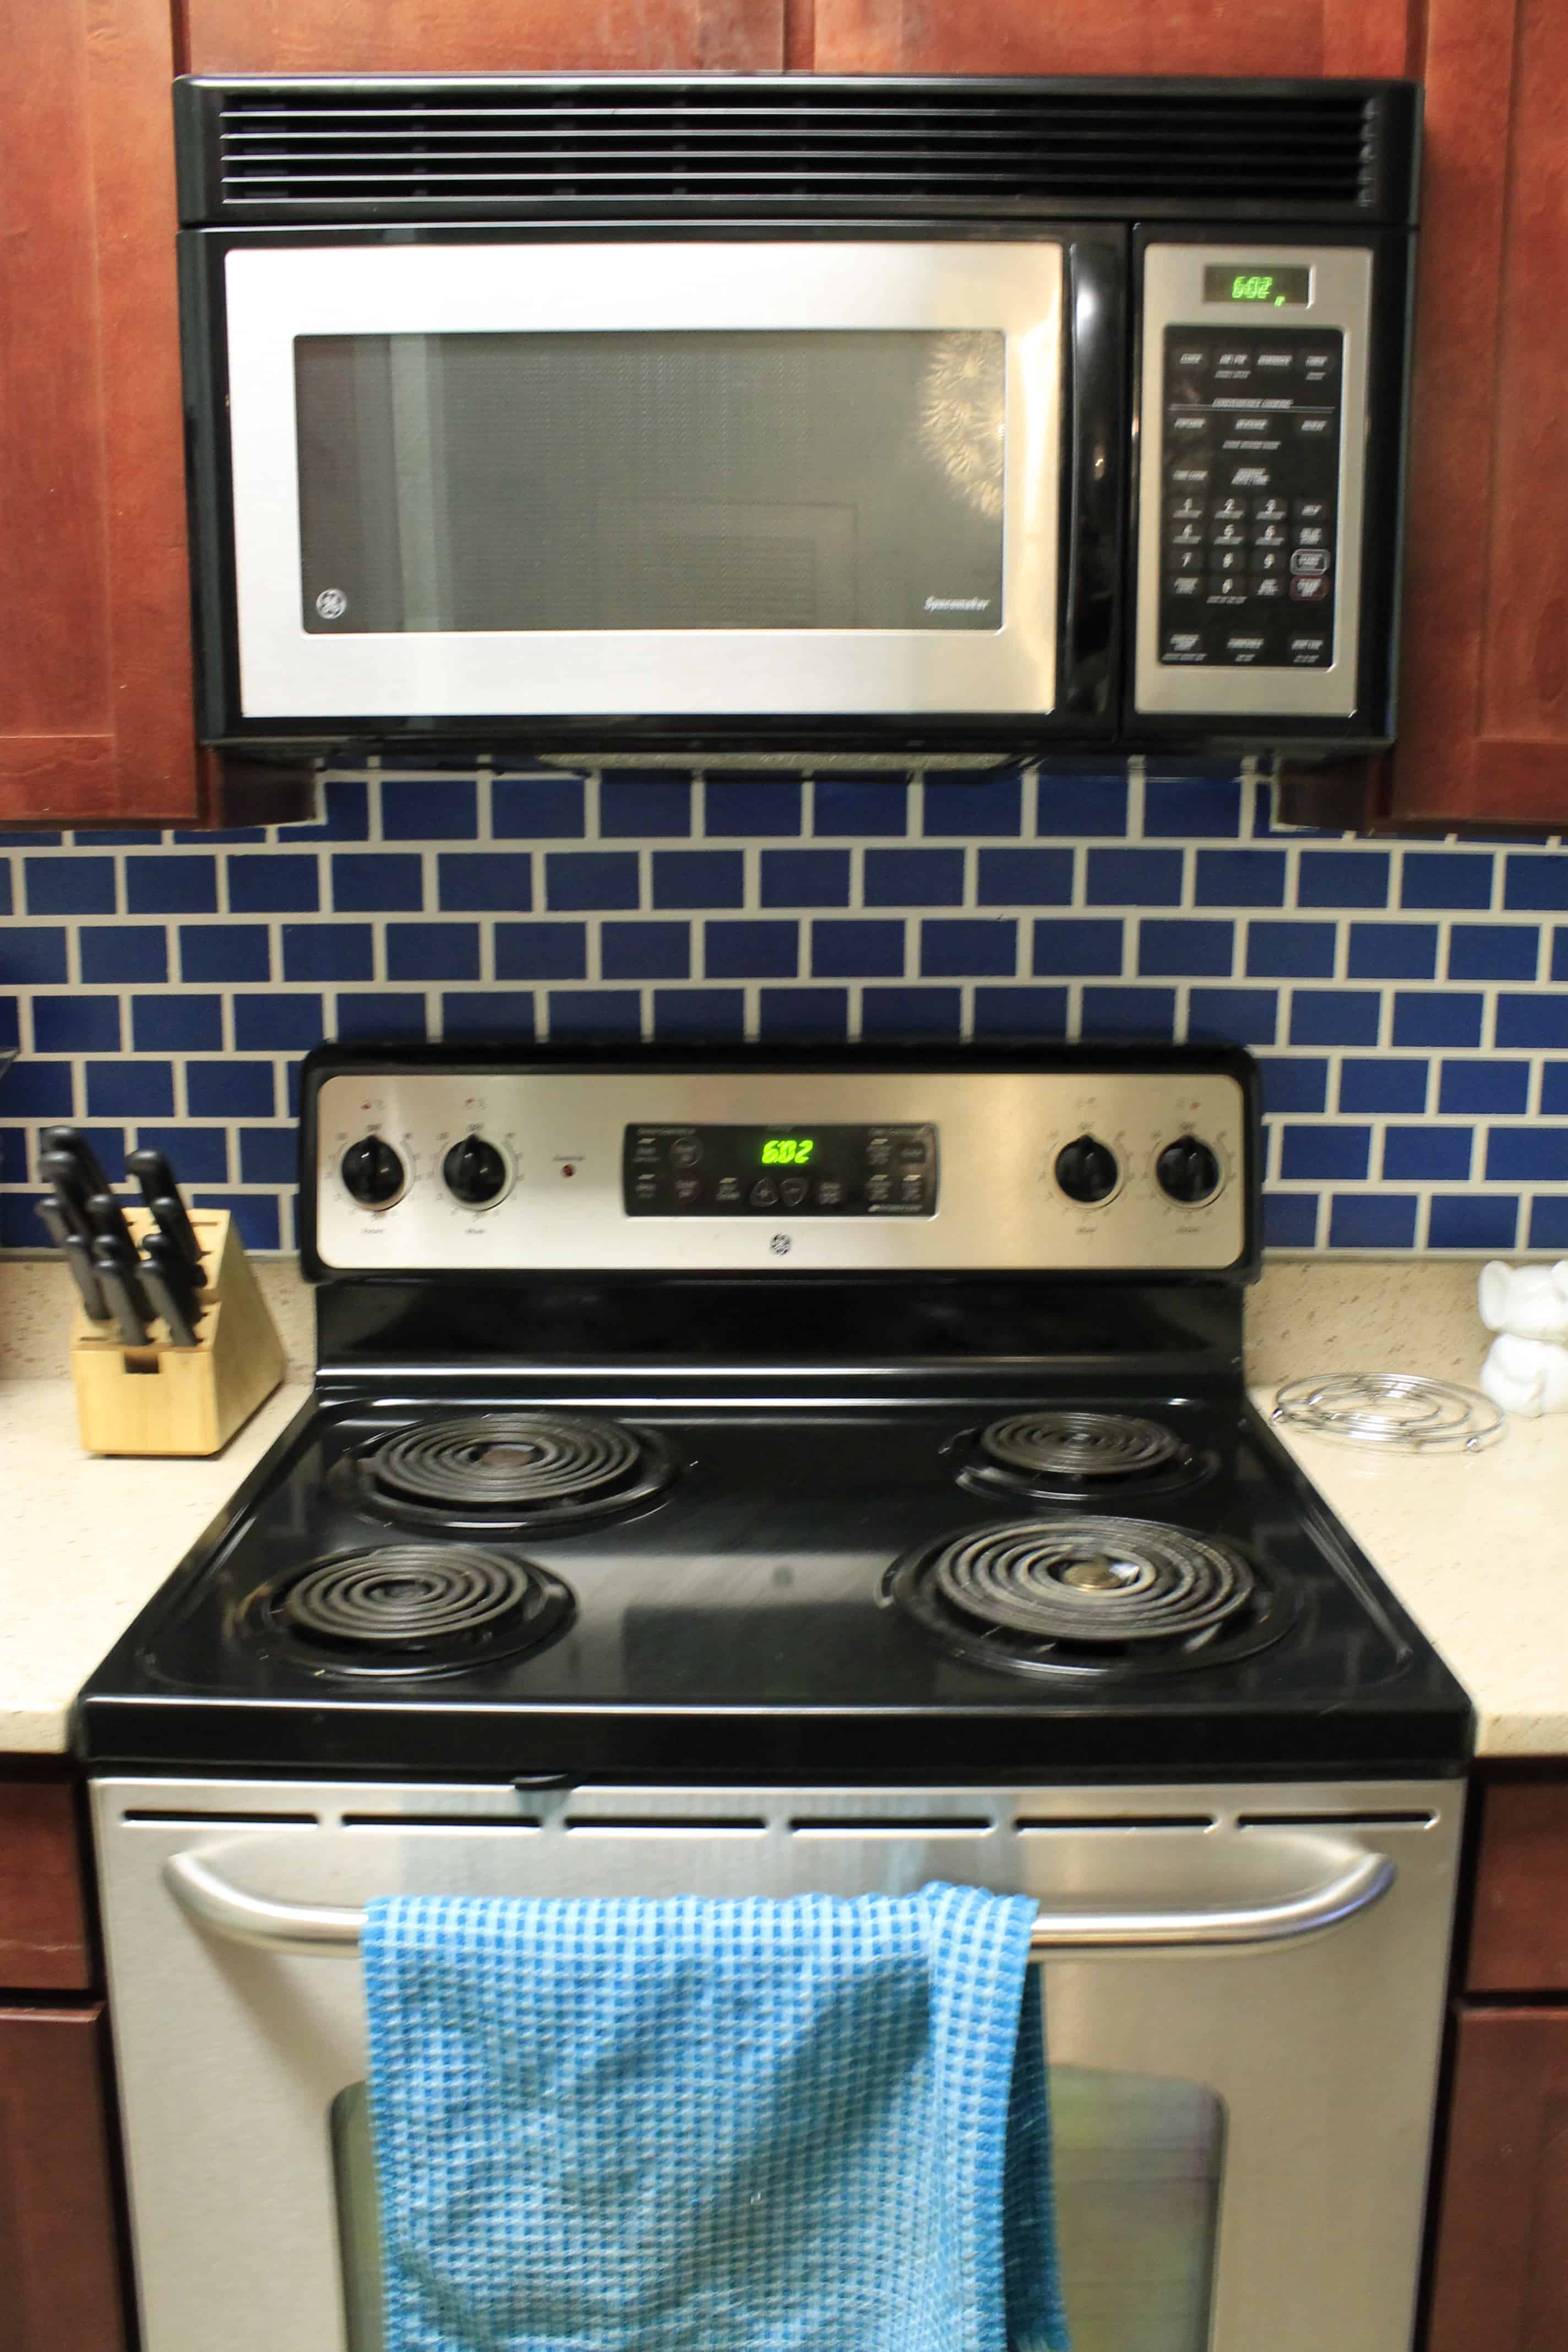
It wasn’t until we got all the way through it that we looked at it and knew that it was what I had envisioned.
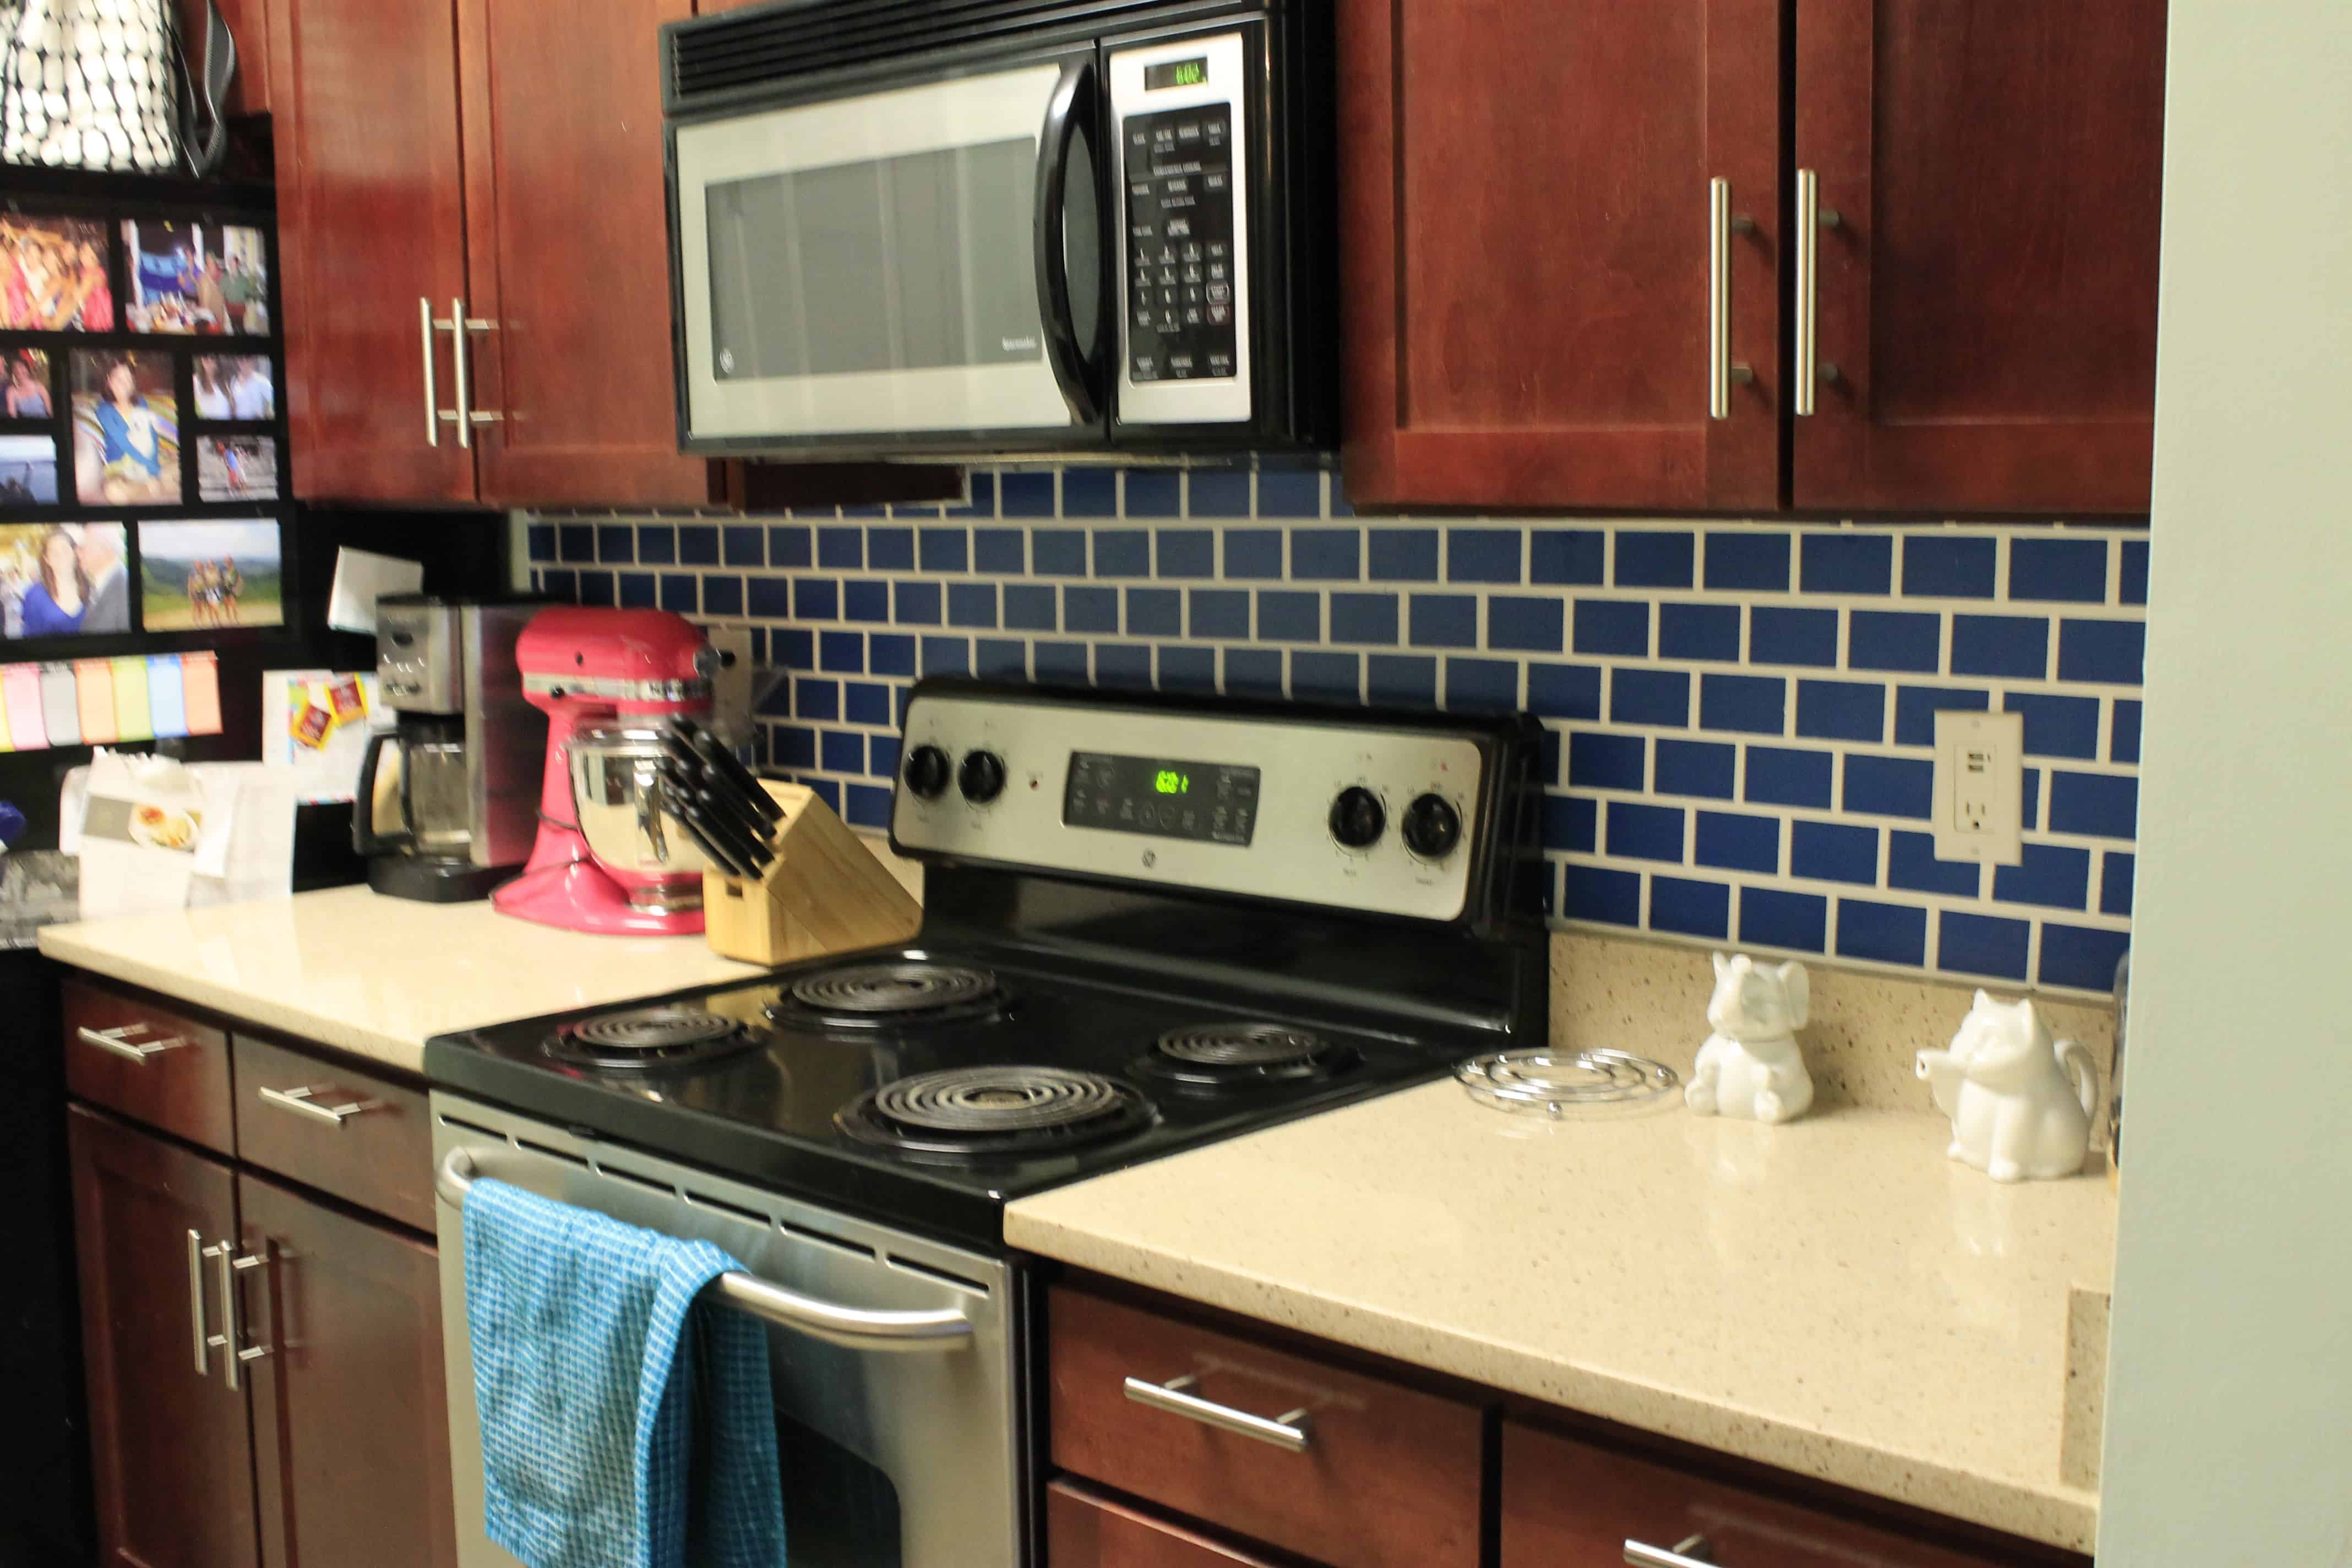
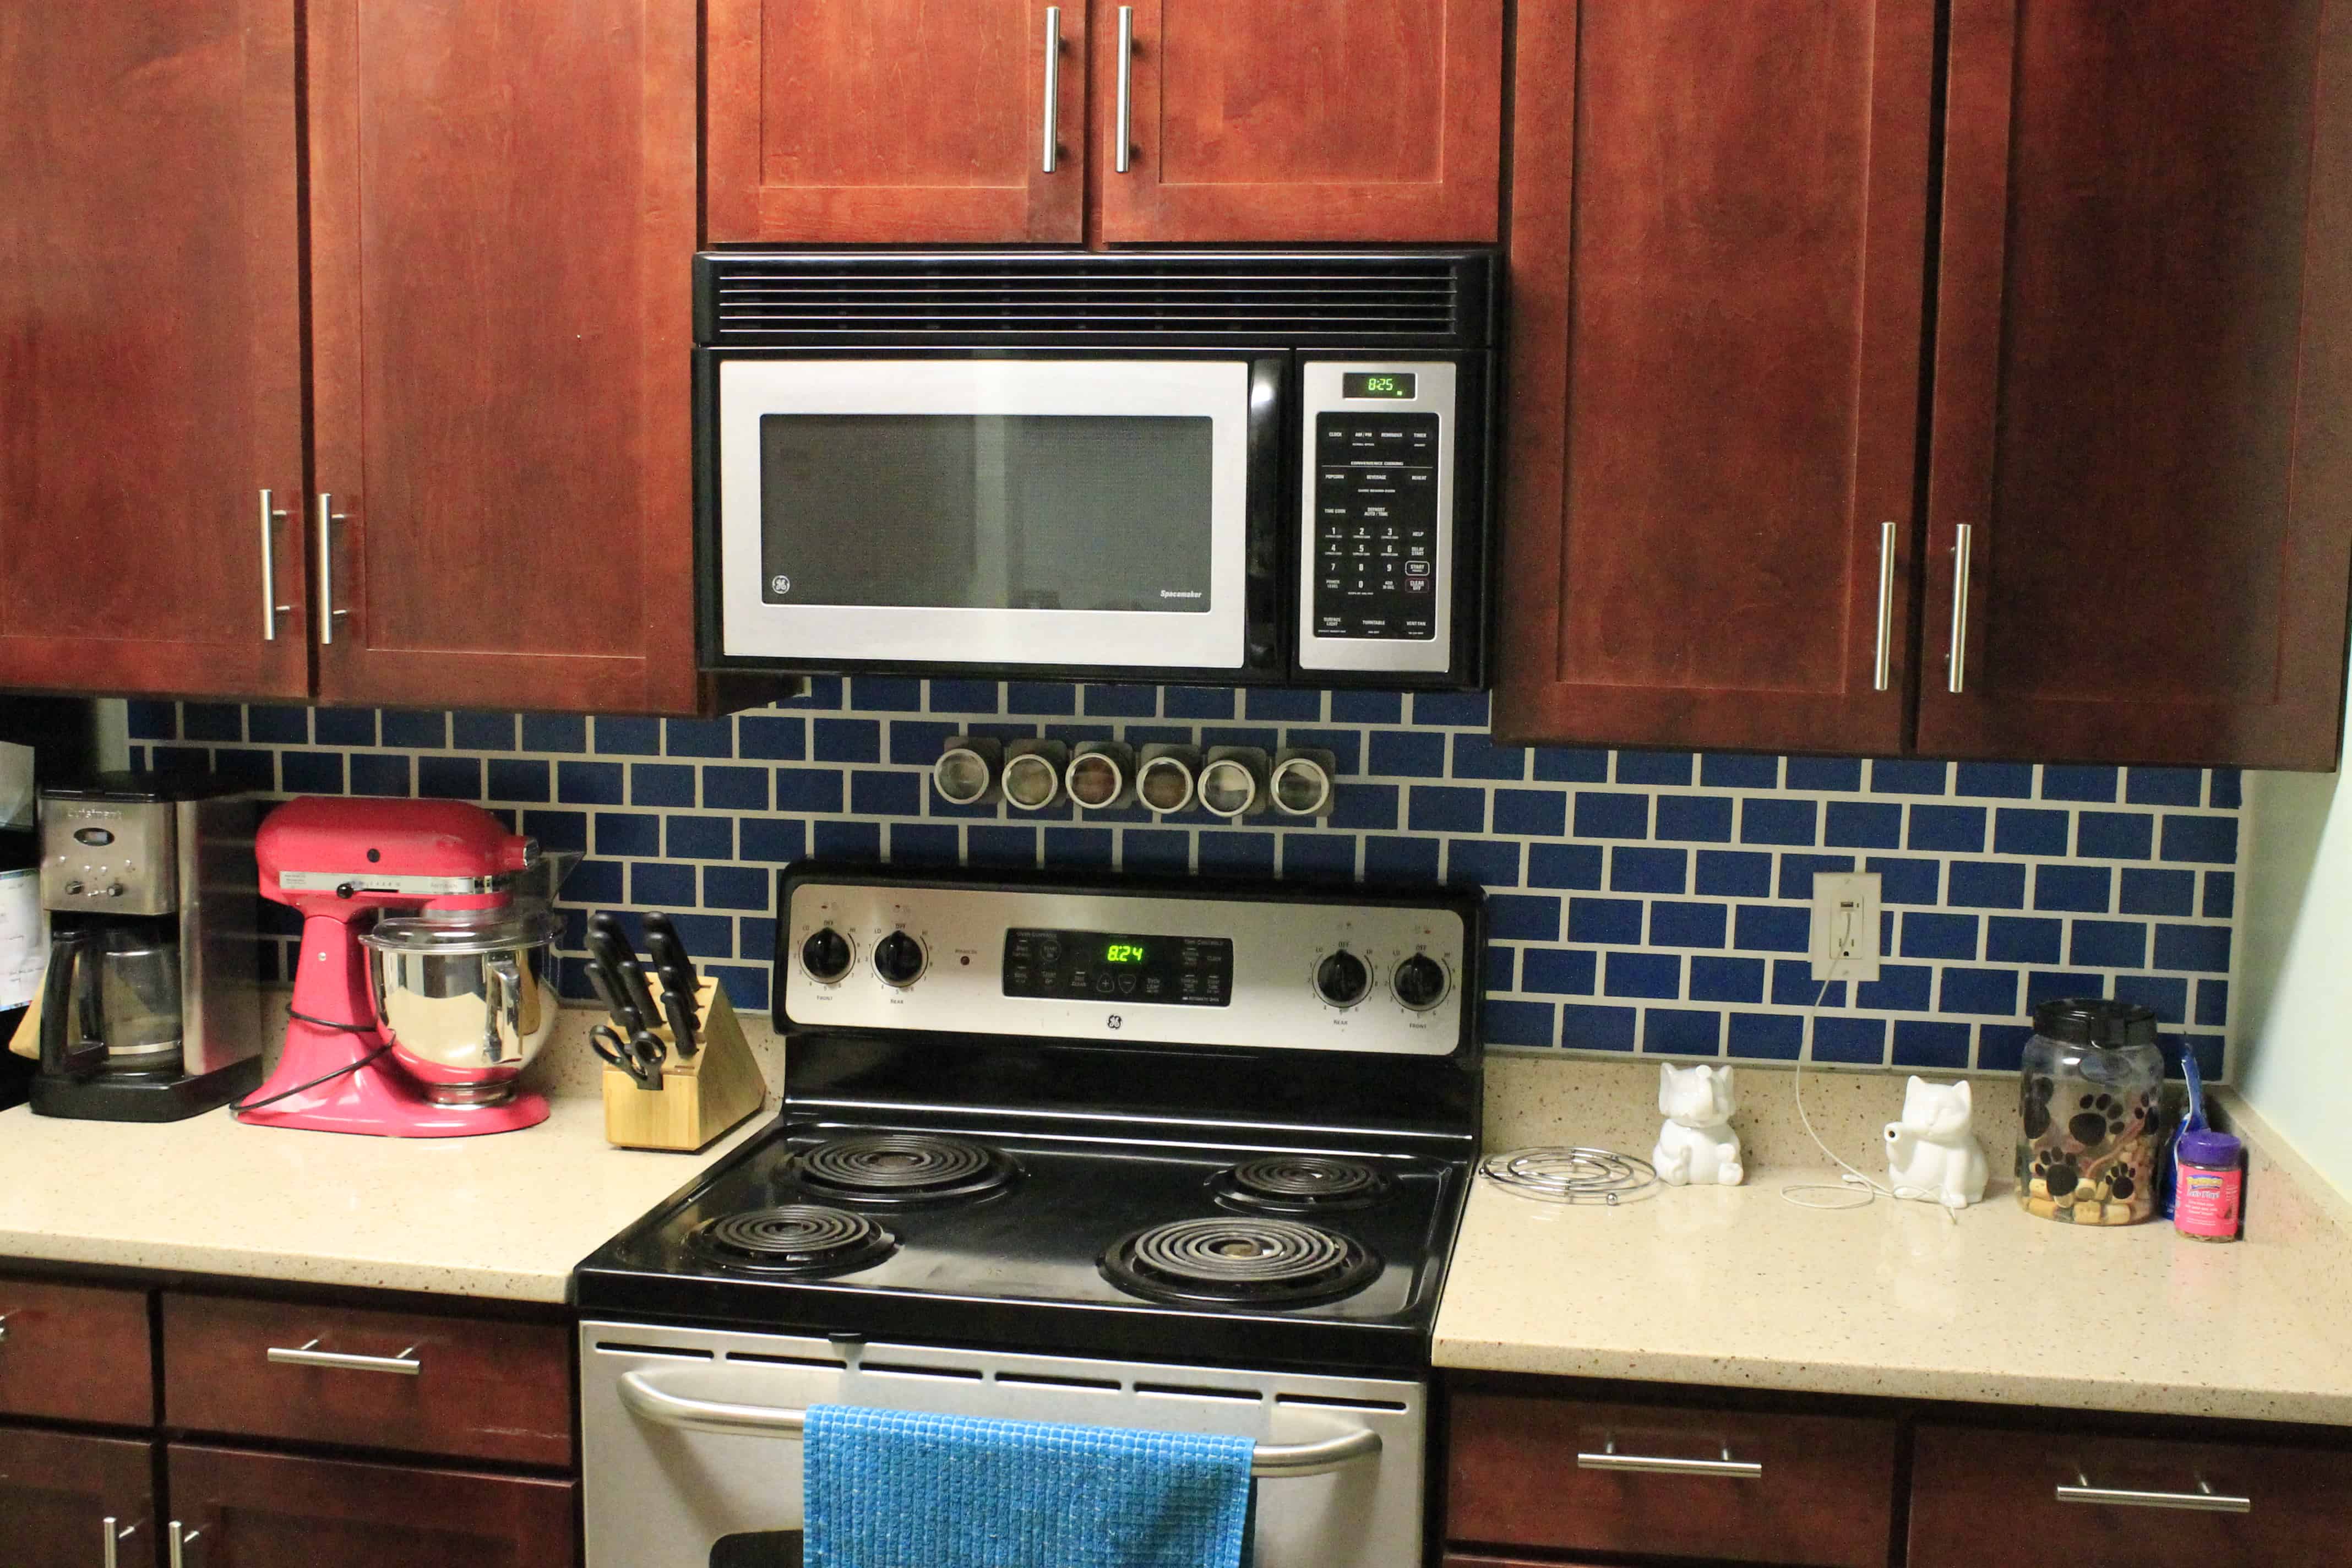
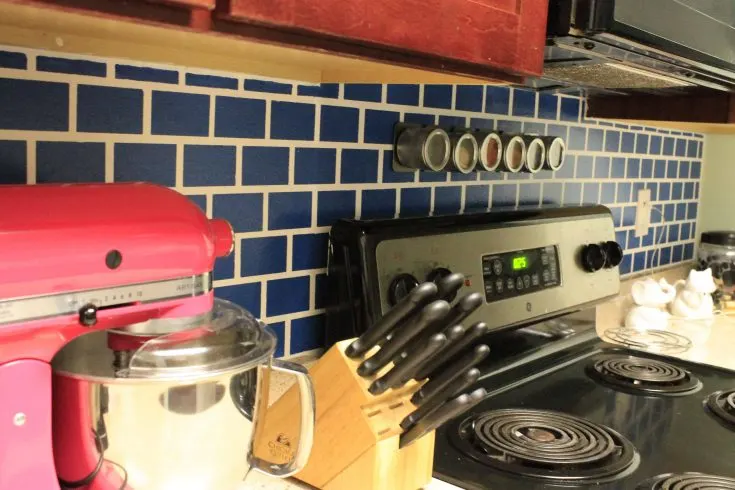
It might not look exactly like tiles but it’s pretty close.
Even if you don’t think it look like tiles, it’s still a really cool impact wall that breaks up the kitchen.
If I was doing it again, I’d make the “grout” lines slightly thinner.
My goal was 1/4 inch, but they ended up being closer to 1/2 inch. I think that it was most important to keep them consistent throughout the project.
But with all the phases of drying paint that this project had to go through, it took a whole week to do and was really frustrating having half of our kitchen as a disaster/work zone.

But, in the end, I’m glad we did this.
How much does it cost to paint a backsplash?
We spent less than $40 total on this project.
For the cost of 2 (small) cans of paint, our kitchen looks new and exciting! The blue really ties in the living room rug and the dining room bookshelf.
I am glad to finally take a step to make the kitchen more us!
We have also now done a tile backsplash. In this post, we compare the DIY process of a painted backsplash to a tile backsplash! We also did a glass peel and stick tile wall.
Pin this project so you can find it later!

How to paint a backsplash to look like tile
Backsplashes can be expensive and use specialized tools. Here is how to paint a budget-friendly backsplash.
Materials
- Paint in tile color
- Paint in grout color
- Painters tape - 2" wide
Tools
- Laser level
- paint brushes
Instructions
- Paint the entire area with your tile color (blue). You might need 2 coats. Allow to dry.
- Use laser level to mark horizontal grout lines. Use 2" wide tape to mark off tiles with 1/4 inch gaps in between.
- Paint grout color (white) in the 1/4 inch gaps. You might need 2 coats. Remove the tape while wet.

- Add stripes of tape 1/4" apart every 3 inches.
- On every other horizontal row - Paint grout color in the 1/4 inch gaps. You might need 2 coats. Remove the tape while wet.
- Repeat this process staggered for the alternating rows.

- Do any necessary touch ups after removing the tape.

Recommended Products
As an Amazon Associate and member of other affiliate programs, I earn from qualifying purchases.


Have you done an alternative to a tile backsplash?


Looking for something?
We’ve been doing this since 2012 so we have a LOT of blog posts!
Search stuff like: Ceiling Projects | DIY Plant Stands | Thrift Flips


Hey there, I’m Sean, the woodworking enthusiast and builder behind CharlestonCrafted.com! Since 2012, I’ve been sharing the magic of turning raw materials into beautiful creations. I love teaching others the art and satisfaction of woodworking and DIY. I try to inspire fellow crafters to make something extraordinary out of nothing at all.