
We’ve changed a number of lights (this is number three) in the condo since getting here to try to eliminate as many “boob lights” as possible. They all look great in the end, and aren’t that difficult to change out. The most difficult thing to me is having to do the job with your arms stretched above your head.
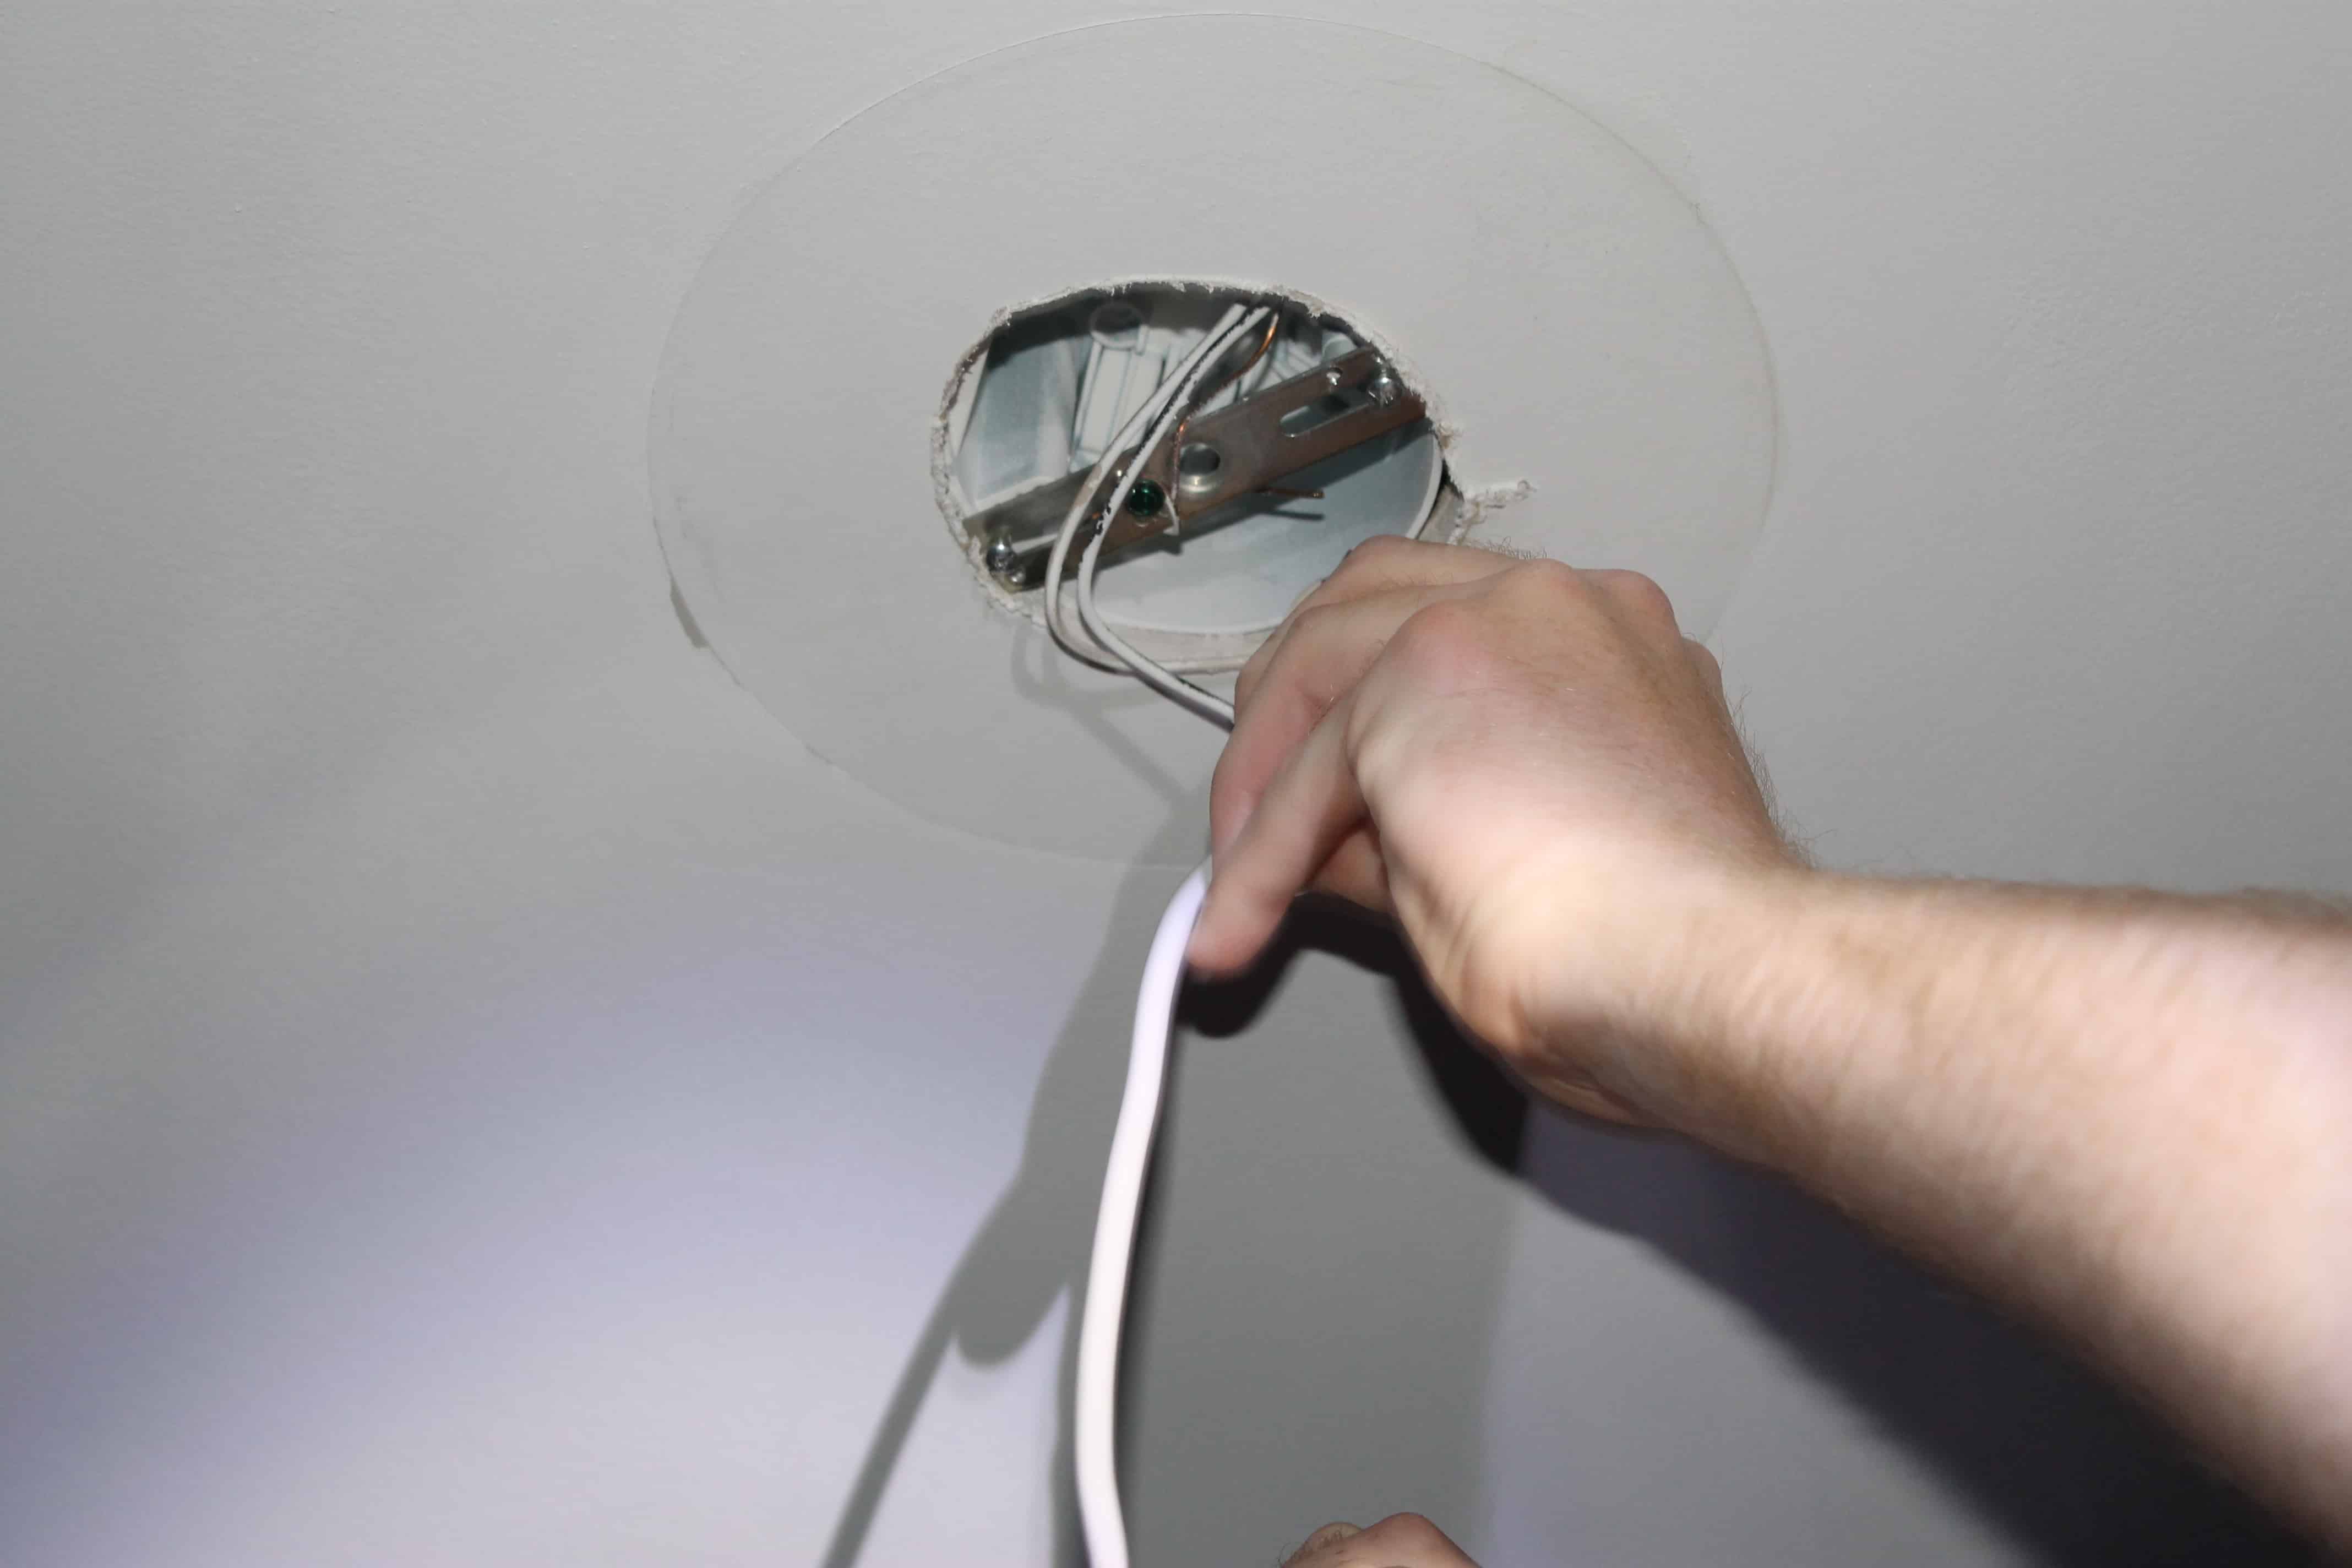
First things first, cut the electricity off in the room you’re working in. Even if your circuit breaker is hidden behind a photo collage, you should still be able to find it.
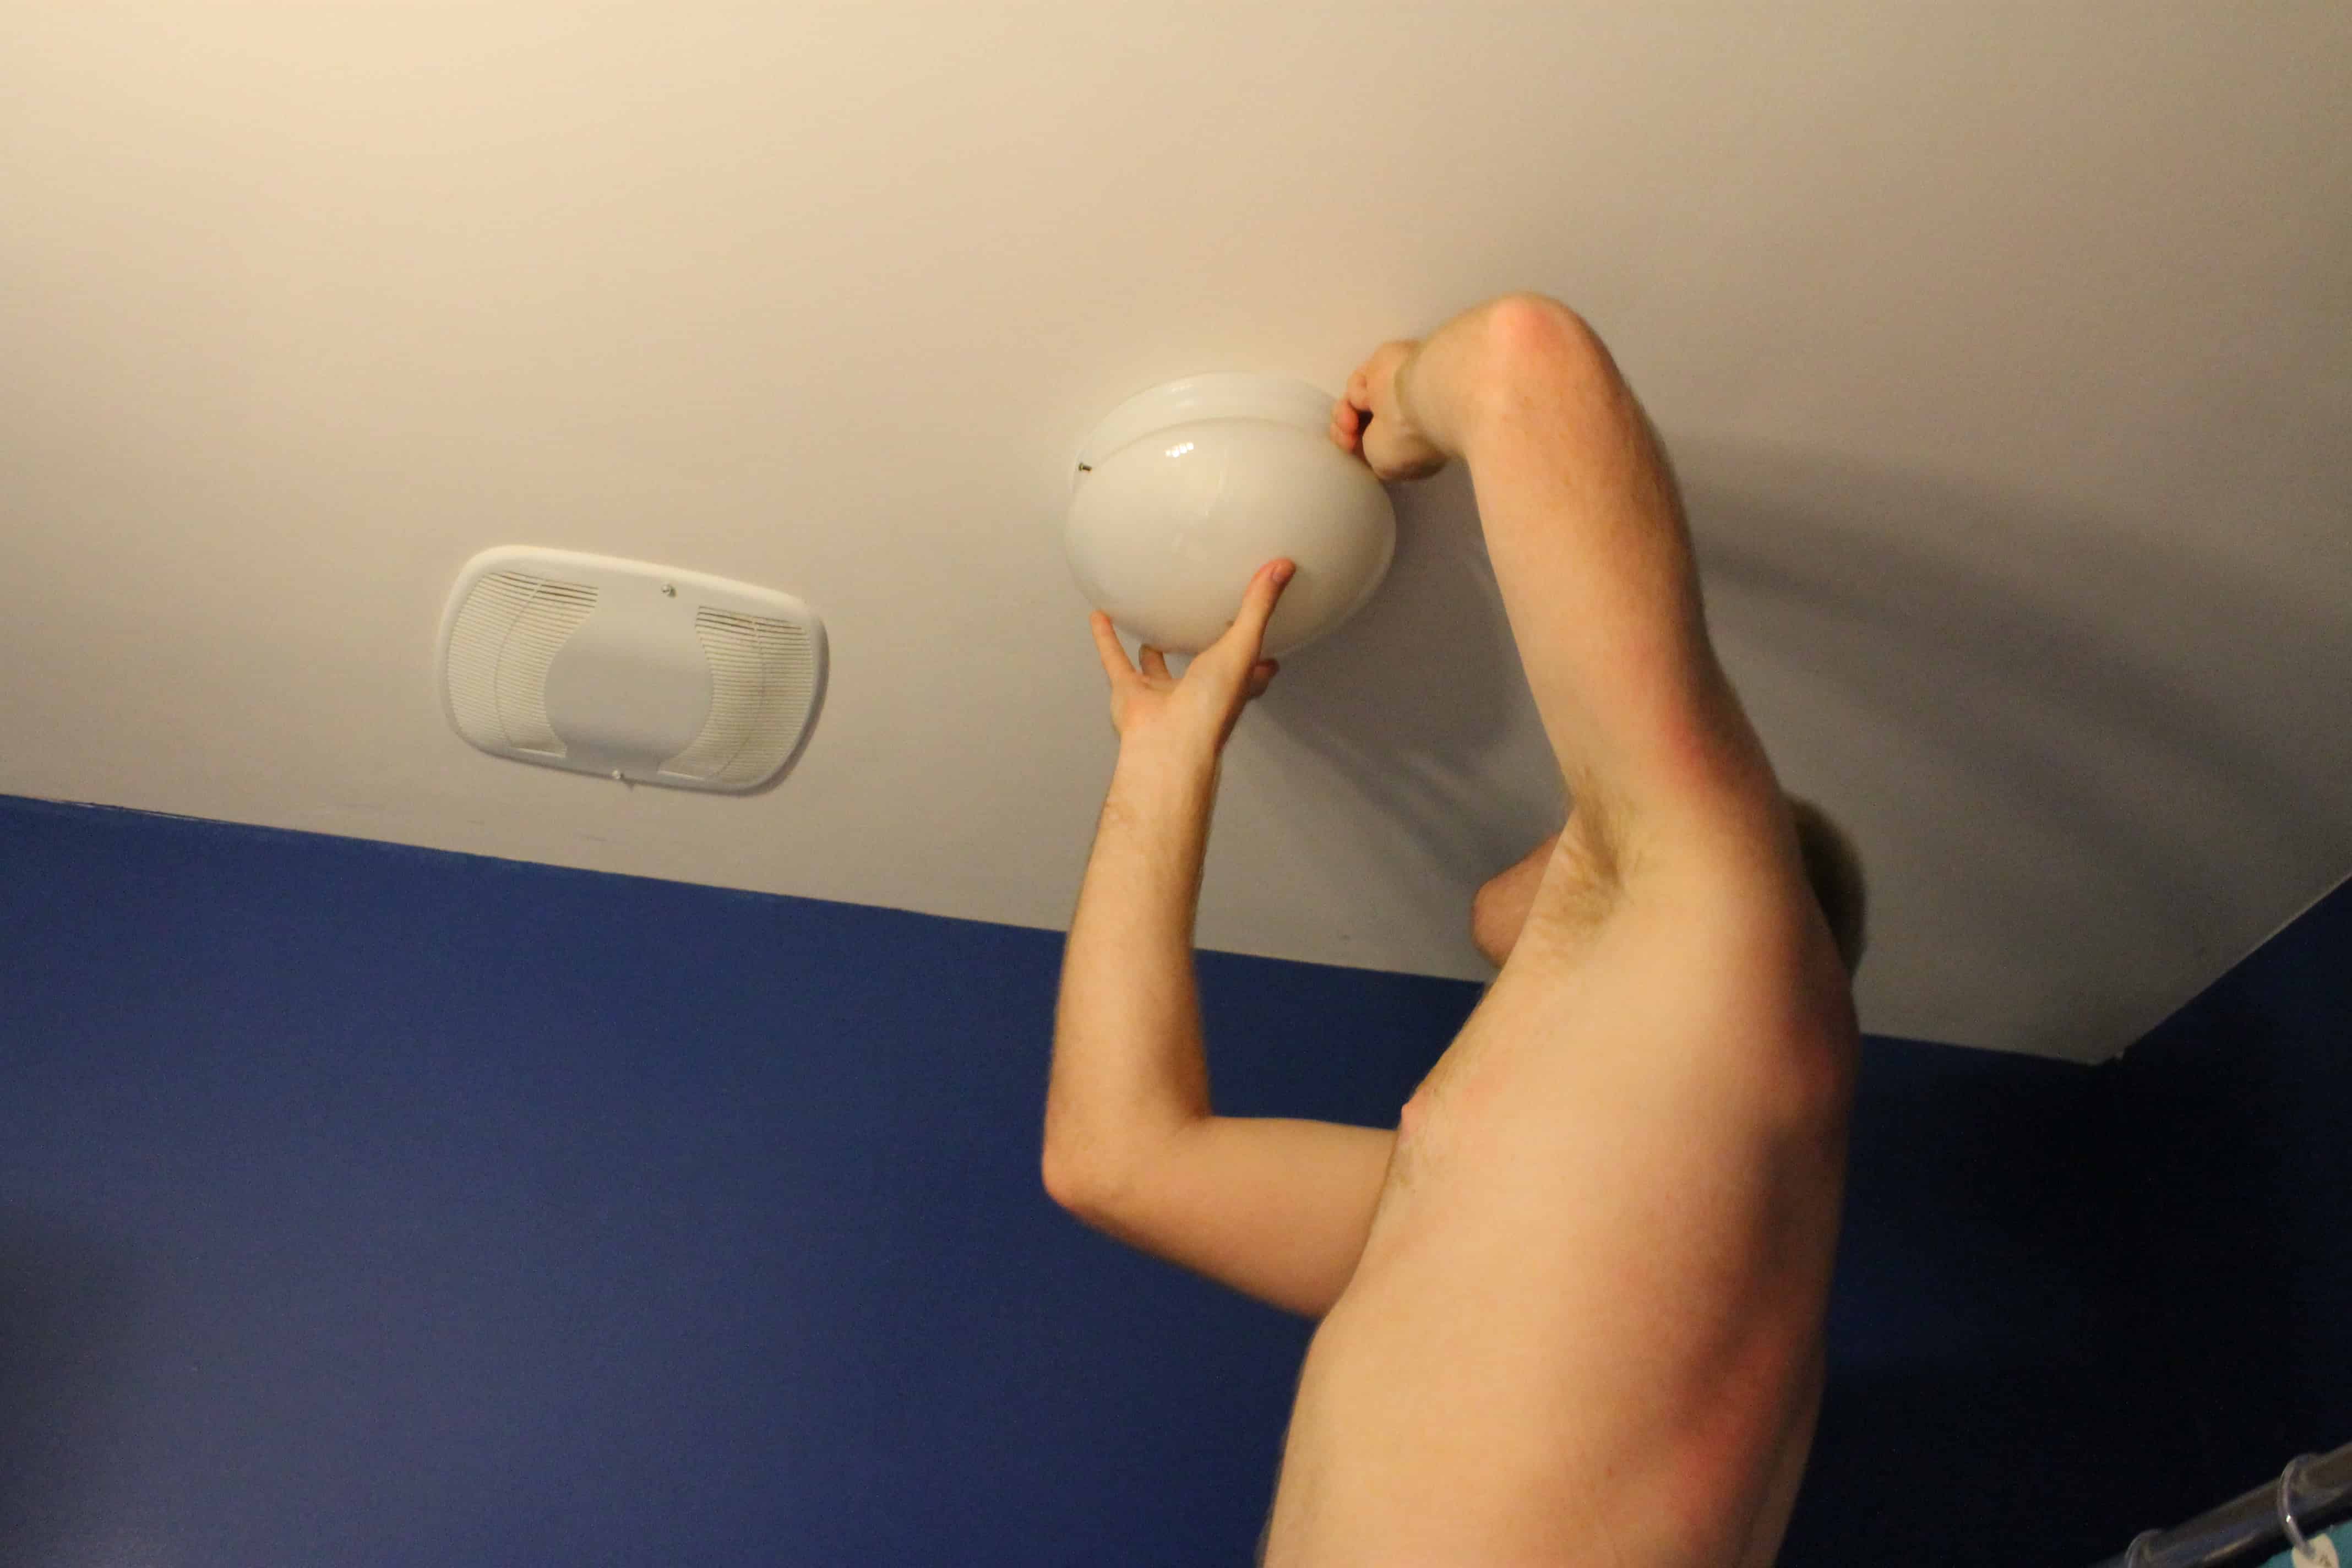

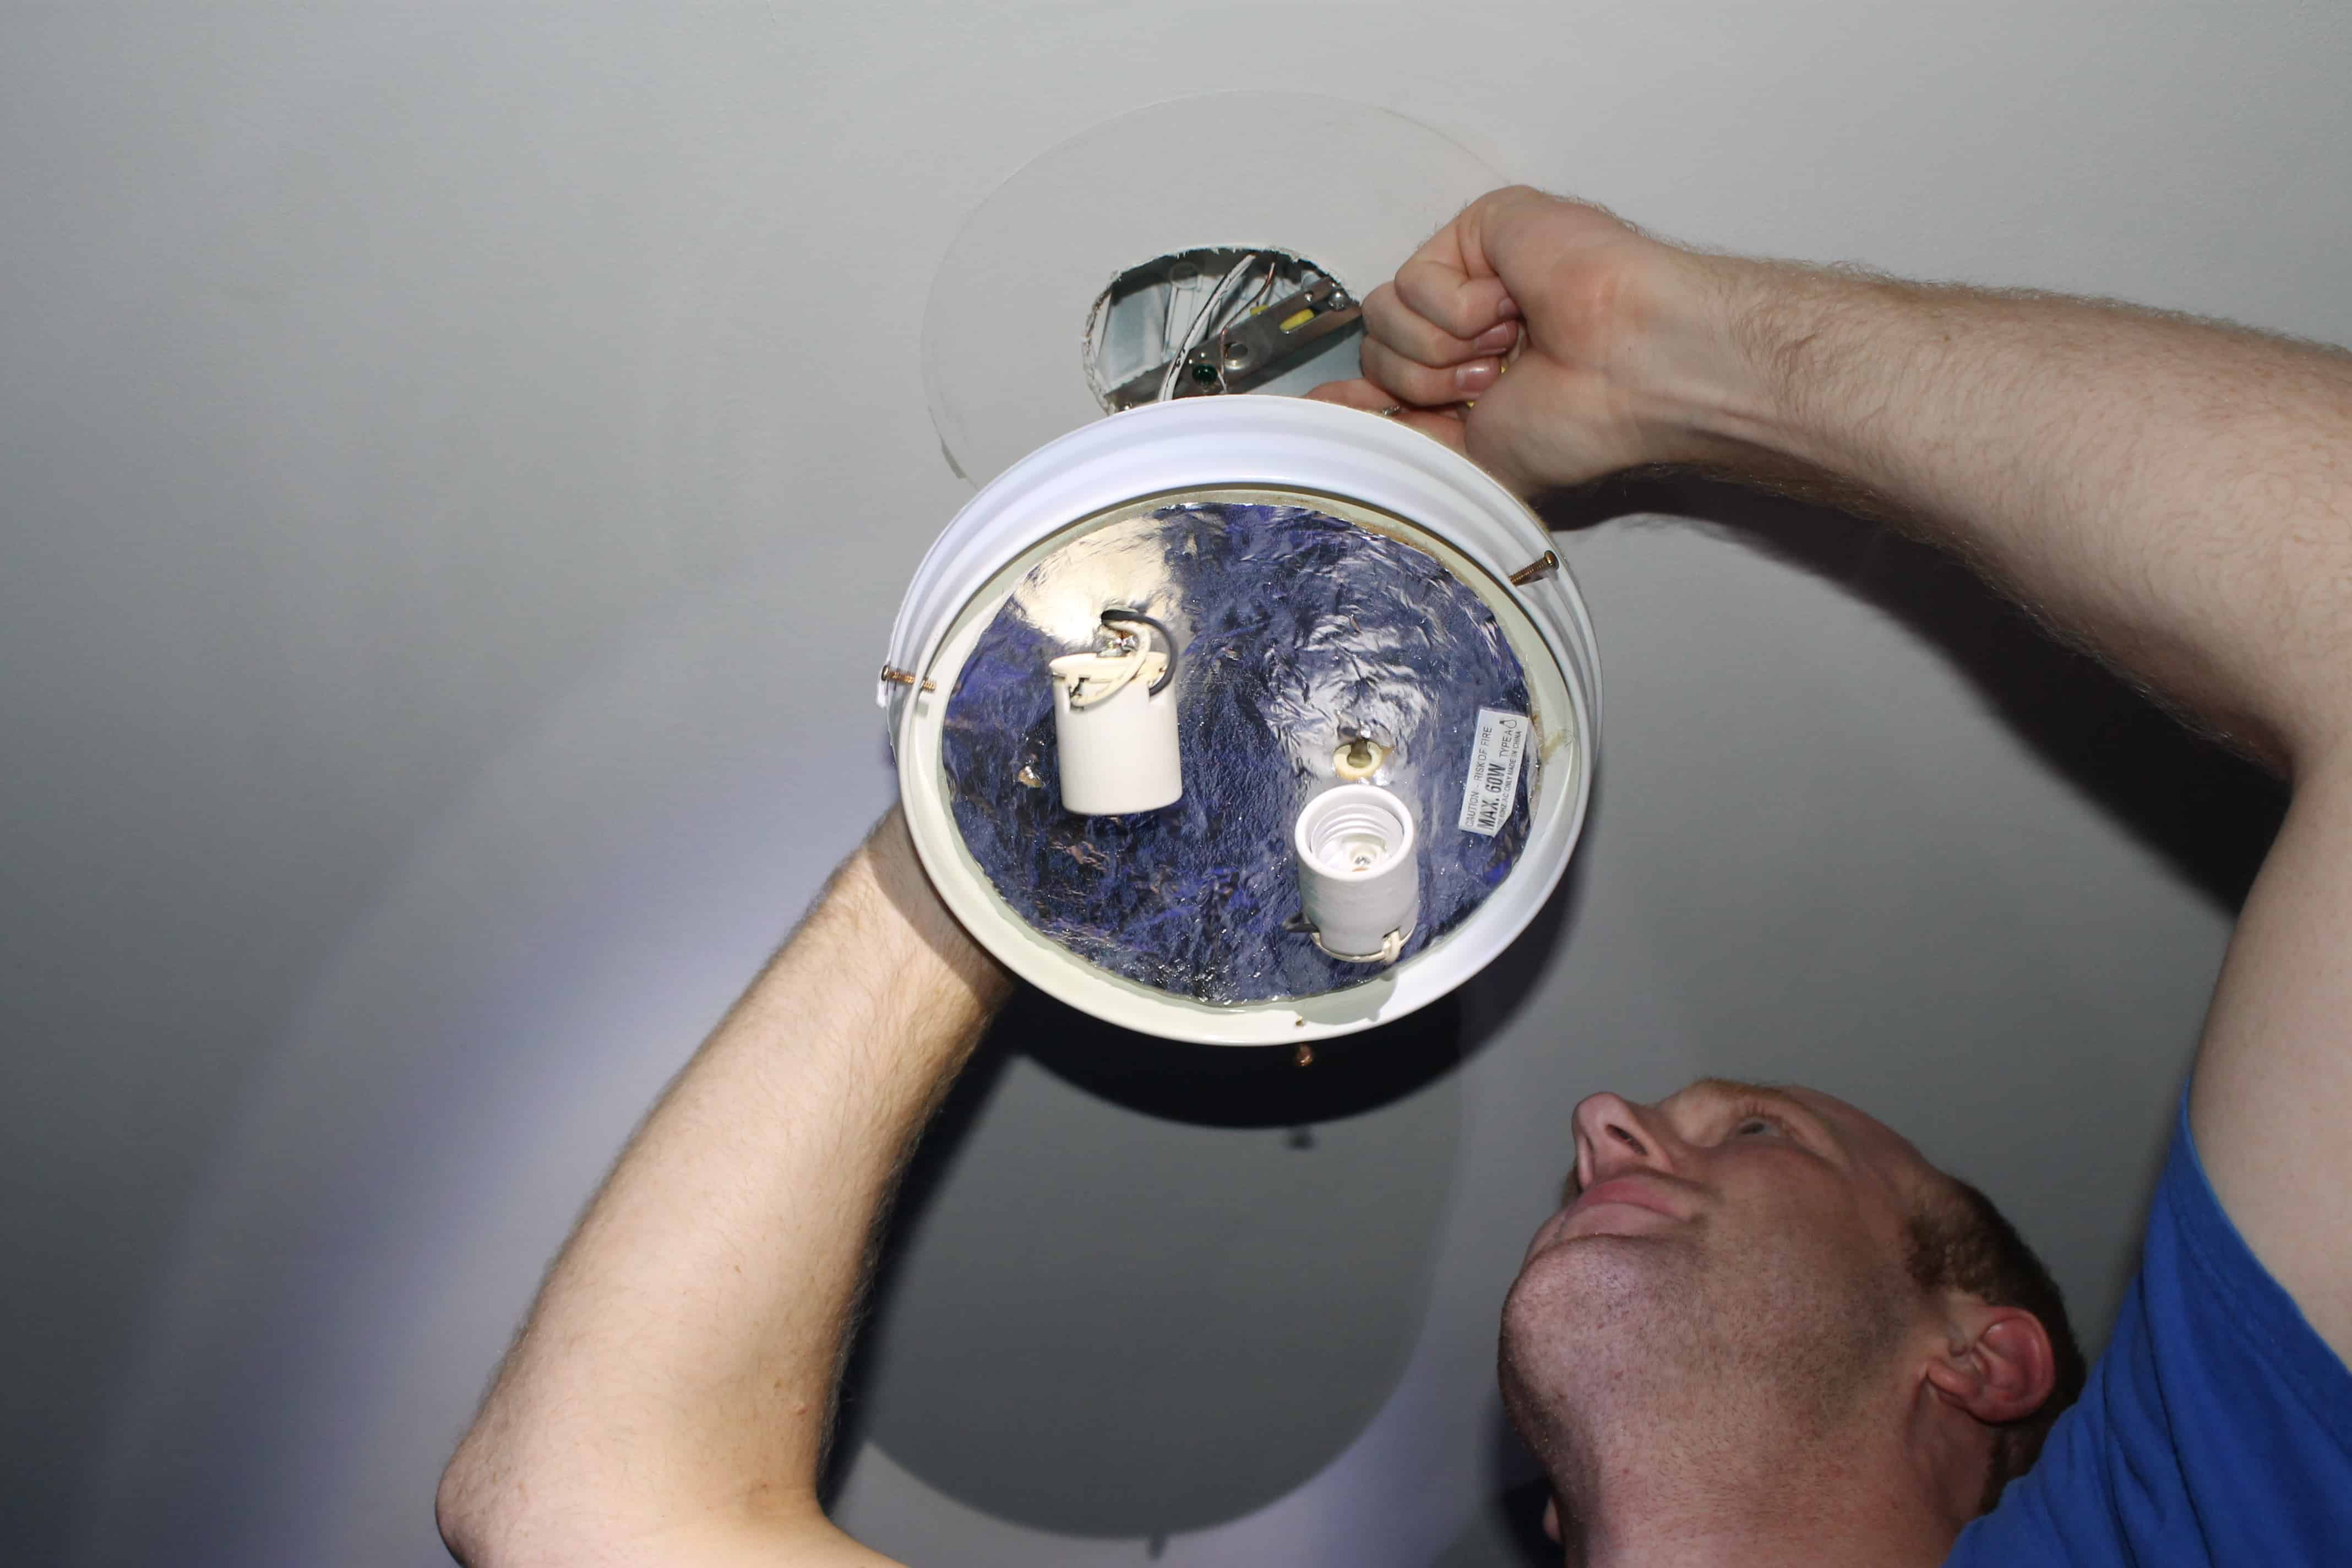
Then, unscrew the old light fixture. Here, you’ll also have to disconnect three wires (a black one, a white one, and a copper one) by unscrewing the cap that is on each and untwisting the wires.
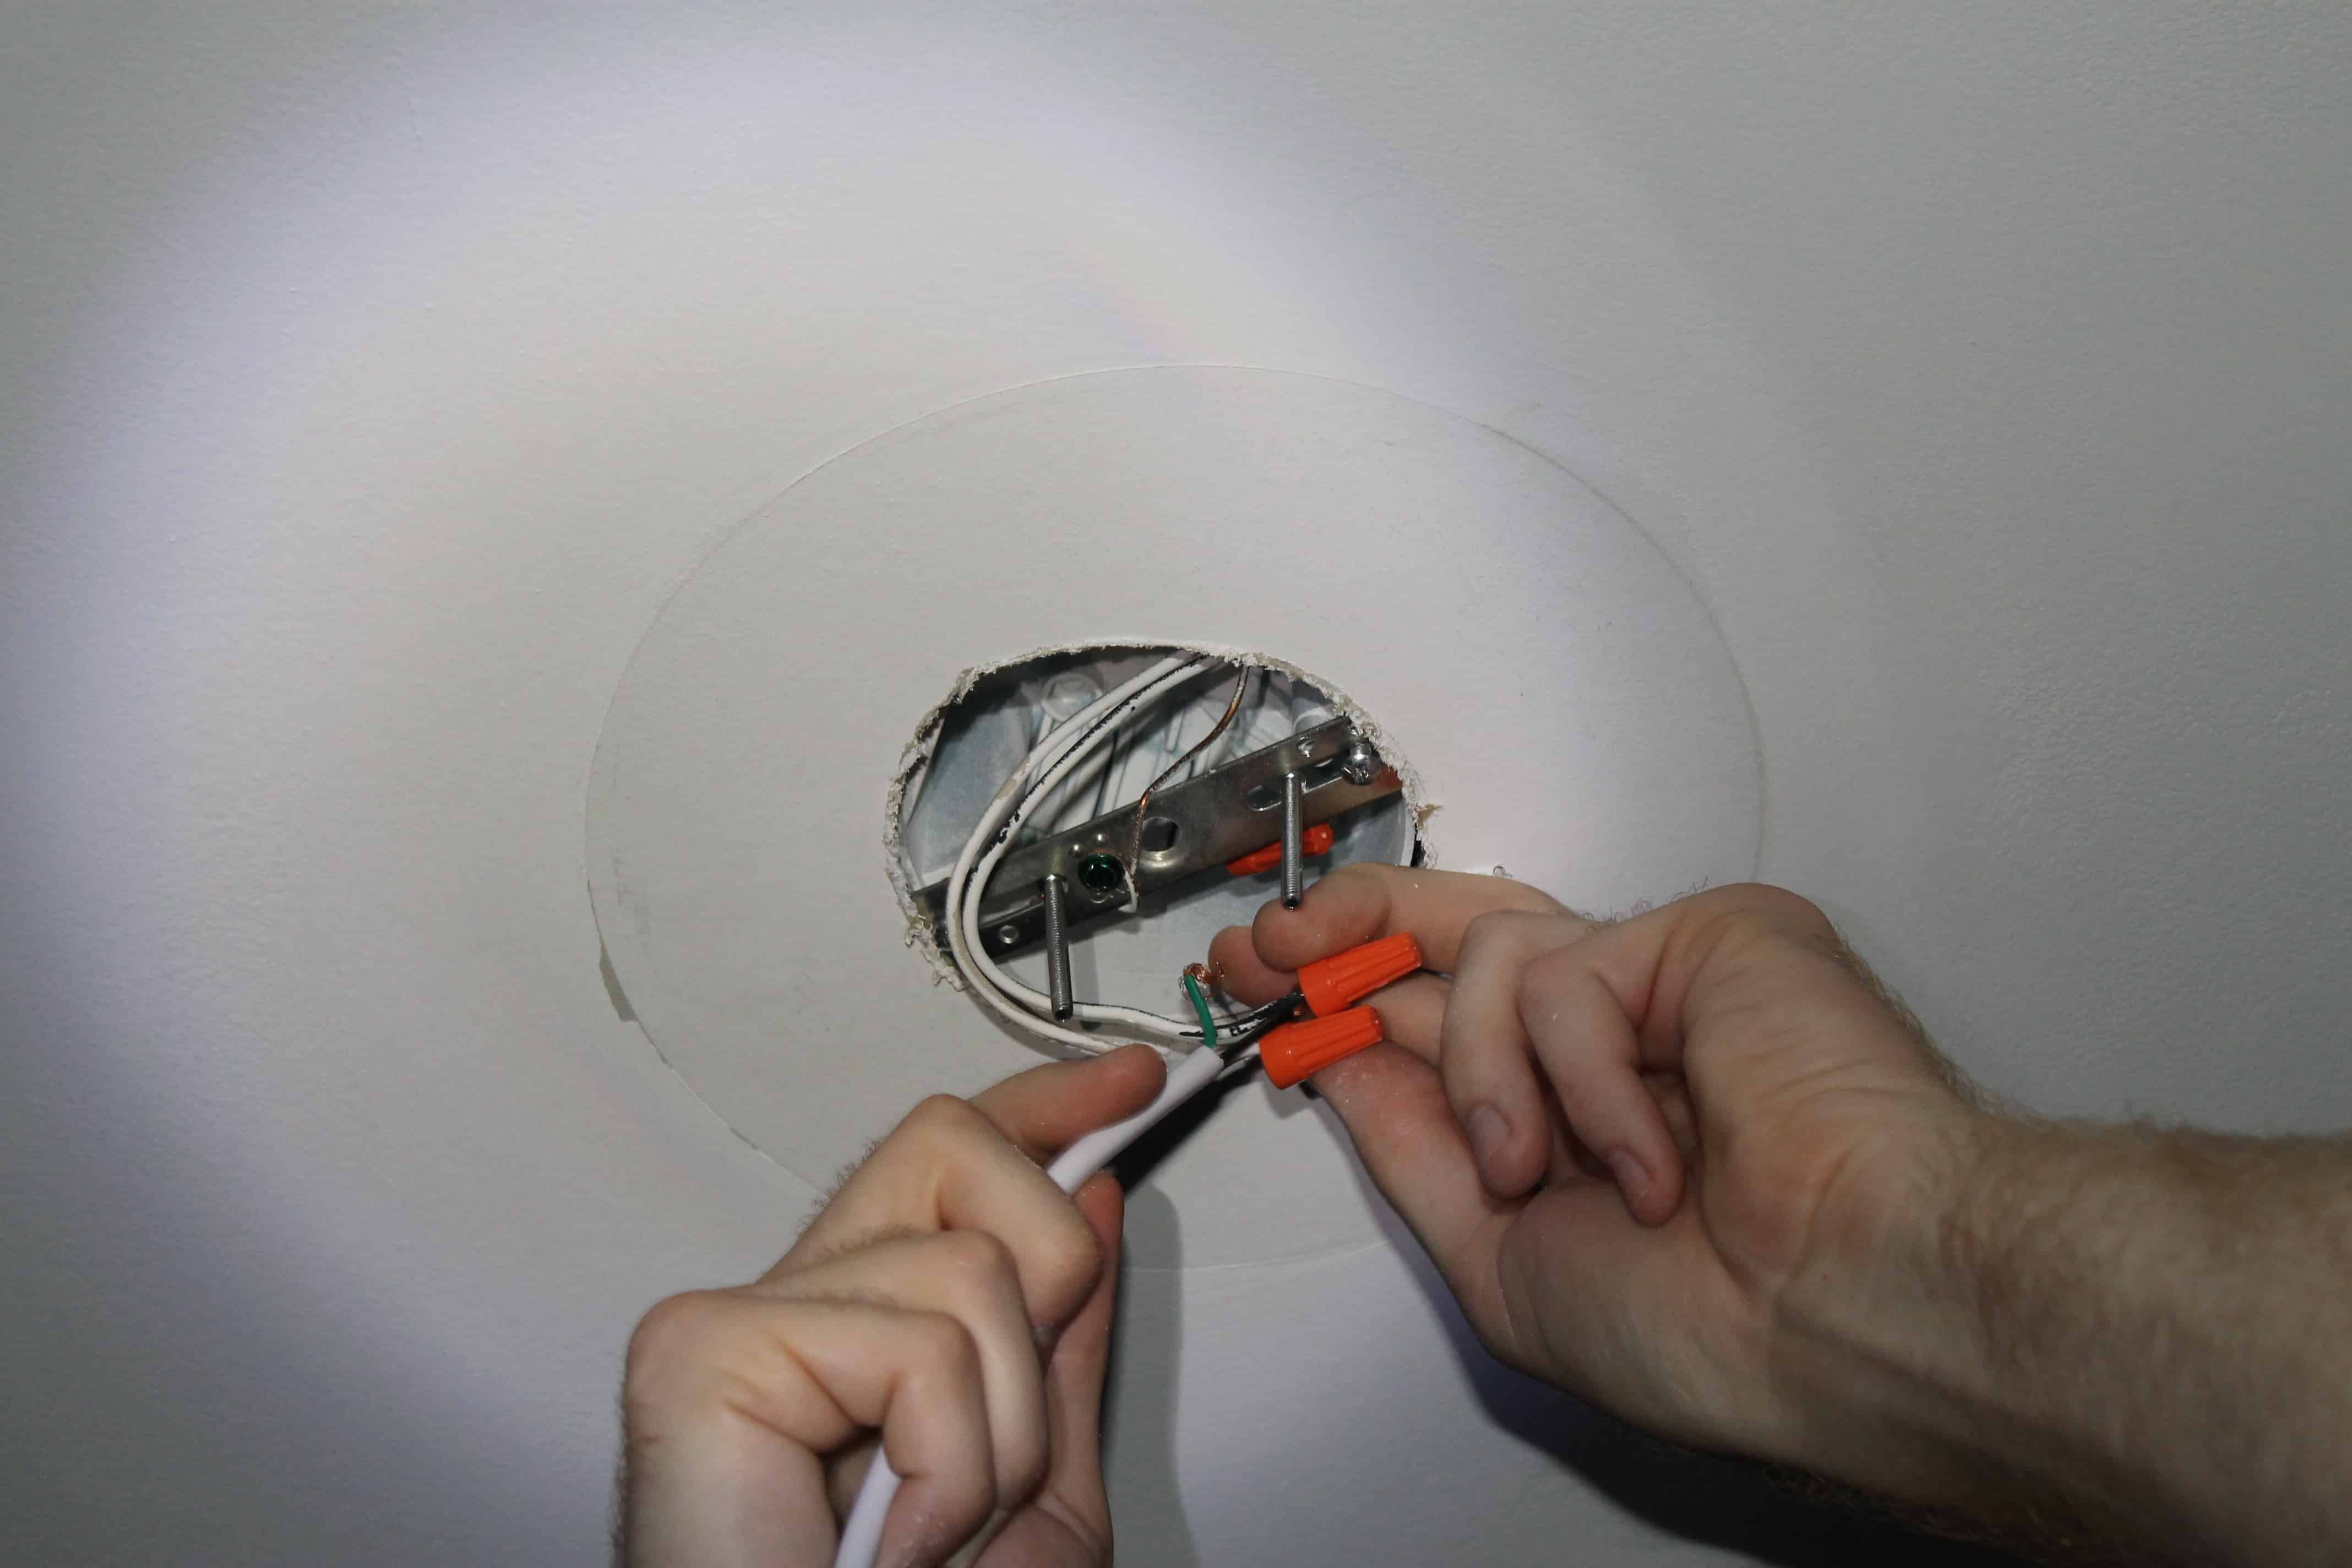
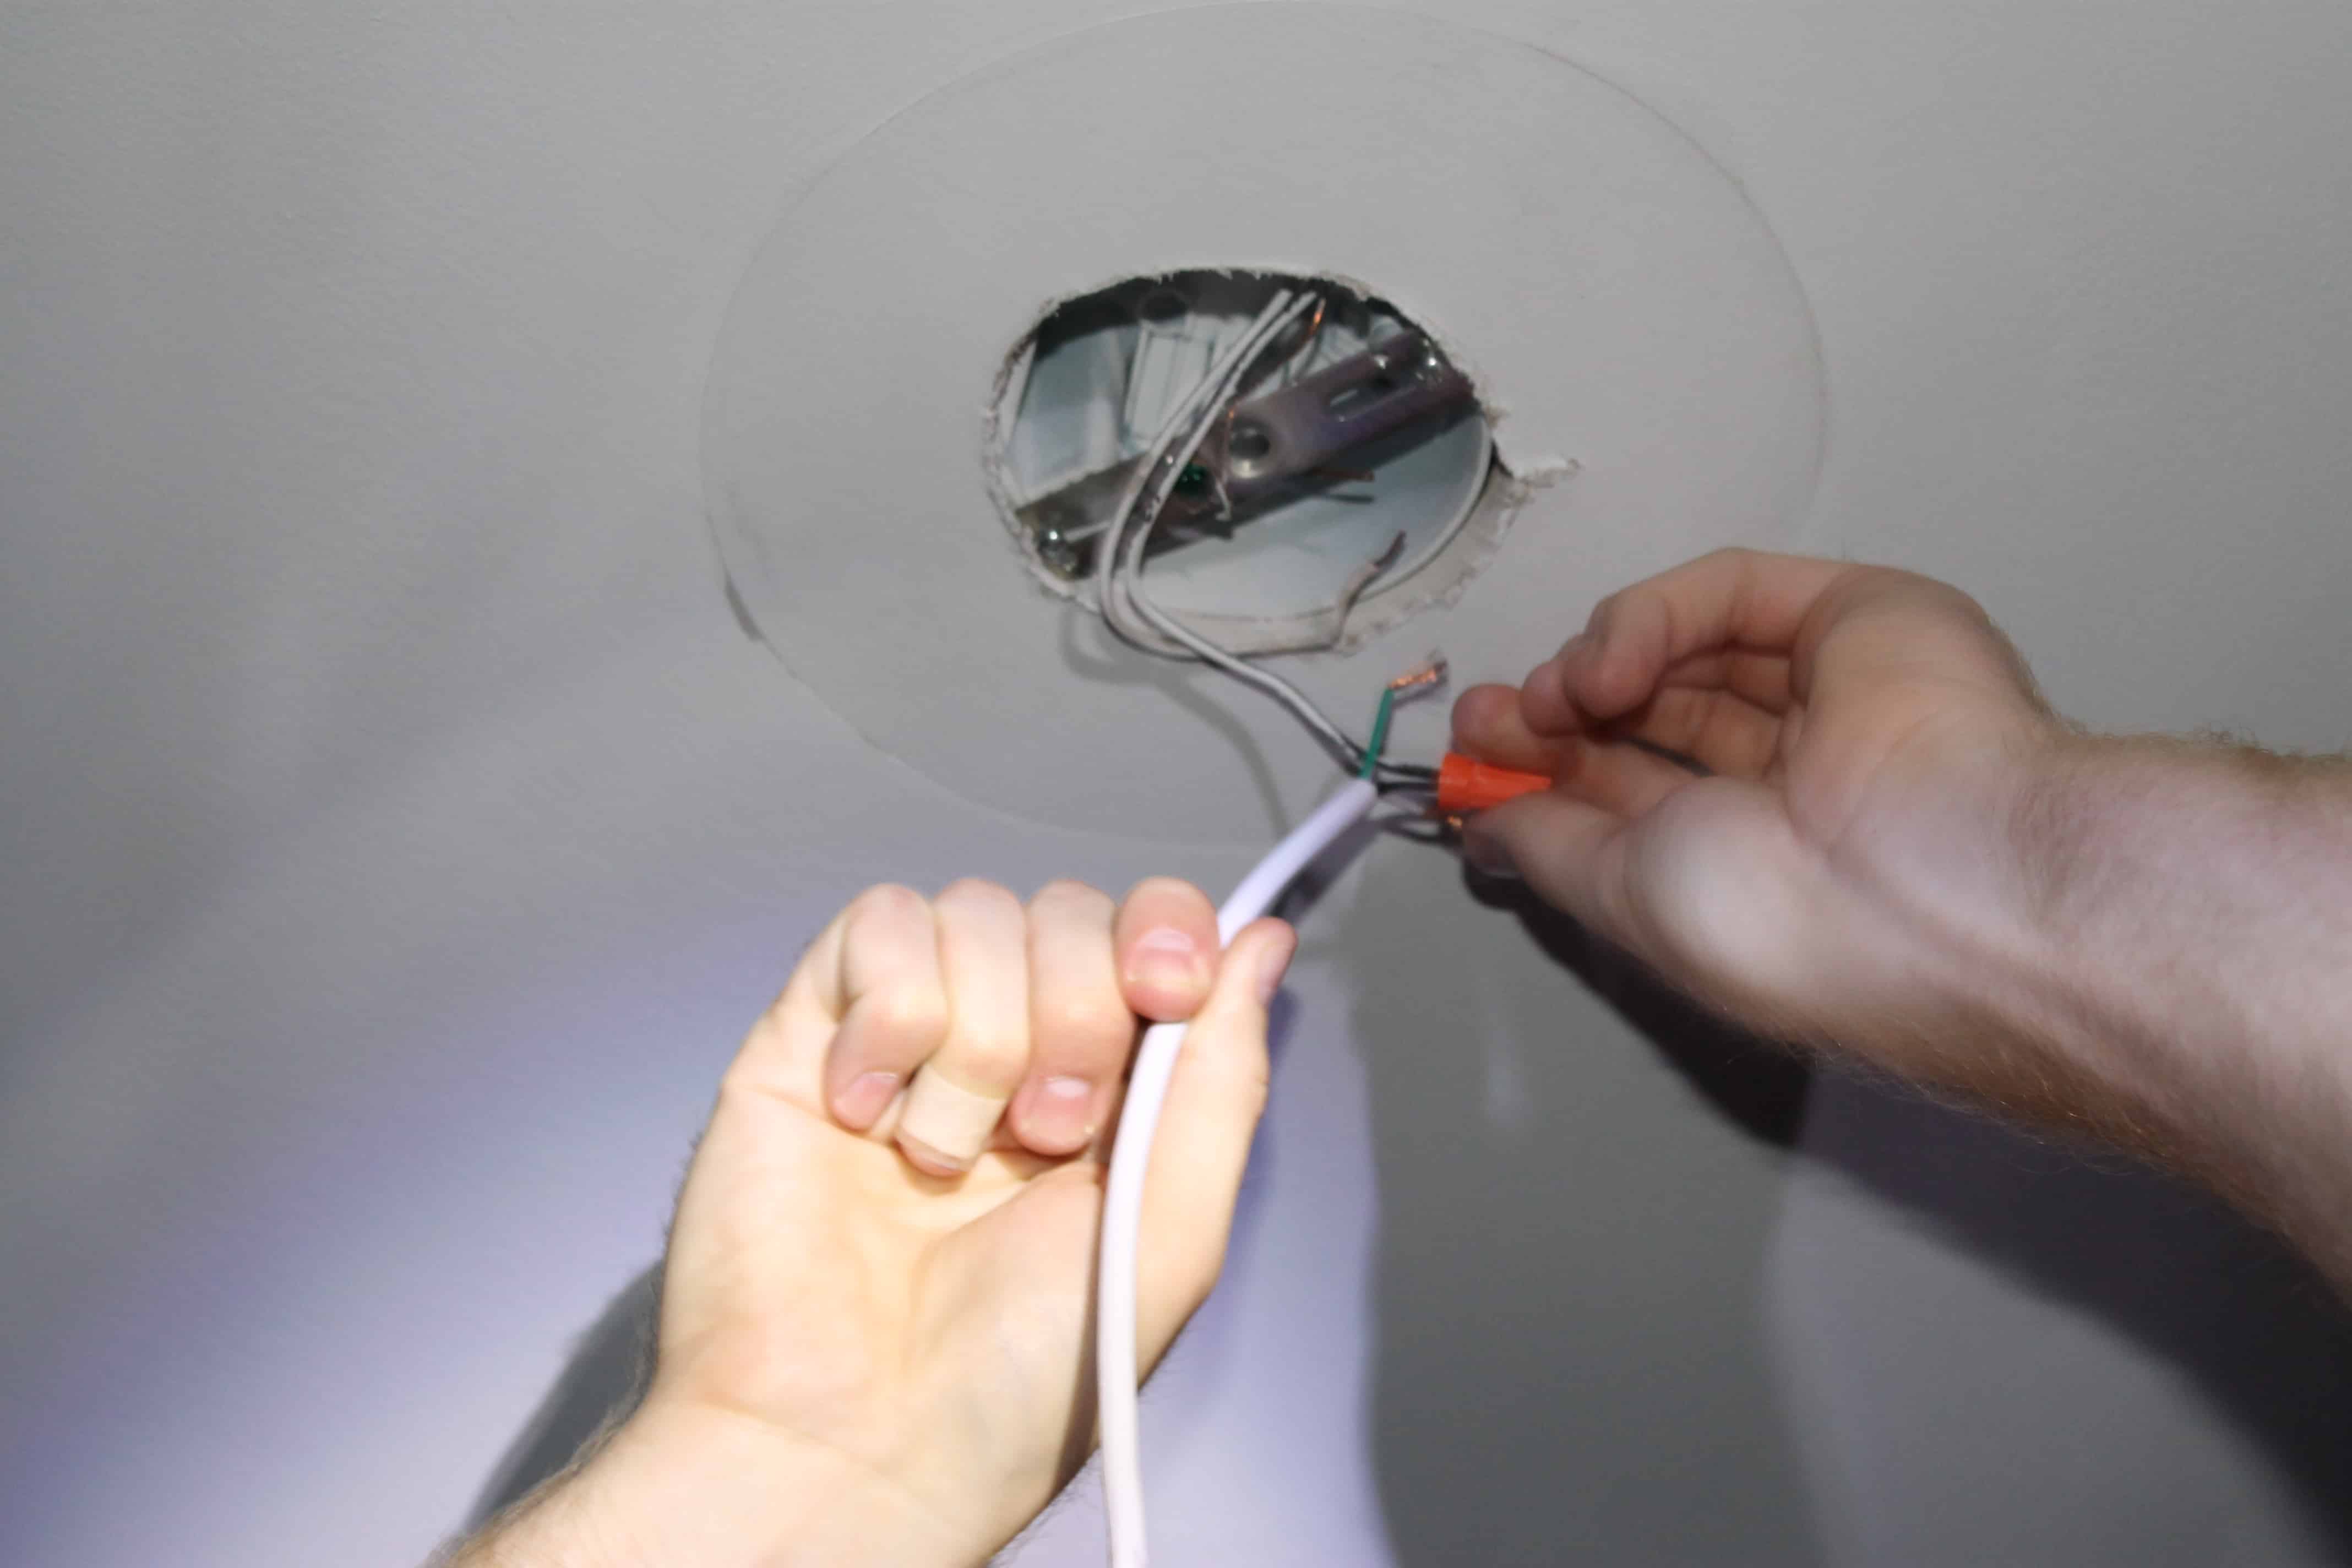
Then comes the part where your arms might start to hurt if you have tall ceilings like us. It’s easier with two people, so one person can hold the light fixture while the other does the electrical work. Simply match up each color wire and screw the cap on to the ends until it’s tight.
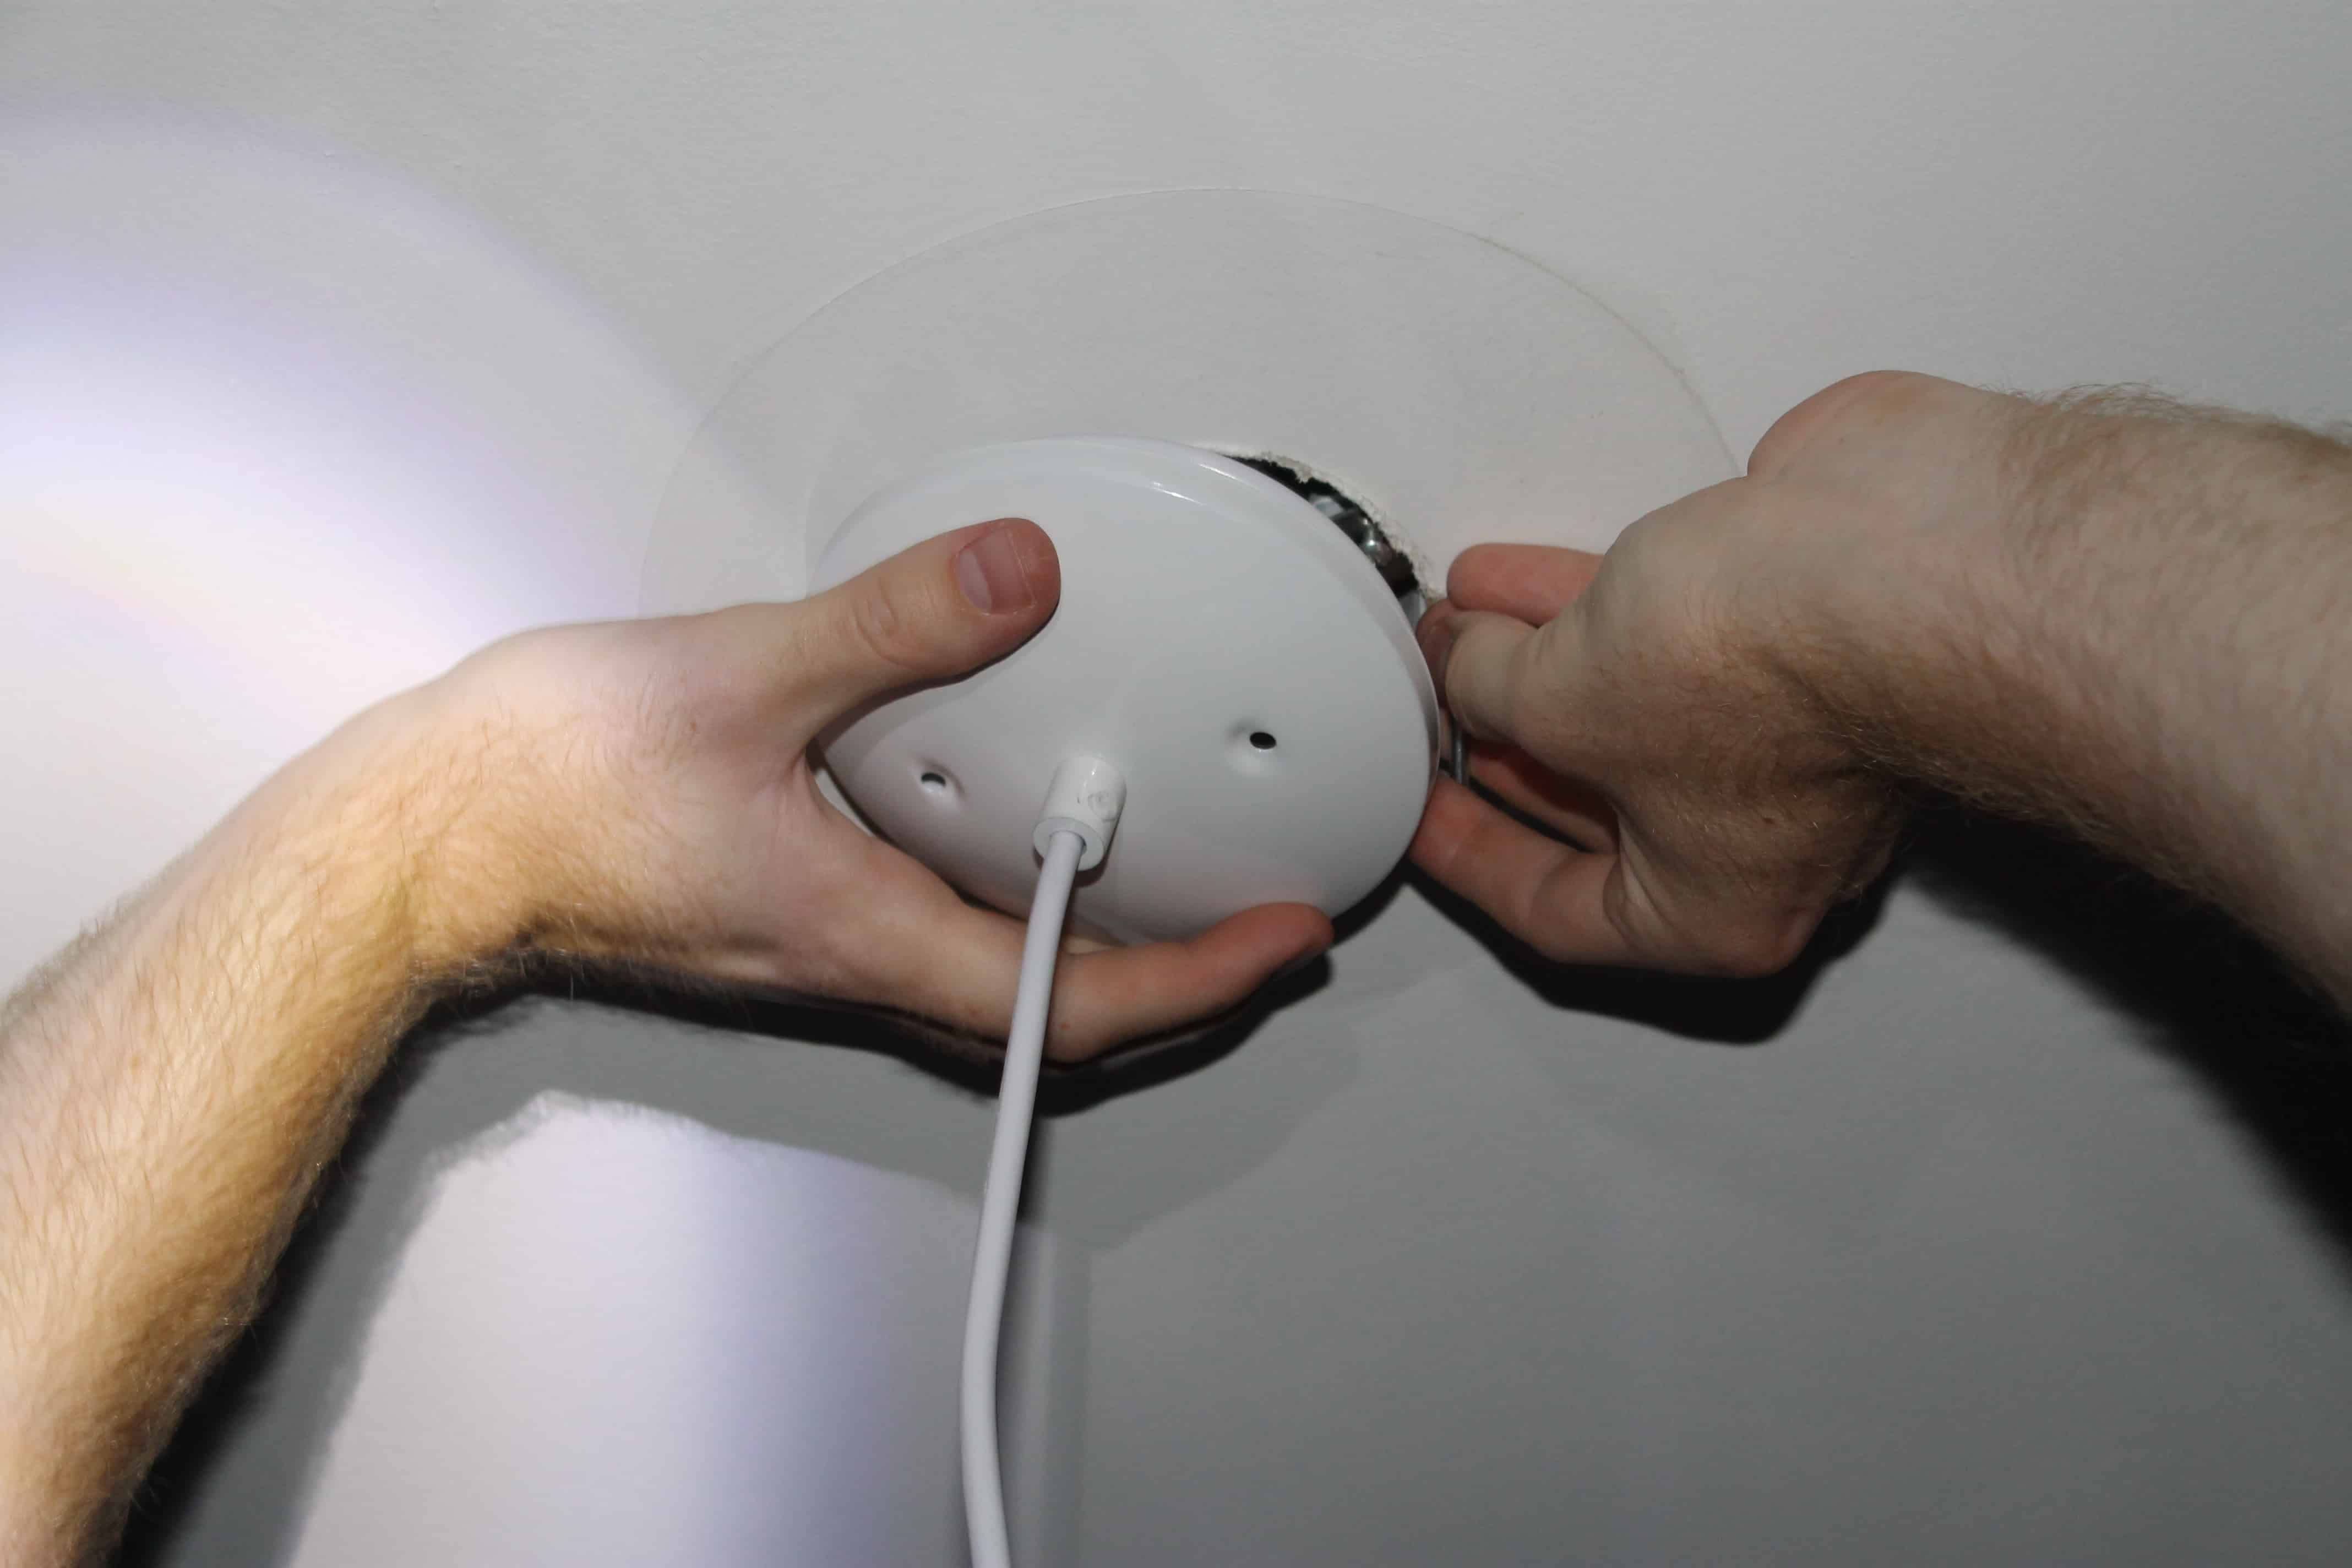
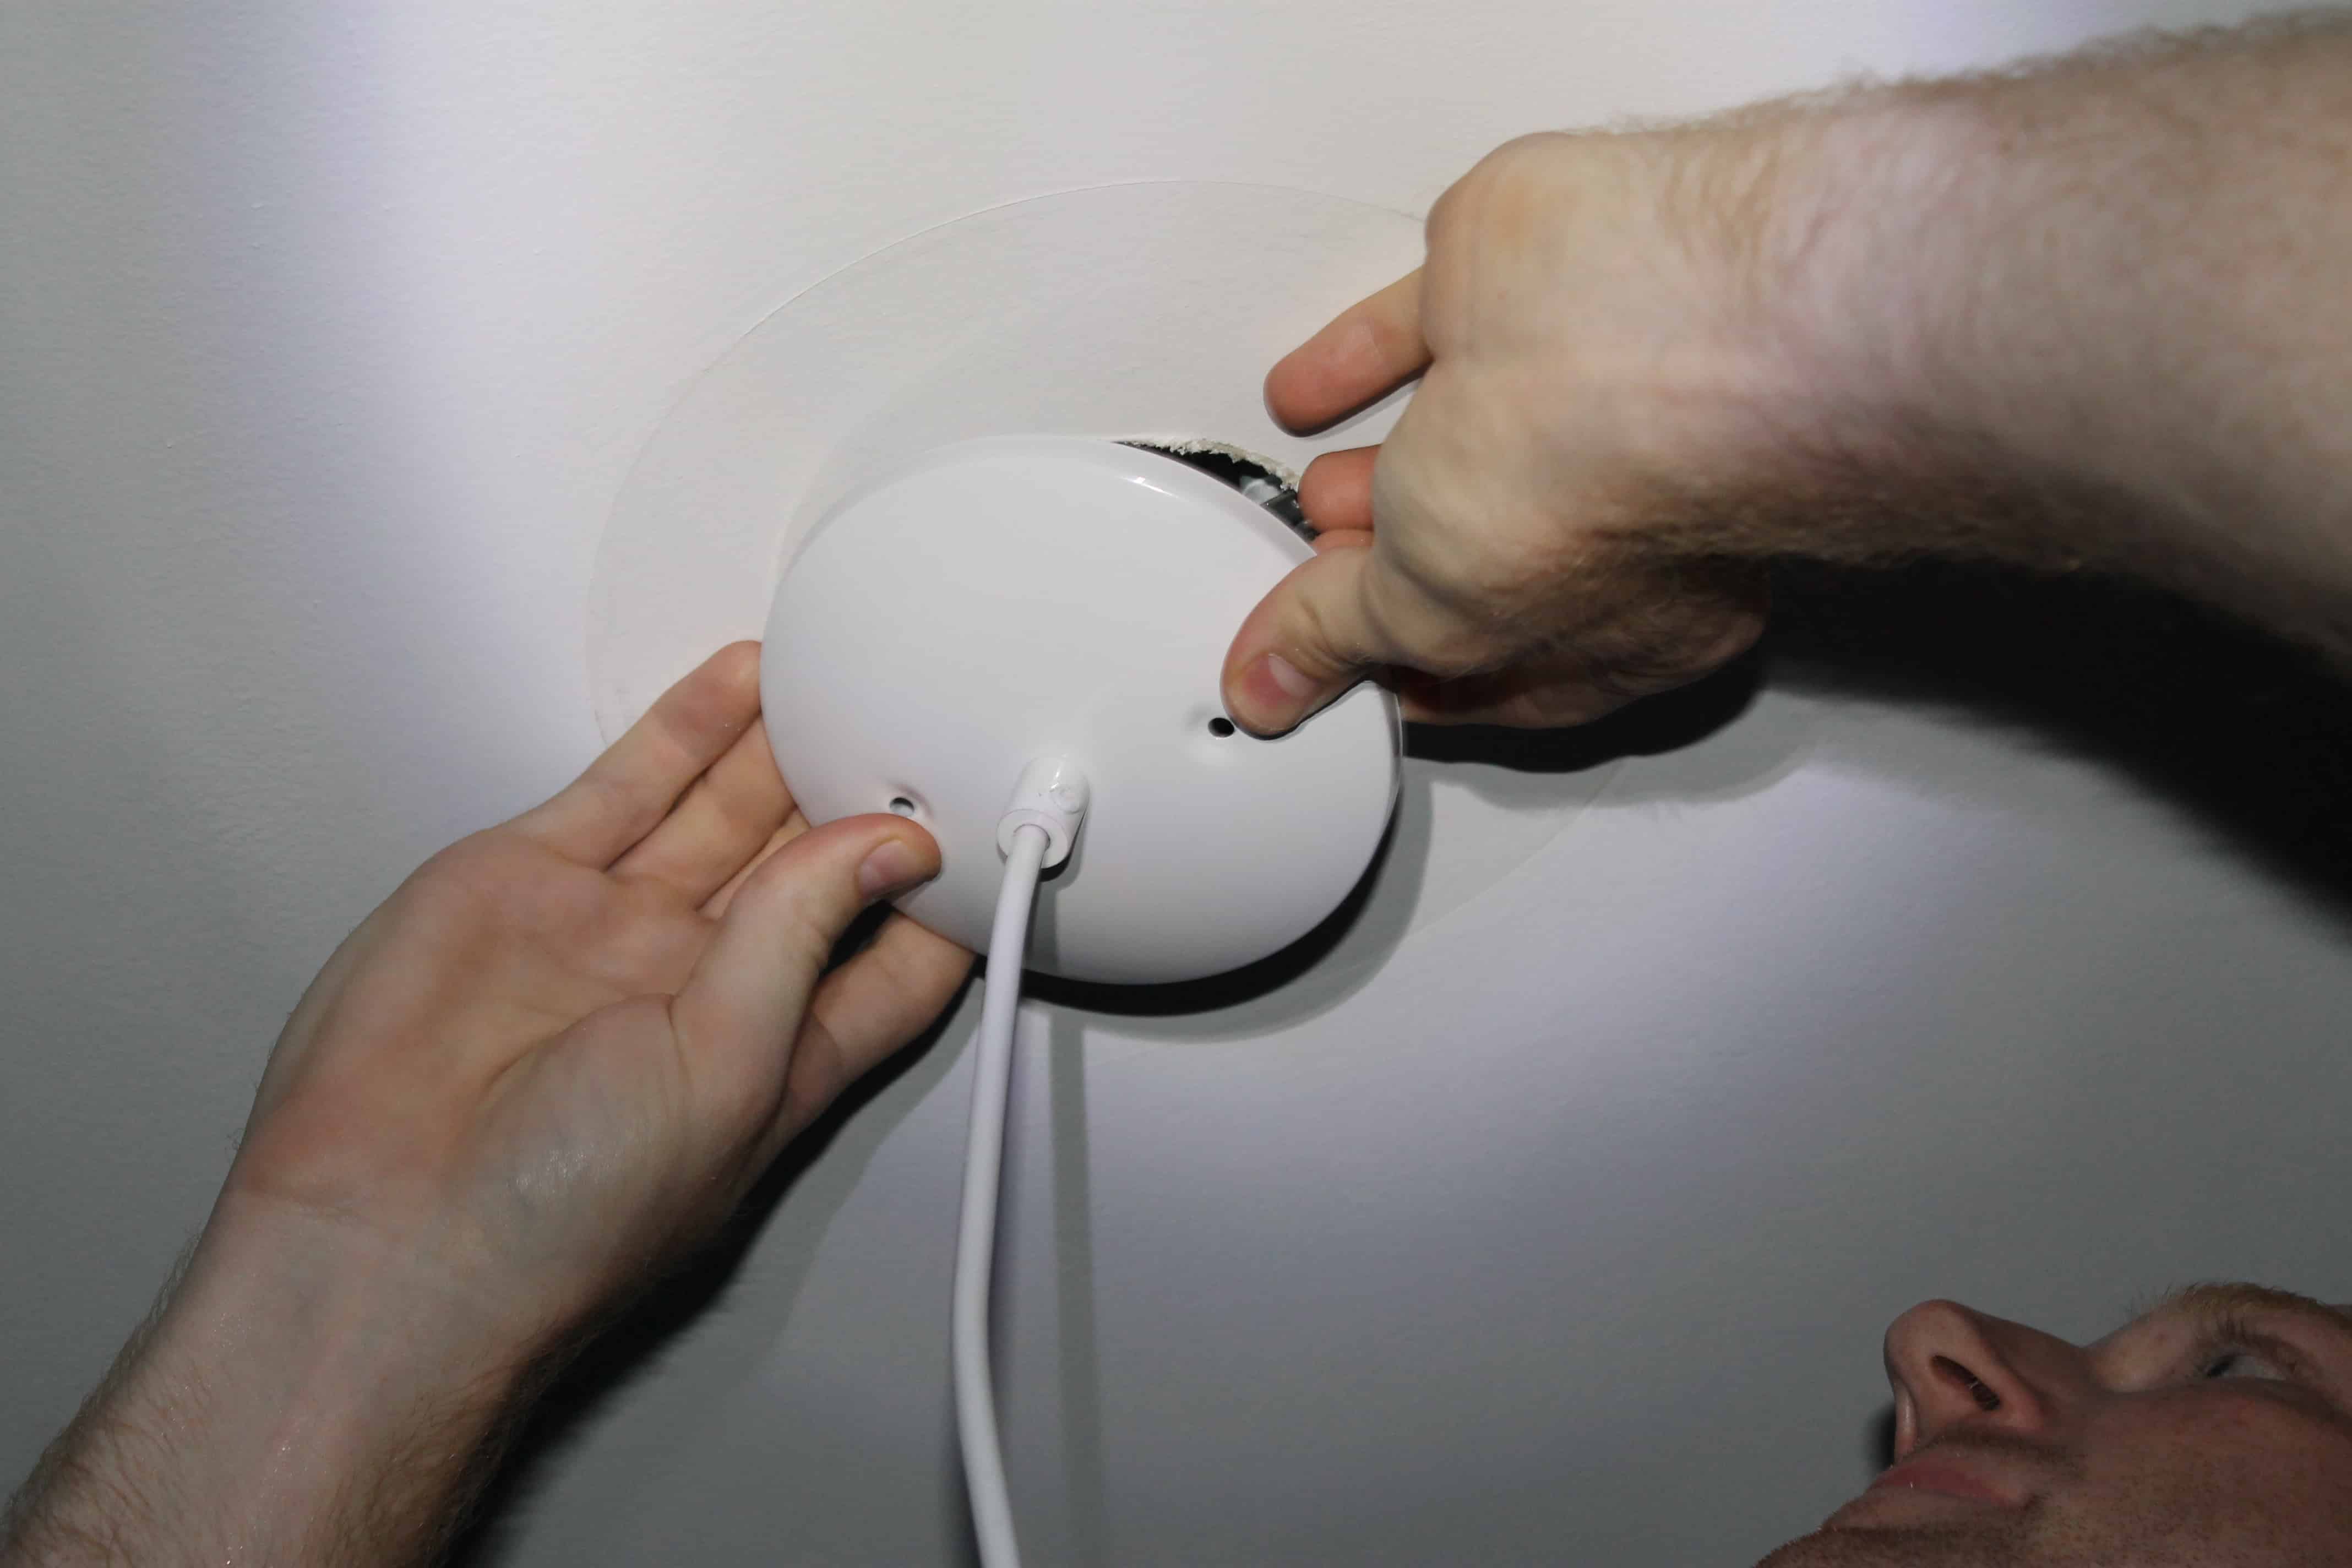
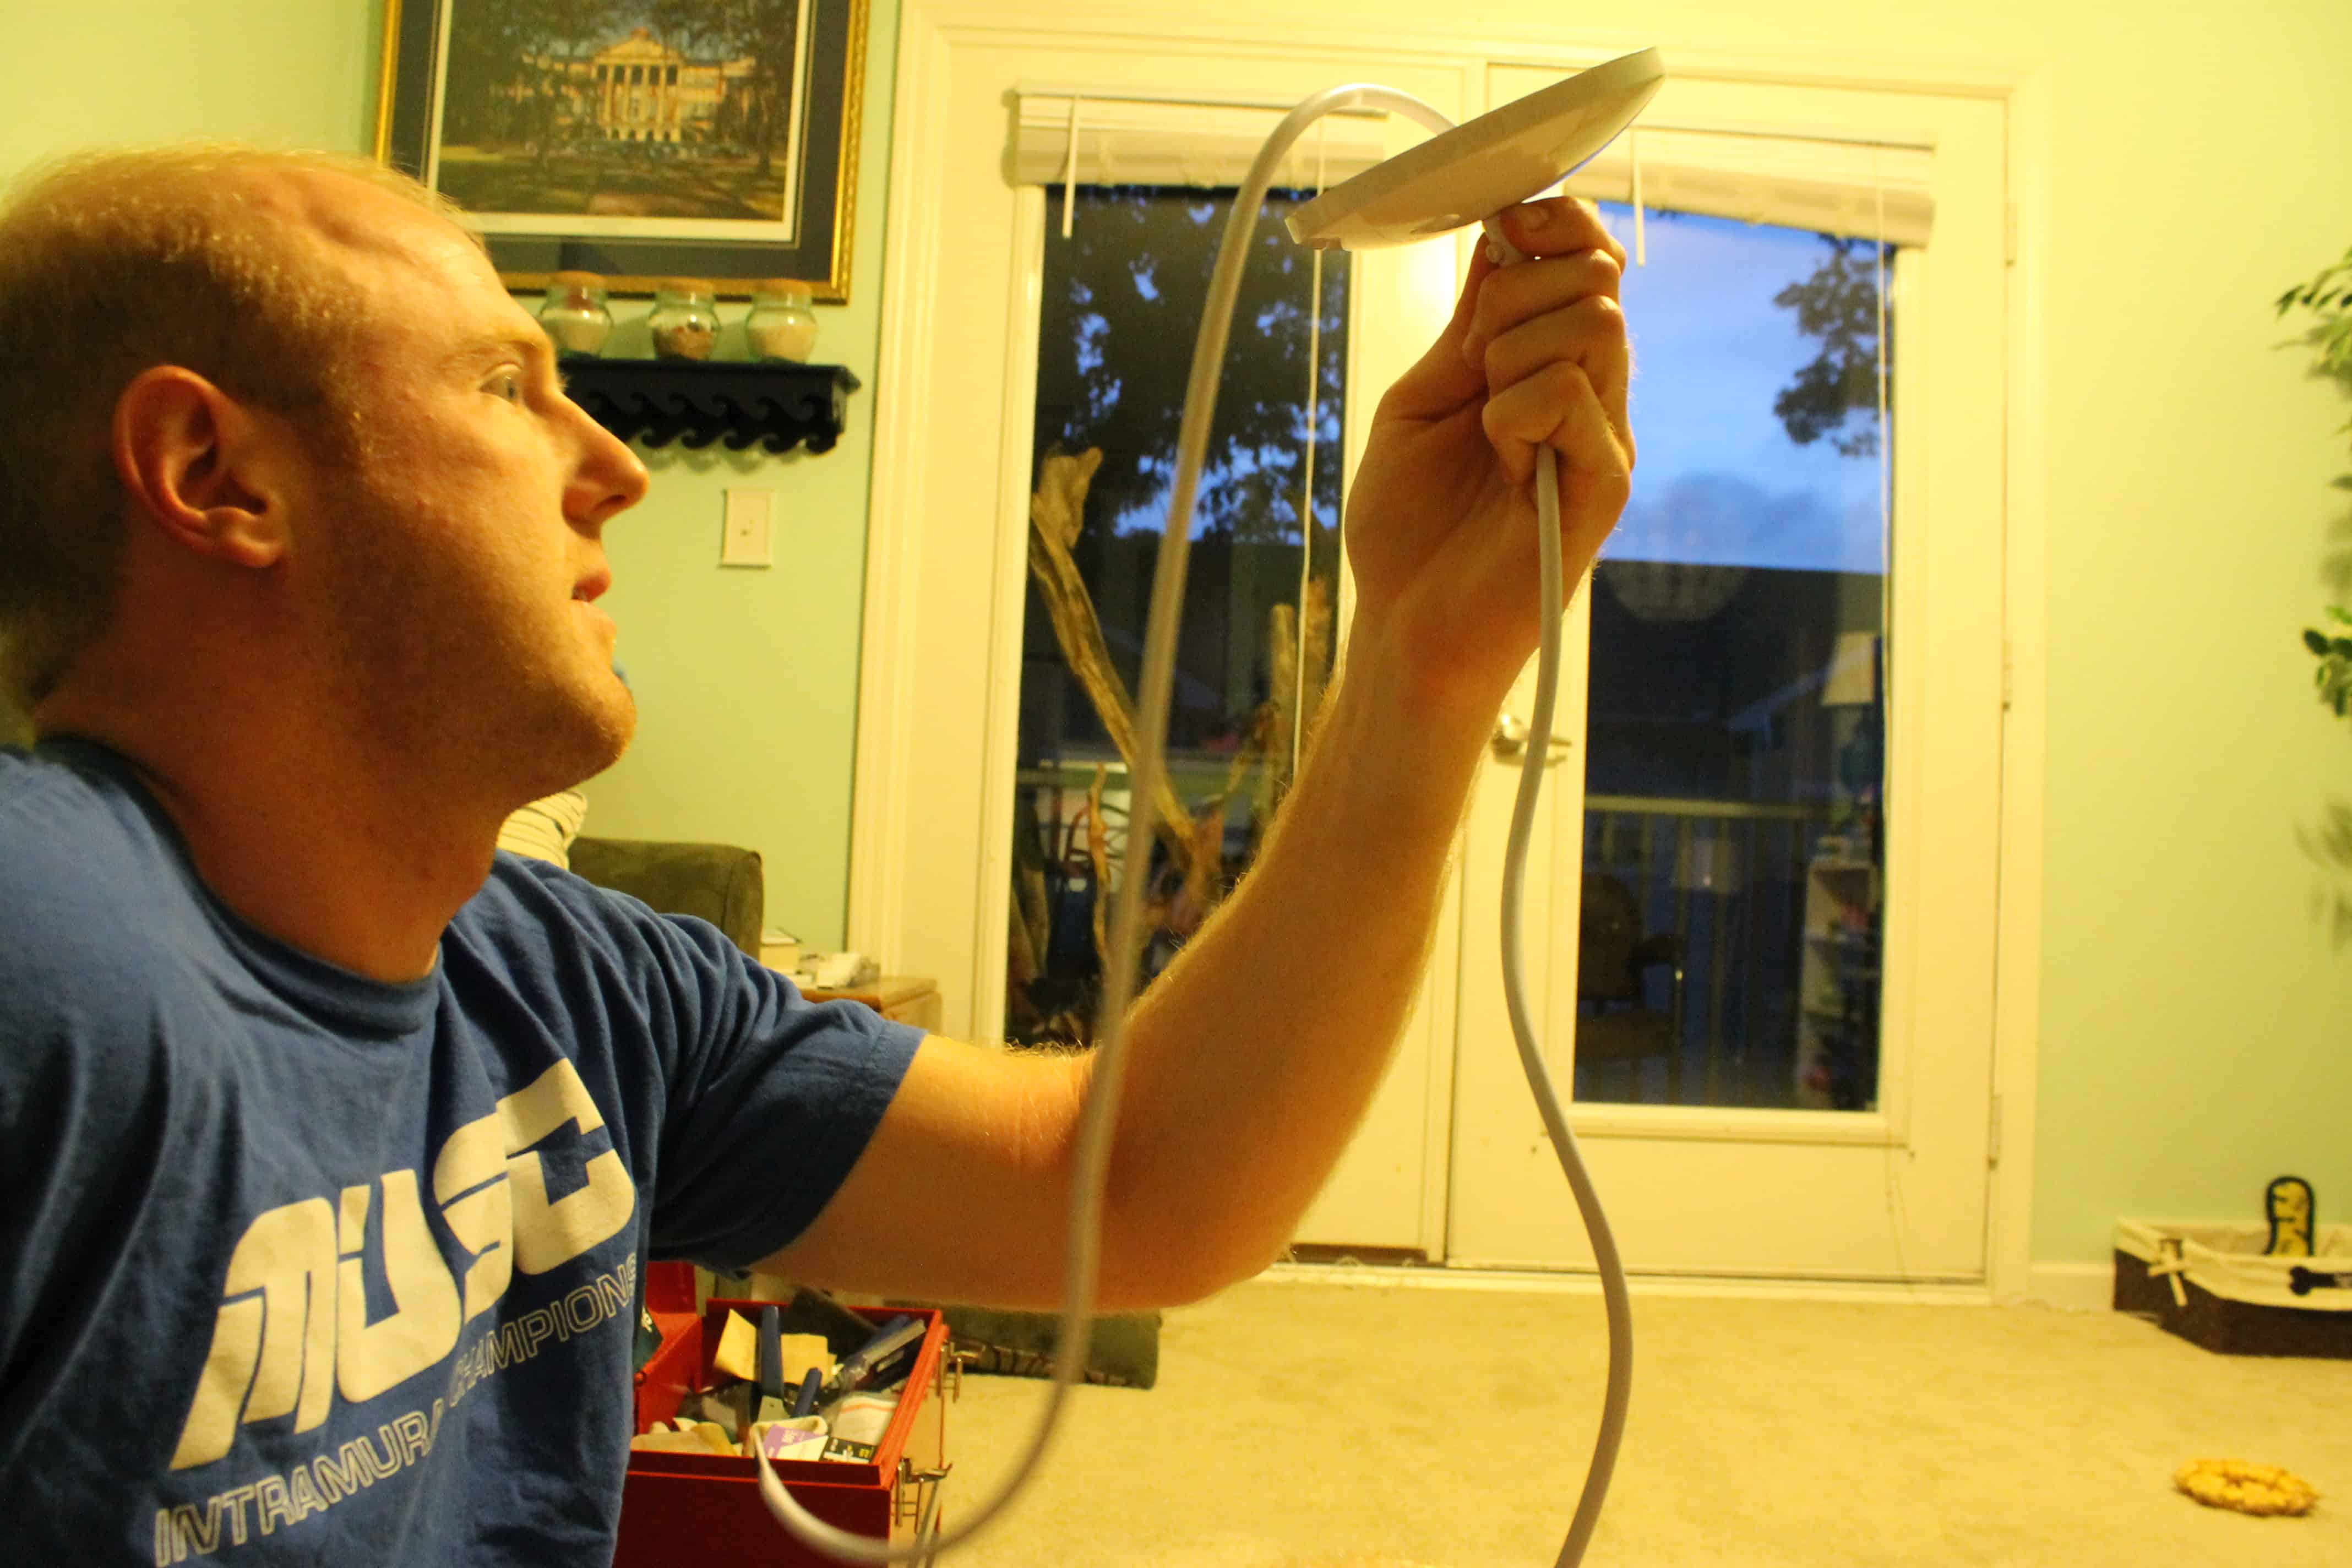
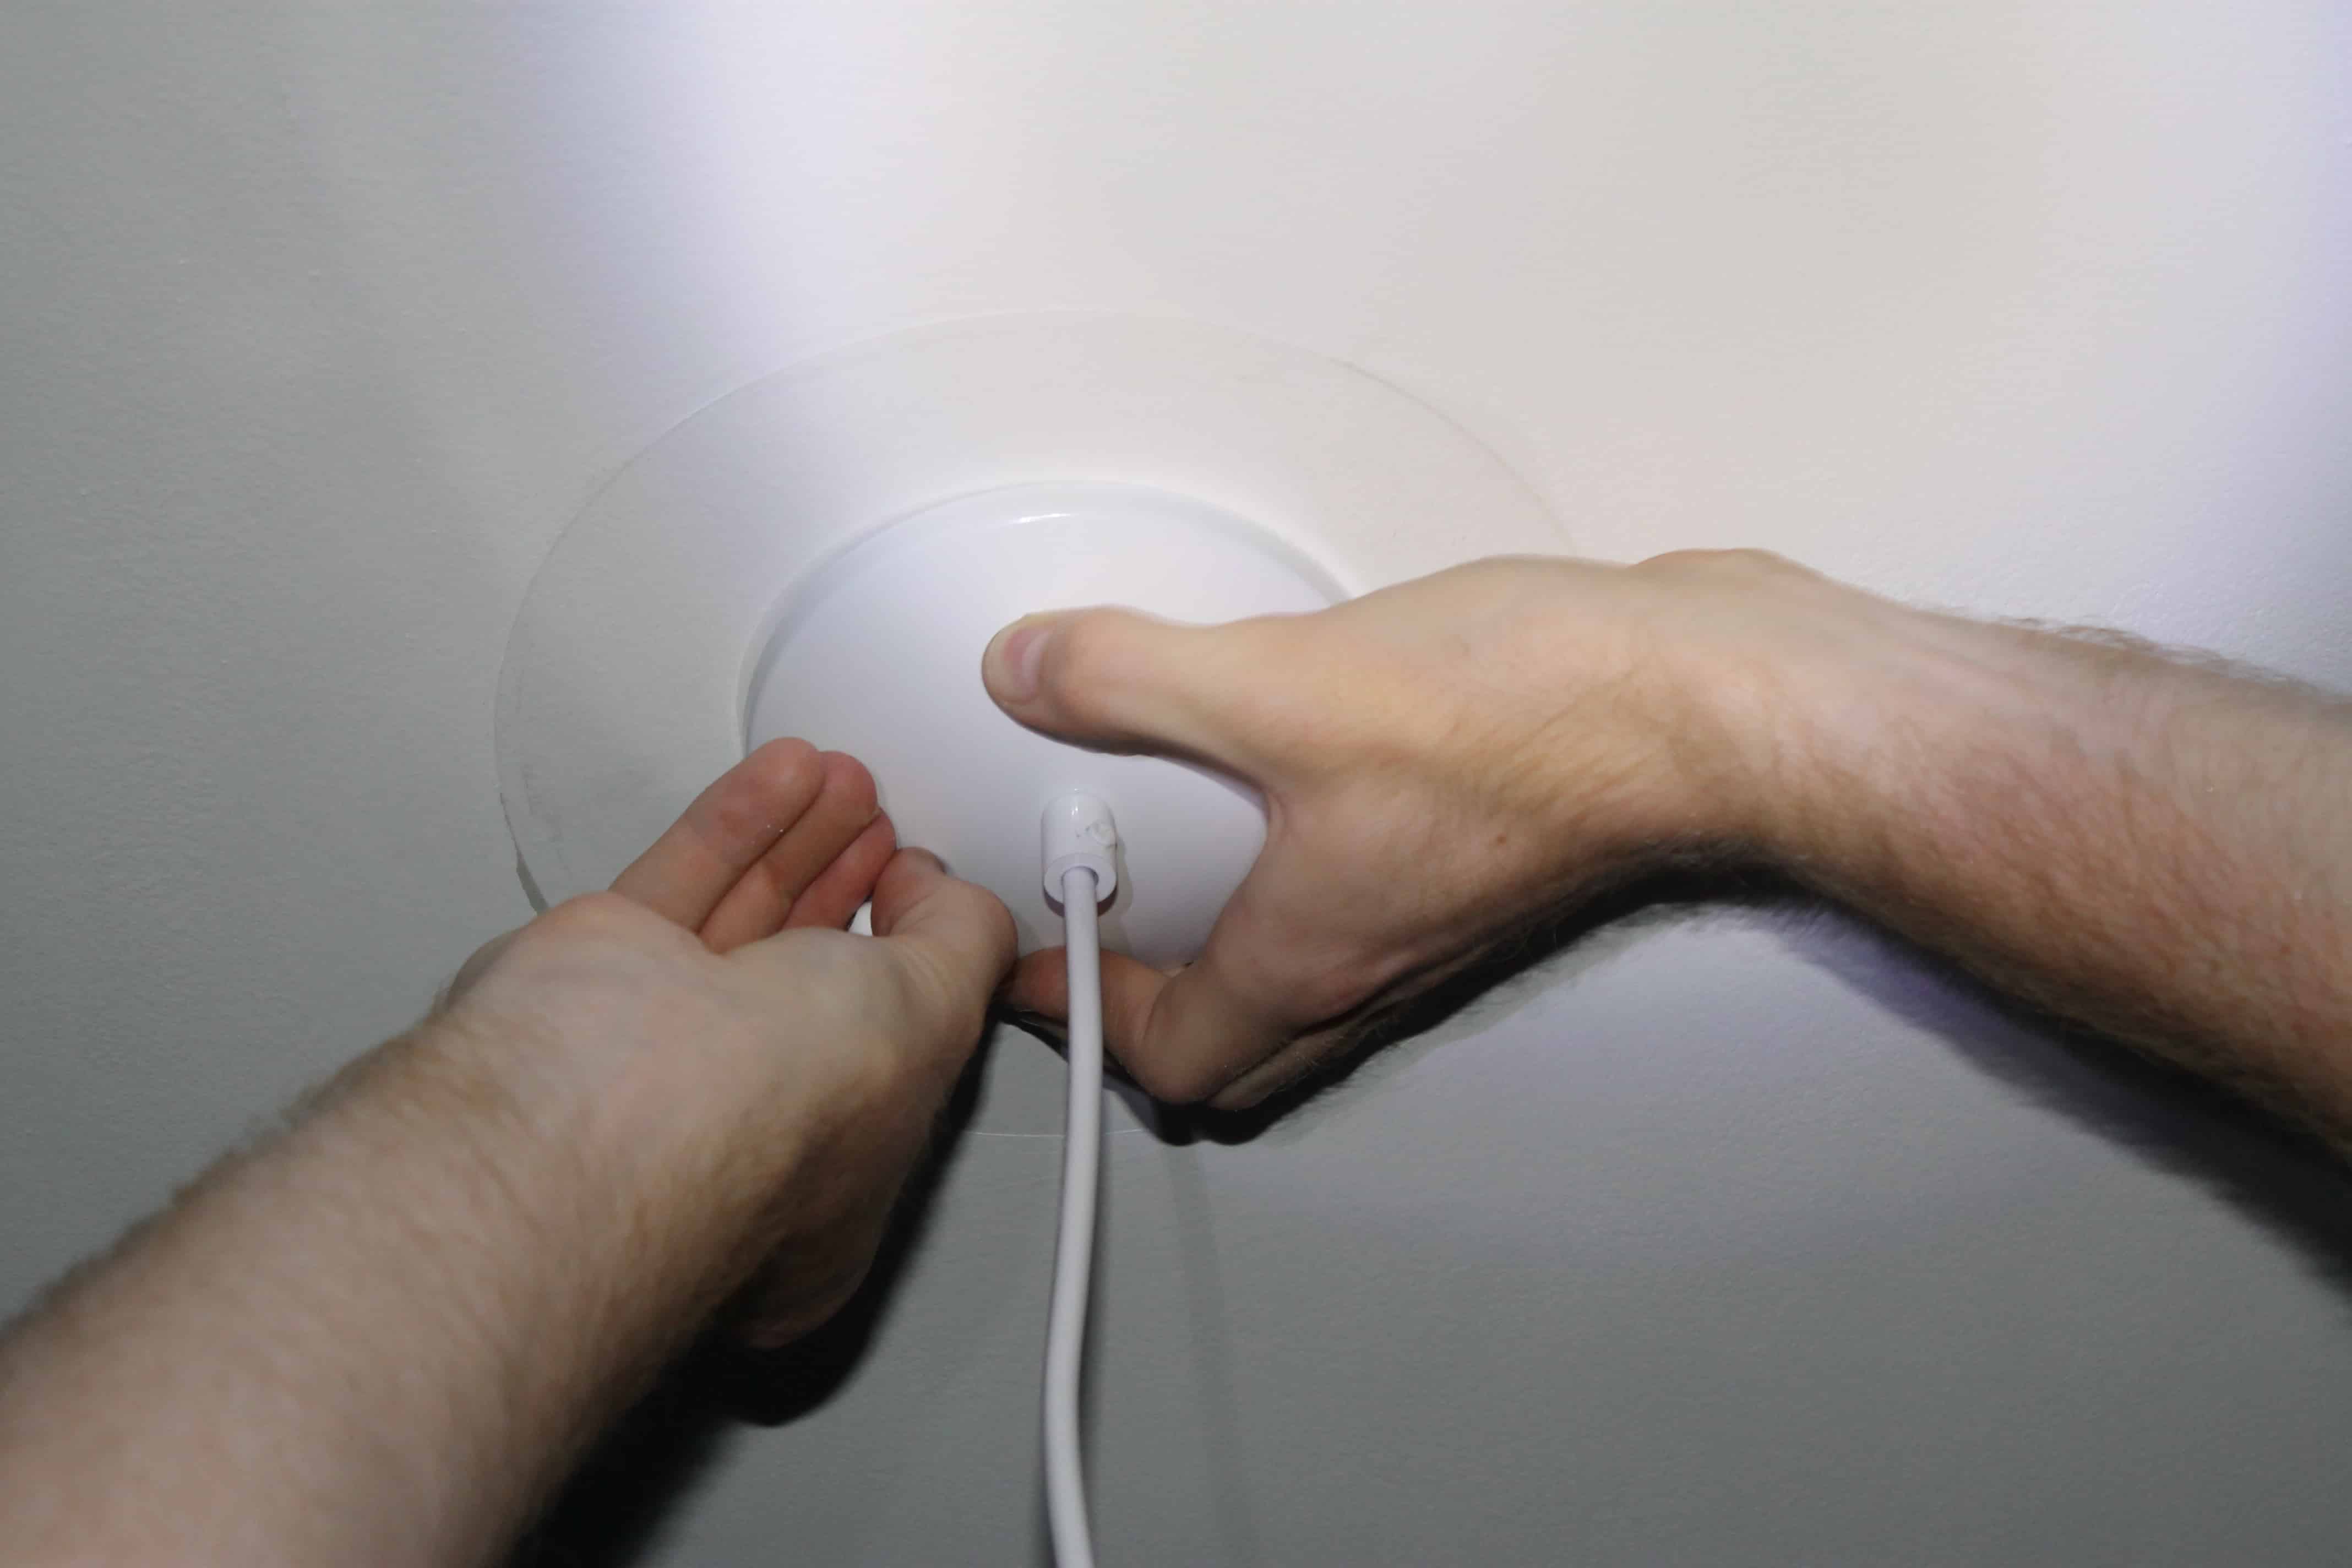
The next part is always the most annoying for me. You have to then wind up any extra length of cord and jam it into the hole. But you also have to make sure it isn’t blocking where the screws need to go to hold it up. Then the hard part comes of trying to align your screw holes of the fixture with the screw holes of the metal bar inside the ceiling. Once you do that, screw it in and you’re done!
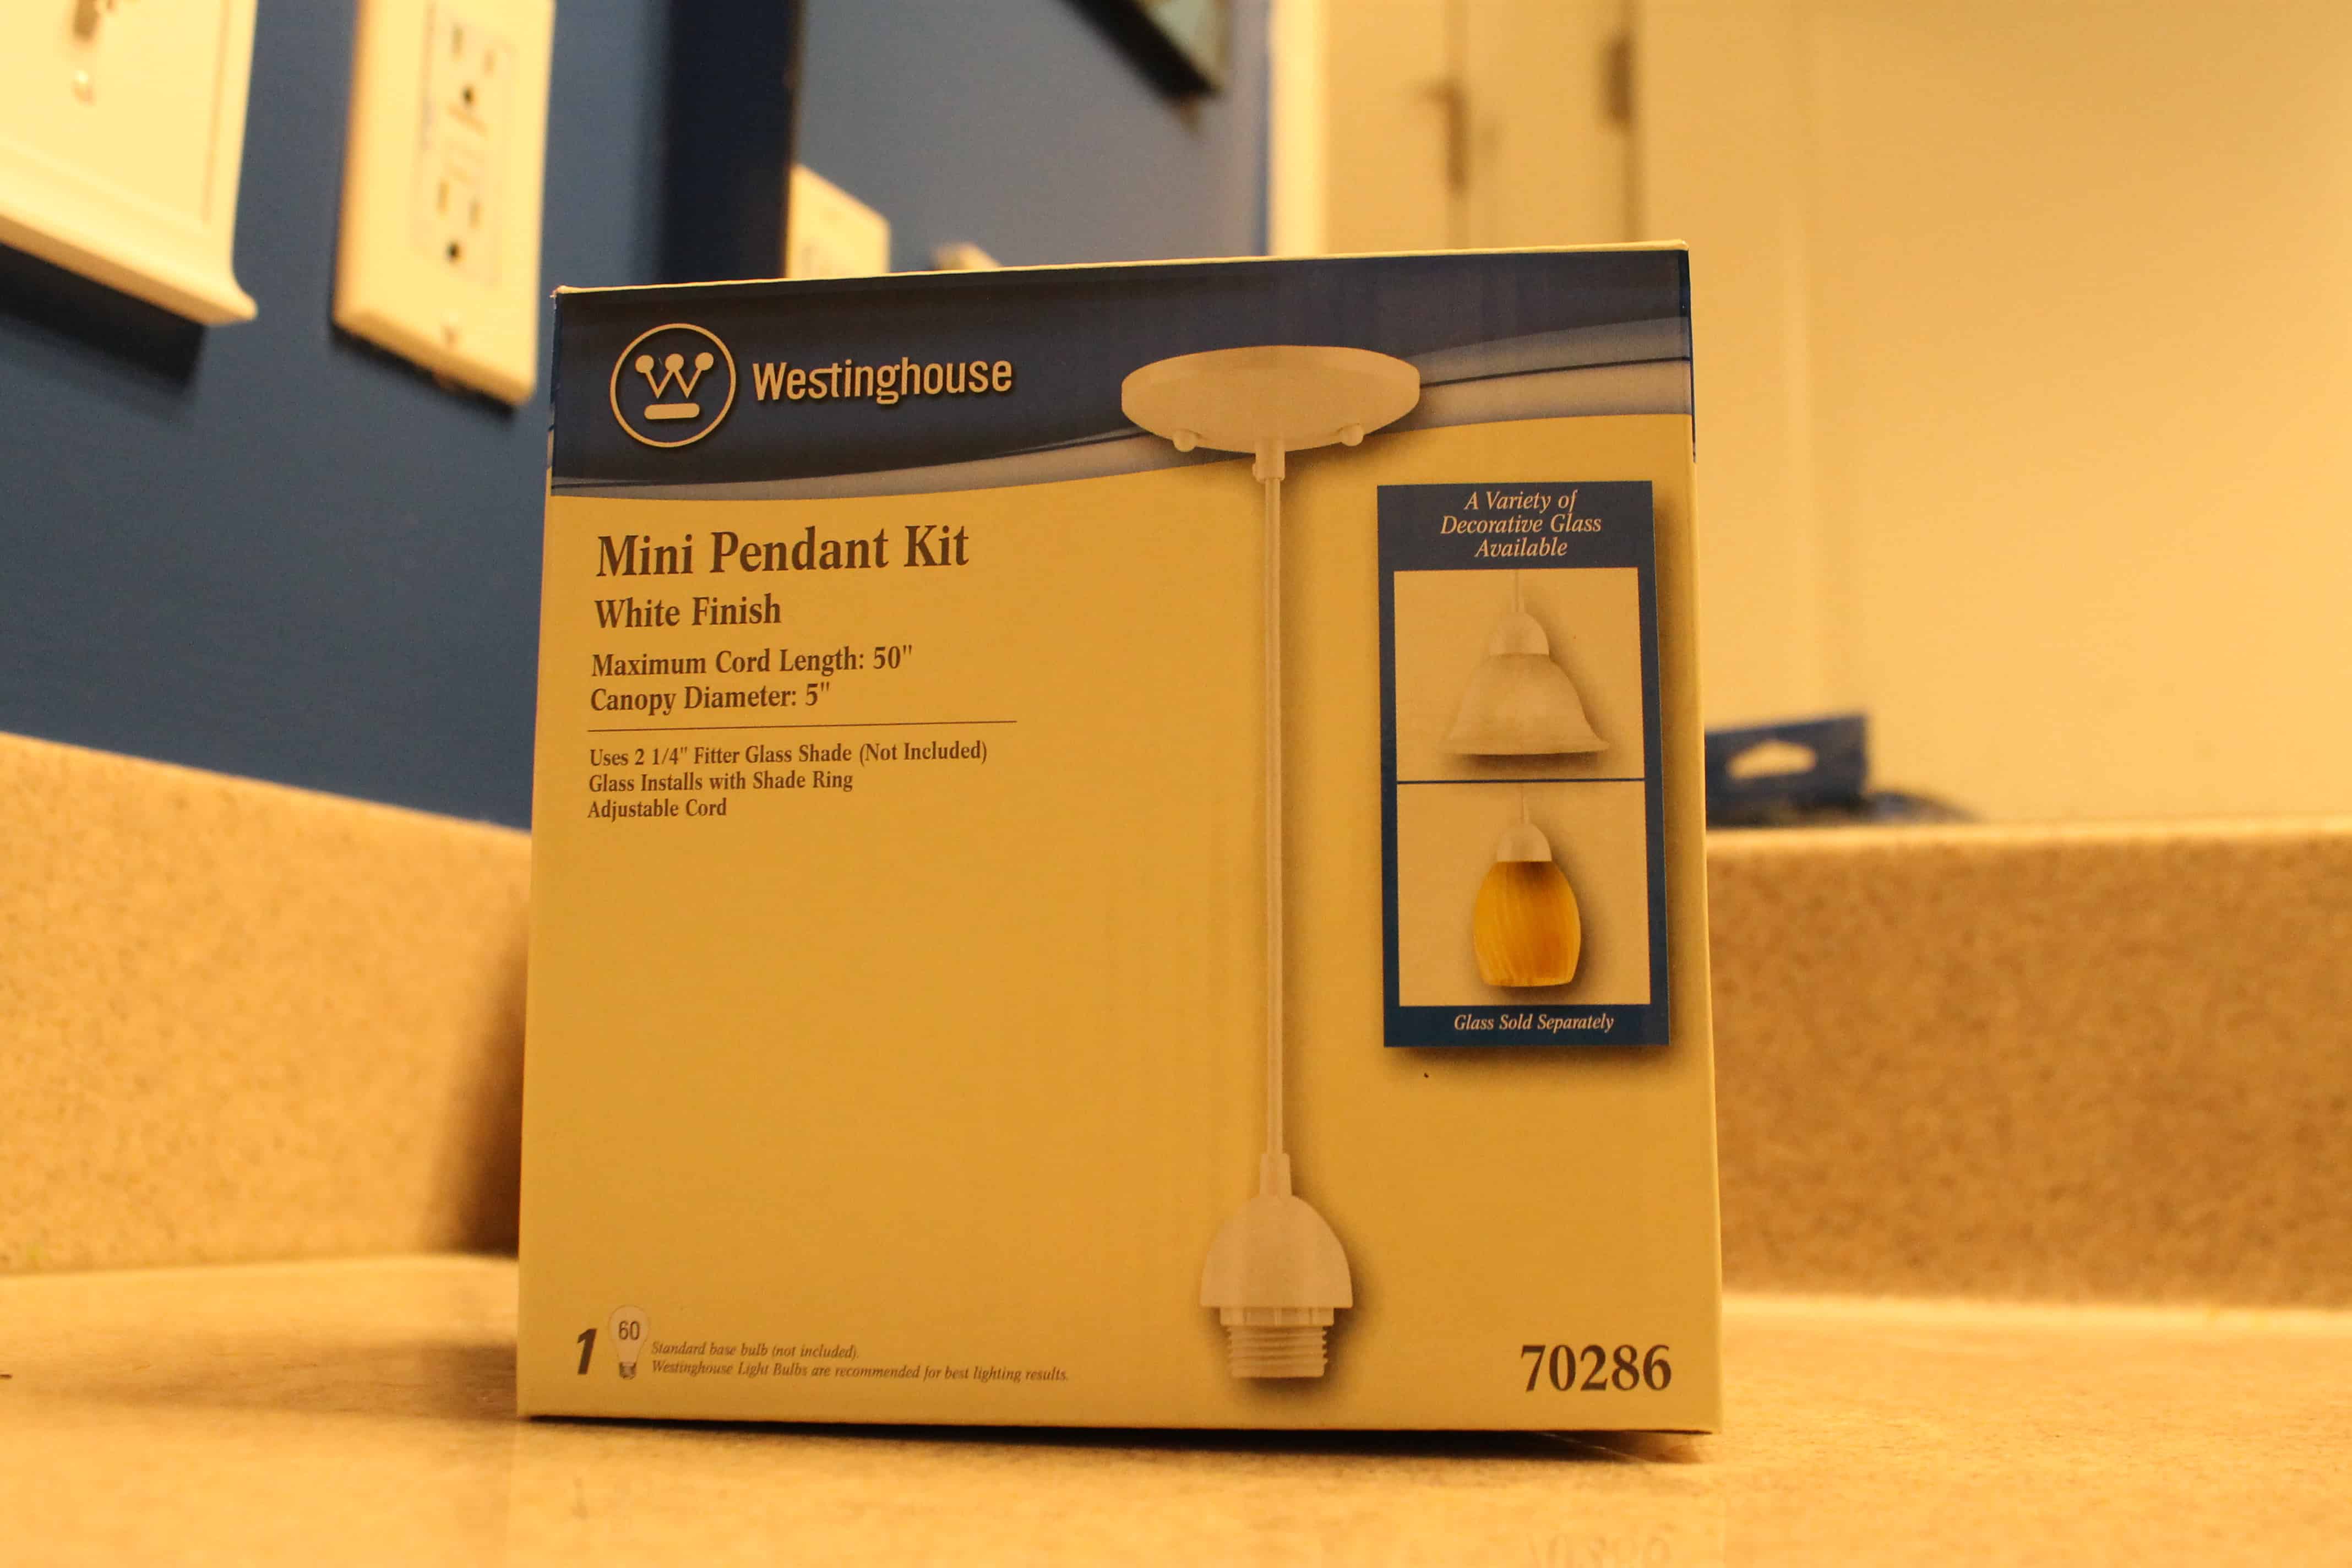
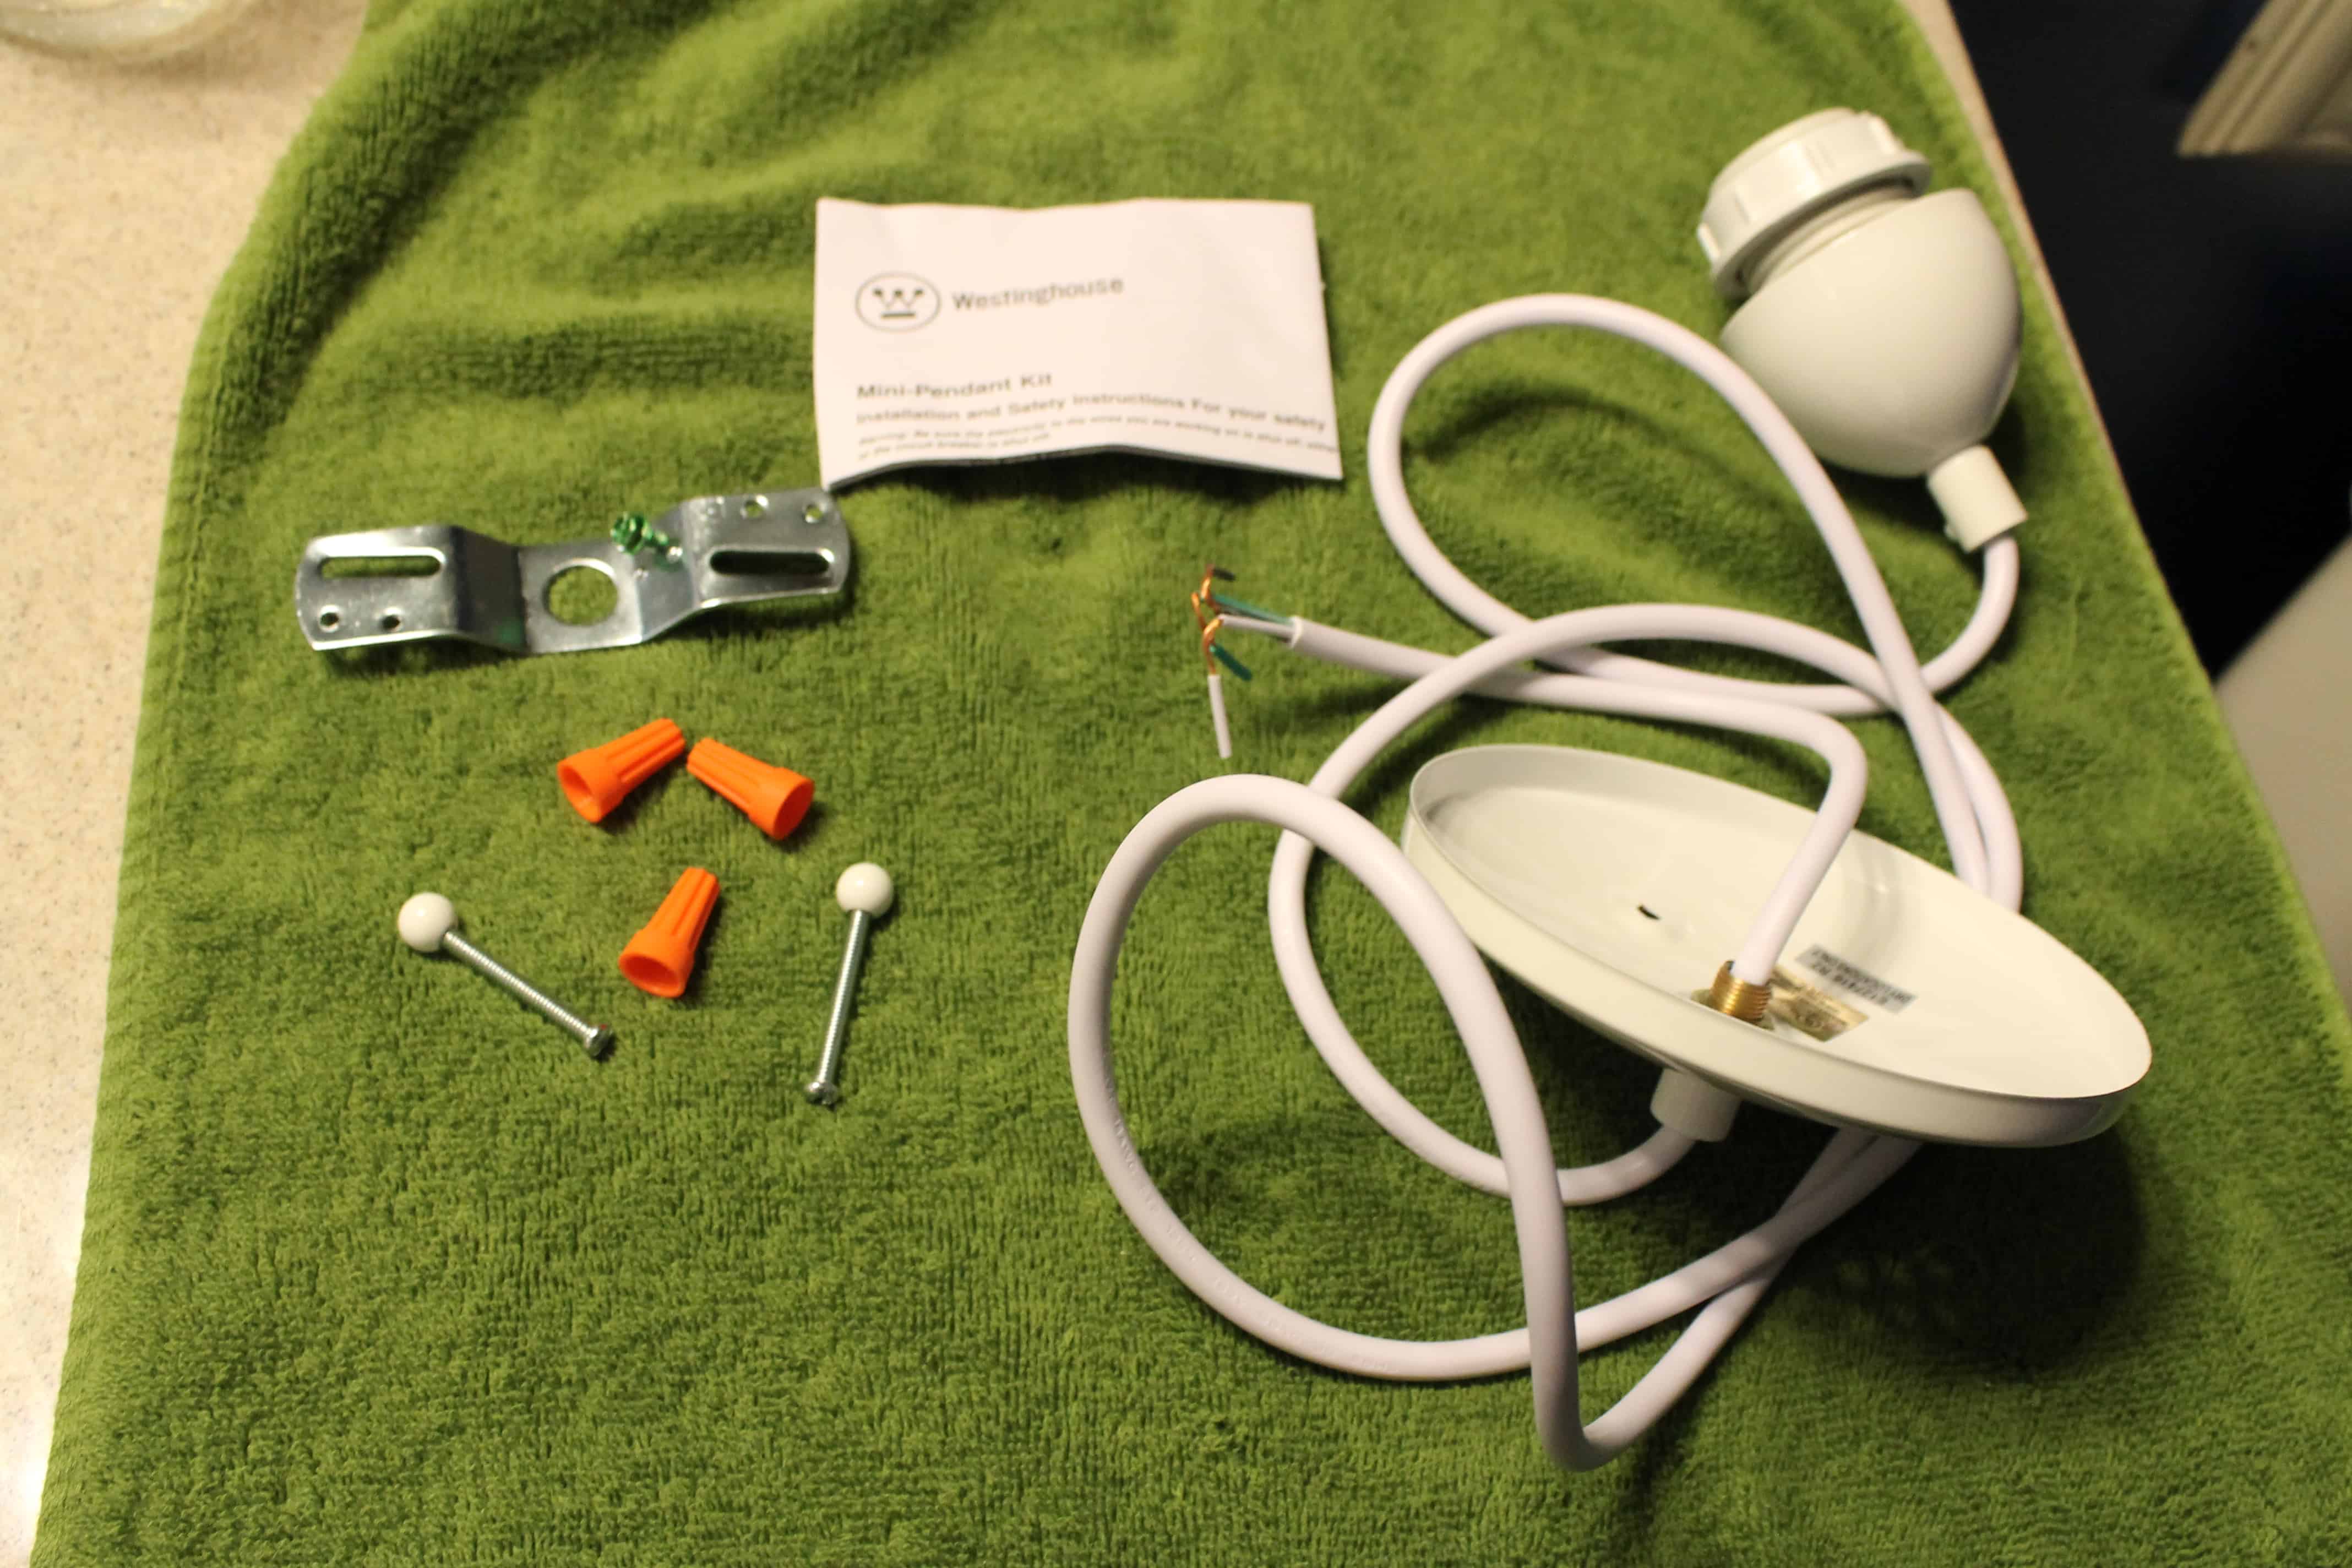
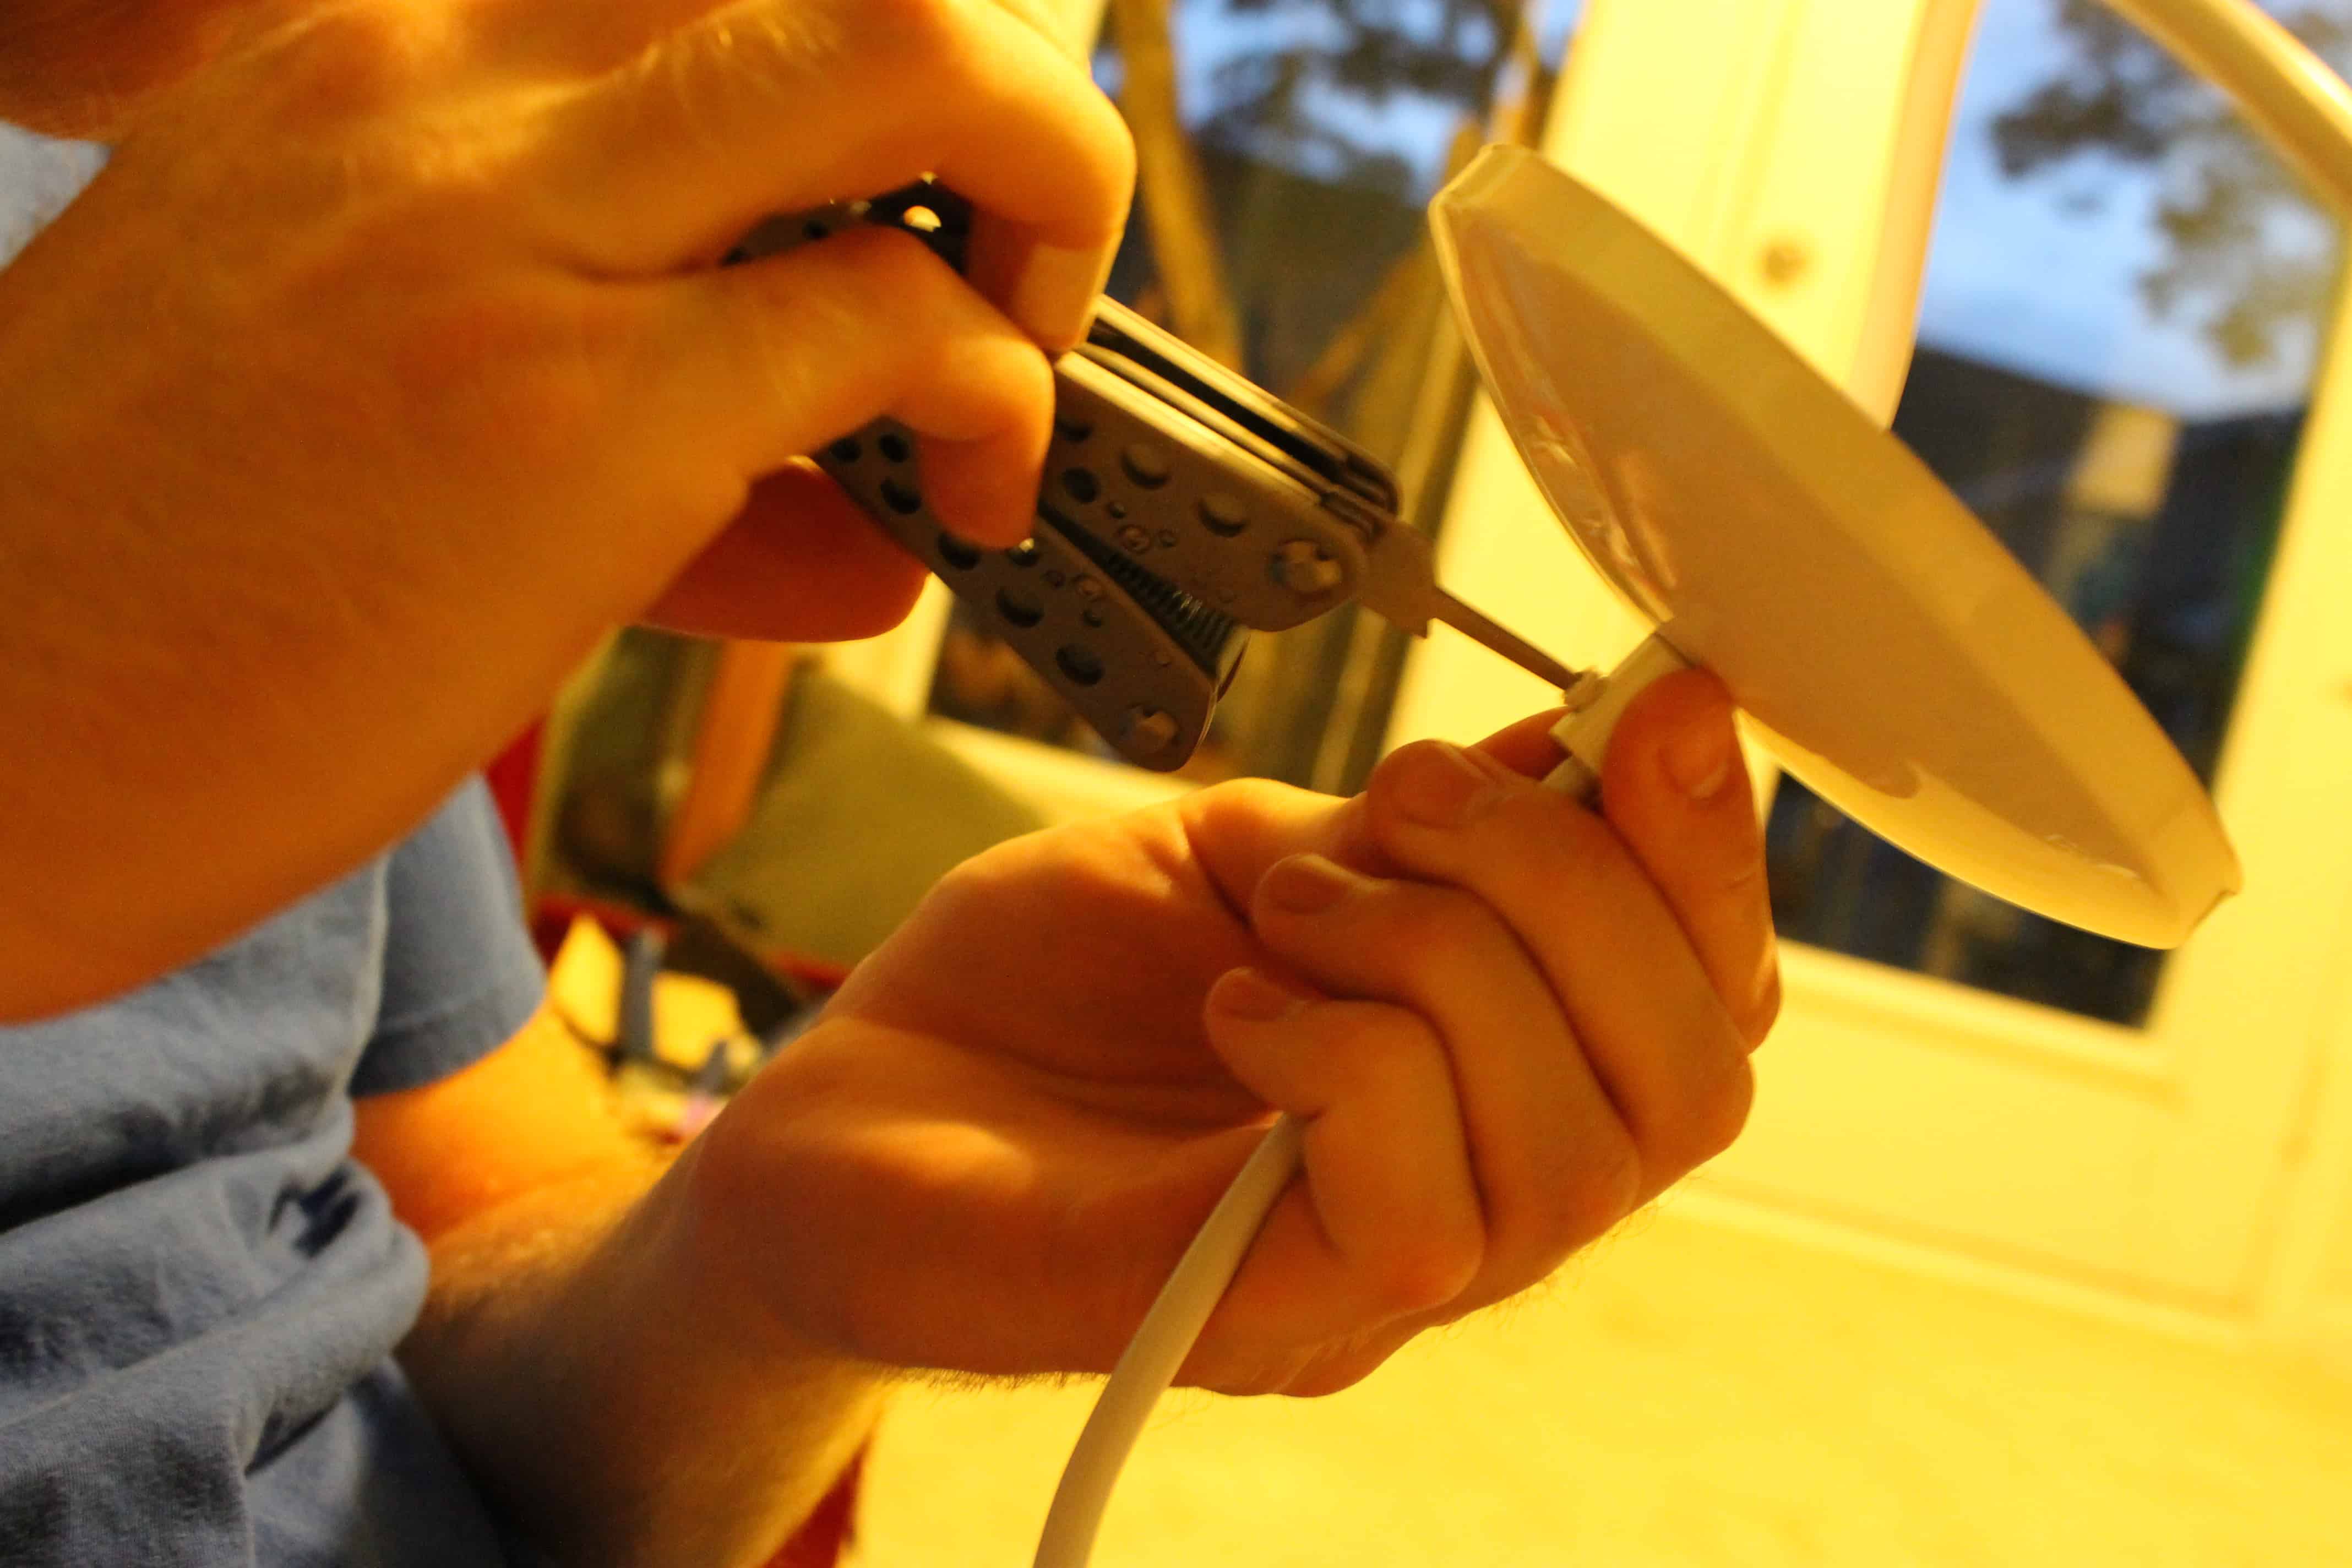
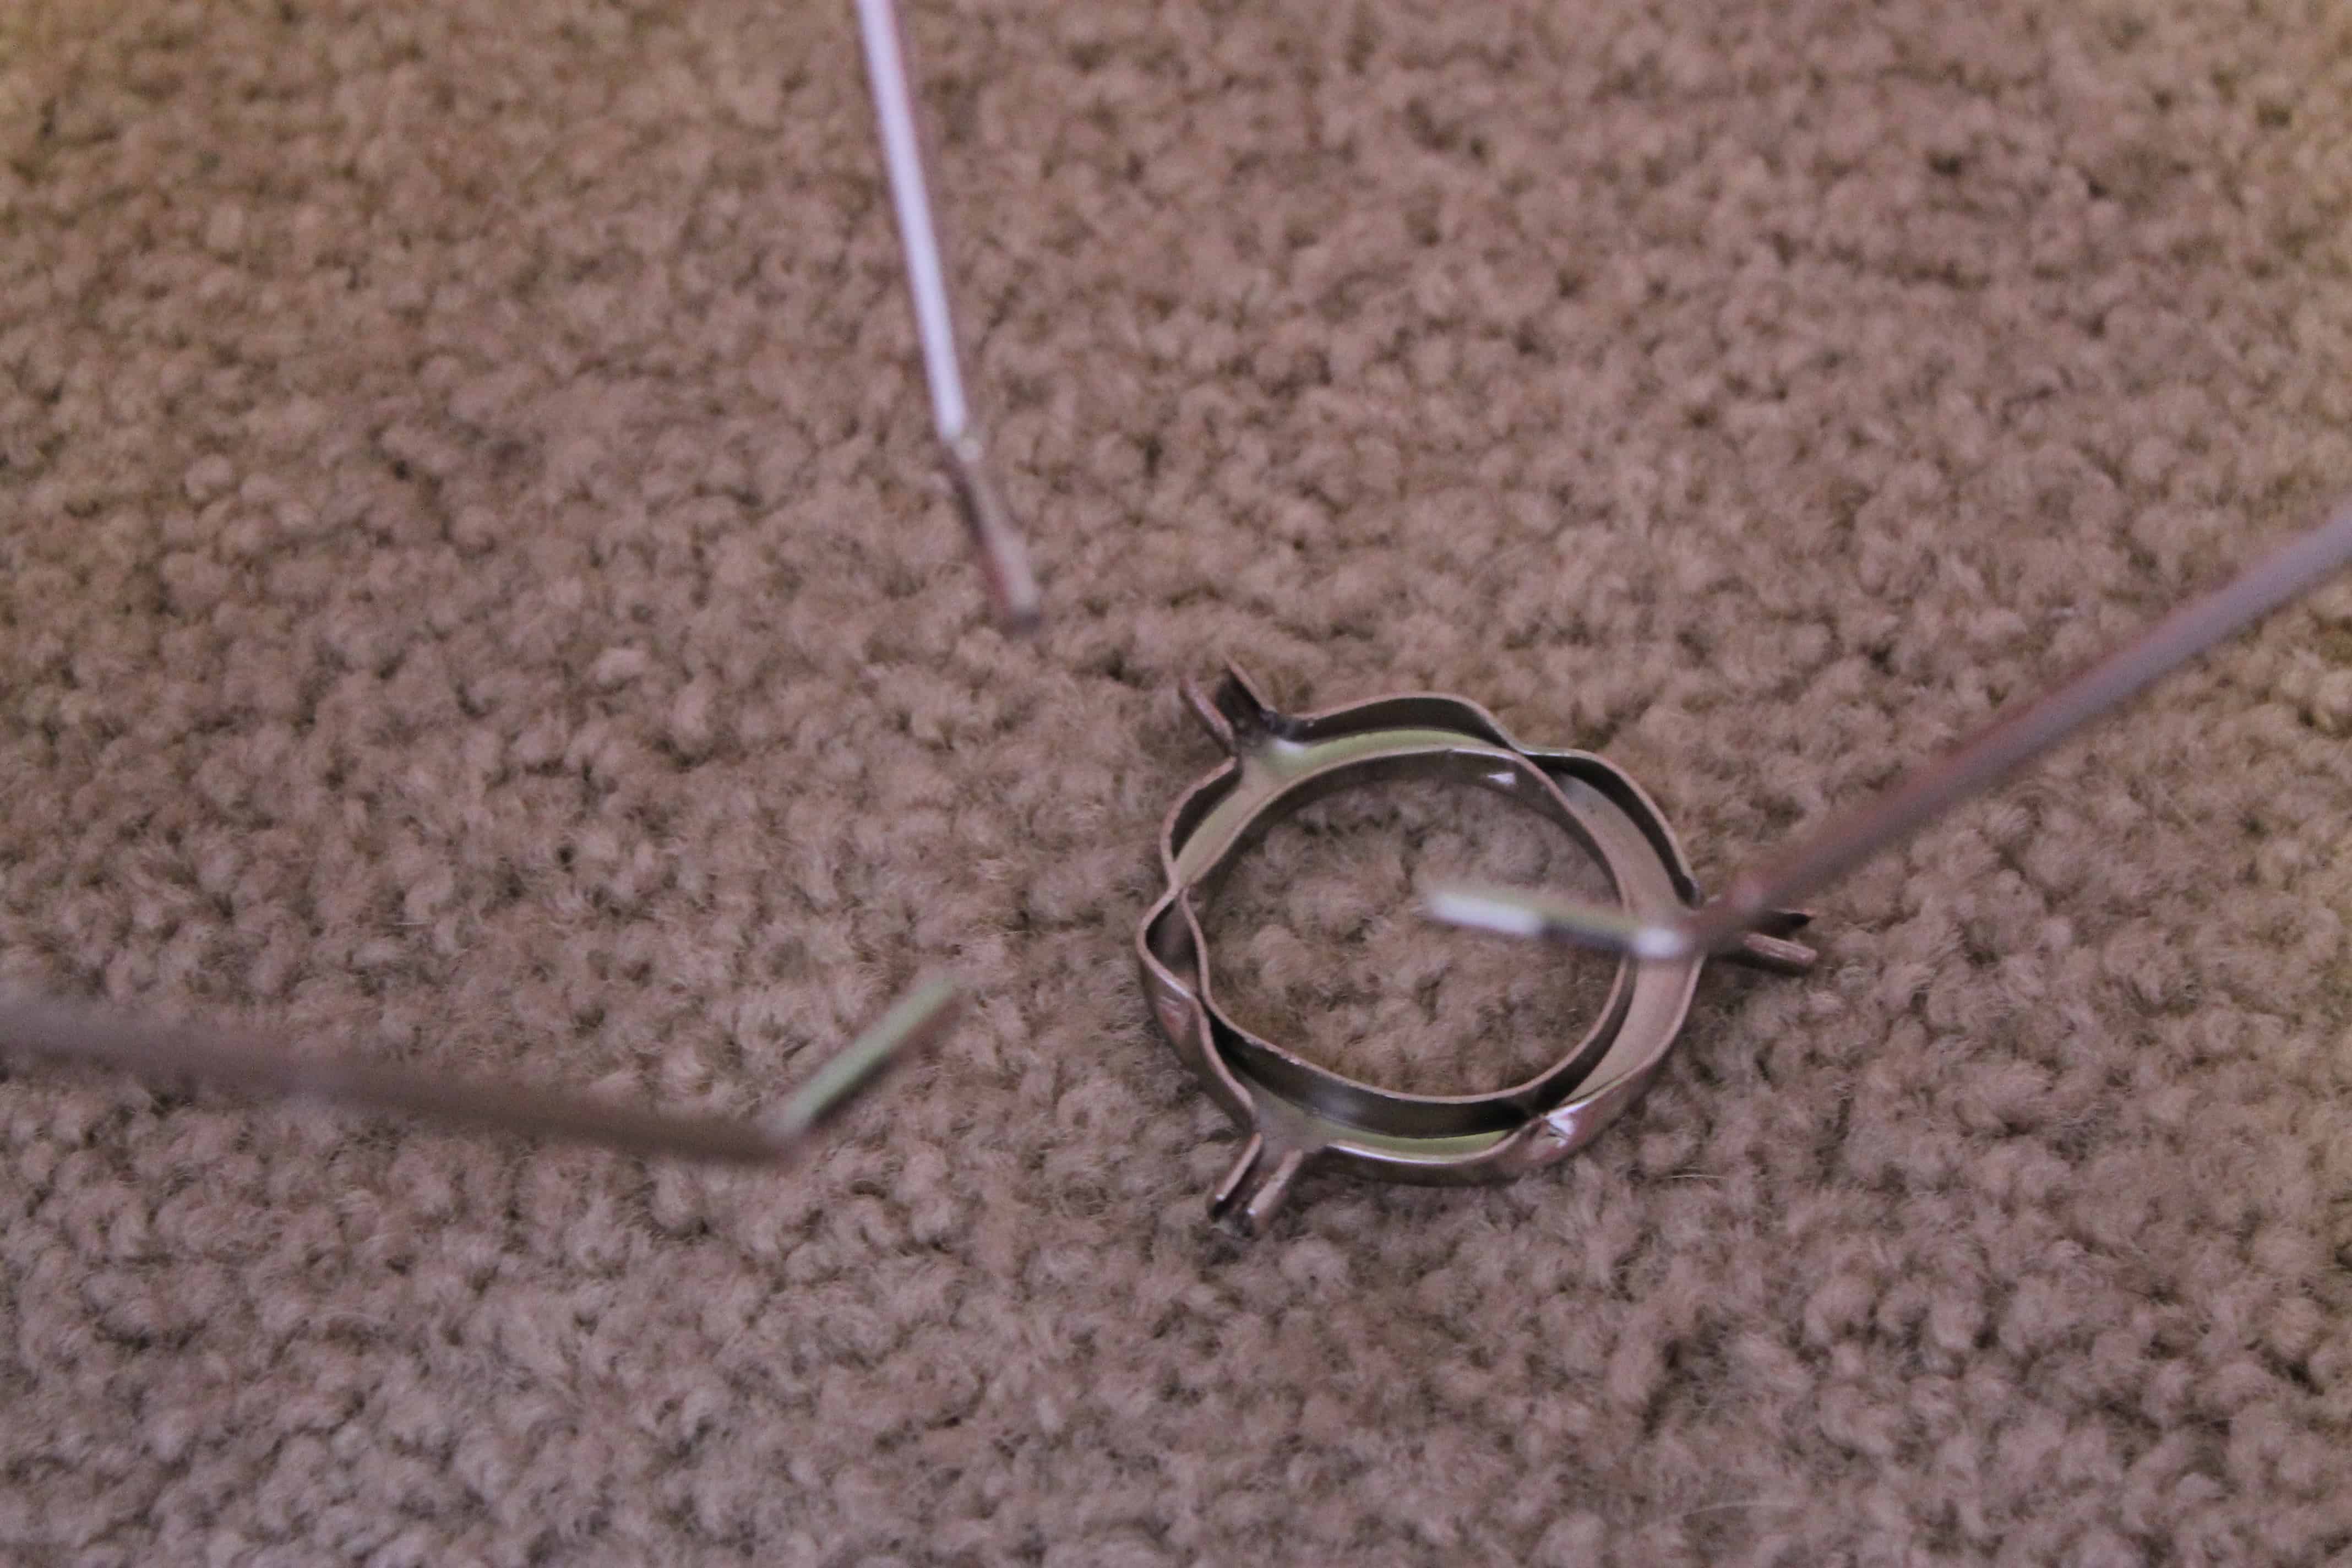
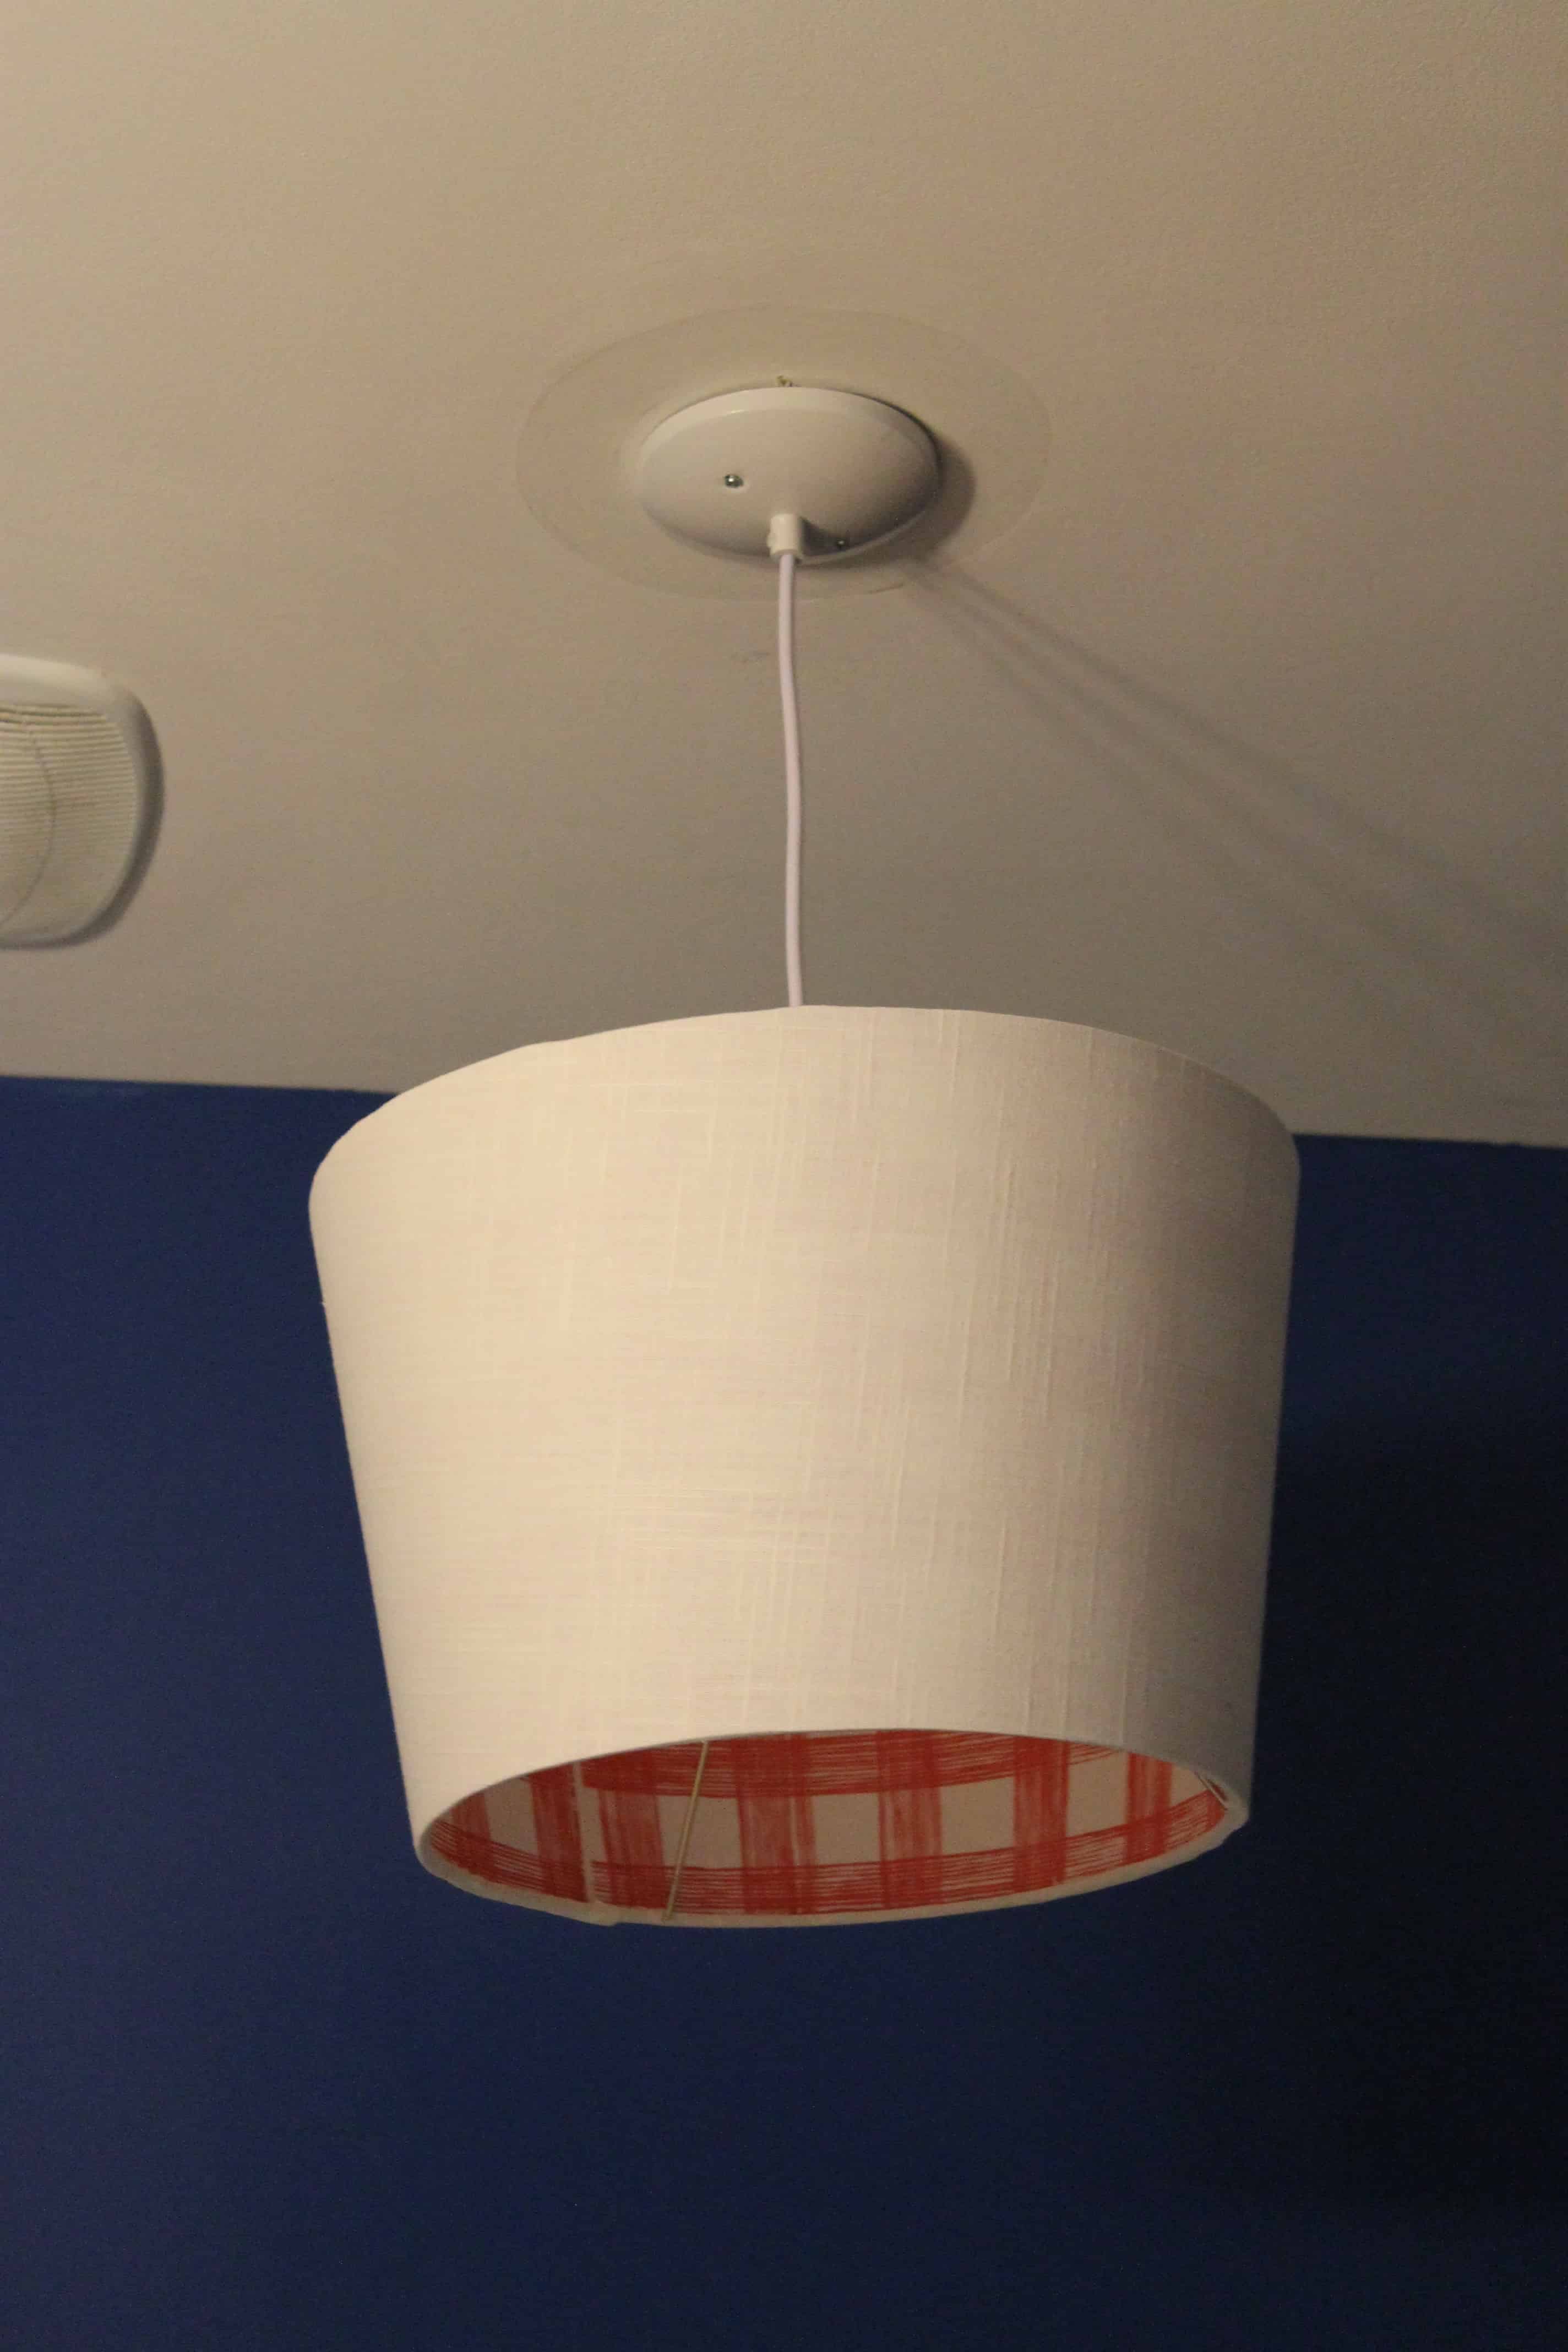
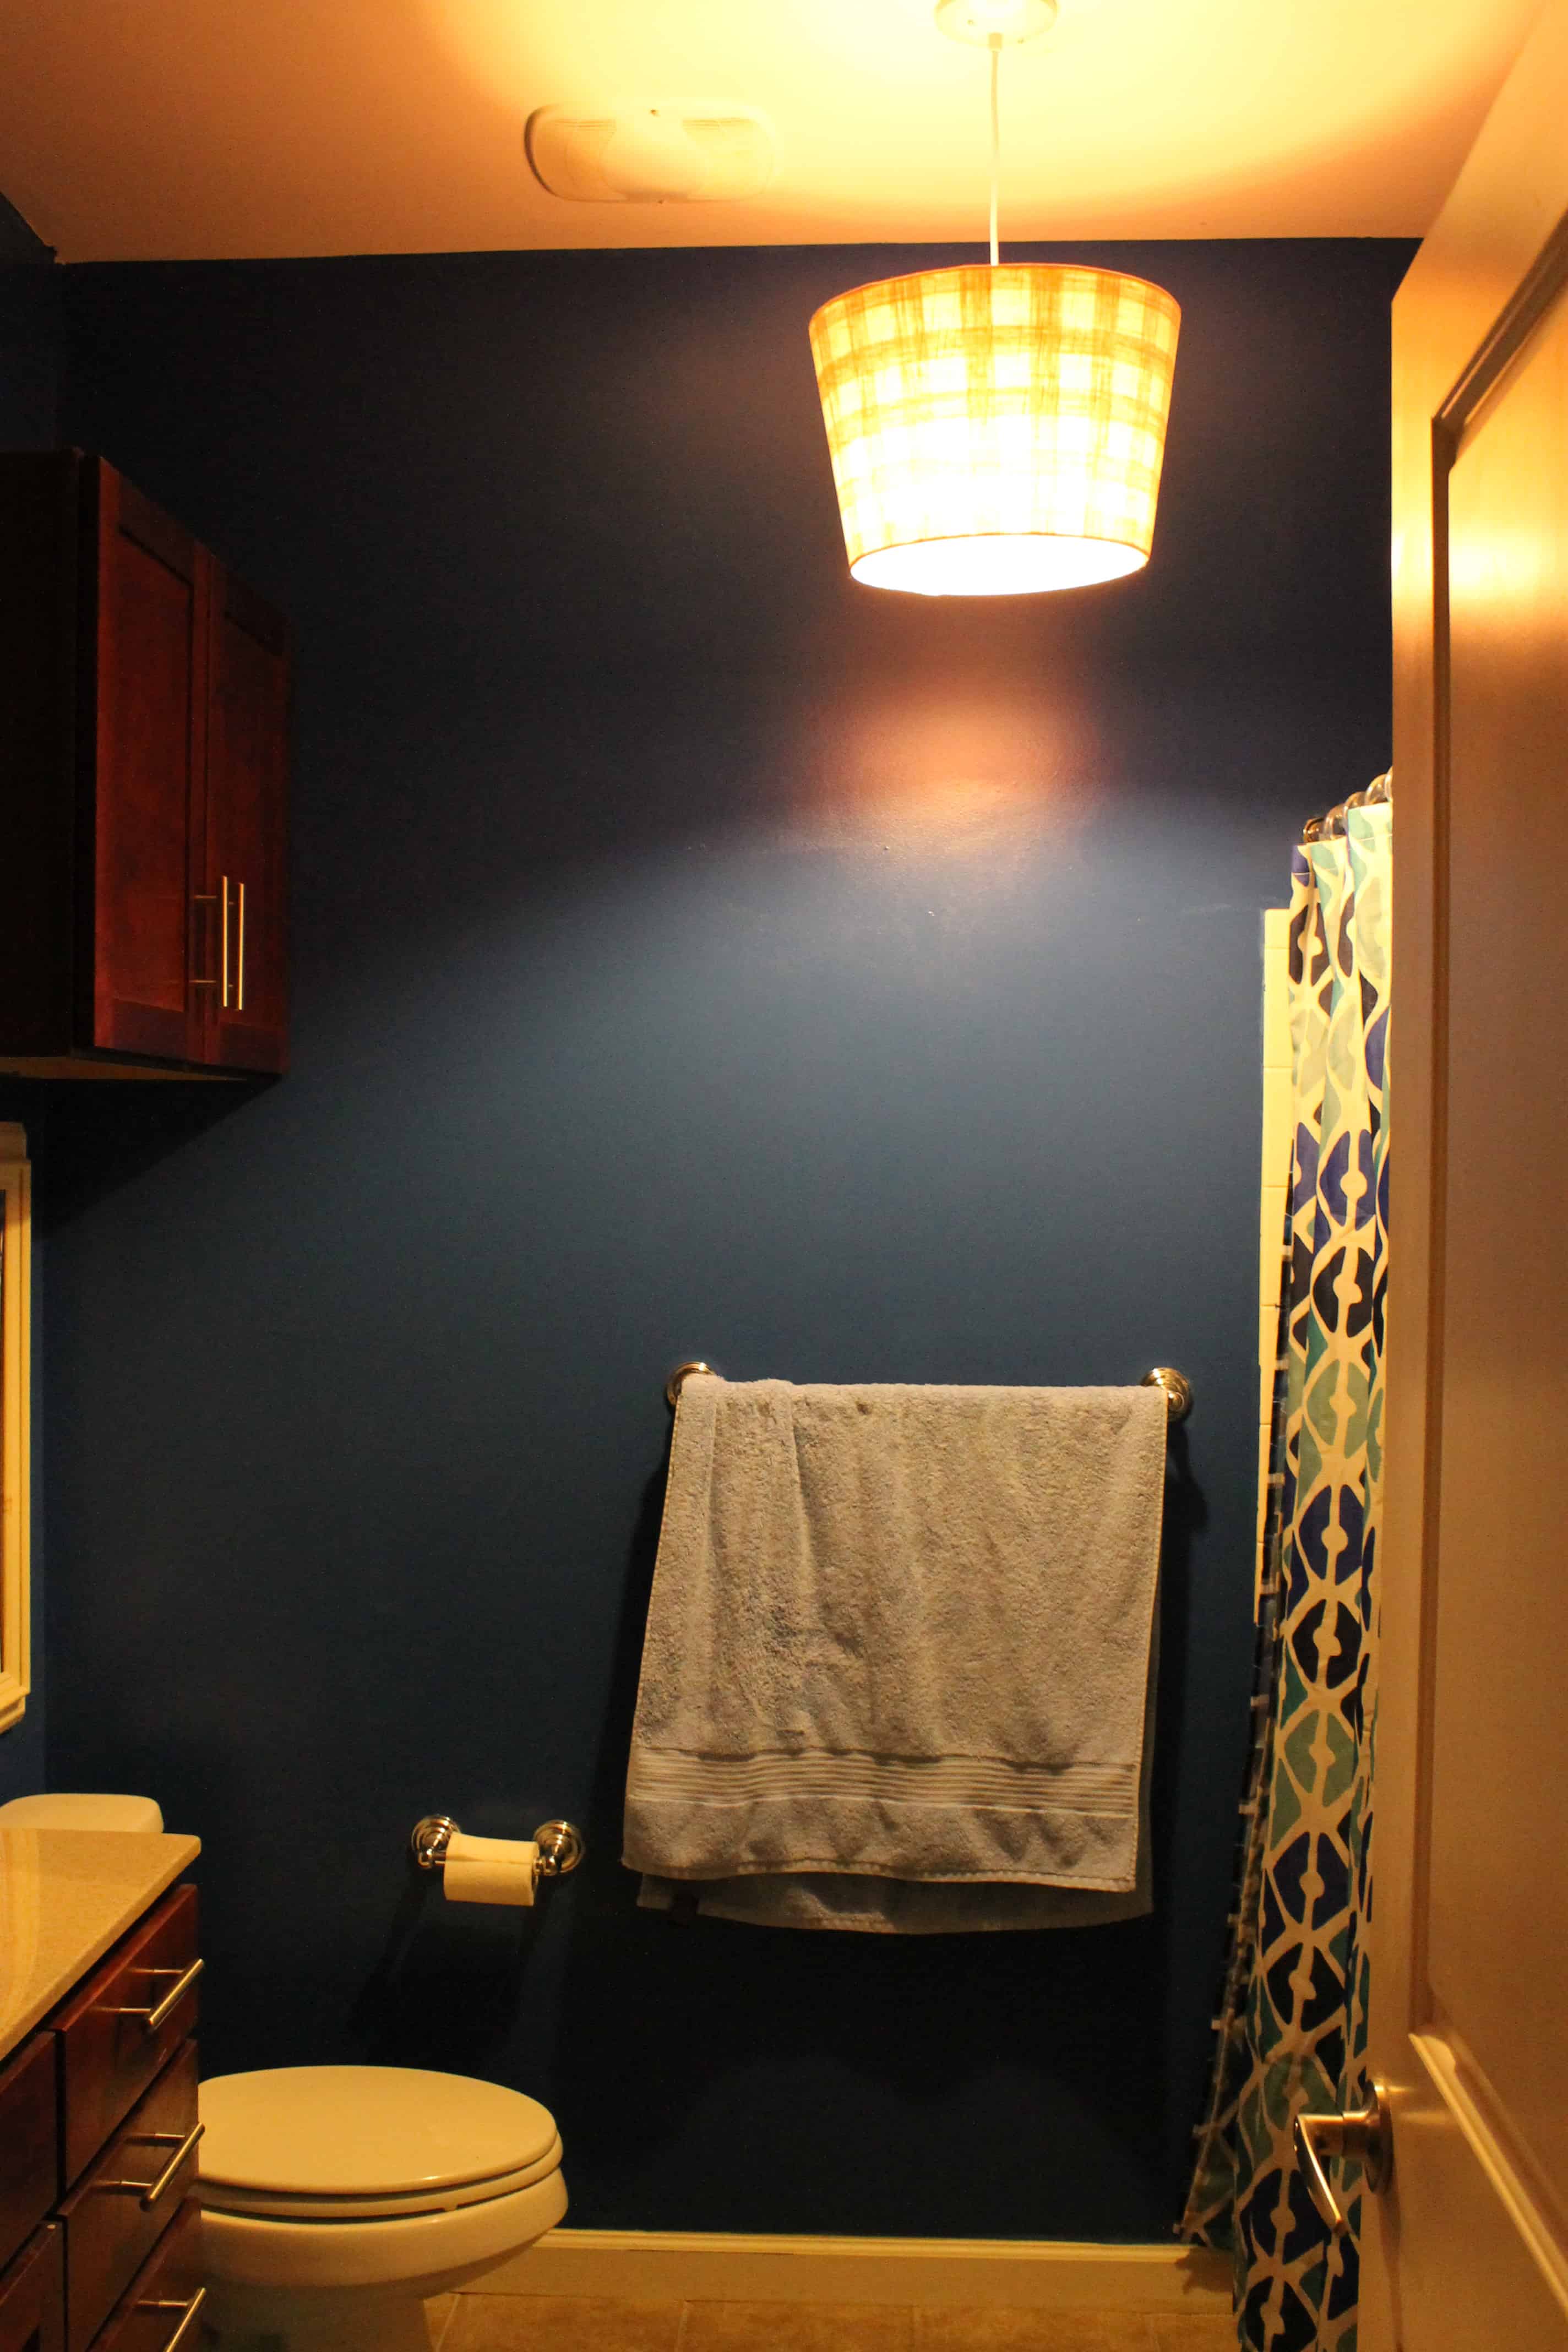
As for this particular light fixture in the guest bathroom, we got a pendant light kit from Lowe’s for $25 and a really cool lampshade from Target on clearance for $10. We hung the pendant light first and then tried to attach the lampshade. Of course, the hole wasn’t big enough to fit around the pendant, so we had to cut out the metal loop and just tighten the pendant washer around the prongs of the lamp.

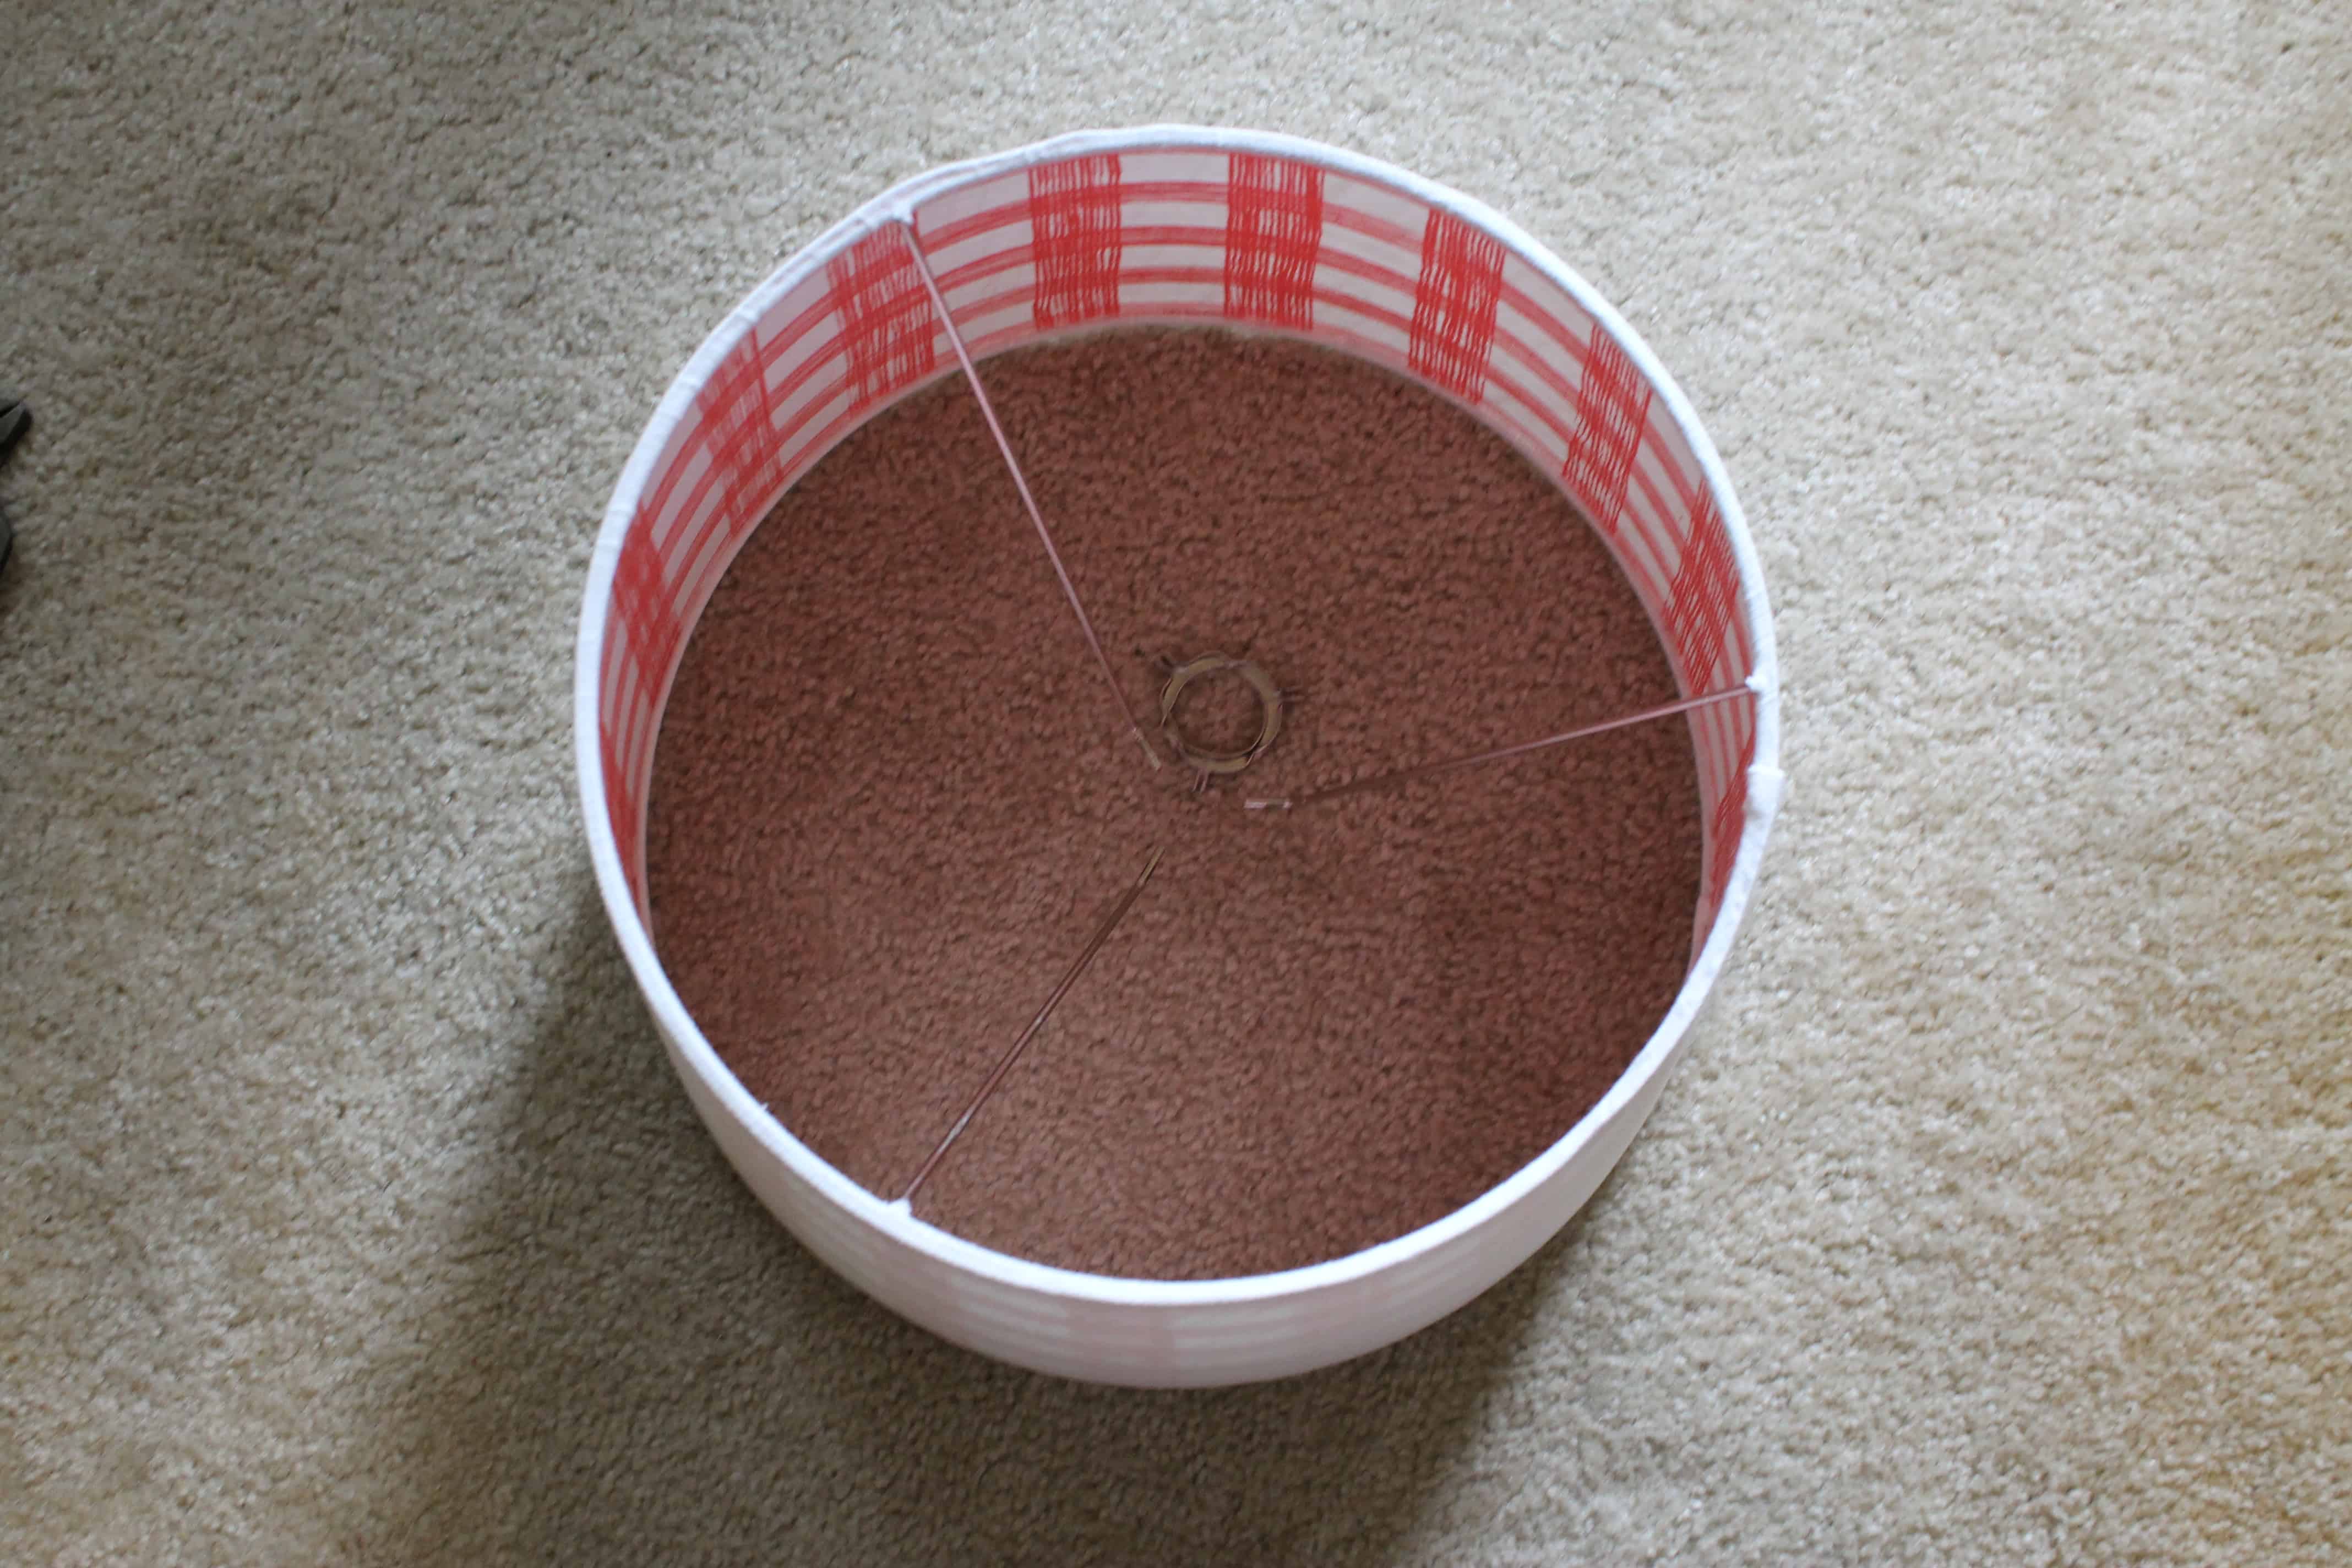
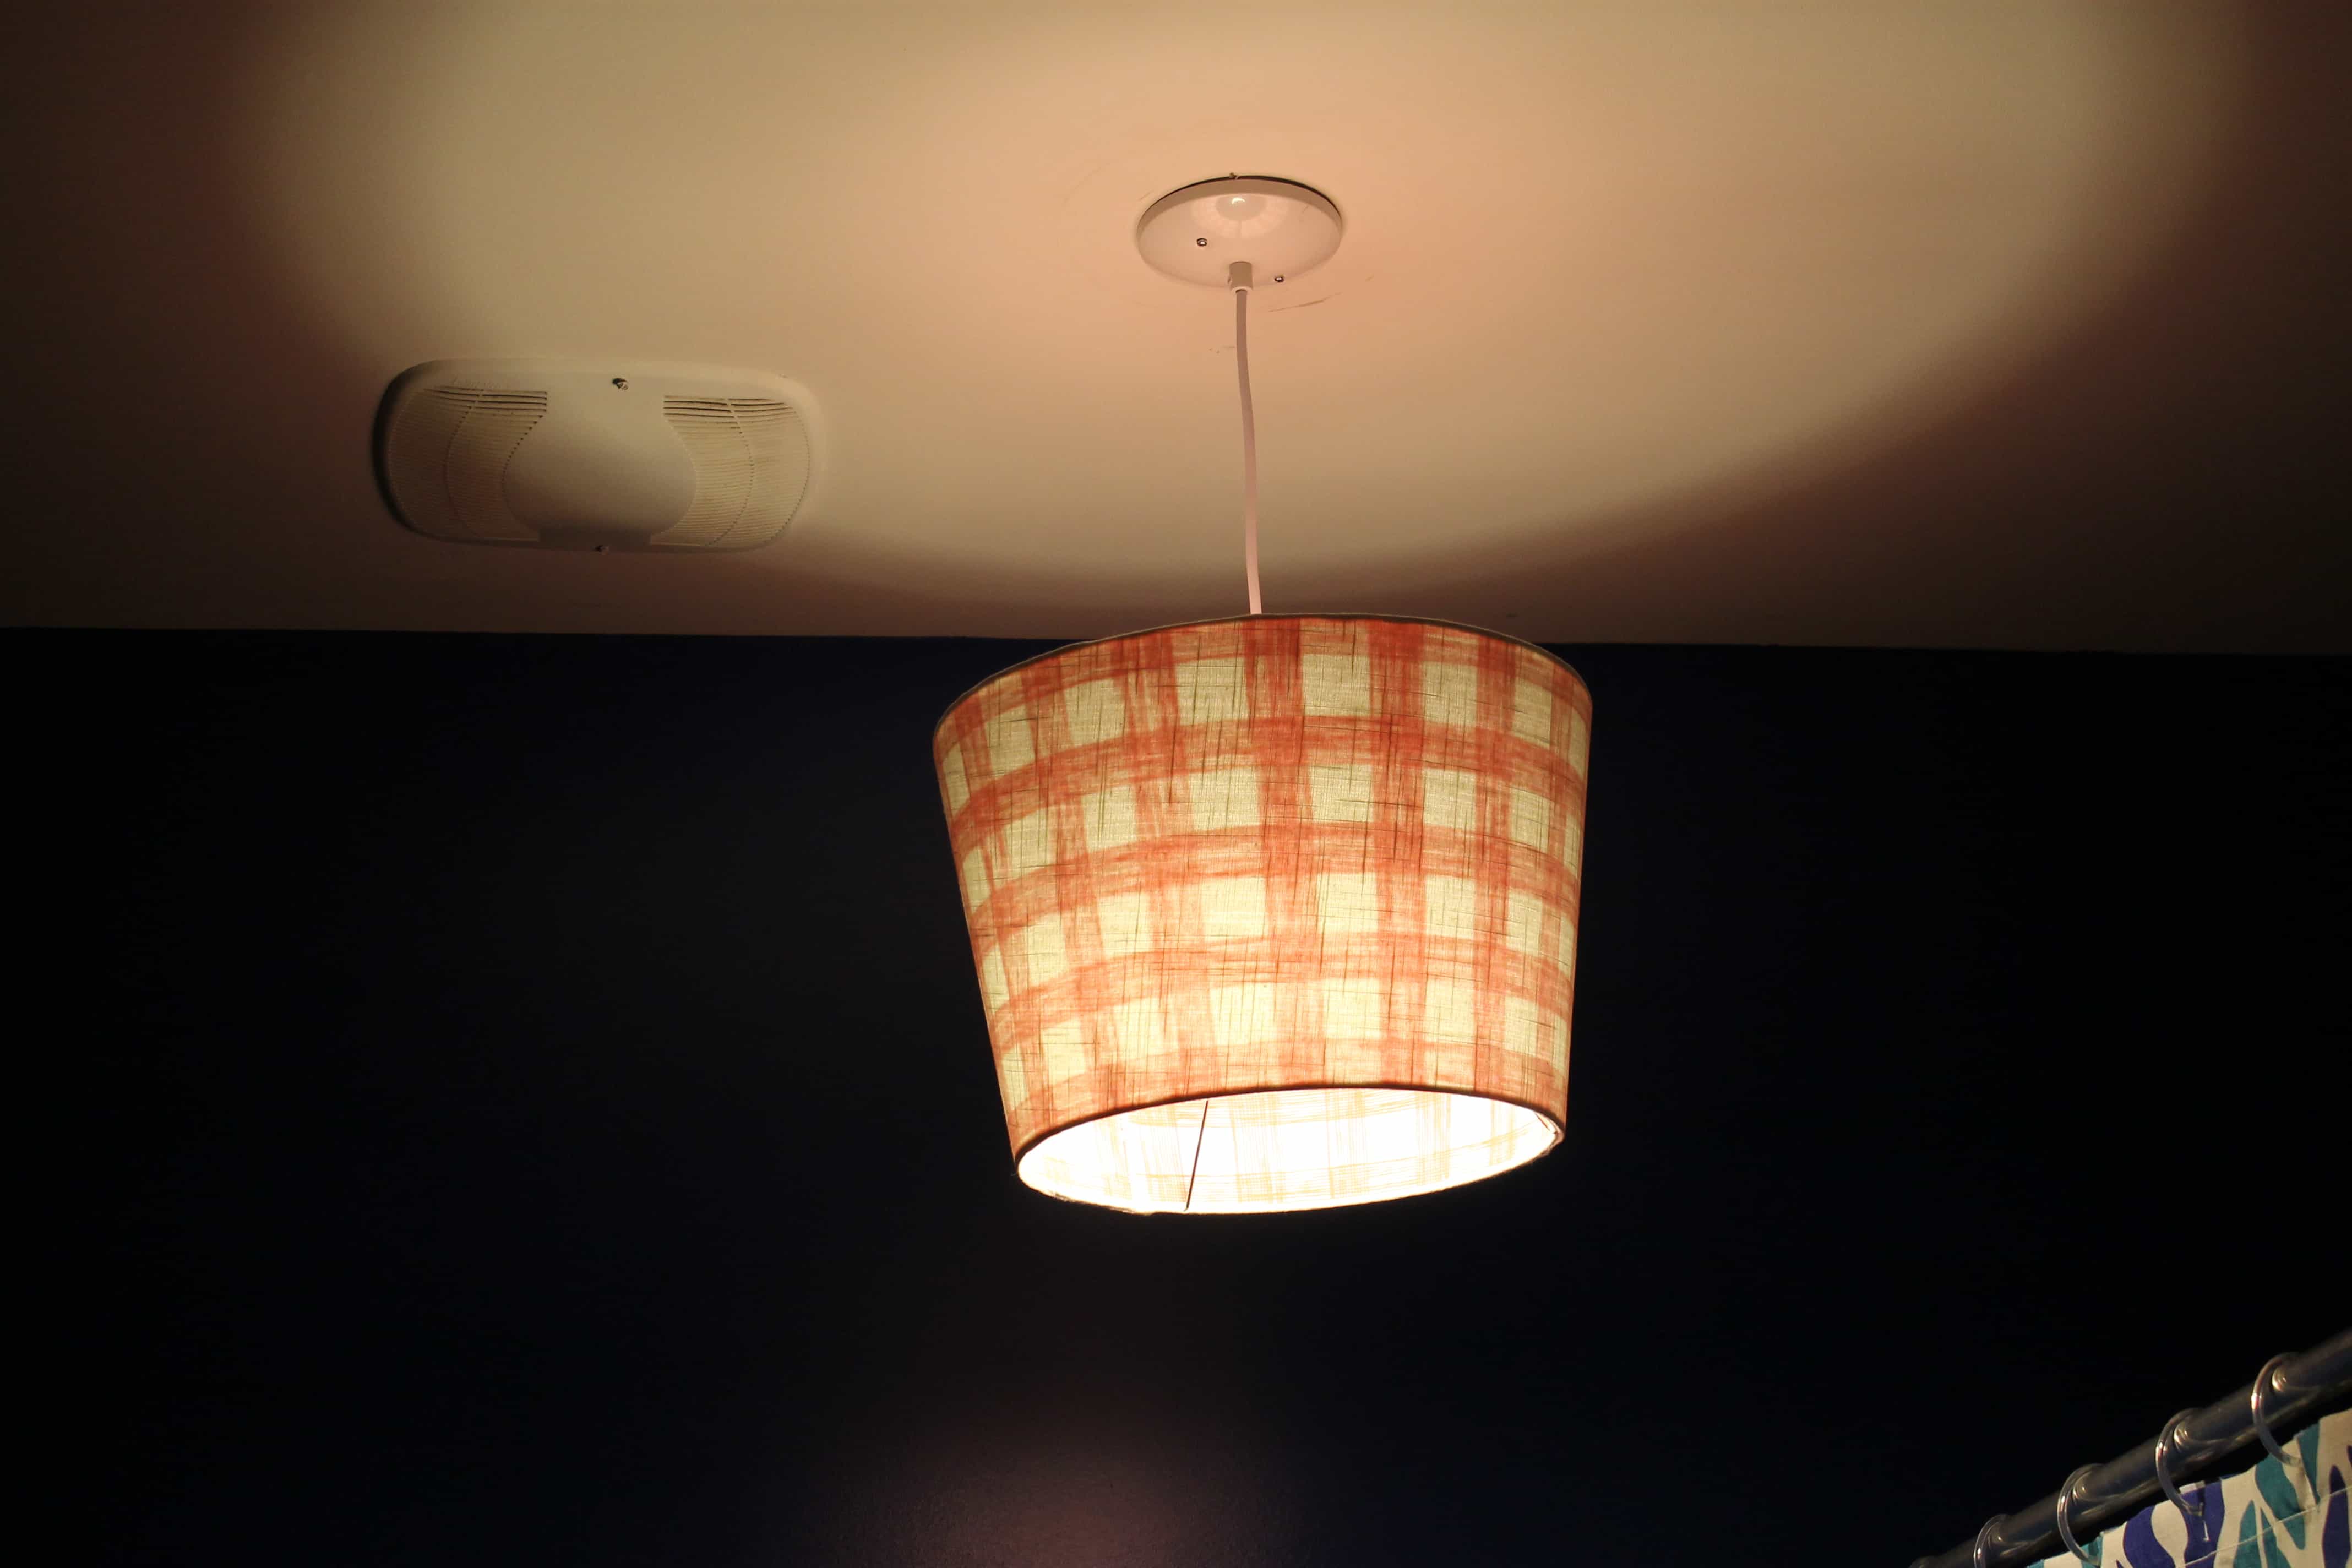
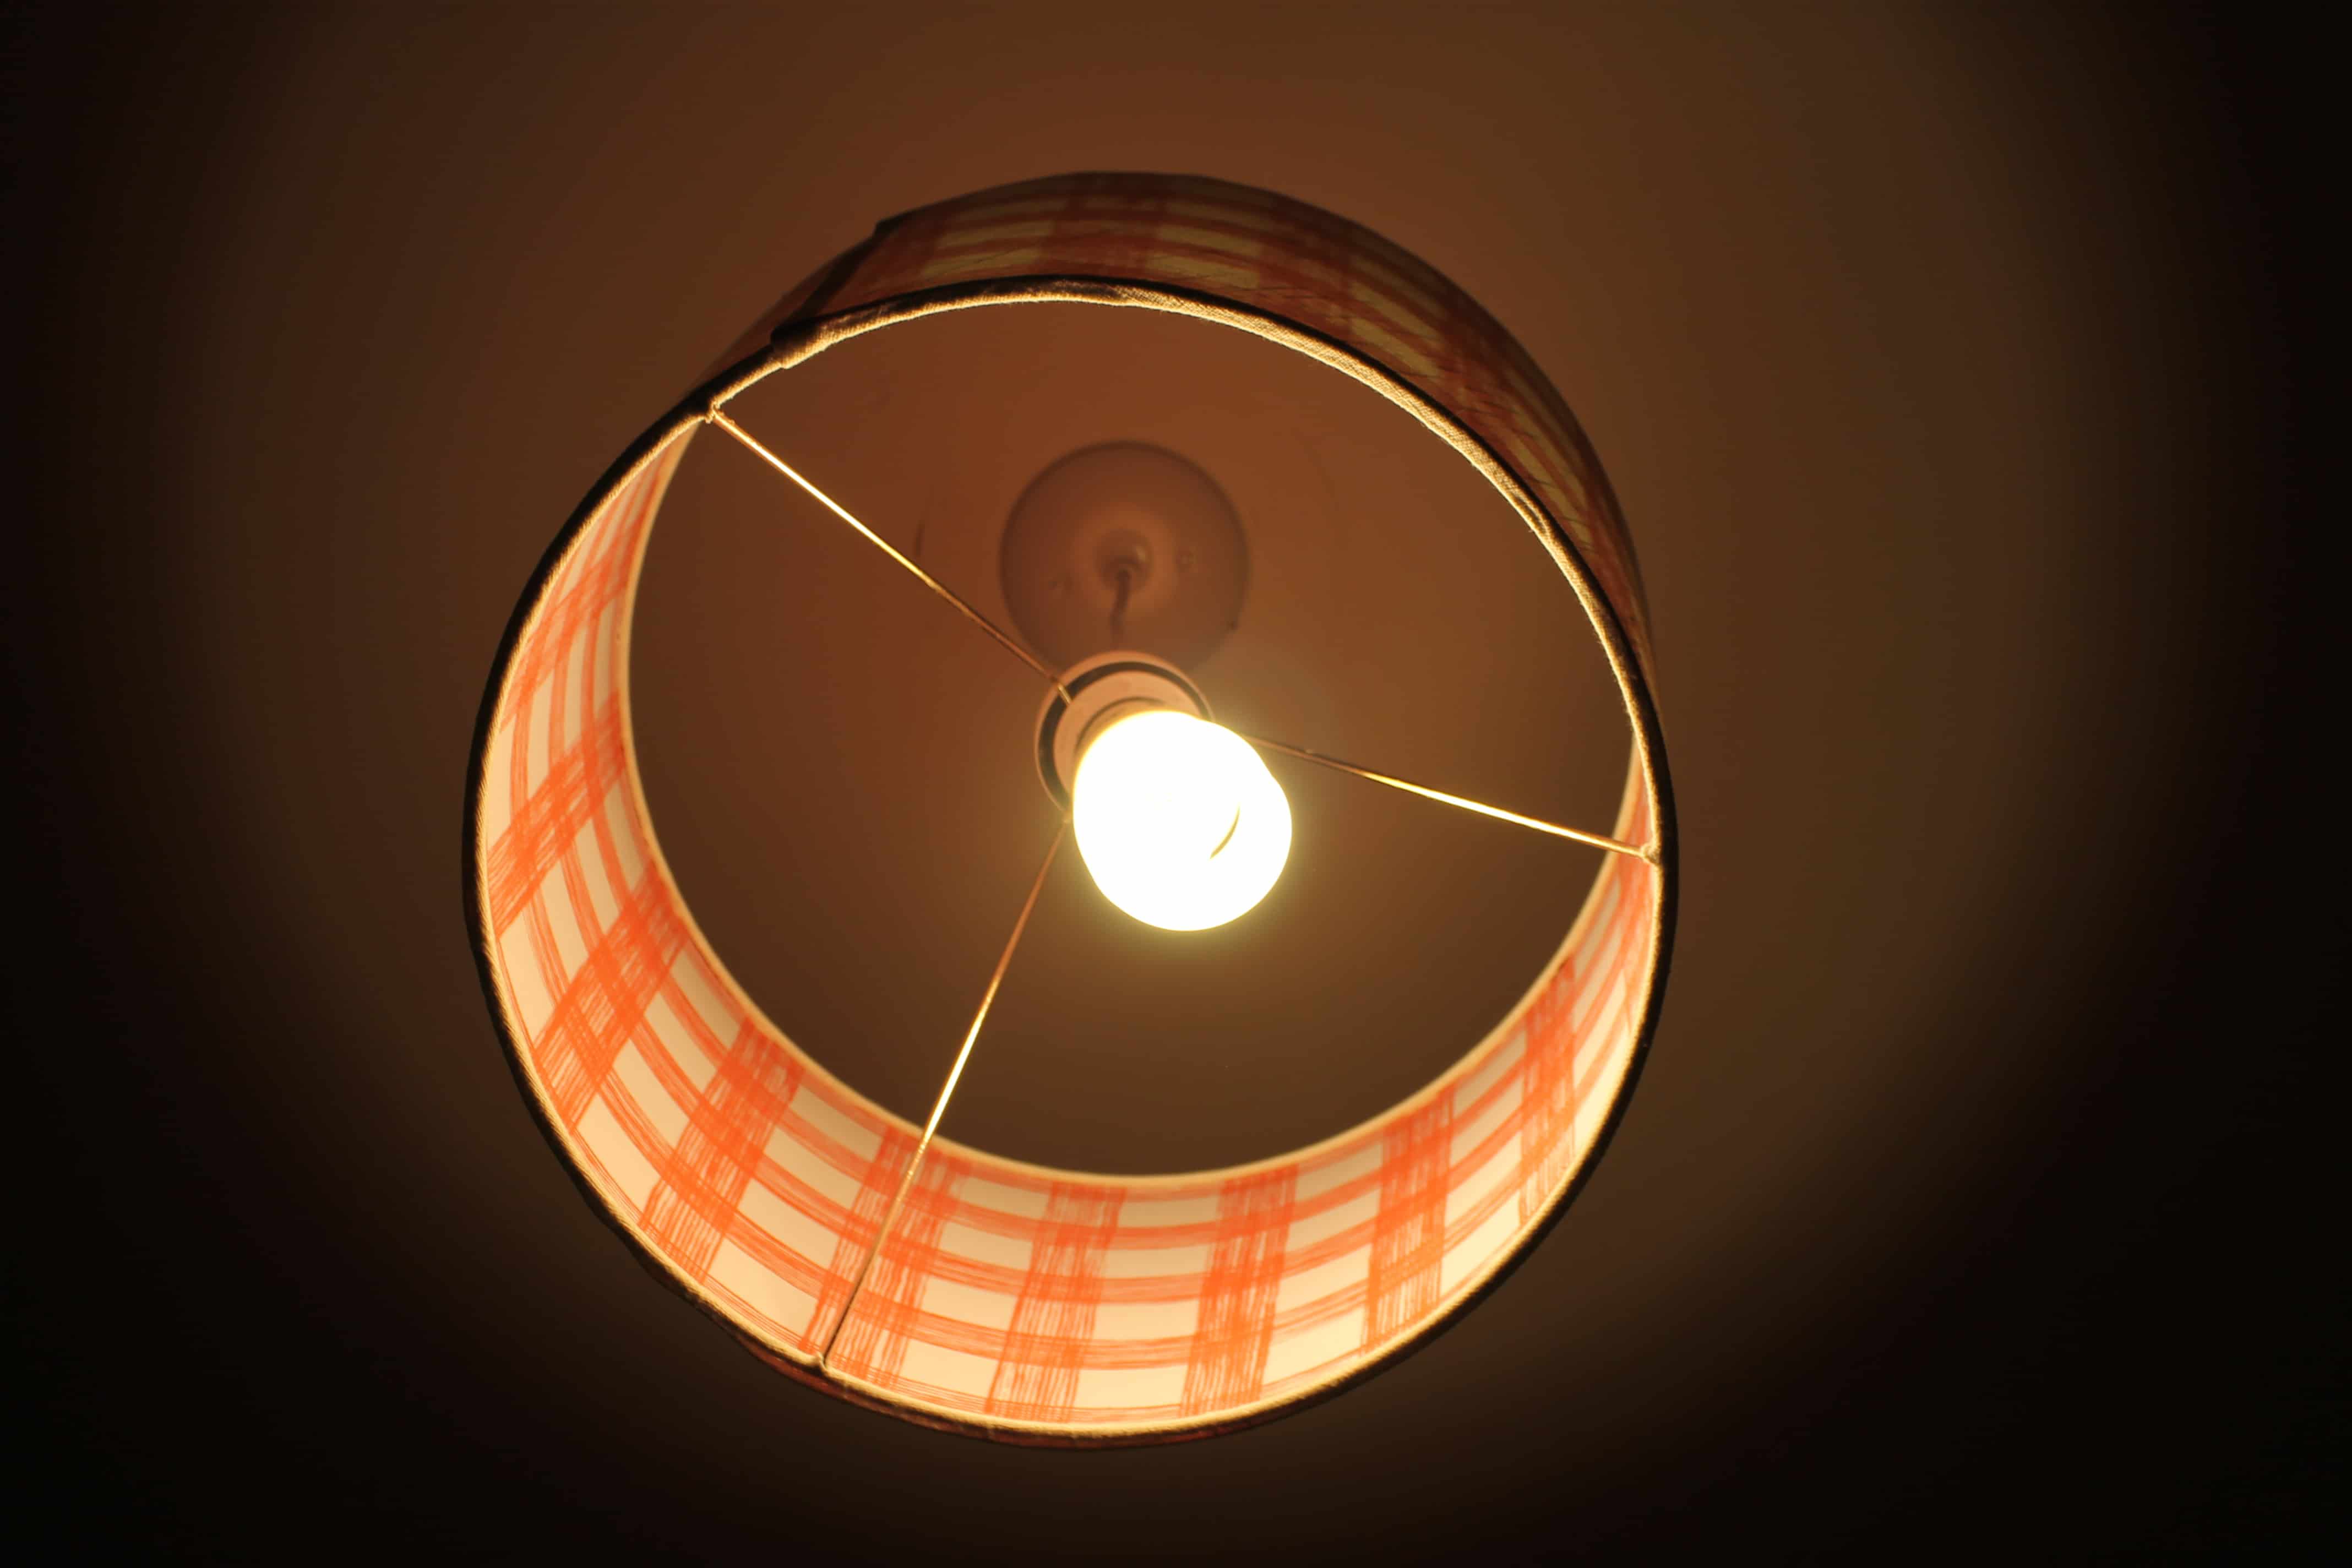
It’s a little shaky, but no one should be touching our light! It looks awesome when it lights up with the light red design on the inside that shines through.

So don’t be afraid to change a light fixture because you’re not an electrician. What are some cool light fixtures you’ve used?
  |
|||
| |
|
|
|


Hey there, I’m Sean, the woodworking enthusiast and builder behind CharlestonCrafted.com! Since 2012, I’ve been sharing the magic of turning raw materials into beautiful creations. I love teaching others the art and satisfaction of woodworking and DIY. I try to inspire fellow crafters to make something extraordinary out of nothing at all.